Learn how to use the same flash drive, thumb drive, SSD, hard drive, or other external storage devices on both macOS and Windows computers.
The problem
Have you ever connected a flash drive to your Mac or PC, only to find that it doesn’t appear in macOS Finder or Windows File Explorer, even though it worked perfectly on one of them?
In most cases, the issue is related to the drive’s file system.
For example, the storage drive may be formatted as Mac OS Extended or APFS, which are macOS-specific file systems. As is typical with Apple products, such drives only work on Apple devices like Macs, iPhones, and iPads, and not on Windows PCs, Android phones, or other devices.
On the other hand, the external drive might be formatted in NTFS, a Microsoft-developed format that Macs can read but not write to. This means you can’t copy or move files to these drives when connected to a Mac.
Here are some simple solutions to resolve this.
Erase and reformat the drive
The easiest fix to make a thumb drive work on both Mac and PC is to reformat it to a file system that both operating systems support. However, keep in mind that this will erase all data on the device, so be sure to back up any important files before proceeding.
The ExFAT format is the only one that works across both Mac and Windows.Once you reformat your storage device to ExFAT, you can plug it into any computer, phone, tablet, or television, and it should work seamlessly, allowing you to both read and write files.
To do this, you’ll have to erase and format the external drive to change it back to the universally compatible exFAT. After that, the drive can be used on Mac, iPhone, iPad, Windows PC, Android devices, and more.
- Connect the drive to your Mac’s USB port.
- Open Apple’s built-in Disk Utility app.
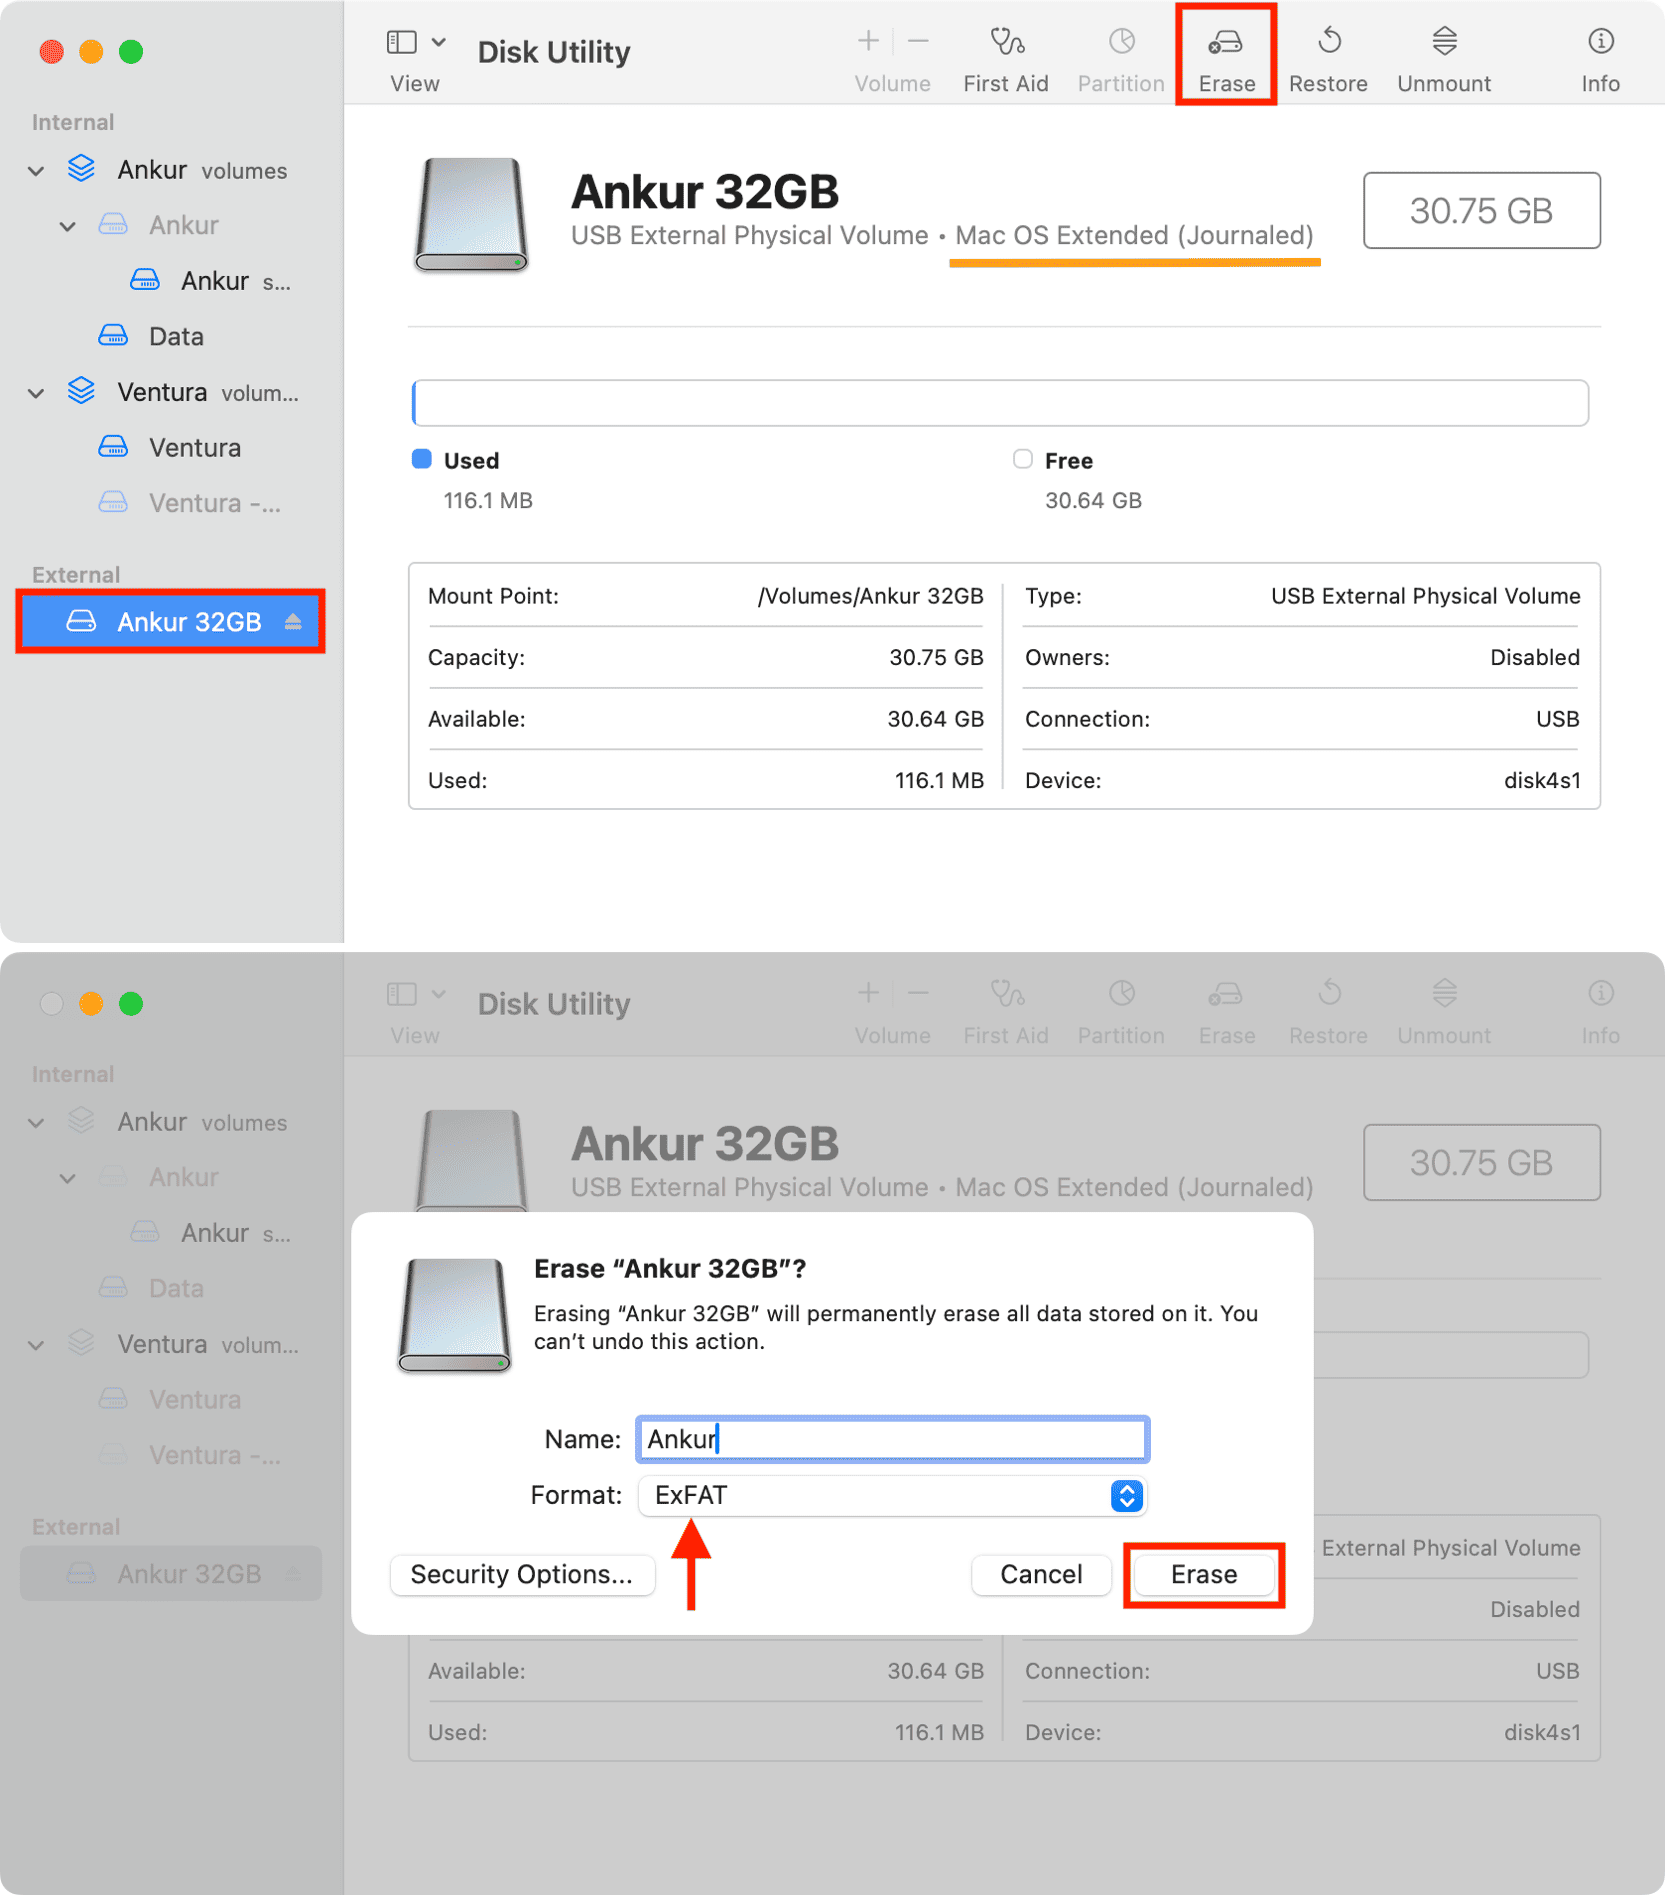
- Select the drive under the External heading of the left sidebar.
- Click Erase from the top toolbar.
- Type the name you want to give to this drive. You can also change it later. Next, click the Format drop-down menu and select ExFAT.
- Now, click Erase and wait for the process to finish.
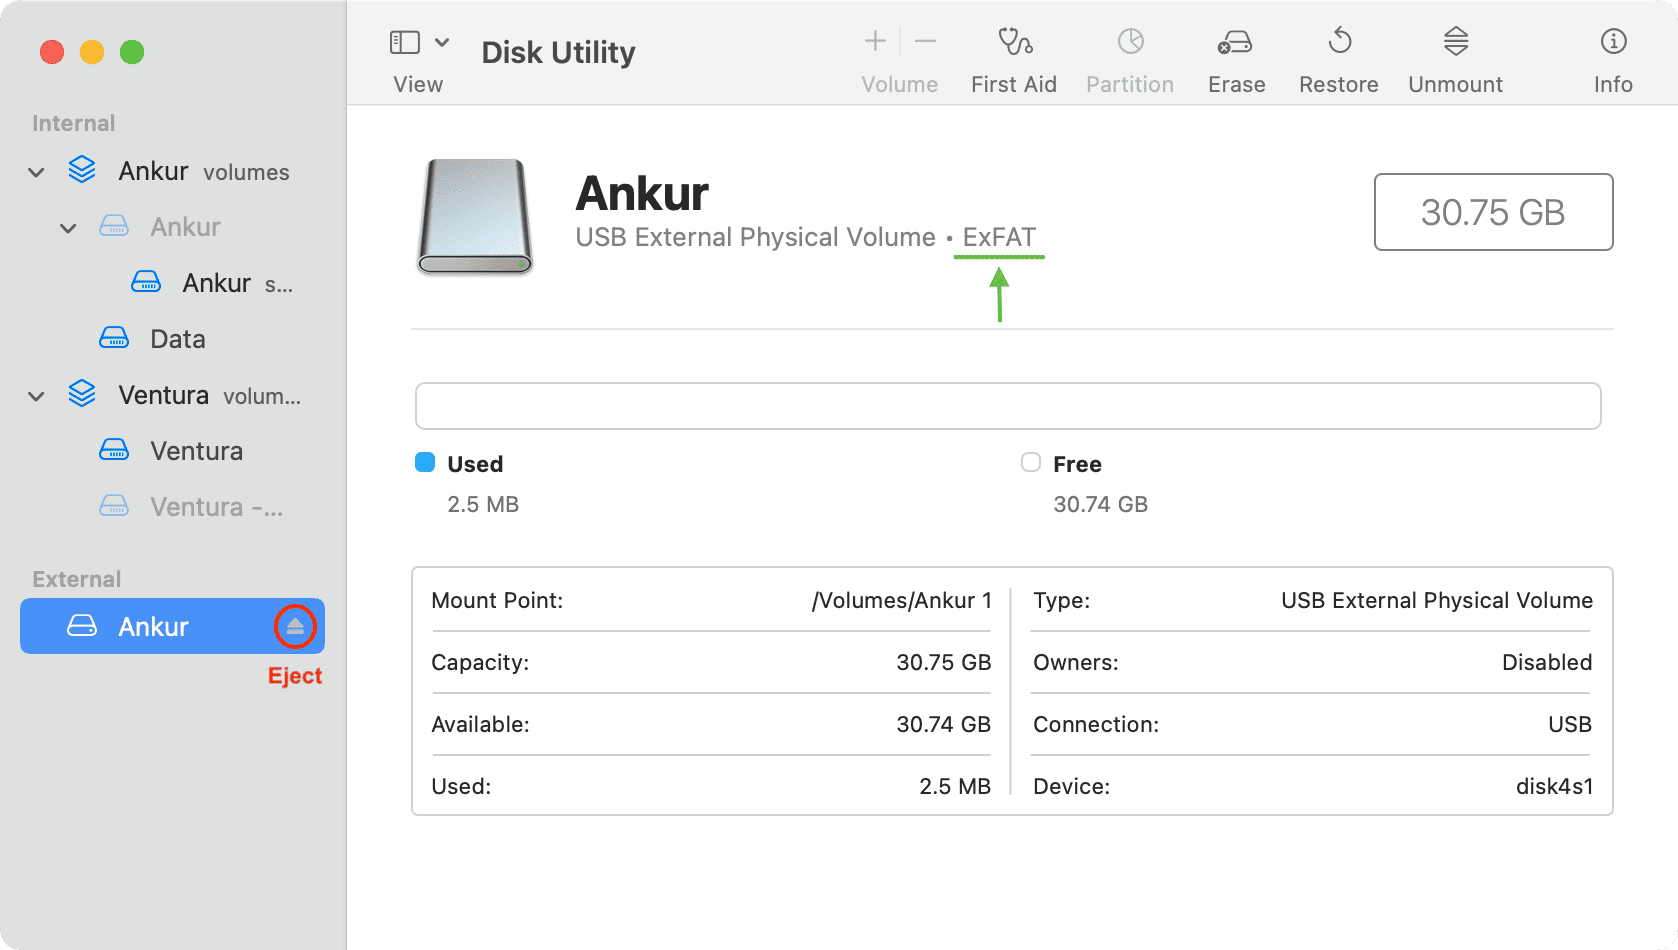
Once completed, you’ll see it has been reformatted to ExFAT. Eject the drive safely by clicking the eject icon next to its name and plug it into a Windows PC. This drive will now work for reading and writing on both Mac and Windows computers.
Note that you can also right-click on the external drive on your Mac’s desktop, running the latest version of macOS, and then select Erase Disk to change its file system. Additionally, you can erase and reformat the external drive, even on your iPhone or iPad.

Important: If your drive is not showing on a Mac but does on a Windows PC, follow these steps to reformat the drive to exFAT for cross-platform compatibility.
Use special software
You might not hesitate to reformat an empty or lightly used drive. However, if you have a 500 GB or 1 TB external drive full of data and your computer’s internal storage is only 256 GB, backing up those files can become challenging.
In such cases, you can use an alternative solution that doesn’t require reformatting or erasing the drive. This involves using special disk manager software like OWC’s MacDrive 11, which allows you to access macOS-formatted drives on Windows PCs.
Other checks
While the correct format is the key factor determining whether a drive will work with a device or not, there are some other things to keep in mind.
- Make sure the cable you’re using is not faulty and is of high quality.
- Double-check to ensure the connection on the drive’s end and the computer port are snug.
- Some large drives may need external power to work, as the power supplied by the laptop or device’s USB port may not be sufficient. So, read the manual that came with the drive and follow it.
- In some cases, the device may have a maximum storage limit. For instance, some cheap Android TVs can only accept a pen drive of up to 128 GB, and anything more than that won’t work. In this case, try using another drive of lower capacity and see if that works.
On a related note: