Learn how to simplify your shopping with the groceries list feature in the Reminders app, which sorts grocery items into categories on your iPhone, iPad, or Mac.
You already know that the Apple Reminders app lets you create and customize multiple lists for different purposes, like Work, Home, Personal, Shopping, Travel, Recipes, Food Ingredients, etc. You can also manually add individual sections or subheadings to better organize your long reminder lists.
But when it comes to grocery lists, you don’t have to manually add the sections; your iPhone will automatically suggest appropriate sections and add your items underneath the correct one. For instance, if you add “Cabbage” as an item, the Reminders app will automatically create a “Produce” section and move Cabbage underneath it. Similarly, if you add “Salmon,” it will move it to the “Seafood” section. You get the idea…
Categorizing items in the Reminders app helps you quickly find all of them when you’re in that specific section of Costco, Walmart, Target, Kroger, or another grocery store, thus preventing you from having to bounce back-and-forth between the various aisles.
Also see: How to create a shared family grocery list on iPhone
Create a smart grocery list on your iPhone
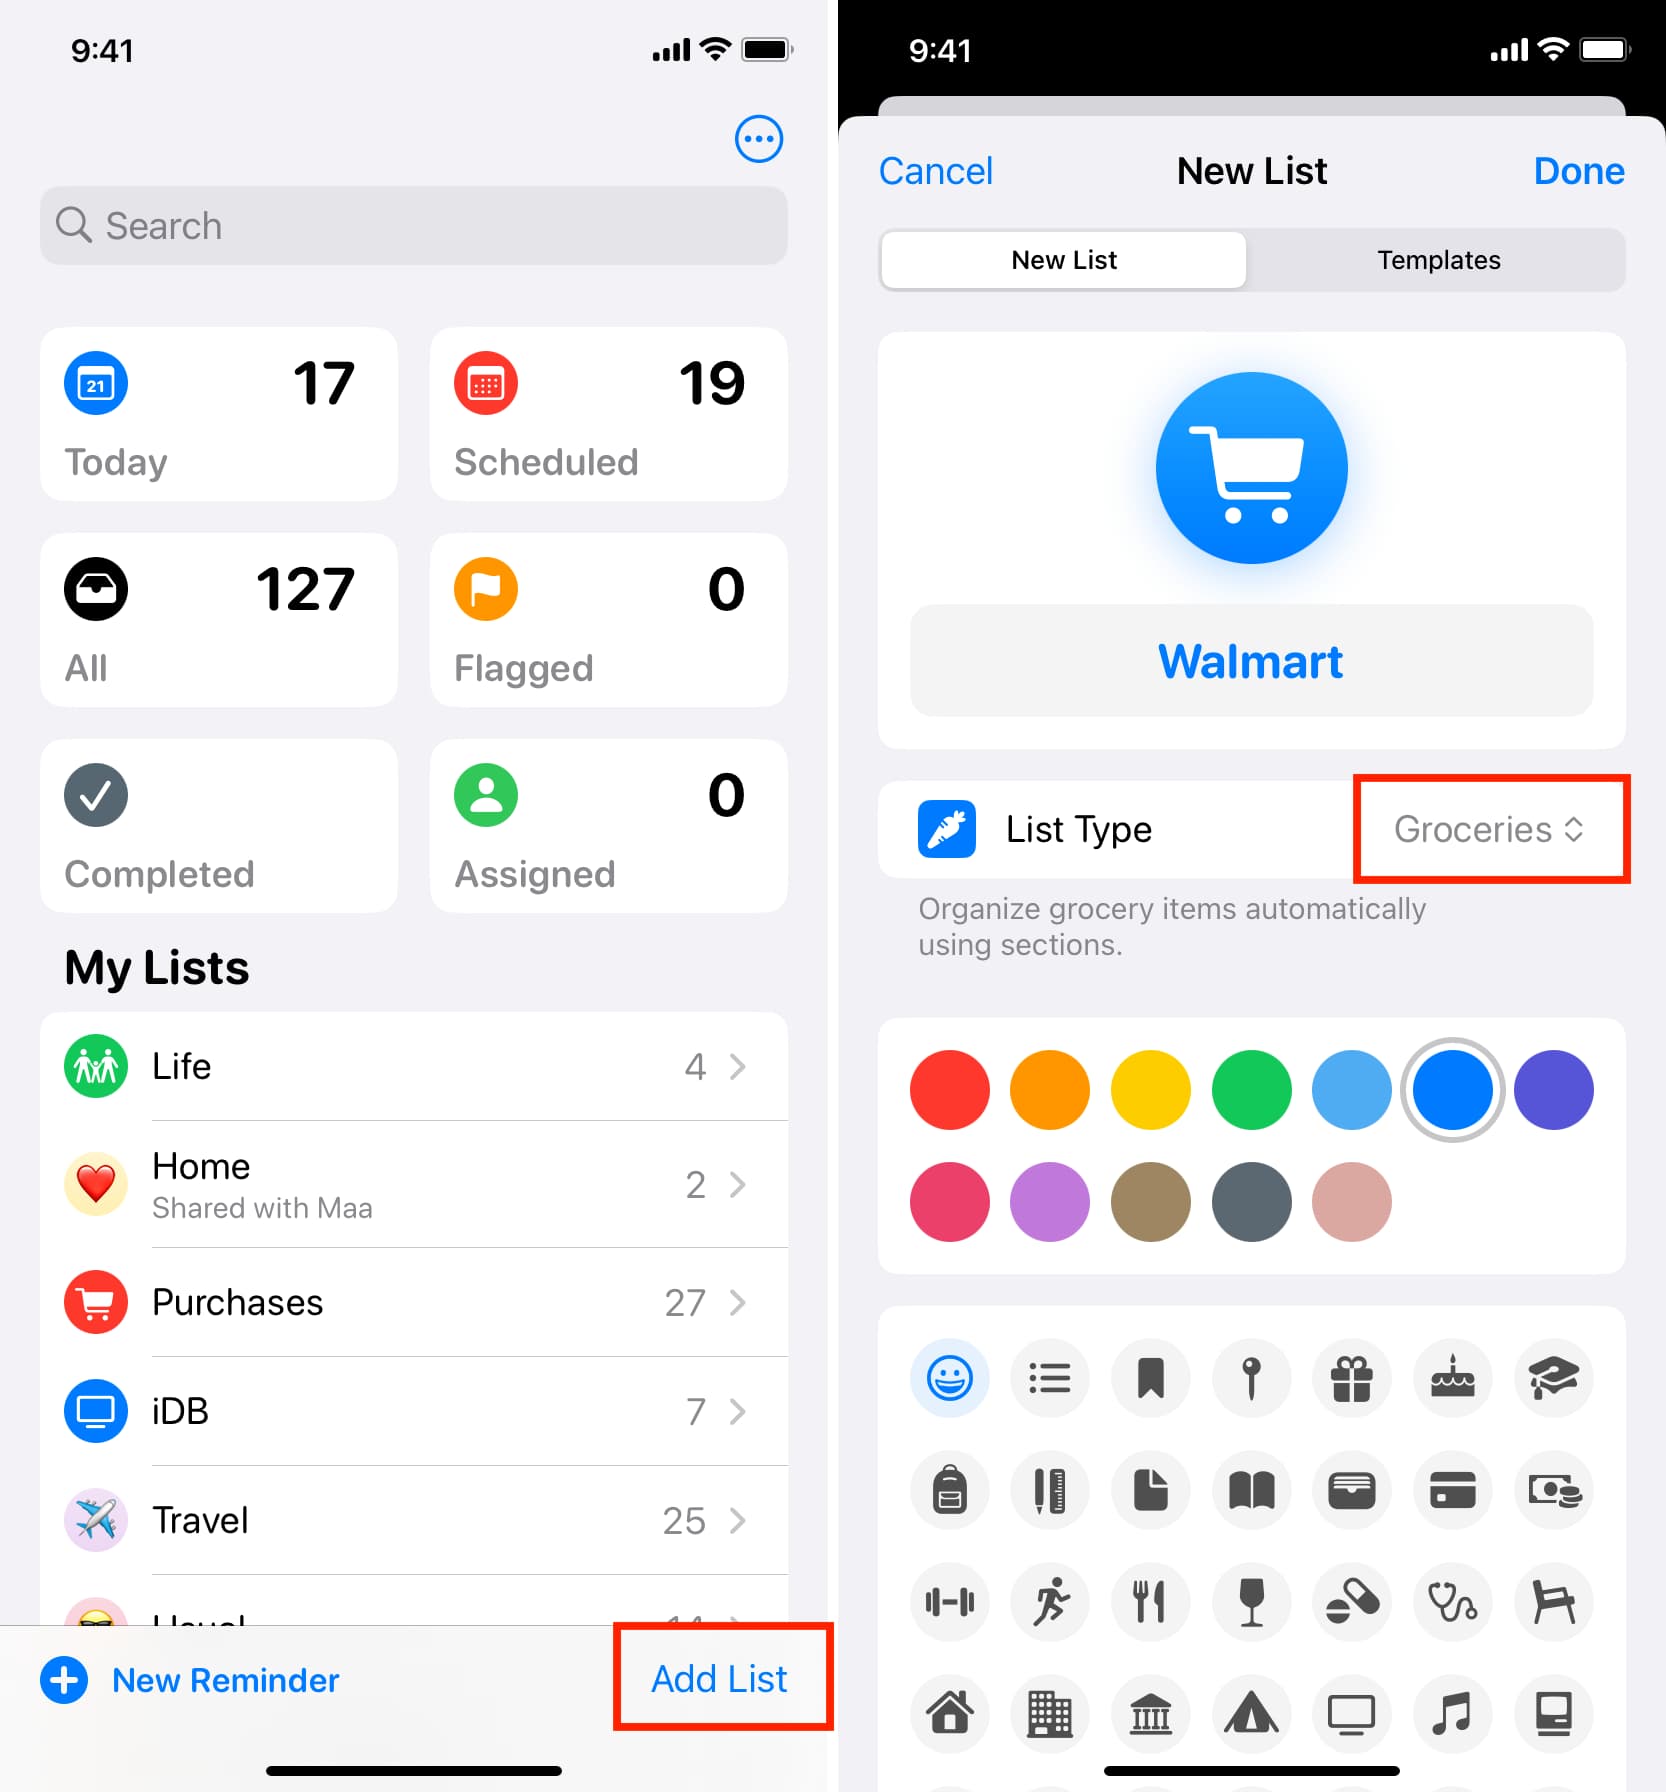
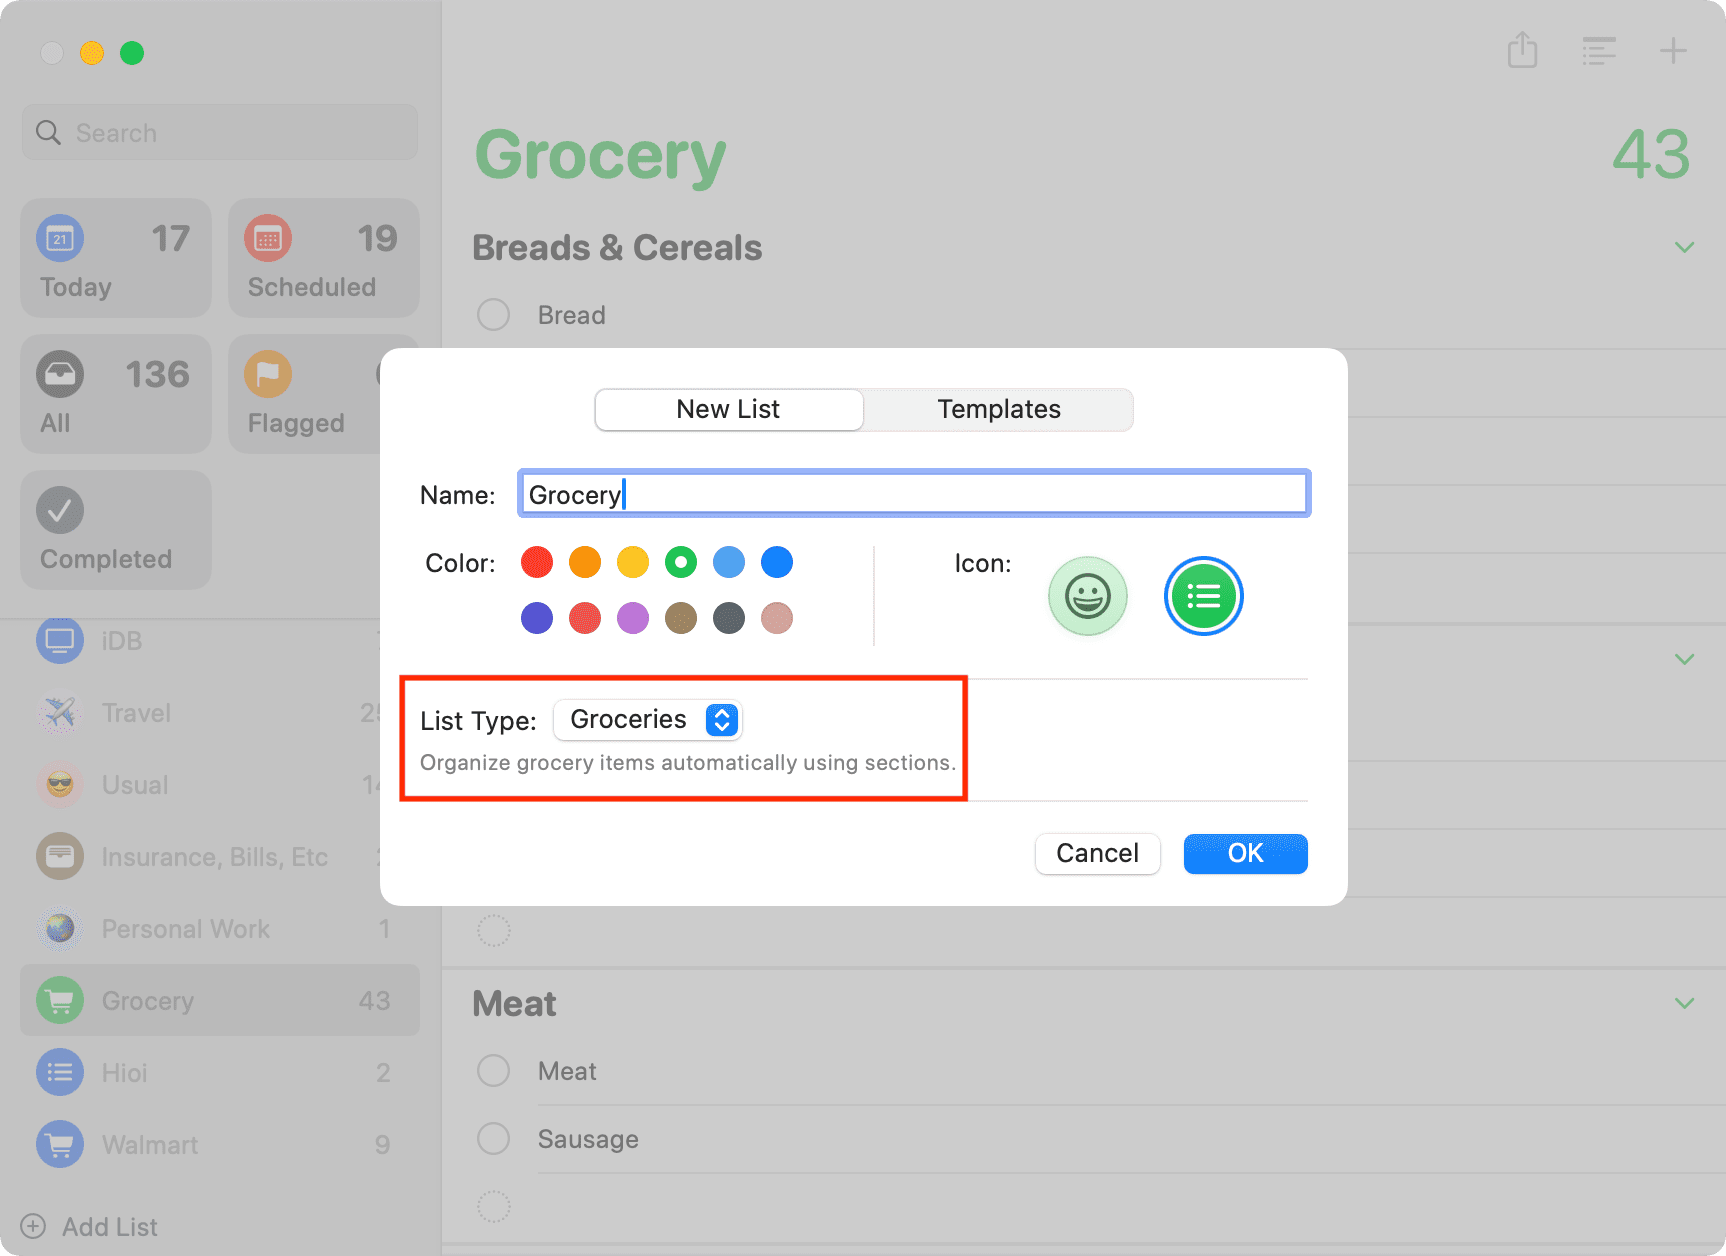
1) Open the iOS Reminders app and tap Add List.
2) Give your list a name. Then, hit List Type and select Groceries.
3) Now customize this list with a custom color and symbol if you want, and then tap Done.
4) You’re now inside your new grocery list. Tap New Item from the bottom, type the name of your first grocery item, like “Eggs,” and hit the return key on the keyboard.
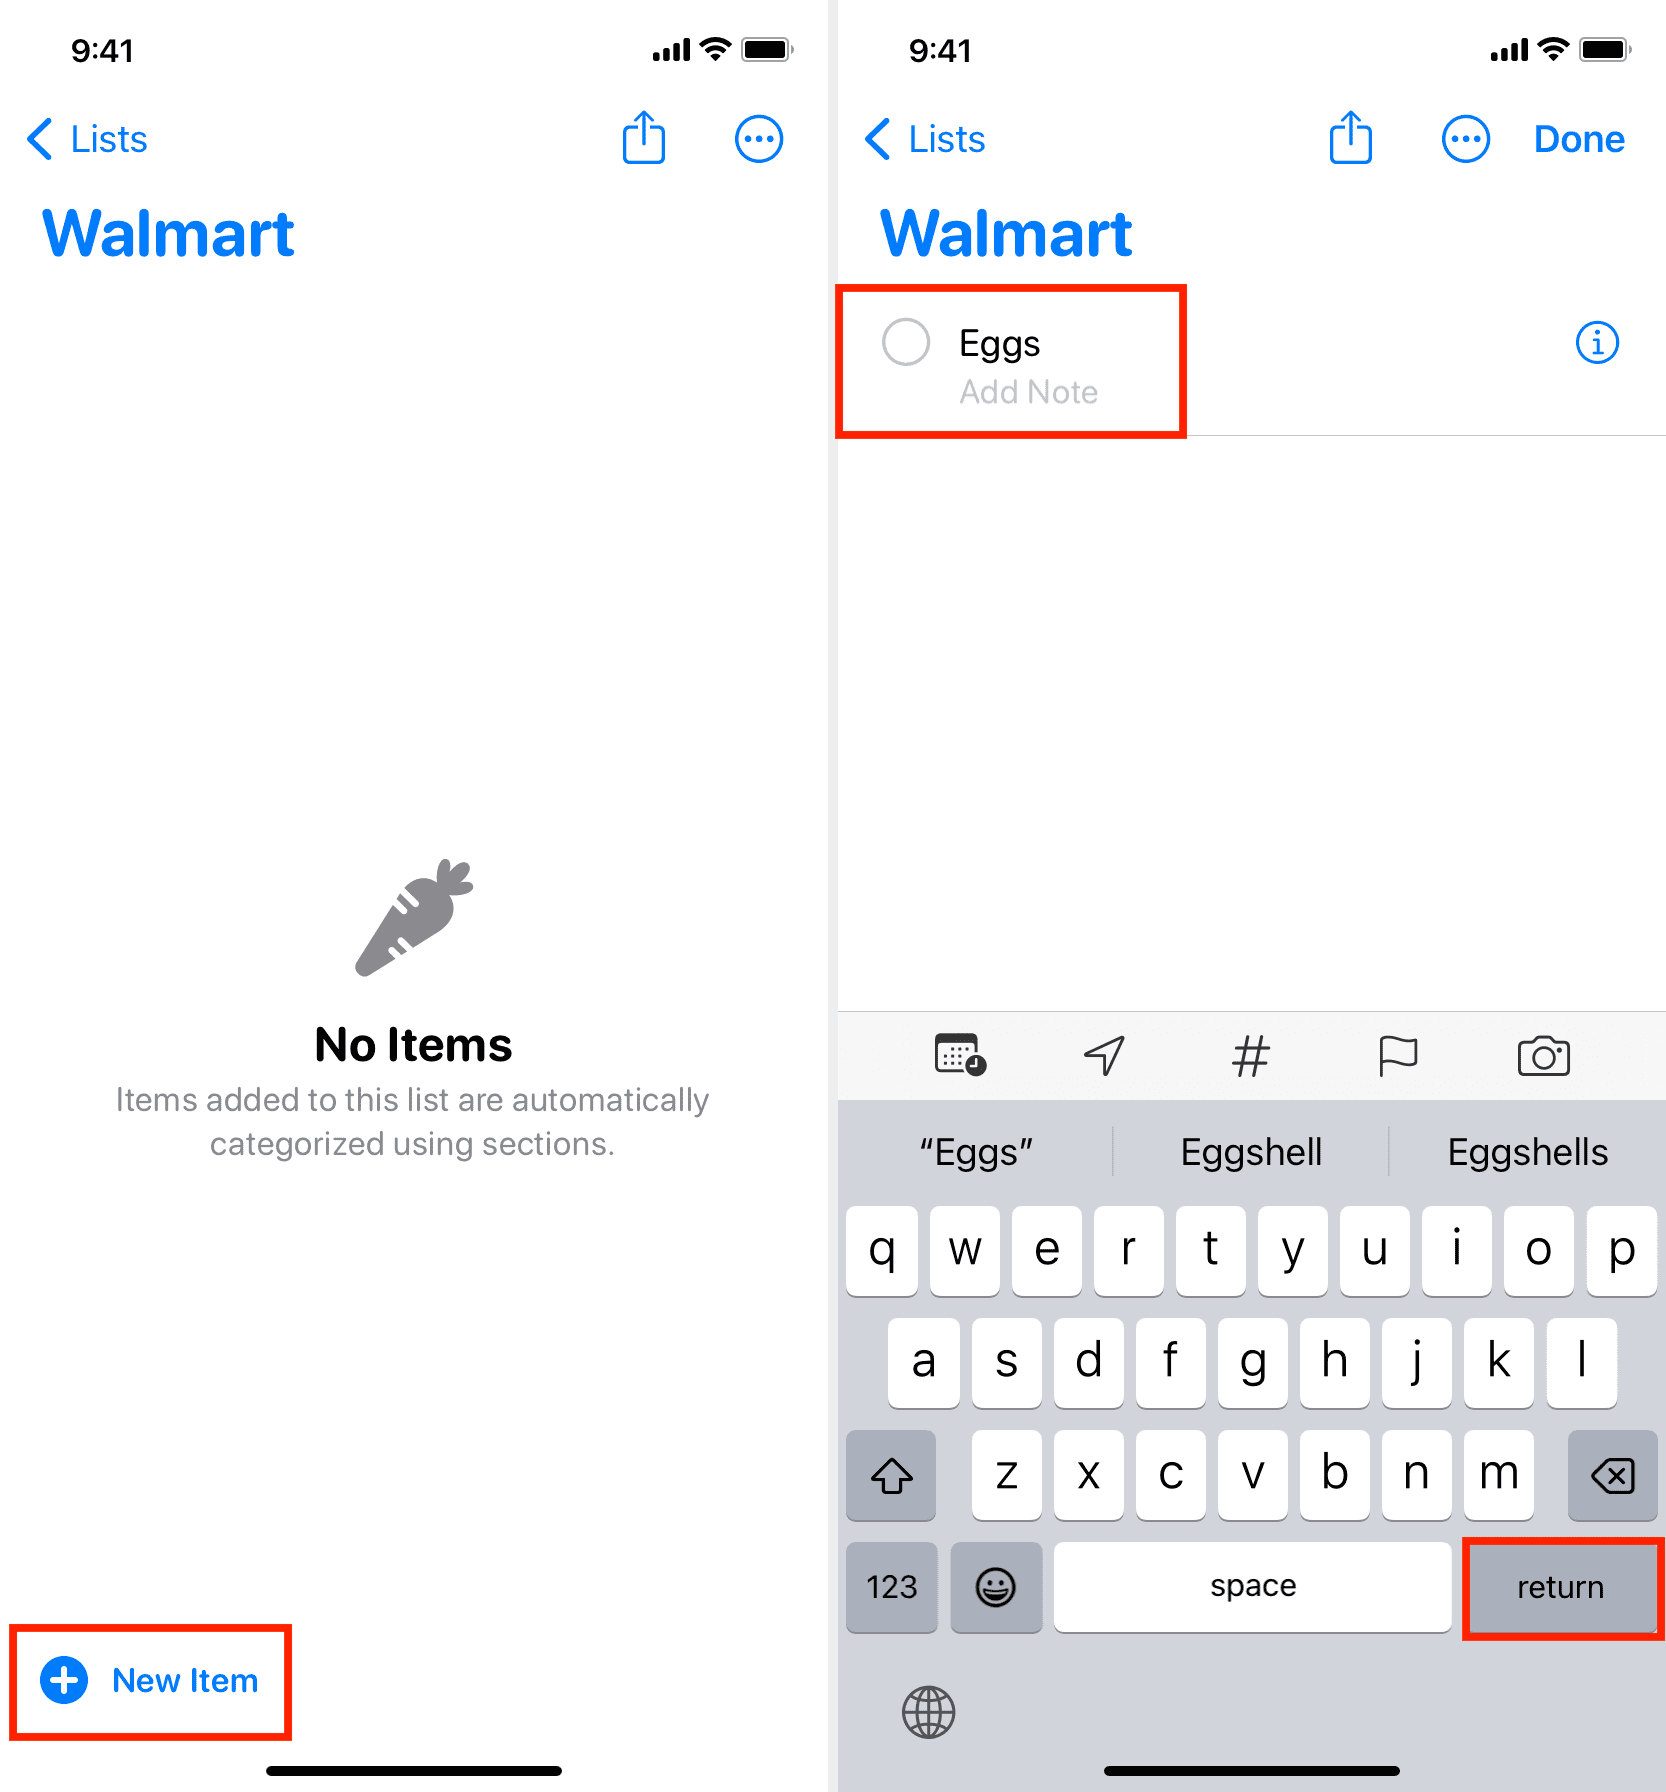
You’ll notice that “Eggs” are automatically moved to a new sub-section called Dairy, Eggs & Cheese. Next, type “Lettuce” and hit the return key. It will automatically move to a new Produce section.
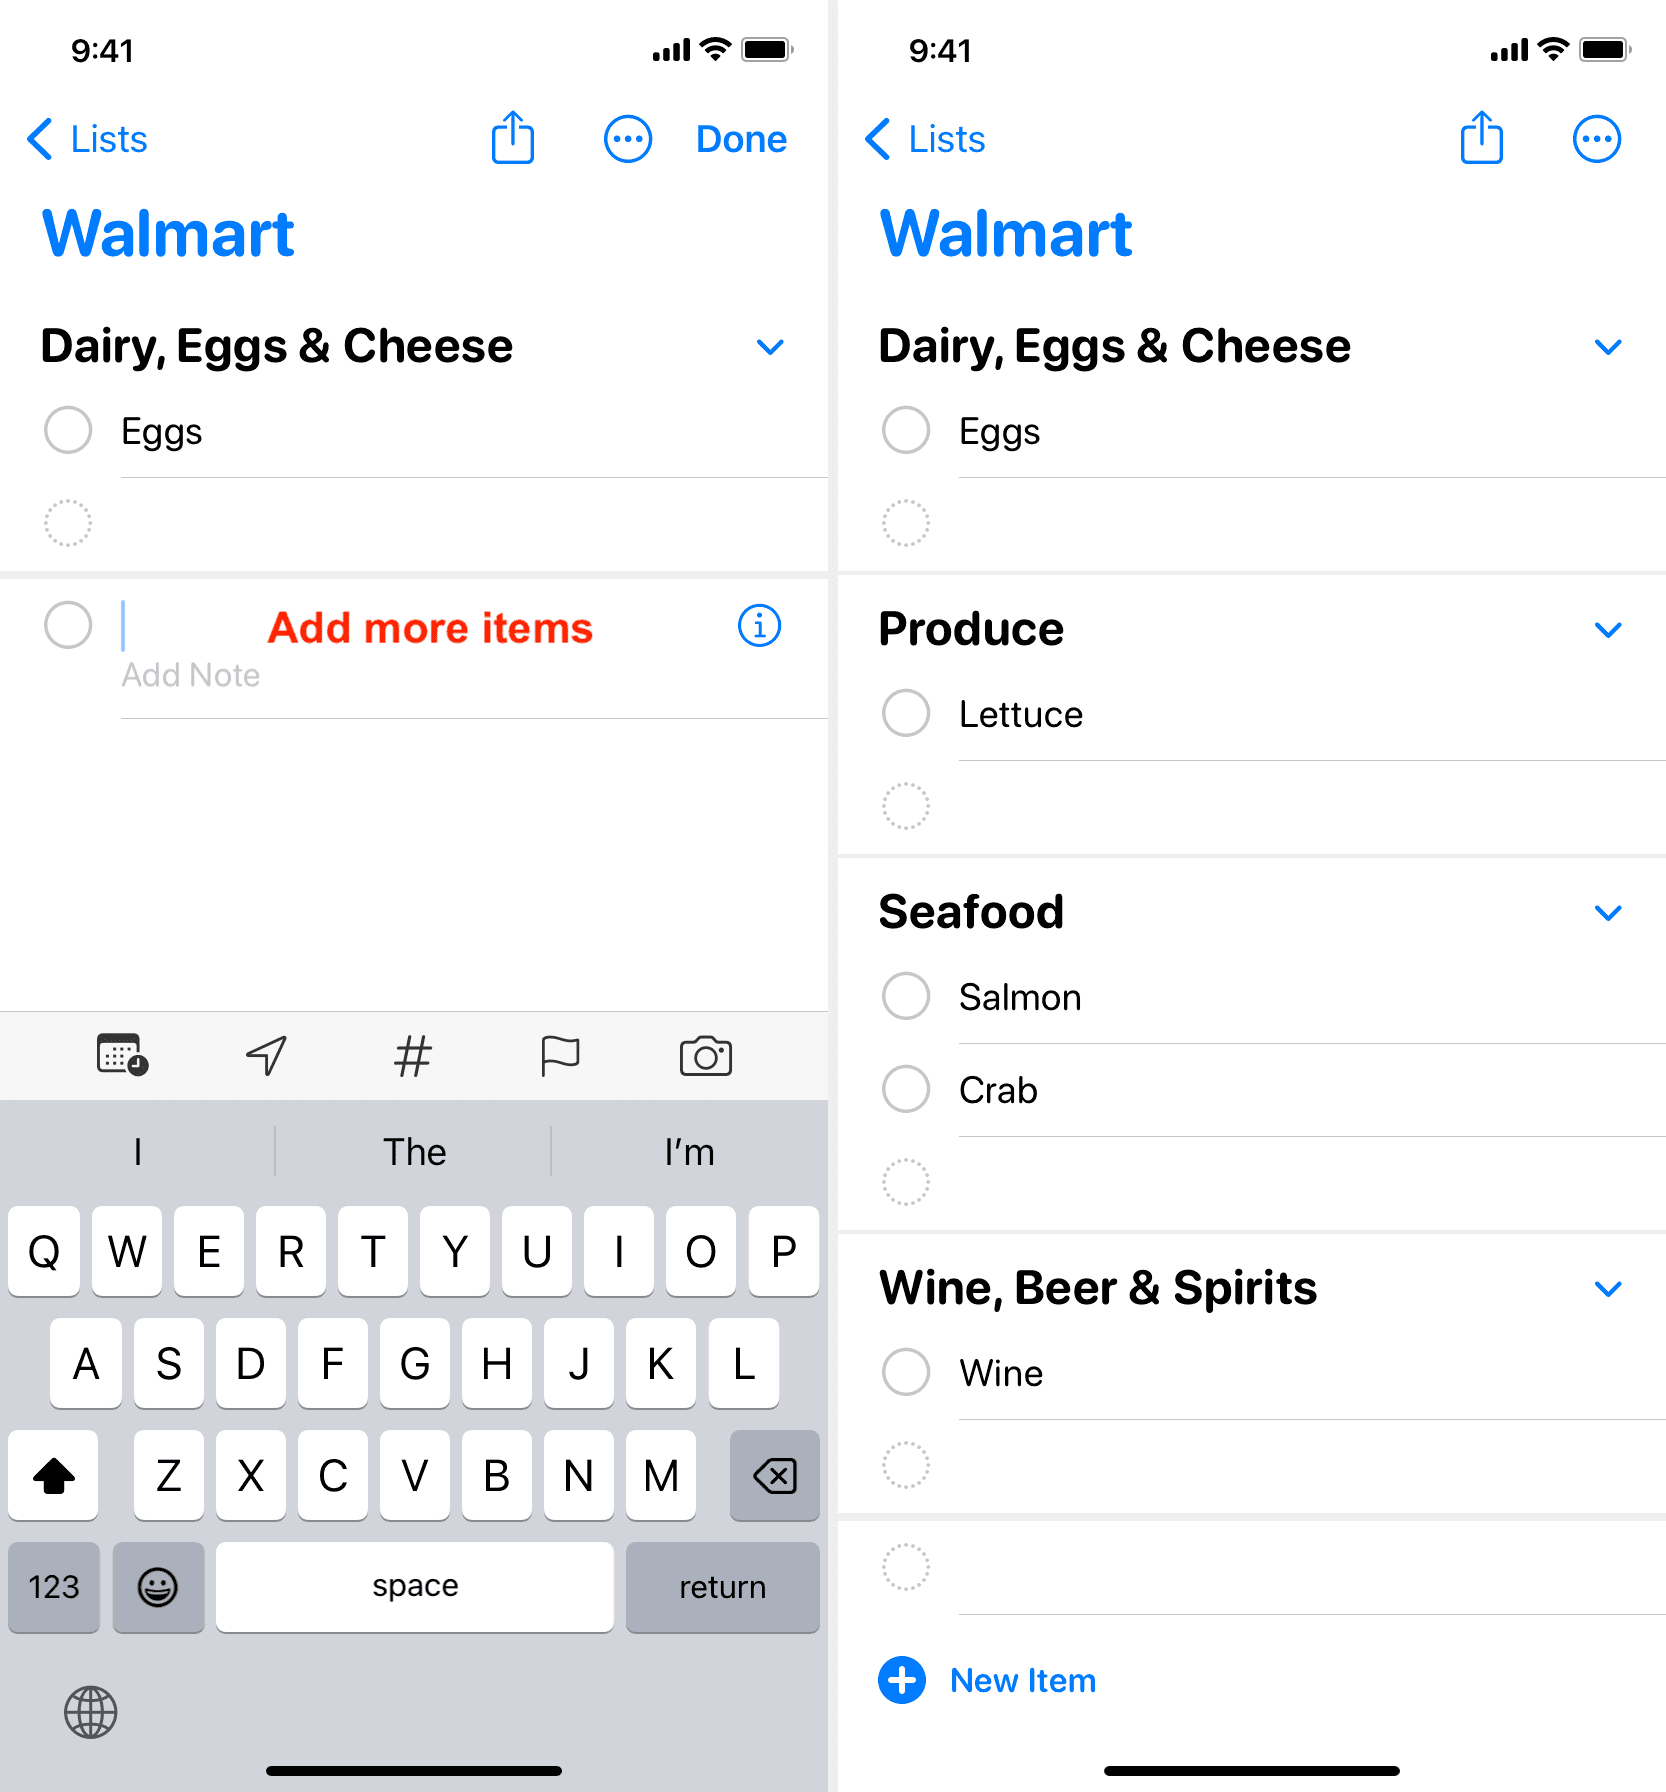
5) Keep adding new grocery items to your list, and your iPhone will do its best to move them to the proper category. You don’t have to do anything extra.
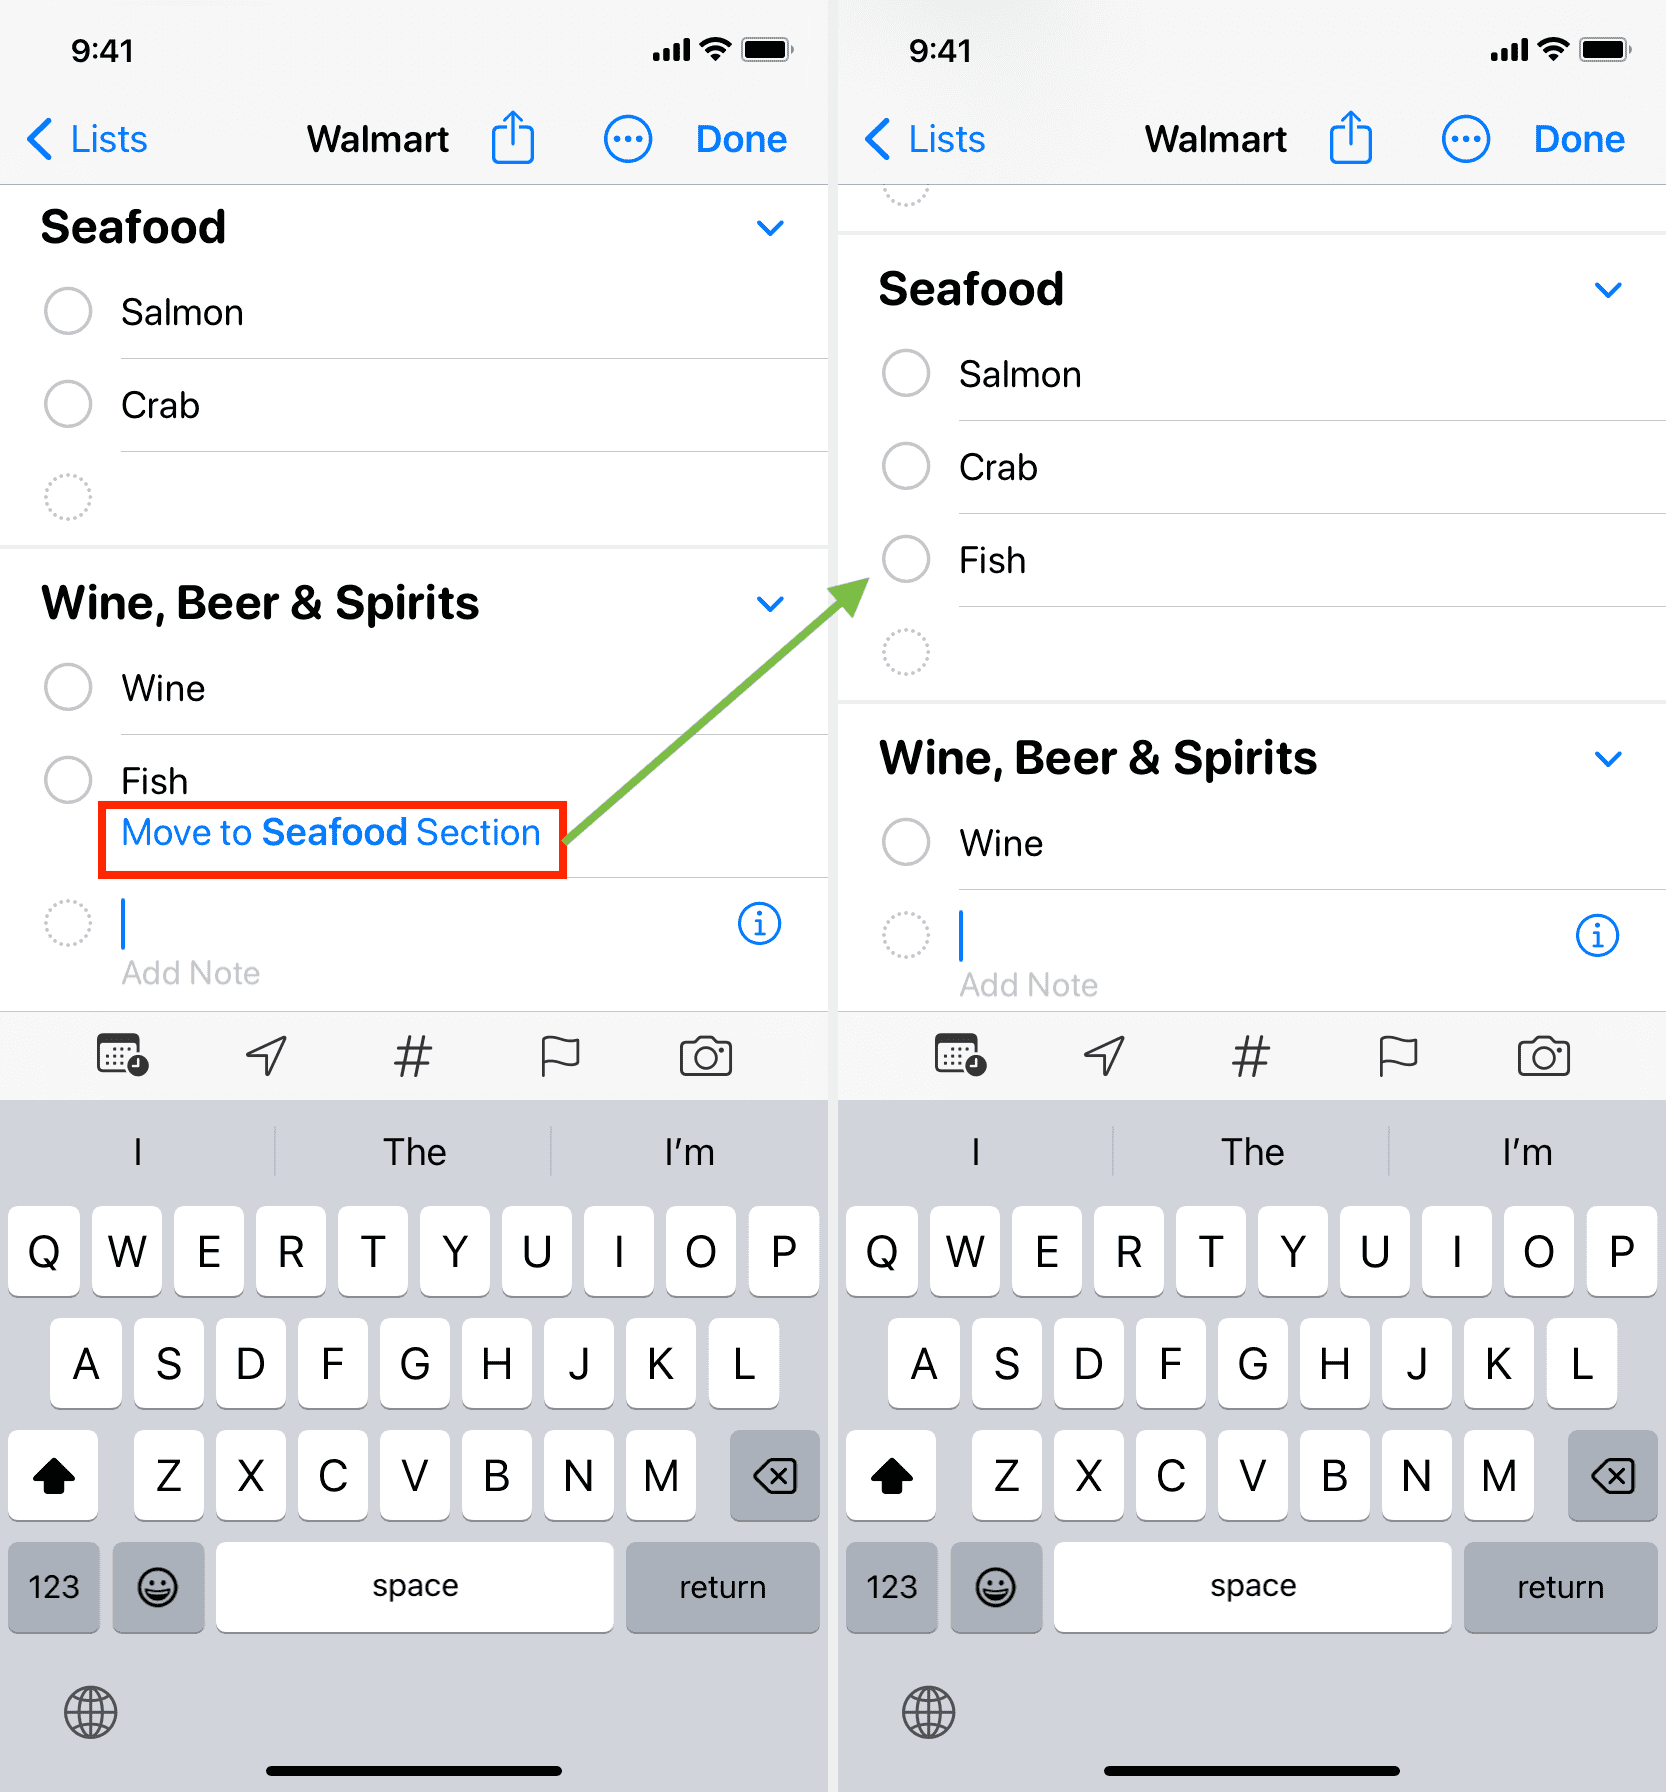
If you add an item that’s not suitable for the current section, the app will suggest you move it to the appropriate category. Simply tap that blue suggestion, and it will be taken care of.
Note: Even in the Groceries List, you have all the regular options of the standard Reminder lists. For instance, you can tap the info button ⓘ next to an item to add an image, URL, subtasks, priority, etc.
Sections available in the Groceries list
Depending on the items you add, the Reminders app may suggest these sections:
- Baby Care
- Bakery
- Baking Items
- Beverages
- Breads & Cereals
- Canned Foods & Soups
- Coffee & Tea
- Dairy, Eggs & Cheese
- Snacks & Candy
- Deli
- Frozen Foods
- Household Items
- Meat
- Oils & Dressings
- Household Items
- Pasta, Rice & beans
- Personal Care & Health
- Pet Care
- Produce
- Sauces & Condiments
- Seafood
- Snacks & Candy
- Spices & Seasonings
- Wine, Beer & Spirits
Create a custom grocery section
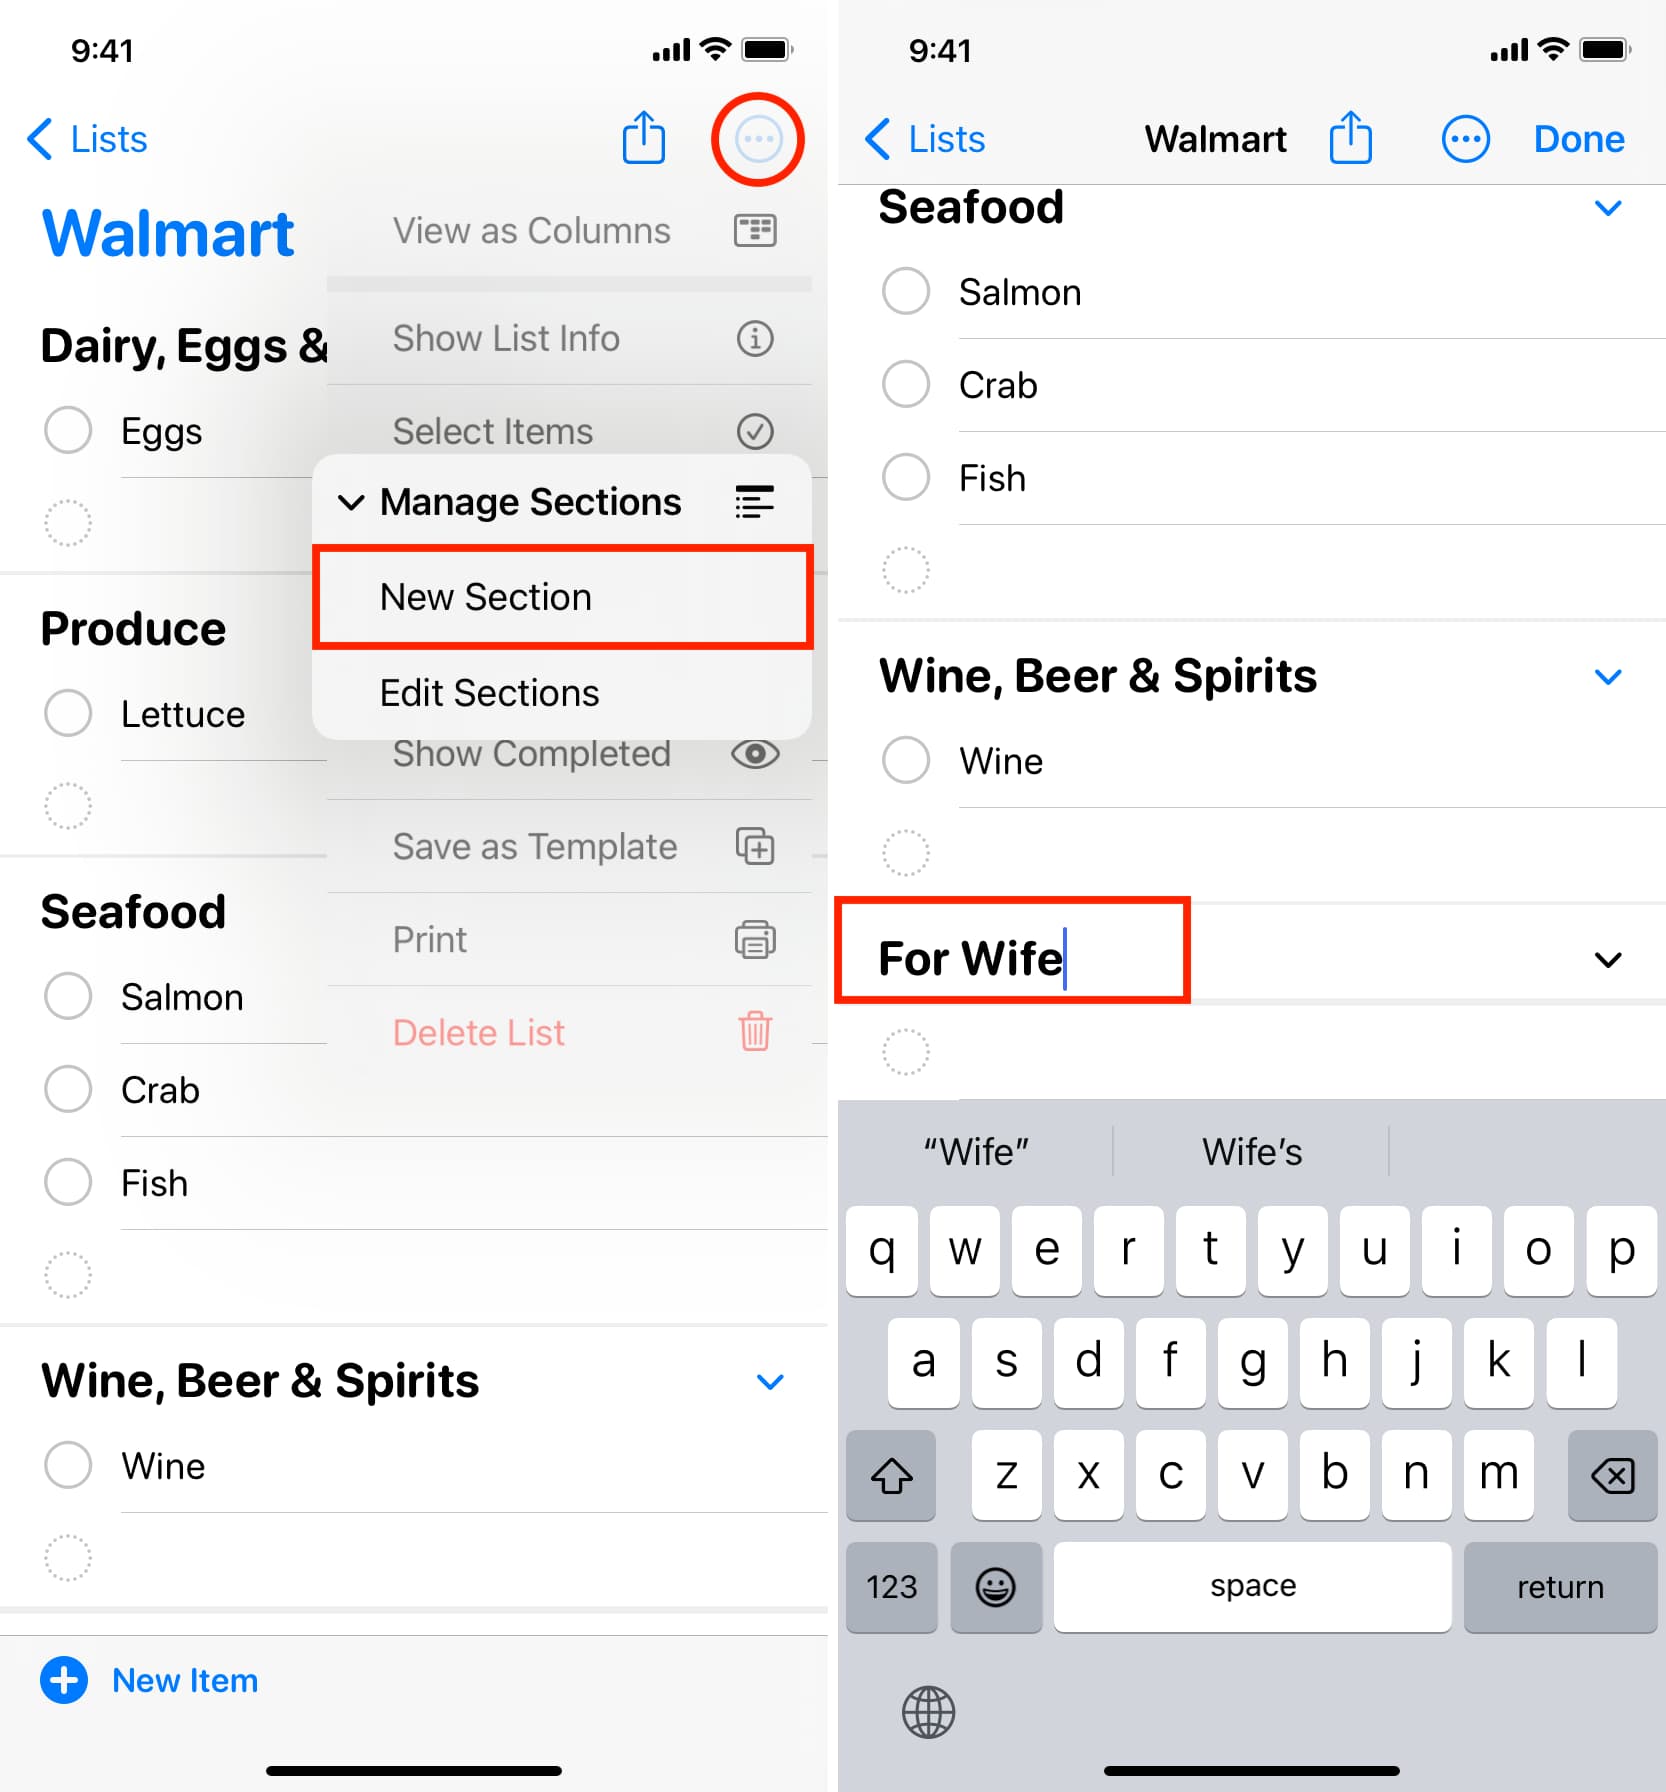
In addition to your iPhone intelligently creating and suggesting sections based on the items you add, you can also create your own custom sections inside the Groceries list or any other Standard list.
- Open the Reminders app and select a list.
- Tap the three dots menu icon in the top right and choose Manage Sections > New Section. Note that if you’re in a List with no existing sections, it will just say New Section.
- Give a name for this custom section and tap the return key on your keyboard.
Rename an existing reminder section
To change the name of an Apple-suggested section or your custom section, tap its existing name and type a new one.
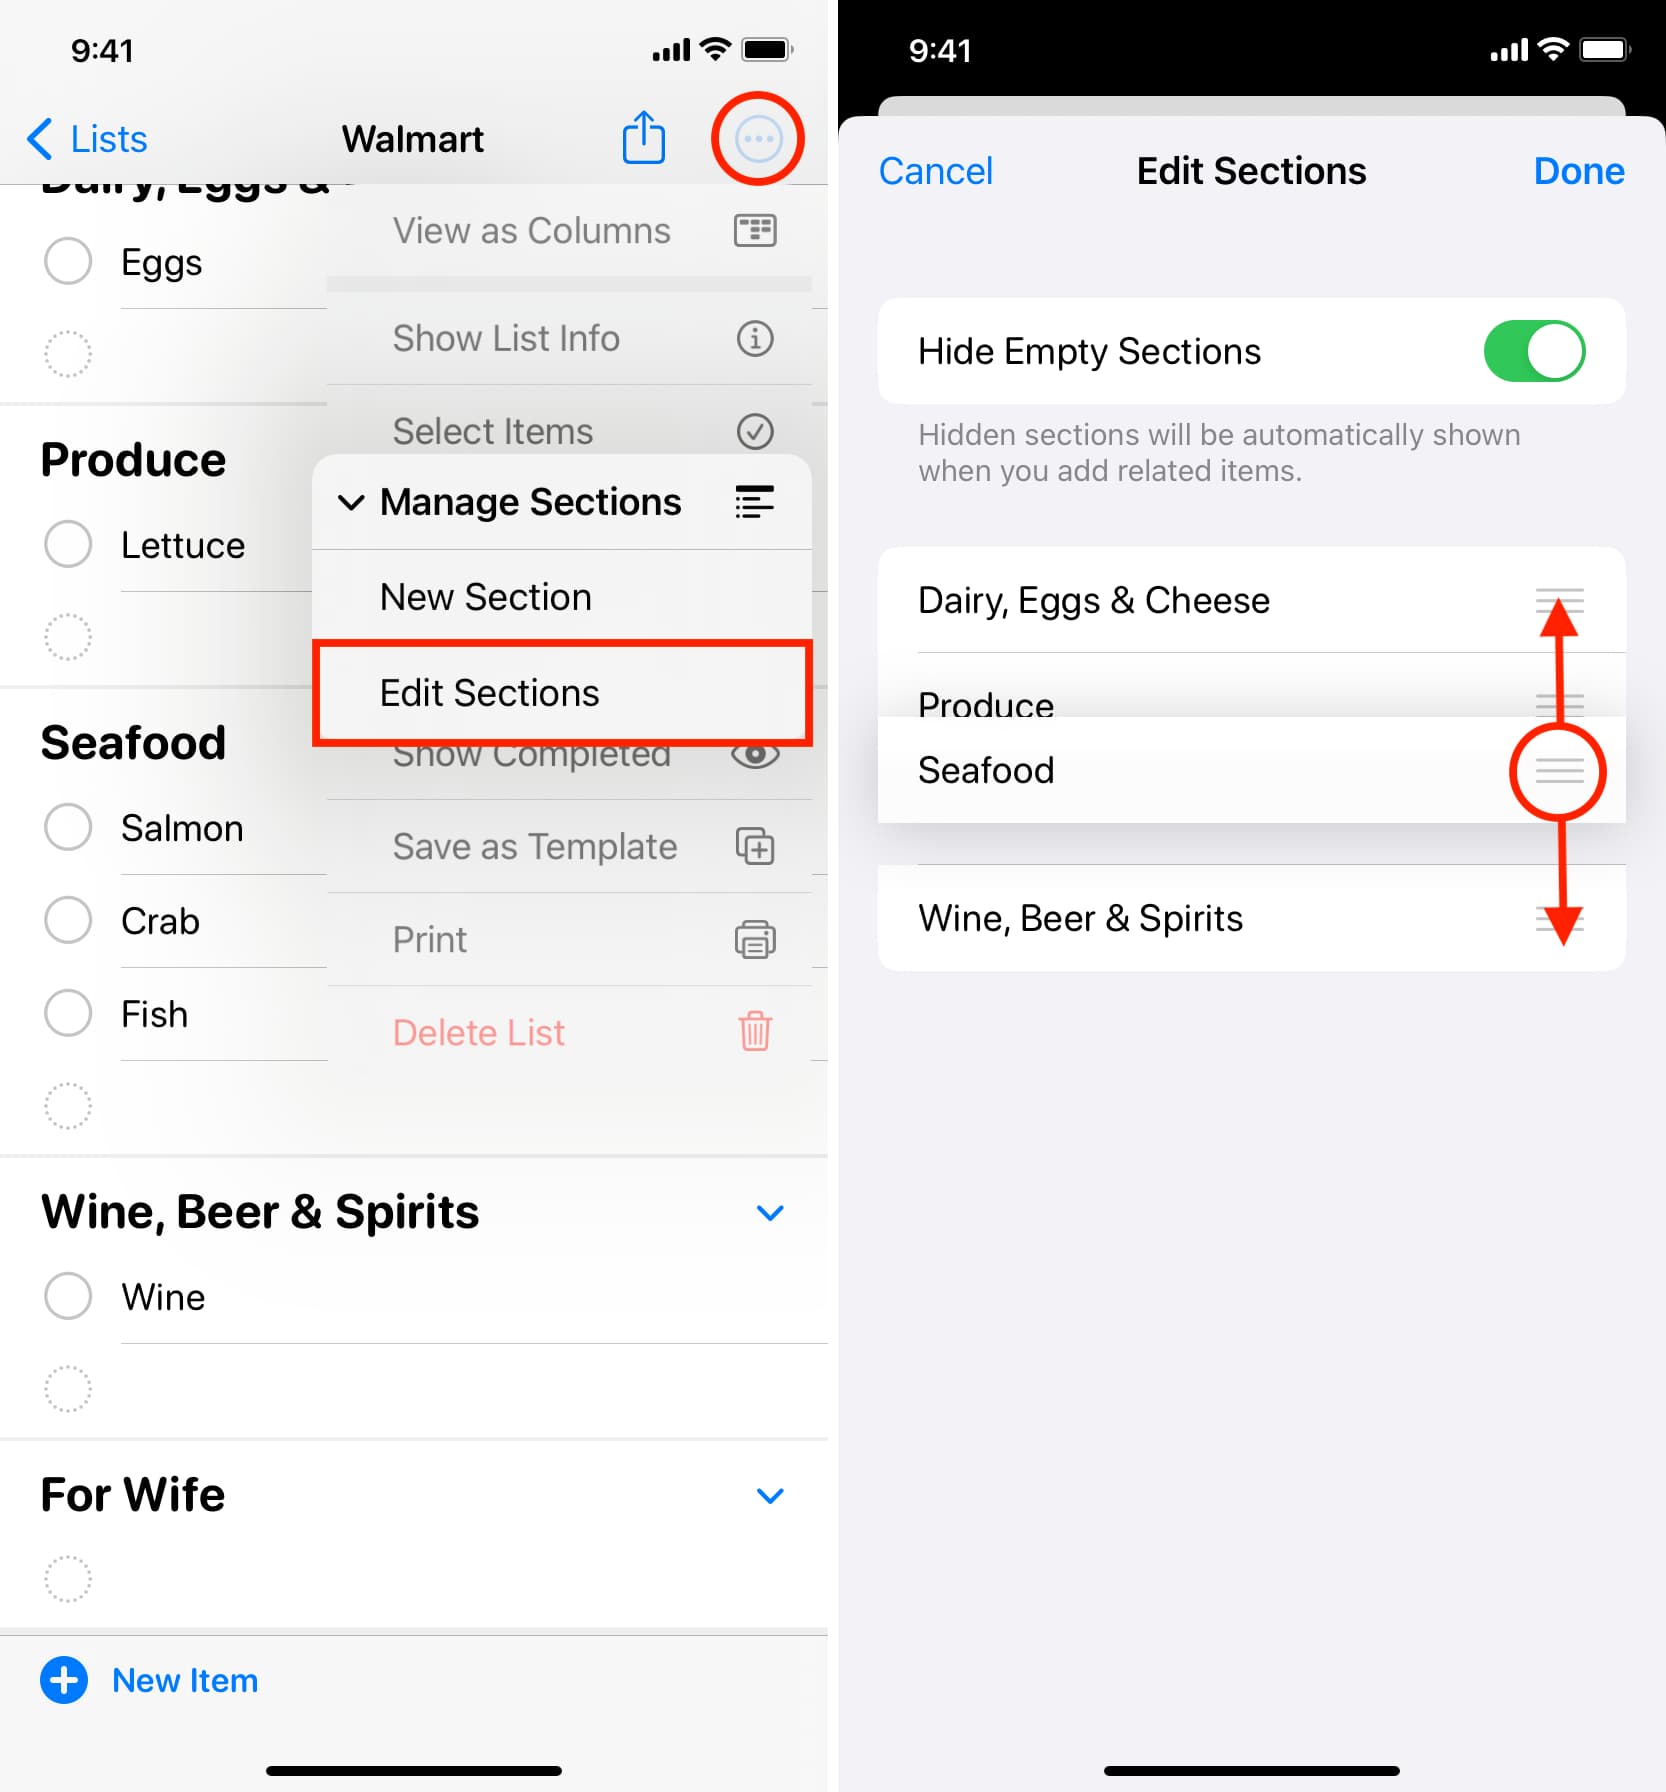
Reorder the sections
If you don’t want the “Oils & Dressings” section on the top, for example, you can move it up or down to your liking.
You can touch and hold the section name and drag it to a new spot. However, it can get slightly tricky for some people to get right, and in that case, you can use the easier method outlined below:
- Tap the three dots menu icon in the top and choose Manage Sections, followed by Edit Sections.
- Use the three-line hamburger icon to drag a section to its new spot.
Tip: You can also touch & hold an individual entry under a section and reorder its position.
Move grocery items from one section to another
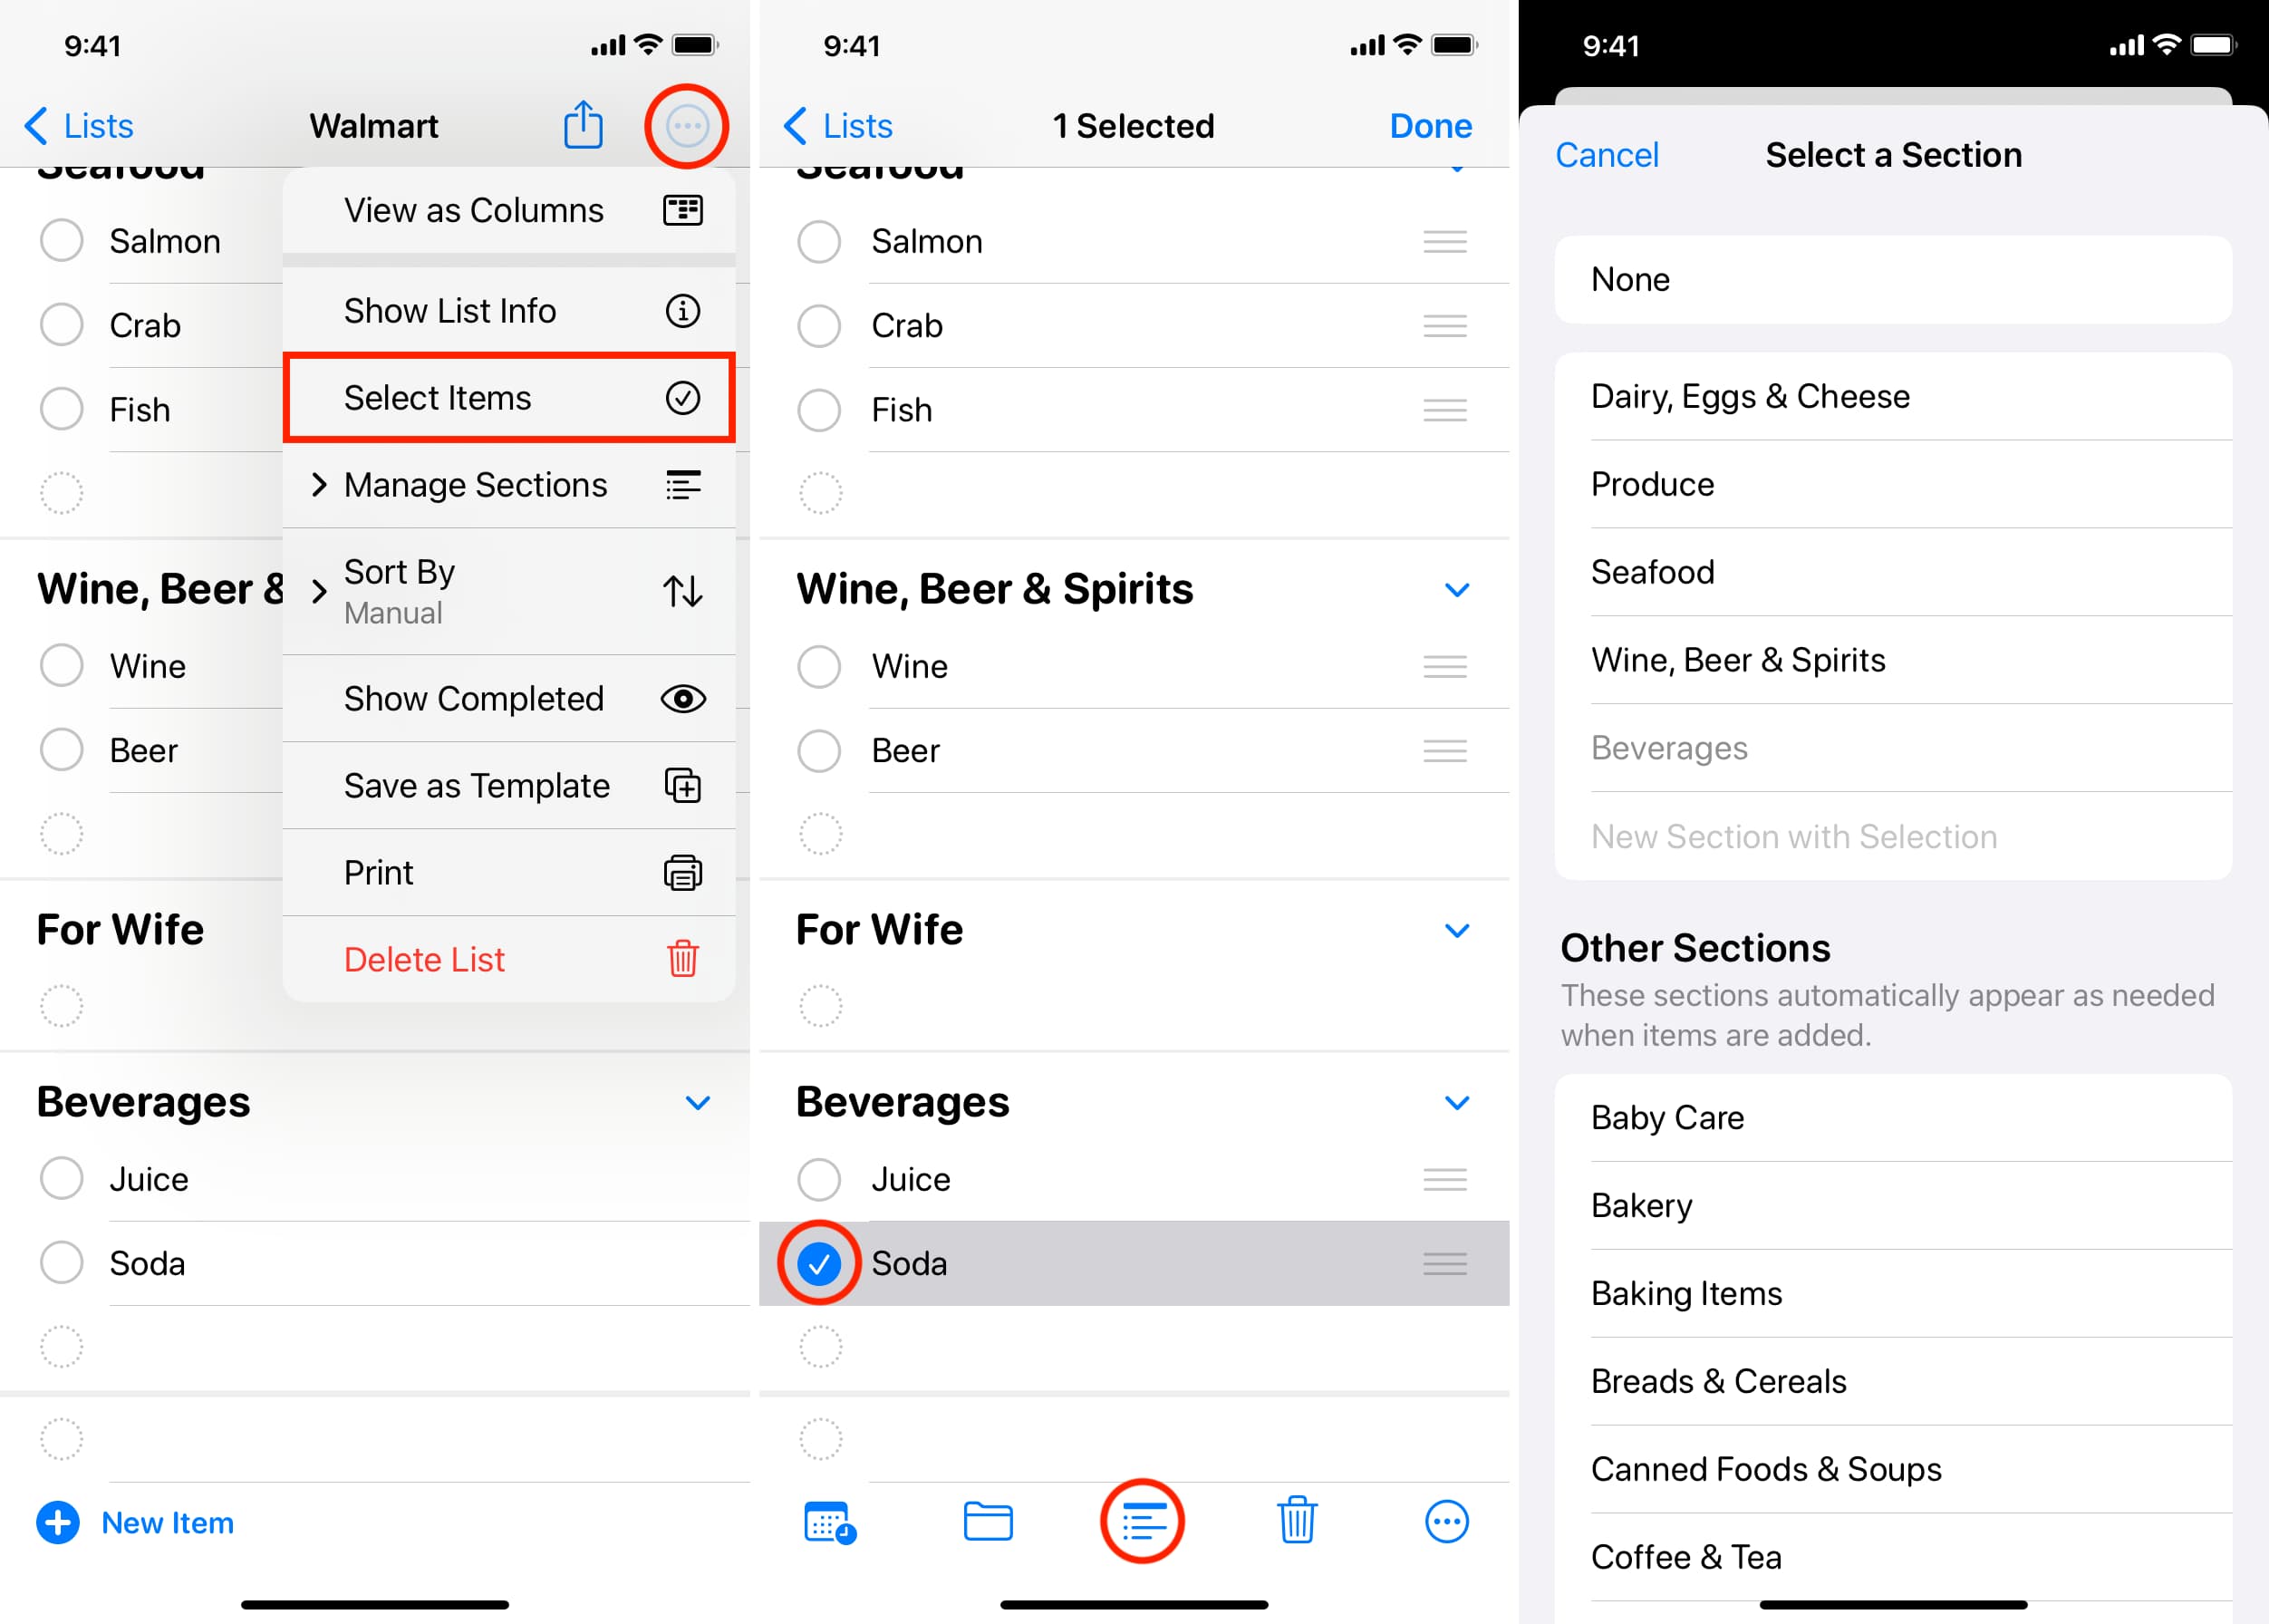
You can manually change the section of an item by following these steps. Apple also says that the list remembers your preferences for the future.
- Tap the three dots menu button and pick Select Items.
- Check the item(s) you want to move to another section.
- After that, tap the section button and choose a new existing or suggested section.
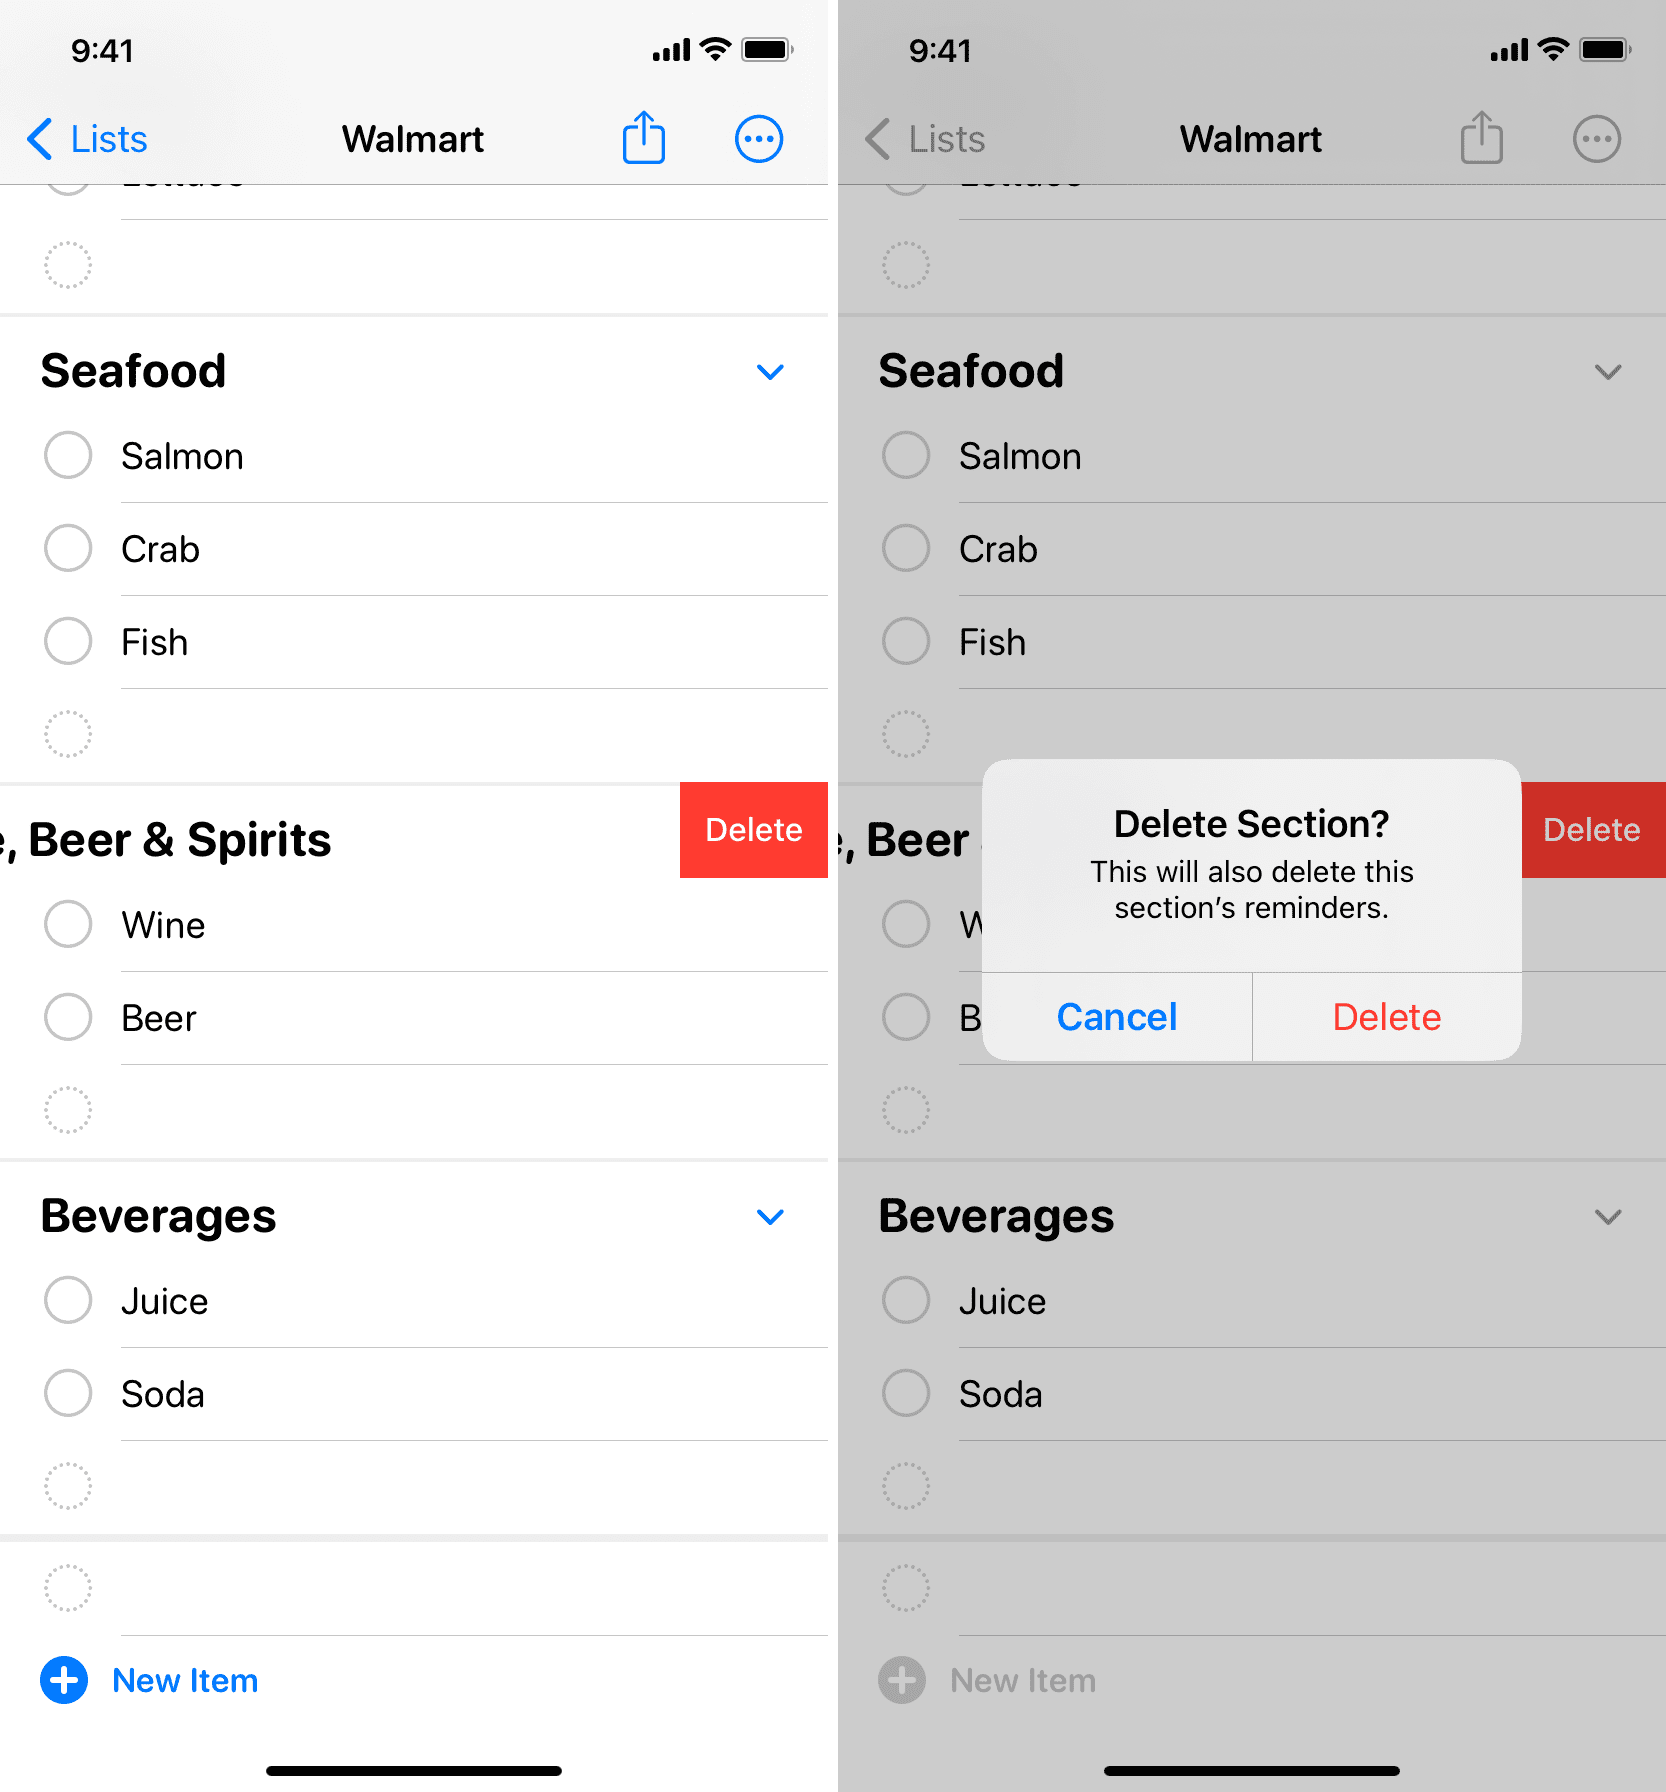
Delete a section and all its items
If you no longer need a suggested or custom-created section, swipe left on its name and tap Delete. Remember that doing so will also delete all the items added underneath it.
Related: How to delete all completed reminders on iPhone and iPad
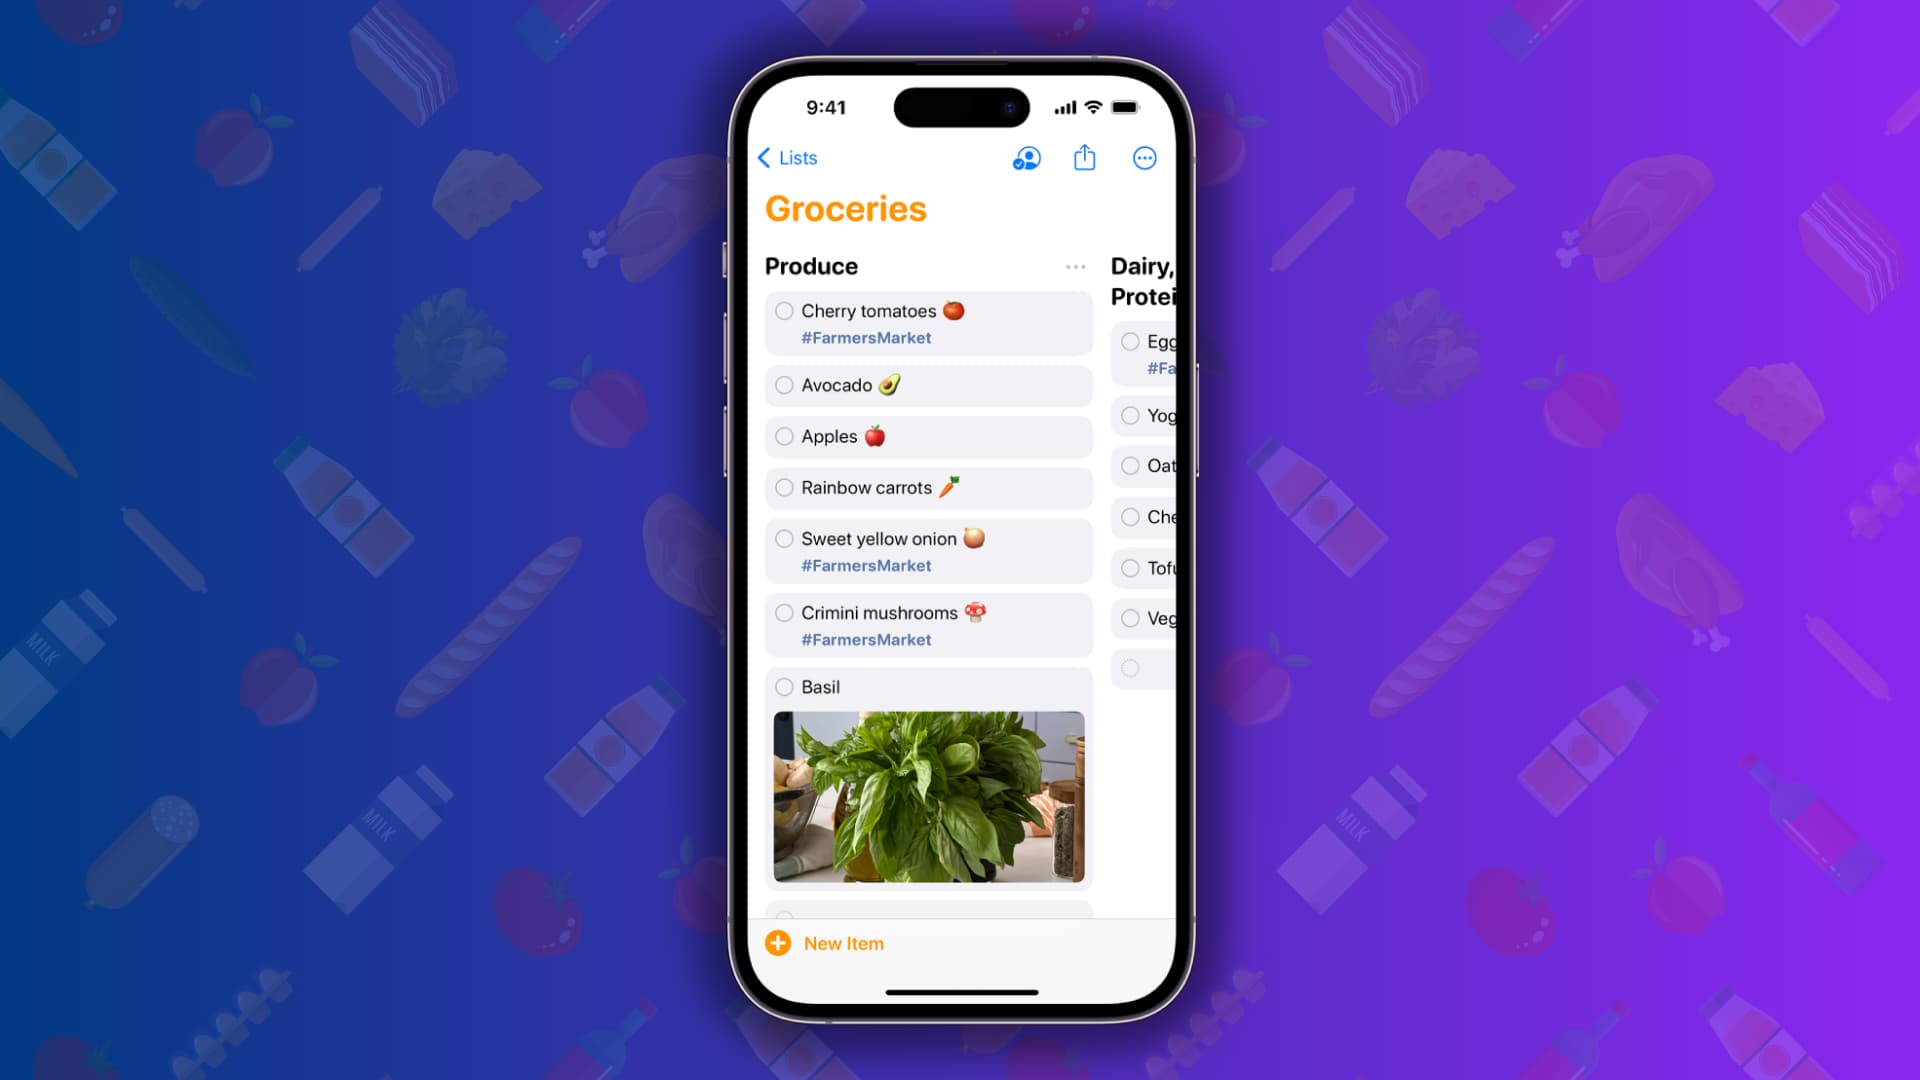
See your groceries in the column view
Since your groceries are listed in proper sections, it can be nice to have all the items of a particular section on your iPhone screen at a time. You can achieve this by switching to column view.
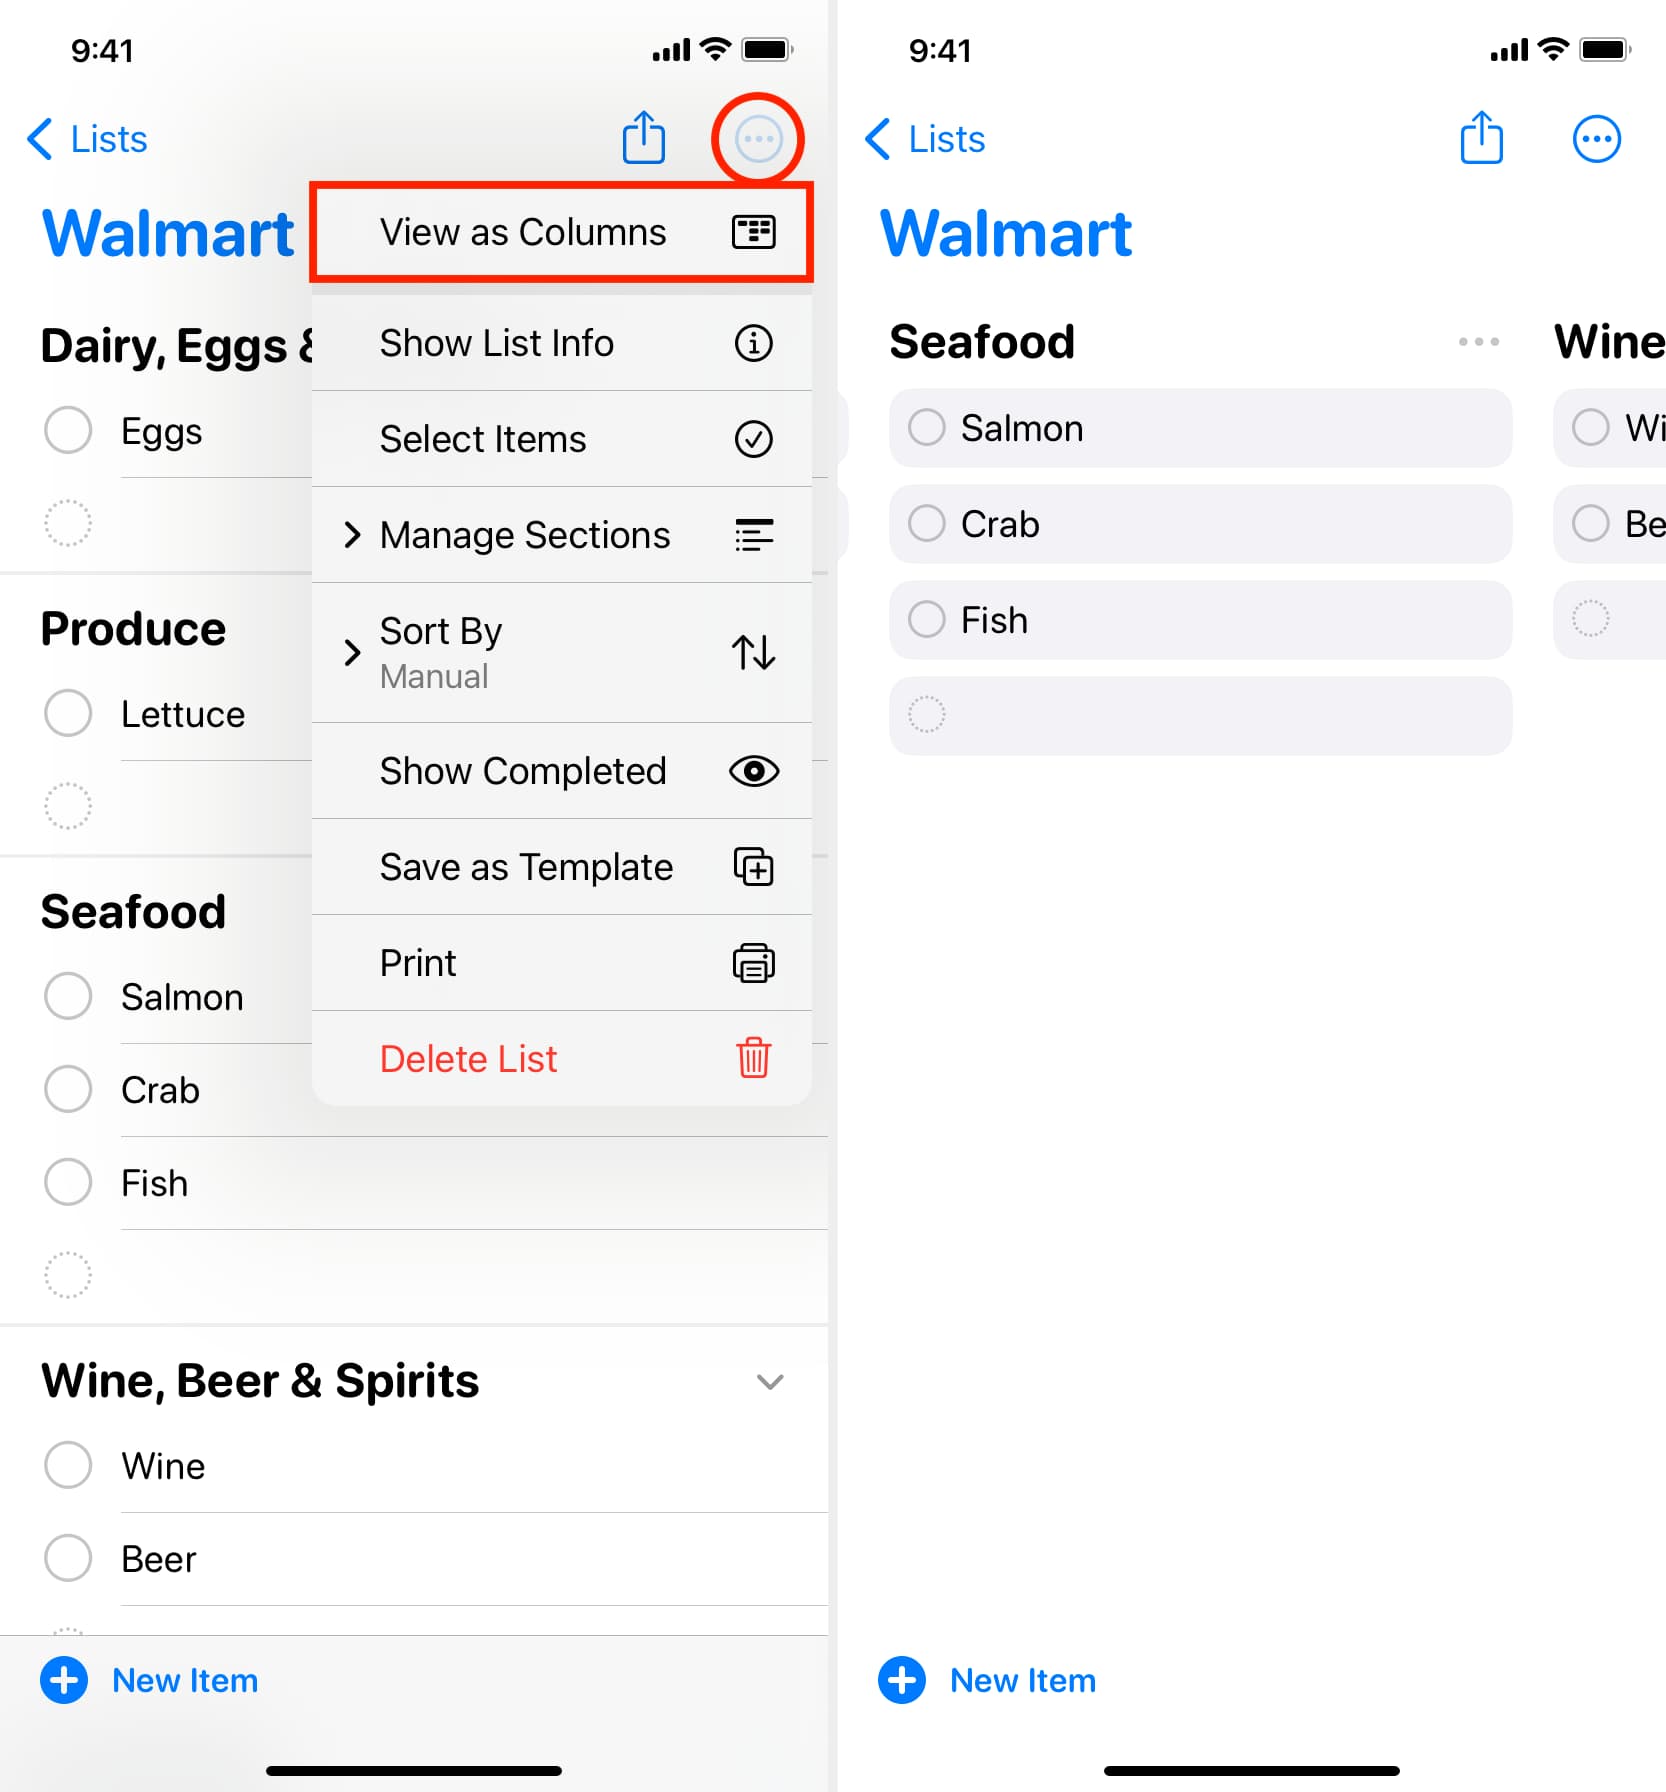
- Tap the three dots menu icon and pick View as Columns.
- Now, swipe left or right to switch between your various grocery sections and see the items listed under them.
- To return to the default view, tap the three dots button and choose View as List.
Groceries list on iPad and Mac
Your iPhone reminders sync to other Apple devices via iCloud. But if you prefer a bigger screen to begin with, you can create and use the Groceries list in the Reminders app on your iPad and Mac, running iPadOS 17 and macOS Sonoma or newer. The process is similar to what we explained above for the iPhone.
More tips for your lists: