Learn how to create stickers from your pictures and Live Photos to use in Messages and other apps on iPhone, iPad, or Mac.
iOS lets you turn your selfie, family photo, an image of your favorite pet and more into a sticker. You can slap these stickers onto Messages chat bubbles, use them to react to texts, or send them as standalone images. You can even decorate photos with stickers using the Markup feature.
Custom stickers are readily available alongside emoji and Memoji on the onscreen keyboard for use in third-party apps which support text input like WhatsApp, Facebook Messenger, and Snapchat.
Turn your still photos into stickers
1) Launch the Photos or Files app on your iPhone or iPad and open an image.
2) Touch and hold the main subject like your face, other people, pets, or objects. A glowing outline and the bubble menu pop up. Choose Add Sticker to turn the selected object into a sticker. Touch and hold the sticker you just created and choose Add Effect from the menu, then pick an effect like Outline, Comic, Puffy, or Shiny, and tap Done.

Turn your Live Photos into animated stickers
You can convert the main subject of a Live Photo into an animated sticker, kind of like an animated GIF.
1) Scroll down in the Photos app on your iPhone or iPad, select Live Photos in the Media Types section, and tap a Live Photo to open it fullscreen.
2) Touch and hold an object on the image like a beer can, slightly slide your finger up to duplicate and detach it from the image, then release the finger and Choose Add Sticker from the menu. You may need to try this a few times to get it right.

3) Tap Add Effect and then hit OFF in the top-left corner to change it to LIVE to animate the sticker, then choose Done to save it. Make sure not to select the sticker as an effect because doing so will turn off the animation.

Can you create photo stickers on Mac?
Unfortunately, you cannot create stickers using the Mac’s built-in Photos app.
Do custom stickers sync via iCloud?
Yes. Any stickers created on your iPhone or iPad sync via iCloud to your Mac, Vision Pro and any other devices using the same Apple Account.
Use your stickers in the Messages app
To use your custom stickers in the iPhone’s built-in Messages app, open an existing conversation or start a new chat and follow the steps below.
Send a sticker
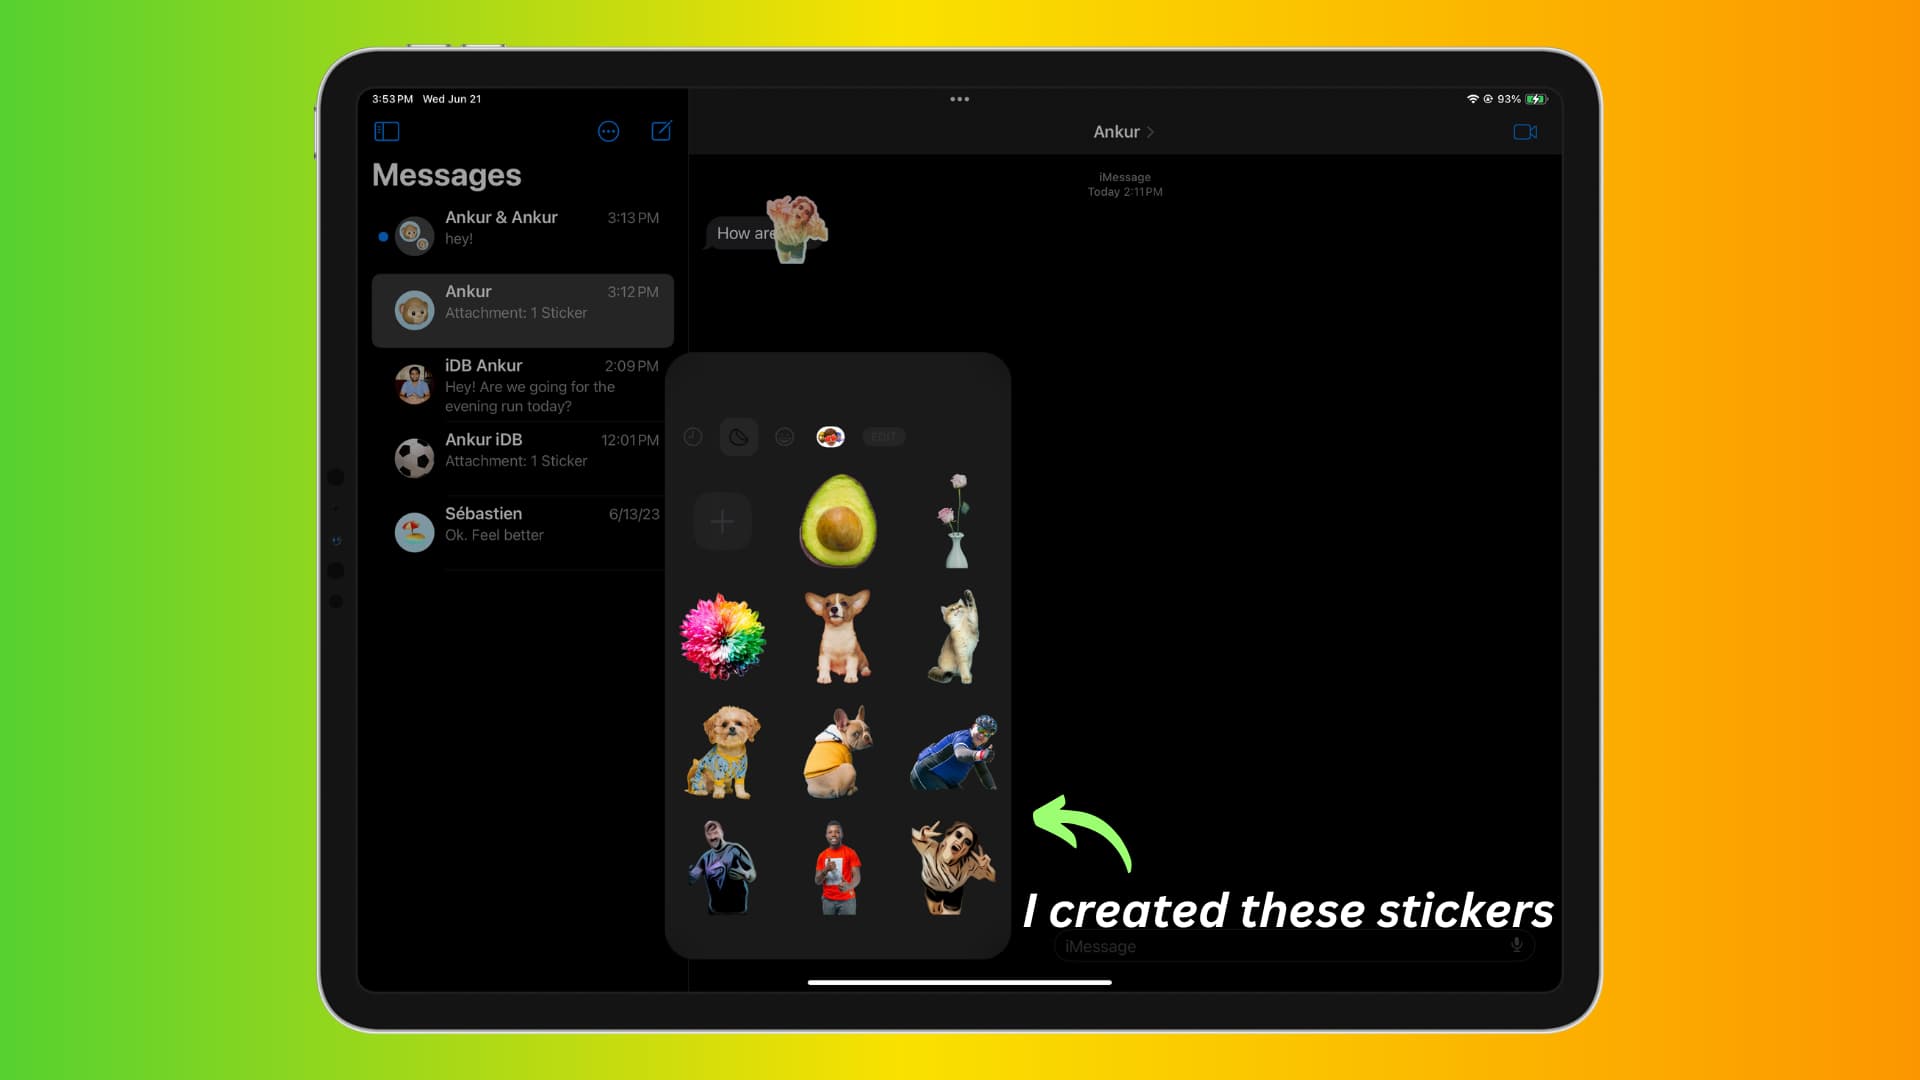
Method 1: Tap the plus button and select Stickers from the list of iMessage apps, then pick a desired sticker and hit the send button.

Method 2: Start typing a message, then hit the emoji key on the onscreen keyboard, select the sticker icon to browse all your stickers and Genmojis, and pick one to send.

Use a sticker along with text
Follow the above steps to add a sticker to your text but write an accompanying message. The sticker will shrink in size to match your text, making it seem like a regular emoji.

Reacting to messages with stickers
Tap the emoji key to see all your stickers. Touch and hold the sticker and drag and drop it onto the message bubble or an inline attachment. The sticker will appear to float over the message. Feel free to give it a try, it’s pretty cool.

To remove a sticker reaction, touch and hold a message on your iPhone and choose Sticker Details. On your Mac, right-click a reaction sticker and choose Sticker Details. Next, swipe left across your reaction sticker on your iPhone and tap Delete or click the X button on your Mac to remove it.

Use stickers in the Mac’s built-in Messages app
While macOS Messages doesn’t support creating stickers from images, you can use stickers created on your iPhone or iPad thanks to the magic of iCloud.
1) Launch the Messages app on your Mac and open an existing conversation or start a new chat.
2) Click the plus icon or the App Store icon and select Stickers from the menu.
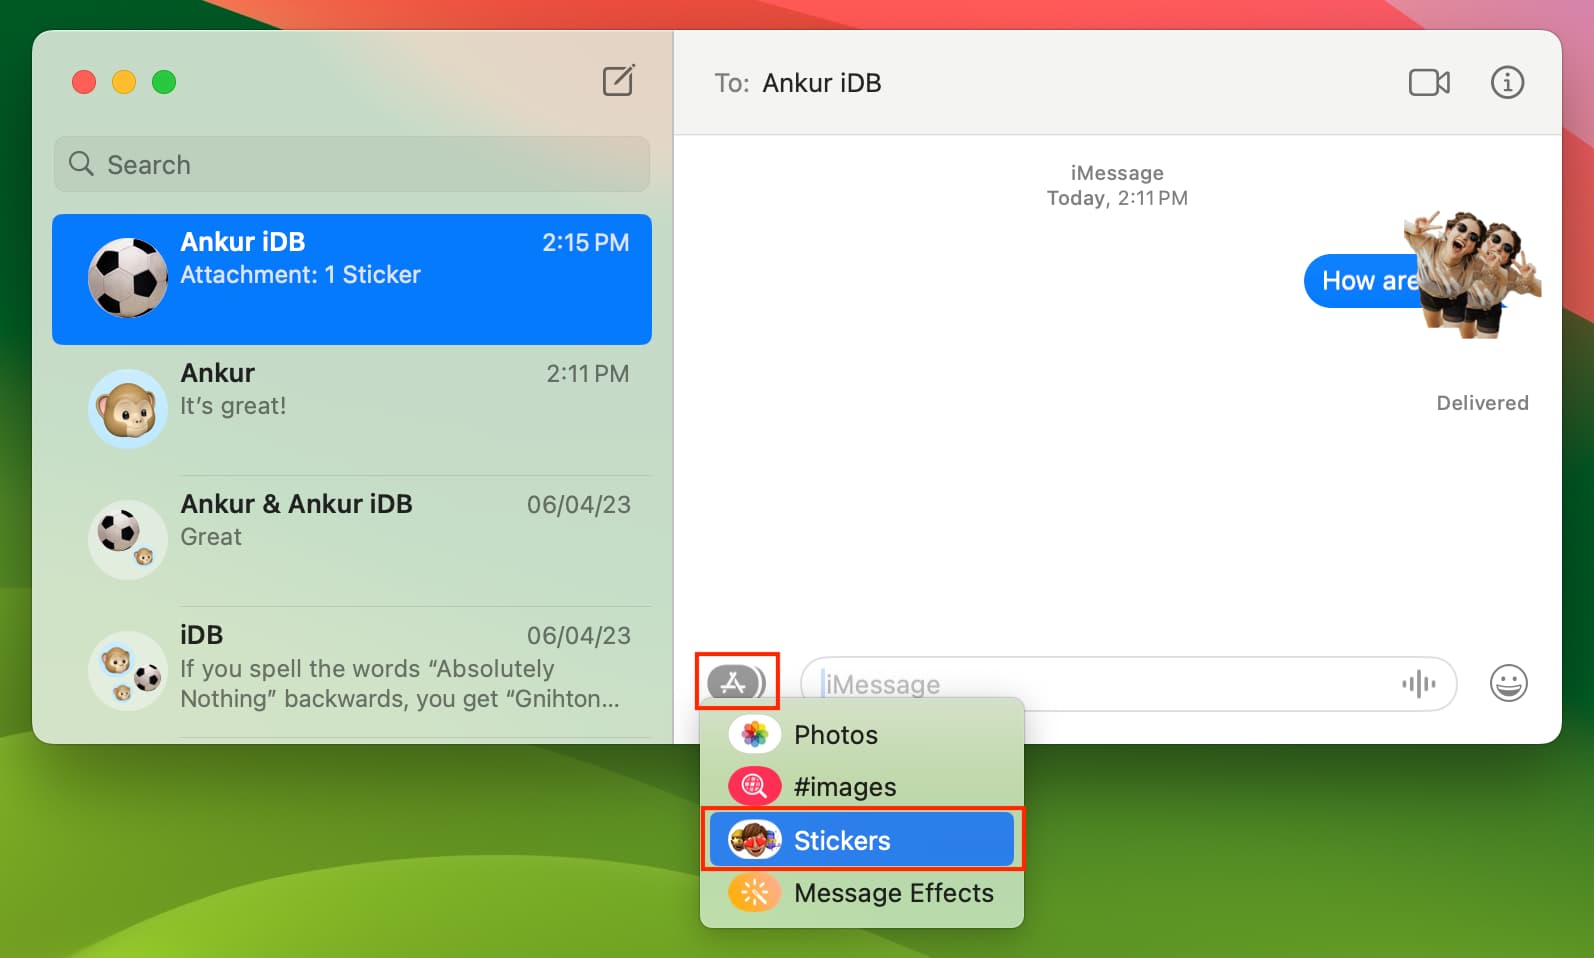
3) Click a sticker to add it to the text entry box, type an optional accompanying message, and hit the enter/return key to send it.
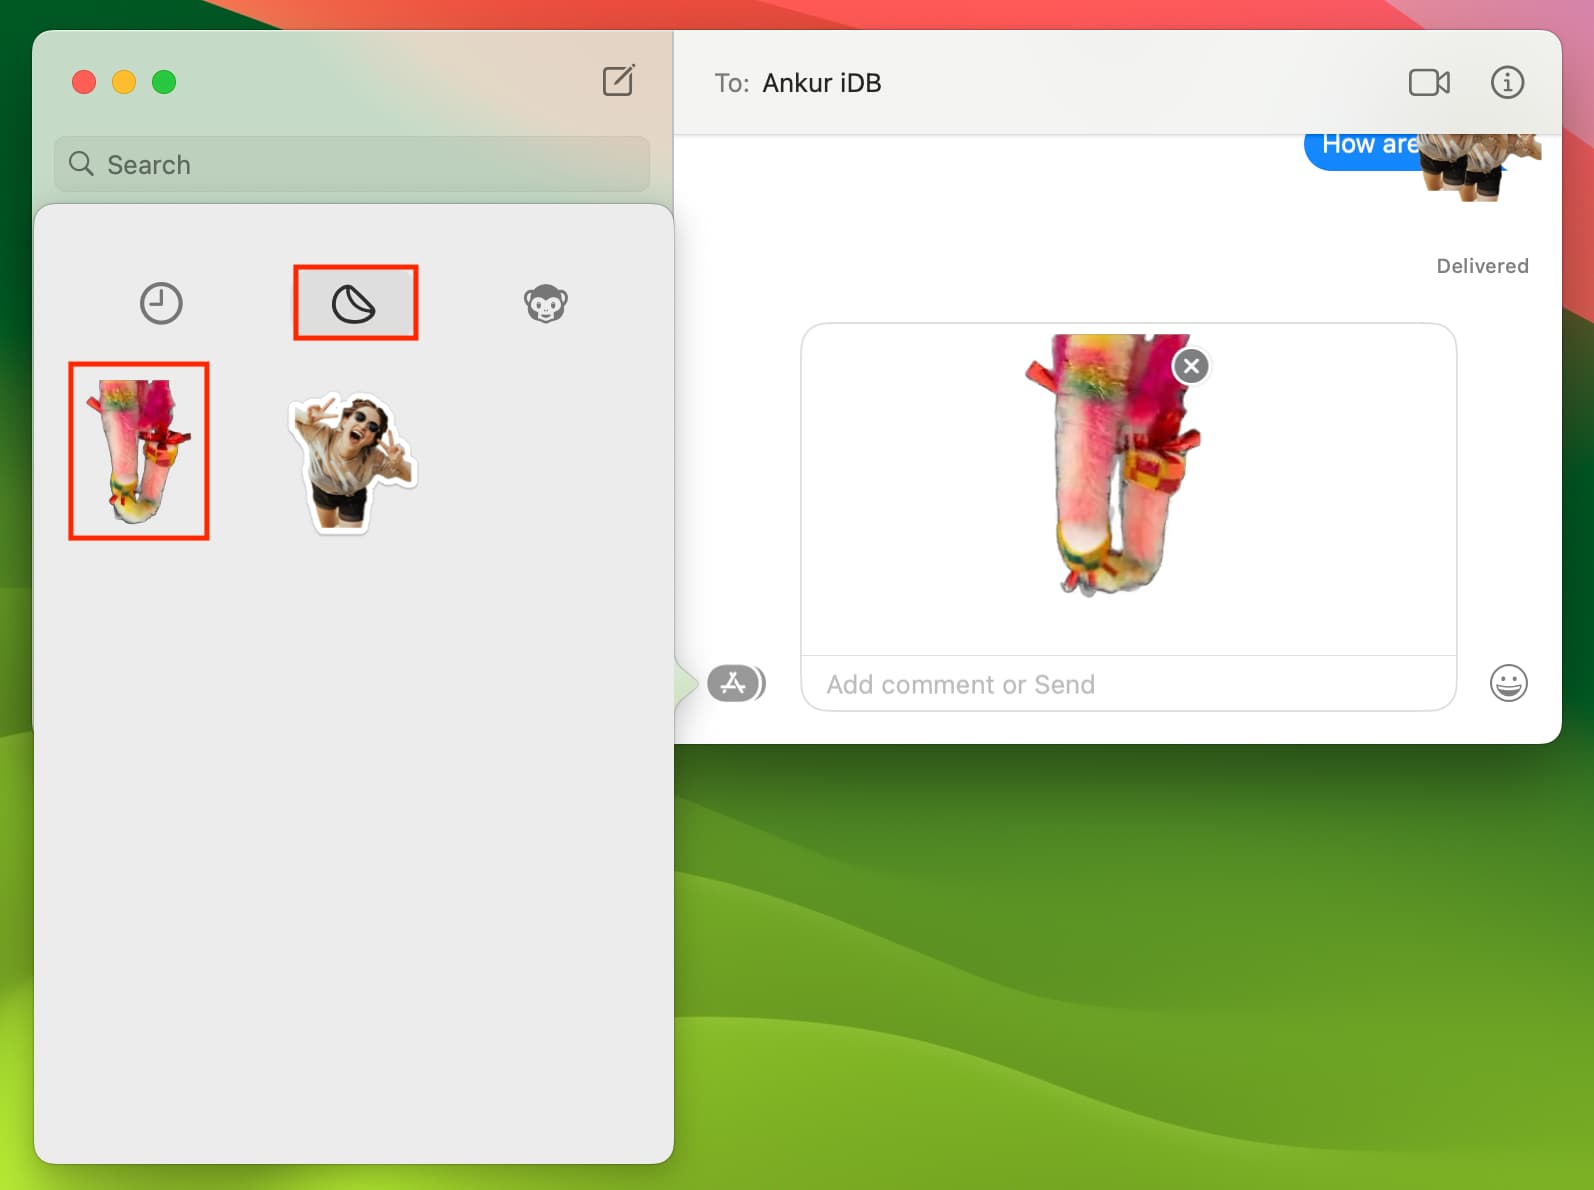
4) You can also drop a sticker onto a chat bubble as a reaction.

Use custom stickers in Markup
The built-in Markup tools let you add shapes, lines, text, and signatures to images. You can also choose the Add Stickers option in the Markup tools to add a sticker to the image.

Use your photo stickers in other apps
Instead of being confined to the built-in Messages app, custom stickers are available in your favorite messaging and social media apps such as WhatsApp, X, or Facebook Messenger. To use them, simply switch to the emoji keyboard and select the sticker tab.

Add another effect to your custom emoji
Follow these steps to add a different effect to your sticker or change the existing effect, with the changes syncing across devices via iCloud.
1) Launch an app like Messages, the open the stickers drawer on the emoji keyboard.
2) Touch and hold a sticker, then choose Add Effect or Edit Effect.
3) Select from Original, Outline, Comic, Puffy, or Shiny, then hit Done. Adding an effect other than Original will turn the animated sticker created into a still one.

Rearrange or delete your custom stickers
1) Go to the sticker section on the emoji keyboard.
2) Touch and hold a sticker and choose Delete to remove the sticker without confirmation.
Choose Rearrange in the sticker gallery to enter edit mode. You can now drag a sticker to a new spot in the gallery or hit the minus sign (-) to delete any sticker. Actually, get rid of several stickers in one fell swoop with the minus sign instead of holding each sticker to use the Delete option.

Also, check out: 65+ tips and tricks for the Messages app on iPhone and iPad