Learn how to set up the Dropbox app on your Mac to manage your new and existing files without having to visit Dropbox’s website every time you need to download or upload a file.
Just like you can set up Google Drive on your Mac for seamless file uploads and downloads, you can also add Dropbox to Finder. Once that’s done, you can use this popular cloud storage service inside the Finder on your Mac, like any normal folder.
This local Dropbox folder will have all your existing files. Furthermore, anything you move to this folder will automatically upload to Dropbox and be available on all your computers, phones, and the web.
Set up Dropbox on Mac
1) Download the installer for Mac using this official link. Then, double-click the downloaded DropboxInstaller.dmg file, and follow the simple on-screen instructions to install Dropbox on your Mac.
Note: If the download or installation gets stuck, click the installer icon in your Mac’s Dock, then click its name in the top menu bar, and select the Quit option. After that, restart the installation.
2) Once the installation completes, sign in to your Dropbox account.

Note: Dropbox will request multiple permissions, such as accessing your Accessibility settings or offering the option to share your screenshots in a snap. You can decline all that unless you know what you’re doing or want to use these features.

When Dropbox is open on your Mac, you’ll see its icon in the top menu bar. Click it to do the following:
- Folder icon: Open the Dropbox Finder folder.
- Globe icon: Access your Dropbox files in your Mac’s default browser.
- Bell icon: See your Dropbox notifications.
- Profile icon: Access app settings/preferences or use the Quit option to close Dropbox on Mac.
Access your existing Dropbox files in Finder on Mac

Open Finder and click Dropbox in the sidebar under the ‘Locations’ heading. It will open the system folder where Dropbox syncs all your files.
Add new files to Dropbox from Mac
Simply drag & drop or copy & paste files into the Dropbox folder in Finder. These will upload automatically to Dropbox and become available on your other devices.
See all your Dropbox files that are available offline

Go to the Dropbox folder in Mac’s Finder, and if you don’t see a download icon next to a file or folder, it means the file or folder is available for offline use on this Mac. But note that their offline cached version may be removed, so use the “Make available offline” option explained below.
You can also see and manage your offline files by clicking the Dropbox icon in the menu bar, going to the profile icon tab, and selecting “Manage hard drive space.” This will display all your Dropbox files that are also saved offline on your Mac and are occupying local storage space. If you need to make space, select the item and click “Make online-only.”

Save a Dropbox file or folder for offline use
Go to the Dropbox Finder folder on your Mac, right-click on one or more items, and select “Make available offline” from the menu. You’ll see a green checkmark when a file is available for offline use.

Alternatively, if you think you won’t be needing a particular file anytime soon on your Mac, just right-click over it and select “Make online-only.”
Set Dropbox to save everything to your Mac
If you’ve sufficient free space on your Mac’s internal disk, follow the steps below to change Dropbox’s default sync settings and have it store all future files both online and offline on your computer. This allows you to have worry-free access to your new files even when you’re travelling and don’t have a fast Internet connection. To make your existing files offline, follow the steps in the previous section.
- Open the Dropbox app on your Mac and click its icon in the top menu bar.
- Click your profile icon and select Preferences.
- Click Sync from the left sidebar and change ‘Default Sync Preference’ to “Available offline” instead of “Online-only.”

Access the full path of the folder where Dropbox saves the files
Earlier, Dropbox used to save its files in the /Users/YourUsername/Dropbox folder. But now, it stores them at ~/Library/CloudStorage.
To go to this folder:
- Open Finder, click Go in the top menu bar, select Go to Folder, paste the above folder location, and hit the enter key.

- You can also open Finder, click Go, hold the Option key, select Library, and then go inside the CloudStorage folder to see the Dropbox sub-folder.

Stop Drobpox from opening automatically on Mac
If you don’t want Dropbox to open automatically after every restart, go to its app preferences and turn off “Open Dropbox upon startup.” Then, go to Mac’s System Settings and remove its auto-launching permission from there if needed.

Delete Dropbox from your Mac
You can remove Dropbox like any other regular Mac app, provided the app isn’t open. I recommend using the AppCleaner method mentioned in our dedicated tutorial.
Note that even after deleting the app, your Dropbox files will still stay saved in Finder. To delete them, go to the Dropbox Finder folder (~/Library/CloudStorage) and click the “Delete Dropbox” button next to ‘The application “Dropbox” could not be found’ or ‘This is an unlinked Dropbox.’ You’ll see these options only after you’ve deleted the Dropbox application or signed out of your account.

What to do if you can’t sign in to Dropbox
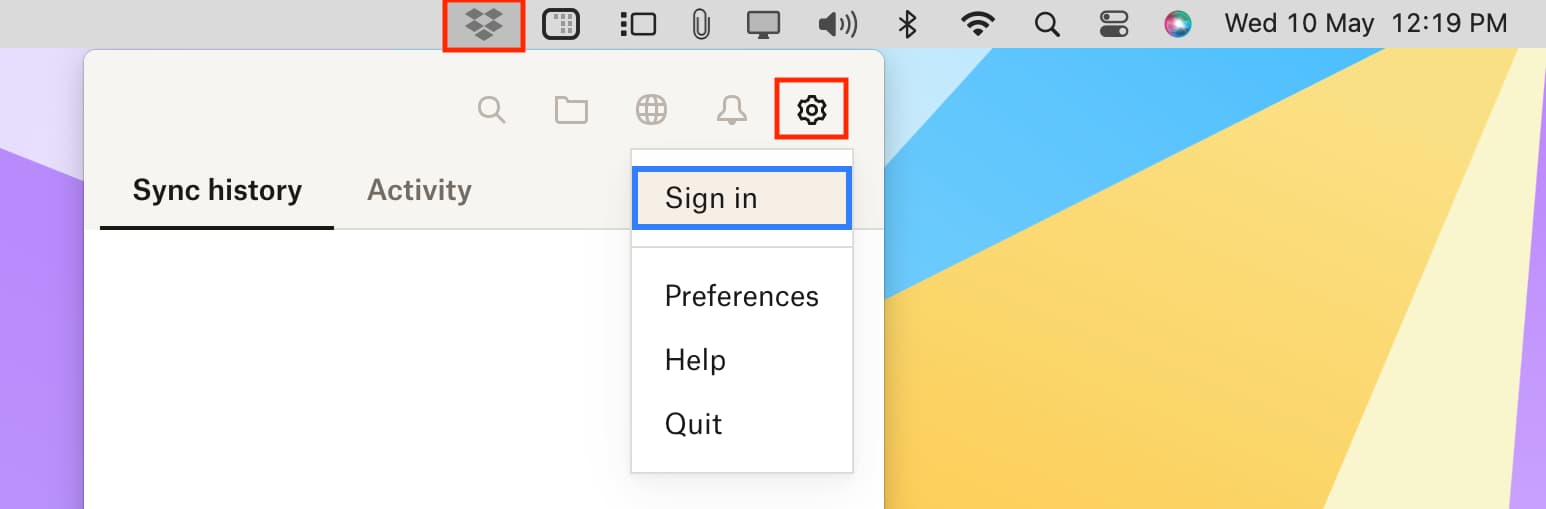
After you finish the installation, you should automatically see the sign-in window. In case you don’t, open the Dropbox app, click its tiny Dropbox icon in the top menu bar, followed by the gear icon, and choose Sign In.
In rare instances, sign-in may not work if you used the Connect a computer option in the Dropbox mobile app or had previously logged in to the same computer. In this case, the app interface sticking out of the Dropbox menu bar icon will behave as if it’s loading or fetching content. But in most cases, it won’t do anything and leave you hanging there. Here’s how to fix it:
1) Right-click on the Dropbox app icon in Mac’s menu bar and choose Quit Dropbox.

2) Open the Dropbox app on your phone and go to Account > Manage devices.
3) Swipe left on your computer’s name and tap Unlink.

4) Now open the Dropbox app on your Mac and sign in again.
Also, check out: How to use Google Drive, Dropbox, etc., in the Files app on iPhone and iPad