In this tutorial, we’ll show you how to make digital copies (image or PDF) of your physical identity card using your iPhone or iPad. You can use these digital copies when filling out online forms or keep them on your device for safe backup.
Why use scanned digital ID cards
- When you’re applying for things like a driving license, passport, or insurance claim, you may have to upload a scanned image or PDF of your governmental or institutional identity card.
- You may have to scan your college or university ID card to fill out exam forms or get verified by UNiDAYS so you can get educational discounts on Apple’s website.
- You can upload your digital ID card to iCloud, Google Drive, or Dropbox and access them from anywhere
Also see: How to take a passport or ID card photo using your iPhone or iPad
Turn your physical ID card into a photo
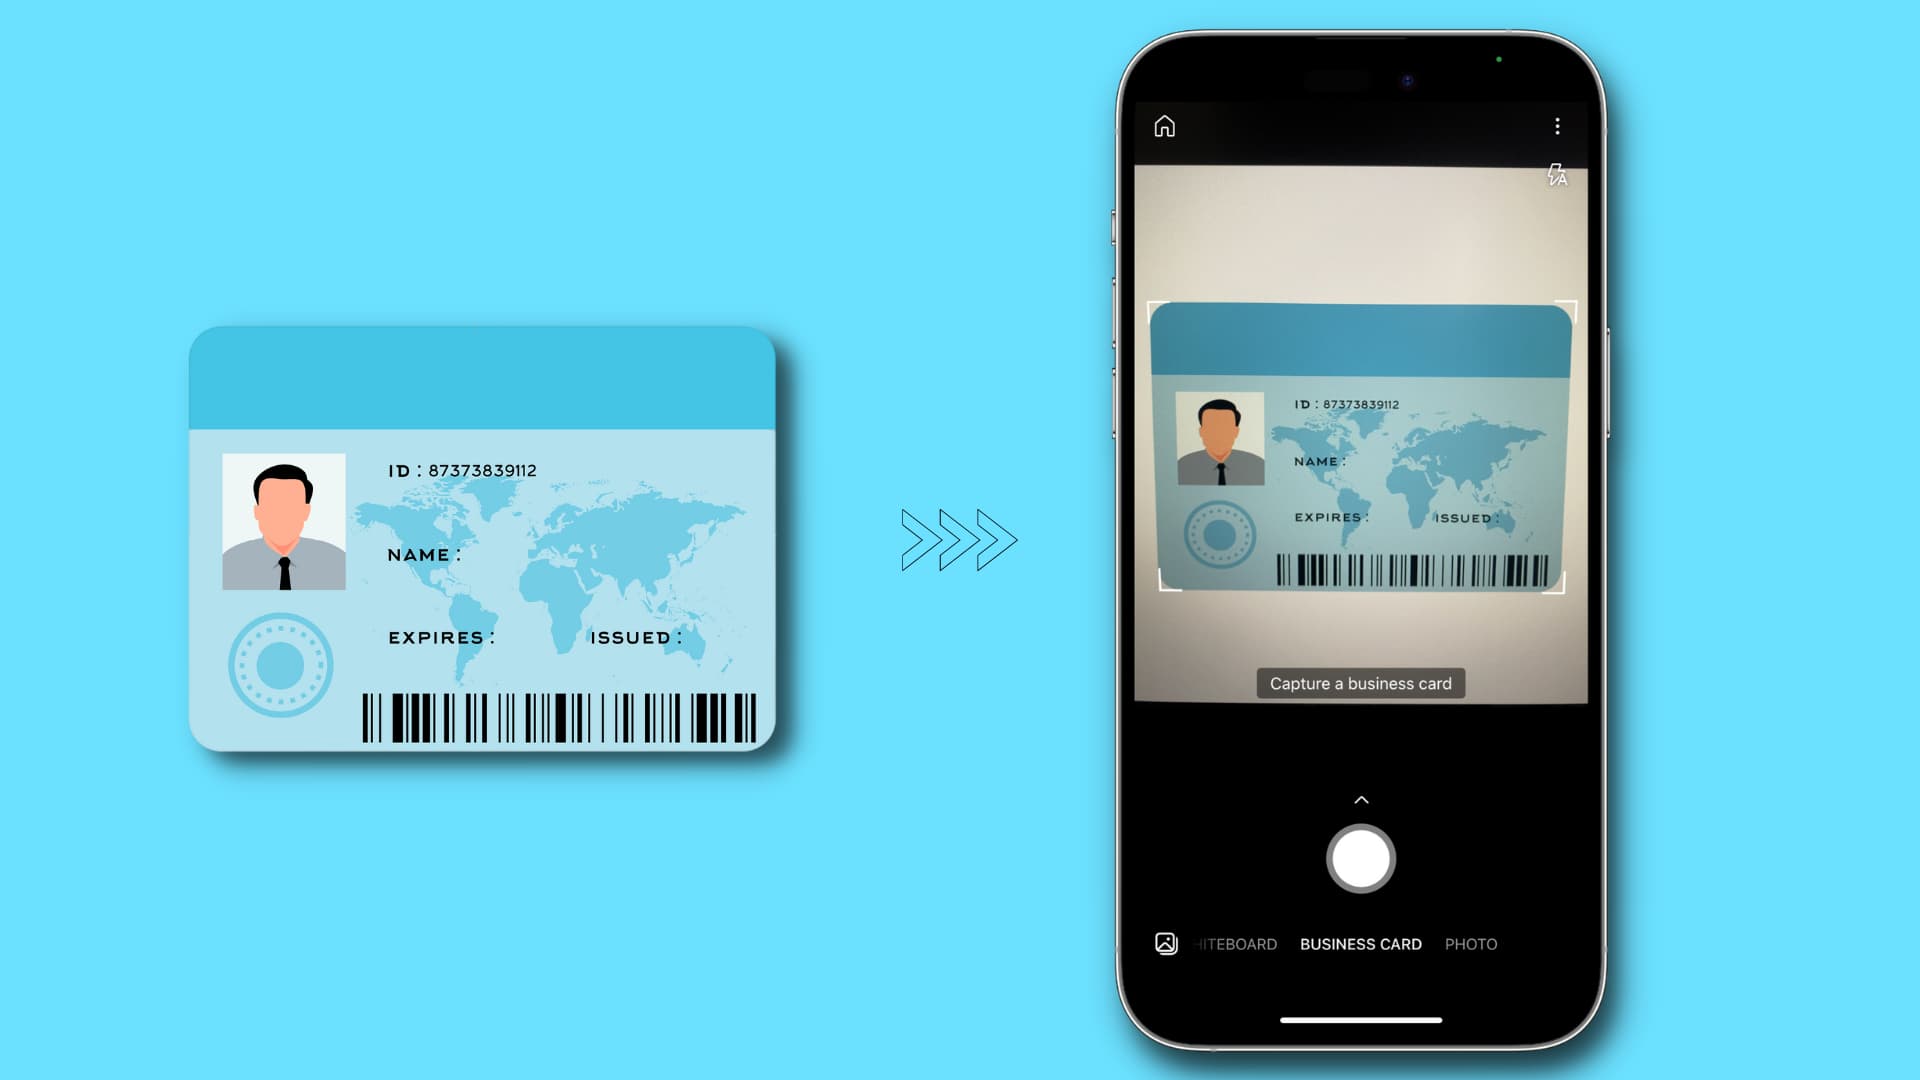
1) Download Microsoft Lens for free from the App Store, and allow it to access your device’s camera and photo library when prompted.
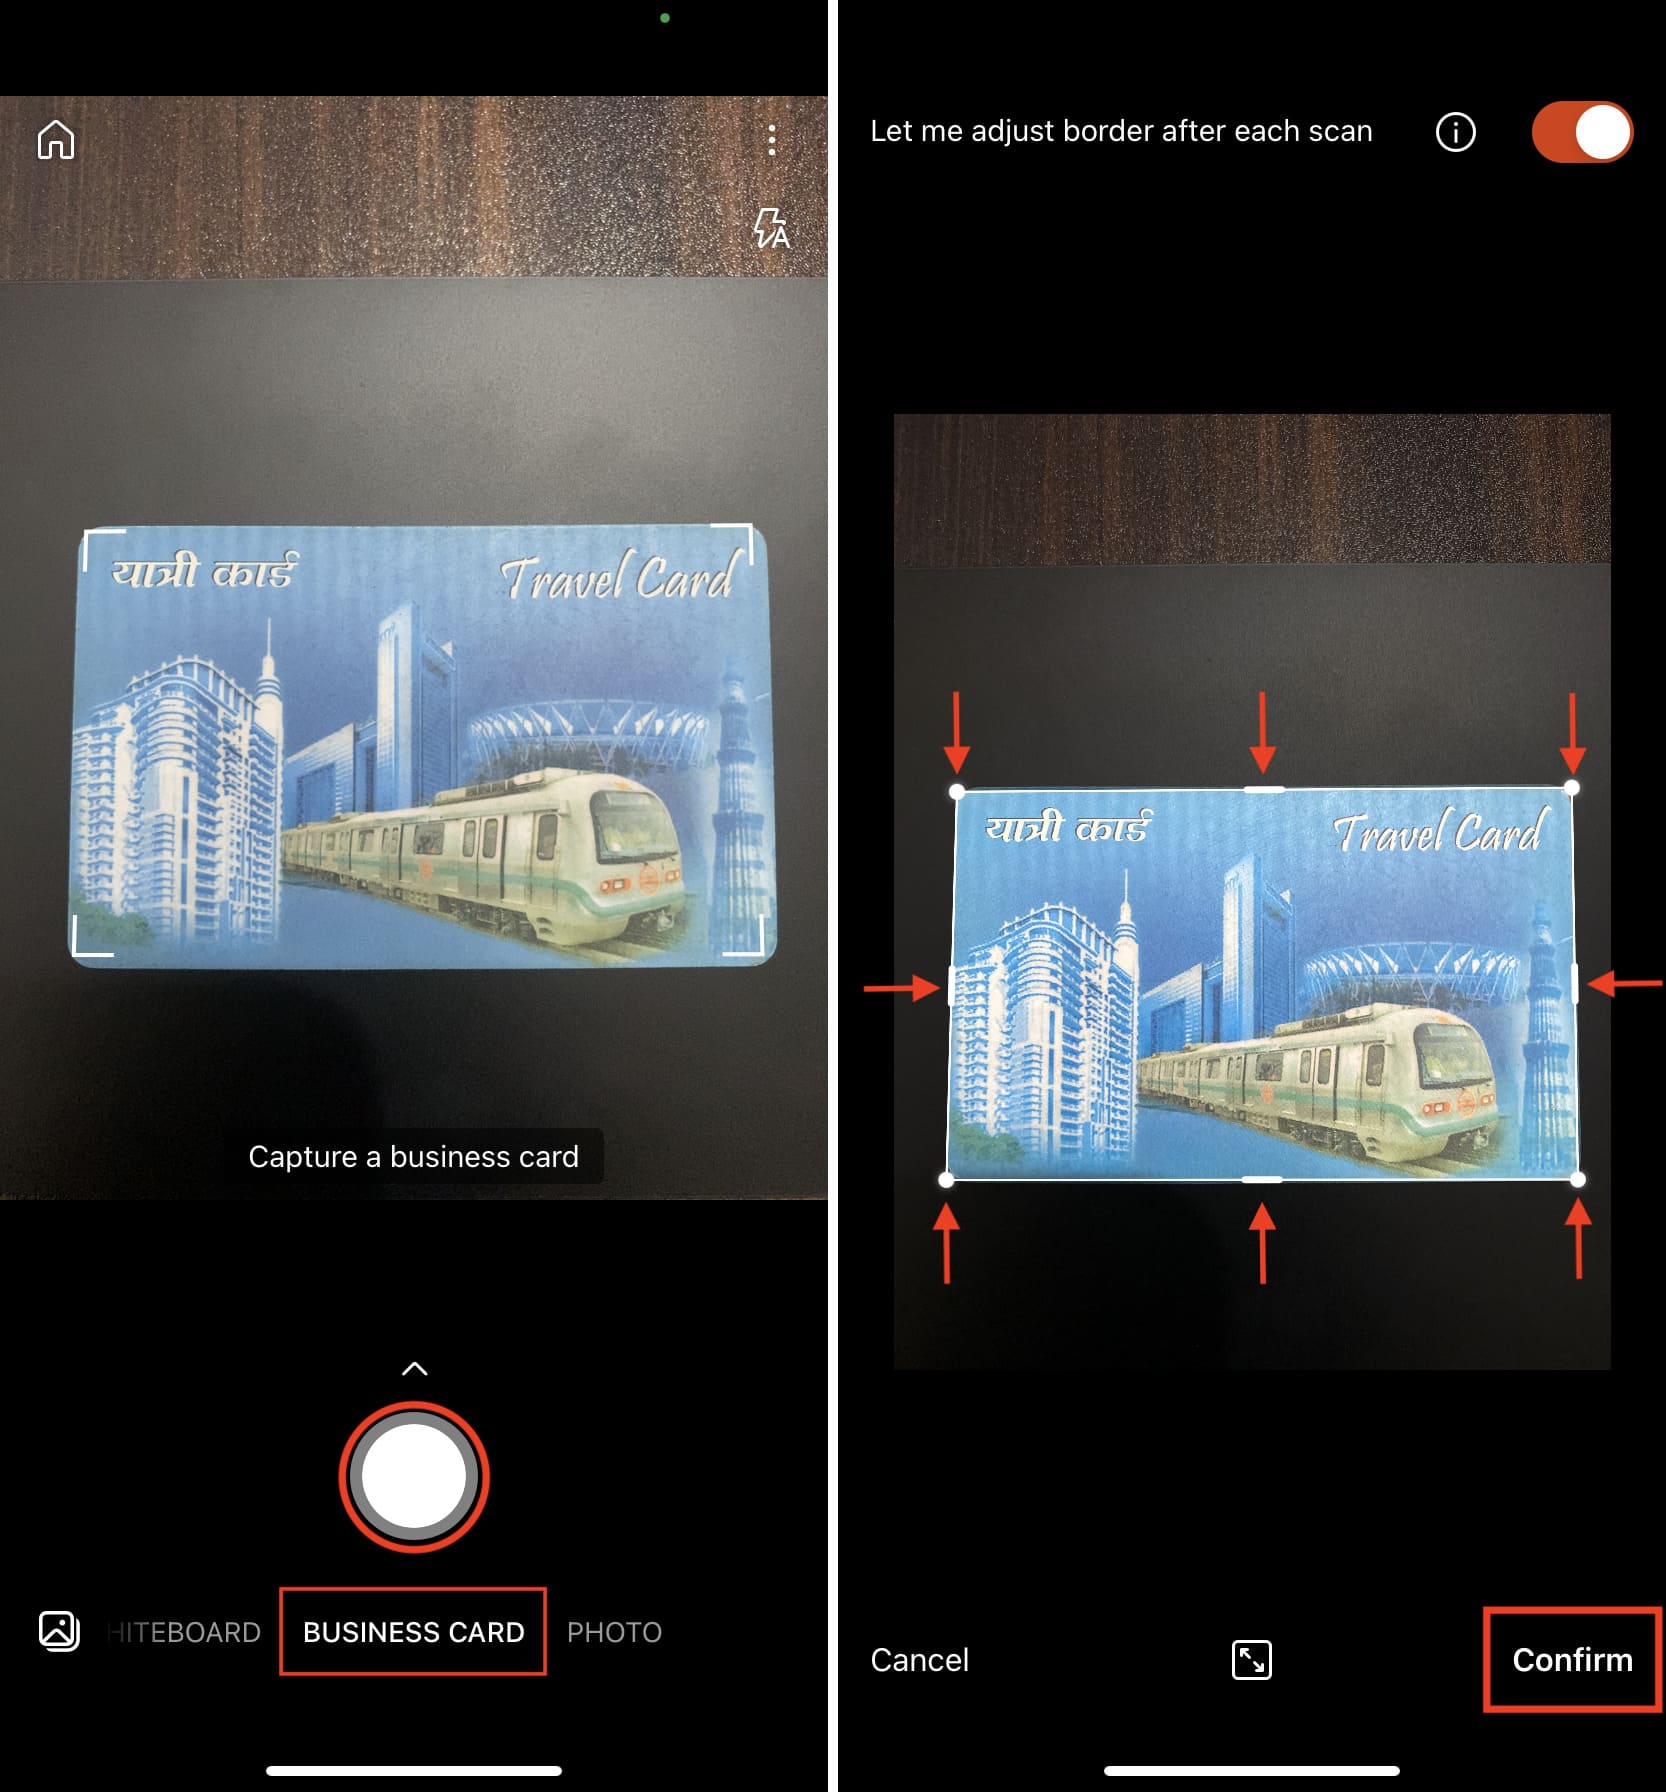
2) Make sure you’re in the Business Card or Document section.
3) Now, place your ID card on a flat surface like a table, floor, or book. Try to select a surface/background that has just one color.
4) Properly align your iPhone over the ID card and take a photo by hitting the white shutter button of the Microsoft Lens app.
5) The app will take a perfect photo. If not, use the four dots in the corners and the four small tabs on the edges to crop out the extra parts of the background. Once that’s done, tap Confirm.
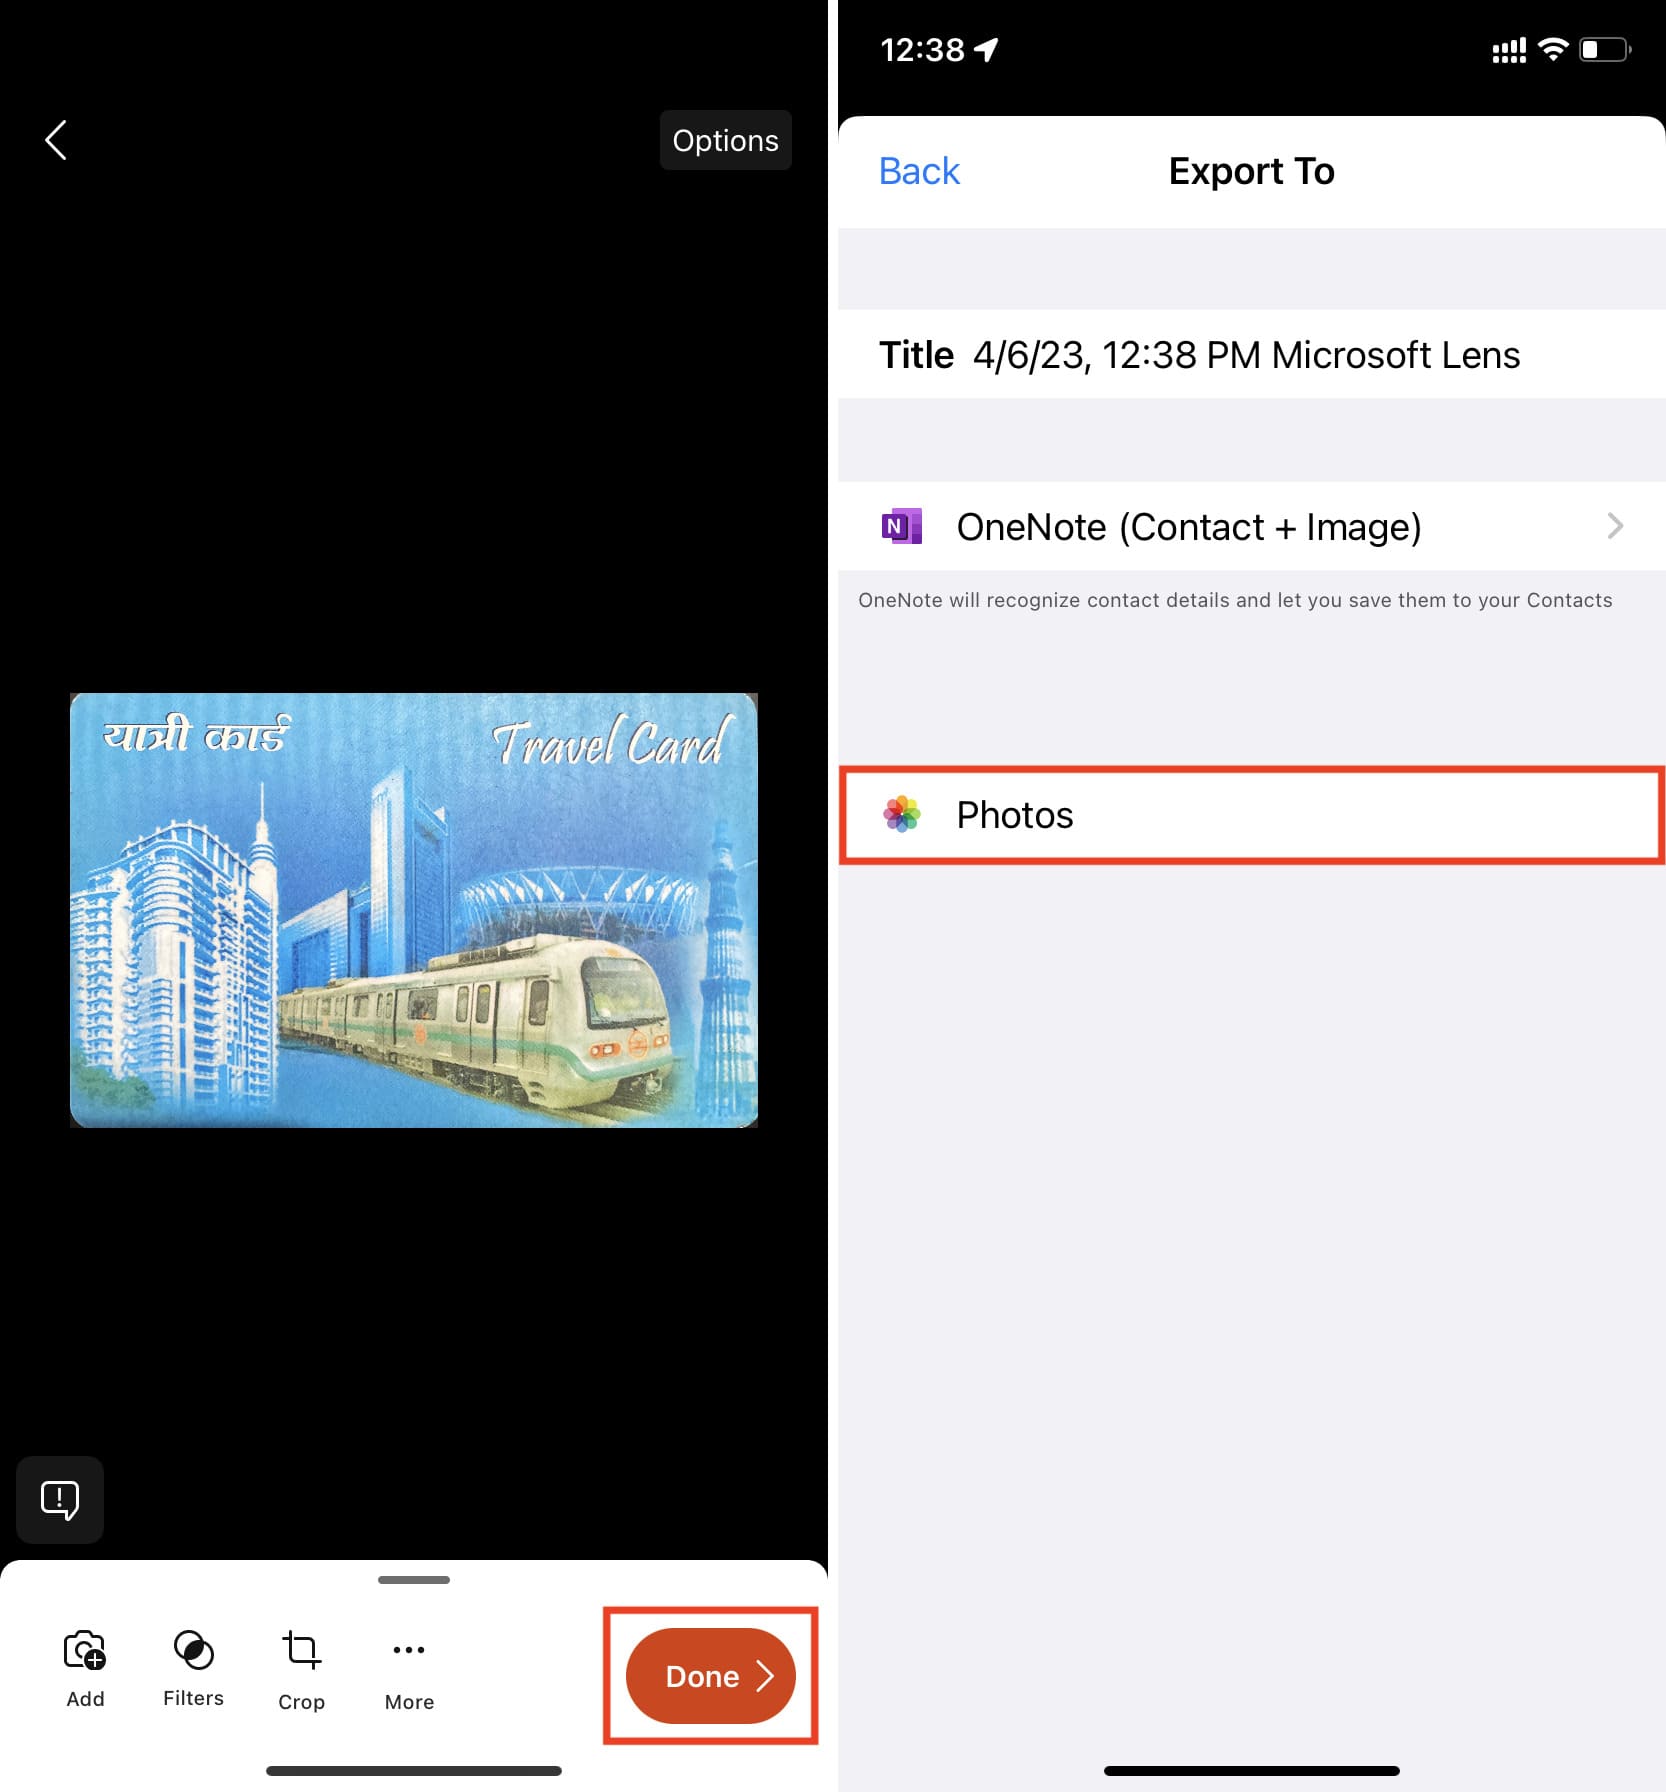
6) Tap Done.
7) Finally, select Photos. The scanned image is now saved to your iPhone Photos app. From here, you can use it while filling out forms or move it to other apps such as Files.
Important points
- Photo size and dimensions: Most government, college, and official sites have a limit on photo size. It could be anywhere from a few KBs to 2 MB. If your image size exceeds what’s allowed, you can easily compress it to reduce the size or dimensions.
- Photo format: Some sites also have image format preferences. Most of them need the image to be in PNG or JPG/JPEG format. You can quickly convert your image from one format to another.
- Need both sides: If you have to scan the front and back sides of your ID card, you can take two scans and then use a photo editing app like Picsew, Canva, or Studio to place both scanned images side by side vertically or horizontally.
- Use other scanner apps: Aside from Microsoft Lens, you can also use one of these iOS apps for scanning documents.
- Just use your camera: If you don’t want to download a third-party app, you can take a standard picture of your ID card using the Camera app and crop out the extra parts of the image to make it look perfect.
- Convert photo to PDF: Once you have taken the photo, you can quickly turn it into a PDF. Or, see the next steps to directly scan and save the ID card as a PDF.
Turn your physical ID card or document into a PDF
Some sites require you to upload your document as a PDF. If that’s the case, you can easily scan the physical ID card and turn it into a PDF using the Notes app, Google Drive app, or the Apple Files app. We’ll use the latter for these steps.
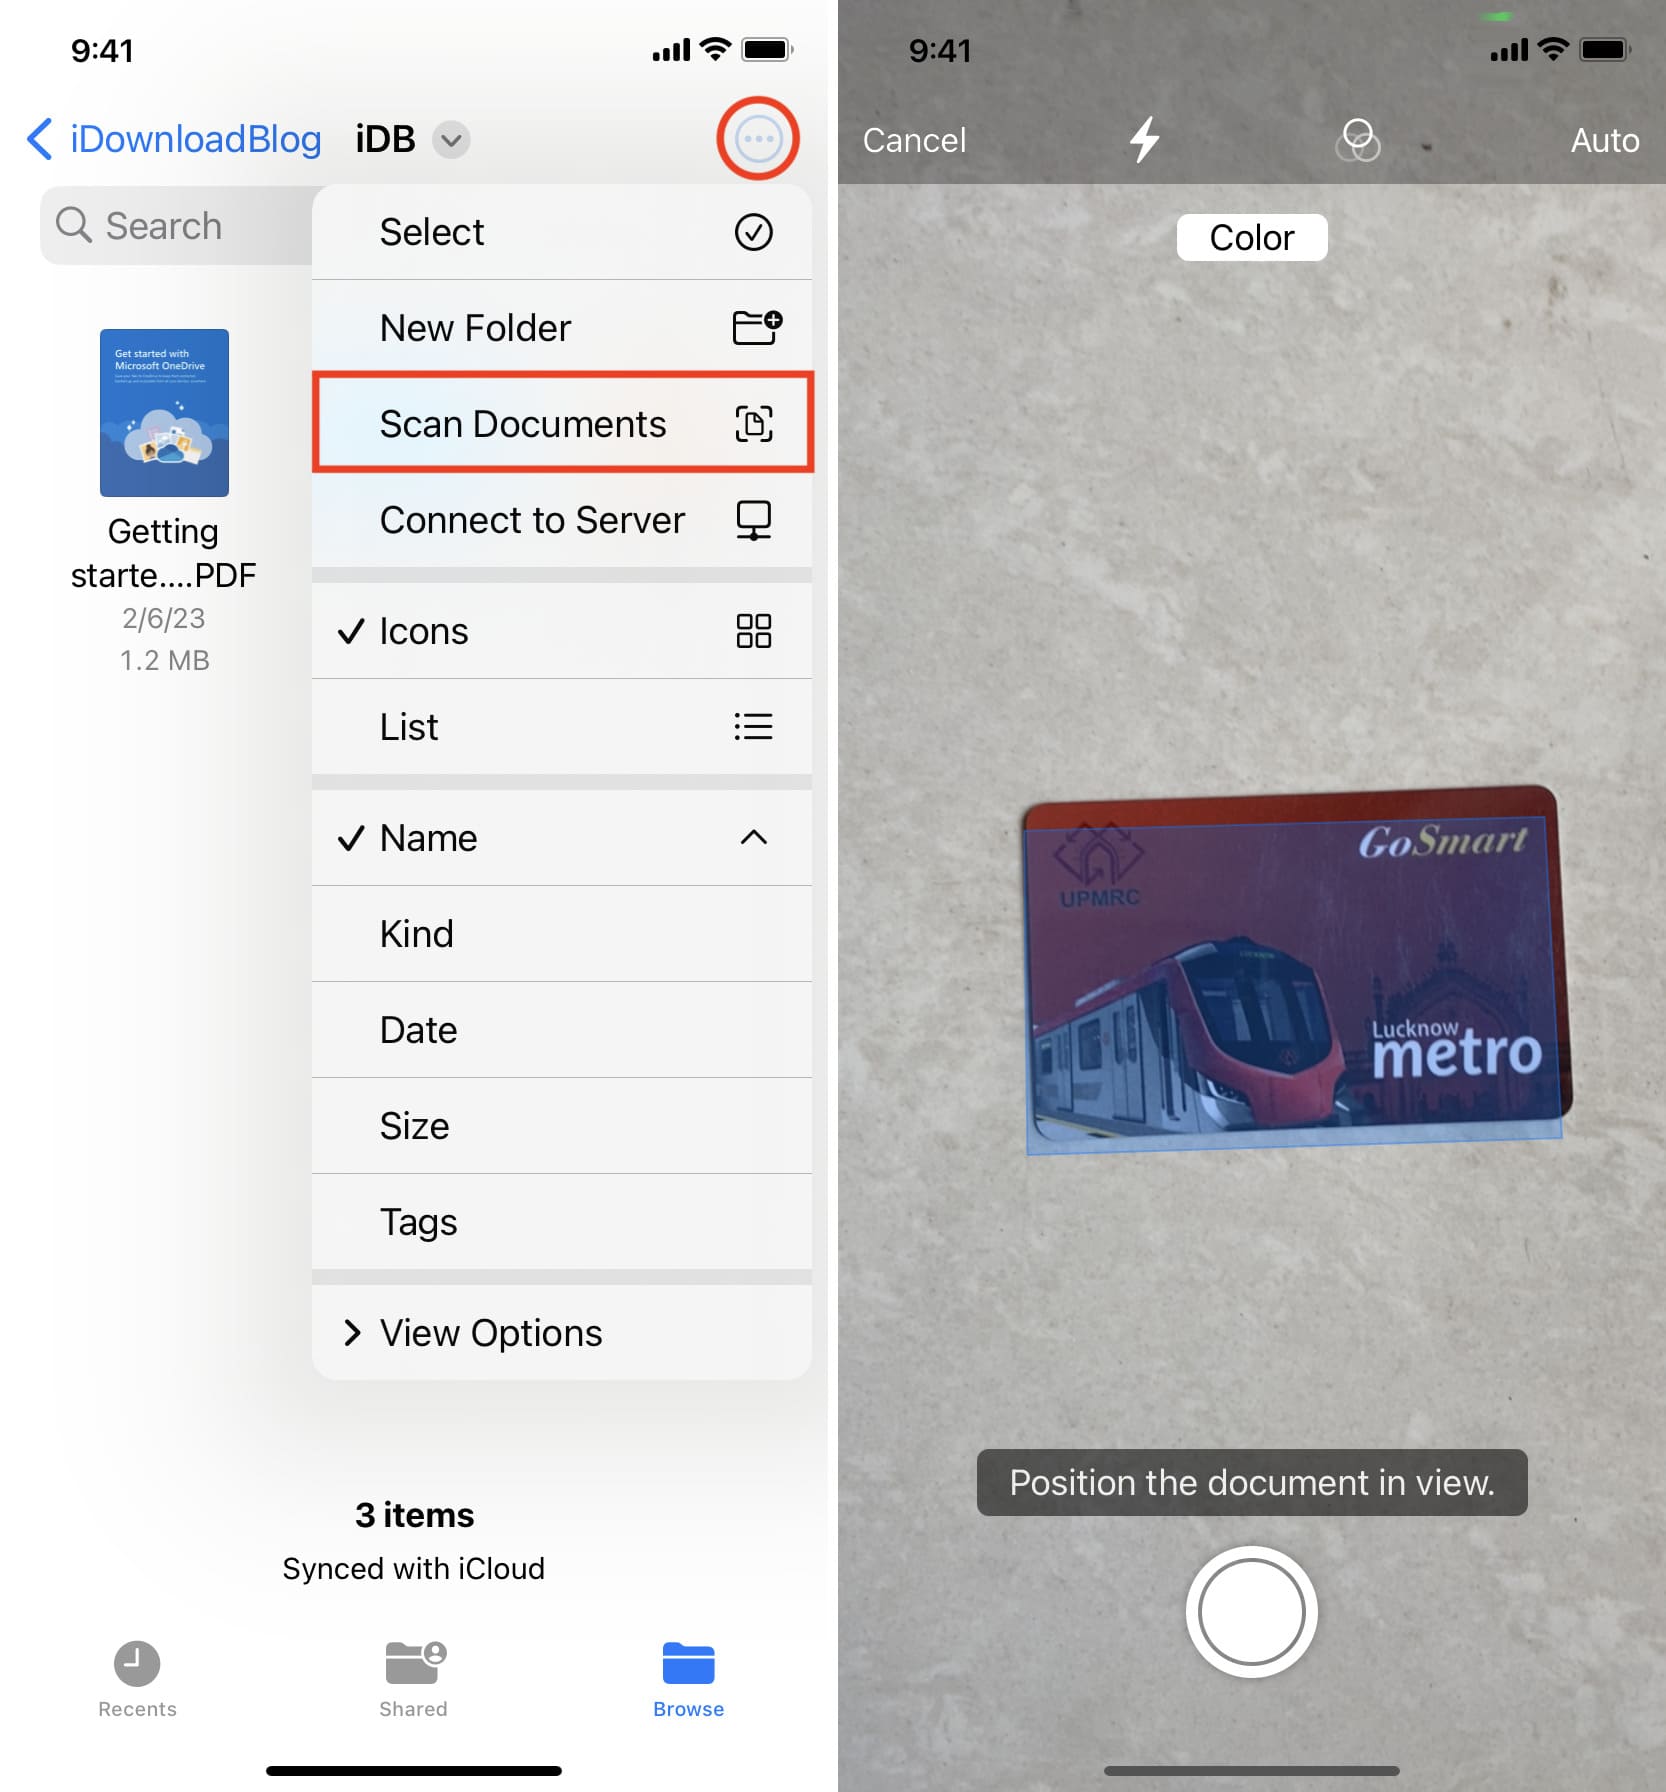
1) Open the built-in Apple Files app on your iPhone or iPad.
2) Go inside a folder and tap the menu button from the top right, followed by Scan Documents.
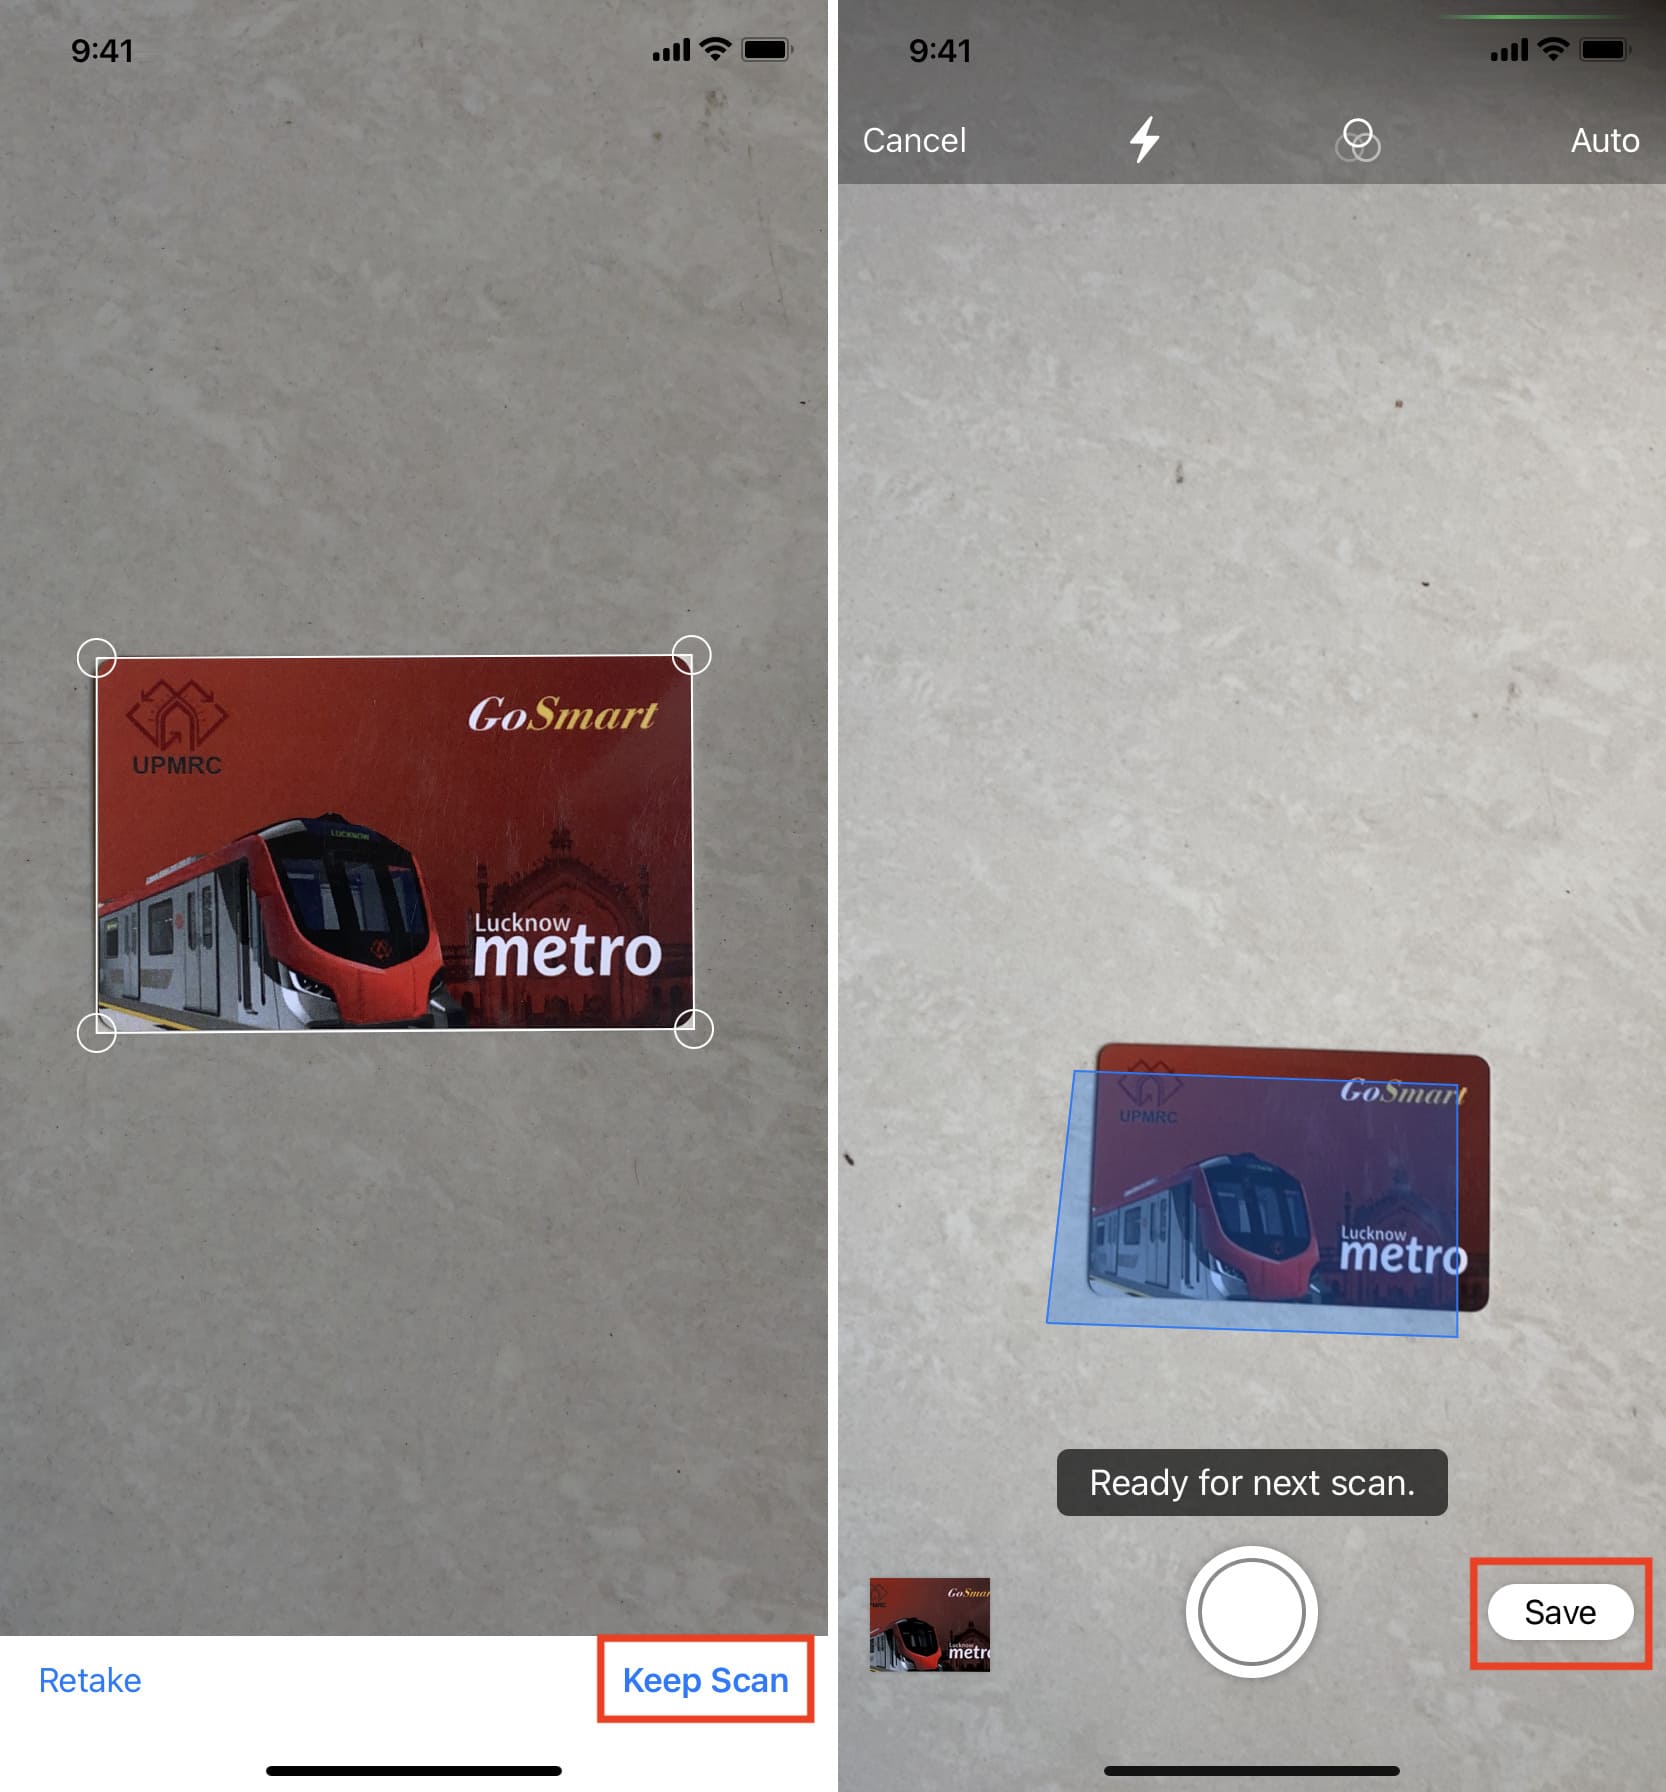
3) Position the ID card or document in the camera frame. When you hold the scanner properly, it will highlight the actual ID card or paper document in blue and automatically take a picture. Aside from that, you can also manually hit the shutter button.
4) Tap Save once the Files app automatically snaps the photo.
If you hit the shutter button, the app will take you to a simple crop screen. Adjust the edges and hit Keep Scan. Now, the app will take you back to the scanner screen and try to automatically snap another photo, so tap Save immediately.
5) You can now rename this PDF to something relevant and hit the done button on your keyboard.
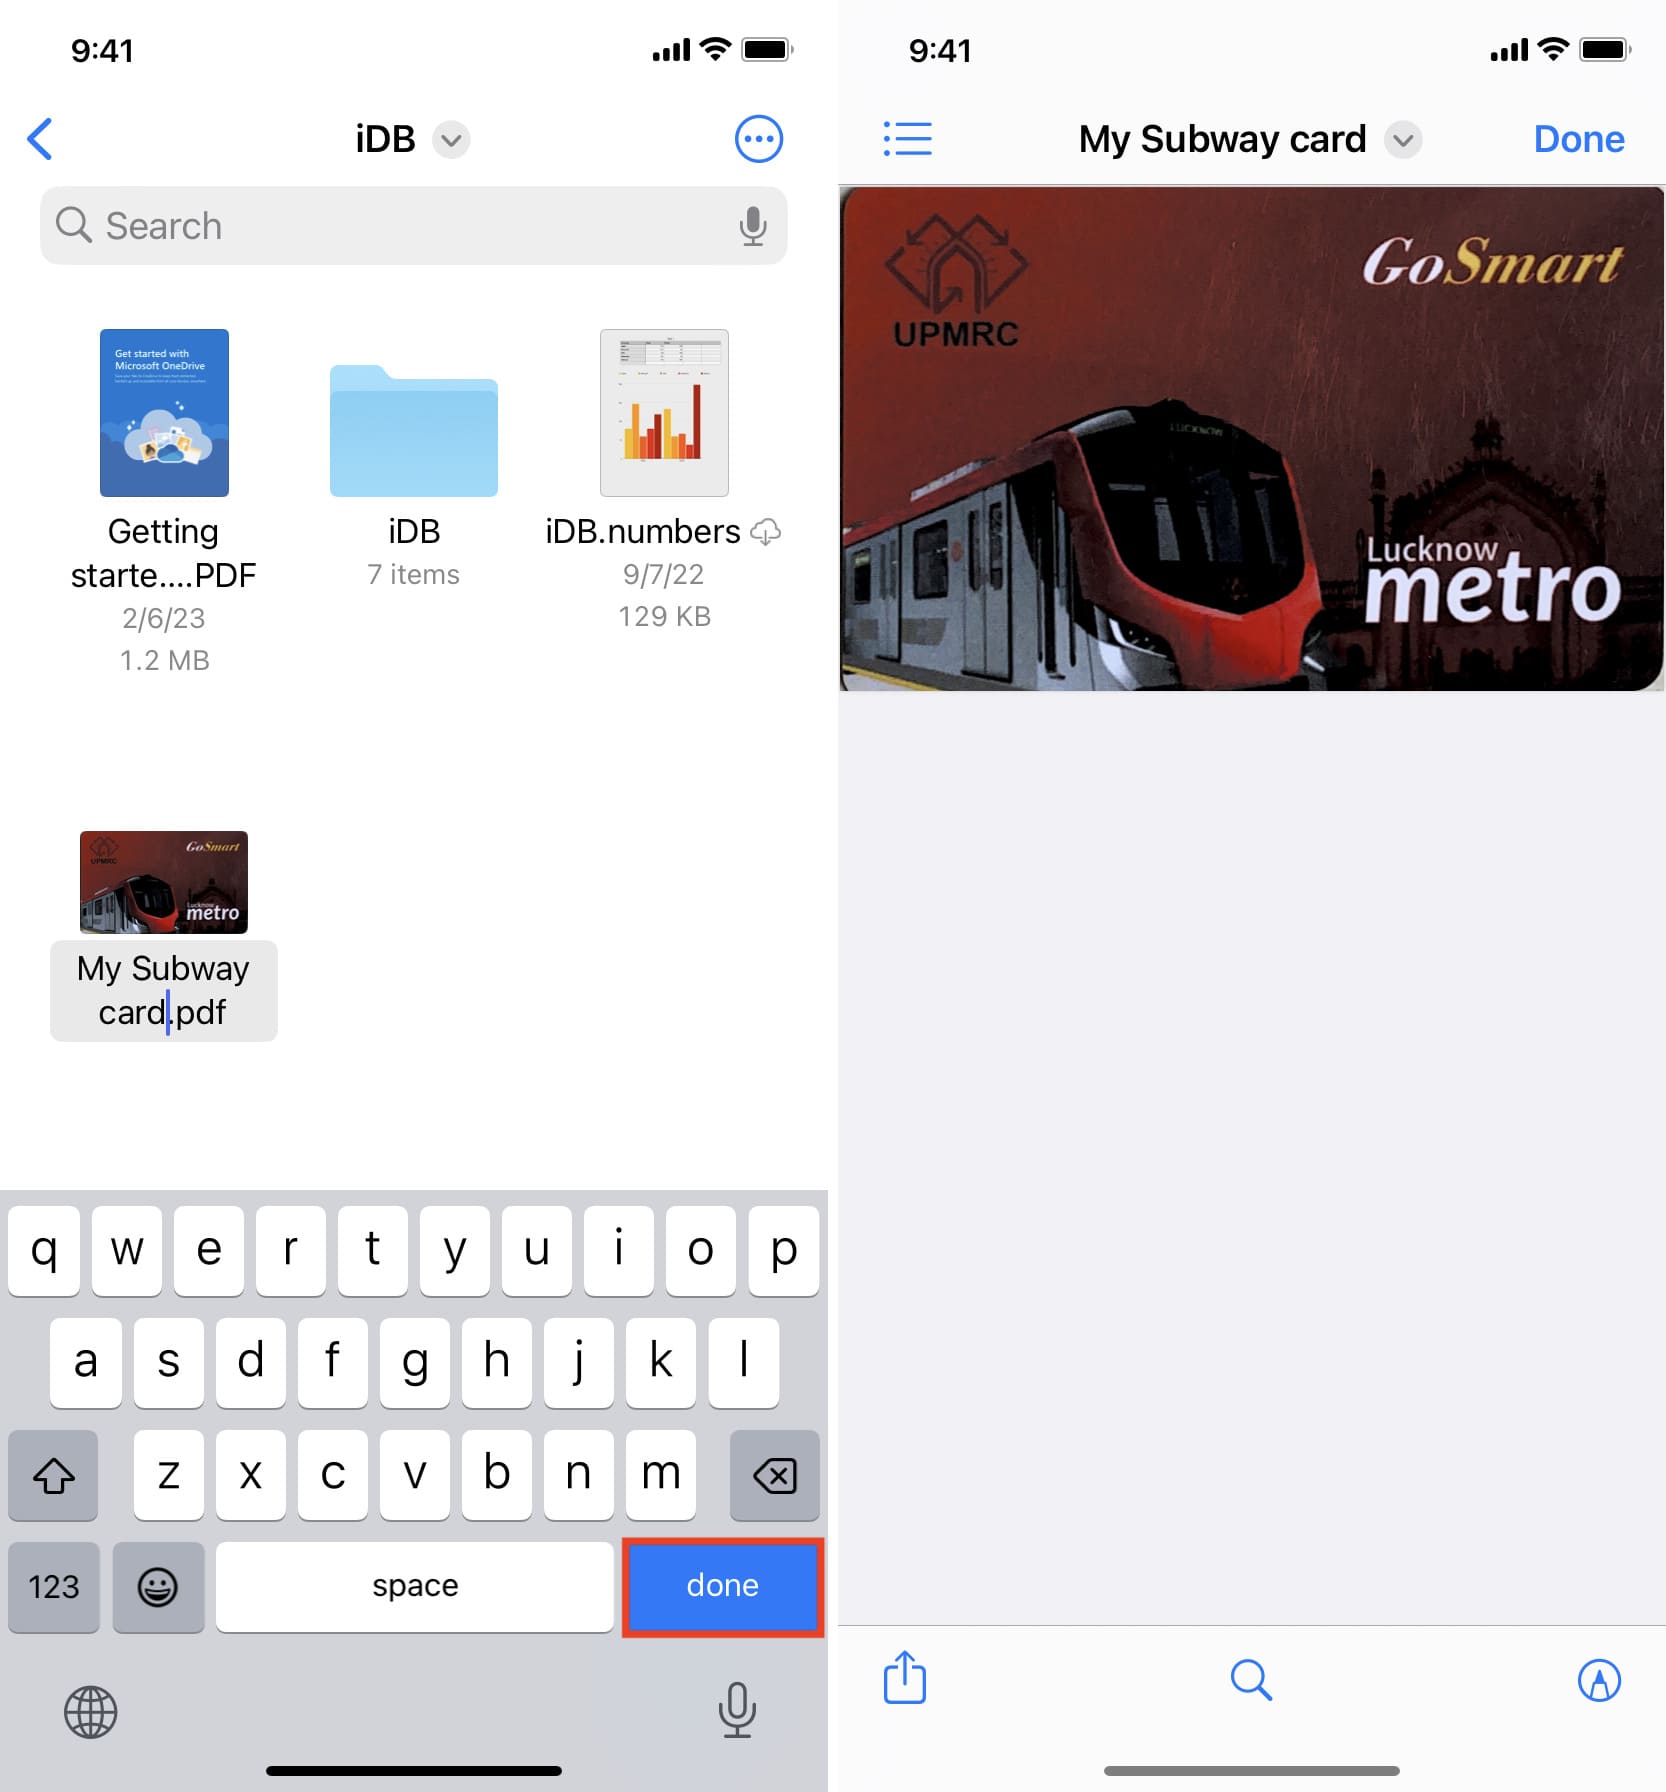
You have successfully turned your paper, plastic document, or ID card into a PDF. You can now upload it for official work, AirDrop it to your Mac, or leave it saved in the Files app for the future.
Important points:
- Compress the PDF: Just like images, the site where you’re about to use the PDF may have size restrictions. But there’s no need to worry, as you can easily compress the PDF to reduce its size.
- Add signature to your PDF: If you need to sign the PDF, you can do that on your iPhone, iPad, or Mac.
- Convert PDF to image: After you turn your ID card into a PDF, you can just as easily turn it into an image.