Follow the steps in this tutorial to transfer data between the internal storage of your Nintendo Switch and a microSD memory card.

One of my favorite things about Nintendo Switch is the ability to use microSD cards for expanded storage. If you play a lot of games, you’ll probably want to buy a microSD card for your Nintendo Switch to overcome the limitations of the internal storage, capped at 32 gigabytes. Transferring data between the internal storage and a removable microSD card will free up storage space on the console.
We’ll show you how to do just that in today’s tutorial. But first, let’s go over some of the basics of using microSD cards on Nintendo Switch.
Nintendo Switch and microSD cards
While you could technically use any microSD card with your Nintendo Switch, only certain models with specific speed ratings will yield the best gaming performance. Nintendo advises using the following memory card types with the Switch:
- microSD (up to 2GB)
- microSDHC (between 4GB and 32GB)
- microSDXC (64GB and higher)
Nintendo Switch does not support miniSD or SD cards. The microSD standard is the smallest of them all and looks like this:
For best performance, Nintendo recommends memory cards with these specs:
- UHS-I (Ultra-High Speed Phase 1) compatibility
- Transfer speeds of at least 60-95 megabytes per second
Manufacturers put the UHS rating on the face of the card. For instance, you may see “U1” or “U3.” The higher the number, the better. Keep in mind that manufactures often overestimated data transfer speeds based on peak performance scenarios. As a rule of thumb, use as fast a microSD card as you can afford (cards exceeding 60-95 megabytes per second shouldn’t cost much more).
You can pick official Nintendo-licensed microSD cards made by SanDisk or ordinary microSD cards without Nintendo branding. Nintendo-licensed microSD cards look nice and are certified to work with the Switch, but opting for a comparable non-Nintendo one can save you a few bucks although you’ll need to format it properly.
Your Switch can save the following data to a memory card:
- Downloadable software
- Software update data
- Downloadable content (DLC)
- Screenshots and captured videos
Follow along with us as we show you how to move data from the internal storage of your Nintendo Switch to a microSD card.
Move data between Nintendo Switch’s internal storage and a microSD memory card
1) Insert a microSD card into the dedicated slot behind the kickstand of your Nintendo Switch, then push in until it clicks.
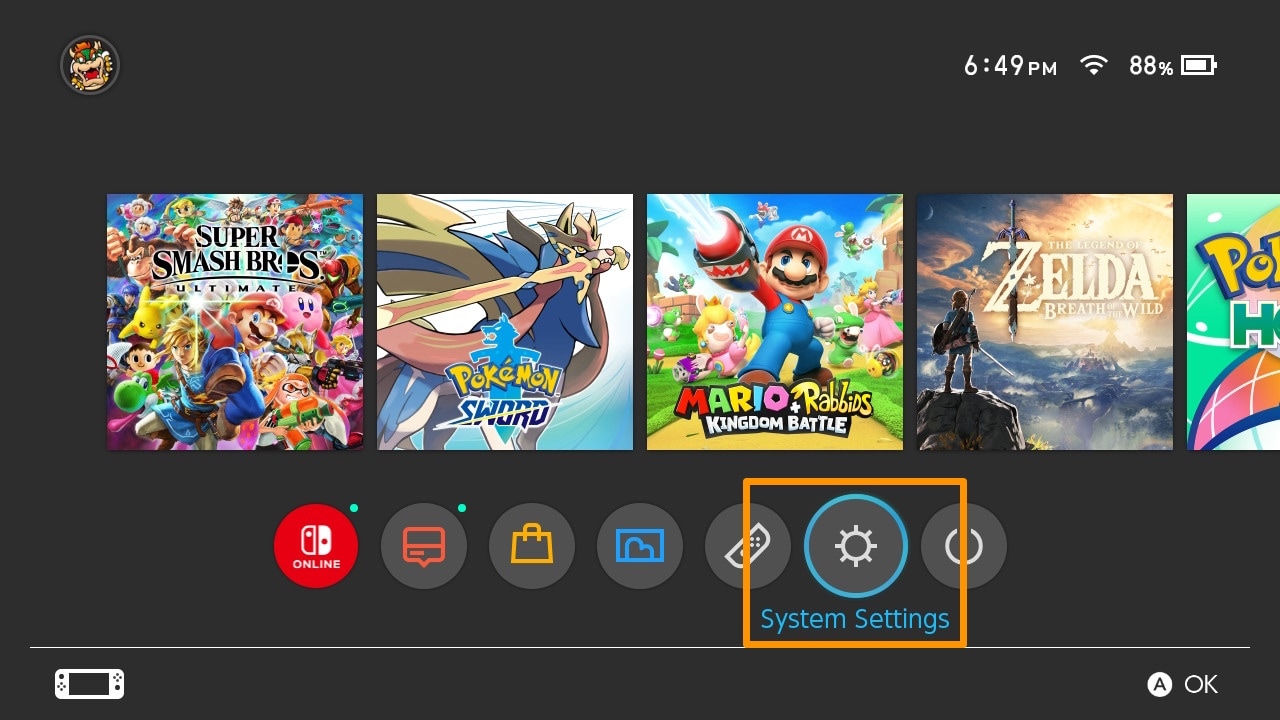
2) Wake up the console and select System Settings on the Home Screen.
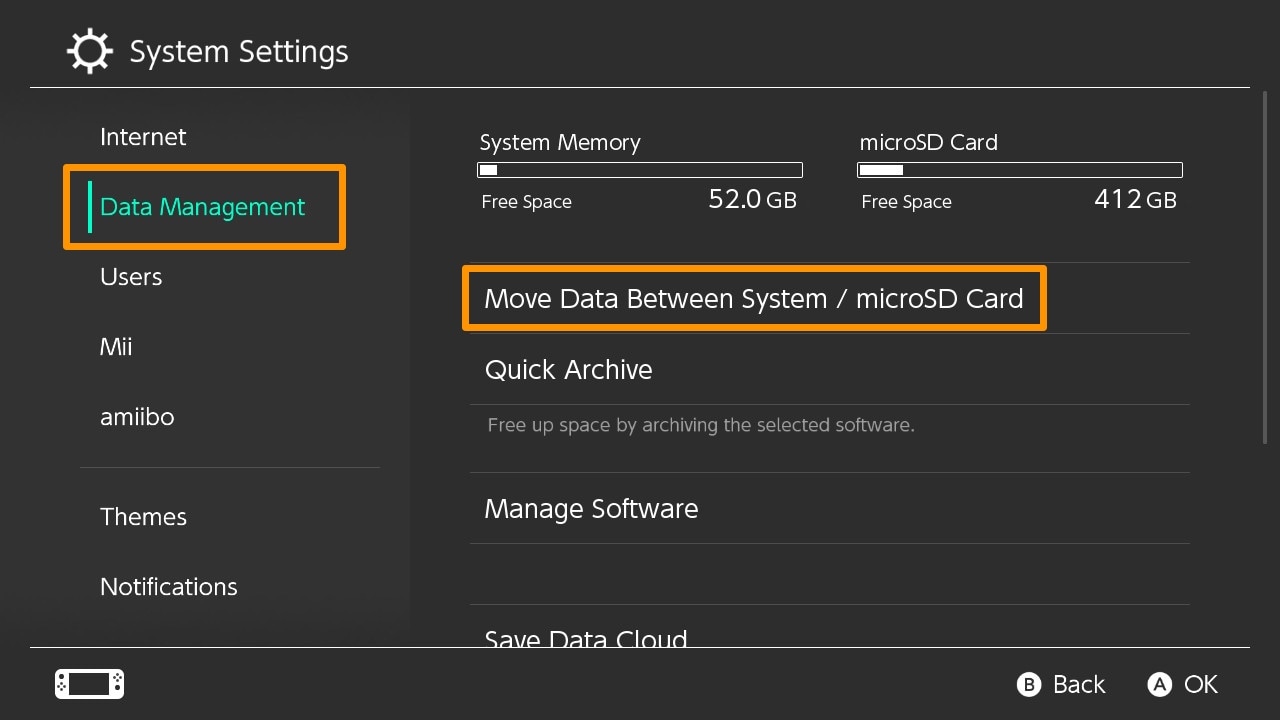
3) Scroll down and select the Data Management section, then choose the Move Data Between System / microSD Card option.
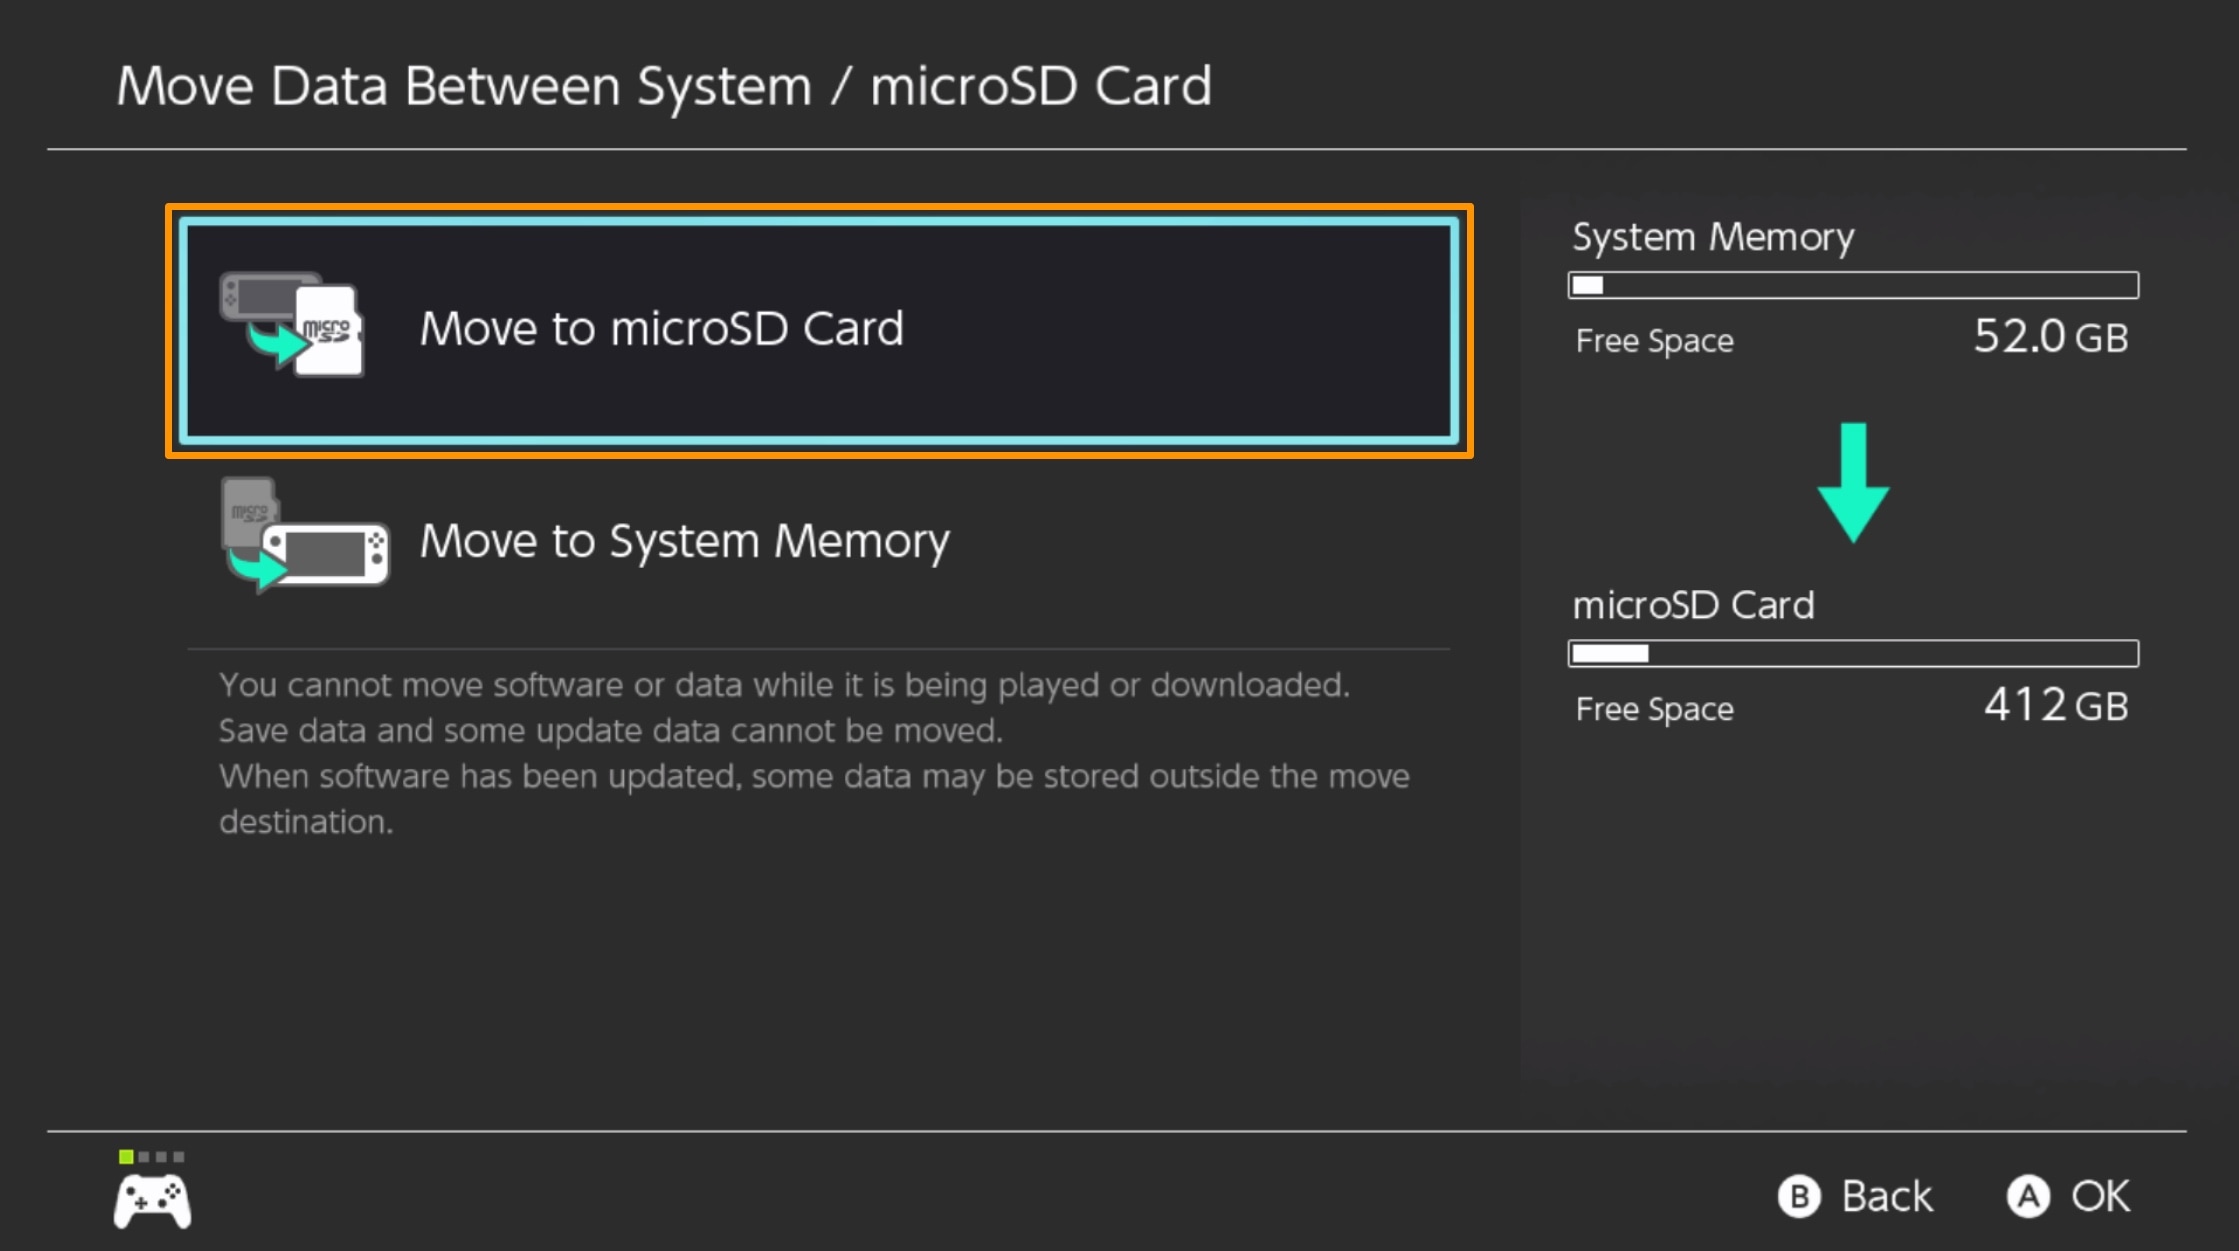
4) Select the Move to microSD Card option.
5) Select the game(s) and/or data you want to move to the microSD card (you can choose more than one).
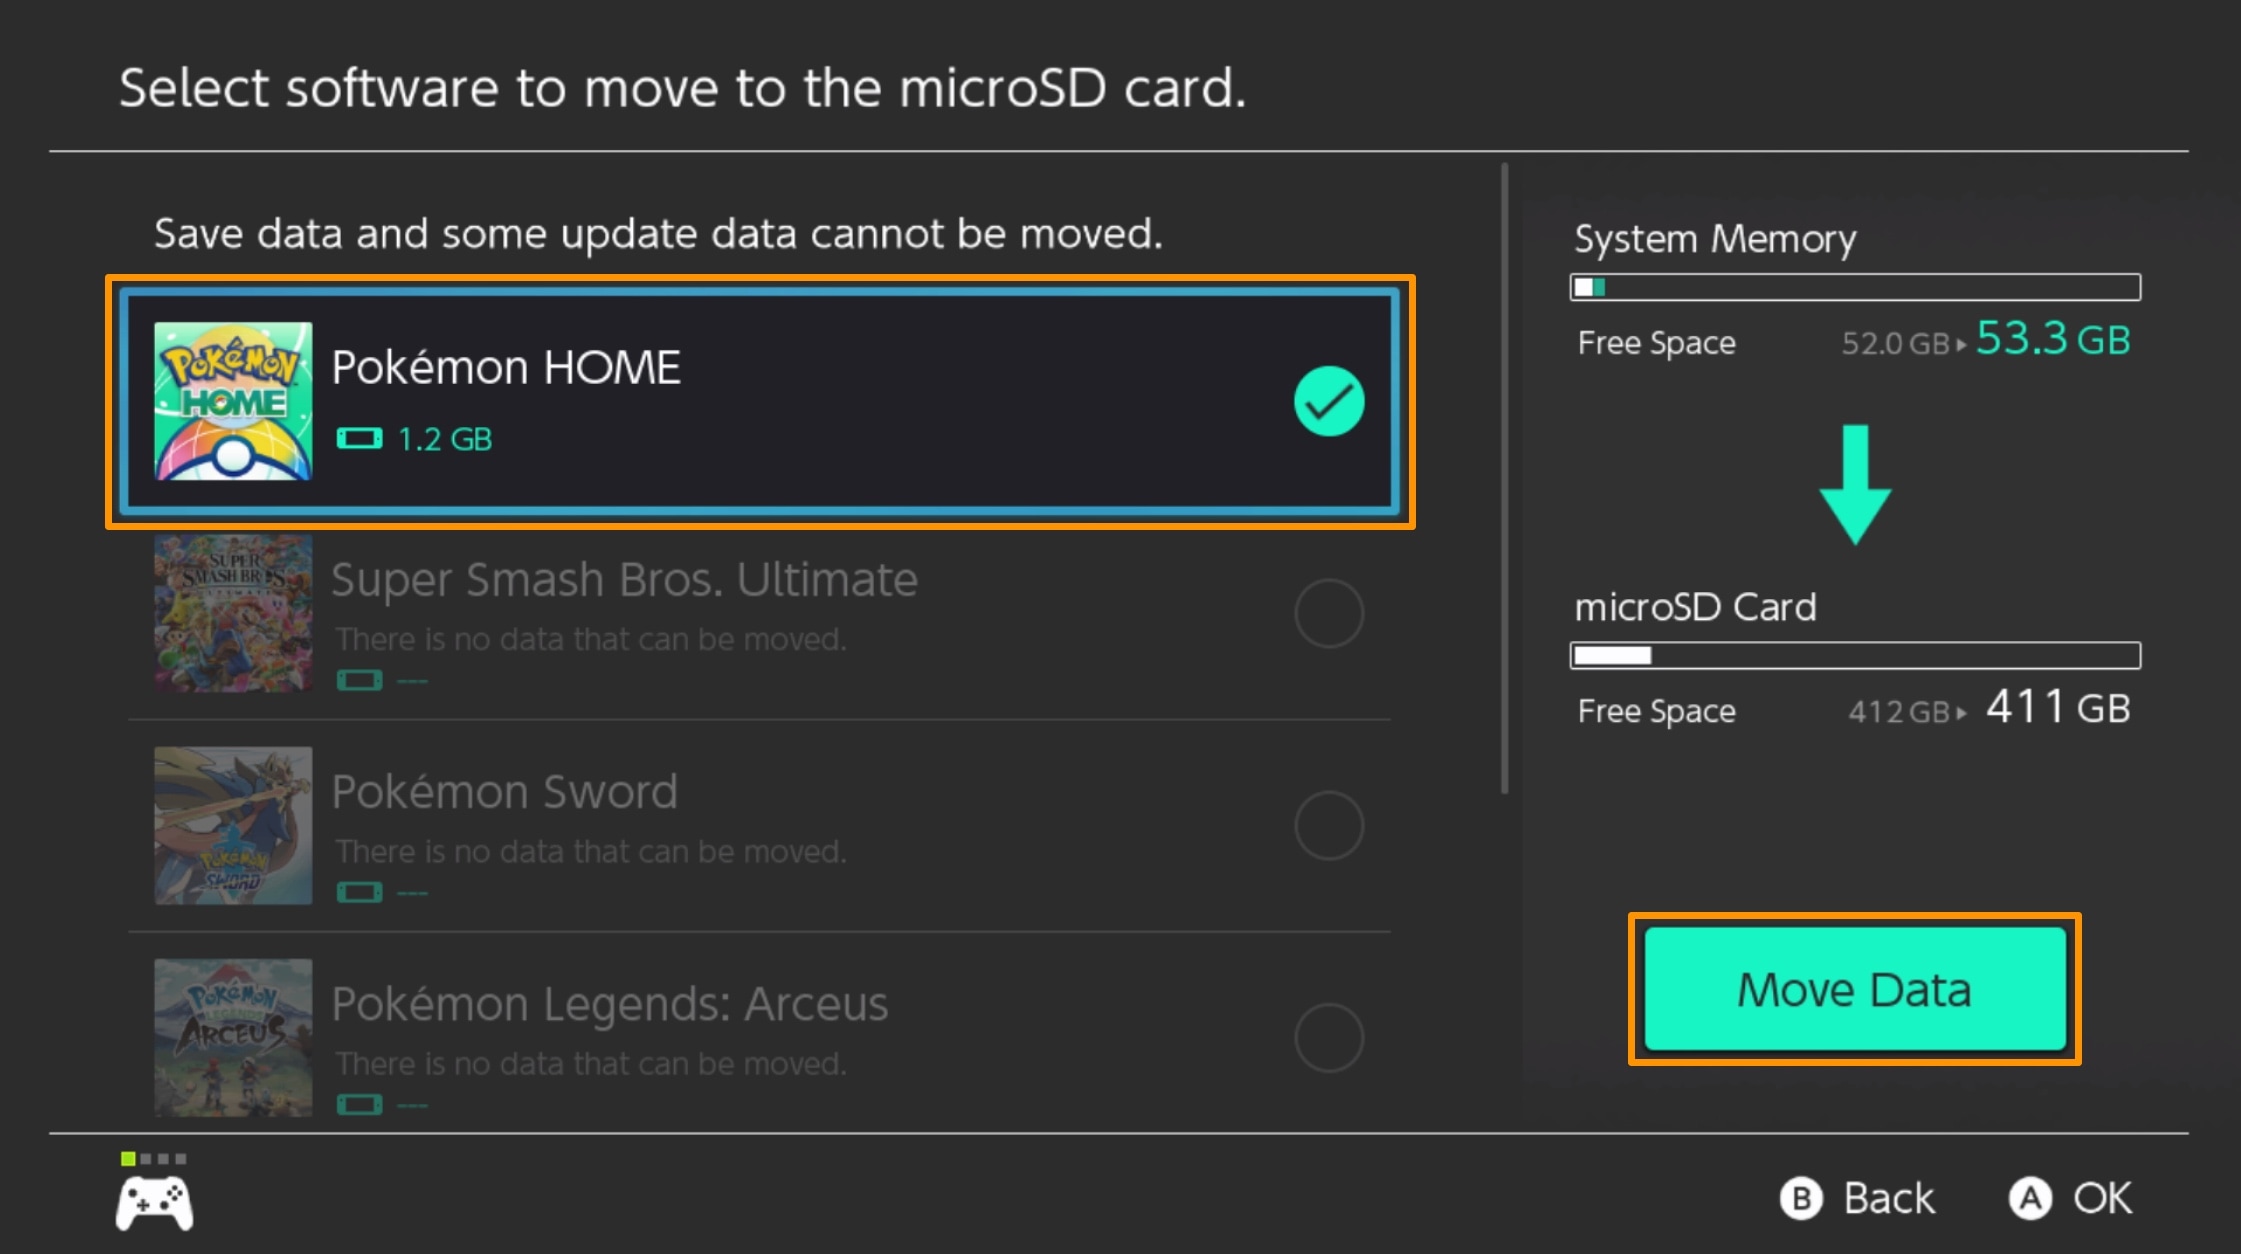
6) Hit the green Move Data button.
7) In the confirmation prompt that appears, select the Move option.

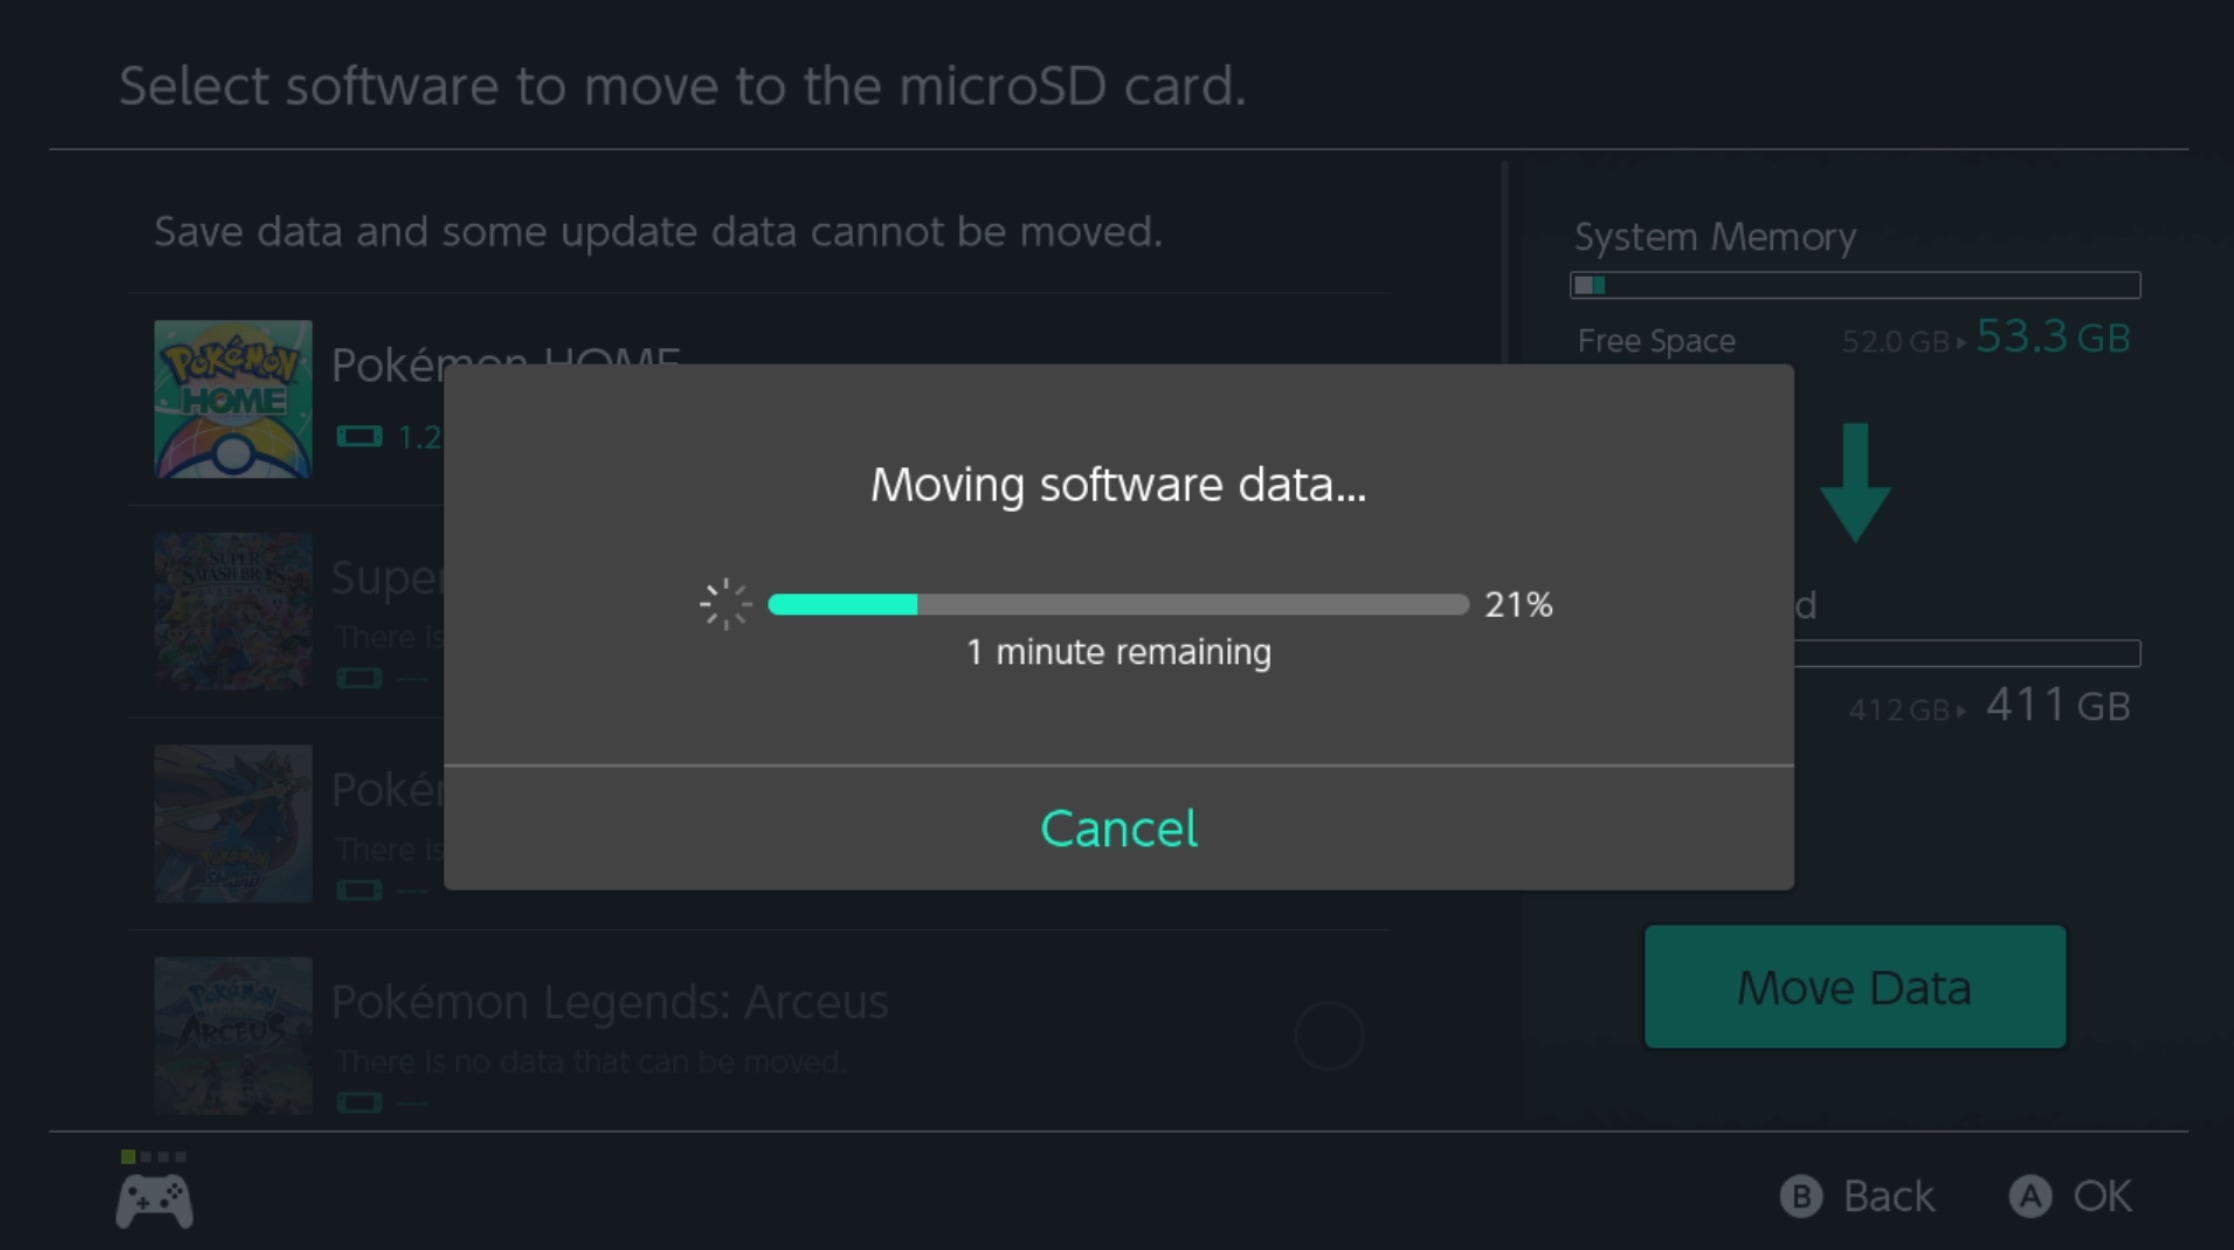
8) The data transfer will begin.
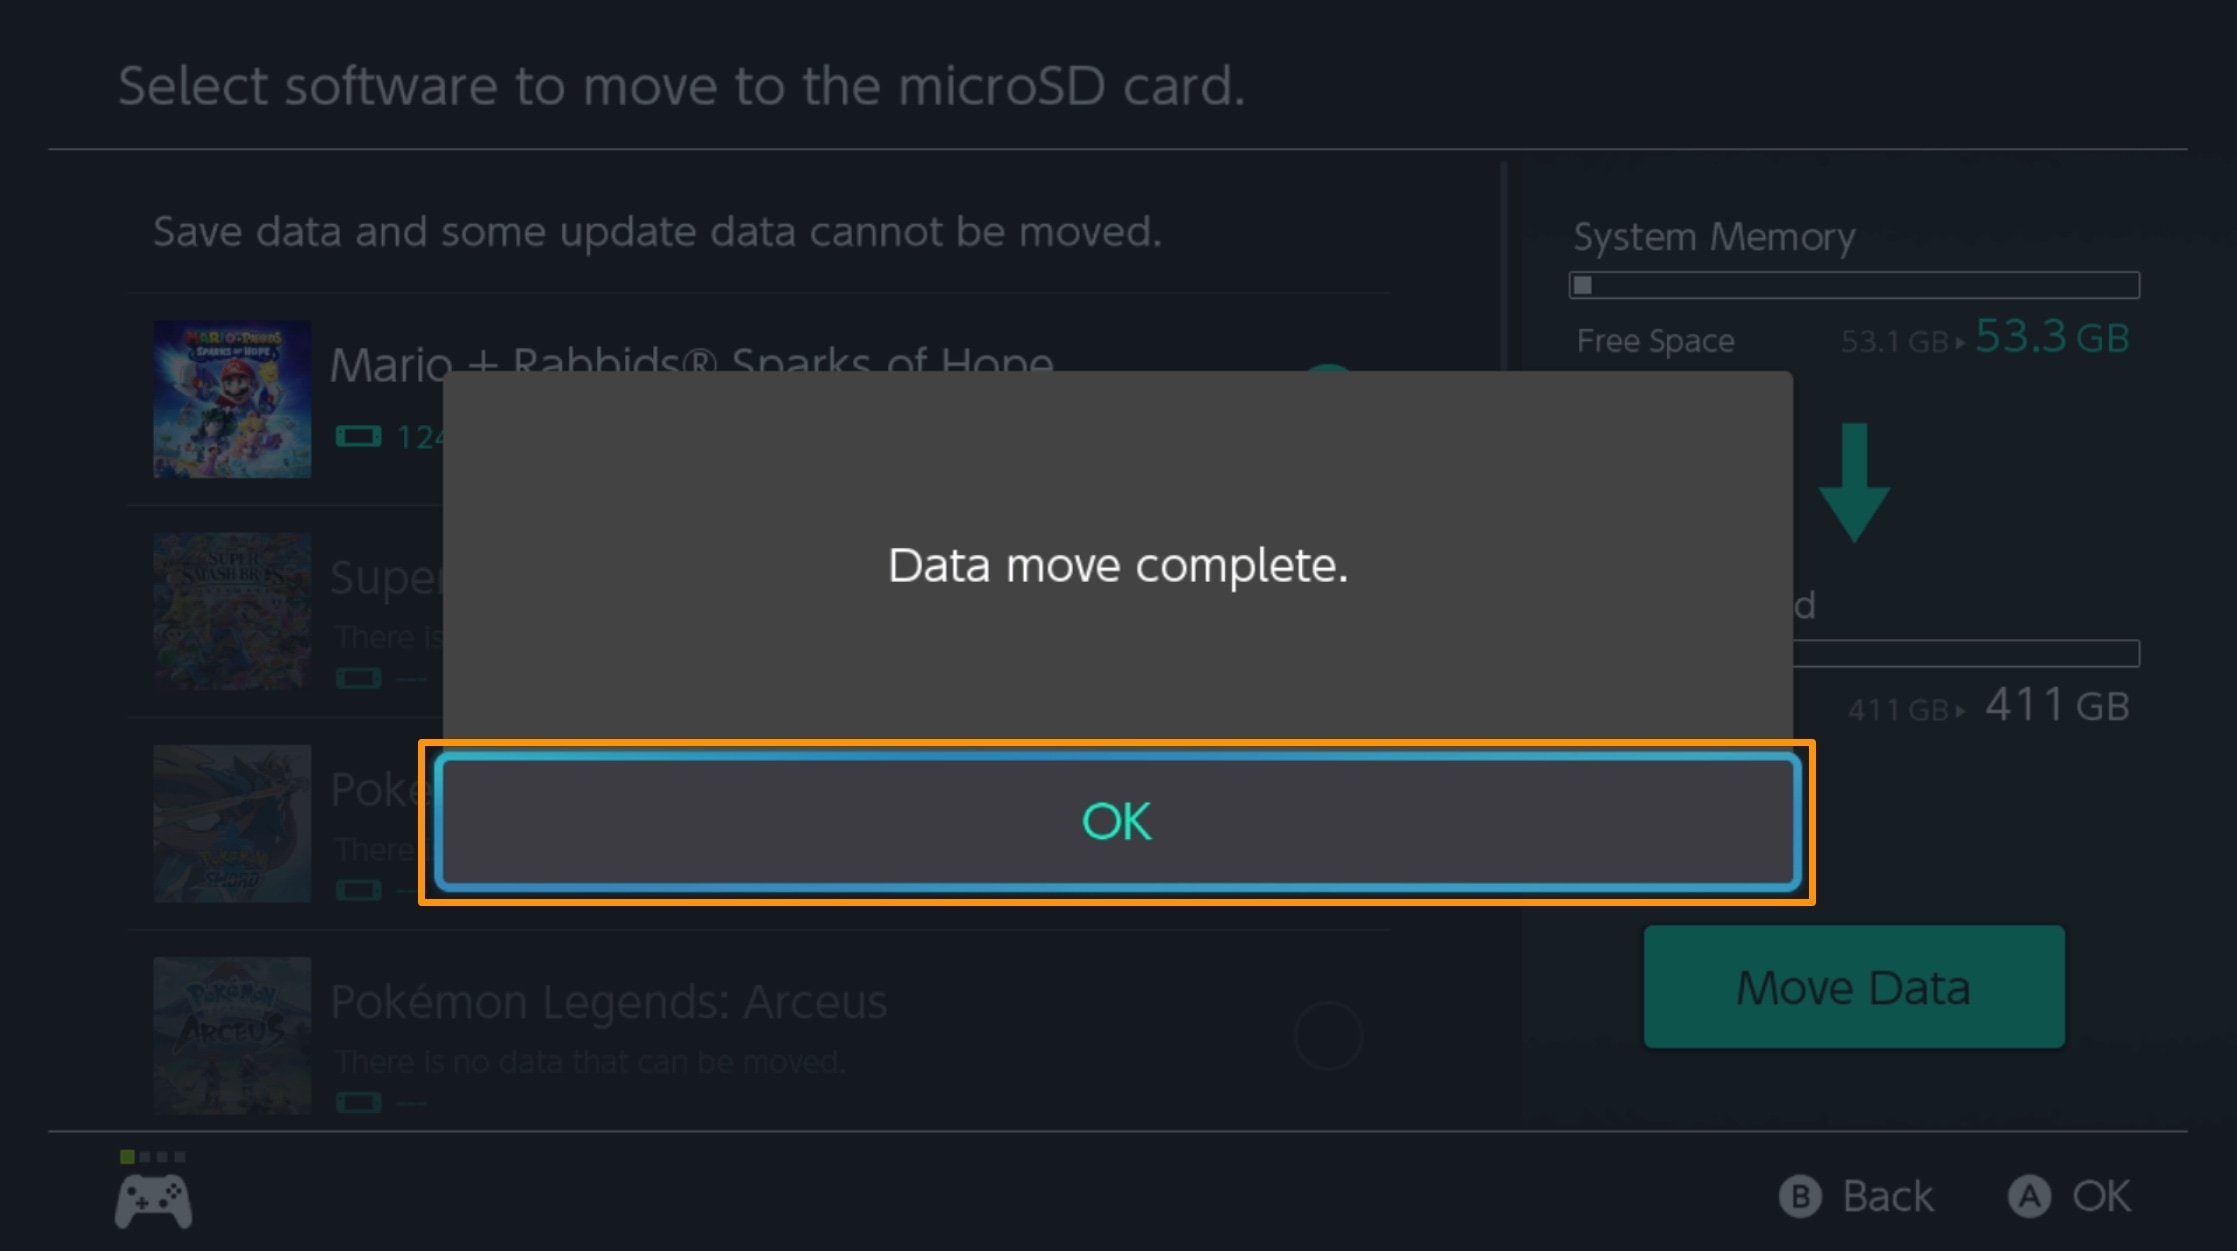
9) When you see a prompt that the data has been transferred, choose OK.
And that’s all there is to it!
Pro tip: To move data from a microSD card to the console’s internal storage, follow the steps above but choose the Move to System Memory option instead.
More for your Switch: