Learn how to add emojis to your photos on iPhone, iPad, and Mac to protect your privacy or creatively enhance your social media presence.

If you want to add creativity or privacy to your photos, emojis are a great tool to achieve the effect you want. Whether you’re adding fun emojis, hiding your face, or concealing sensitive parts of an image, it’s easy to do with just a few simple steps.
Also see: How to blur a face in a video on your iPhone for privacy
Apple Photos app
You can use Markup tools inside the stock Photos app to add emojis, Genmoji, or stickers over an image.
On iPhone and iPad
1) Open an image in the Photos app and tap the edit icon, followed by the markup button (pen inside a circle).
2) Hit the plus icon (+) and pick Add Sticker to place your current stickers or Genmoji over the picture. If you want to add regular emojis, select the Add Text option. We’re choosing the latter.
3) You’ll now see the word Text in a box on the screen. Tap it to open the keyboard.

4) Use your keyboard to enter one or more emojis here. Then, tap anywhere else on the screen to hide the keyboard, and tap the added emoji to highlight and select it. Then tap the Aa icon.

5) Use the plus button to increase the size of the emoji. You can also tap the text size option (60 pt) and choose a bigger number.
6) Finally, drag the emoji to the desired spot on the image and tap Done > Done to save the image with the emoji over it.

You can now share it over social media or send it via Messages, WhatsApp, Email, and more.
Note: You can also access the markup tools (explained above) from inside the Messages app: Start by adding a photo to the message typing box. After that, tap the photo and hit Markup.
Remove the emojis: Open the edited image inside the Photos app and tap the edit button > Revert > Revert to Original to remove the added emojis.
On Mac
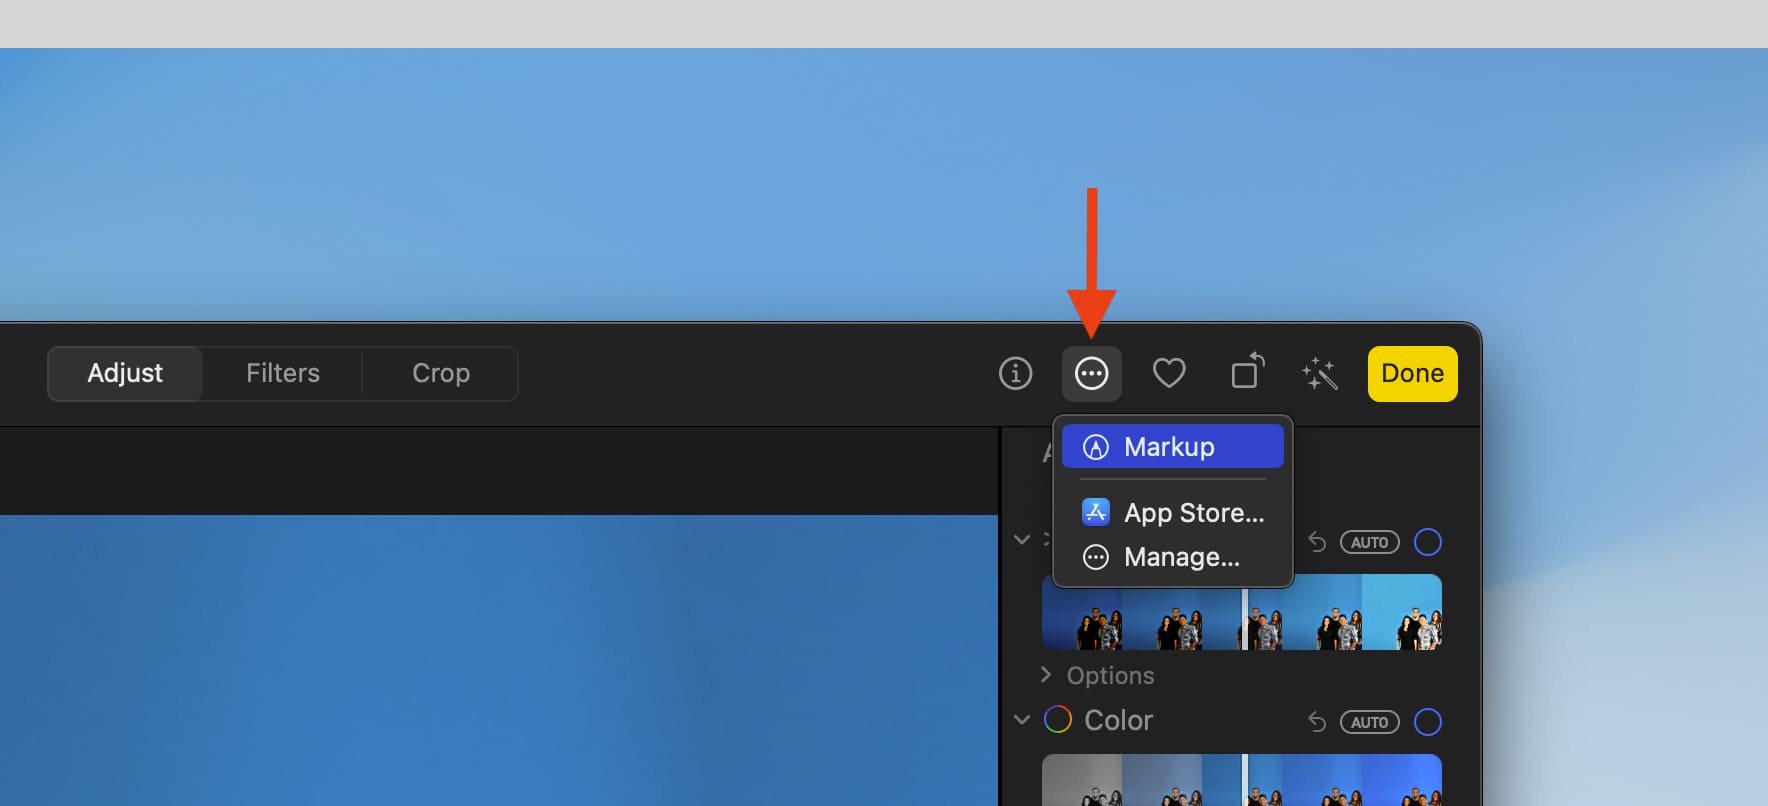
1) Open the image inside Mac’s Photos app and click Edit > More button > Markup.
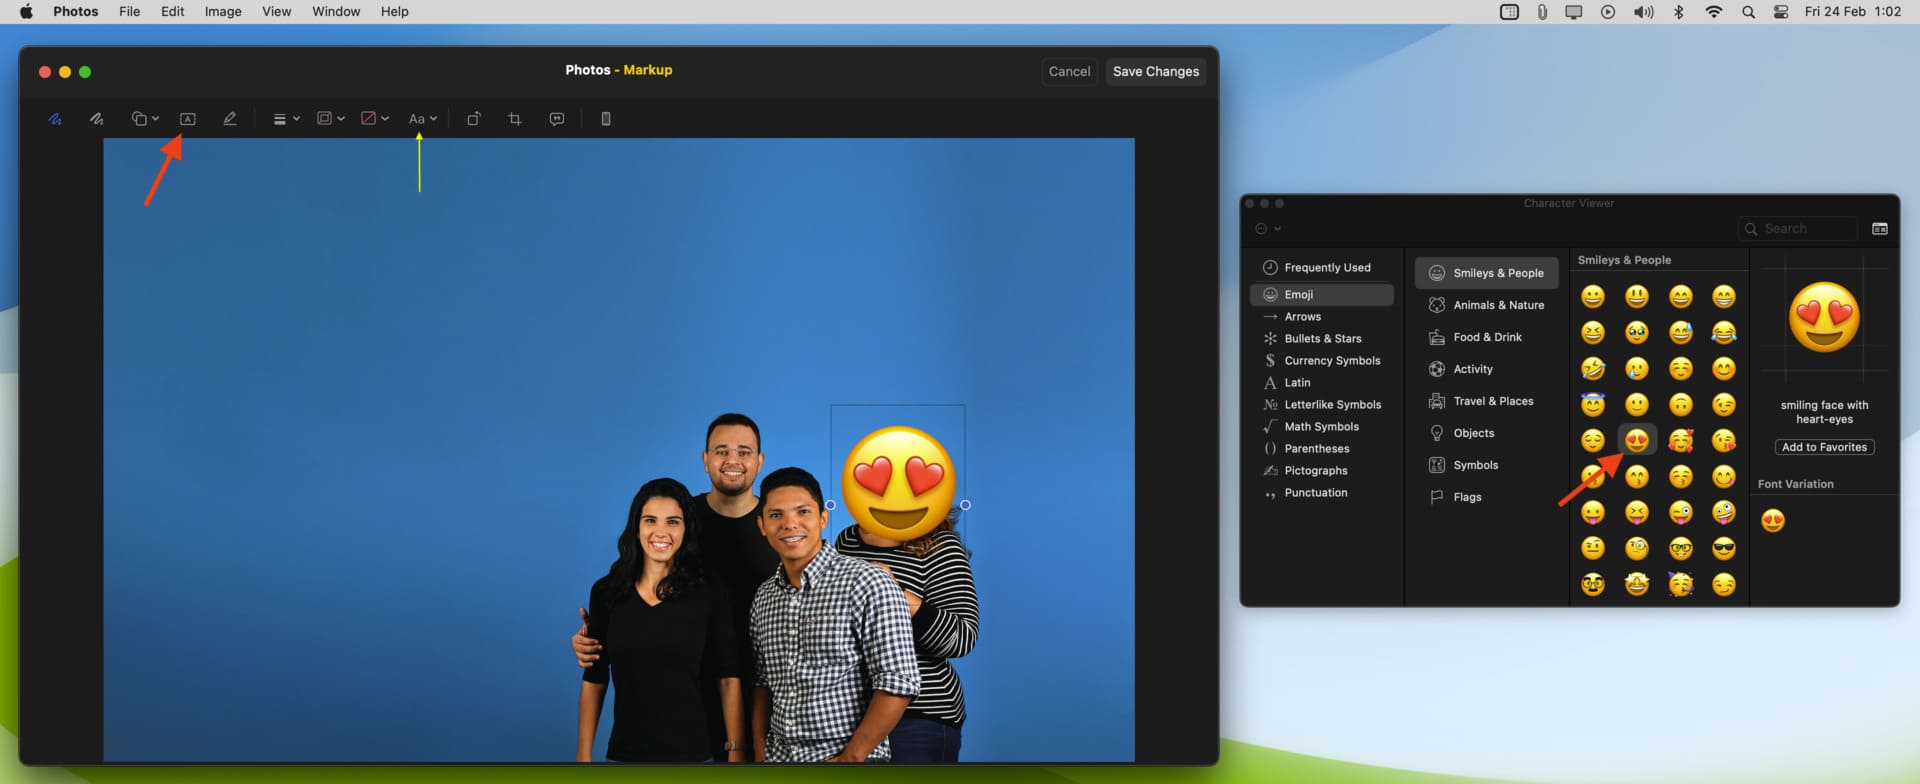
2) Choose the text tool [A].
3) Double-click the Text box and press Control + Command + Space Bar to open Mac’s emoji keyboard or use it from the menu bar. After that, double-click the desired emoji in the Character Viewer pane to add it over your photo.
4) With the emoji placed on the photo, click the Aa tool > N pt to adjust the emoji size. Drag it anywhere you want to place it on the picture.
5) Finally, click Save Changes > Done.
In addition to the Photos app, you can open an image in Mac’s Preview app and follow steps 3 to 5 to add an emoji.
X (Twitter)
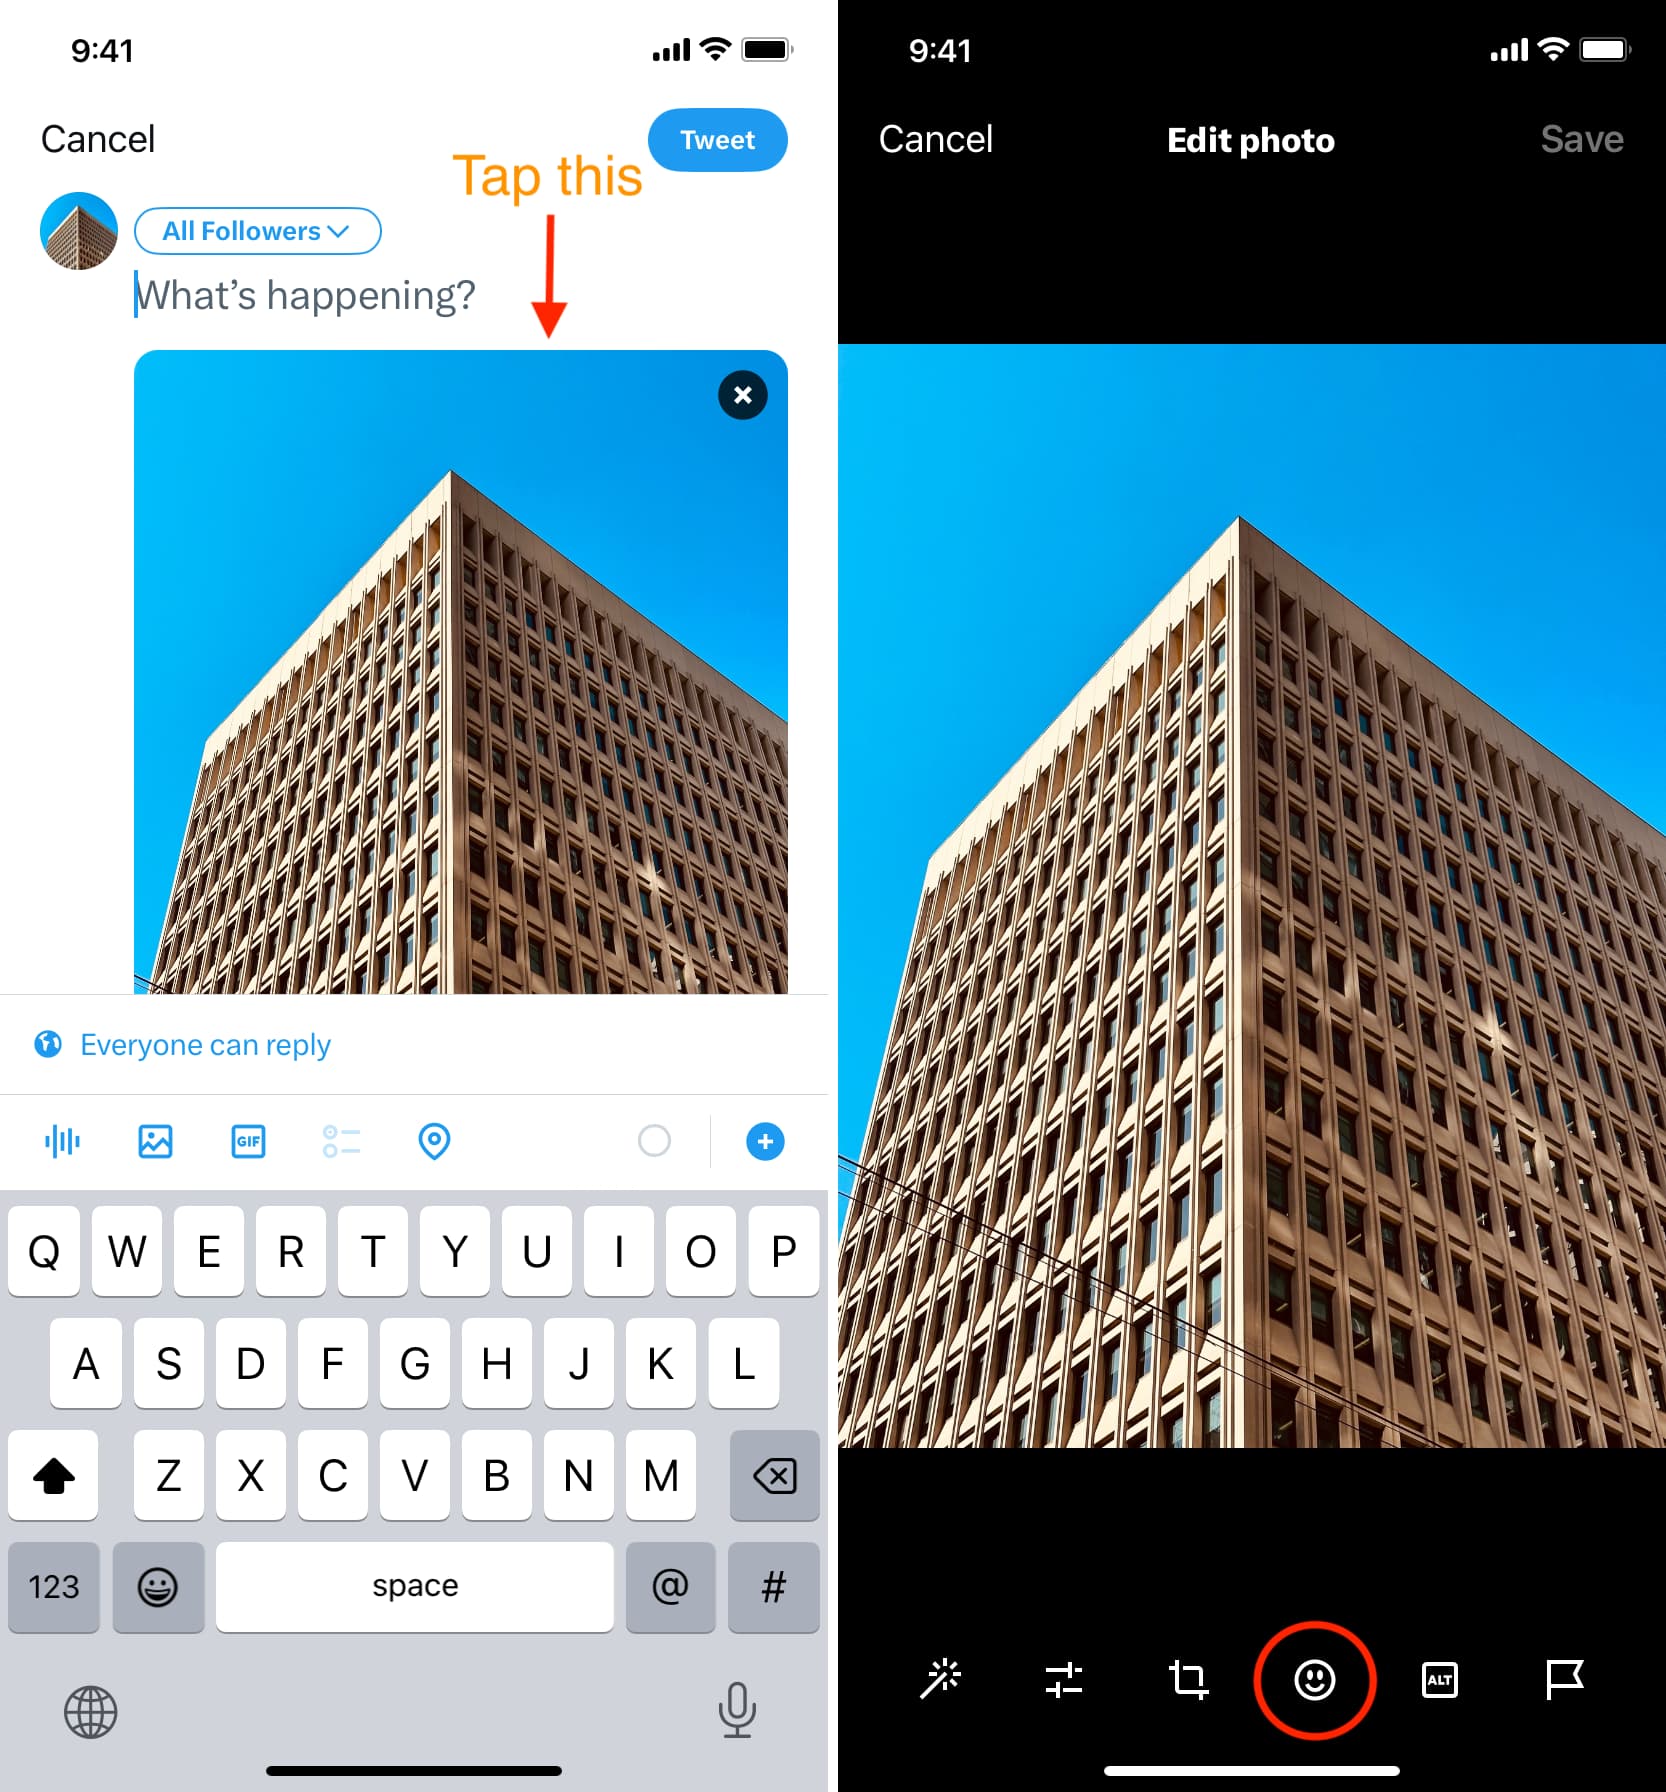
1) Open the X app on your iPhone and compose a tweet with a photo.
2) Tap the photo to edit it.
3) Hit the smiley button.
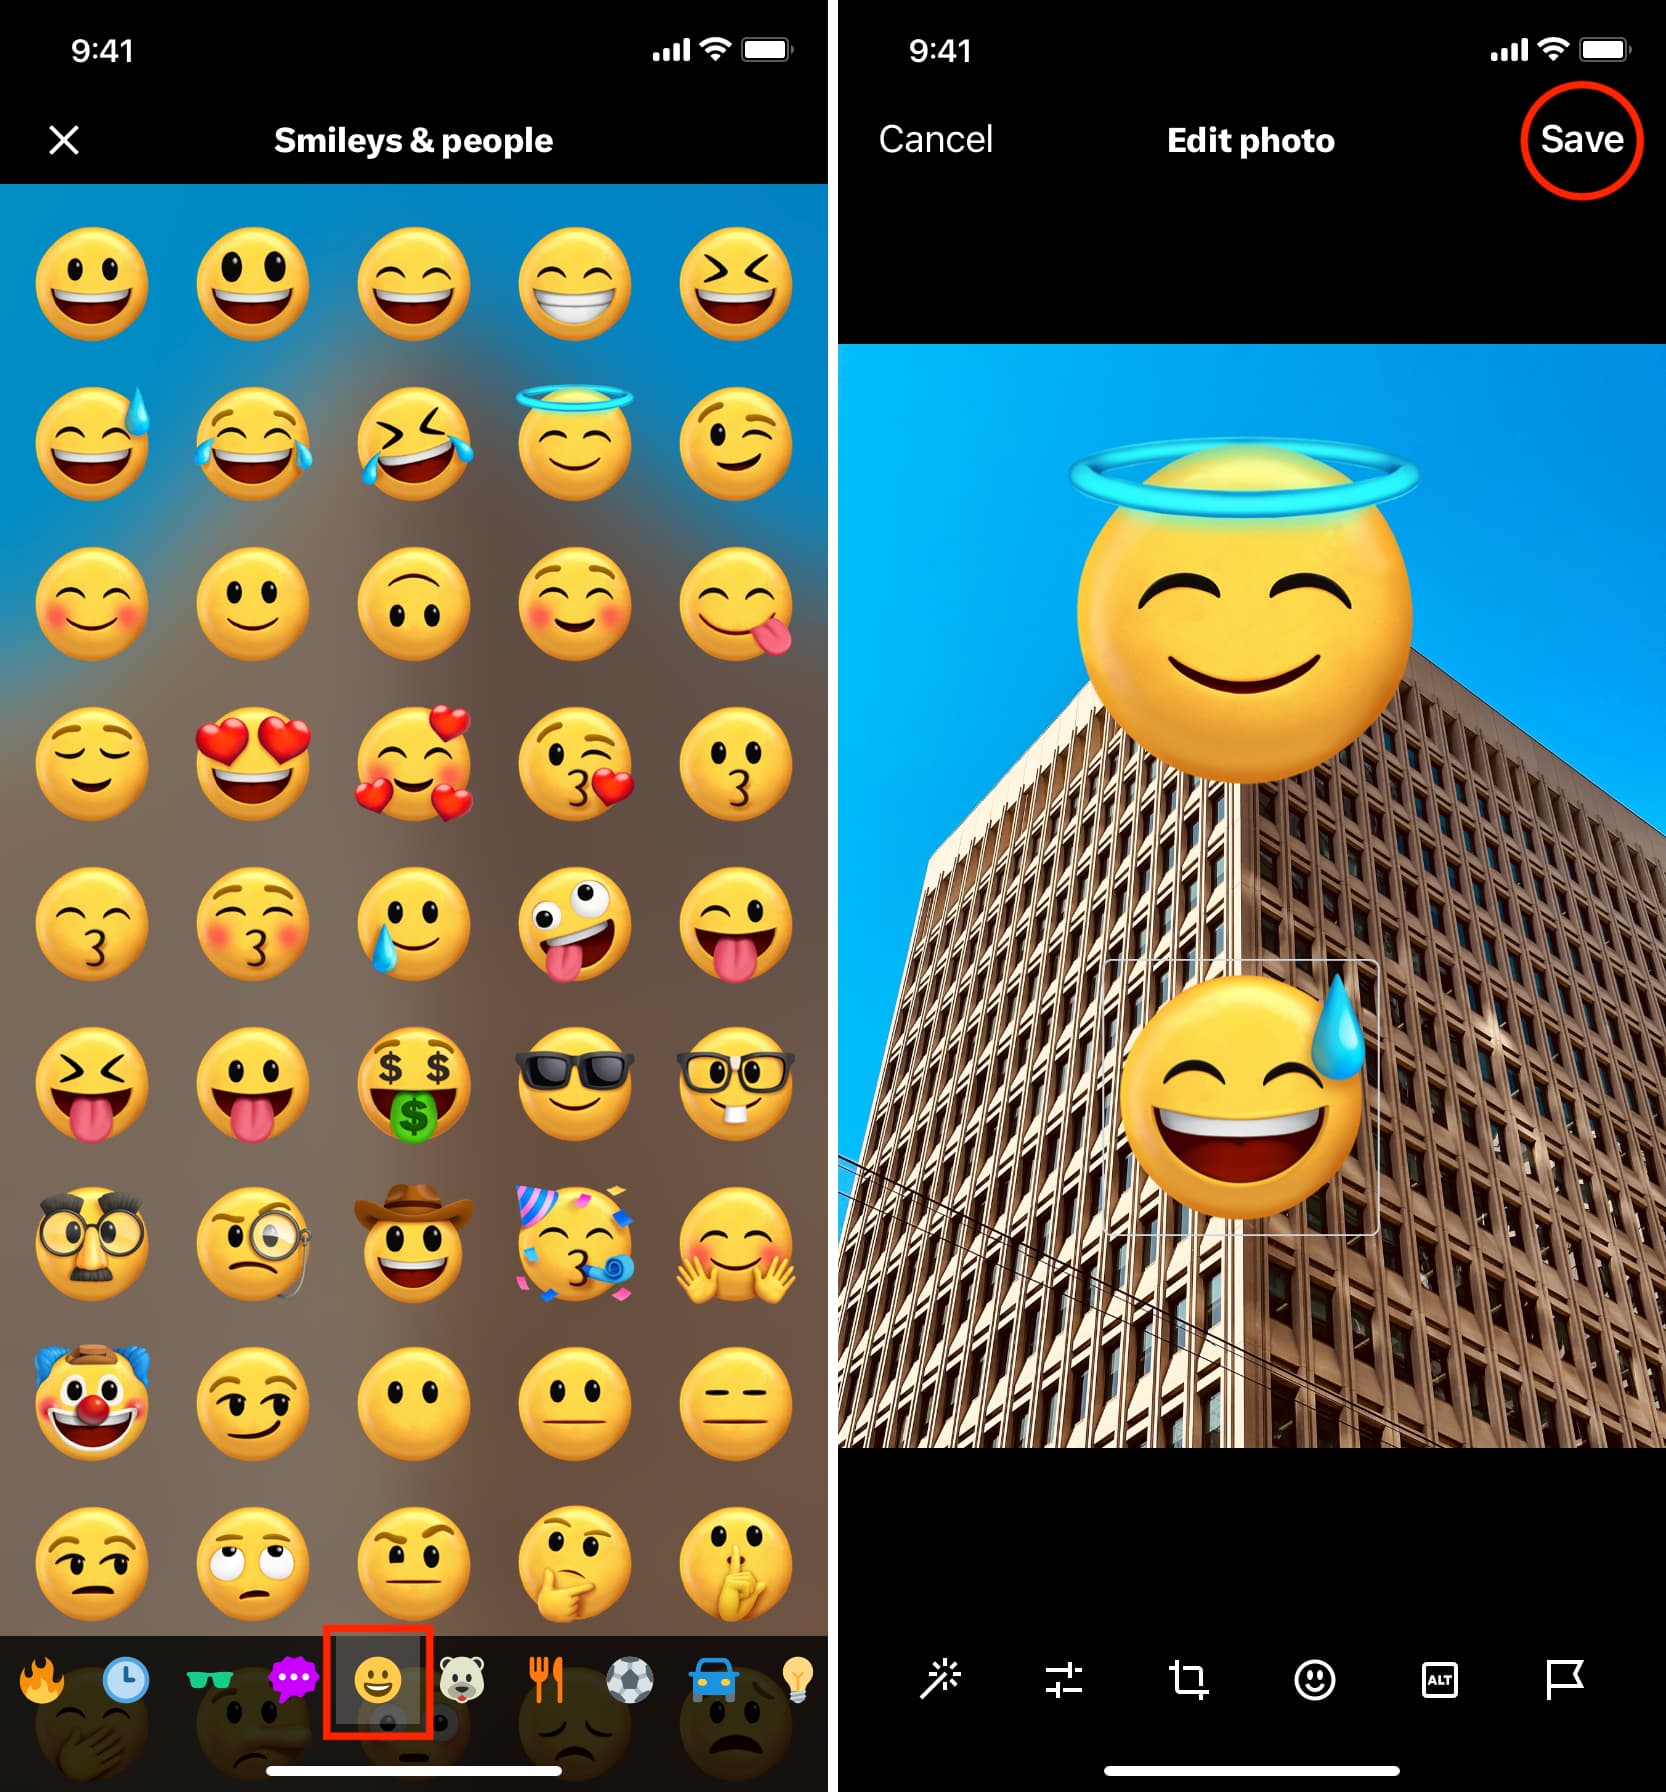
4) Tap the smileys button at the bottom and select the emoji you want to use.
5) Drag it to the desired spot on the image and hit Save.
6) Finally, tap the Post button.
You can add emojis and stickers using the Instagram app while publishing a regular post or story.
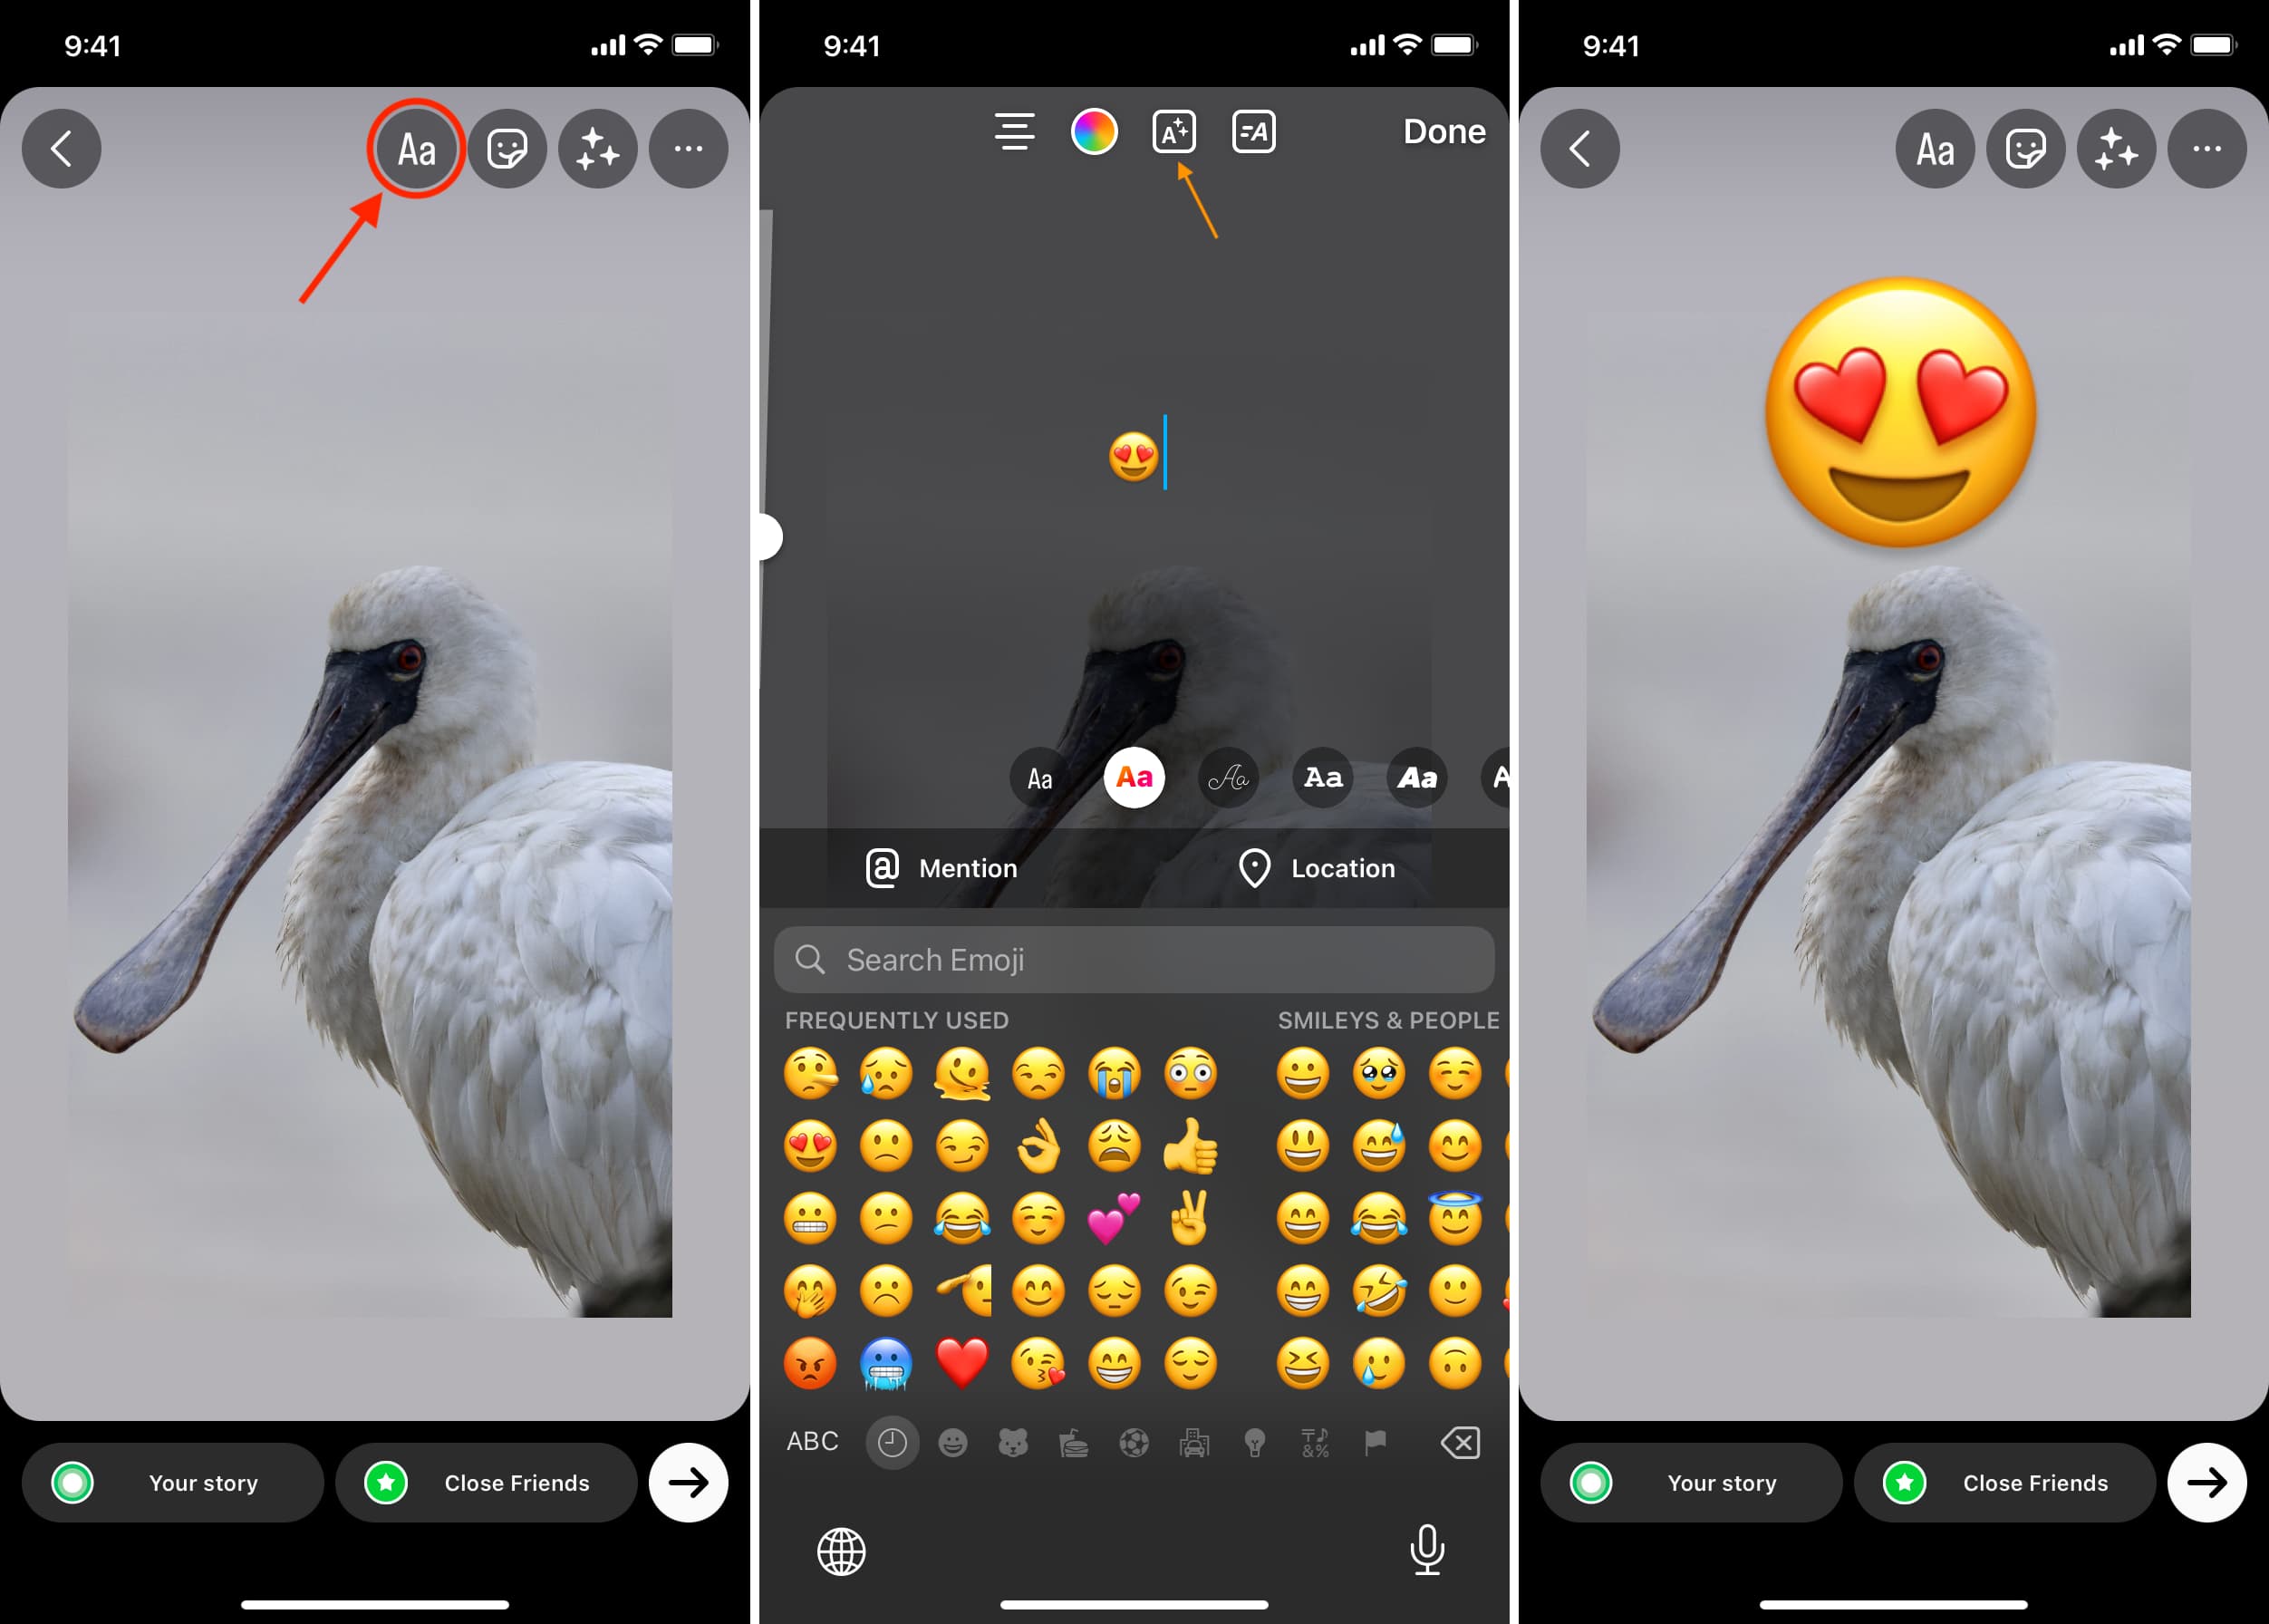
1) Add a photo to put as your Instagram story or regular post.
2) Tap the Aa button and use the keyboard to enter the emoji.
3) If a black or white border is behind the emoji, hit the A button to remove the background.
4) Finally, publish your Instagram story or post.
In addition to the above steps, you can also tap the stickers icon and use a reaction sticker.
You can add emojis to pictures while posting Facebook Stories as well as normal posts.
1) Add an image to your Facebook Story or Post.
2) Story: On the Story screen, swipe the items at the bottom of the screen and select an emoji, or tap the Stickers icon and scroll down to pick an emoji. Use two fingers to pinch in and out to change the emoji size. Finally, hit Share.

3) Post: On the Post screen, tap the photo or the Edit button and then tap the stickers icon. Now, scroll down and select an emoji. Alternatively, you can tap the Aa button and enter emojis using the keyboard.

Snapchat
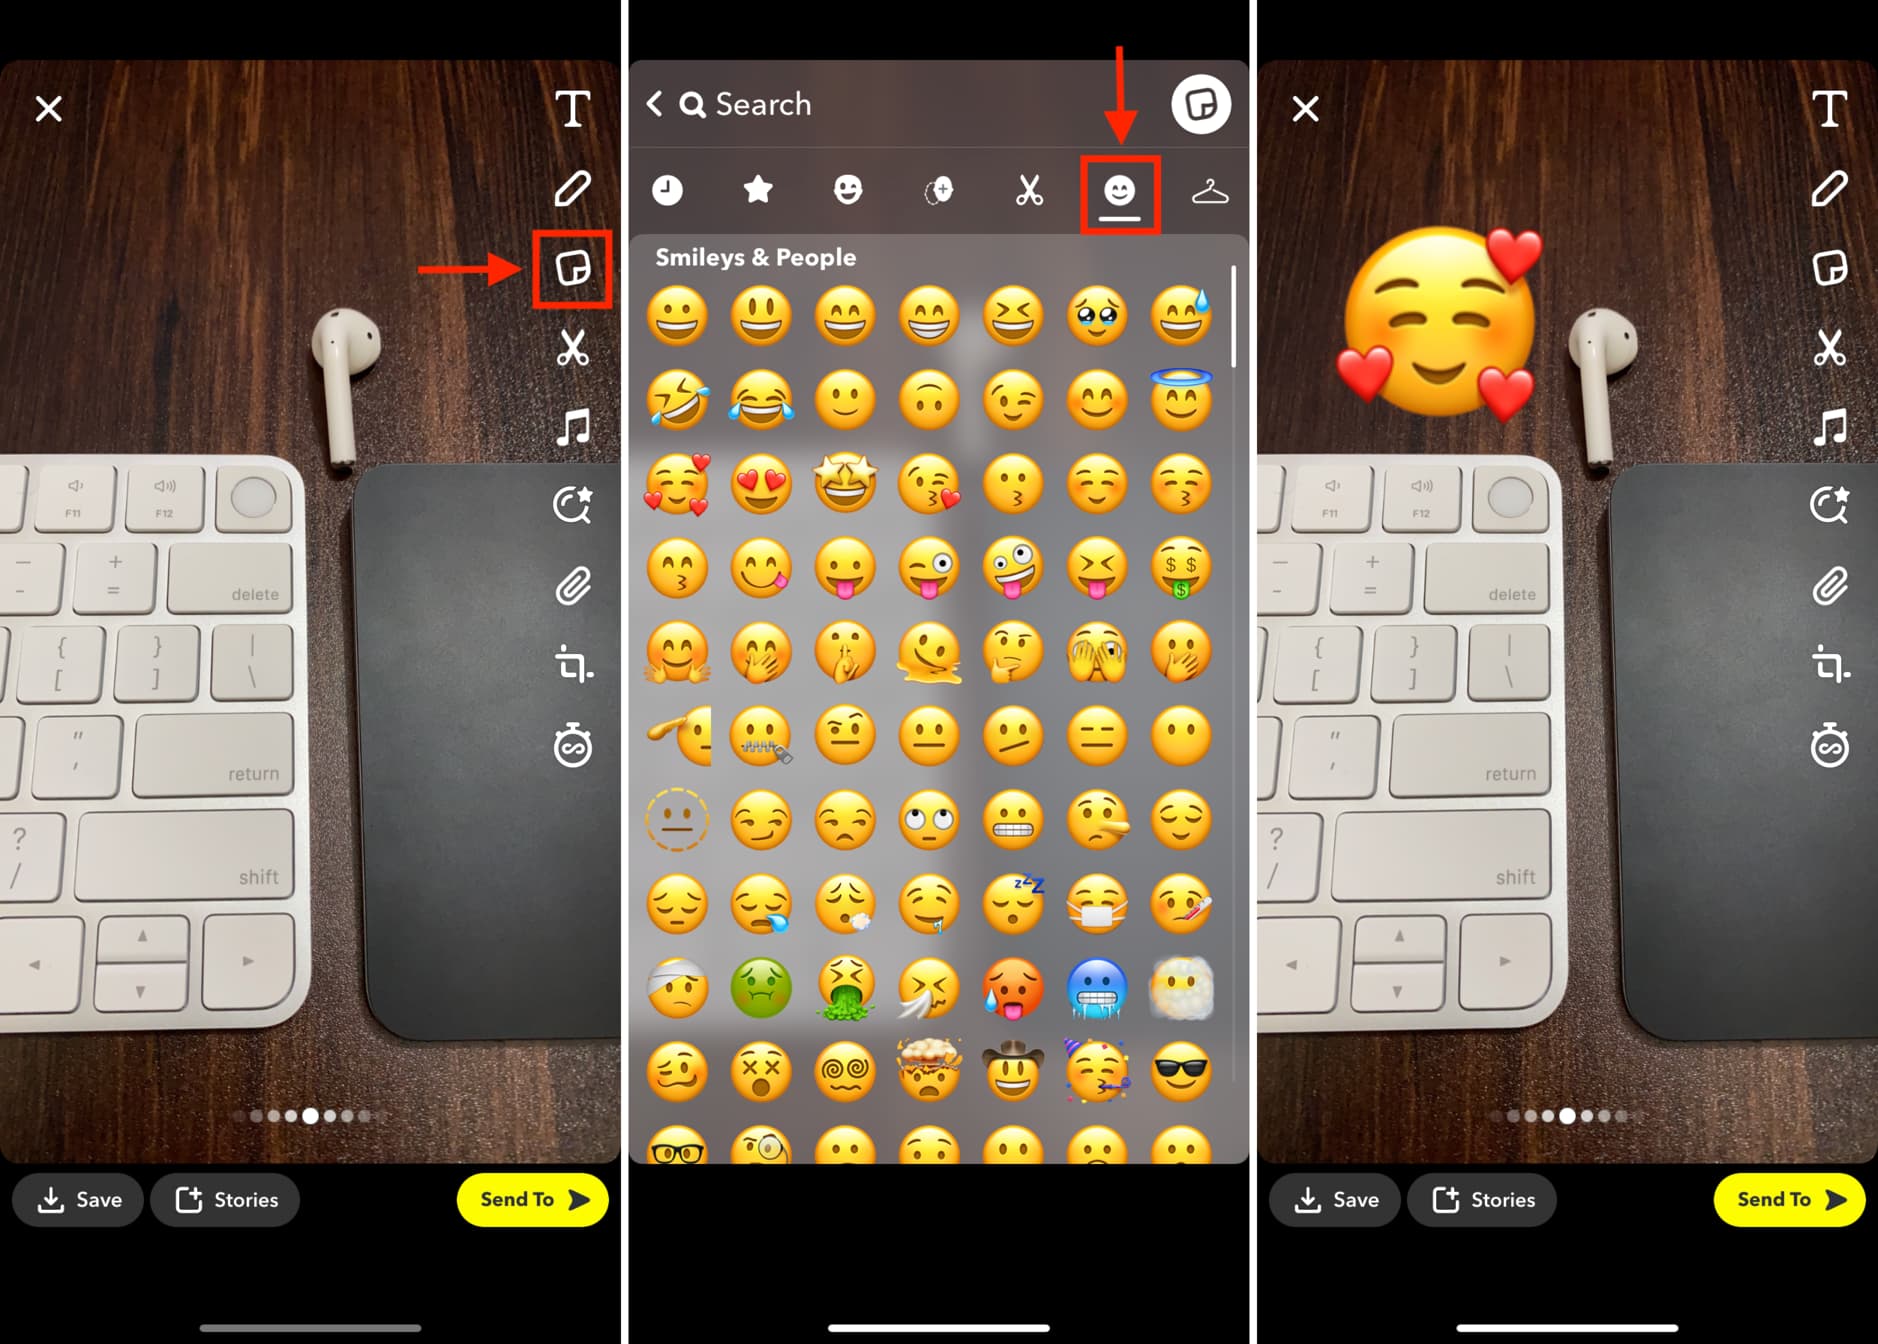
1) Add a picture from your Photos app or take one using the Snapchat camera.
2) Tap the stickers icon and hit the smiley emoji button to insert an emoji into your Snap.
3) Use two fingers to pinch in or out the emoji to decrease or increase its size.
4) Finally, send it to your Snapchat friends or post it as a story.
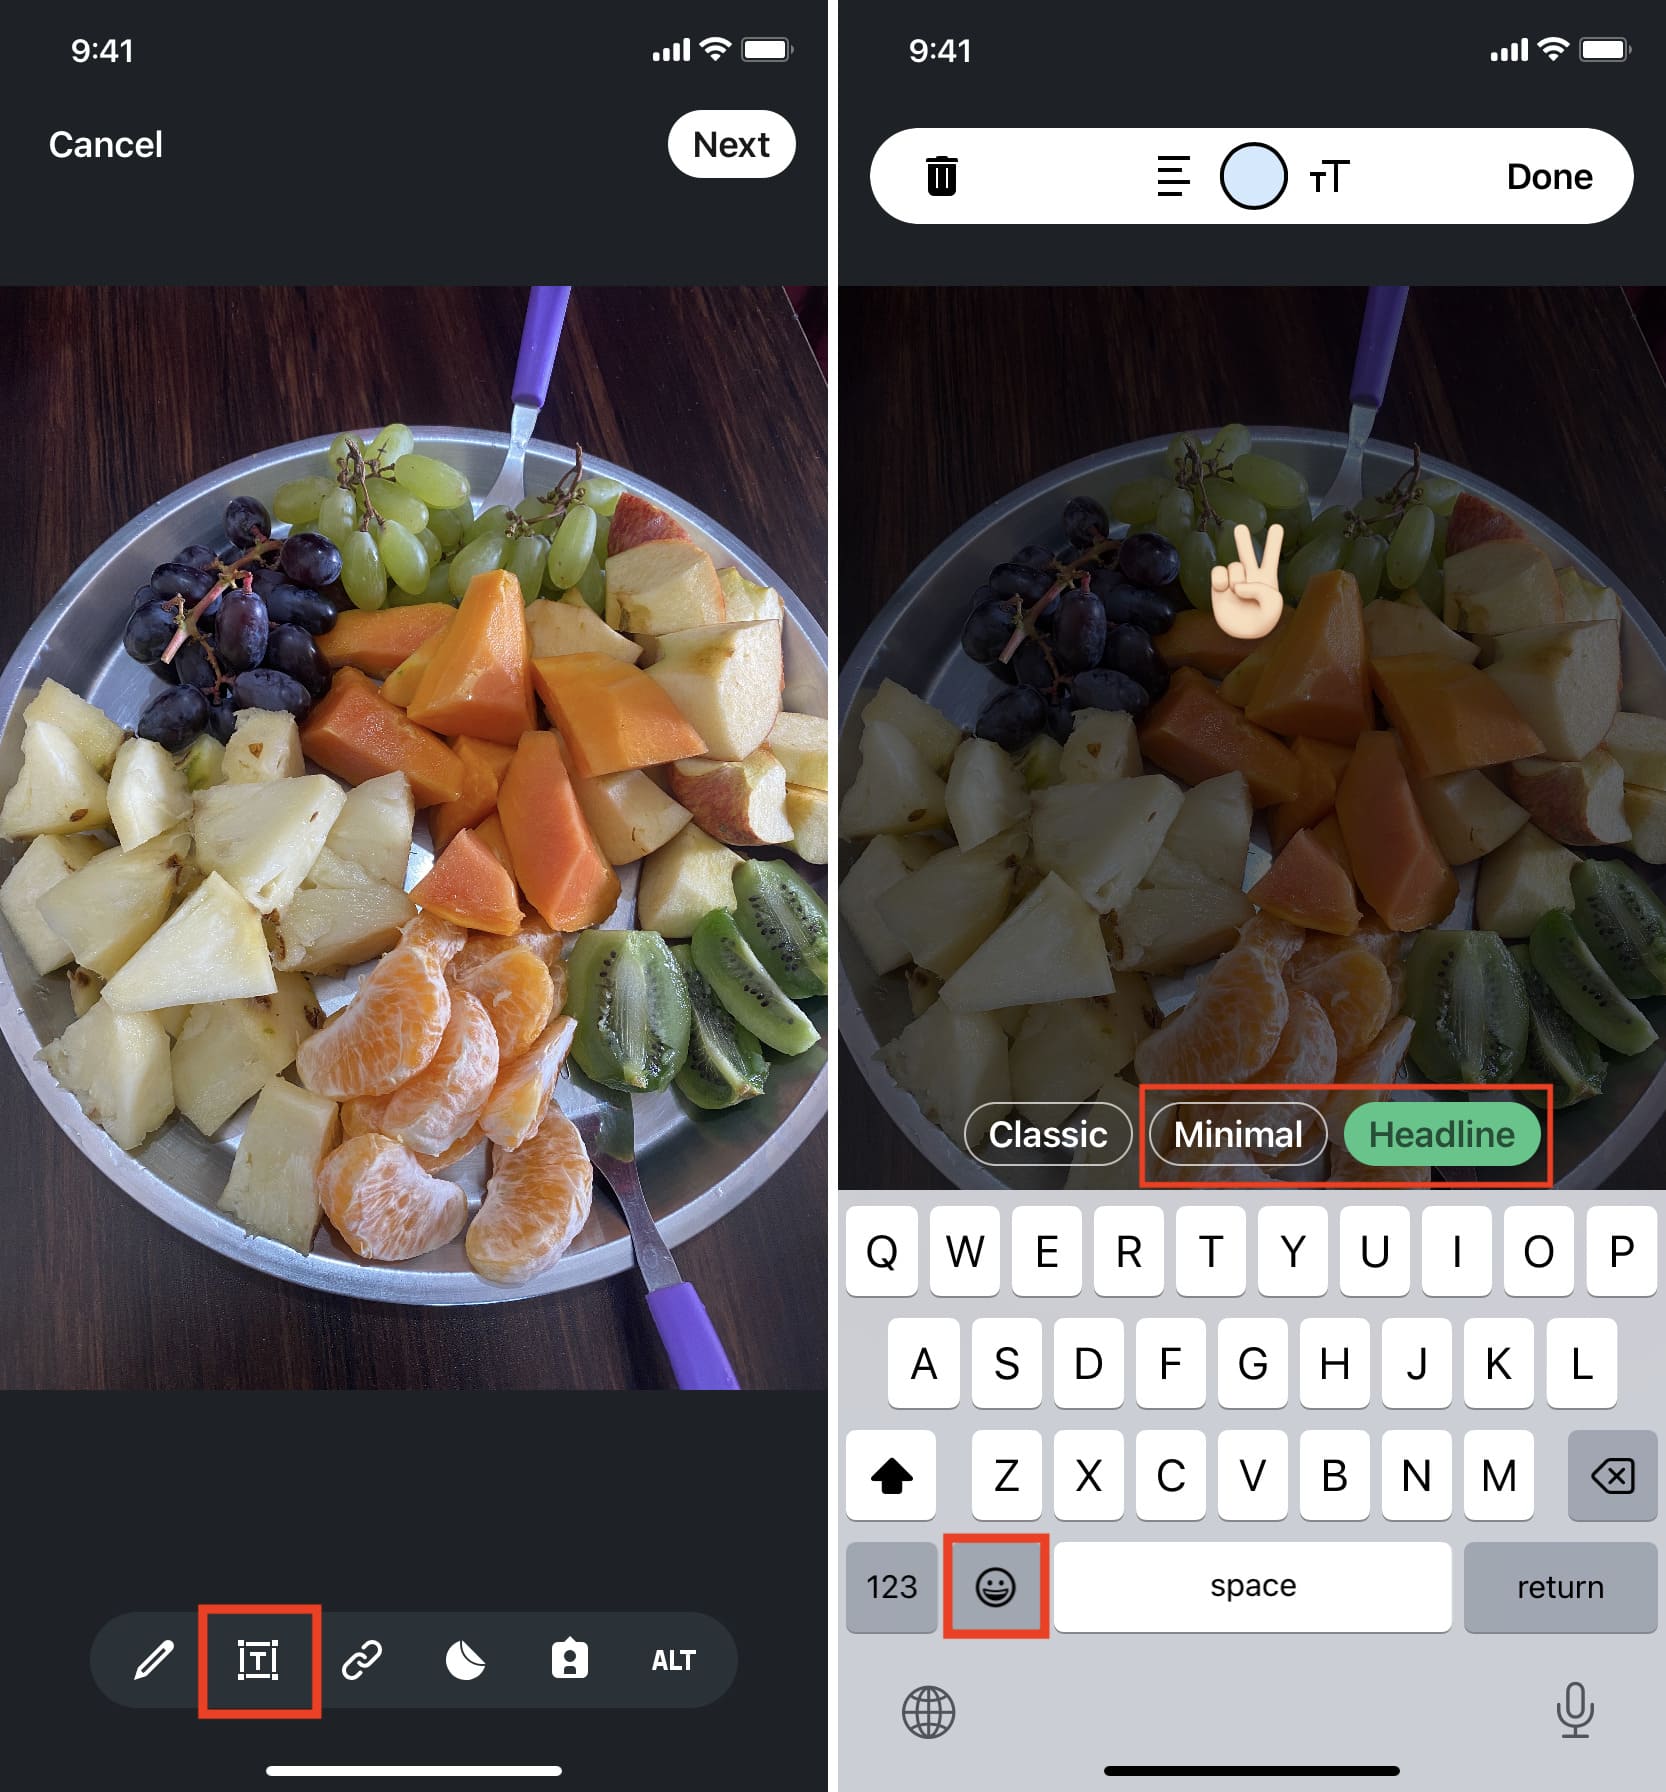
1) Create a new post, add a photo to it, and tap the photo or hit the little pen icon.
2) Tap the text button [T] and enter the emoji using your iPhone keyboard.
3) Remove the background by selecting Minimal or Headline.
4) Tap Done, followed by Next to post the image on LinkedIn with emoji over it.
1) Open a conversation and tap the plus button (+), followed by Photos.
2) Select the image you want to send and tap the pencil icon to edit it.
3) Tap the sticker button and go to the emoji tab from the top.
4) Pick the emoji you want to add over the image.
5) Adjust the emoji size and place it at the desired spot before hitting the blue send button.

Related tips:
- 5 free ways to create memes on iPhone and iPad
- How to add a watermark to an image on iPhone and iPad
- How to make a GIF on iPhone
Most images are from Unsplash. Top image: Naassom Azevedo for Unsplash.