In this step-by-step tutorial, we’ll show you how to capture a studio-like portrait photo on your iPhone or iPad and edit it for use in ID cards, job applications, passports, and more.
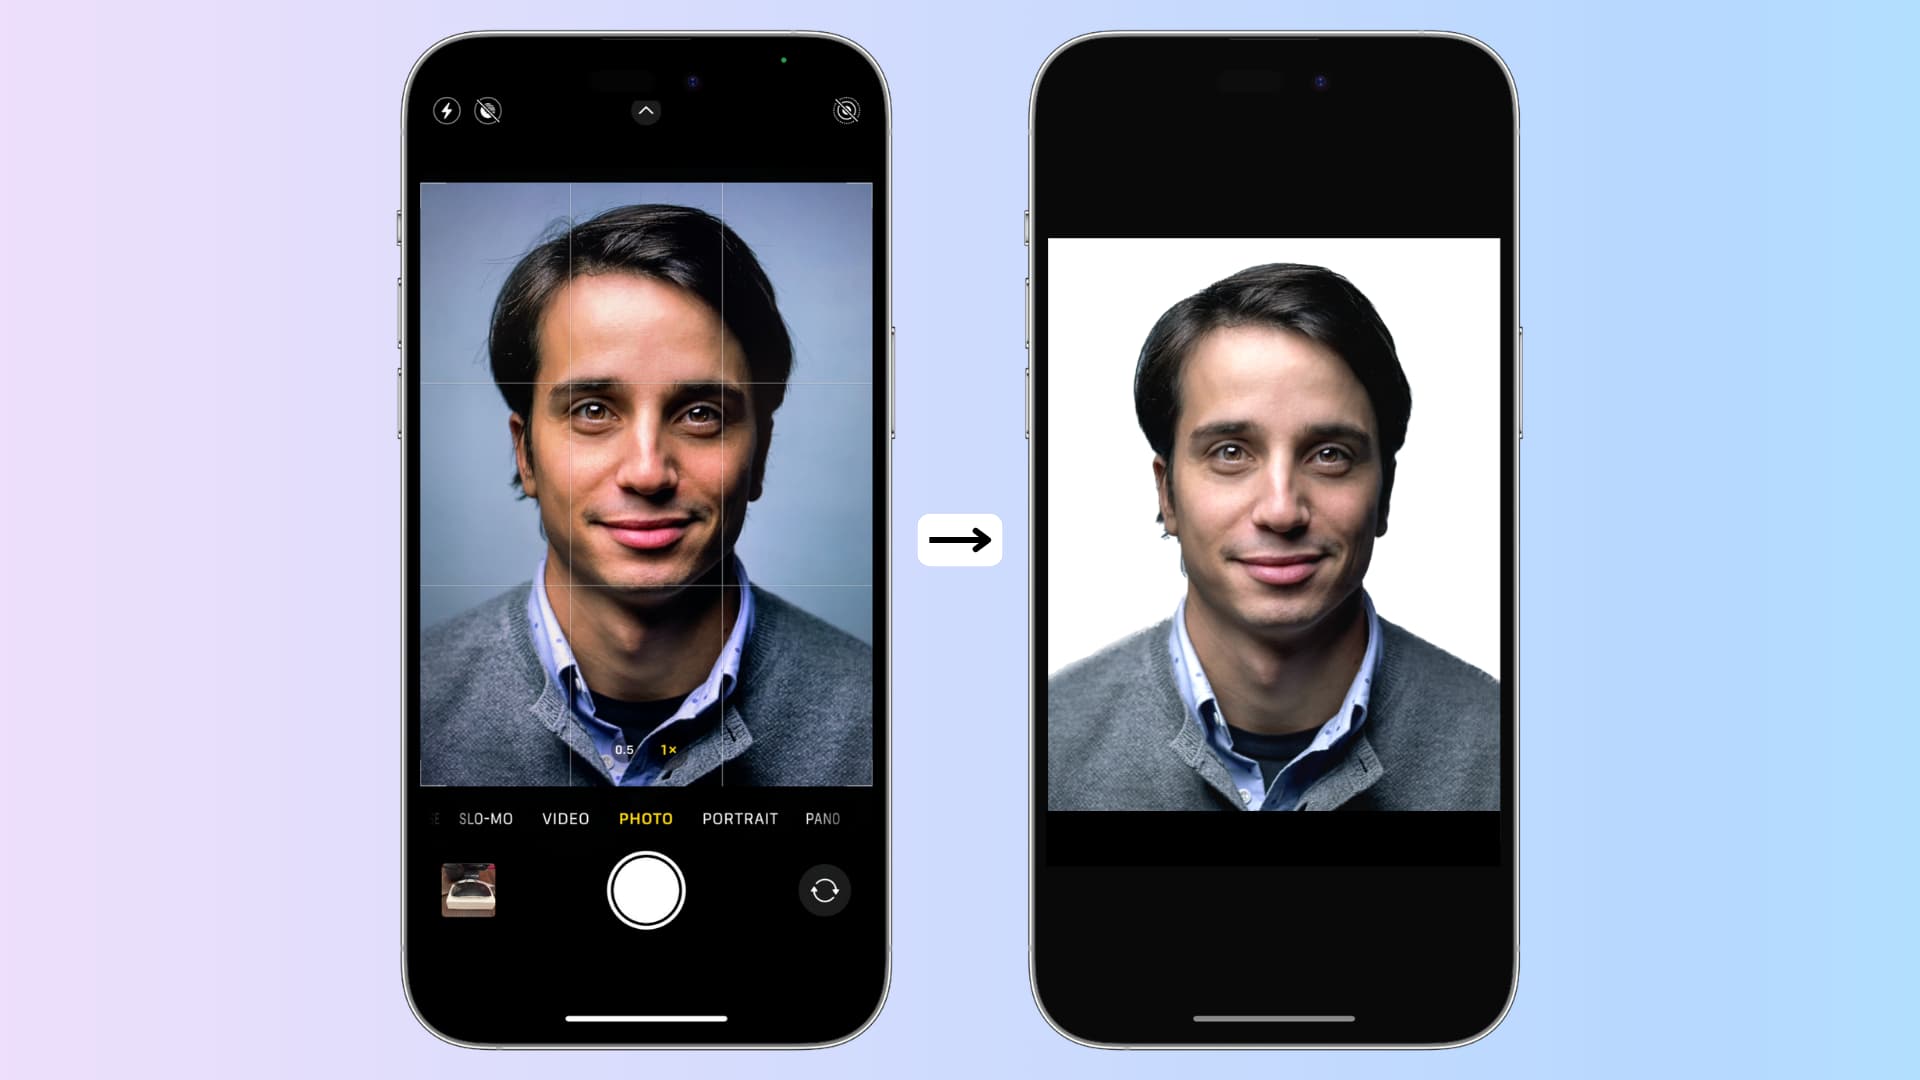
The entire process takes just five easy steps that anyone can follow.
Step 1: Take the photo in front of a solid background
- Stand in front of a wall, a green screen, or preferably a single-color background like a plain curtain.
- Ensure the room or area is well-lit.
- Open the Camera app on your iPhone or iPad and ask someone to take a close-up photo of your face, extending down to your chest (or as required). If no one is around, place your iPhone on a tripod and use the timer feature. Alternatively, you can remotely control your iPhone camera to take a picture. As a last resort, you may take a selfie.
Important: Make sure to follow the required guidelines. For example, if you’re taking a photo for your US passport application, remove your glasses, keep your eyes open, and your mouth closed.
Step 2: Optional: Increase the photo brightness
Go to the Photos app and open the image. If the picture is not bright enough, tap the edit icon and use the brightness slider to adjust it. Avoid making any other major adjustments (the more natural, the better).
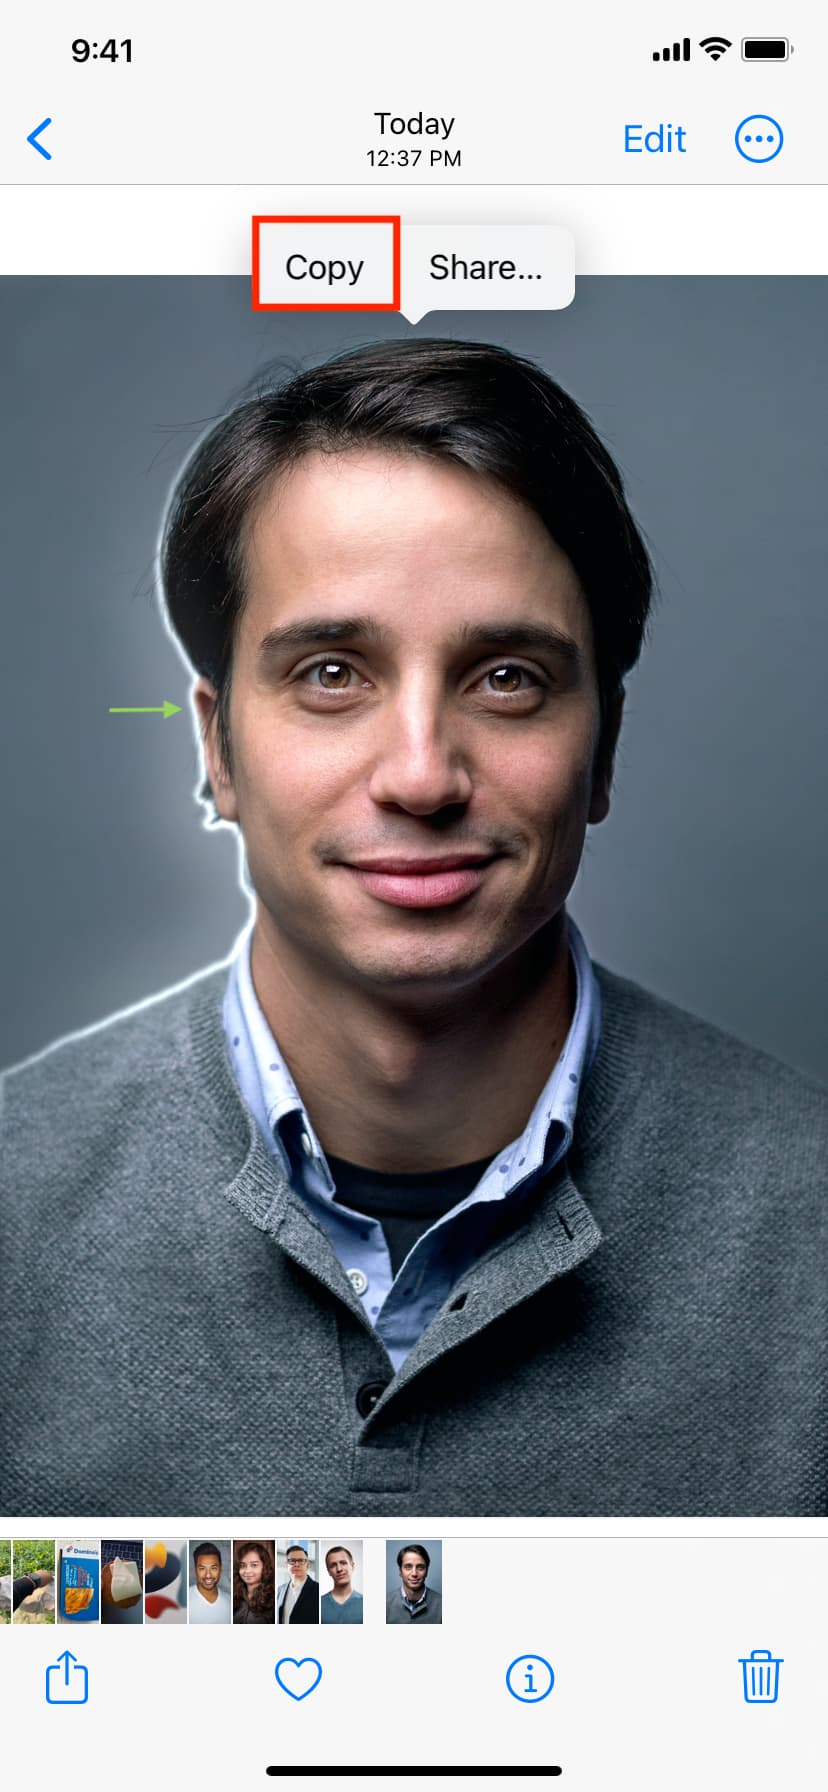
Step 3: Extract your face from the photo
- Open the photo inside the Photos app.
- Touch and hold the main subject of the image (which is your face) until you see a white line run through it.
- Tap Copy. This will remove your face from the image background and copy it to your clipboard.
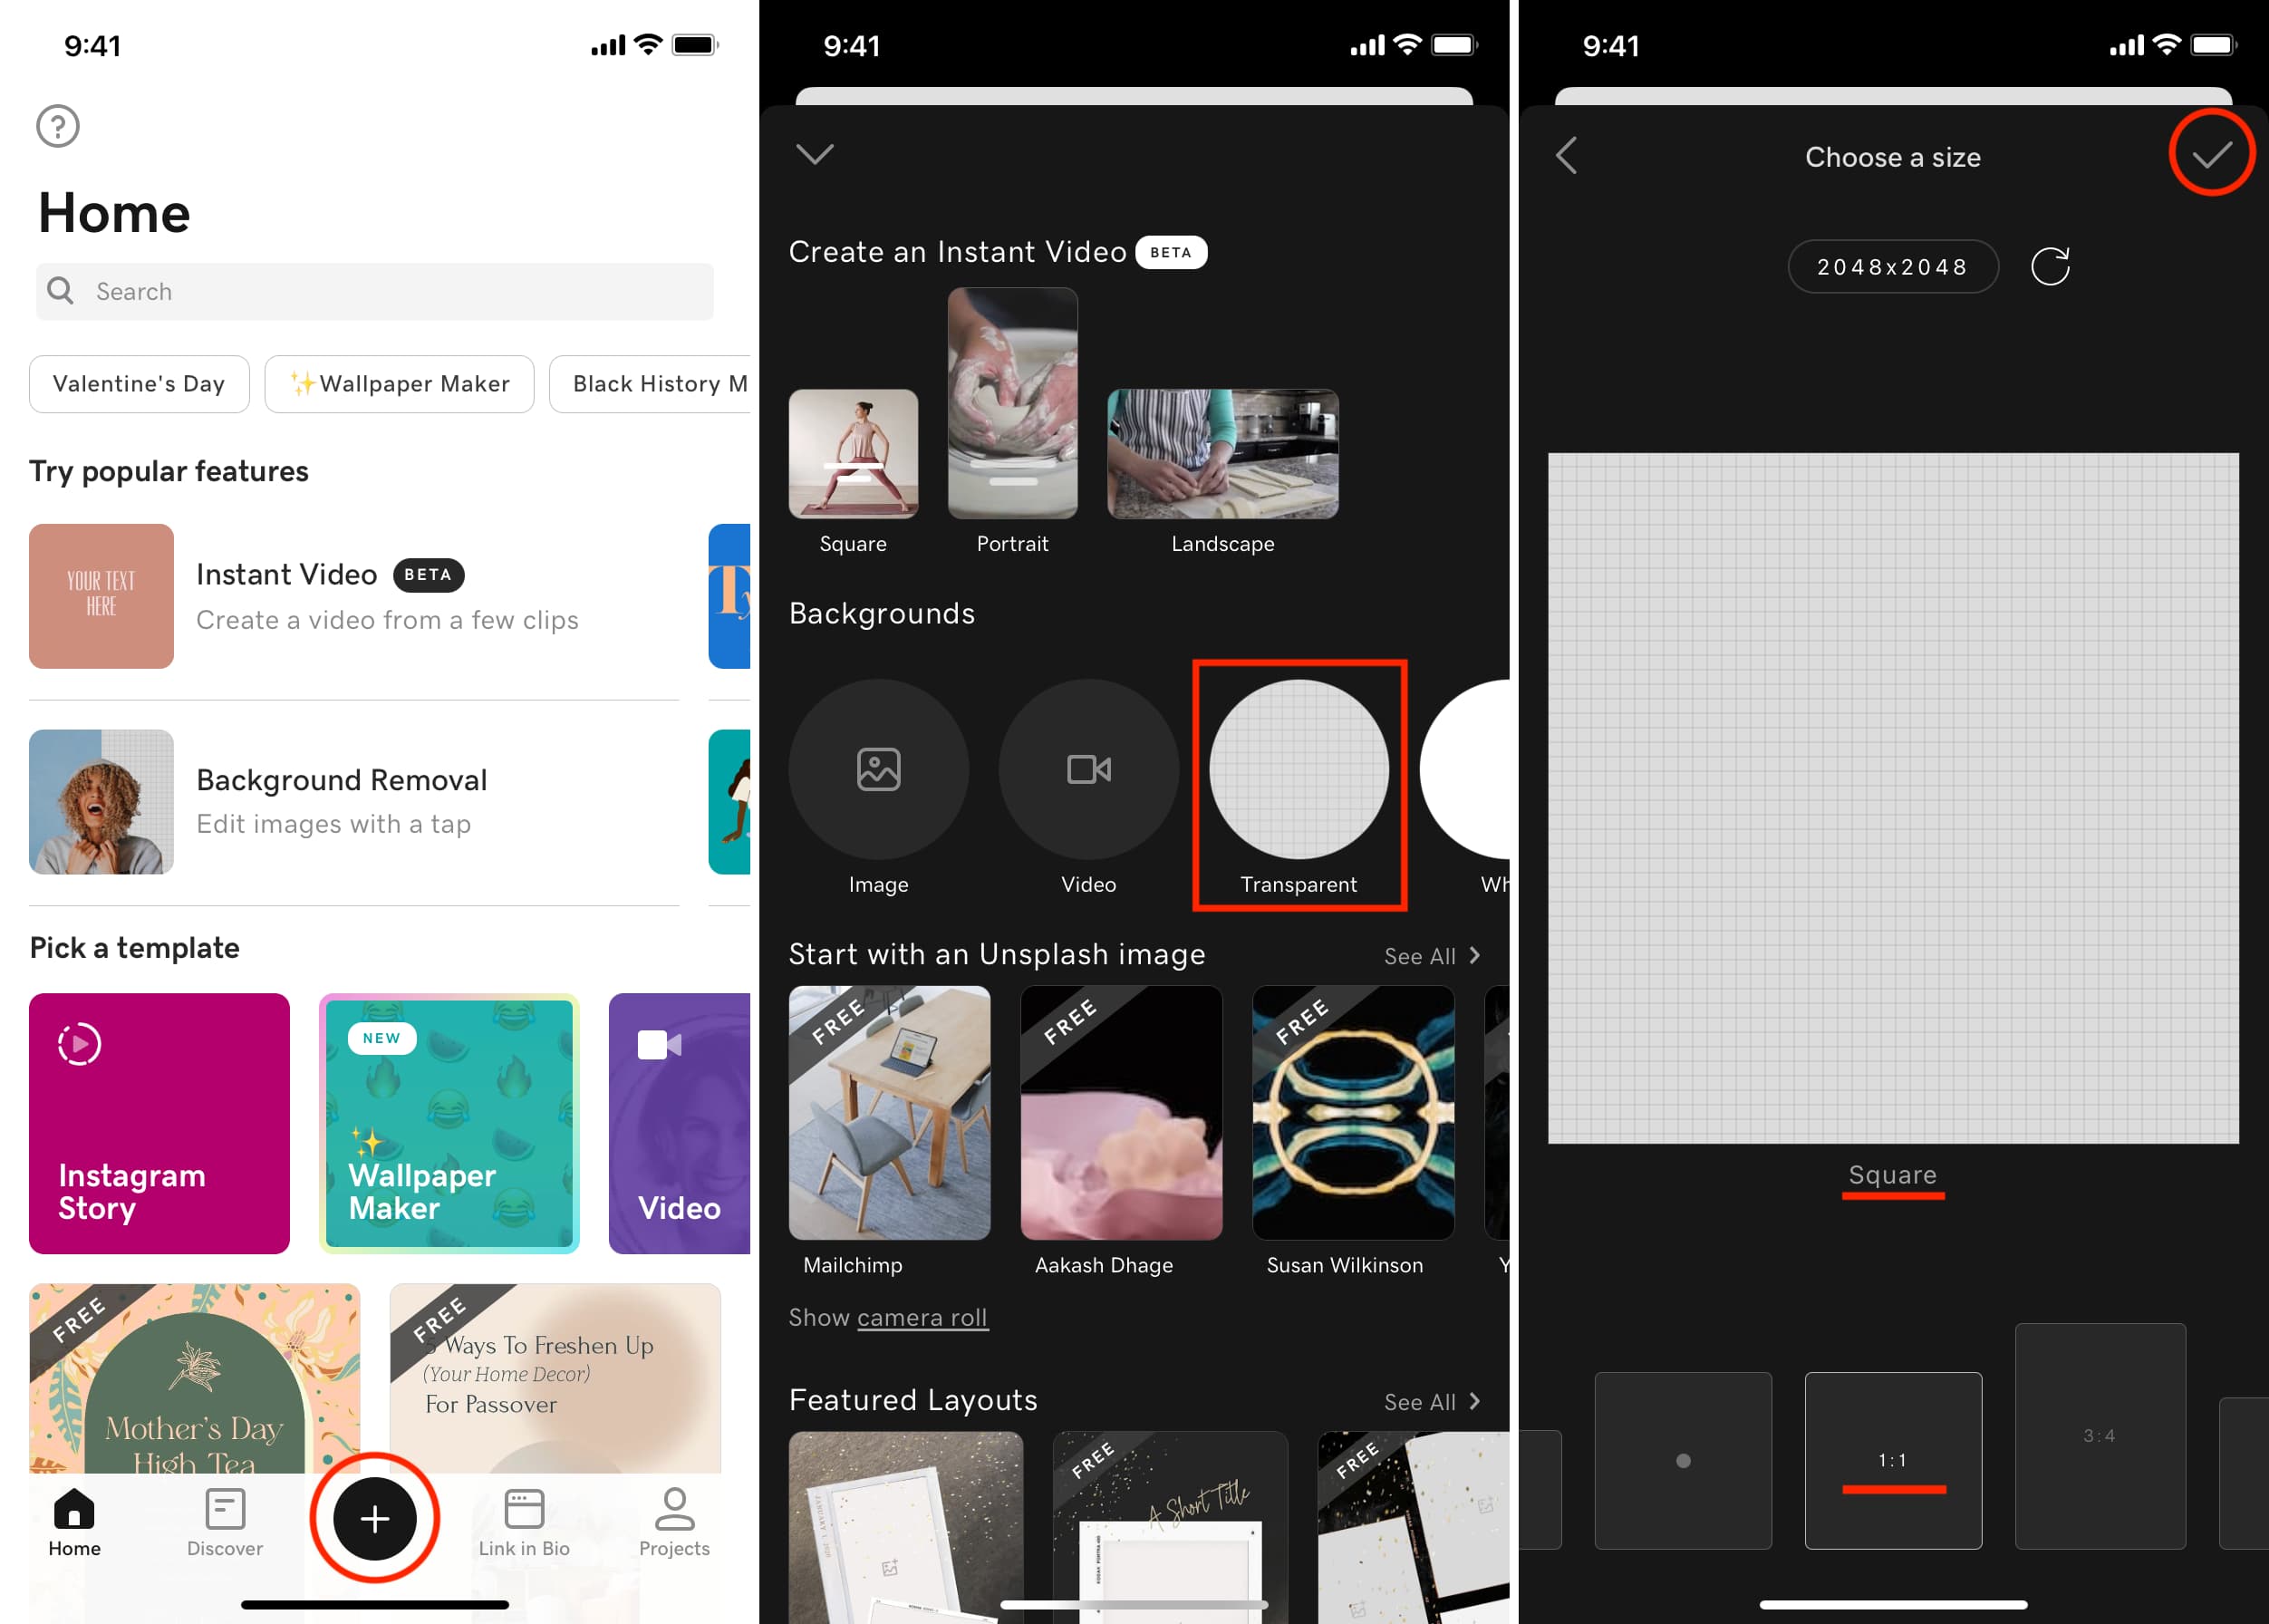
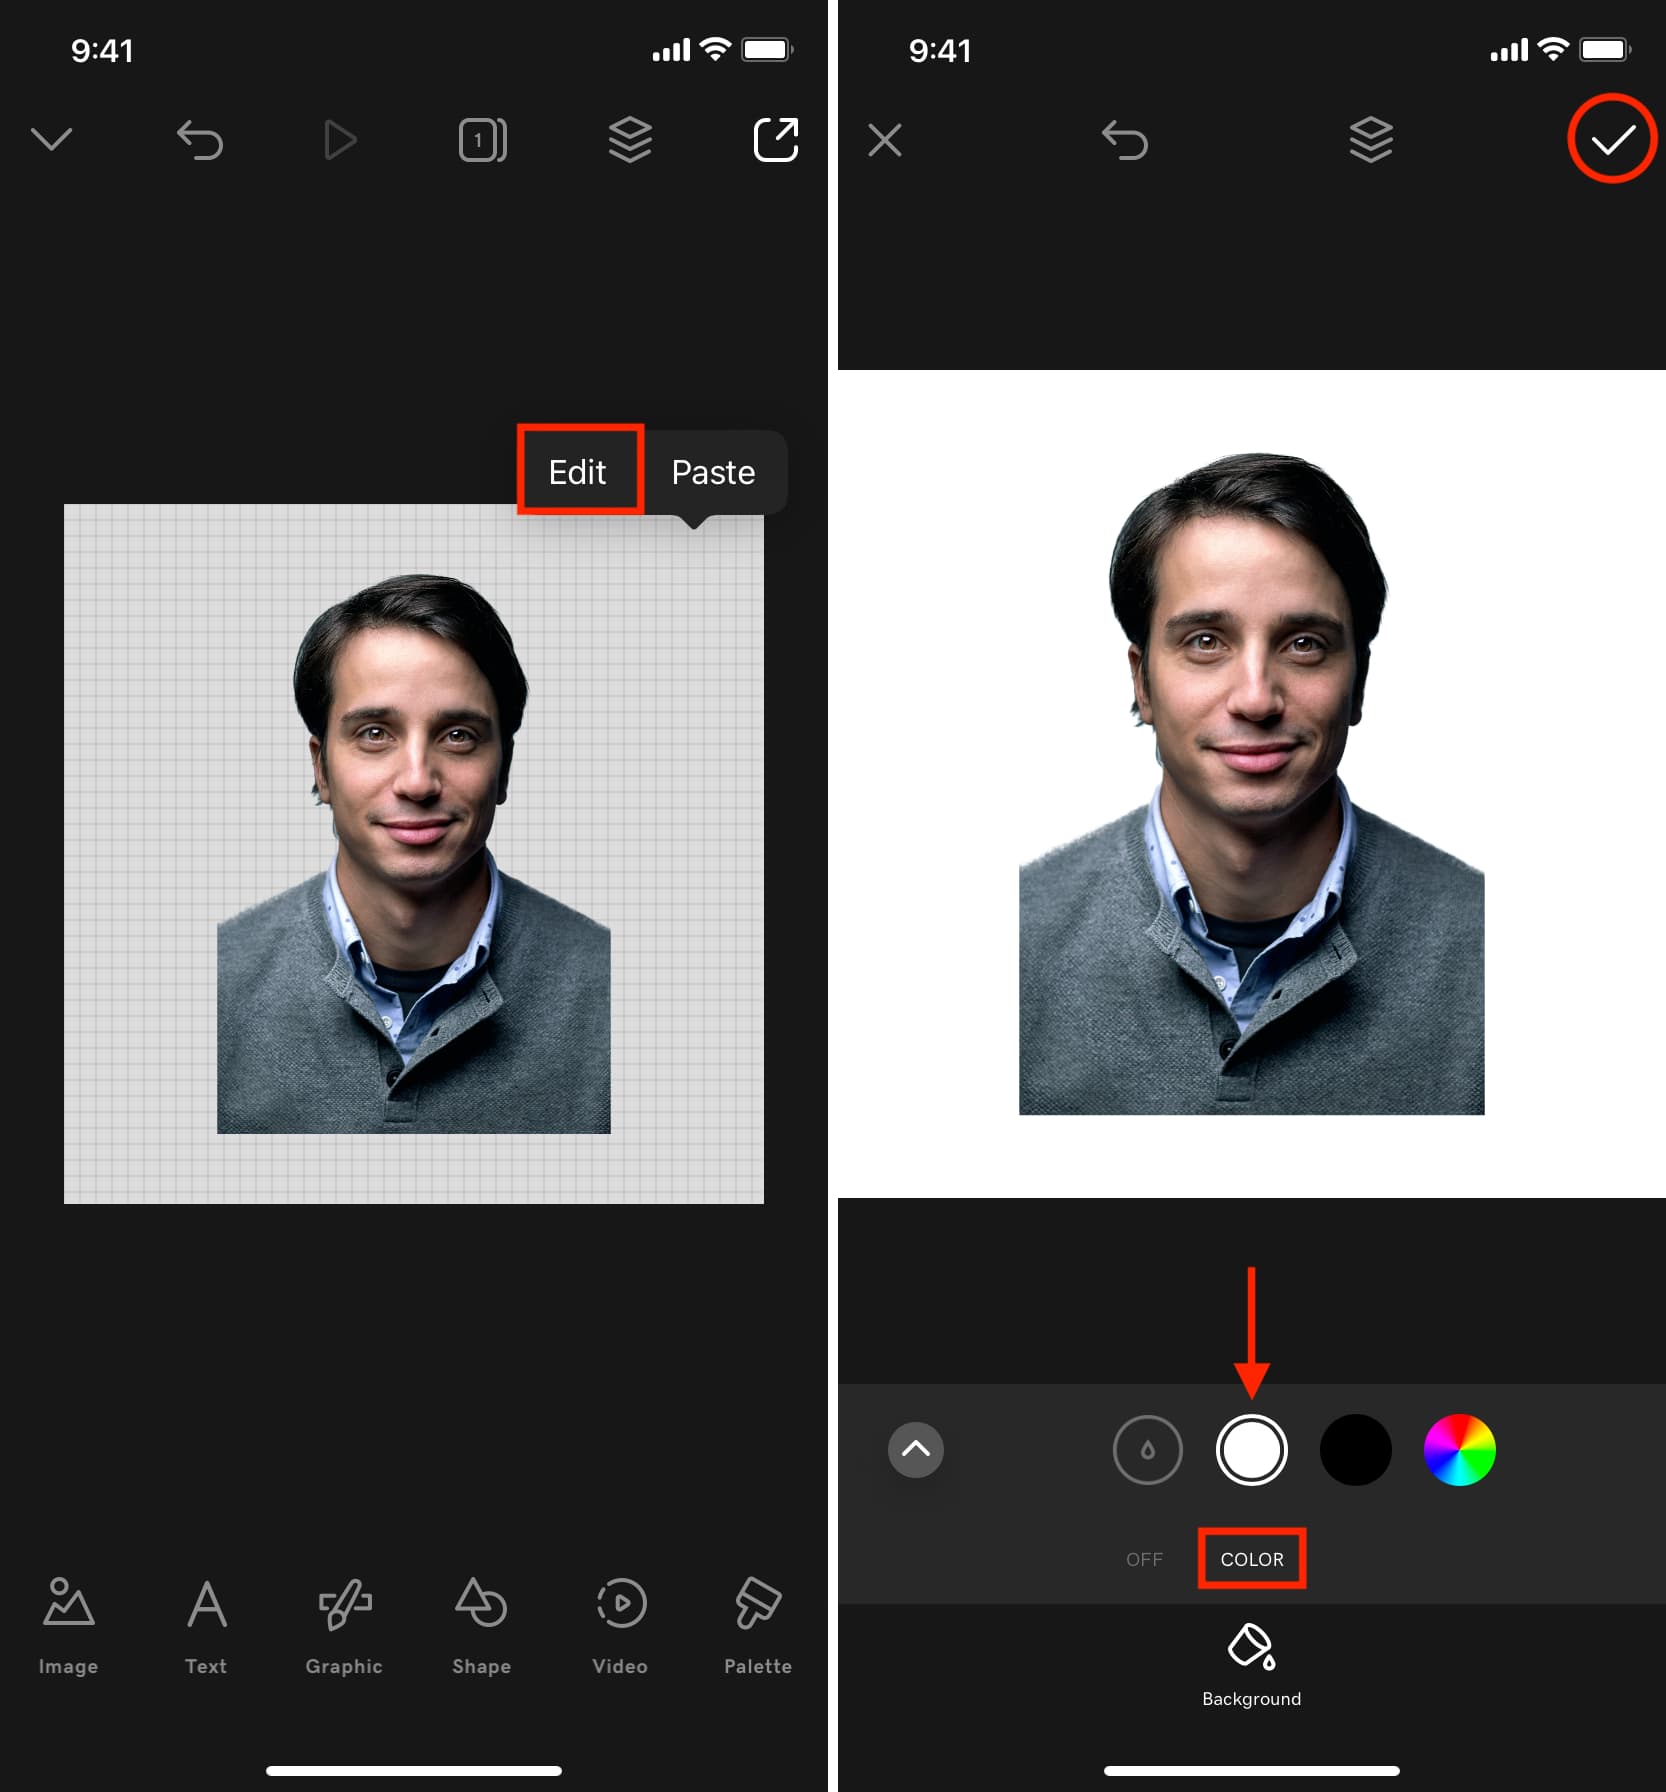
Step 4: Create the final image
1) Download and open a photo editing app like GoDaddy Studio on your iPhone or iPad.
2) Tap the plus button and select Transparent.
3) Select a size and tap the check mark.
You will have to figure out the exact guidelines based on your use case. For instance, US passports require a square photo (2 x 2 inches). So, select Square (1:1). If you’re planning to use it for something else, like an ID card, then Portrait (3:4) may be suitable.
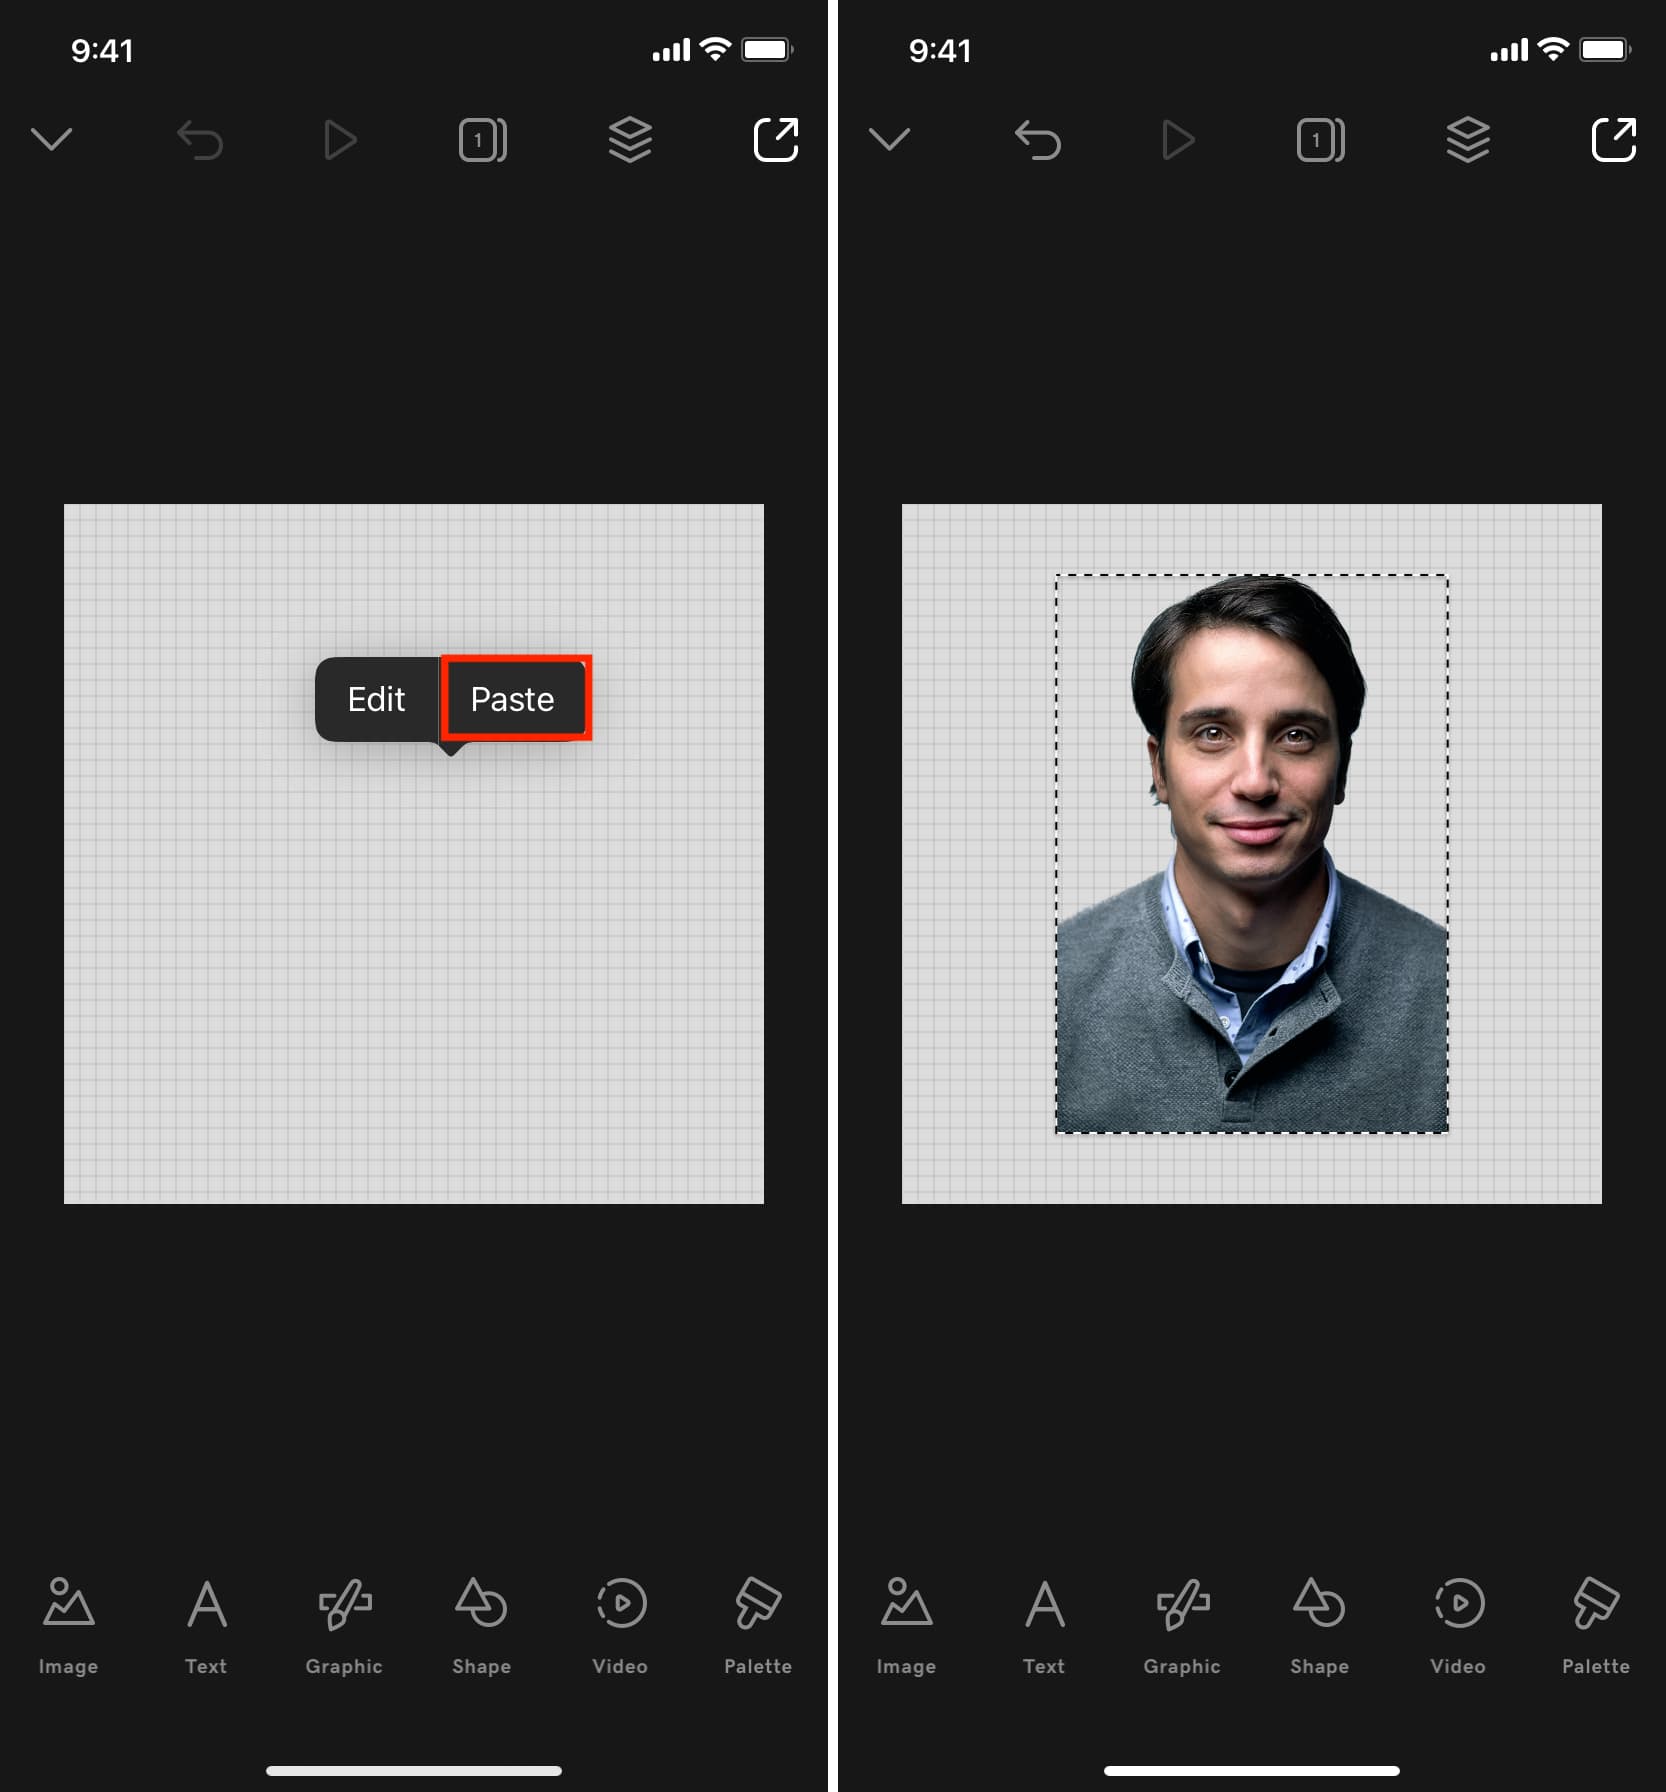
4) Tap once on the empty canvas and choose Paste, followed by Allow Paste. This will paste the copied subject (your face) here.
5) Tap the transparent area behind the image and choose Edit.
6) Select Color and pick white, blue, or any other background (per the guidelines) where you will be using this photo.
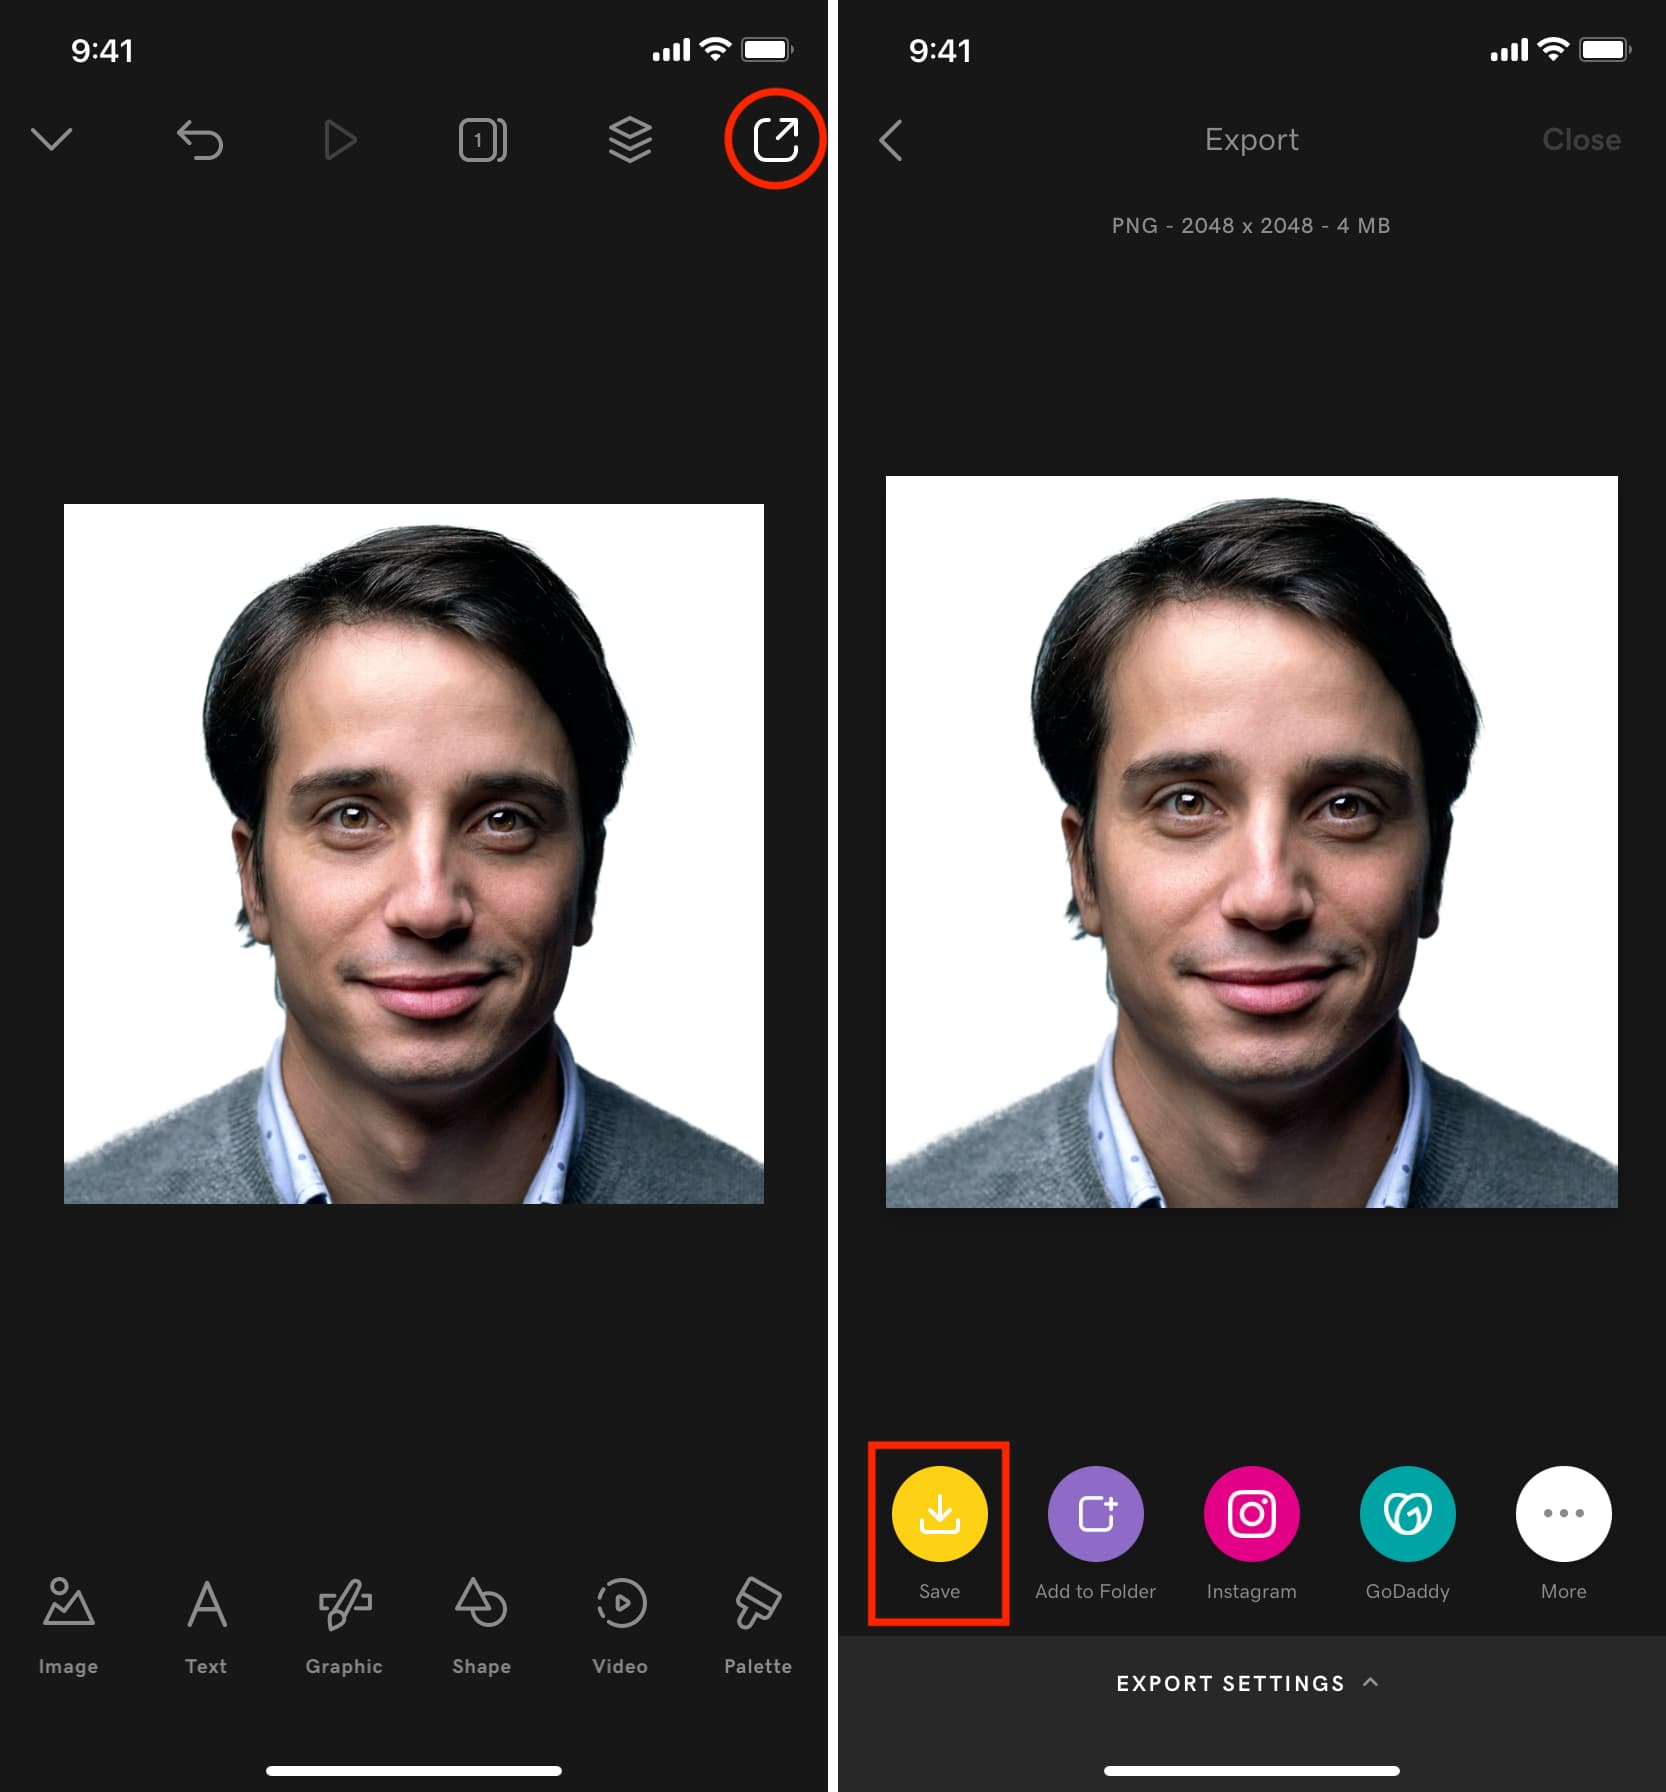
7) Now select your face and pinch in and out or slightly zoom the image to adjust it.
8) Finally, tap the export icon and hit Save. The final image is saved to the Photos app.
Step 5: Use it digitally or print it
Use digitally
The final image is ready to be used on websites, online forms, PDFs, and more.
One thing to remember is that many sites have precise image file size and dimensions requirements. For example, it may say the photo size should not exceed 120 KB or that the image should be 640 x 640 in size. If you encounter such requirements, we have dedicated guides to help:
Take a physical print
If you need a physical copy of this photo, be sure to print it on matte or glossy photo-quality paper.
More image-related tips:
- 3 ways to save your signature as an image on iPhone and iPad
- How to add a watermark to an image on iPhone and iPad
Stock image: Jurica Koletić for Unsplash