In this tutorial, we’ll show you how to reliably transfer iPhone photos and videos to your iPad using a wired connection.
What you need
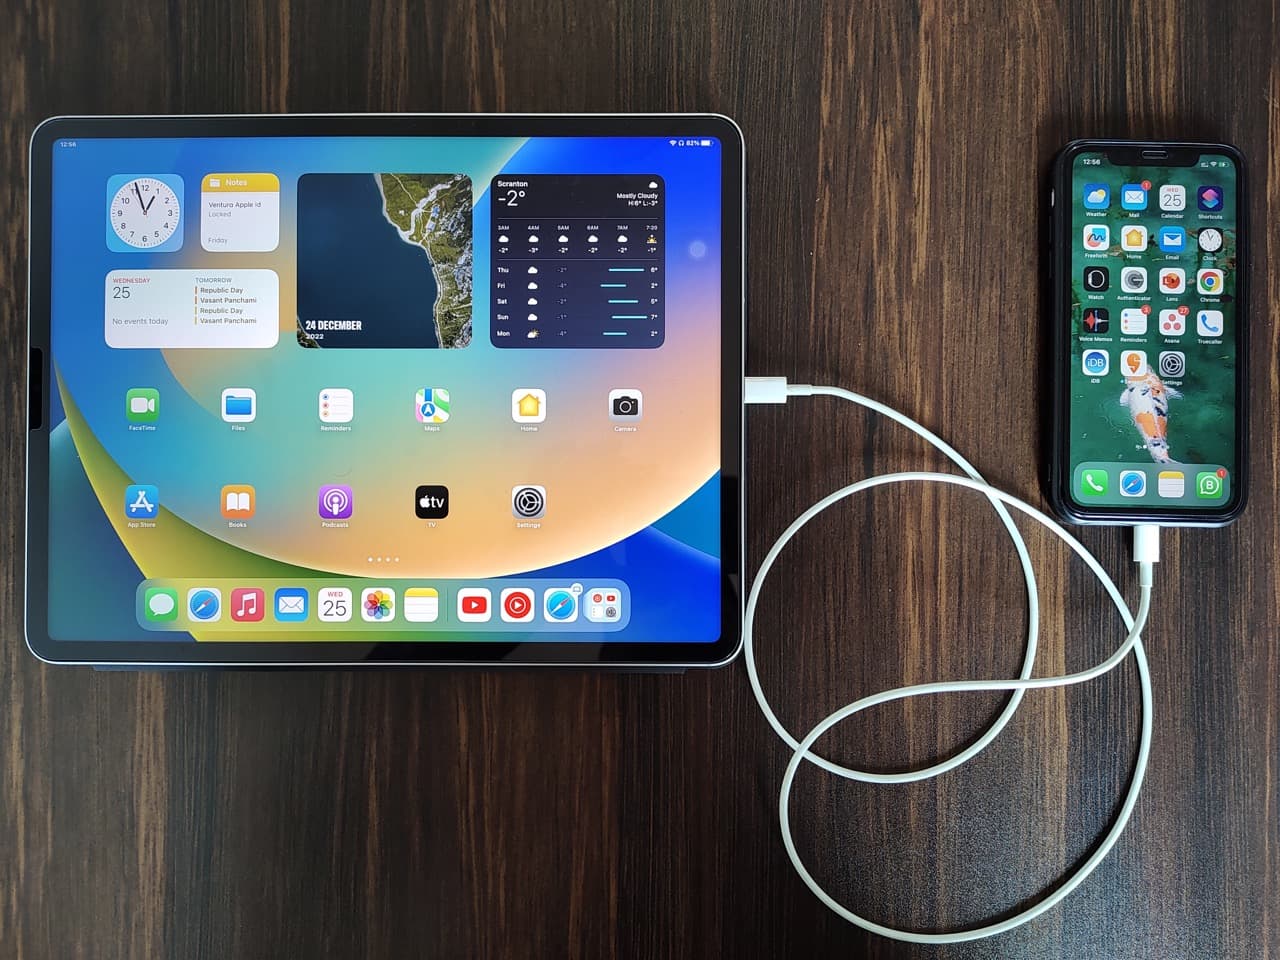
In addition to your iPhone and iPad, you’ll need a USB-C to USB-C or USB-C to Lightning cable to connect your phone and tablet. If both your iPhone and iPad have Lightning ports, you’ll need a special cable with Lightning connectors on both ends or a Lightning to USB hub.
Transfer iPhone photos and videos to iPad’s Photos app using a cable
1) Connect your iPhone to your iPad using an appropriate cable, as shown in the image below.
2) Unlock your iPhone and tap Trust on the Trust This Computer screen. Then, authenticate with Face ID, TouchID, or your iPhone passcode.

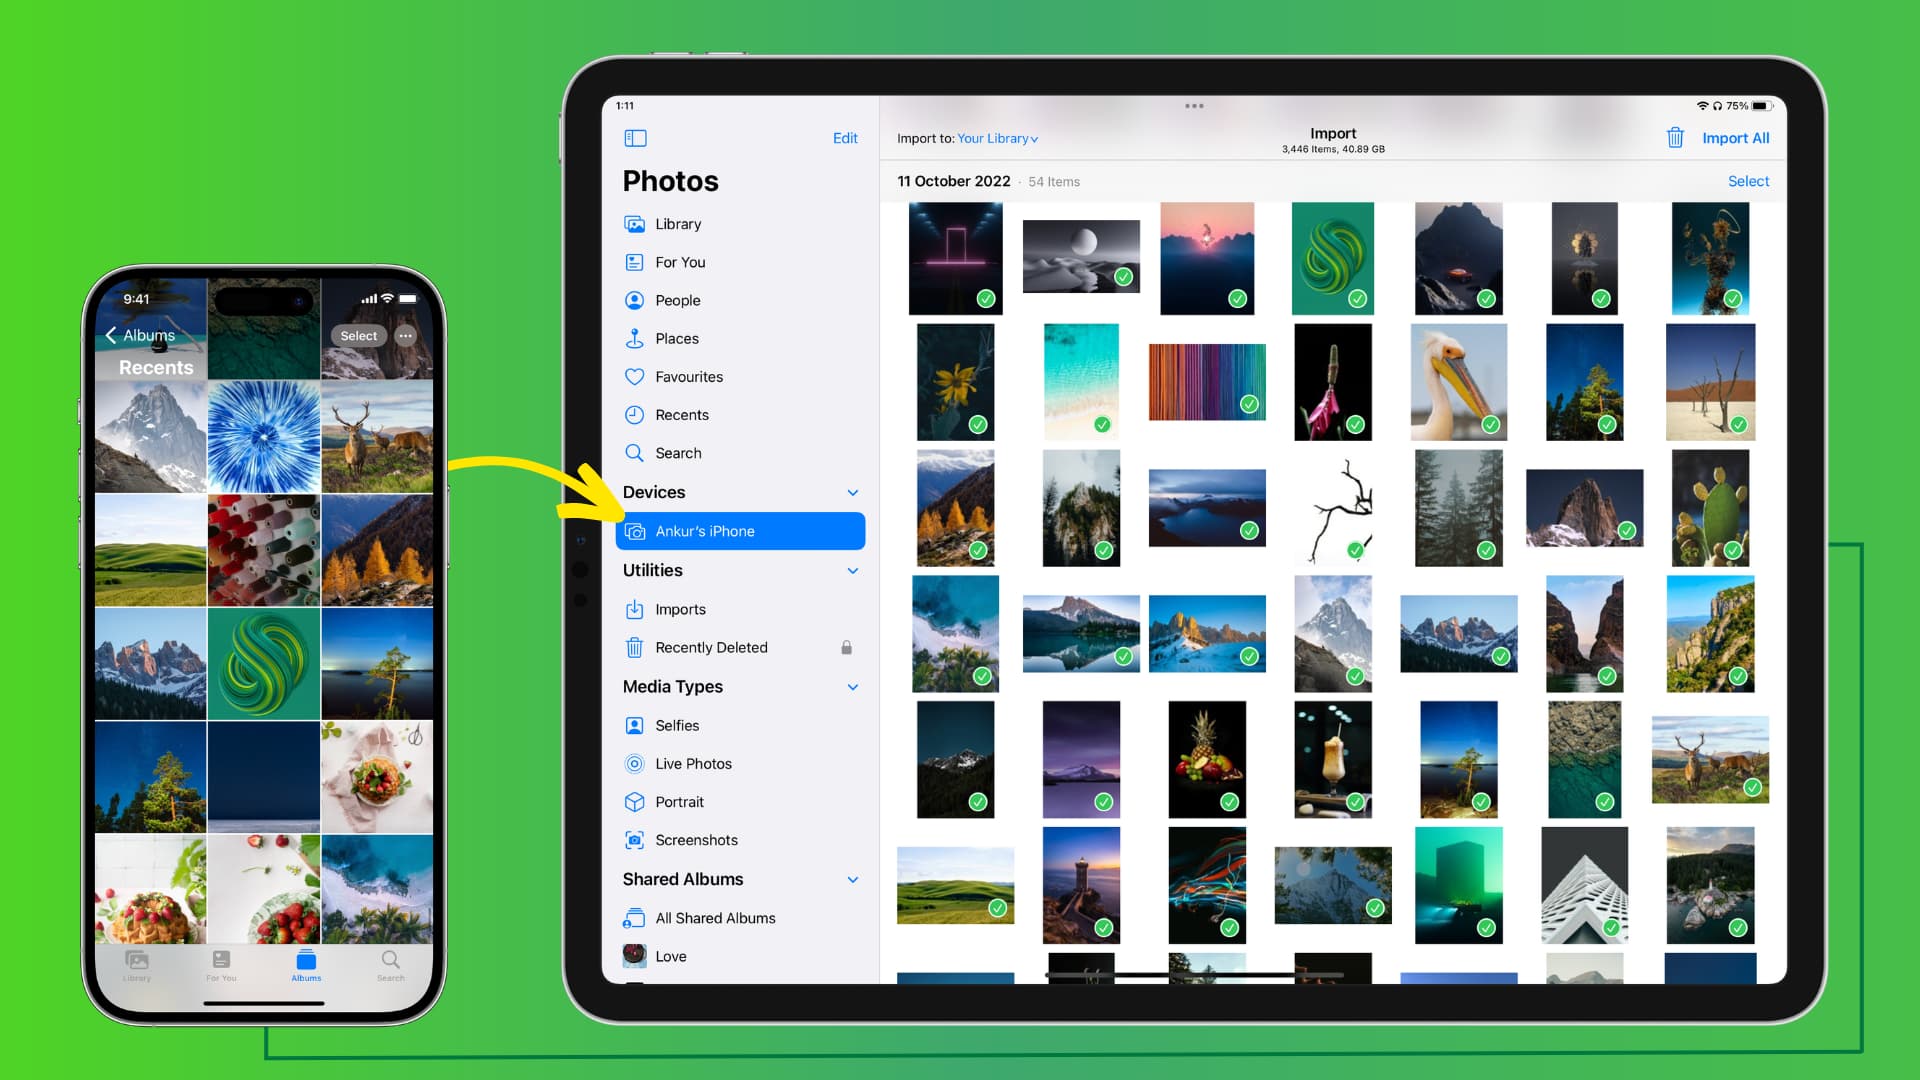
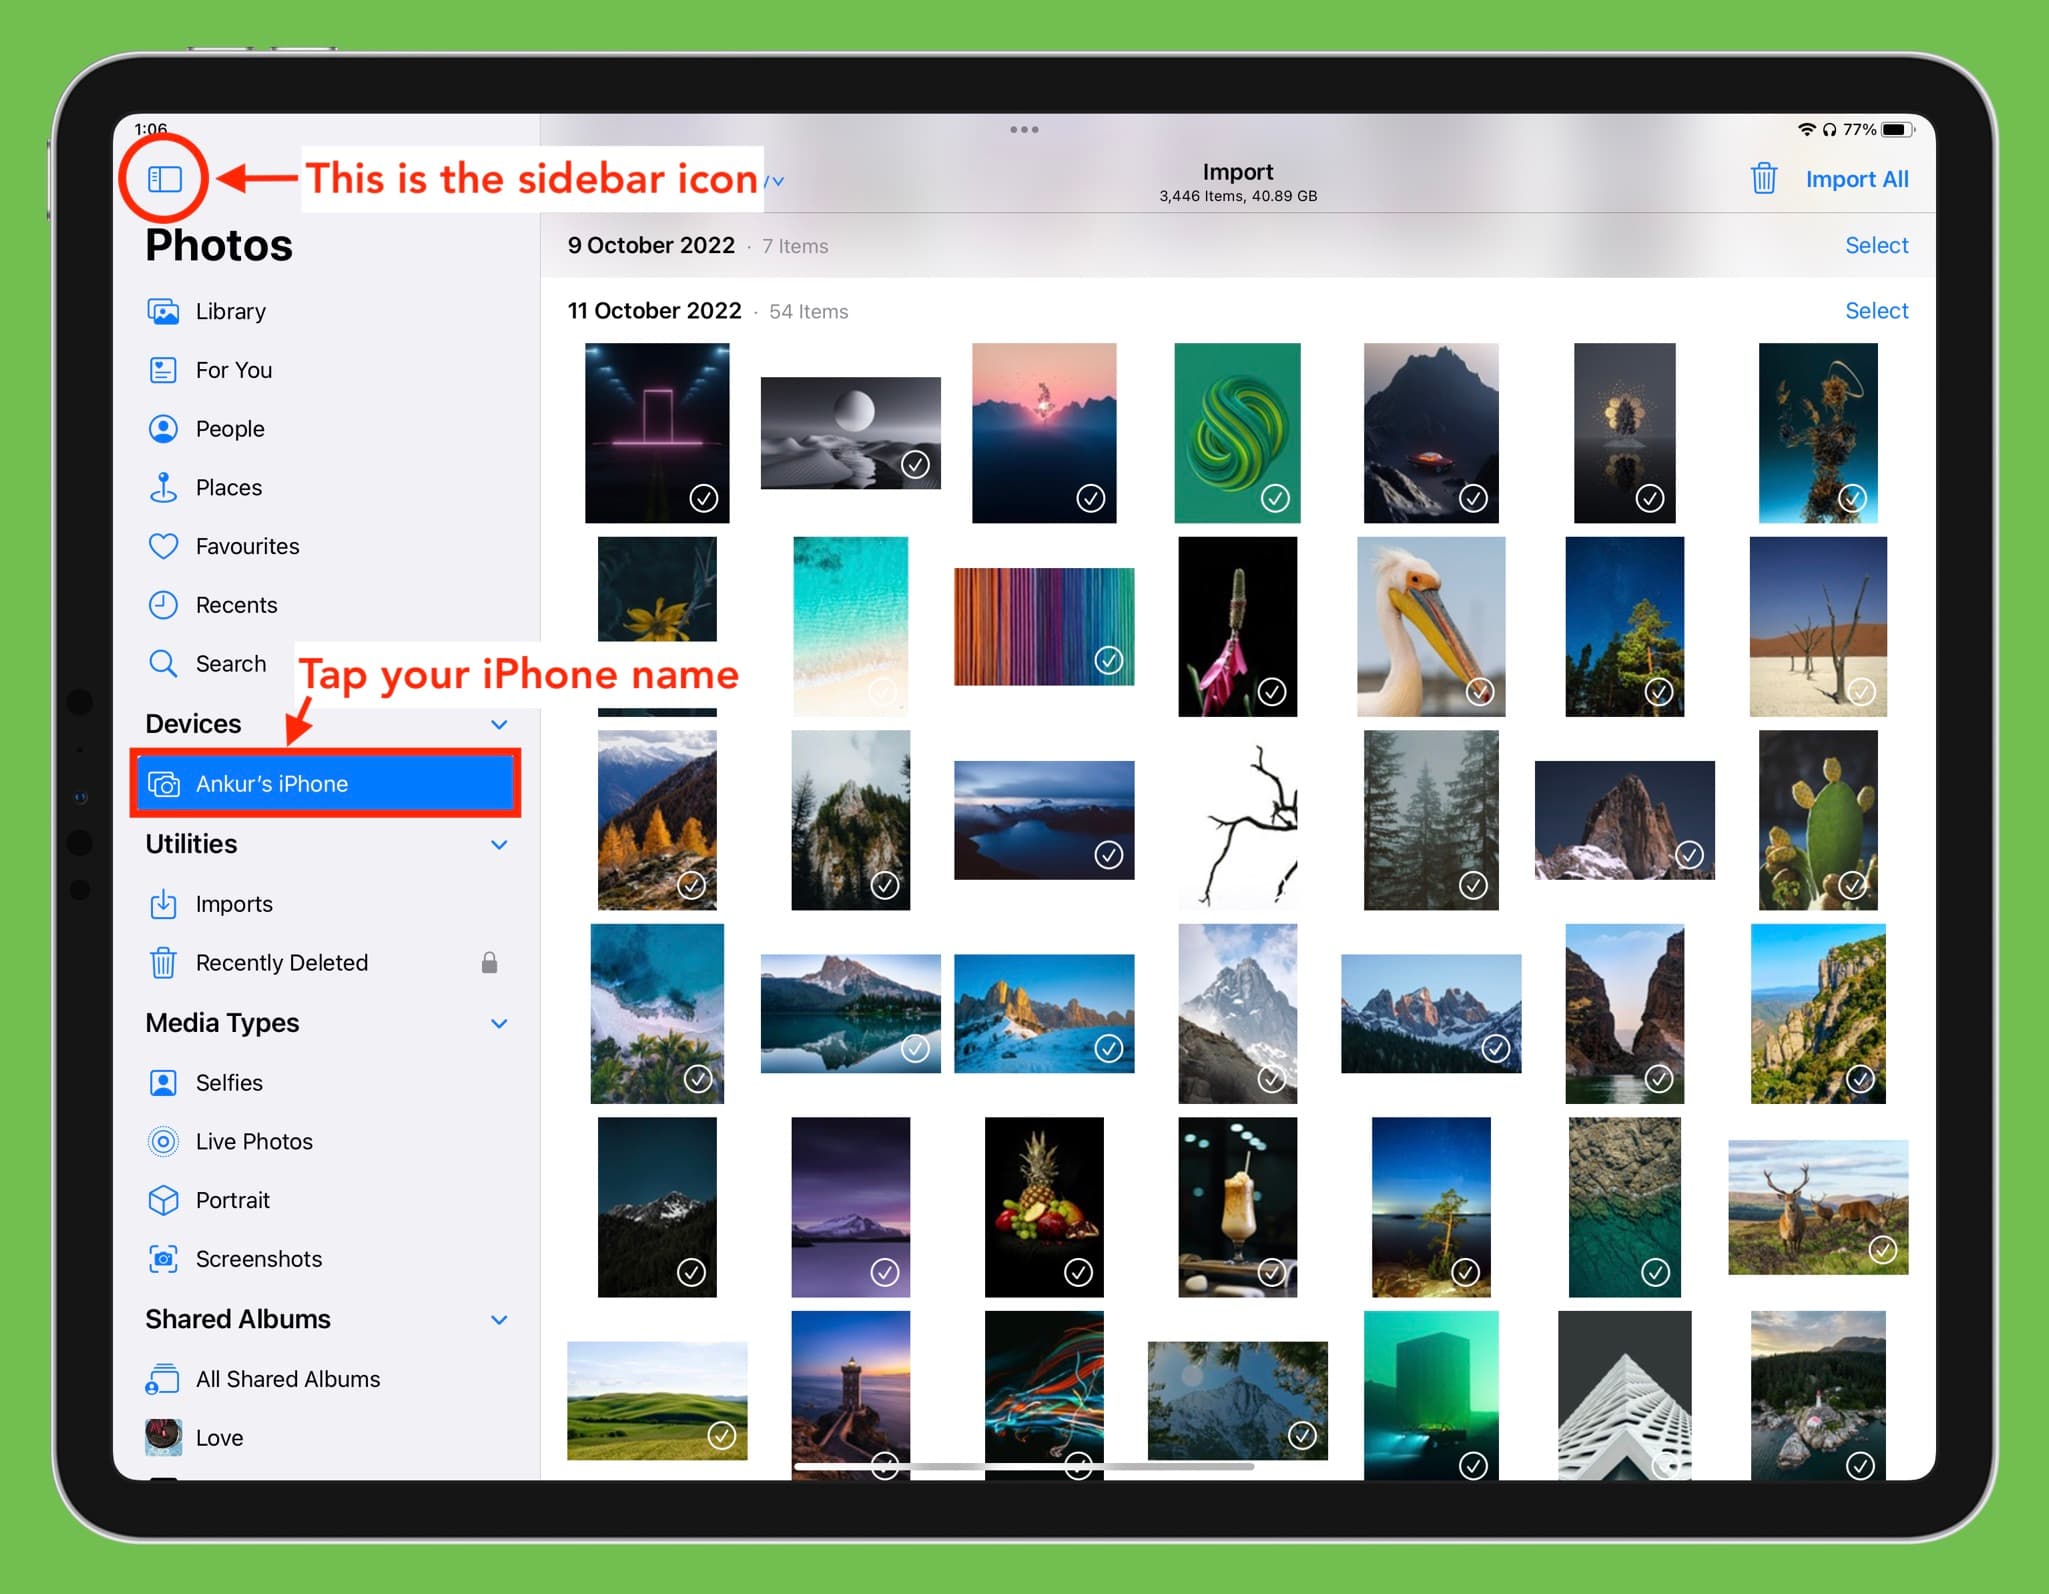
3) Open the Photos app on your iPad. If you don’t see the left sidebar, tap the sidebar icon in the top left.
4) Select your iPhone under the Devices section.
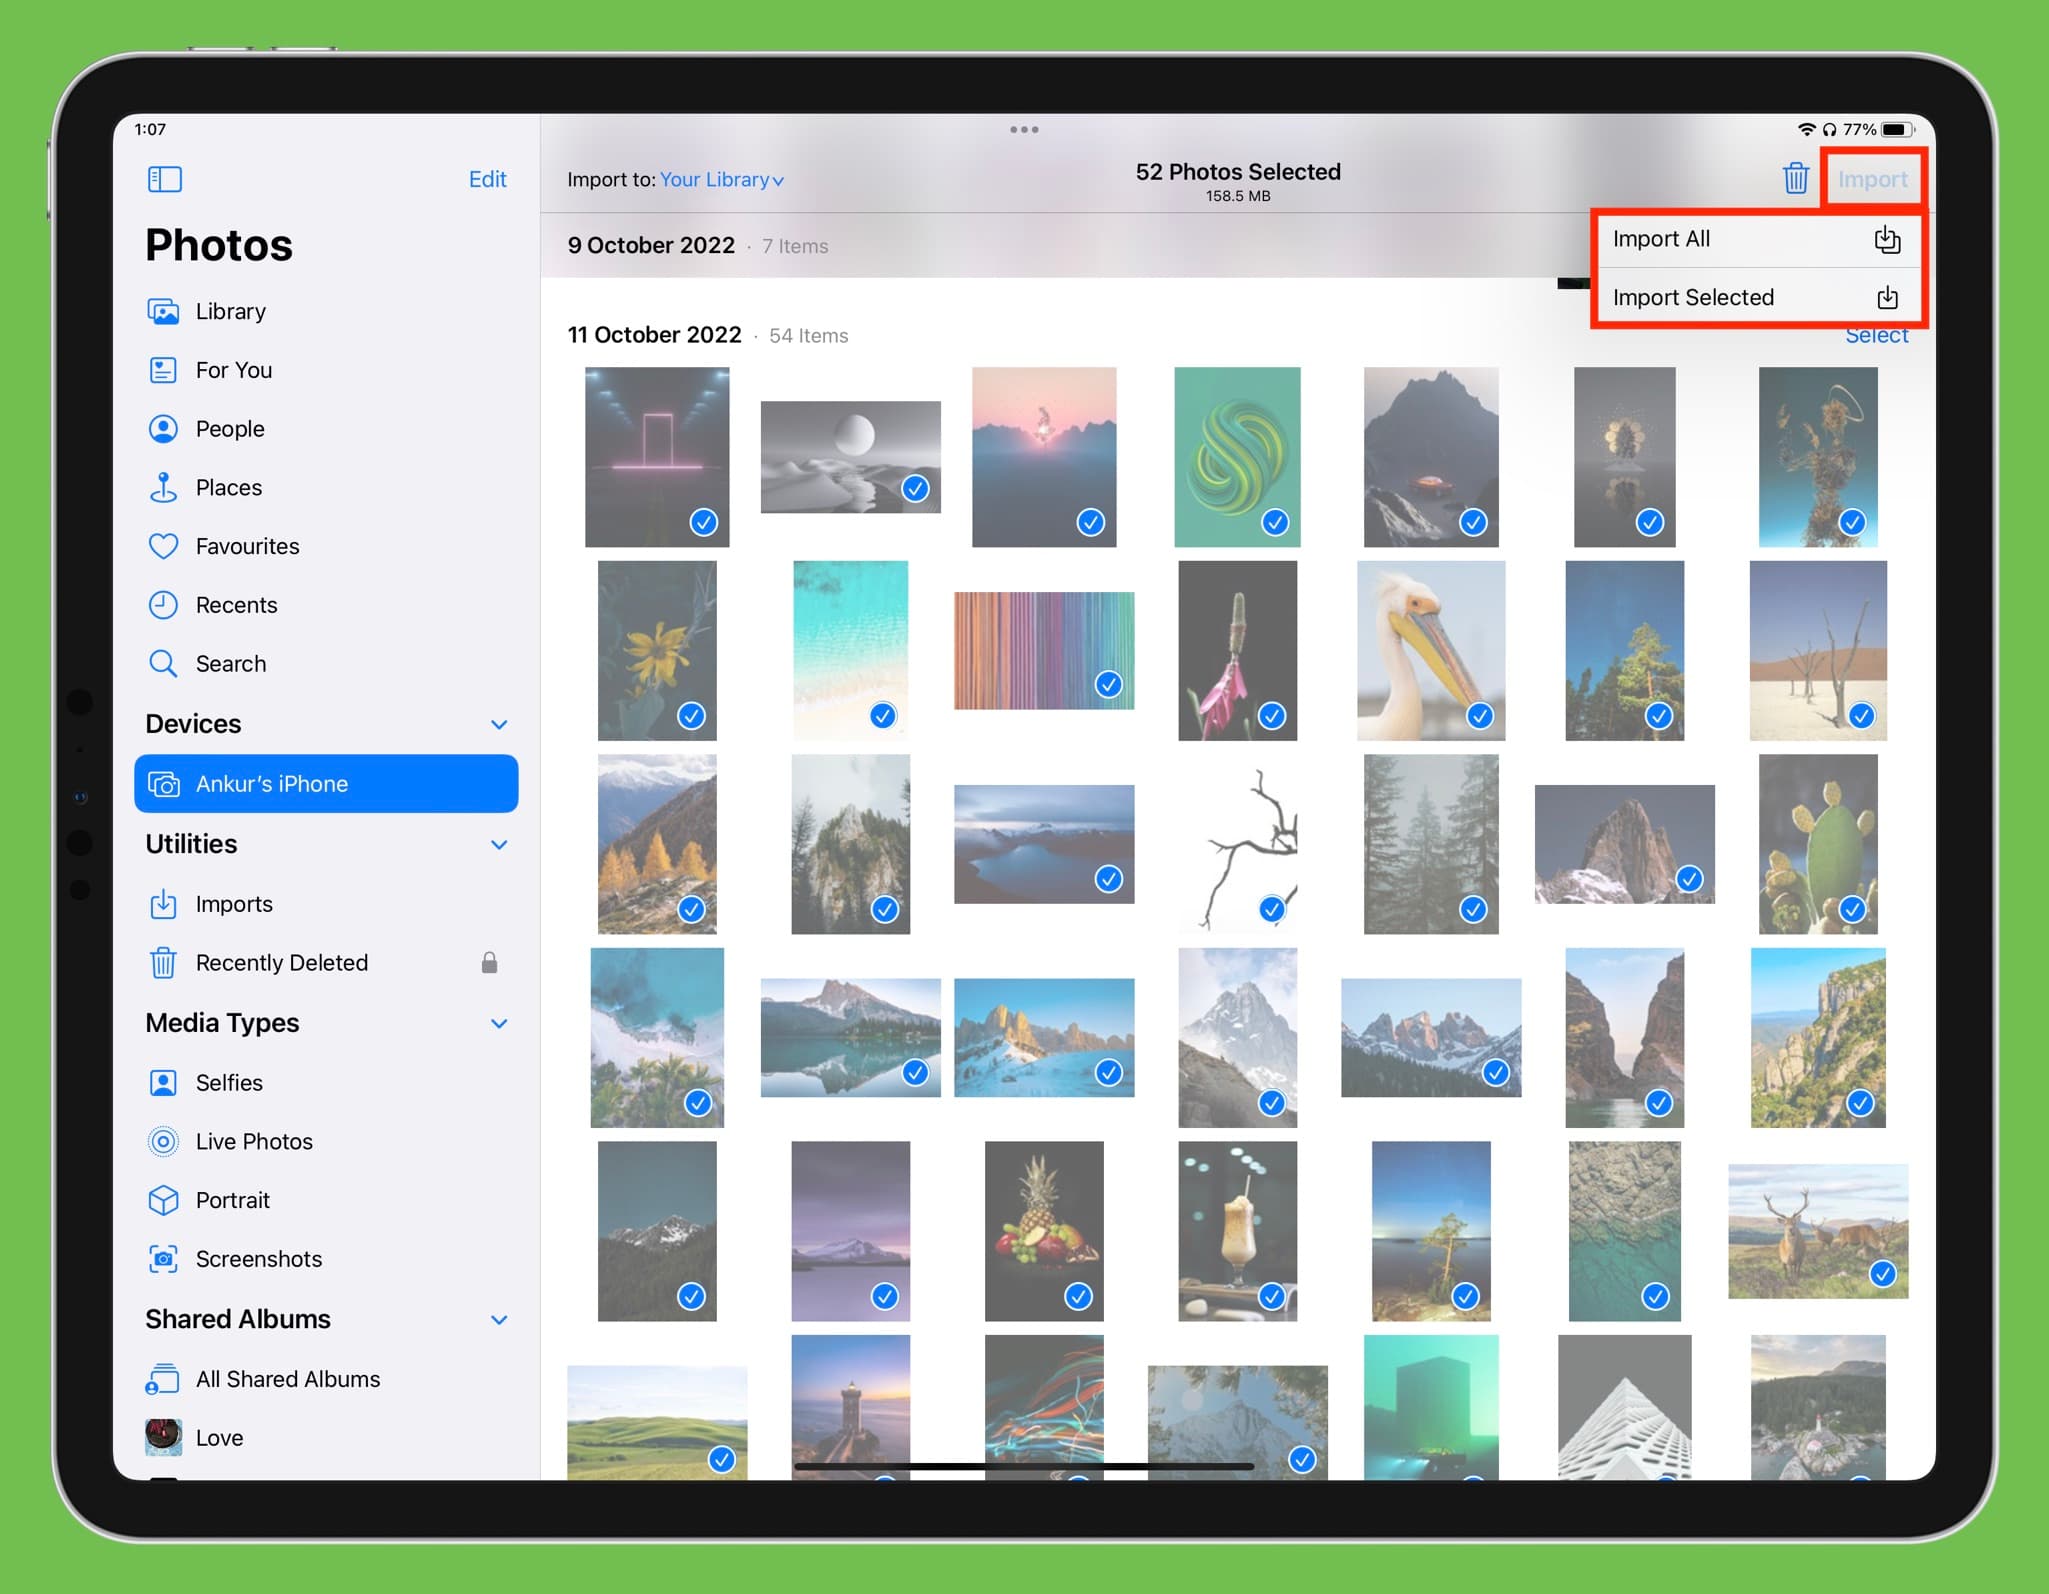
5) You’ll see all your iPhone photos on your iPad’s screen. At the top, the total number of pictures and their combined size will be displayed. The interface here resembles the import screen in Mac’s Photos app.
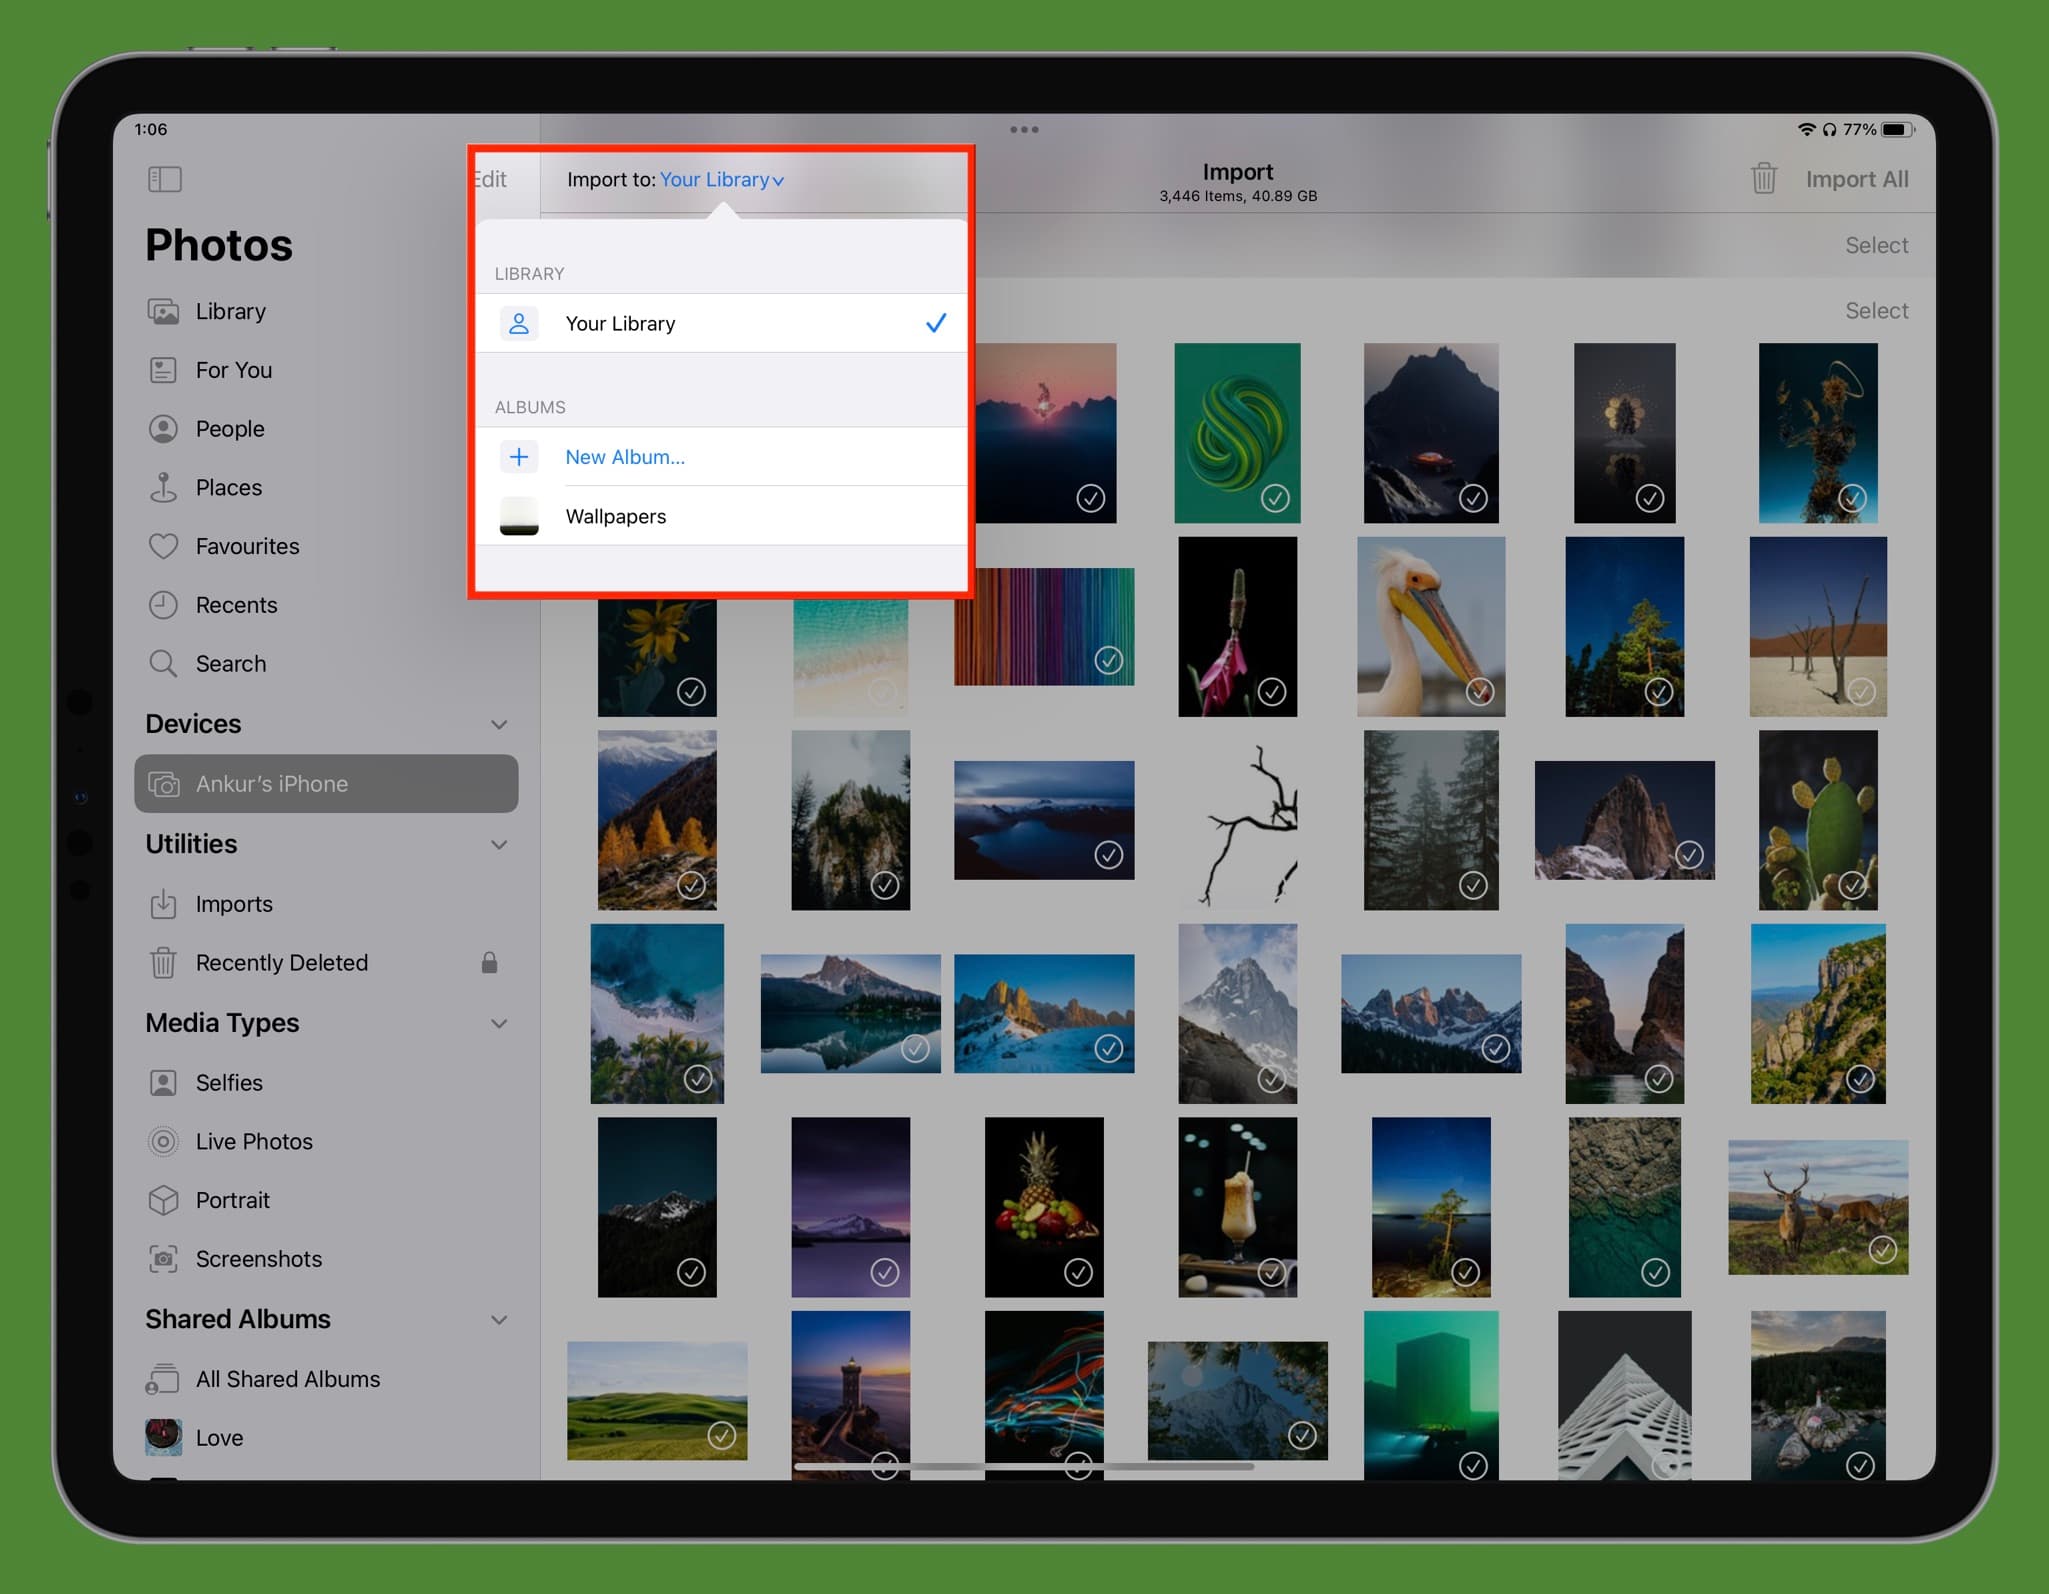
Optional: By default, all images will be imported to your iPad’s Photos library. However, you can tap Your Library to choose an existing album or create a new one to import the photos into.
6) With everything set up, follow these steps to import photos and videos from your iPhone to your iPad:
- Import one photo: Tap an image to select it, then tap Import > Import Selected in the top right.
- Import several photos: Tap multiple items to select them individually, or drag with one finger to select all images in its path. Alternatively, tap Select next to a date to choose all photos from that day. Once you’ve made your selection, tap Import > Import Selected.
- Import all iPhone photos to iPad: Simply tap Import All from the top right or go to Import > Import All.
7) As the images start importing, you’ll see a circular progress bar in the top right of your iPad screen to indicate the status.
Once the import is completed, you can remove those images from your iPhone by tapping Delete or Keep to have them on both your iPhone and iPad.
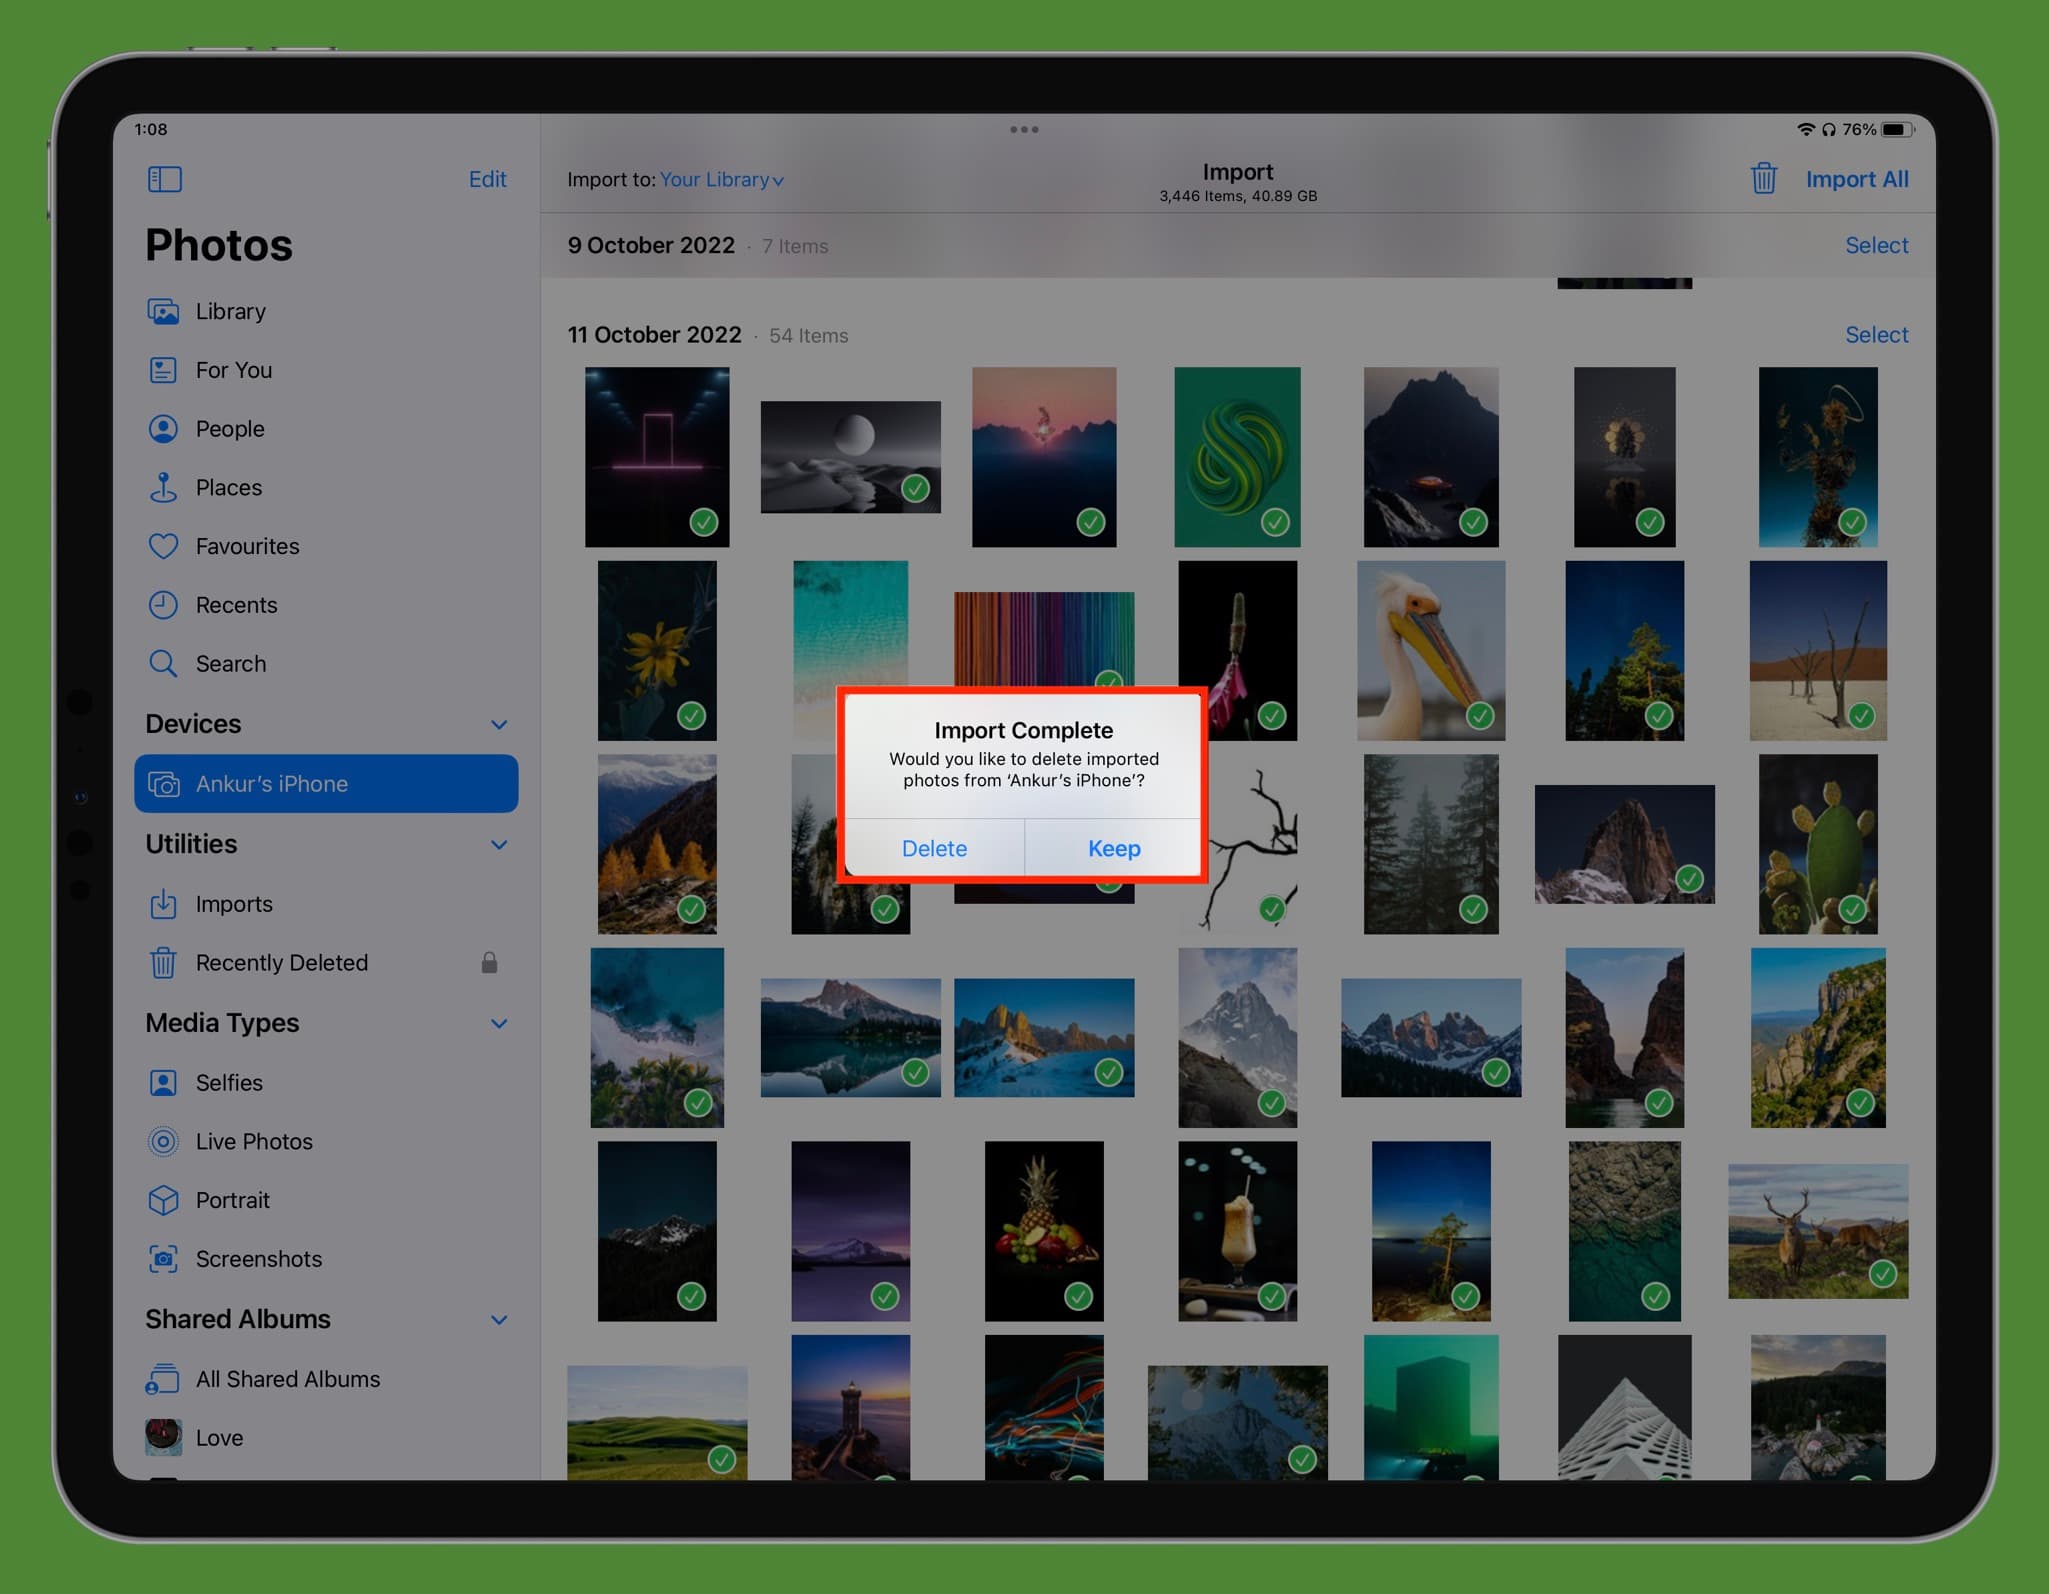
Tip: The photos with green checks mean they are already imported.
Where can you see the imported photos?
You’ll find all the imported media in the Imports, Library, and Recents sections of the iPad Photos app. If you selected an album before importing, open that specific folder to view the transferred photos and videos.

Disconnect iPhone from iPad
Once the transfer is complete, unplug your iPhone’s cable from the iPad to safely disconnect it.
Why importing directly to the iPad Photos app is better than AirDrop
Wireless AirDrop is an excellent way to send pictures, videos, and other files from your iPhone to other Apple devices. However, the wired Photos app method to transfer media has the following advantages:
- Quicker and easier for transferring all photos: Using a cable connection, you can transfer all your iPhone photos to your iPad in just a few taps, even if you have thousands of them! In contrast, using AirDrop for the same task might take hours to complete.
- Comfort: You can see all your iPhone photos comfortably on the large iPad screen and pick and choose the ones you want to import.
- Album selection choice: Photos and videos sent via AirDrop will always go to the main library of the iPad Photos app. However, when you import them via cable, you can choose to save them to a preferred album.
- iPhone remains usable during transfer: When sending files via AirDrop, exiting the Photos app or locking your iPhone may cause the transfer to fail. In contrast, with a wired transfer, you can continue using your iPhone or lock it without interrupting the process.
- It’s reliable: AirDrop has not been at its best in the last few versions of iOS, iPadOS, and macOS. I’ve often found it to fail when sending several large video files. Importing via wire is certainly more reliable, with almost no failure rate.
- Delete after import: Once the images are transferred, you can choose to delete them from your iPhone in one tap.
- No unwanted image conversion: On rare occasions, transferring a PNG file via AirDrop may forcefully convert it to a different format, such as JPG. There is no [known] risk of this happening when transferring via cable.
Use wired AirDrop

In addition to the above method, you can connect your iPhone and iPad with an appropriate cable and then AirDrop selected images from your phone to your tablet. Since both devices are connected via a wire, AirDrop will use the wired connection to transfer the files.
If you use iCloud Photos
If you already use iCloud Photos with the same Apple ID on your iPhone and iPad, all your photos and videos will automatically appear on both devices as long as they are connected to the internet. In that case, there’s no need to transfer the files manually using AirDrop, a cable, or any other method.
Other transfer tips: