In this tutorial, we’ll show you how to stop all your Apple devices, including HomePod and Vision Pro, from automatically downloading and installing software updates.
Why turn off automatic software updates
Software updates typically bring new features, fix bugs, and improve stability and compatibility with apps. Therefore, we recommend keeping your devices updated.
However, you may want to stop your devices from automatically downloading and installing updates for the following reasons:
- You’ve learned from social media or other forums that the latest update has introduced issues like battery drain or removed a feature you found useful. As a result, you’re waiting for Apple to fix these in a future update.
- You have a capped internet plan, or you use Personal Hotspot with your Mac and don’t want it to unknowingly download large update files in the background.
- You want the best possible speeds for web browsing and file downloads.
- You rely on an outdated app that may not work with the next version of iOS, and its app developer has no plans to update it.
- Your device downloads the update file and irritates you with an unremovable red badge on the Settings app or repeated popups asking you to install the update. Related: How to remove a software update that’s already downloaded (but not yet installed)
- Auto-downloading and installing software updates can make your device unusable for a short time, which might be inconvenient, especially when your Mac is in the middle of downloading a large, important file.
- You want to jailbreak your iPhone and, therefore, don’t want to install any new, unsupported iOS updates.
Stop software updates from downloading and installing automatically
Once you prevent your device from automatically downloading updates, it will also stop automatic installation. However, you can choose to disable automatic software installation without turning off automatic downloads.
iPhone, iPad, and Vision Pro
- Open the Settings app and go to General > Software Update.
- Tap Automatic Updates.
- Turn off iOS Updates, iPadOS Updates, or visionOS Updates under the Automatically Download section.

Note: You should keep the switch for ‘Security Responses & System Files‘ enabled.
Related:
- How to stop your iPhone or iPad from automatically downloading app updates
- How to cancel in-progress app updates on your iPhone or iPad
- How to know the exact file size of an app or update for your iPhone
Apple Watch
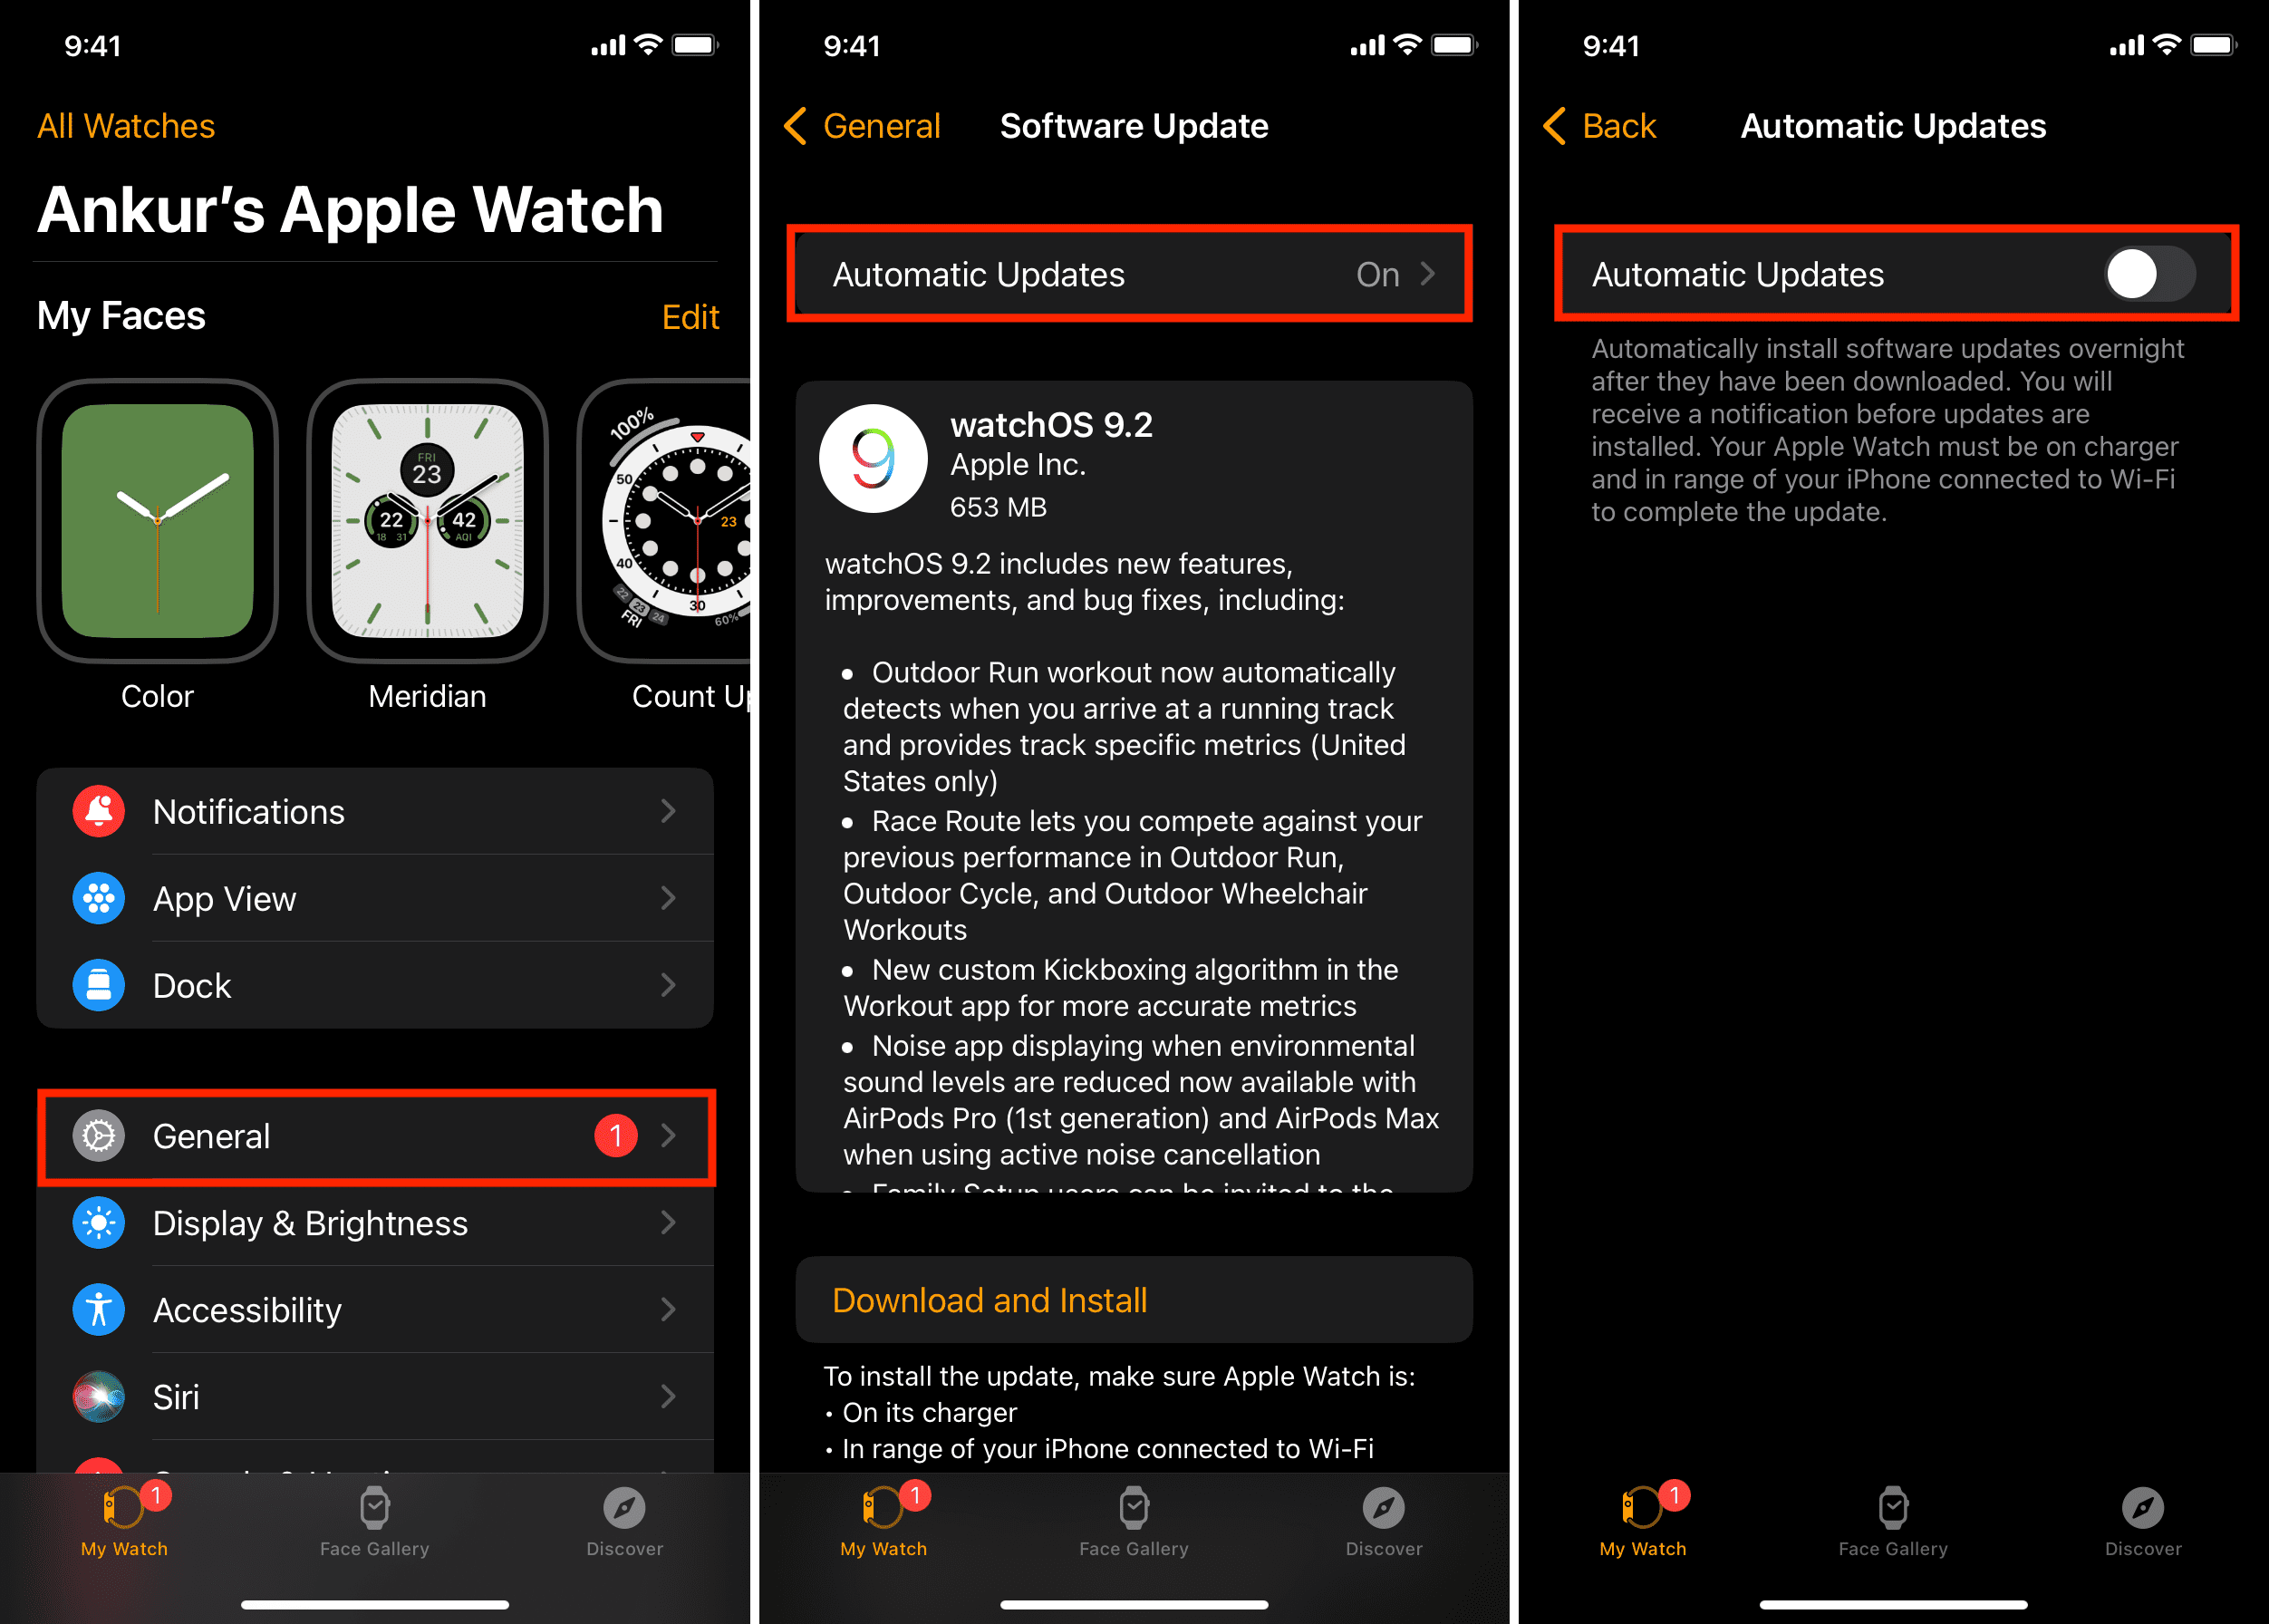
- Open the Watch app on your iPhone.
- Go to My Watch > General > Software Update.
- Tap Automatic Updates.
- Turn off the switch for Automatic Updates.
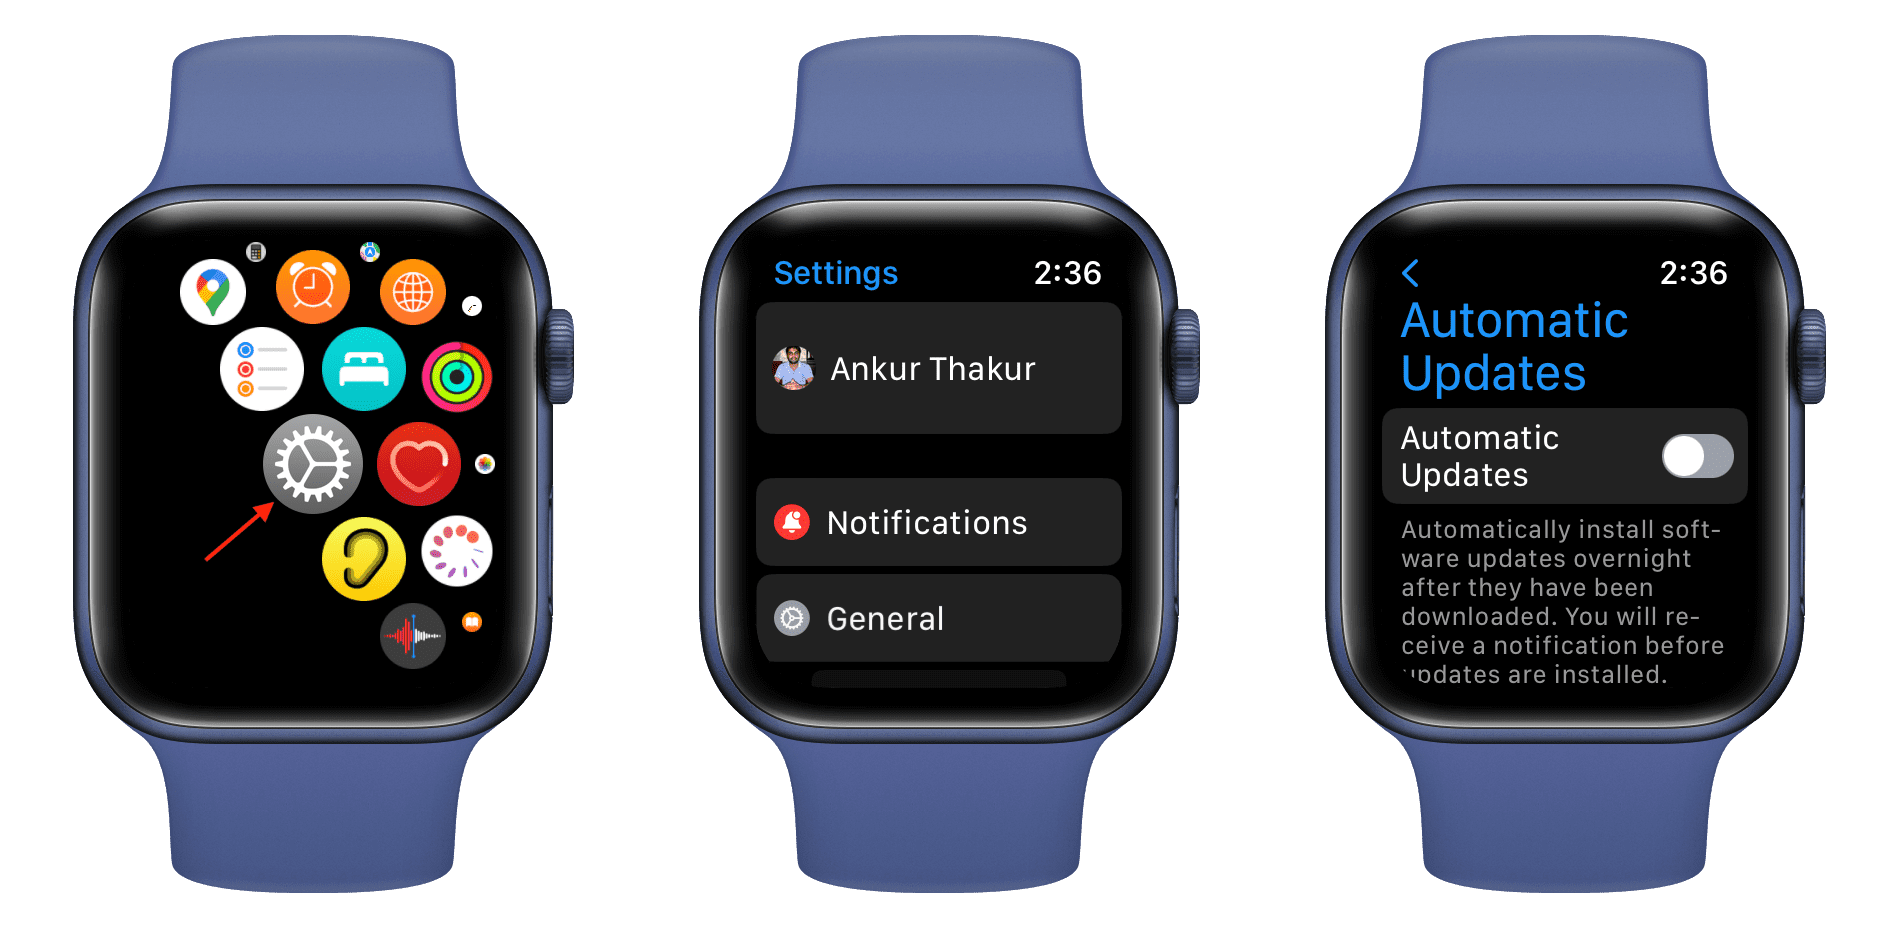
You can also stop your Apple Watch from updating automatically by going to Settings > General > Software Update > Automatic Updates.
Mac
- Open System Settings and go to General > Software Update.
- Click the info button ⓘ next to Automatic updates.
- Turn off the switch for ‘Download new updates when available‘ and click Done.
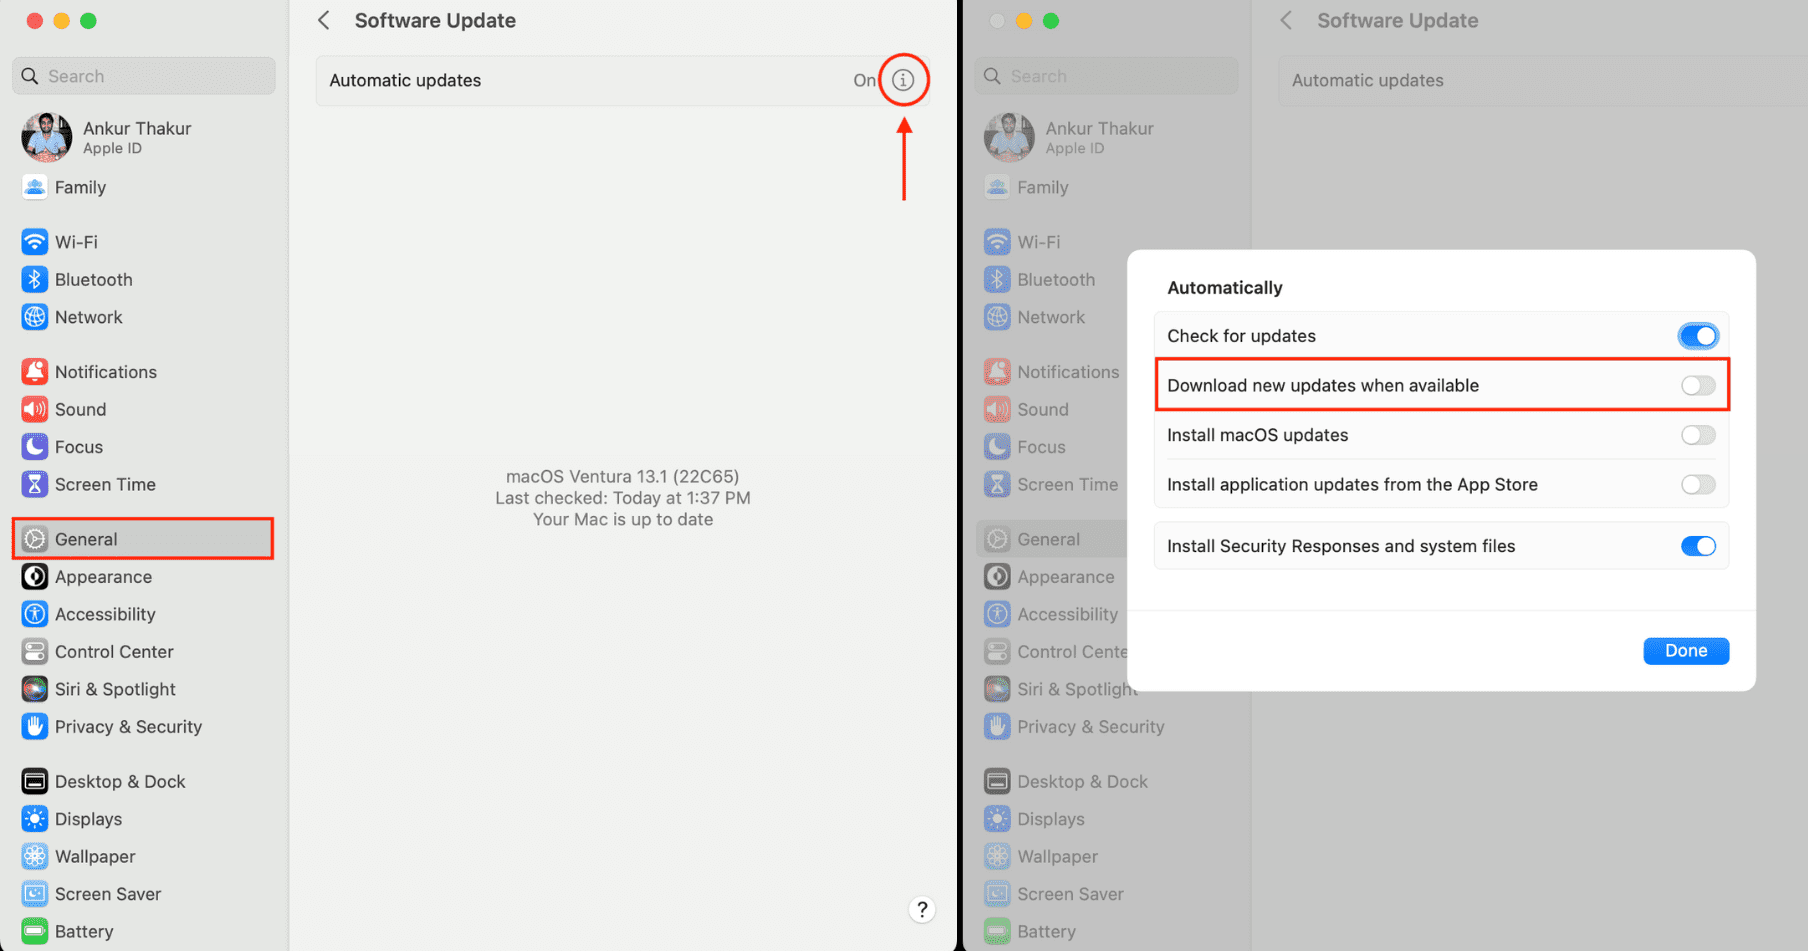
Note: You can keep ‘Check for updates’ on. This will only notify you when a new macOS update is available—it doesn’t auto-download them. Additionally, we recommend keeping ‘Install Security Responses and system files’ enabled for obvious security reasons.
On older versions of macOS, like macOS Monterey and earlier, go to System Preferences > Software Update to turn off automatic updates.
Related:
- All the ways you can update apps on your Mac
- How to see the exact dates when apps and macOS were last updated on your Mac
HomePod
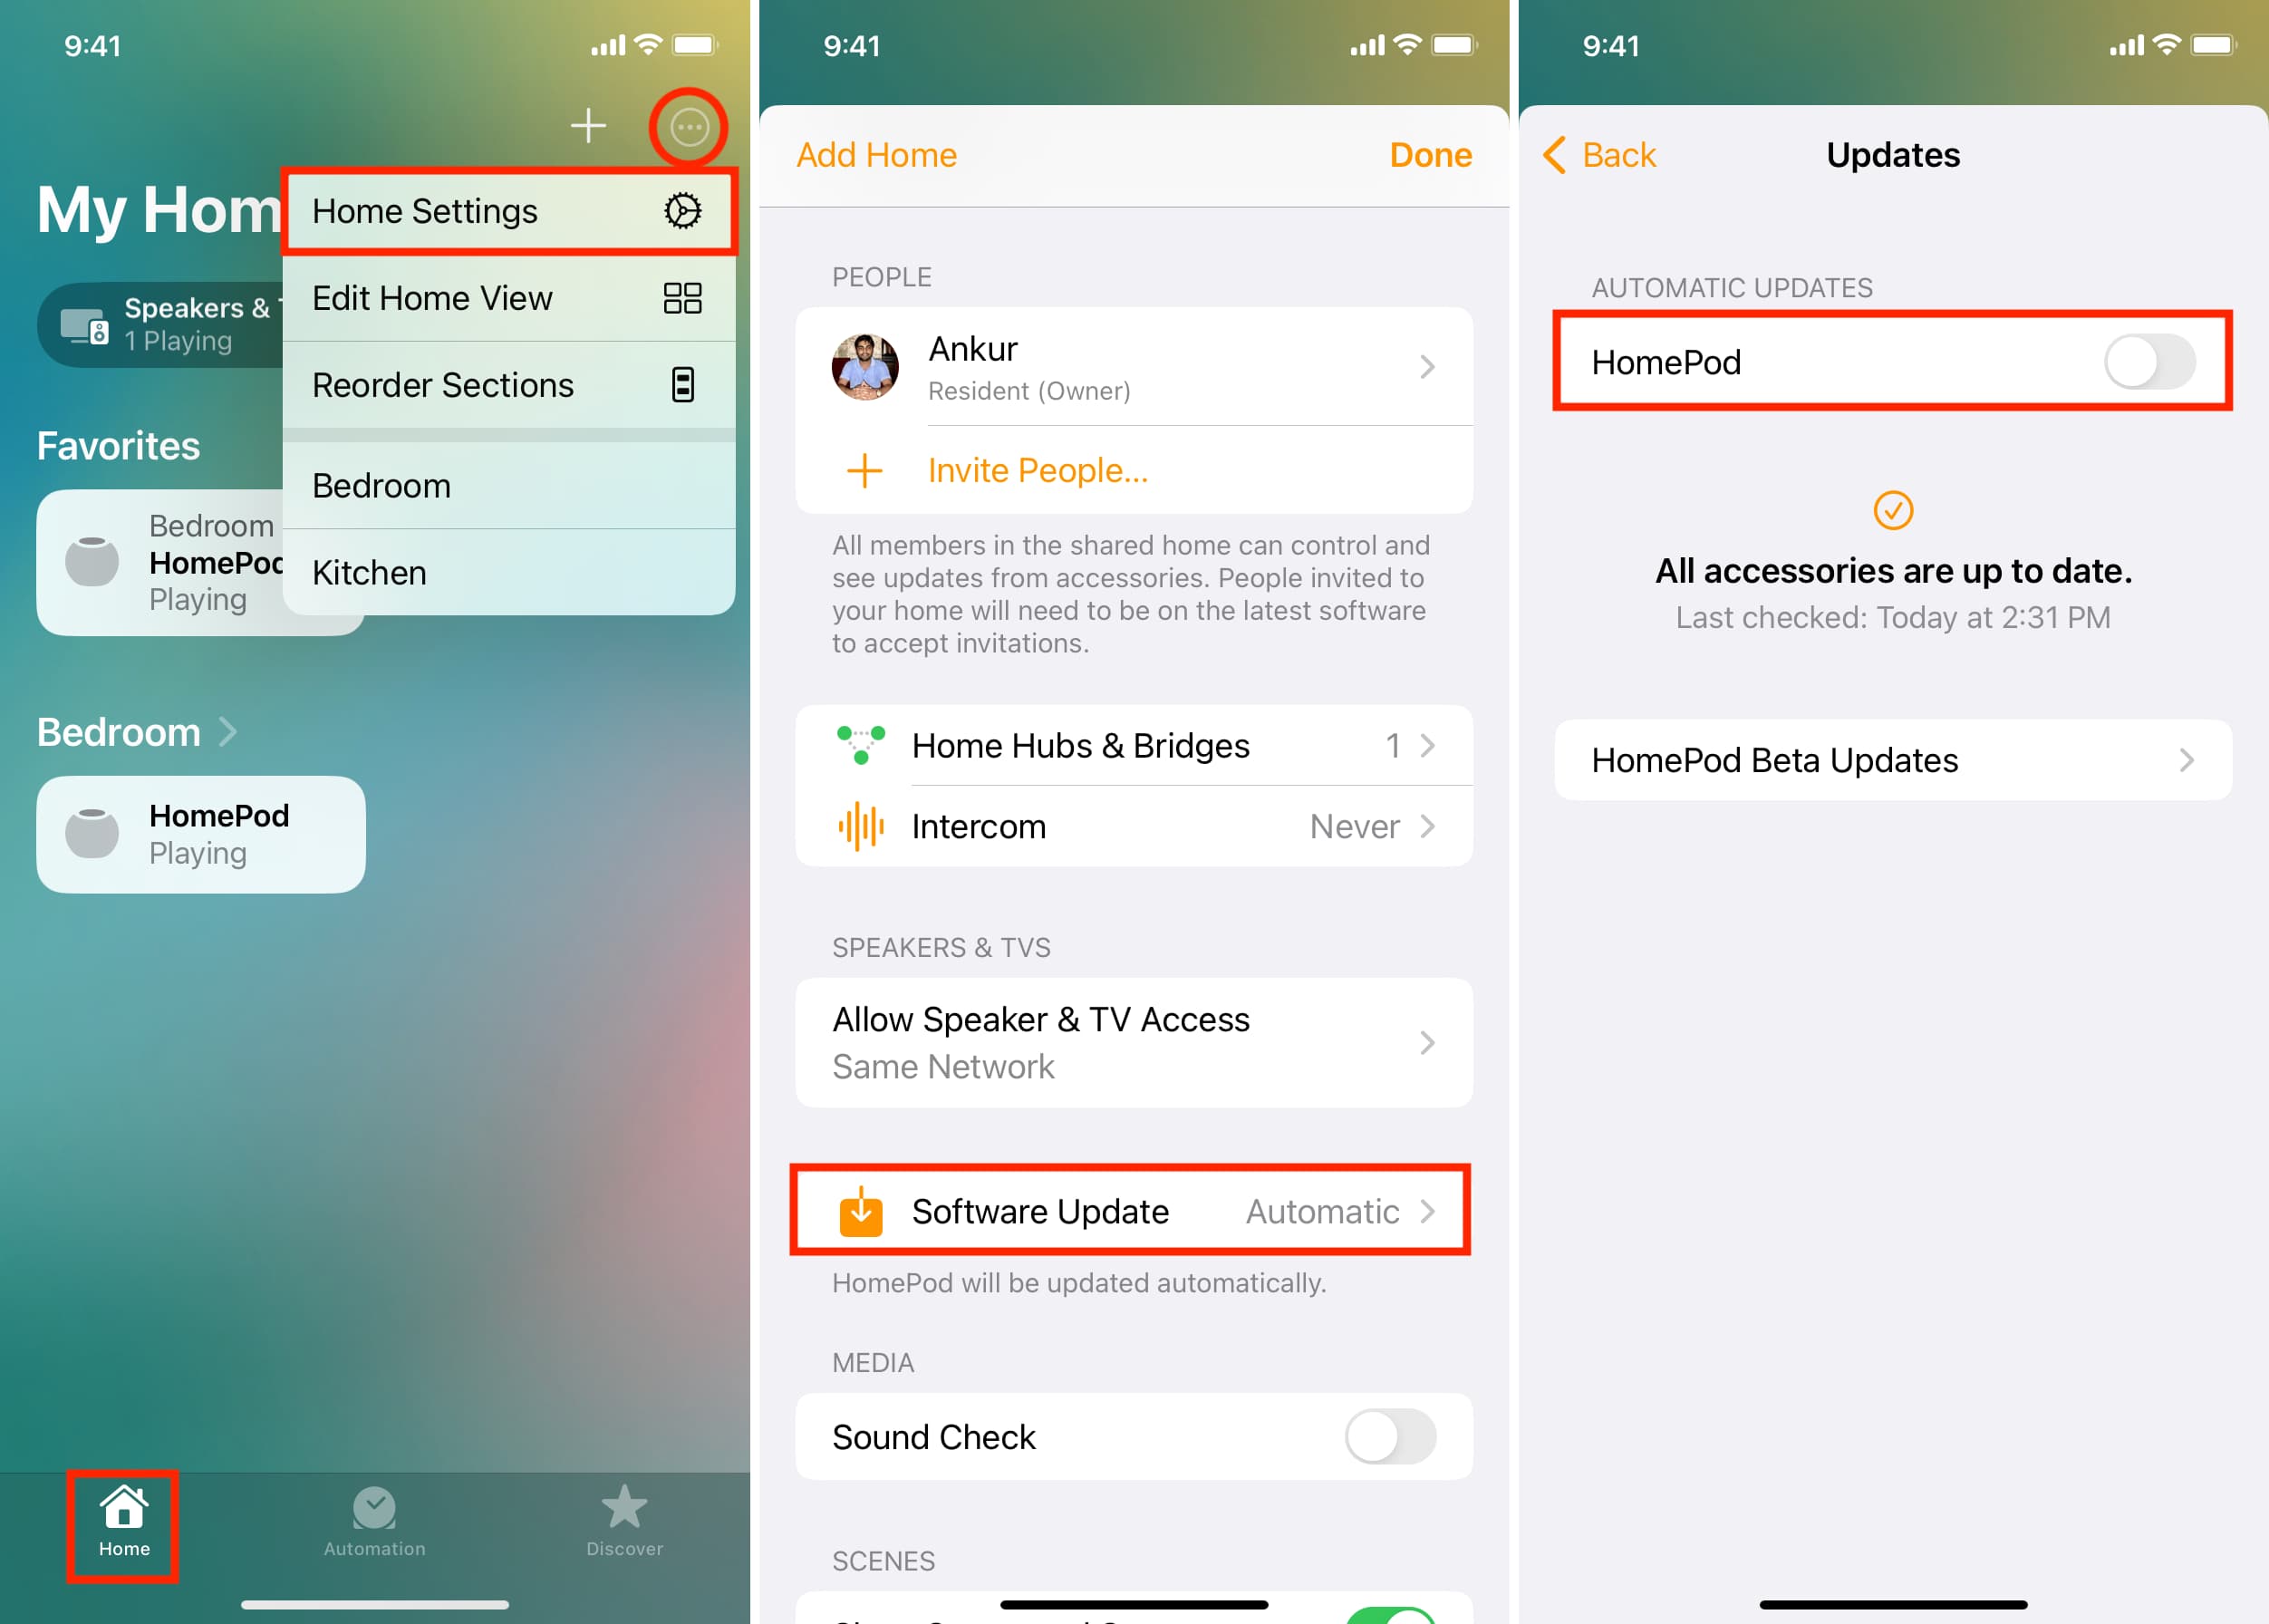
- Open the Home app on your iPhone, iPad, or Mac.
- Tap the three dots icon in the top right of the Home section and select Home Settings.
- Tap Software Update.
- Turn off the switch for HomePod under the Automatic Updates heading.
Apple TV
- Go to Settings > System > Software Updates.
- Turn off Automatically Update.

Next, check out: