Learn how to reset the passcode on your iPhone or iPad in case you’ve forgotten it so you can unlock the device and regain access to your apps, settings, photos, etc.
Before we proceed, we’ll attempt to back up your iPhone or iPad, even if it’s disabled or locked. This will ensure your data is safe. If for some reason the backup fails, all is not lost; you should be able to recover any data saved in iCloud or Google, like contacts, messages, calendar events, apps, and more.
With that said, follow along with us as we show you seven different ways to reset a forgotten iPhone or iPad passcode.
1. If you changed the passcode in the last 72 hours
If you recently set a new iPhone passcode only to forget it shortly after, you have 72 hours to reset it using your old passcode. This is the only way to regain access to the device without erasing it and losing all data. After the 72-hour cutoff period, your only options are one of the solutions below.

2. Reset the passcode via Security Lockout
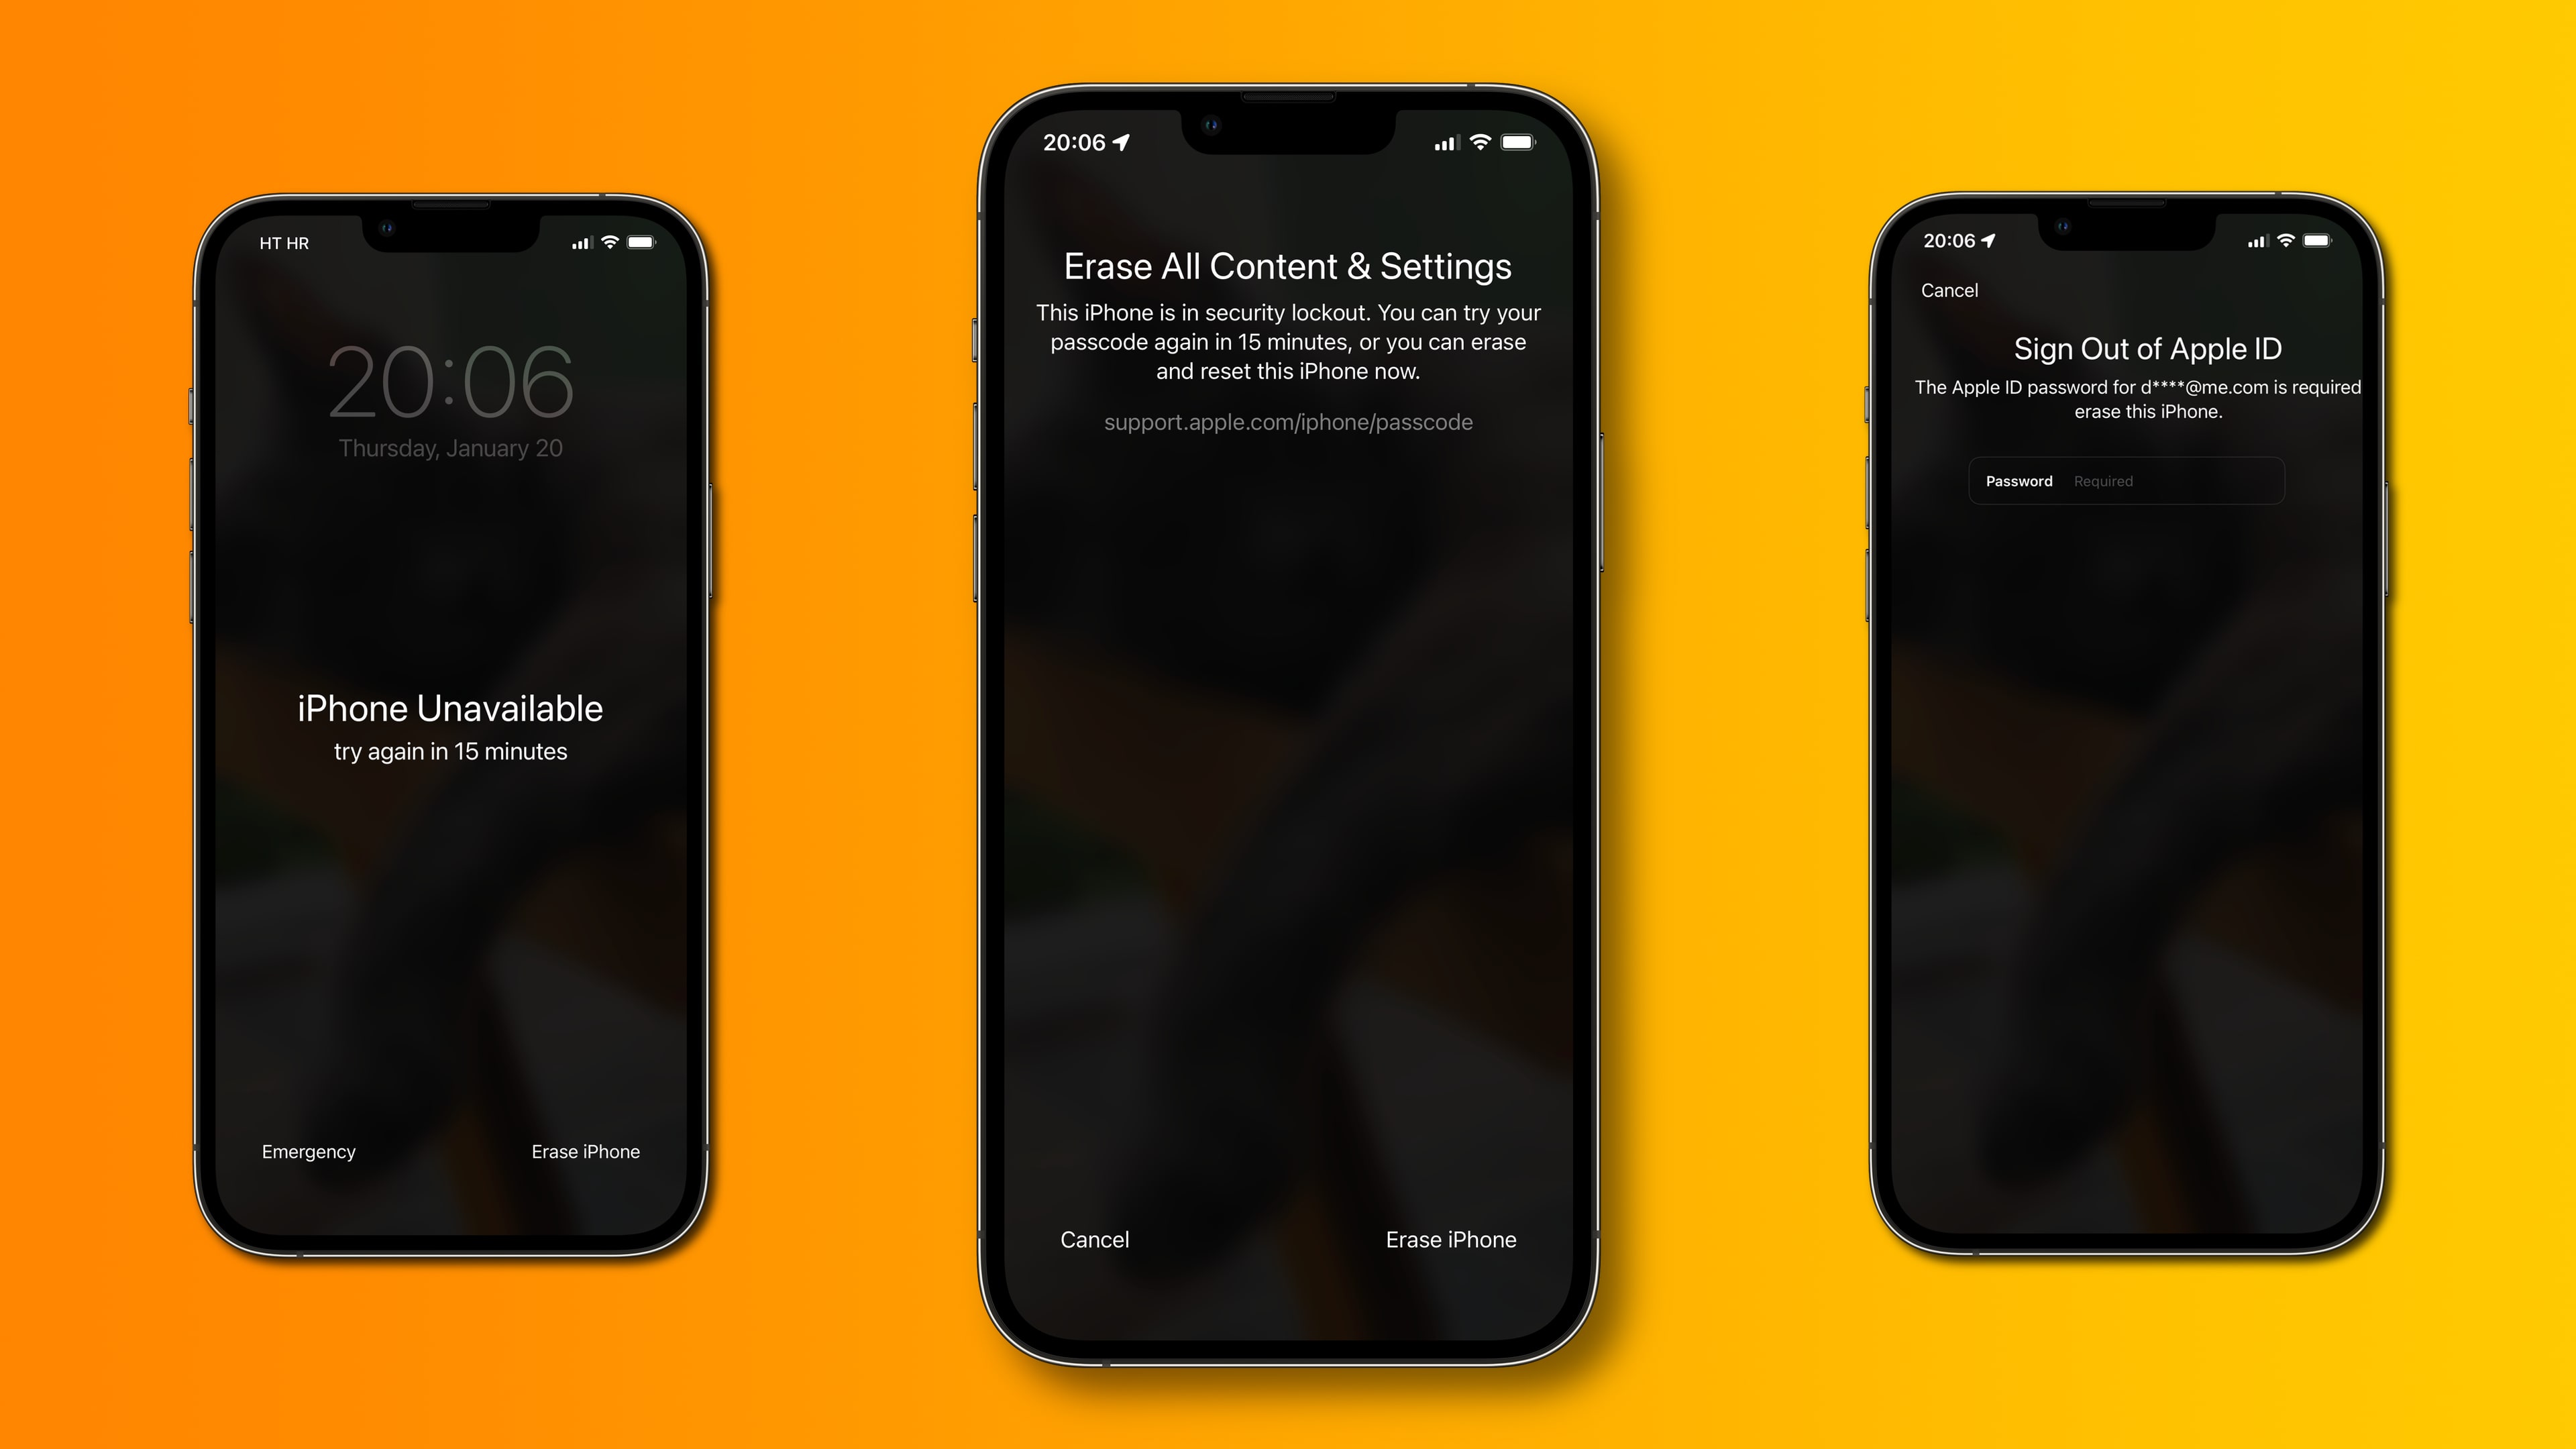
You can reset and erase a locked iPhone without a computer. After too many failed passcode attempts, your iPhone enters Security Lockout mode that allows you to erase the device by providing your Apple account credentials.
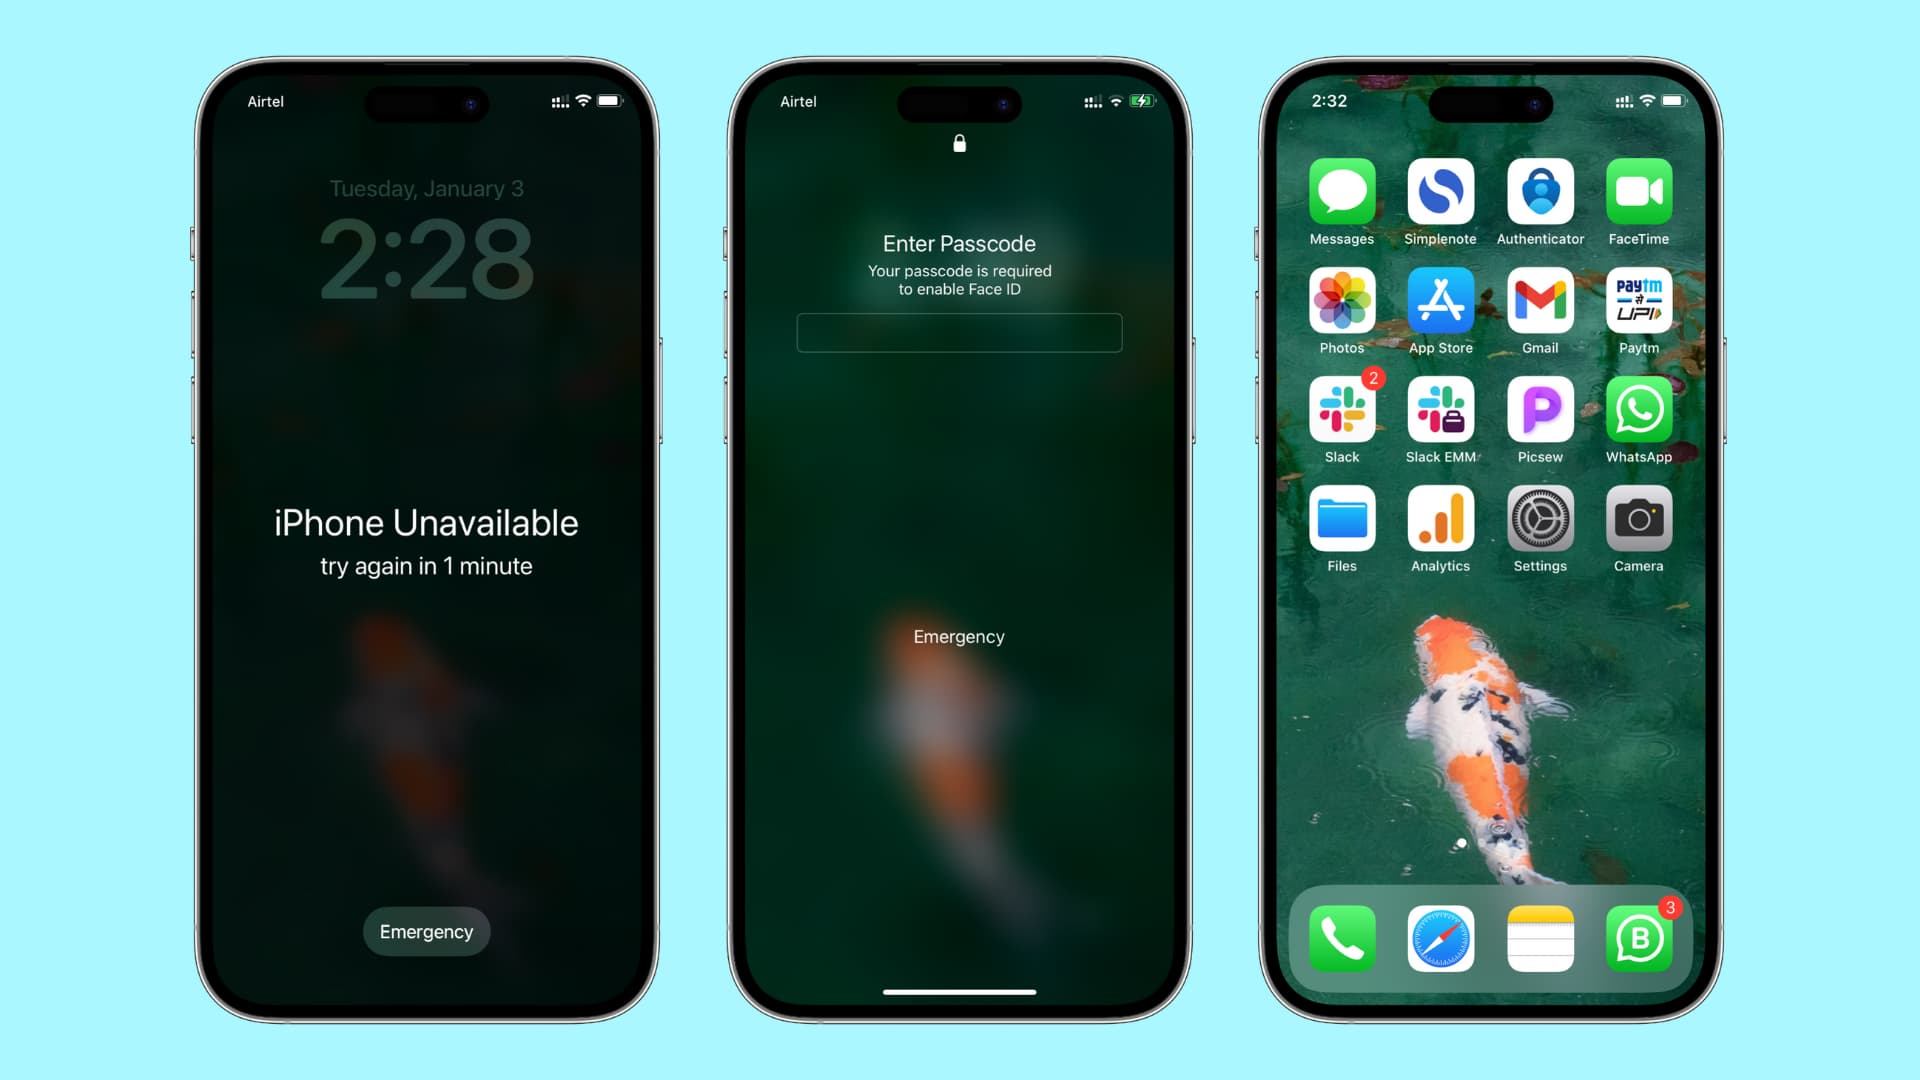
1) Enter an incorrect passcode on the Lock Screen until a message appears, saying to try again later.
2) Keep entering the wrong passcode until an Erase iPhone option appears at the bottom.
3) Tap Erase iPhone, then hit Erase iPhone again to confirm the action.
4) Enter your Apple account password. This will sign you out of your Apple account on this iPhone.
5) Select Erase iPhone to permanently delete all of your data, settings, and more.
6) The device will restart and show iOS setup. Follow the onscreen instructions to set up your iPhone again, restore your data and settings from a backup, and create a new passcode.
3. Enter Recovery Mode
You’ll need to connect your iPhone to a Mac to use Recovery Mode. If you don’t own a Mac, borrow one from a friend or family member. Or, visit your nearest Apple Store and ask specialists to help you.
1) Be sure your iPhone isn’t plugged into a computer and then turn the device off.
2) Plug one end of the cable into your iPhone.
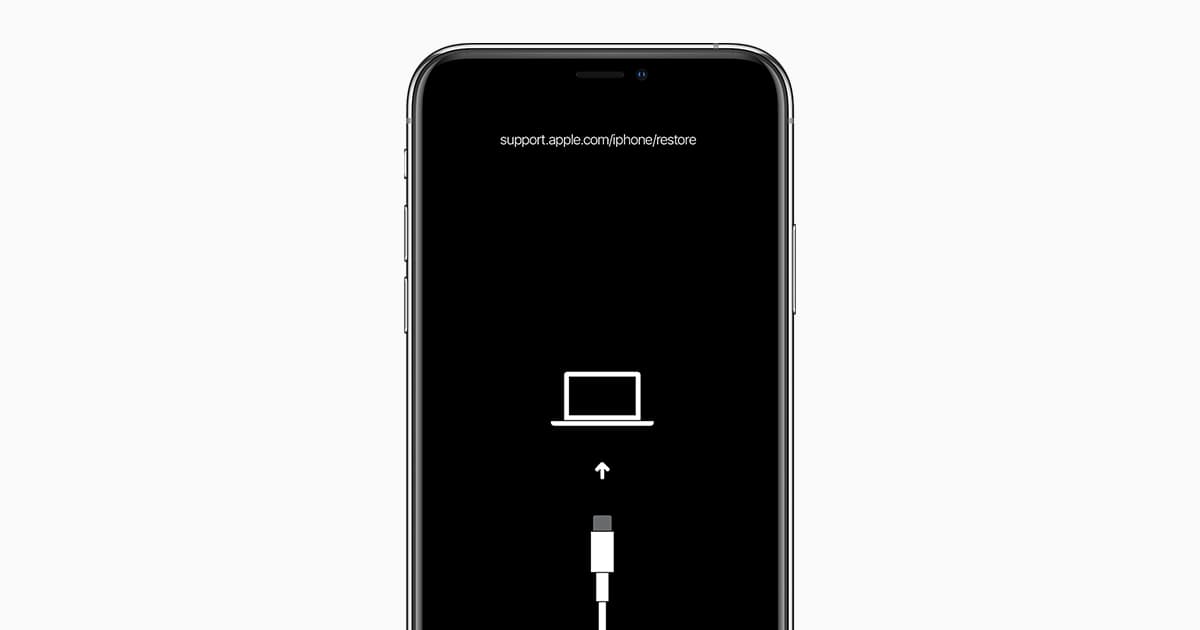
3) Click and hold the iPhone’s power button and immediately plug the other end of the cable into your Mac. Keep holding the button until the Recovery Mode screen appears, displaying a white cable pointing toward a MacBook. If the Recovery Mode screen doesn’t appear, turn the device off and follow the above steps again.
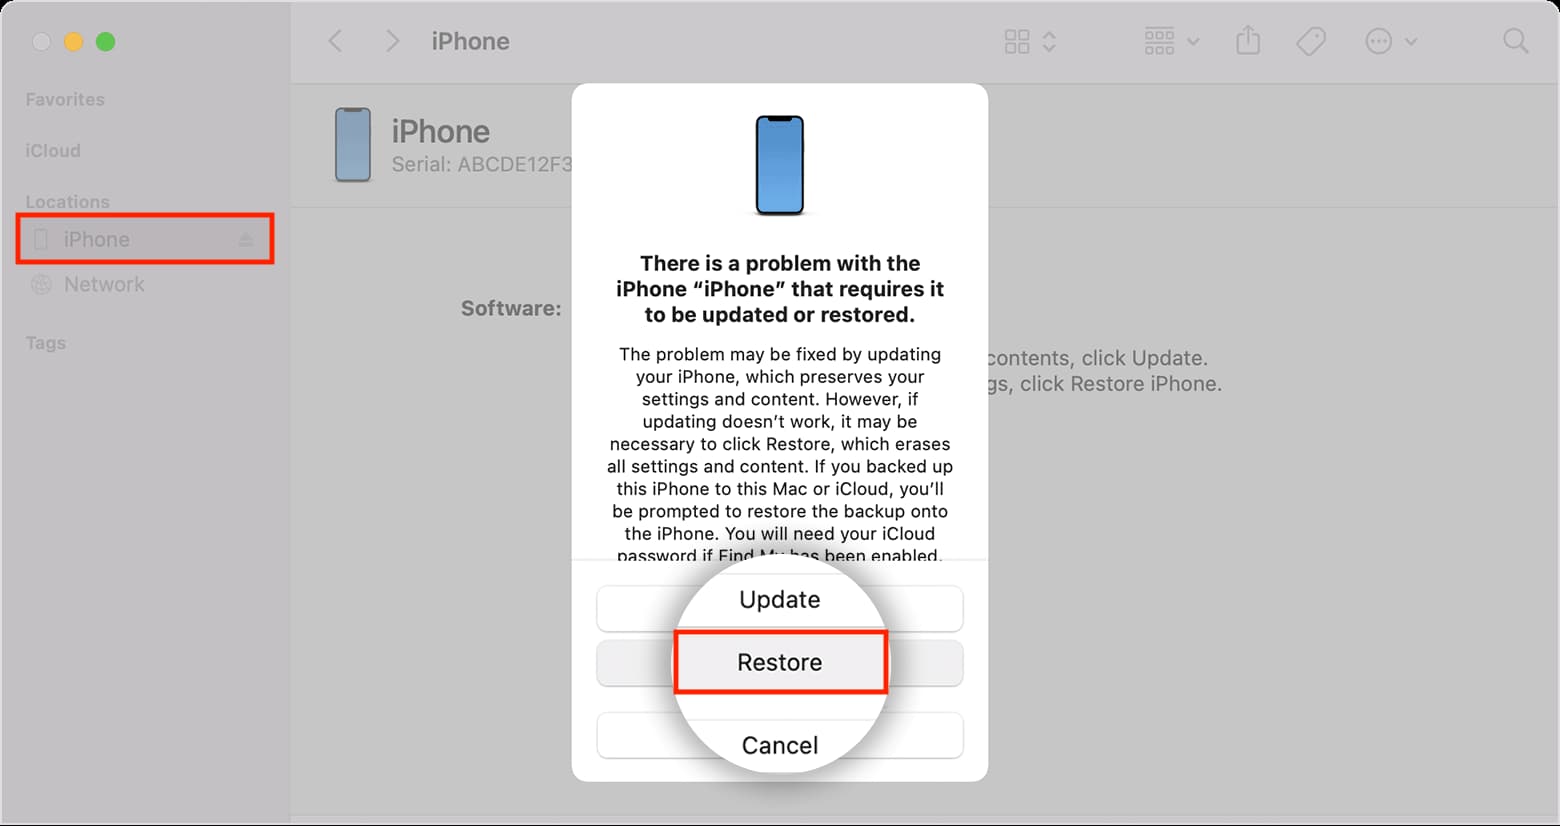
4) Select your iPhone’s name in the Finder’s sidebar under Locations.
5) Hit the Restore button on the popup in the Finder. Your Mac will download the latest version of the iOS operating system and install a fresh copy on your iPhone. You will then set up your iPhone from scratch and create a new passcode.
4. Use the Apple Devices app for Windows
You can also do this on a Windows PC, the only difference being that instead of the Finder, you’ll use the official Apple Devices app from Apple.

5. Restore from backup if Find My is turned off
Find My is a security feature turned onby default. If you’ve turned Find My off, however follow the steps below to reset your passcode. You will need a Mac or Windows PC, the cable that came with your iPhone and a previously made backup to restore your device form.
1) Connect your iPhone or iPad to a Mac or Windows PC using the cable that came with it.
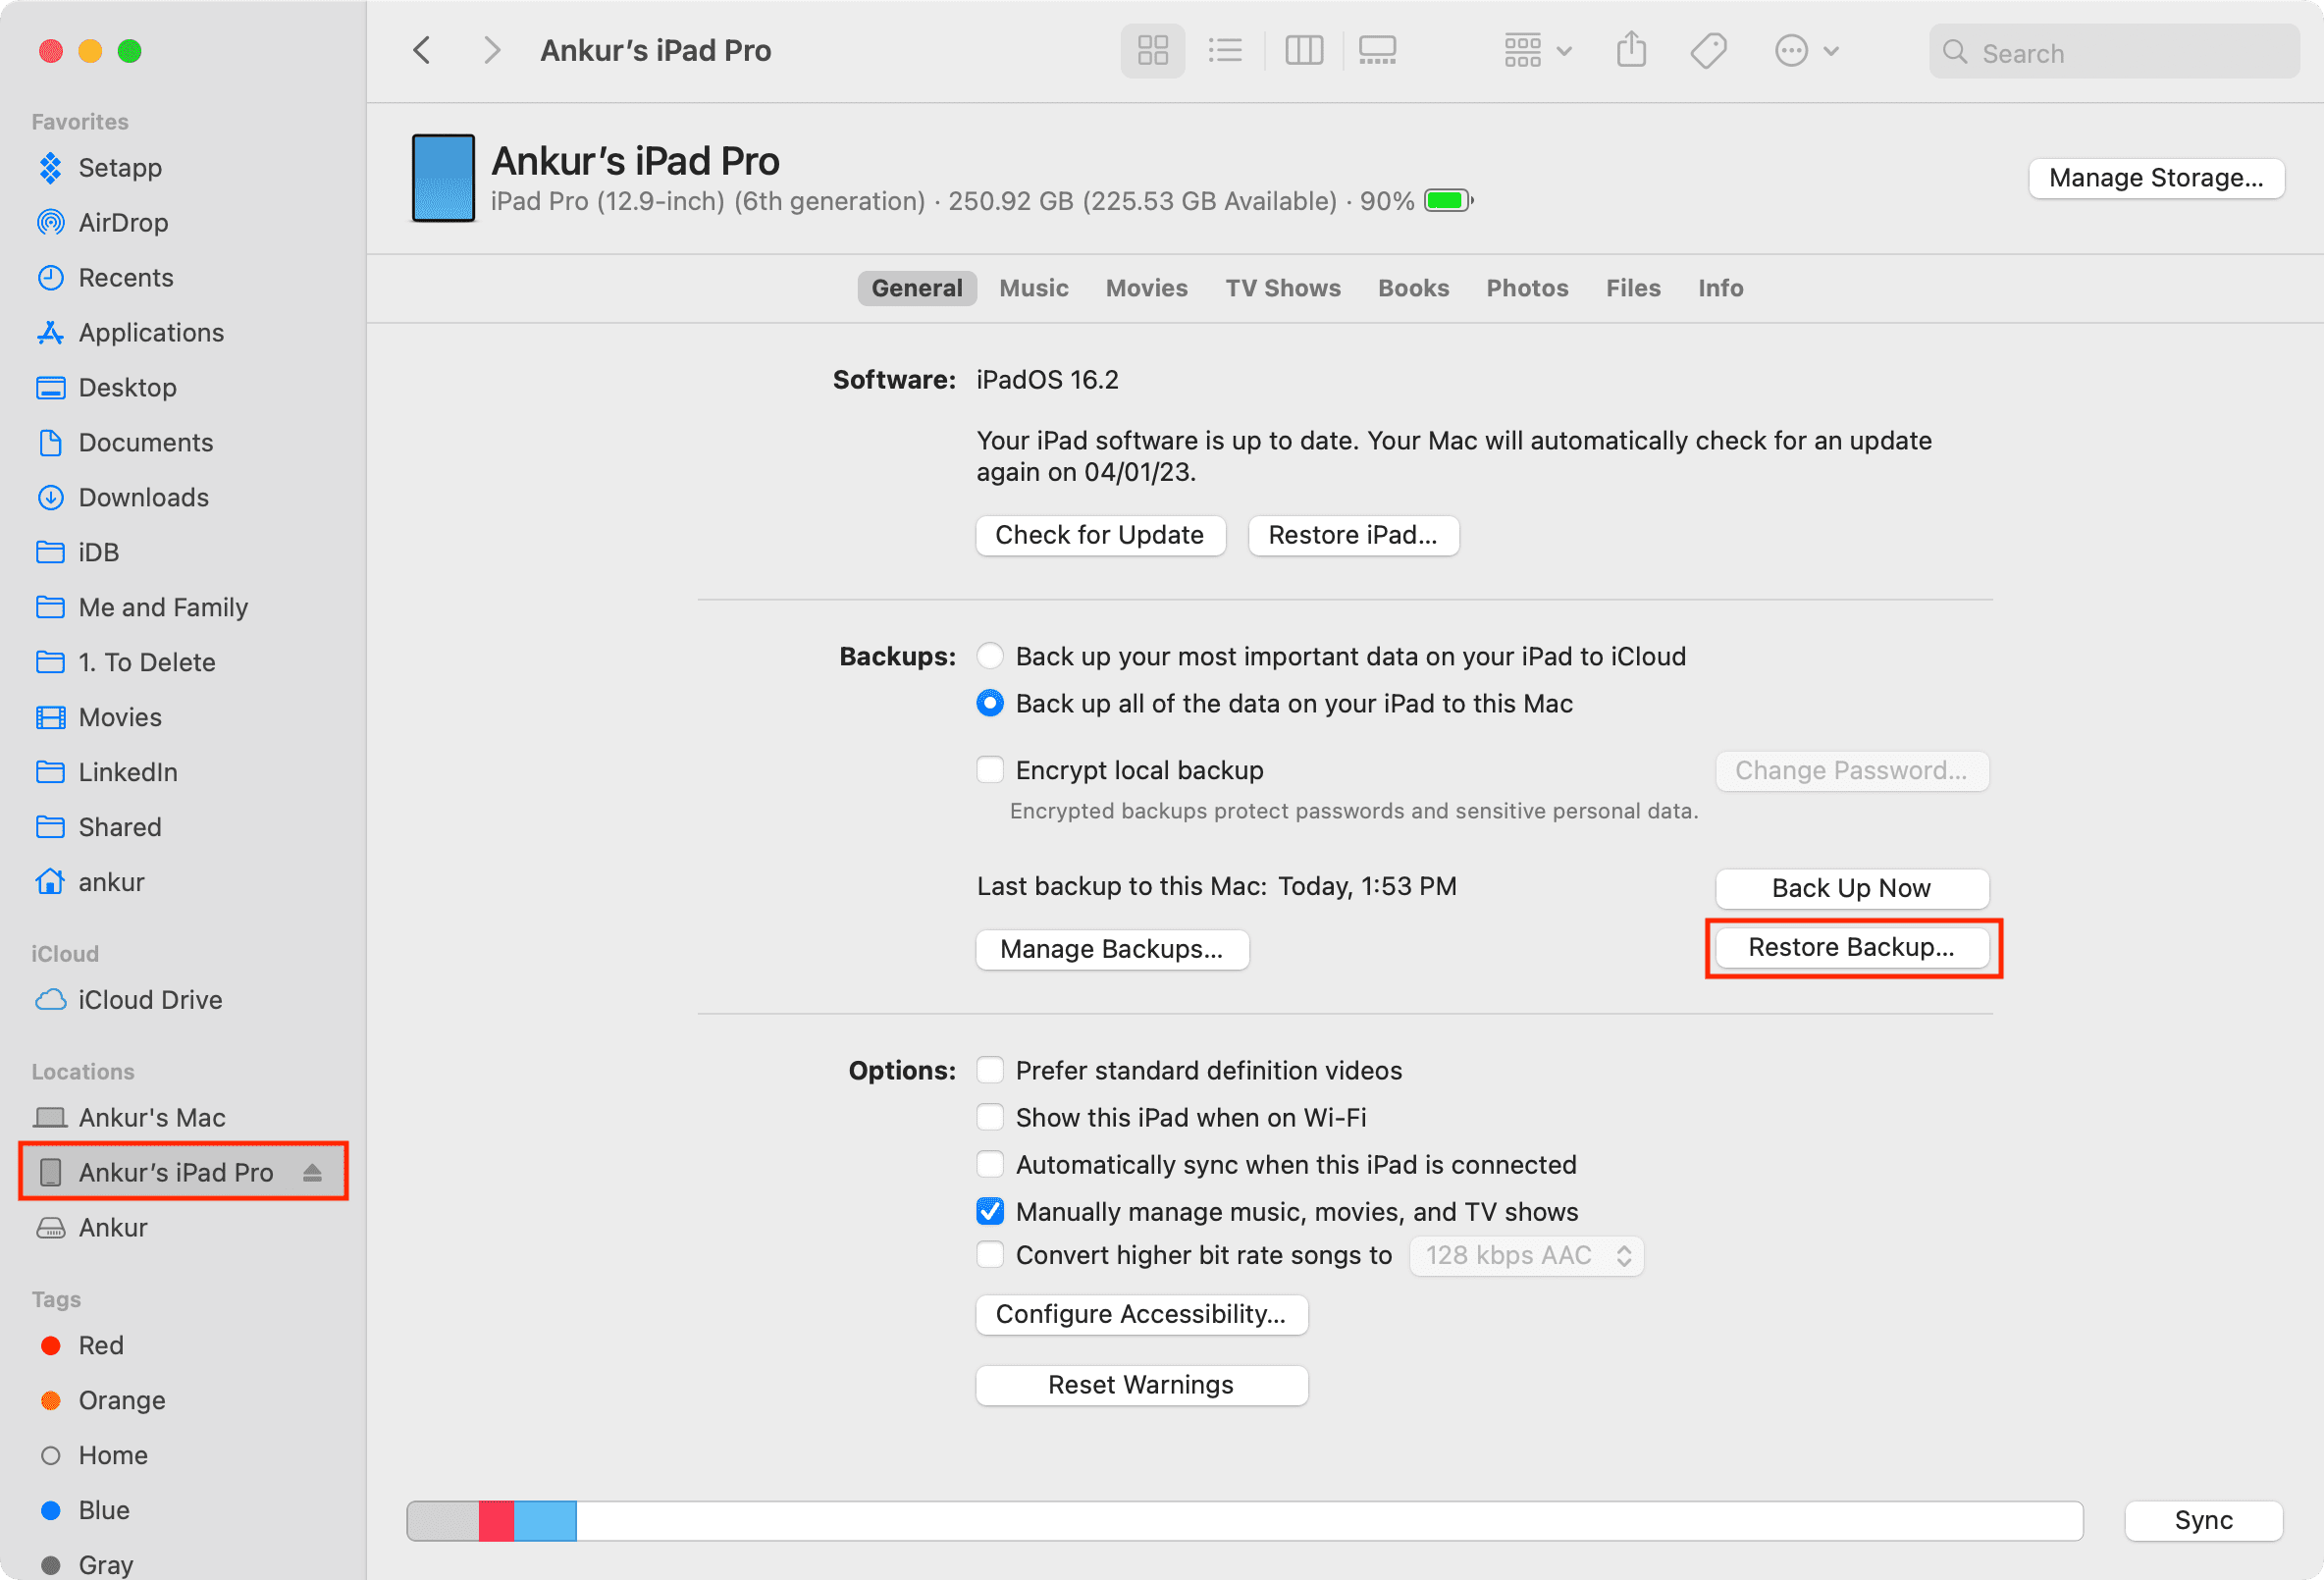
2) Select your device in the Finder on your Mac or the Apple Devices app on the PC.
3) Click Restore Backup.
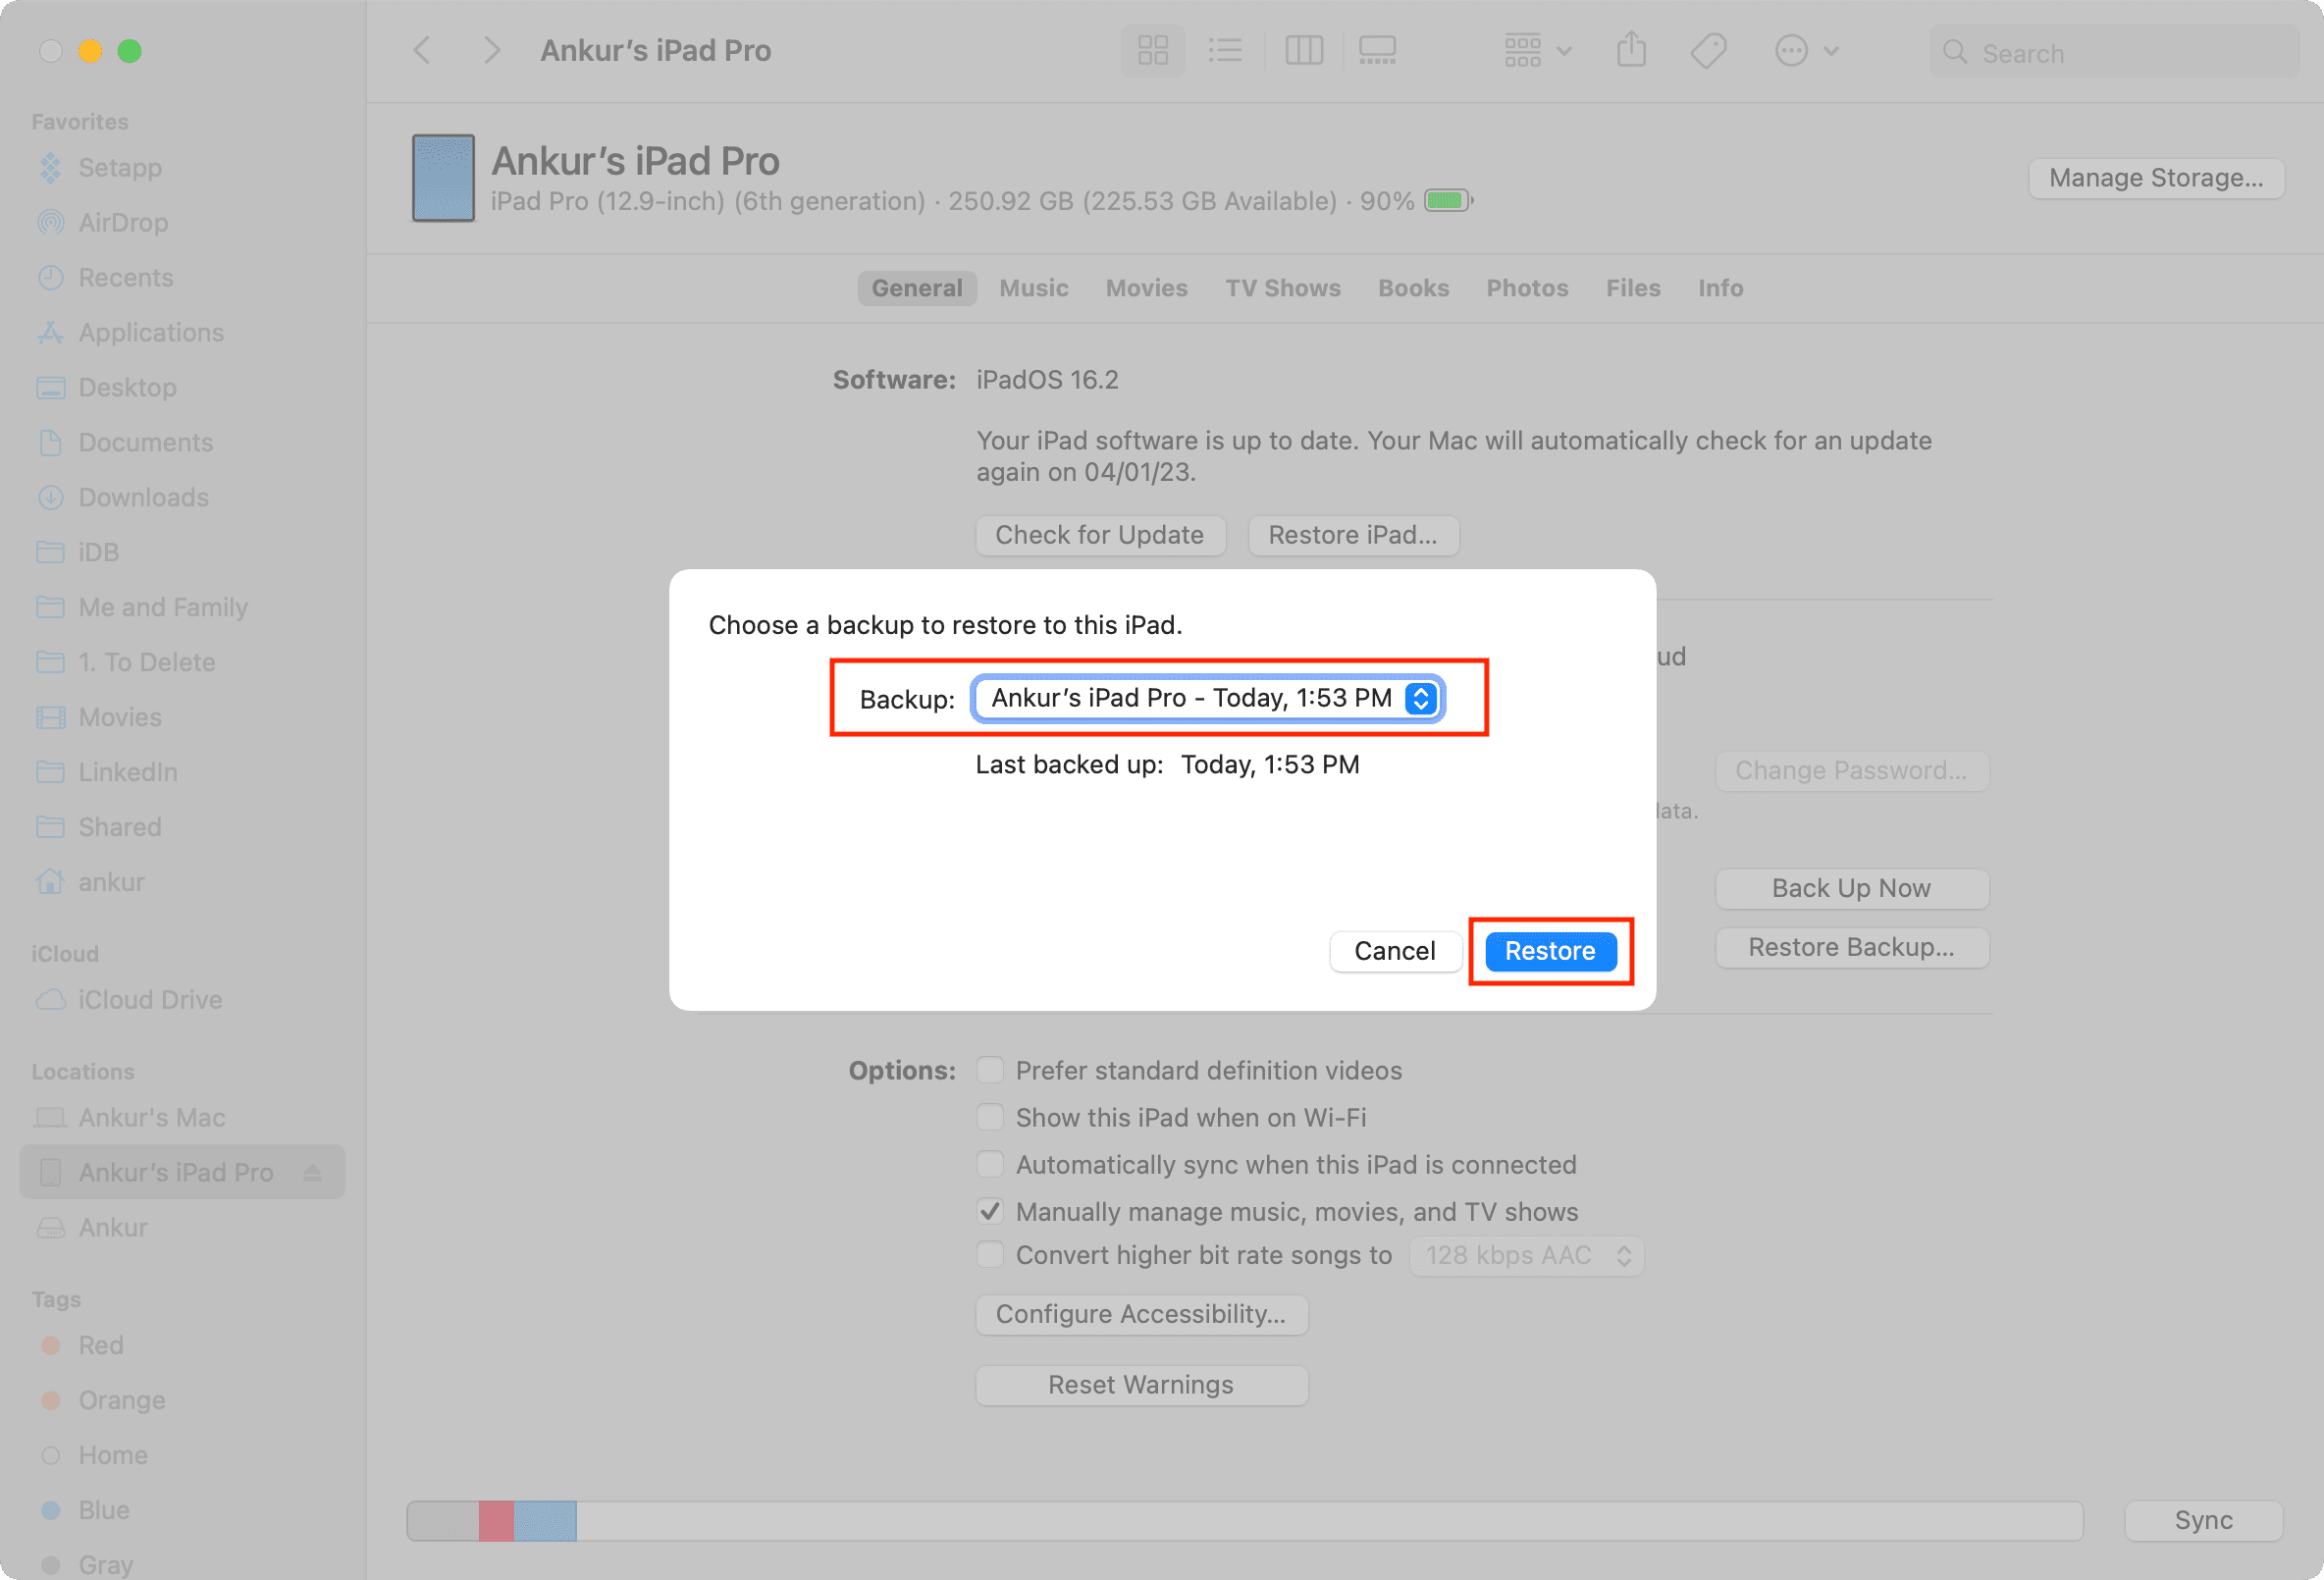
4) Select the most recent backup you created earlier, then click Restore.
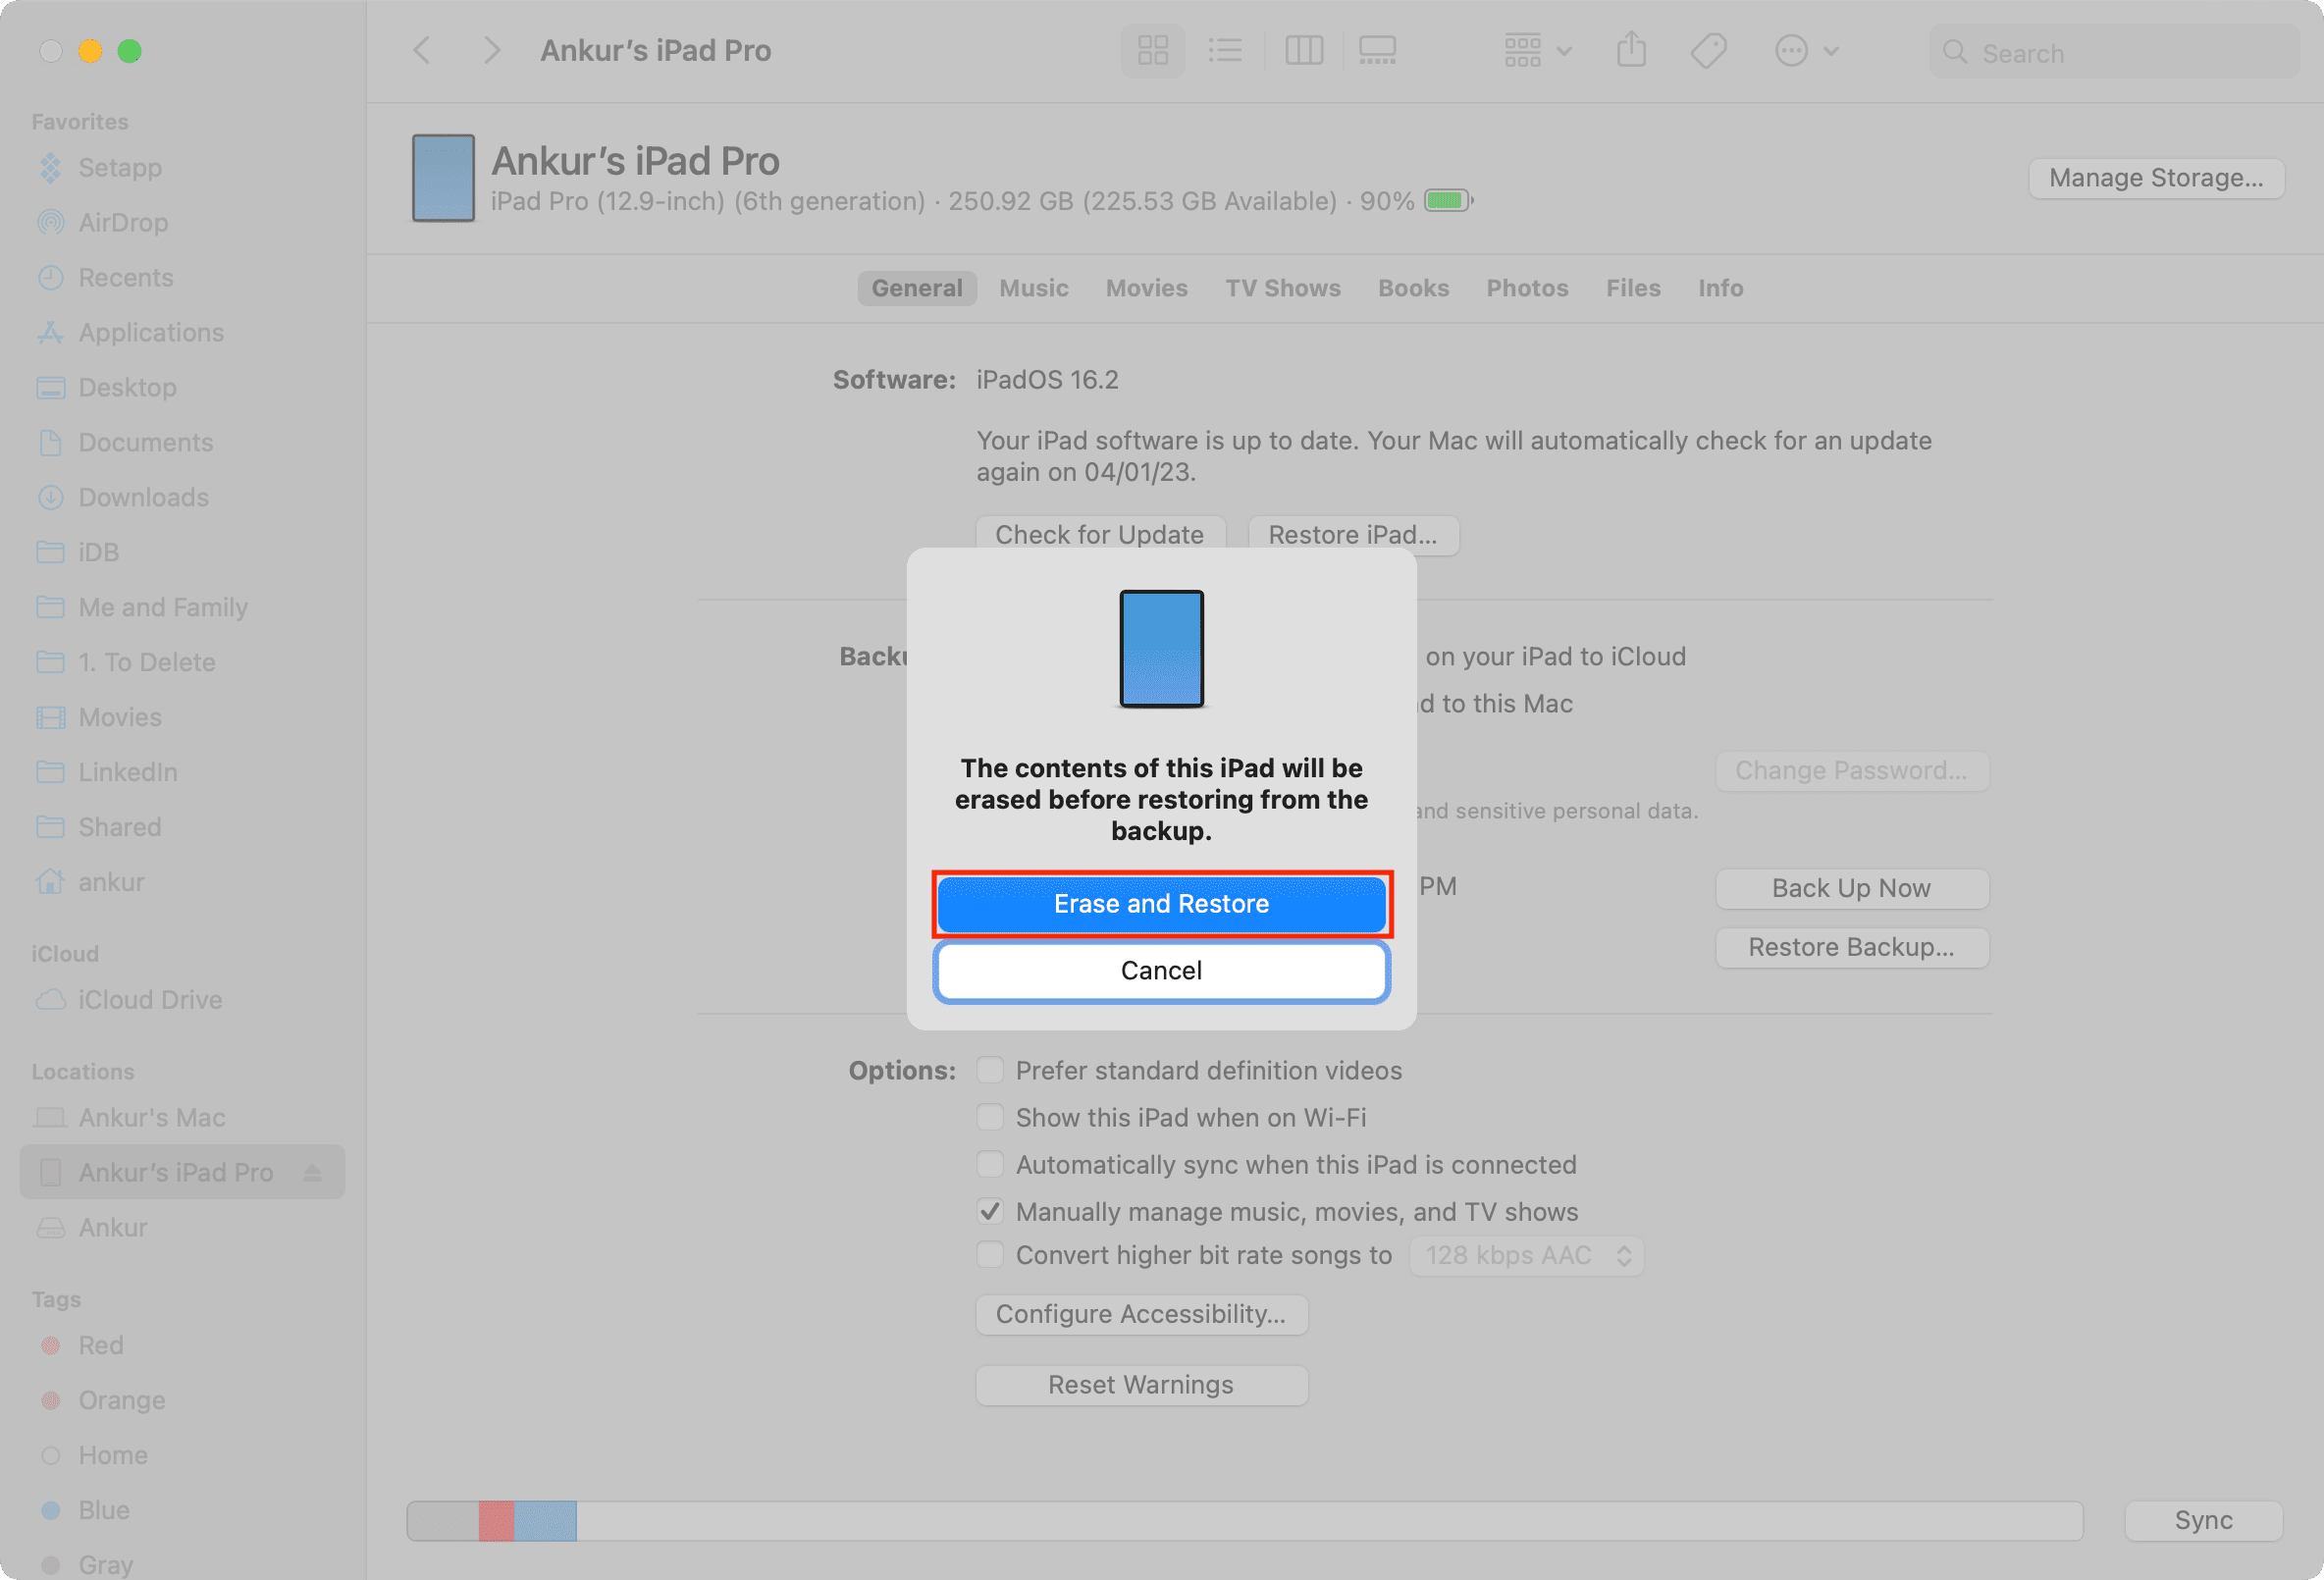
5) Finally, click Erase and Restore. After the device has been erased, you’ll need to set it up again and create a new passcode.
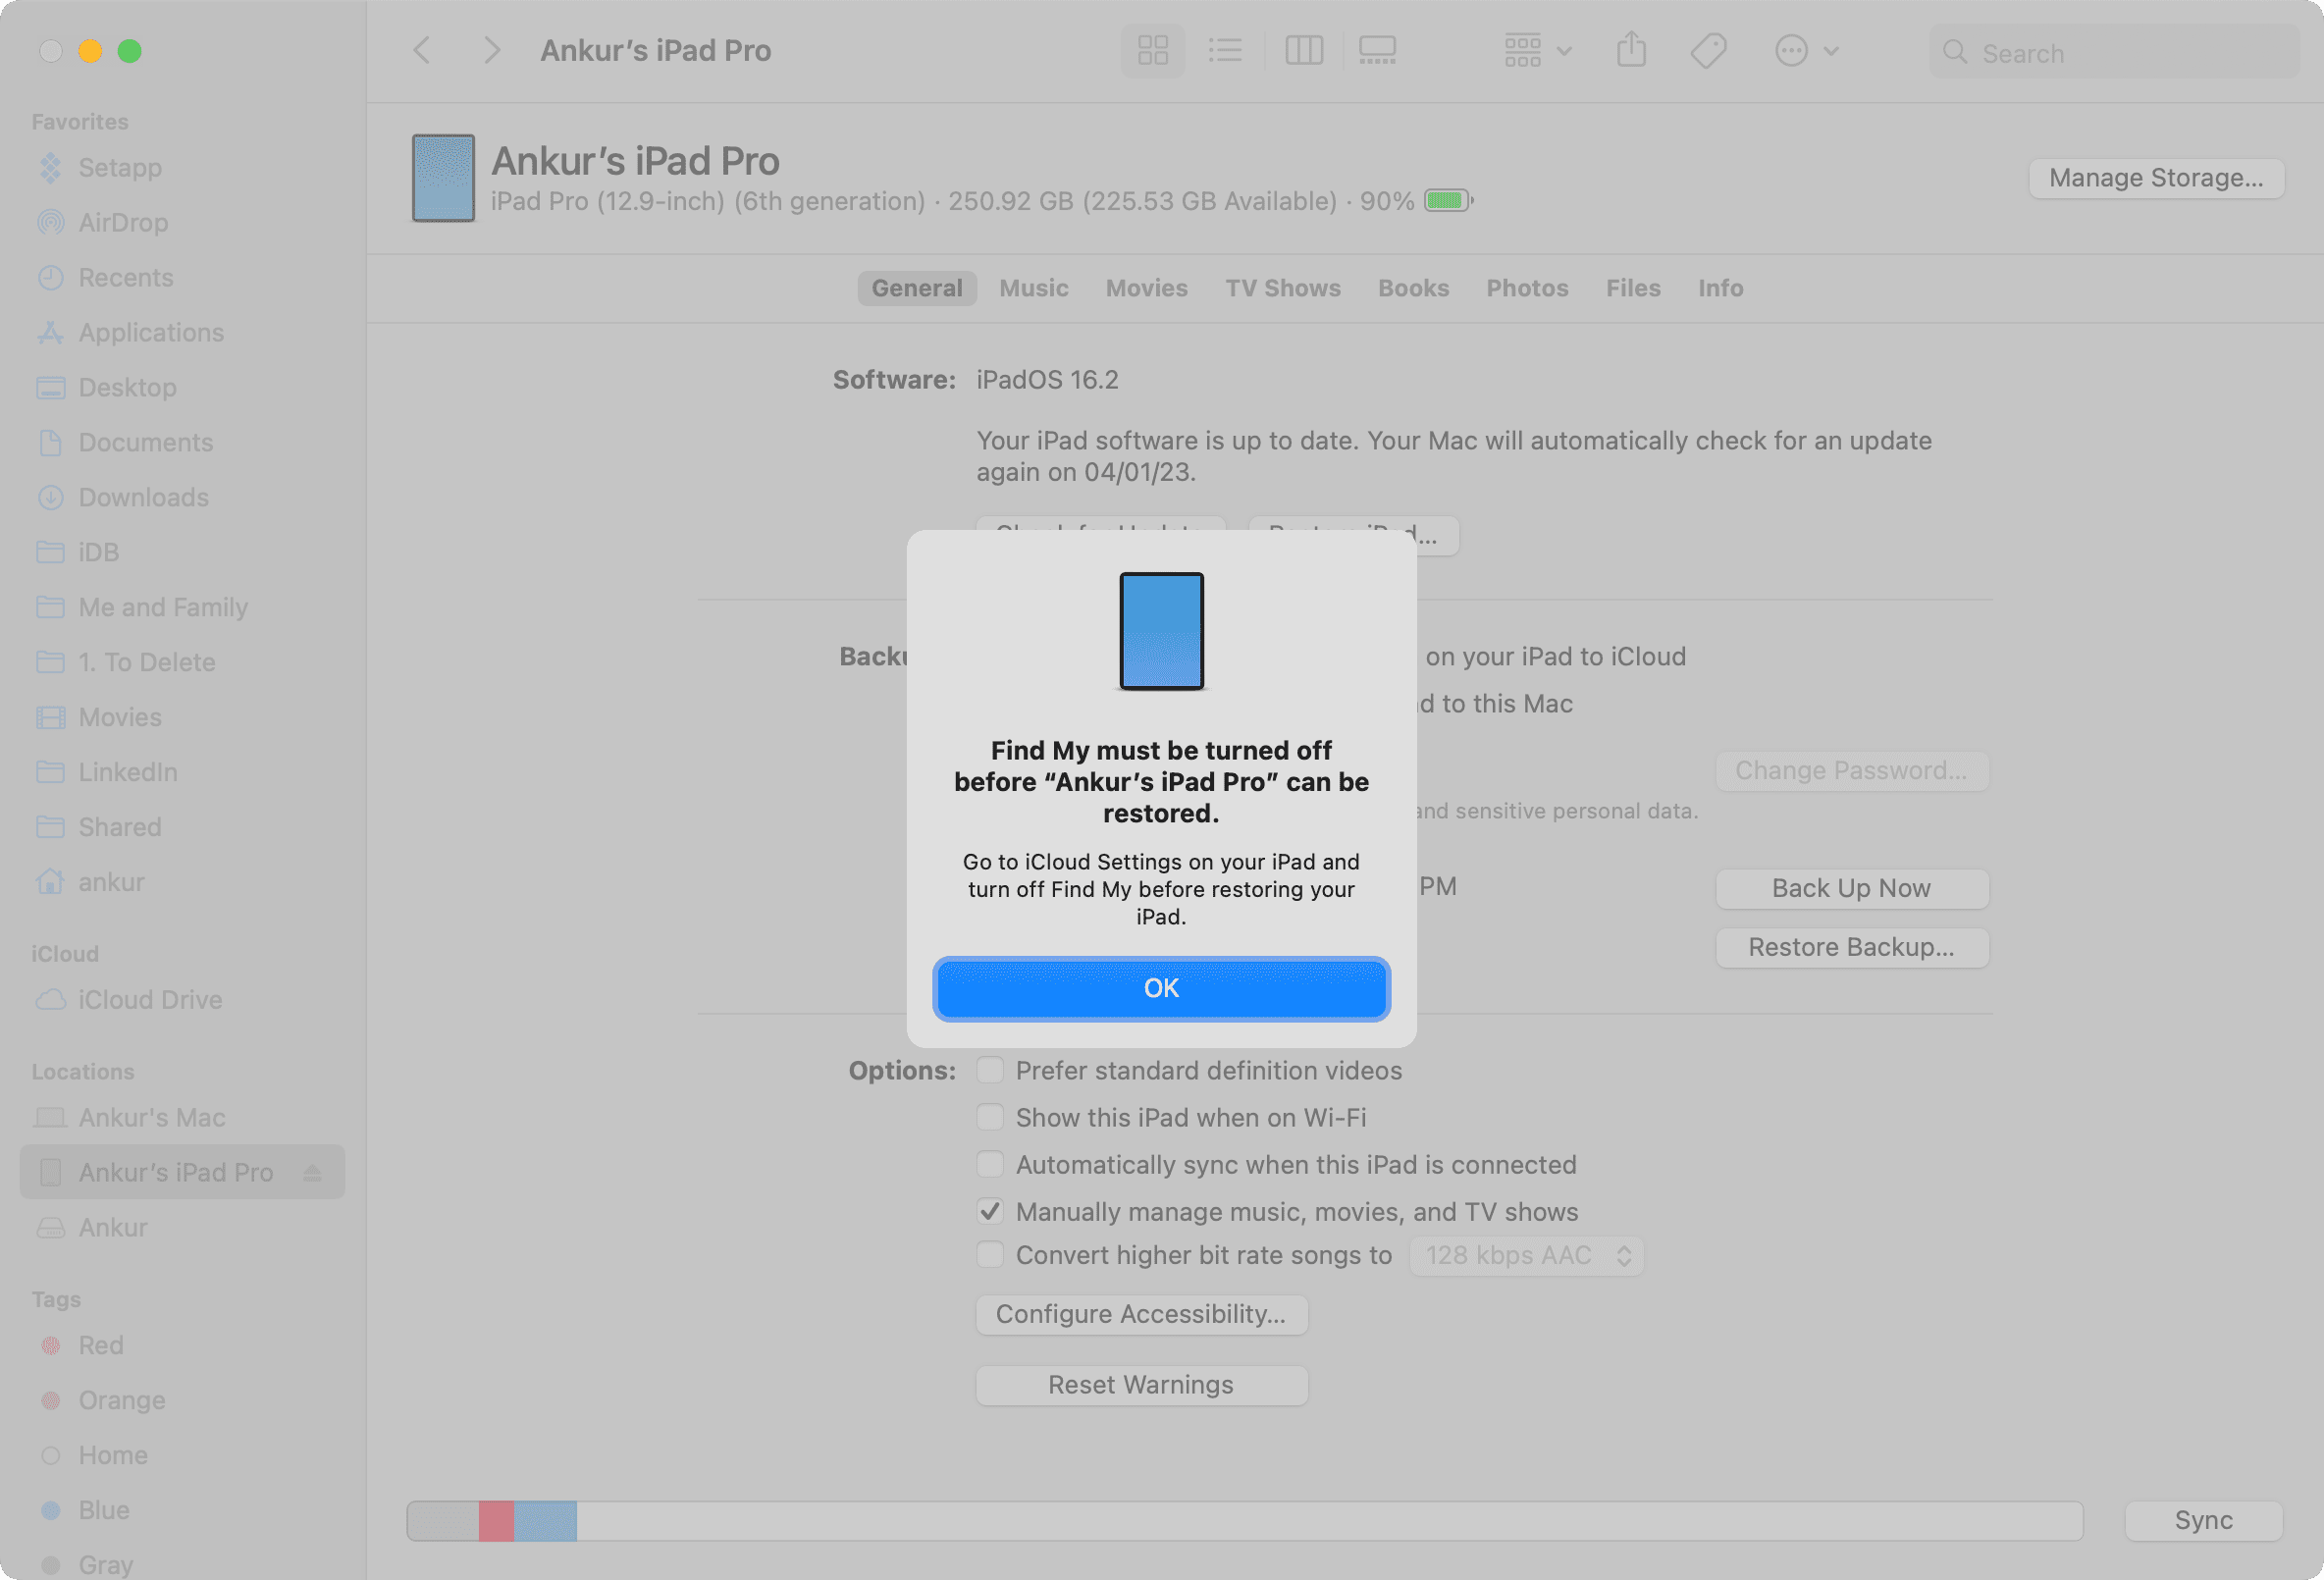
As mentioned, this method works only if Find My iPhone was turned off. Otherwise, follow the previous methods (Recovery Mode) or try the remaining solutions below.
6. Reset the passcode on the iCloud website
1) Visit iCloud.com/find in a web browser, click Sign in, and log in with your Apple account.
2) Select your iPhone or iPad in the All Devices section.
3) Click Erase and follow the instructions. Your iPhone will be erased remotely, provided it’s connected to a Wi-Fi or cellular network. Otherwise, move to a location where you previously joined a Wi-Fi network. With the erased, set it up again and create a new passcode.

7. Use third-party tools
A quick web search reveals several iPhone tools that promise to recover a forgotten iPhone passcode. In most cases, these third-party tools don’t work. Also, unofficial tools may do more harm than good and only work if Find My is turned off, which is almost never the case. Therefore, it’s best to avoid using them.
What to do after erasing your iPhone
After erasing your iPhone, you’ll need to set it up again like you did upon unboxing and turning your new iPhone on for the first time. But this time, you’ll need to provide your Apple account password to bypass the Activation Lock security feature that’s automatically enabled when Find My is turned on. The iOS setup screen also offers you the option restore the device from a backup on your computer or in iCloud.
Things to consider
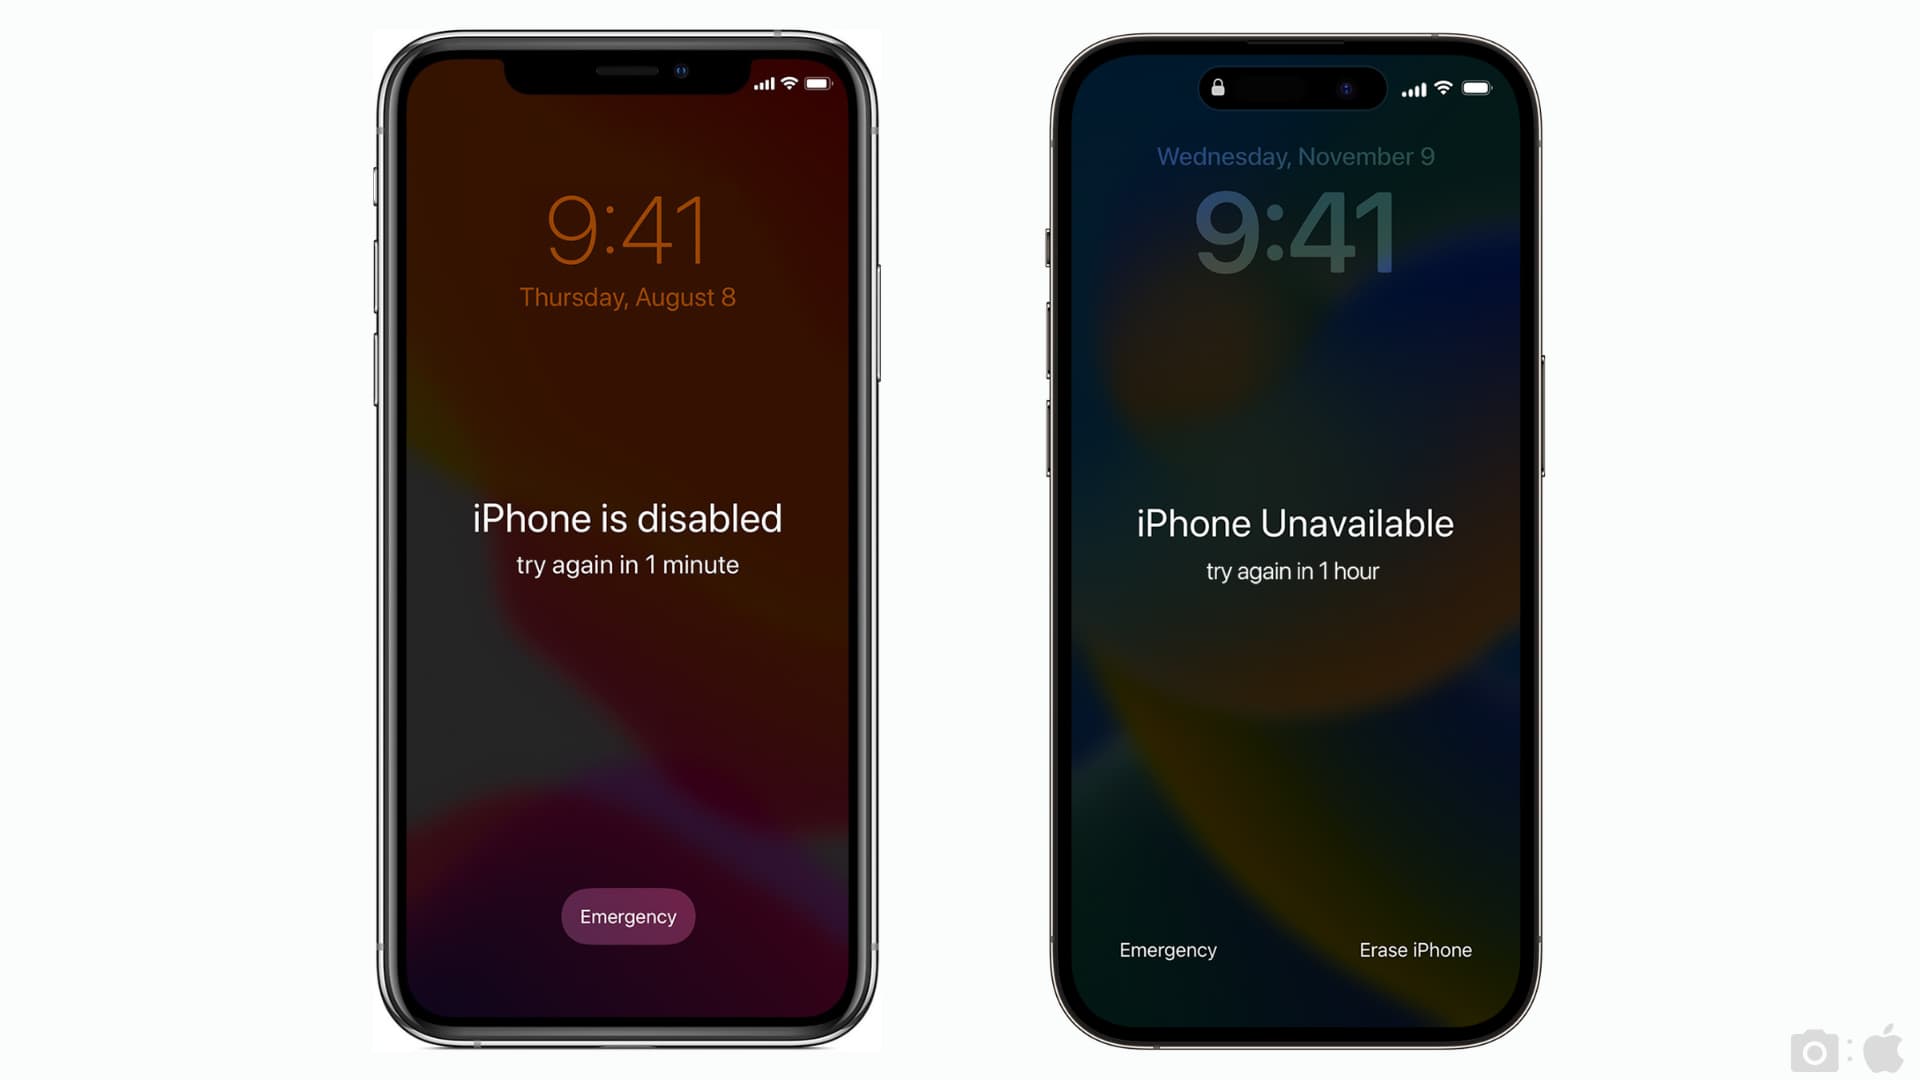
iPhone is disabled
After entering the wrong passcode five times in a row, your iPhone is locked and temporarily disabled to prevent brute-force passcode attacks. You’ll see a message saying “iPhone Unavailable/iPad Unavailable” or “try again in 1 minute, try again in 15 minutes, try again in 1 hour, or try again in an absurdly long time.”
Can I reset iPhone passcode using my Apple account?
Your Apple account password can be used to initiate a passcode reset on the iCloud website. The downside to these approaches is that all your data and settings will be erased.
Will erasing the device clear all my data?
You’ll lose all data on the device after erasing it. That’s why you should regularly back up your iPhone or iPad to a computer or iCloud.
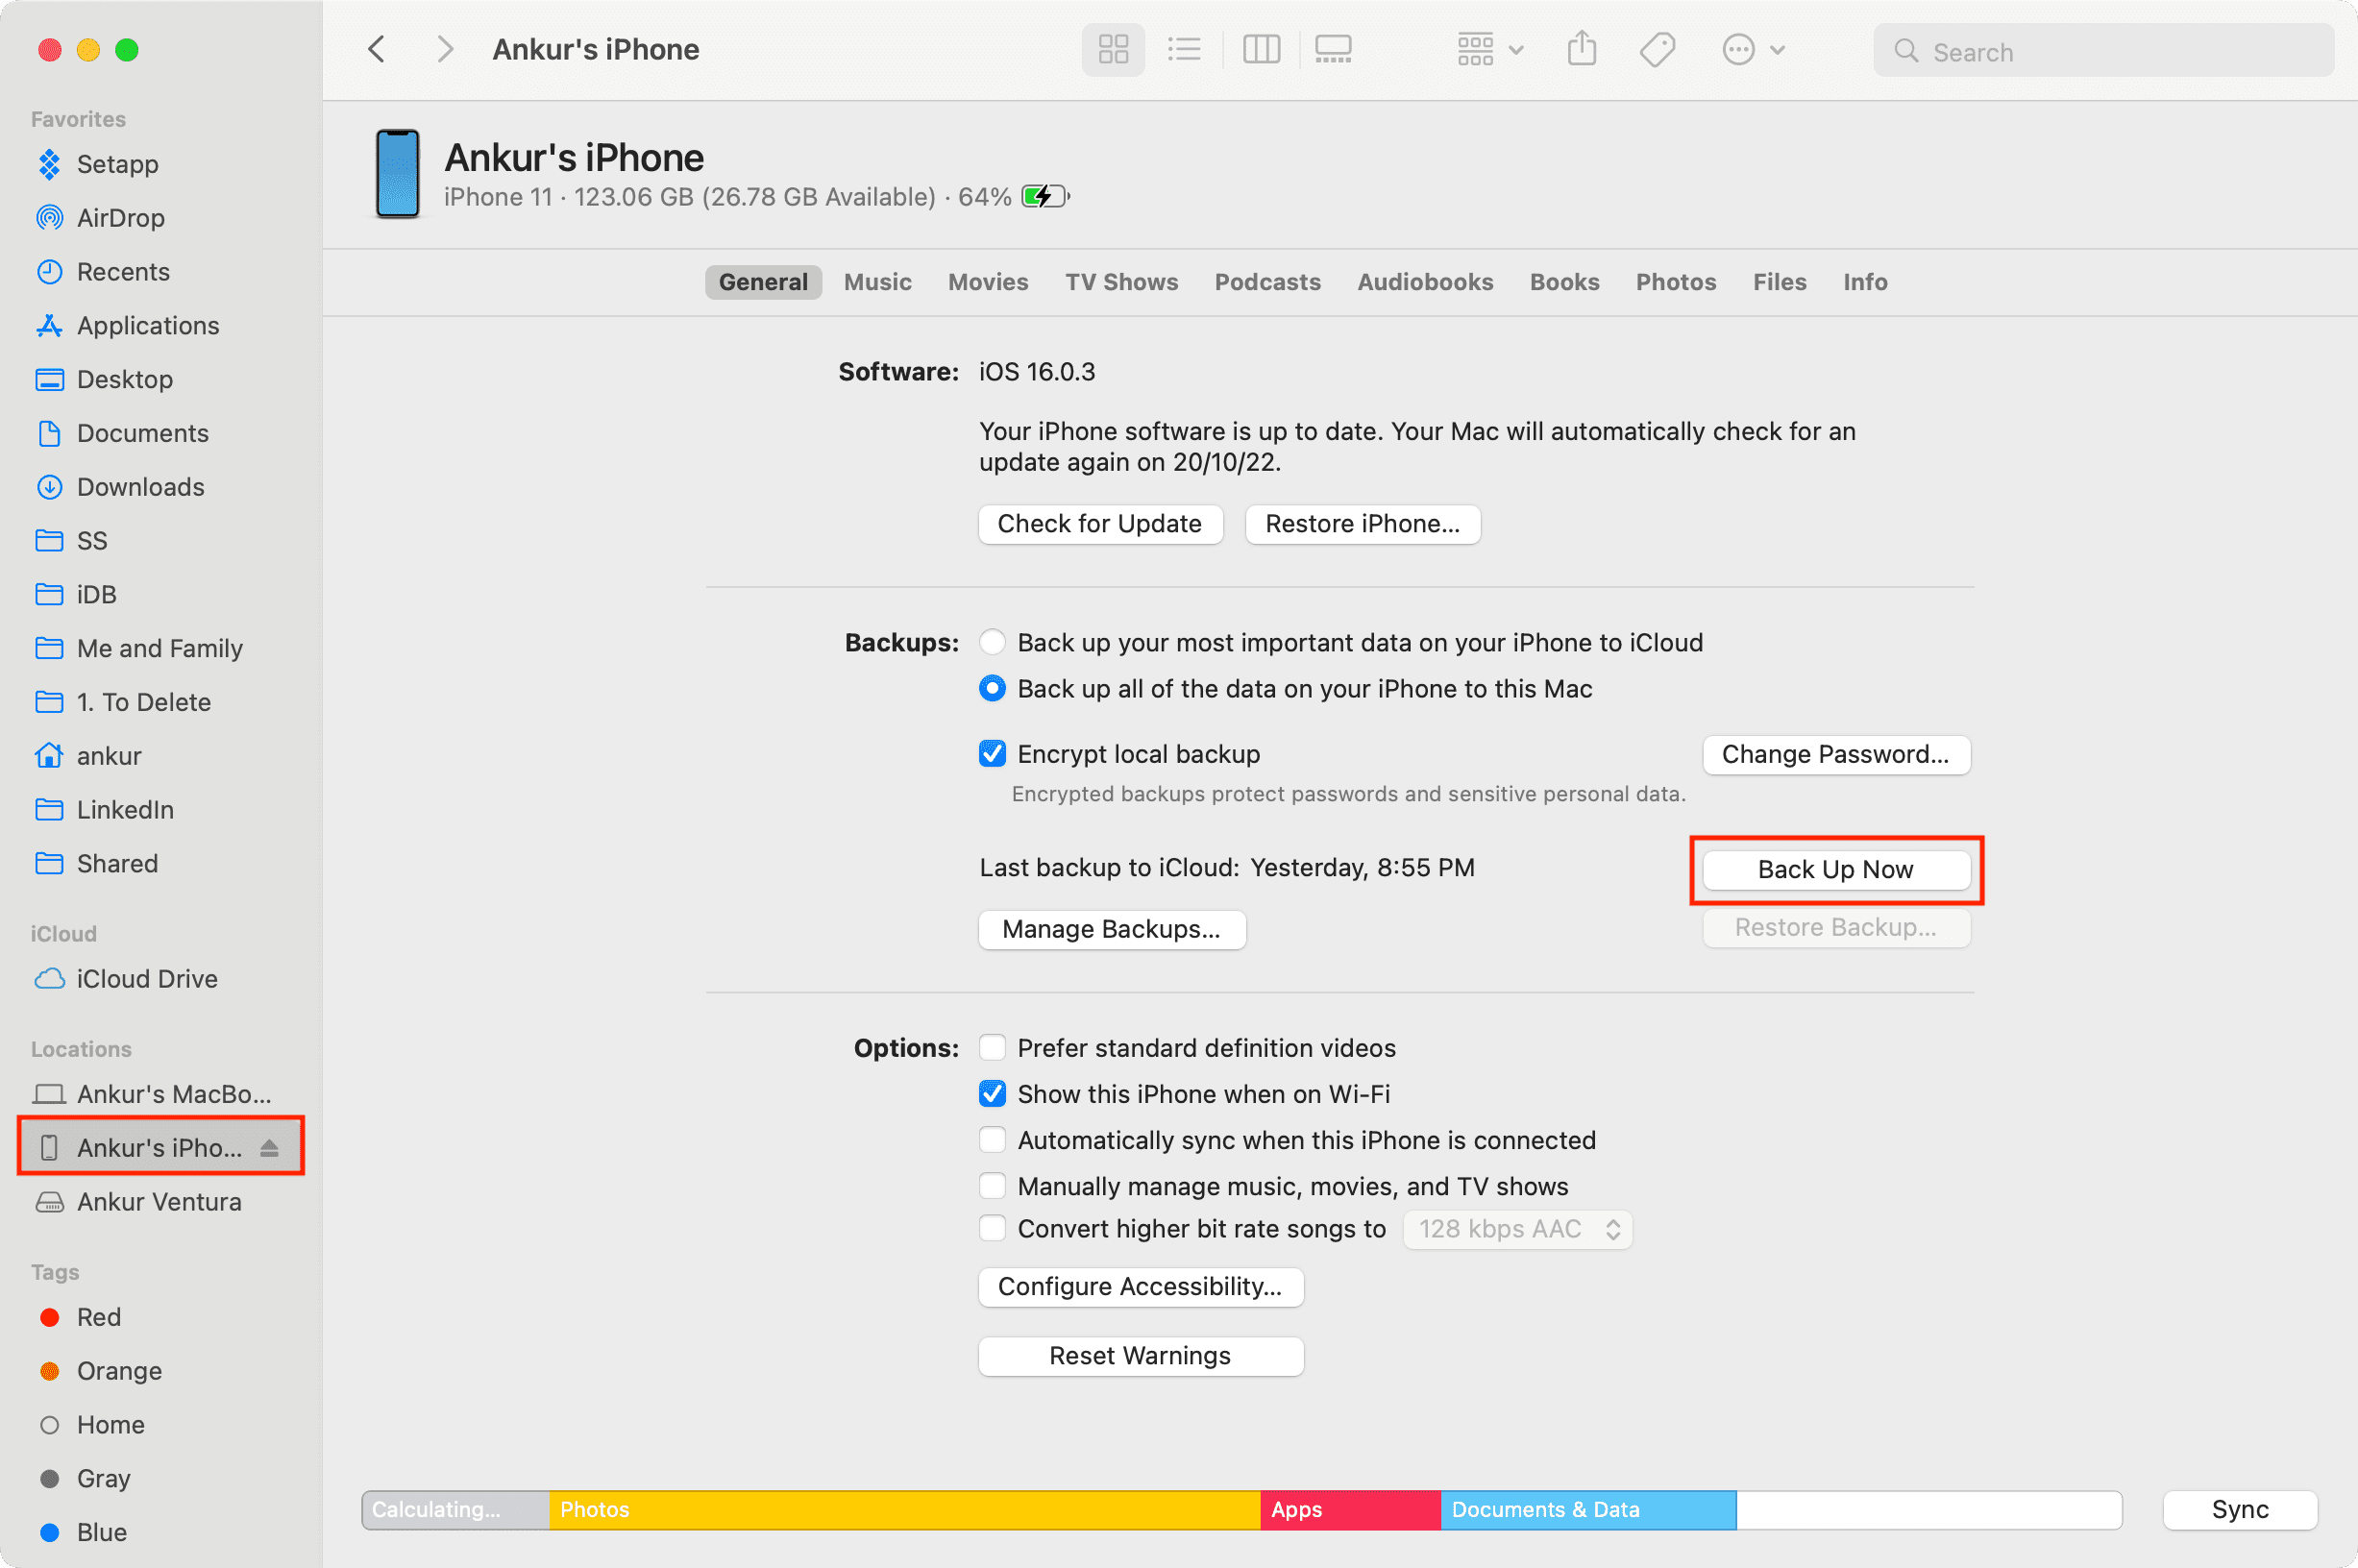
Try backing up a locked iPhone
When you connect an iPhone or iPad to a Mac or Windows PC for the first time, you’ll need to approve the “Trust This Computer” prompt. If you remember approving this request for a specific computer, like your own Mac or a family member’s PC, you should be able to back it up by following these steps:
- Connect your iPhone to the computer your previously trusted.
- Open the Finder on your Mac or the Apple Devices app on your Windows PC.
- Select your iPhone and click Back Up Now in the General section.
This will create a backup of your locked or temporarily disabled iPhone. You’ll use this backup to restore your device after resetting its passcode.
Can’t back up?
If you’re asked to trust this computer or provide the iPhone passcode, you either never connected the device to this computer before or revoked trust access. Either way, you won’t be able to back it up. You will need to erase your iPhone, and lose some of your data. Still, there’s hope!
What if I can’t back up my locked iPhone?
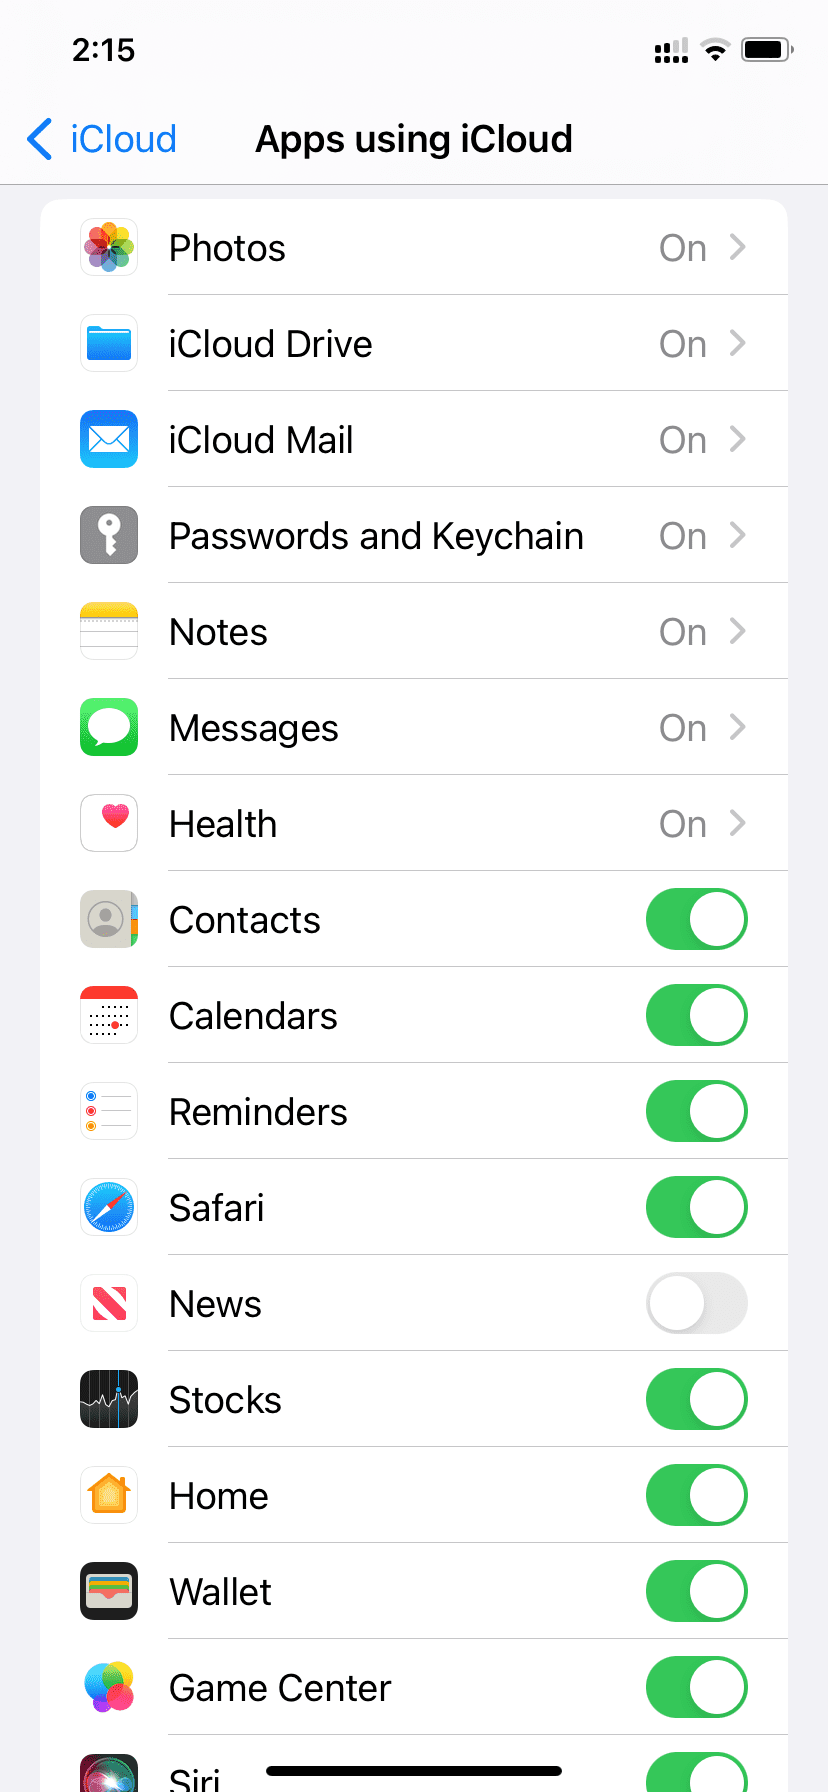
Any data in cloud storage like iCloud or third-party services like Dropbox or Google Drive won’t be lost, like contacts, photos, reminders, and more. To regain access to this data, download the official app for your favorite cloud storage service after erasing your device.
Related tutorials
If you have forgotten passcode on your Apple Watch, follow the steps in this tutorial to reset it. We also have the steps for parents wishing to reset the Screen Time passcode that protects parental controls.