Learn how to turn your iPhone or iPad into a wired or wireless thumb drive to store and transfer files between your Mac or Windows PC.
You can store various types of data and transfer files between computers using a USB thumb drive or external hard disk/SSD. Surprisingly, you can also achieve this with your iPhone or iPad when connected to a Mac or PC.
The basics
Several iOS apps show up as potential locations to save files in Finder on Mac and Apple Devices app on Windows PC.
Using these apps, you can keep any file you want on your iPhone or iPad. You can even safely store files that are incompatible with iOS and third-party iOS apps. In other words, regardless of the file format, these apps can save your Word files, PDFs, ZIP, DMG, APK, MP3, MP4, MKV, AVI, Photoshop files, Sketch files, or anything else.
Now, before we move forward, you must download an iOS app on your iPhone or iPad that will show inside Finder or the Apple Devices app on a Mac or PC. I’ve listed some of these apps below. You can try a few and decide which one works best for you. If your only goal is to store the files, any one of them will work fine.
- Apple’s iMovie, GarageBand, Pages, Keynote, Numbers, or Clips
- Documents
- VLC
- Infuse
- Secure FileManager (allows you to put a password lock on the app)
- Files Go
- Total
- iFiles
Use iPhone or iPad as a USB drive on Mac or Windows PC
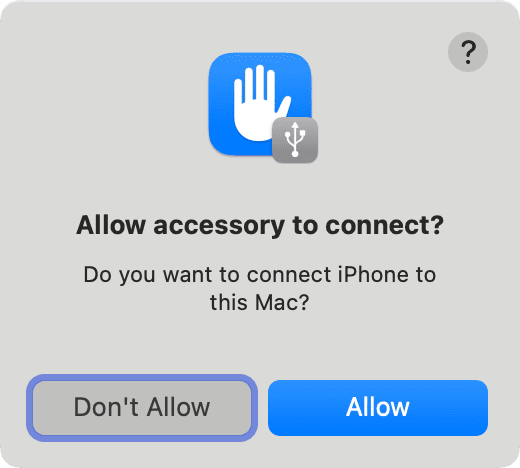
1) Connect your iPhone or iPad to a Mac or PC using an appropriate cable. If you see an alert on your computer asking permission to connect, click Allow.
2) Open Finder on Mac or Apple Devices on Windows PC. Note that you will have to use iTunes if you’re on an old Mac or PC.
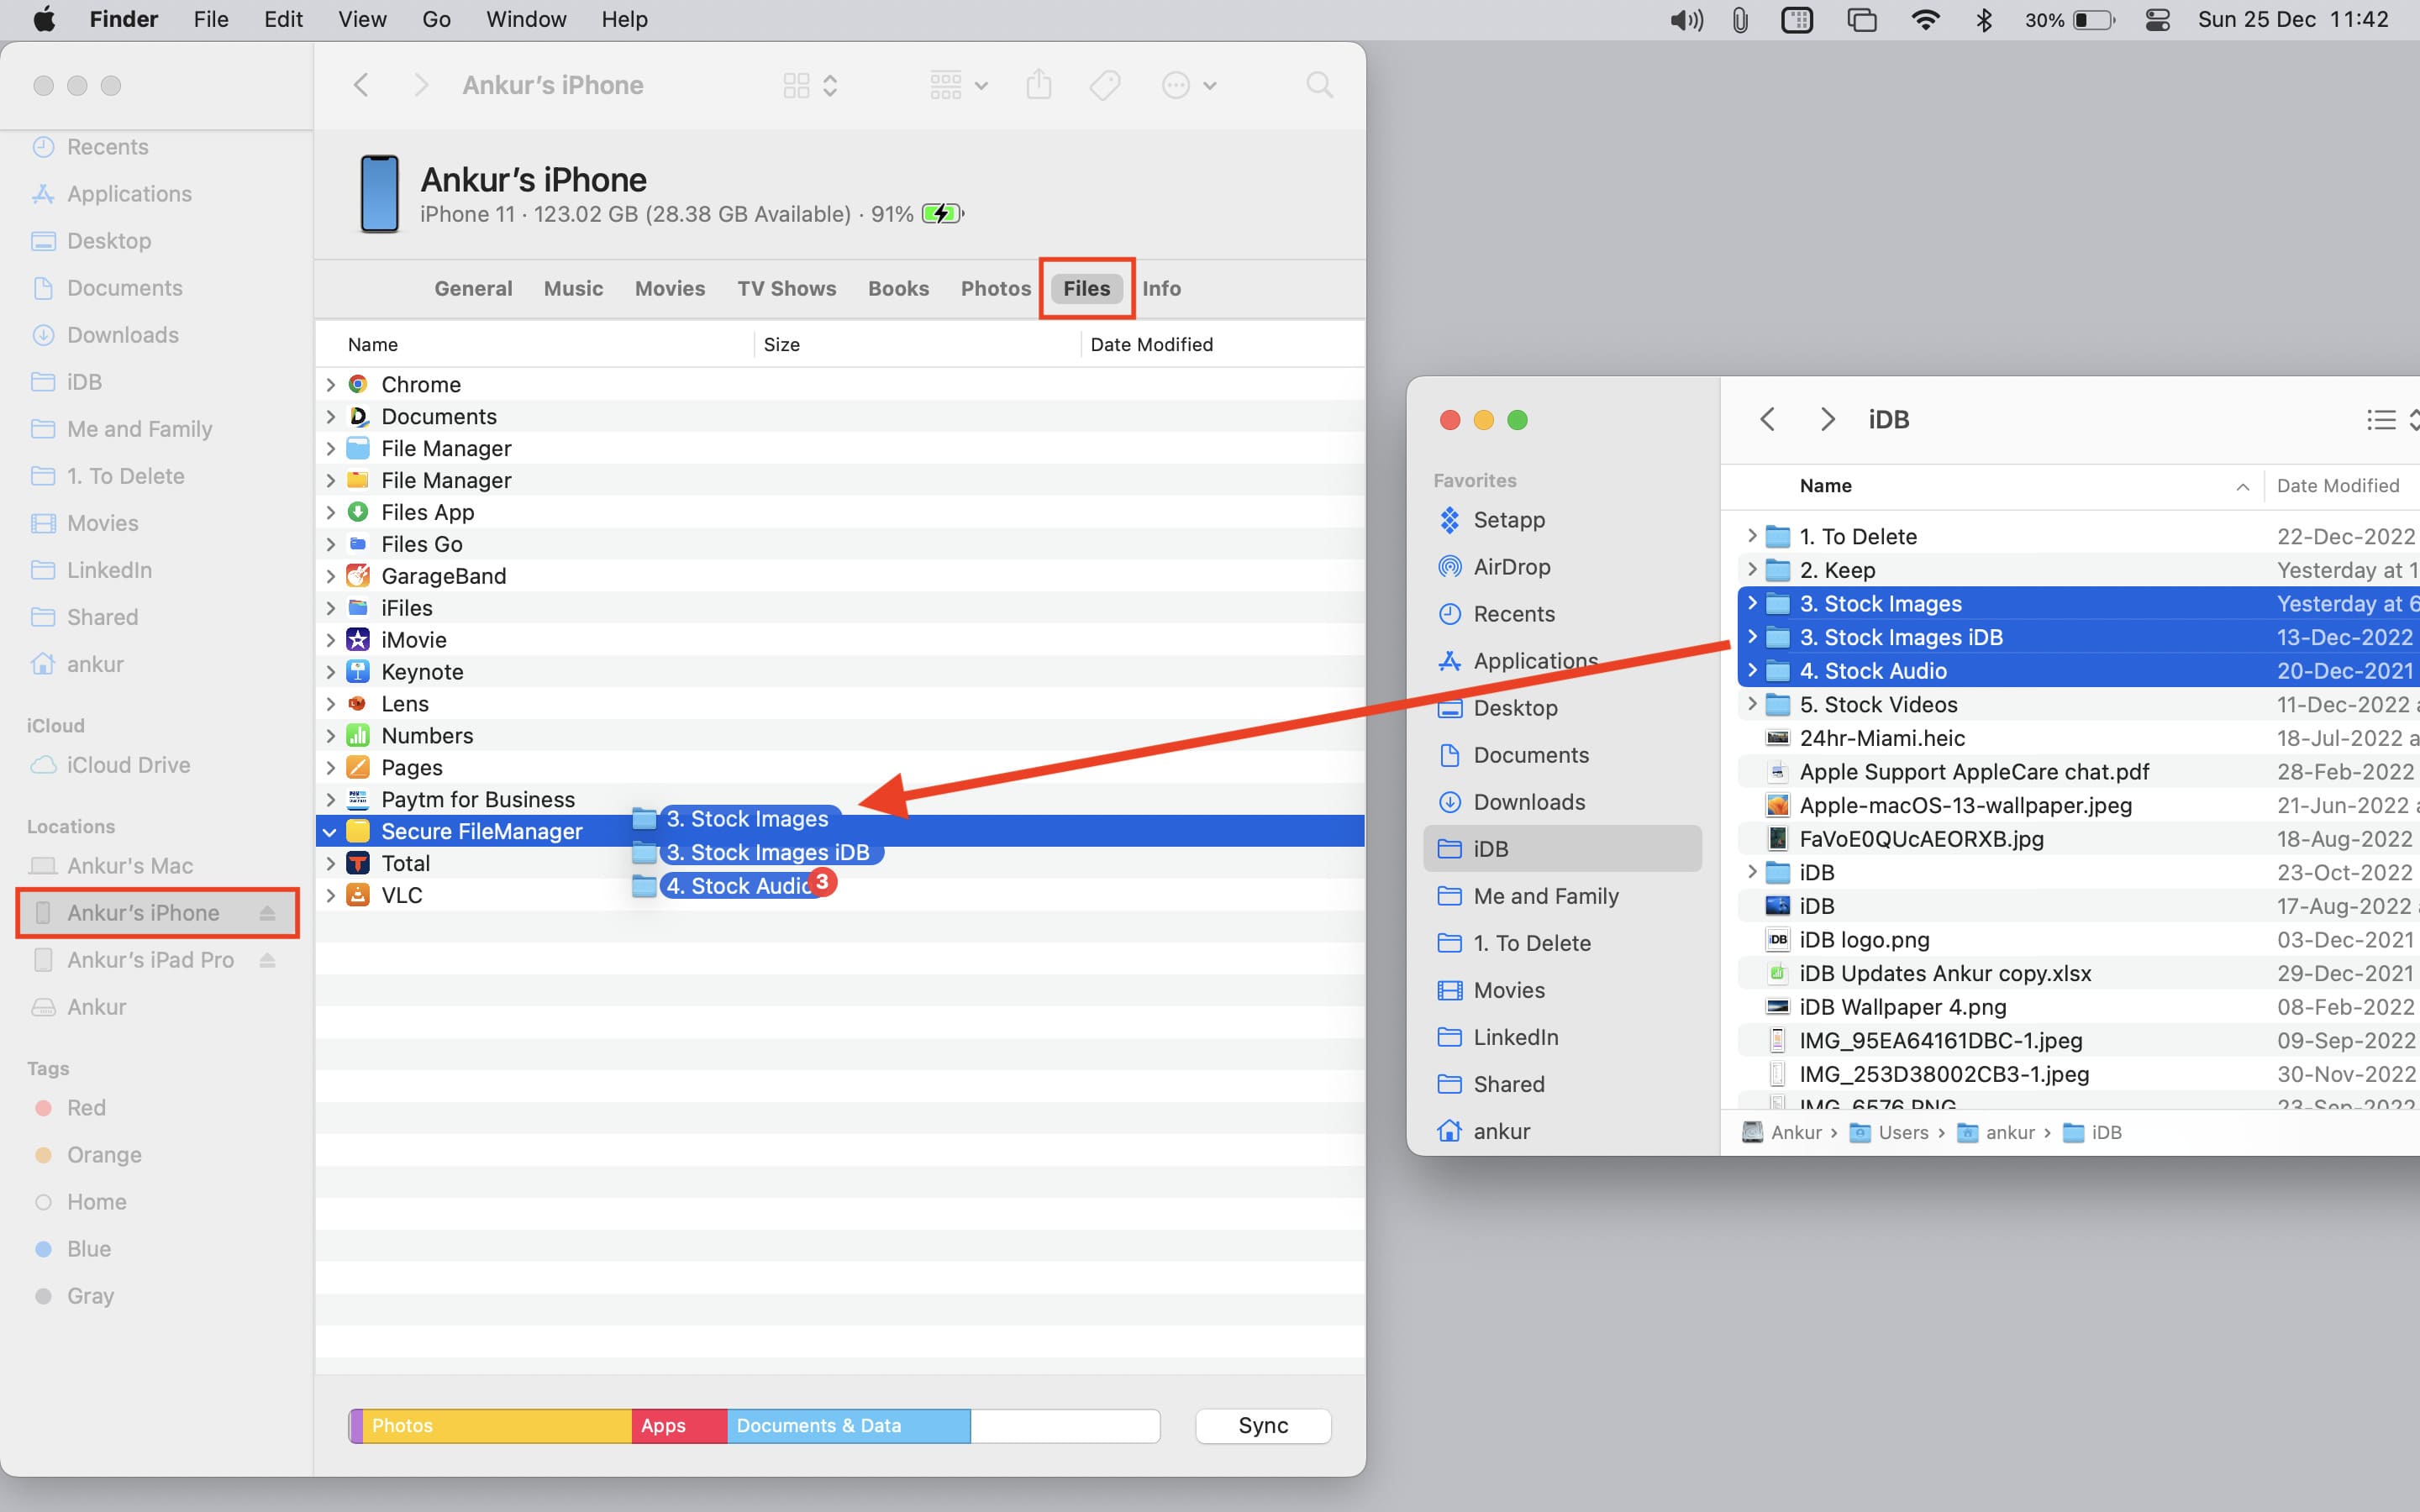
3) Locate your iPhone or iPad in Finder or Apple Devices app by clicking its name in the left sidebar. If you are in iTunes, click the tiny iPhone or iPad icon in the top menu bar.
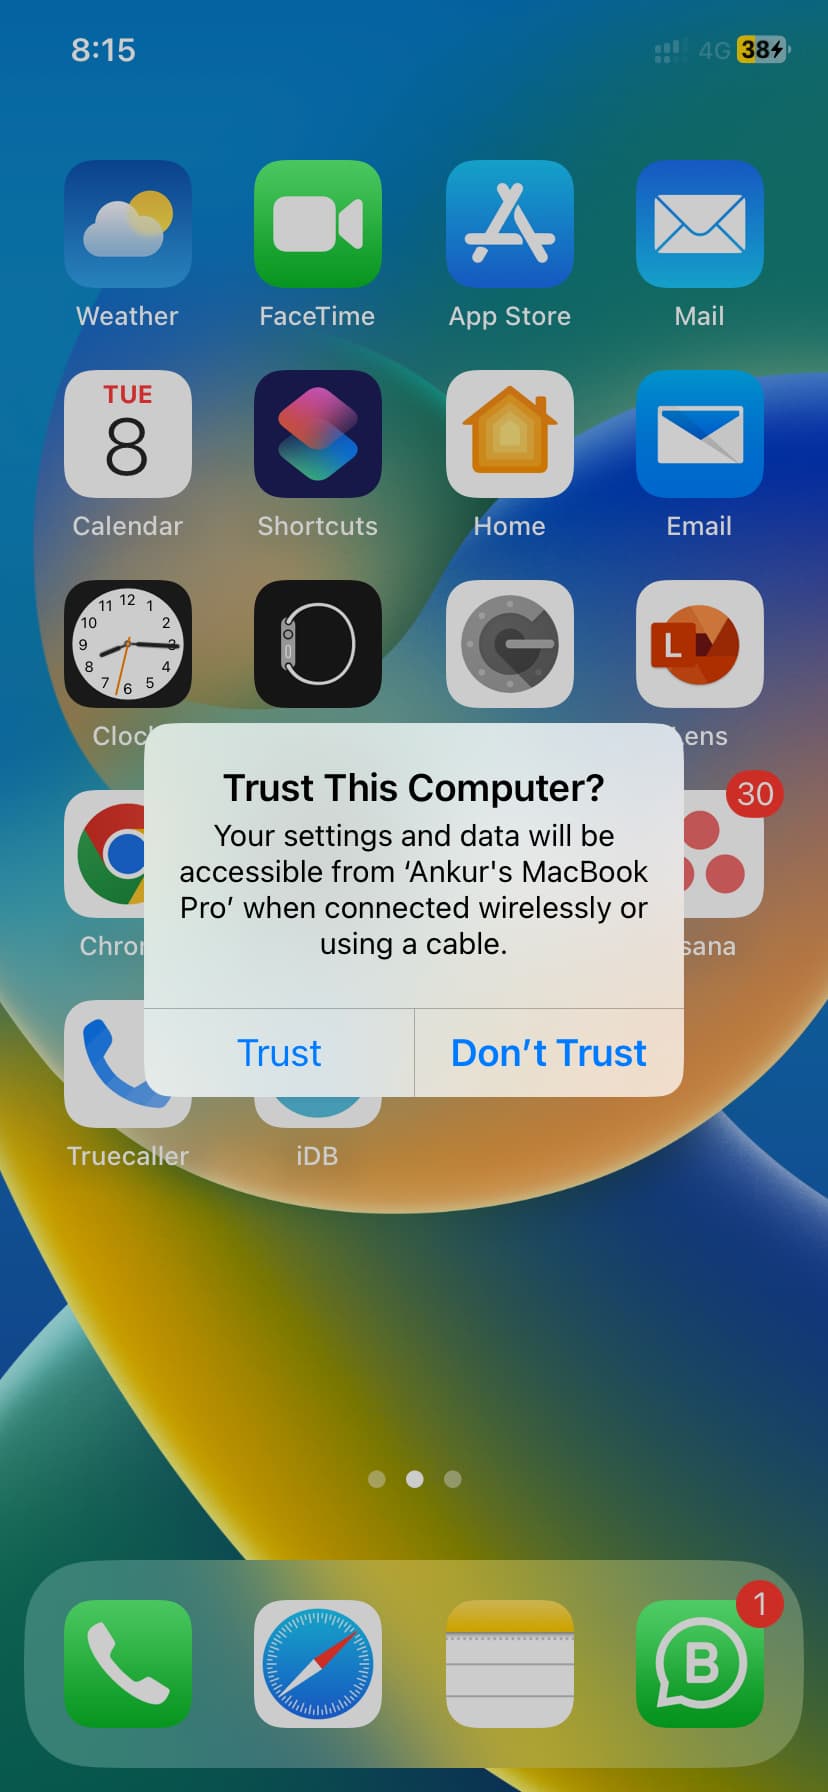
4) If this is your first time connecting your iPhone or iPad to this computer, click the Trust button on your computer screen. After that, tap Trust on your iPhone or iPad and authenticate with Face ID, Touch ID, or device passcode. Once you do this, you authorize your iOS device to trust the concerned Mac or PC, thereby allowing an exchange of data between the devices.
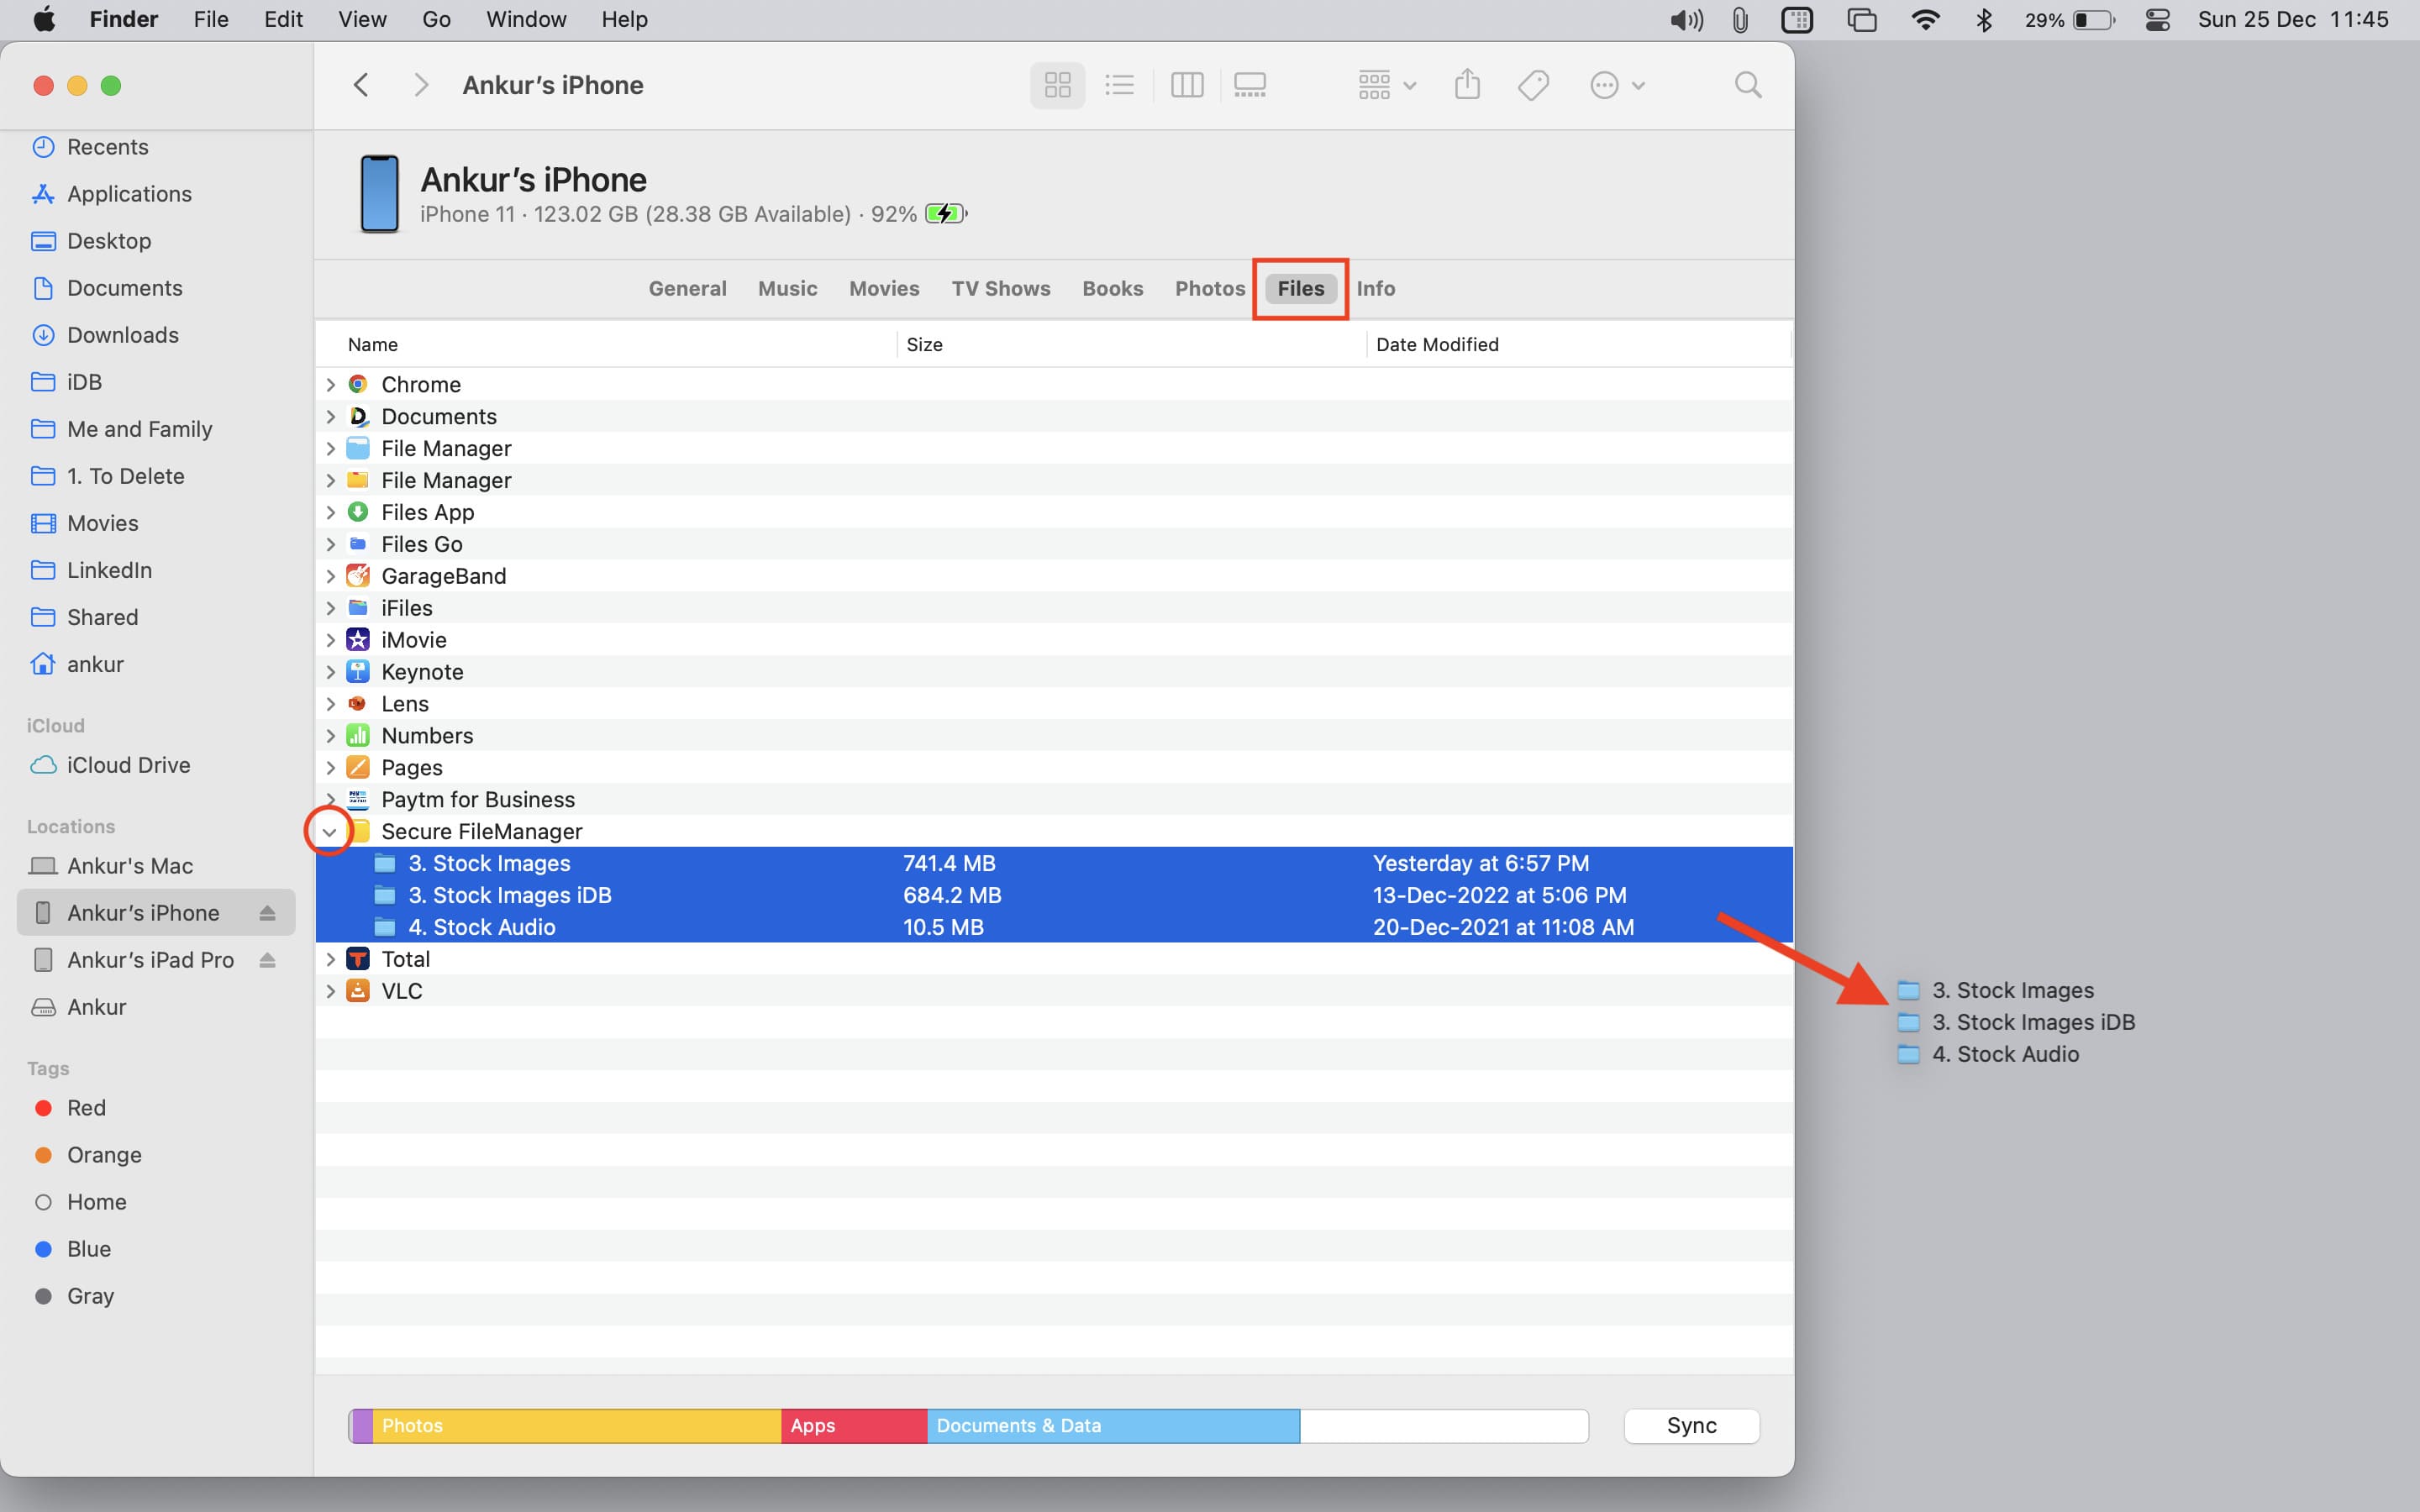
5) With the initial setup completed, bring your attention back to Finder or Apple Devices app and go to the Files section.
6) You’ll see the iOS app you downloaded earlier. Make sure the Finder (or Apple Devices) window isn’t taking up the entire screen, and open the computer folder where you have the files you want to store on your iPhone or iPad.
7) Drag the files or folders from the computer folder to the app visible inside the Files section. Depending on the file size, it will take some time to transfer.
Here’s how it looks on a Windows PC:

8) Once done, eject your iPhone by clicking the small eject icon.

You have successfully moved files from your Mac or PC to your iPhone or iPad.
Where to find the stored files on your iPhone
The files you transfer using the above steps can appear in the following locations.
Option 1: Inside the iOS app
If the files you transferred are compatible with the app, or if the app is a file manager, you can access the files within the app itself. Look for a folder or section named iTunes, Files, File Sharing, Computer, or something similar. For example, if you transfer a PDF to the Documents app, it can open it. Similarly, if you store an MKV, MP4, or AVI file in the VLC app, it can play it.
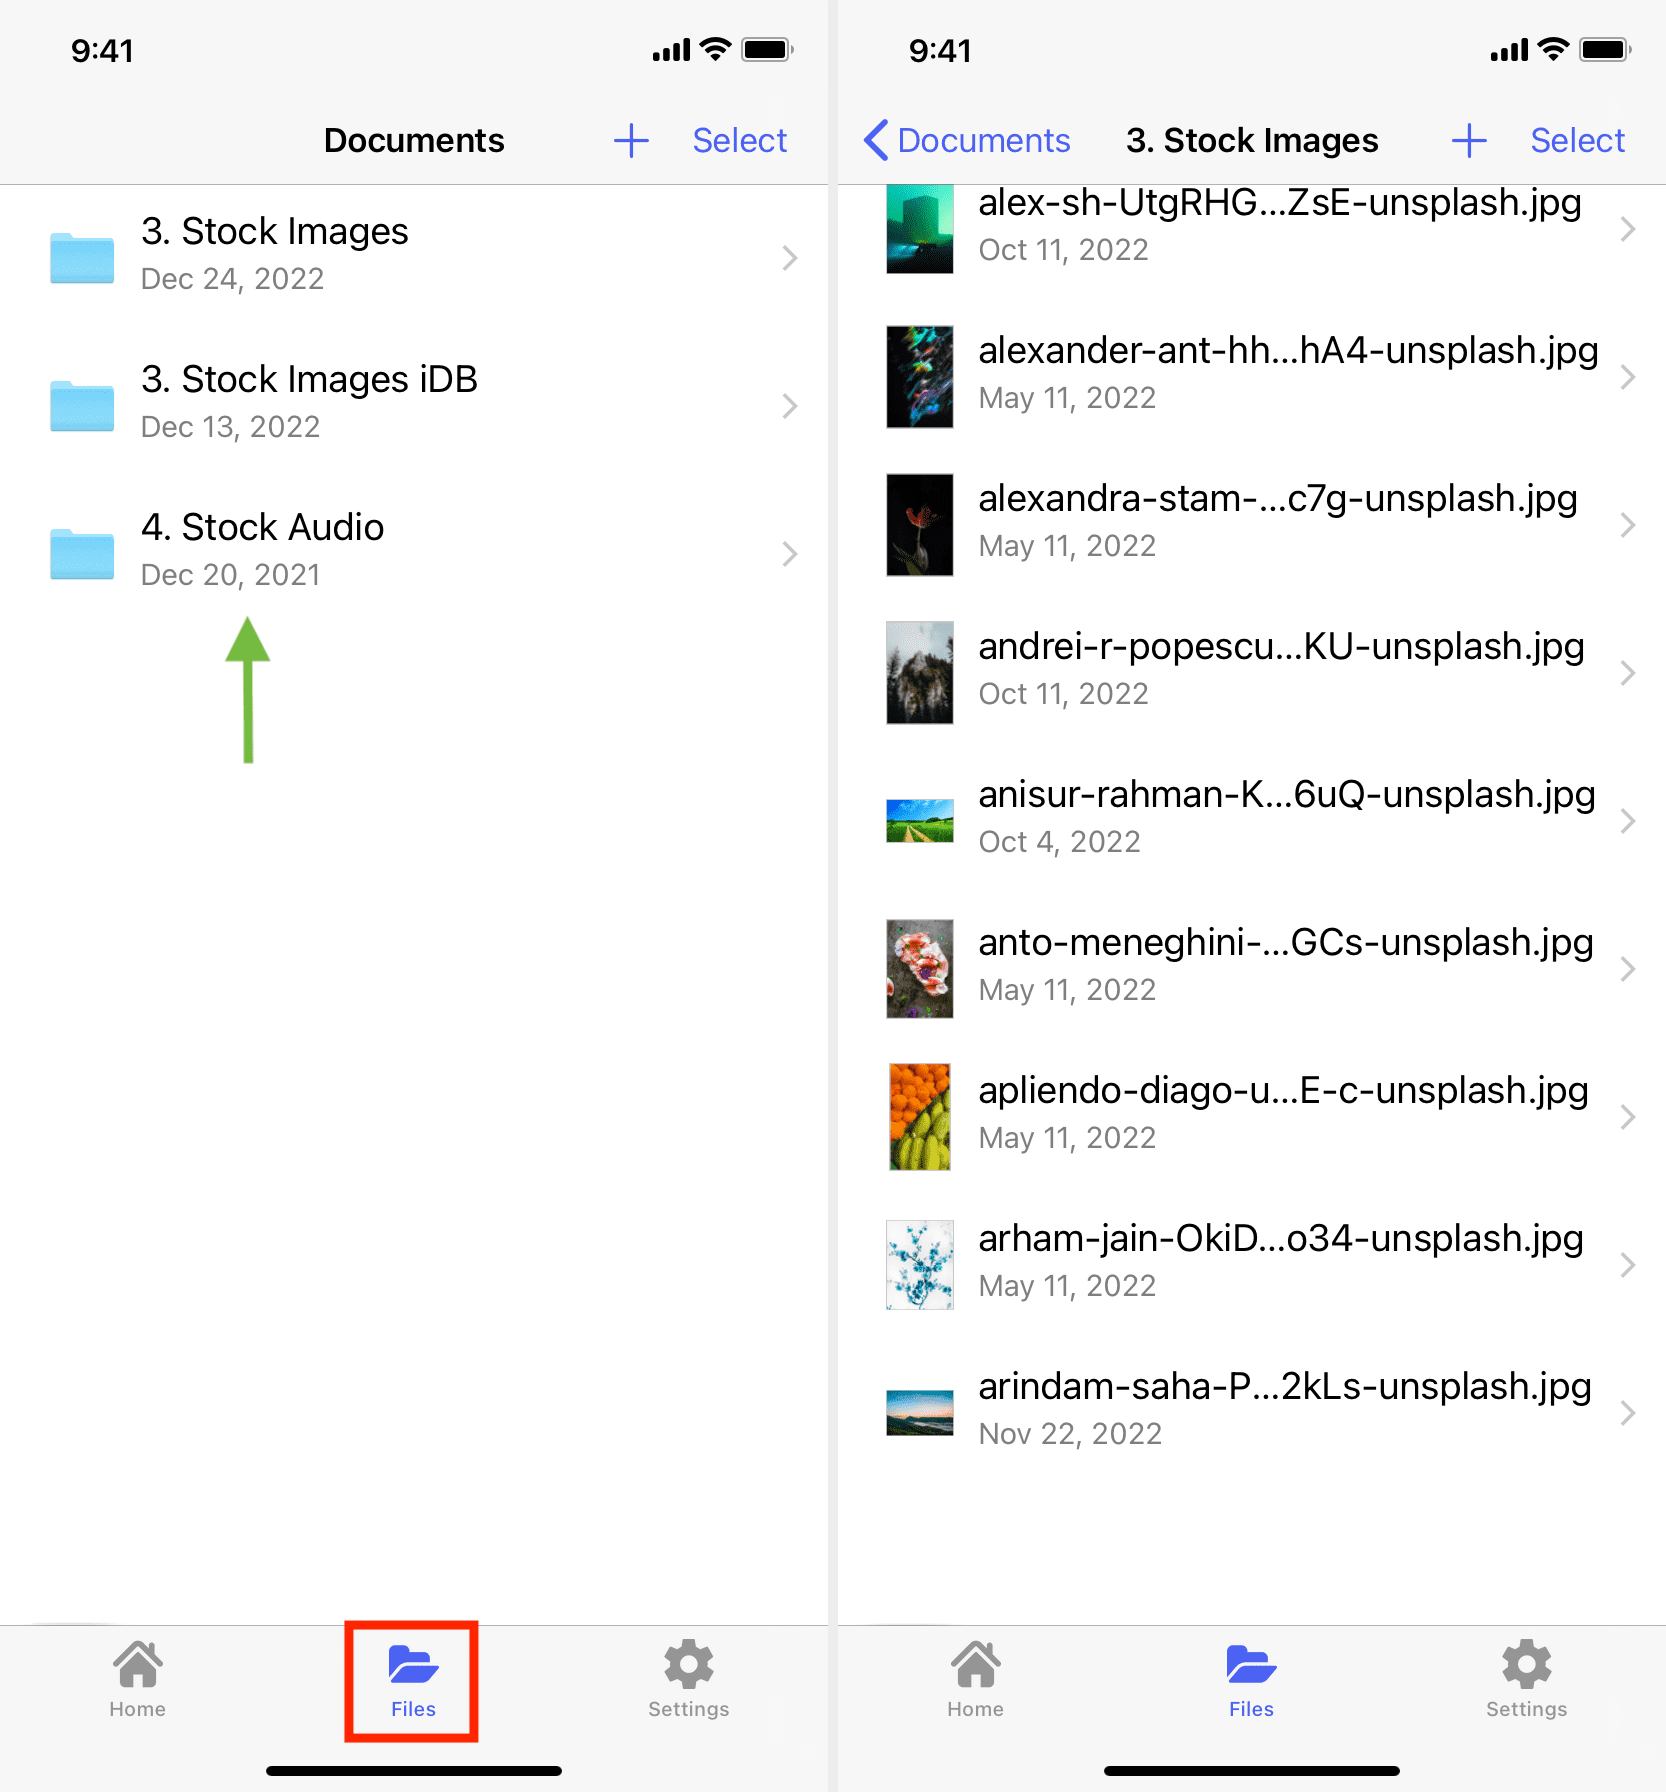
Option 2: Inside the Apple Files app
Go to the On My iPhone/iPad section of the Files app, and you may see a folder that has the same name as the iOS app. You should see the files you transferred from your Mac or PC here.
Option 3: Only when connected to a computer
It’s also possible that you may not see the files inside the concerned app or the Files app. However, rest assured that your data is saved on your iPhone or iPad. You can access it when you connect your device to a Mac or PC and navigate to the Files section (explained below).
Move the files from your iPhone or iPad to a computer
- If you want to access those files on a Mac or PC in the future, follow all the steps 1 to 6 mentioned above. If it’s the same computer, you won’t have to go through the entire trust process again. But for a different computer, you’ll have to authorize it.
- Now, head to the Files section in Finder or the Apple Devices app.
- Click the tiny arrow next to the app name in Finder to expand it. On a Windows PC, simply click the app name. You’ll see all the saved files here.
- Drag the file from Finder (or the Apple Devices app window) onto your computer’s desktop or folder.
Delete the files
You can delete the stored files from your iPhone or computer.
From iPhone
Open the concerned app or the Files app where these files are saved. From here, select and delete them.
Aside from that, if you delete the app where the files are saved, it automatically removes all the files stored inside it. For instance, if I delete the Documents app, all the files and folders I have saved there will be removed.
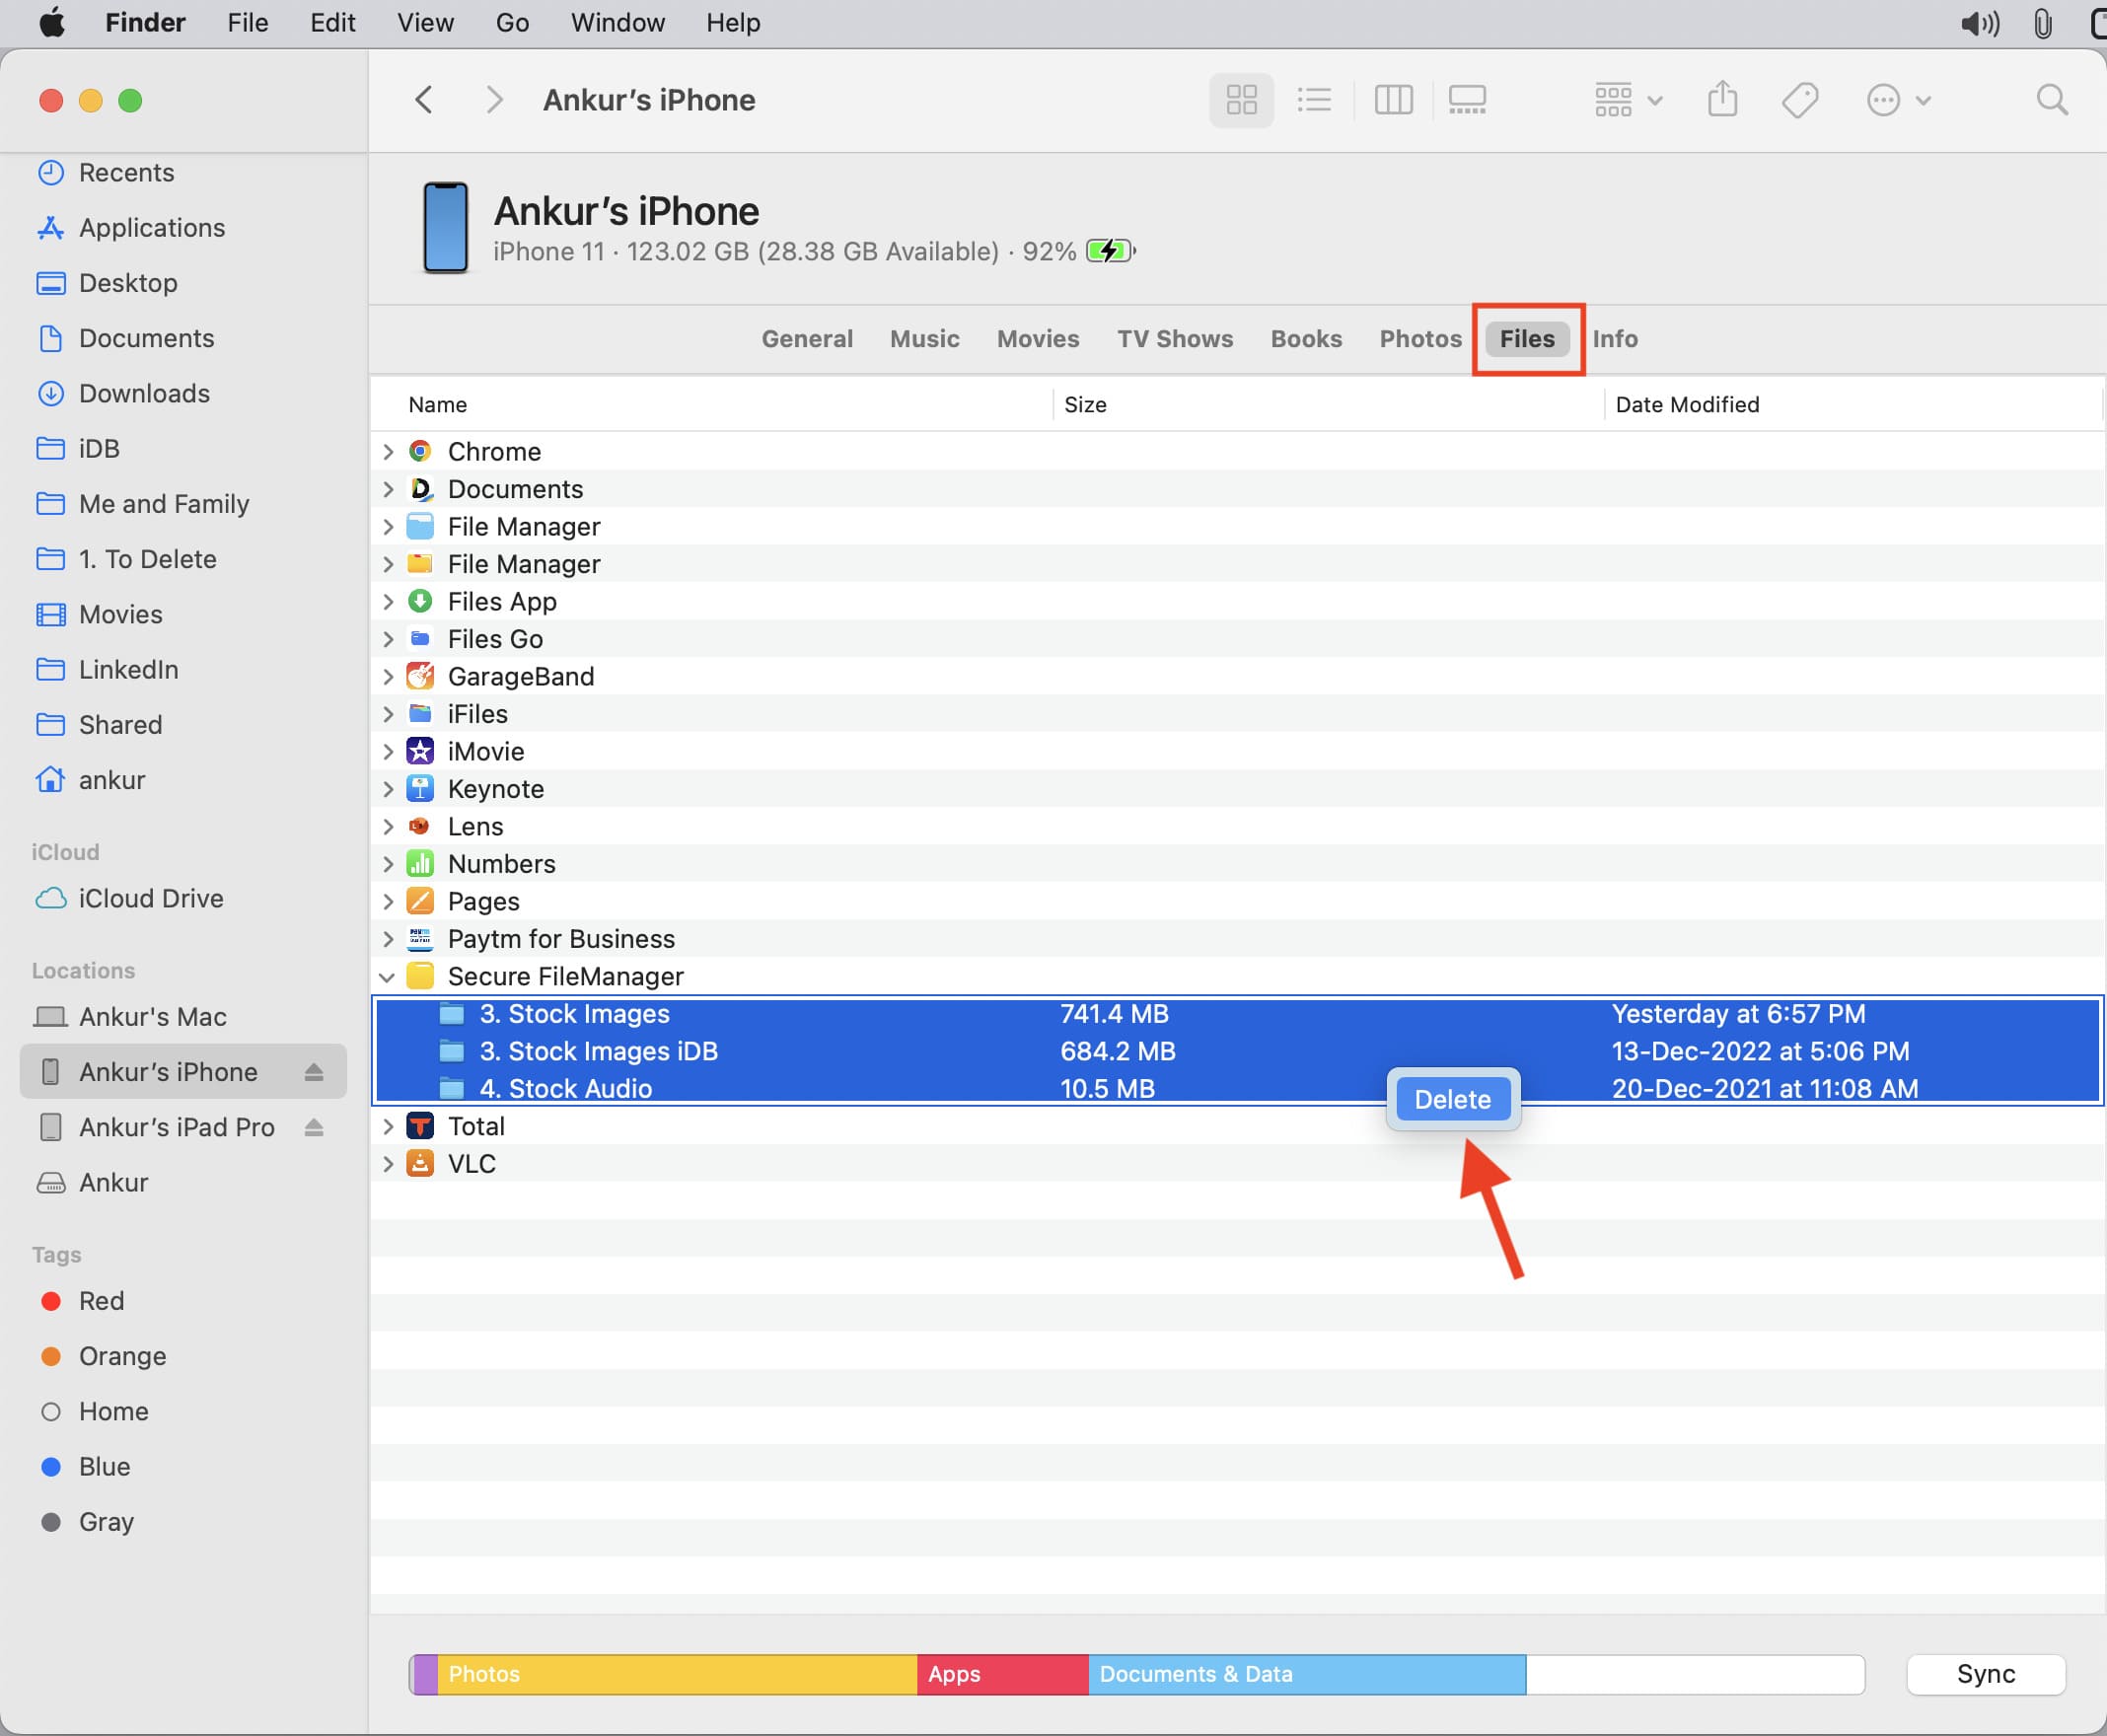
From computer
- Access the files saved on your iPhone or iPad inside Mac’s Finder or PC’s Apple Devices app.
- Select the file, right-click over it and choose Delete.
Use iPhone or iPad as a wireless USB drive
In the above steps, you saw how to copy files from a computer to an iPhone or iPad and vice versa via a Lightning or USB-C cable.
You can also enable wireless access after successfully connecting your iPhone or iPad to your computer. Once you do that, your iPhone or iPad will appear inside Finder or the Apple Devices app when both your iPhone/iPad and computer are on the same Wi-Fi network.
- Connect your iPhone or iPad to your computer and follow the above-mentioned steps to complete the trust process.
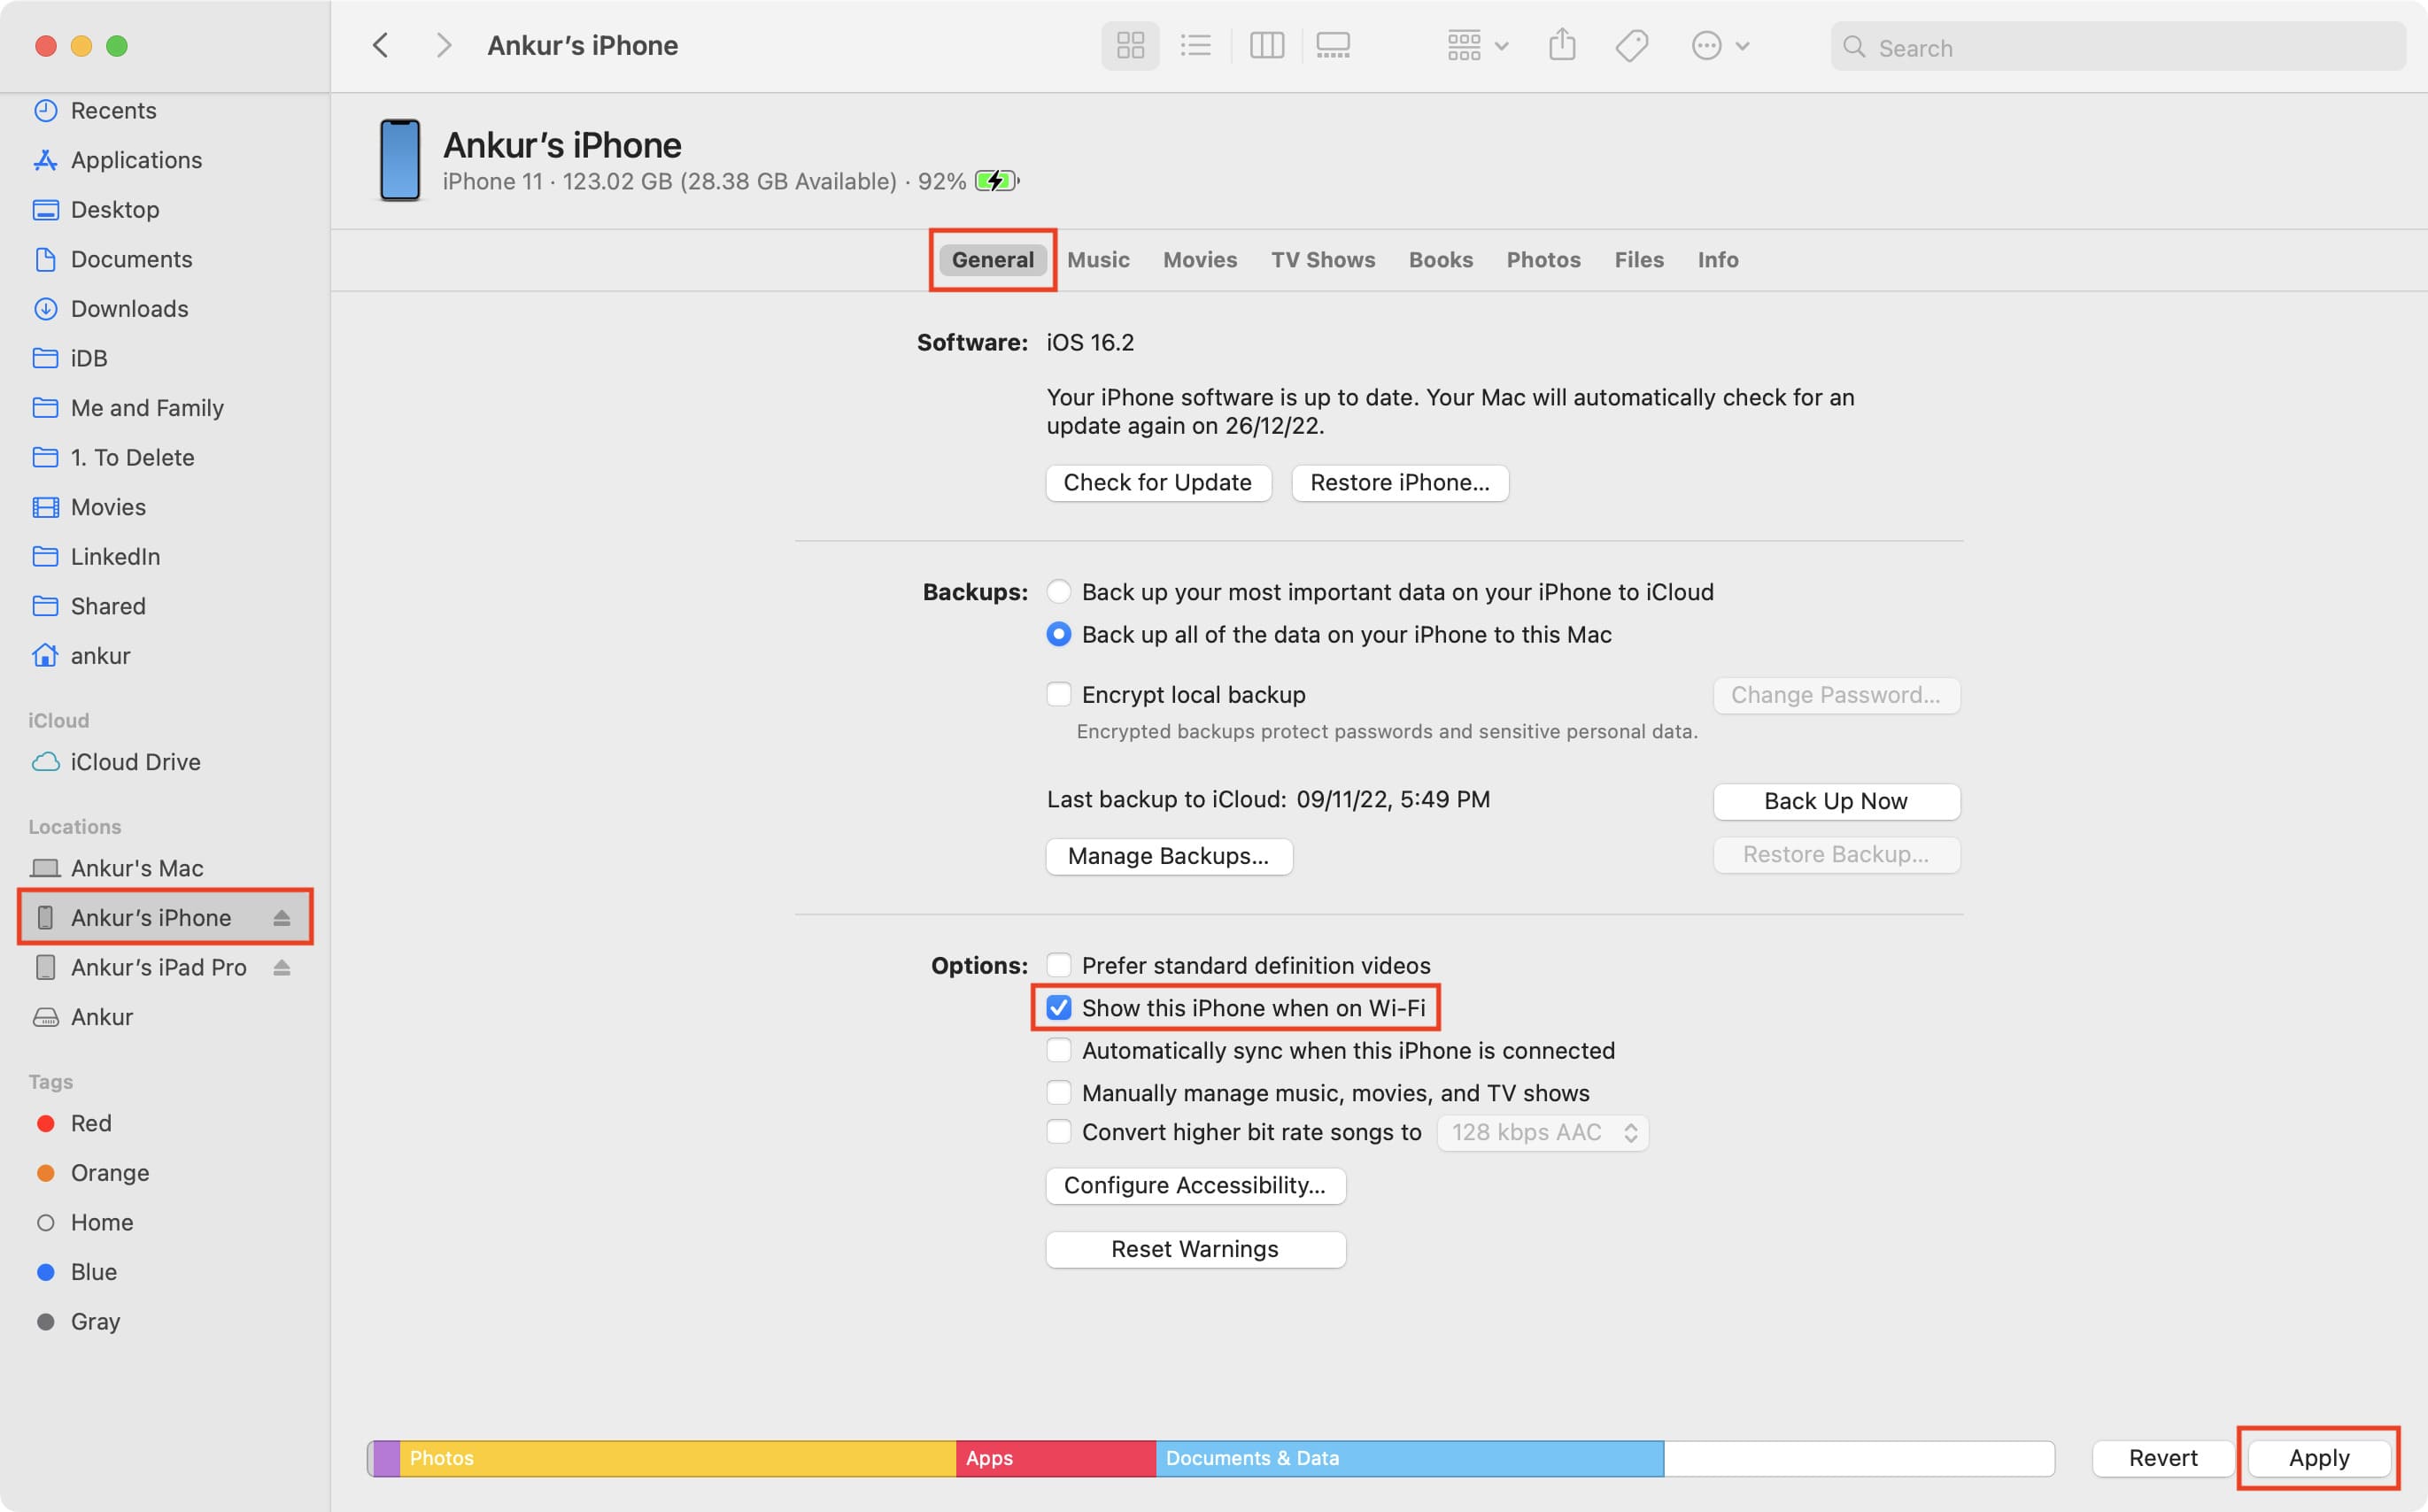
- Select your iPhone or iPad in Mac’s Finder or PC’s Apple Devices app.
- Scroll down in the General section and check the box that says ‘Show this iPhone when on Wi-Fi.’
- Click Apply or Sync.
You have successfully set your iPhone/iPad to appear inside Finder/Apple Devices app when both the iPhone/iPad and Mac/Windows PC are on the same Wi-Fi network and your iOS device is unlocked. From now on, you won’t need a cable to transfer files between devices.
Important note: Keep your iPhone or iPad screen awake and unlocked during the wireless transfer. The transfer will fail if the device locks. For example, if you’re transferring a 3 GB movie file from your computer to your iPhone, it may take a few minutes. If your iPhone locks during the transfer, it could fail, and you’ll need to restart the process.
On a related note: