Check out these free solutions to compress PDF documents and reduce their file size on iPhone, iPad, and Mac, then pick ones that work best for you.
Some websites impose a size limit on uploads, so you may need to compress your PDF to ensure it doesn’t exceed this limit. Reducing a PDF’s size is definitely a good idea when sharing huge documents over a slow Internet connection, but you can also reduce the size of PDFs stored locally in order to save storage space on your phone or computer.
Use the built-in tools to make a PDF smaller
Apple has built PDF compression tools right into iOS, iPadOS, and macOS. These built-in methods don’t let you adjust compression and may not reduce the size of some PDF files, but they’re available right out of the box without installing anything extra.
Preview on the Mac
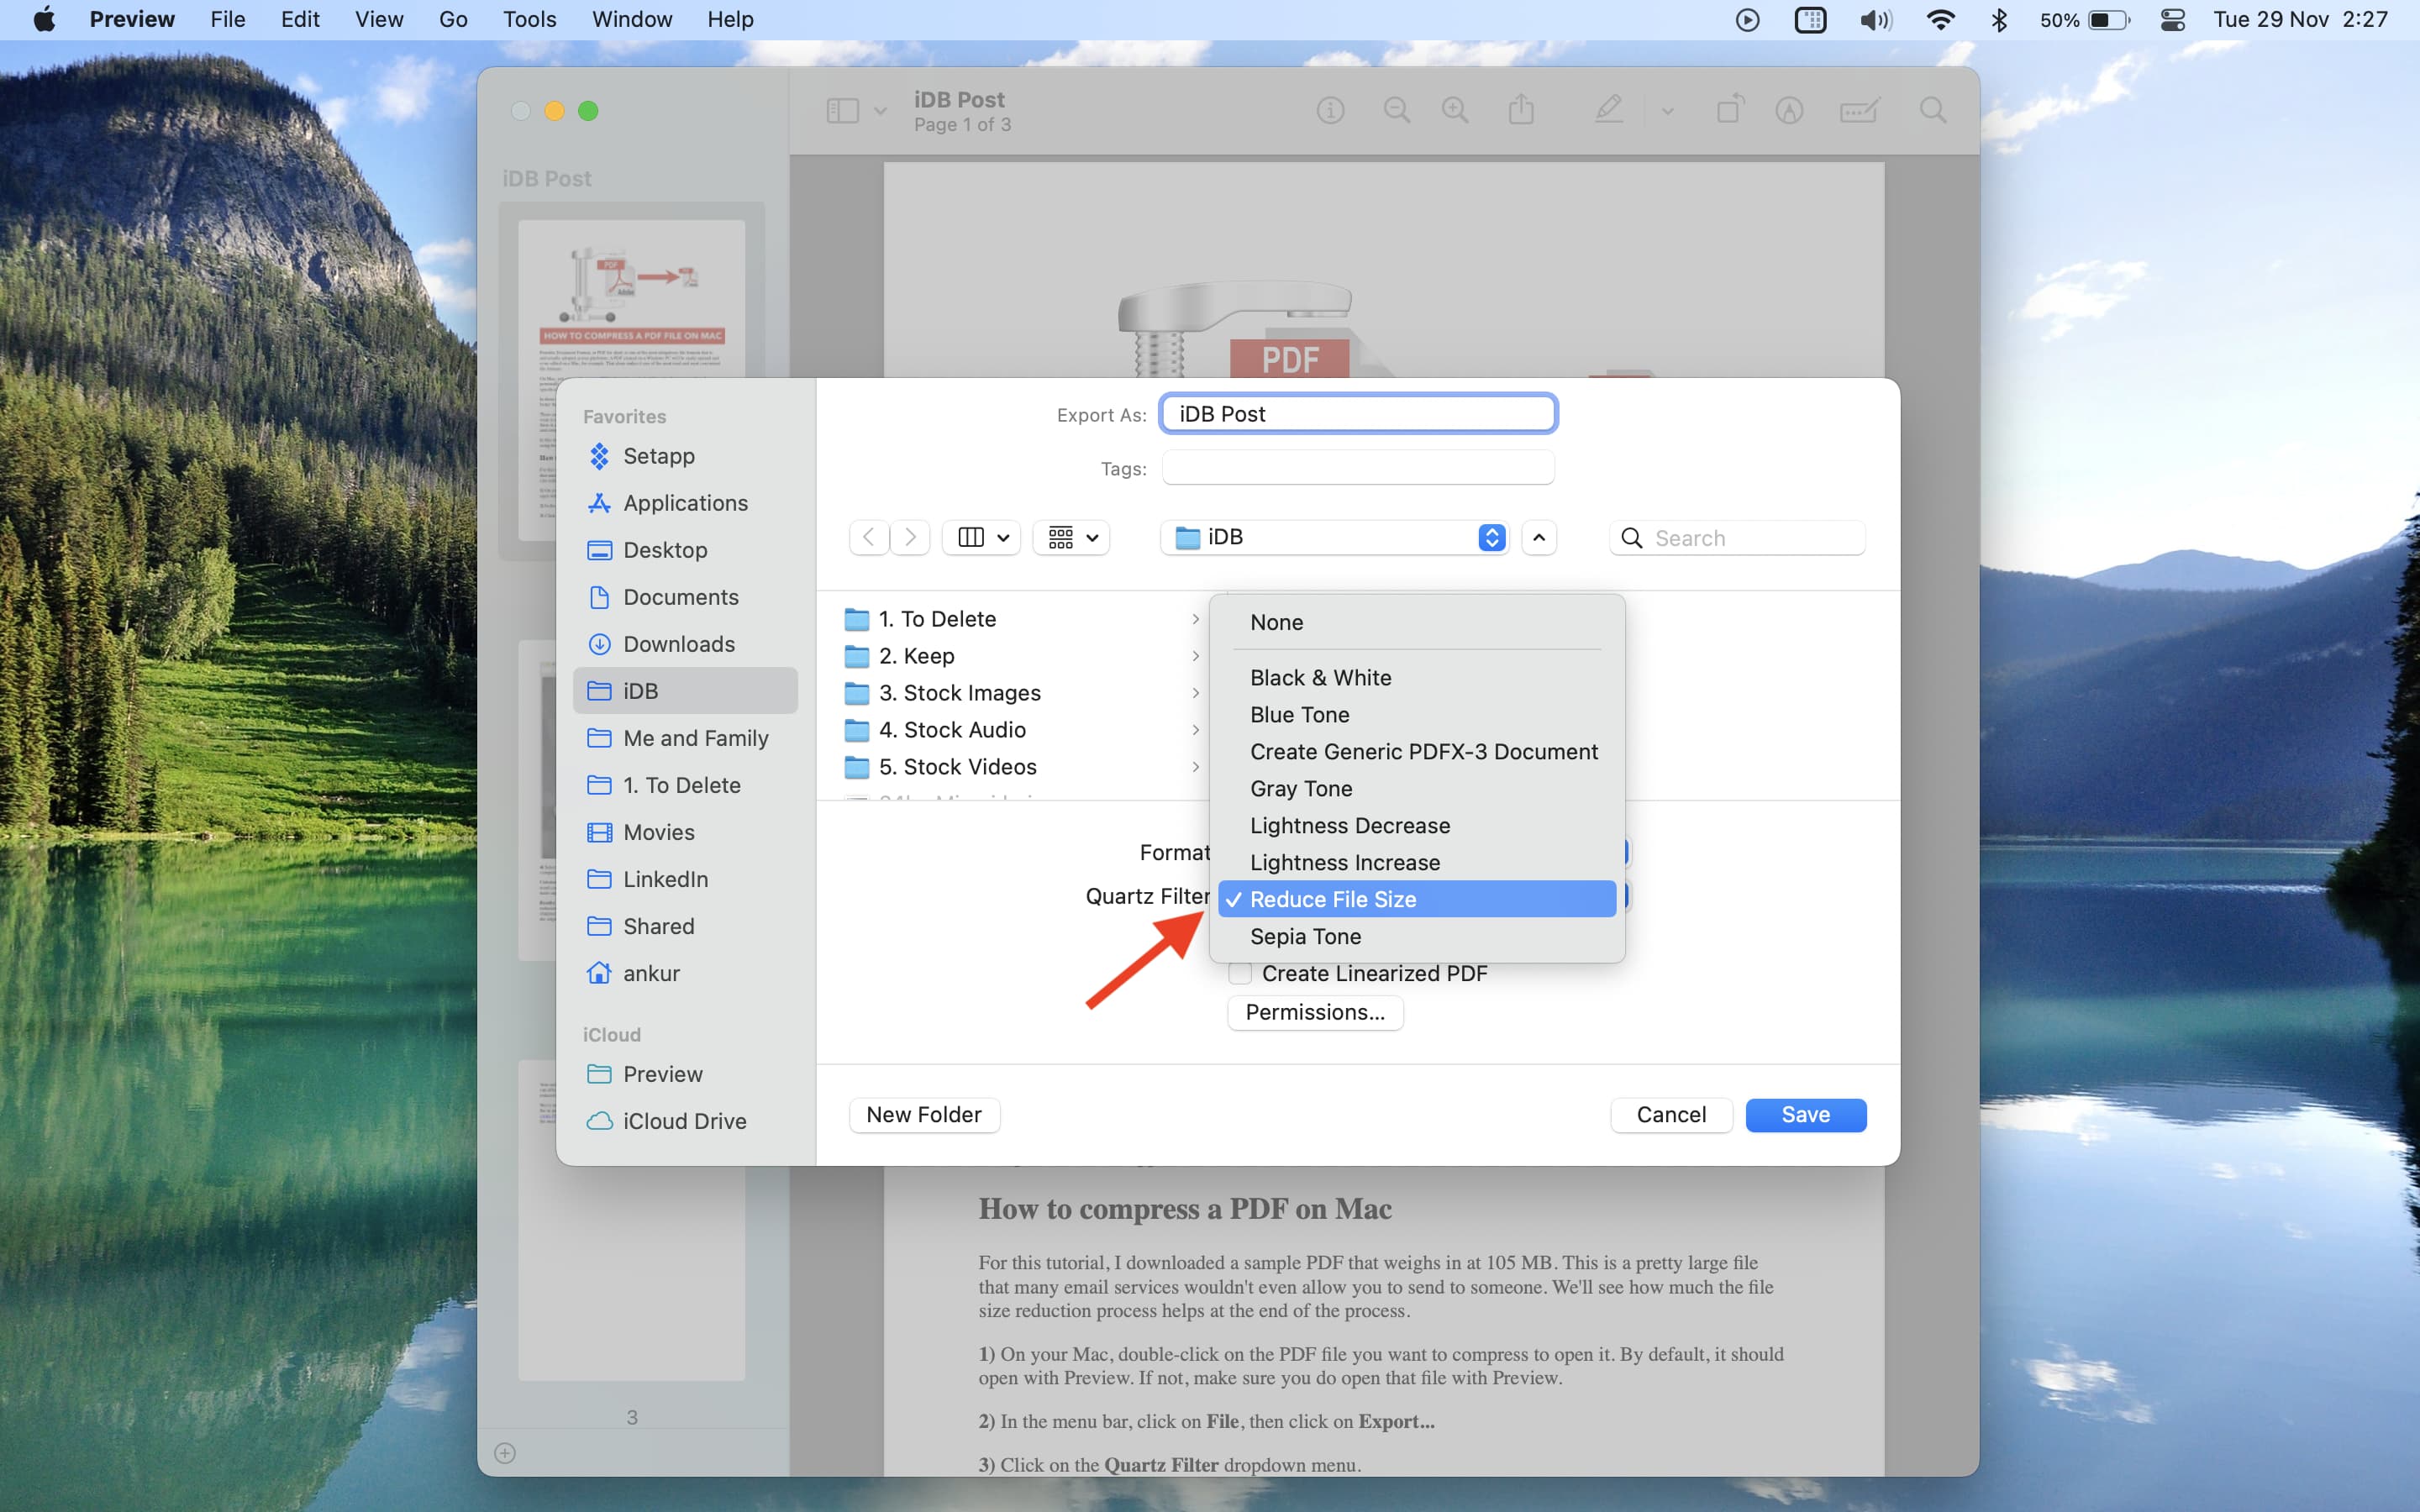
macOS has a relatively unknown feature which allows you to compress a PDF document to reduce its size on disk. Start by double-clicking a PDF file in the Finder to open it in Preview (or right-click and choose Open With > Preview from the menu). Click the File menu and choose Export, then click the Quartz Filter menu, choose the Reduce File Size option and hit Save. Preview will save a compressed PDF file to the selected location.
As mentioned, you don’t have any control over compression. If that’s something you really want to adjust, look into other options right ahead.
Quick Actions in the built-in Files app on iPhone and iPad
Open the Files app on your iPhone or iPad, touch and hold a desired PDF file and choose Quick Actions > Optimize File Size from the menu. Doing so will process your PDF and reduce its size, then save it.

The Shortcuts app
You can reduce the size of PDFs on your iPhone or iPad with the free Optimize PDF File Size automation. Click this link in Safari to import the automation into the Shortcuts app, then tap Optimize PDF File Size in the All Shortcuts section to run it, then select a desired PDF on your device and choose Open.
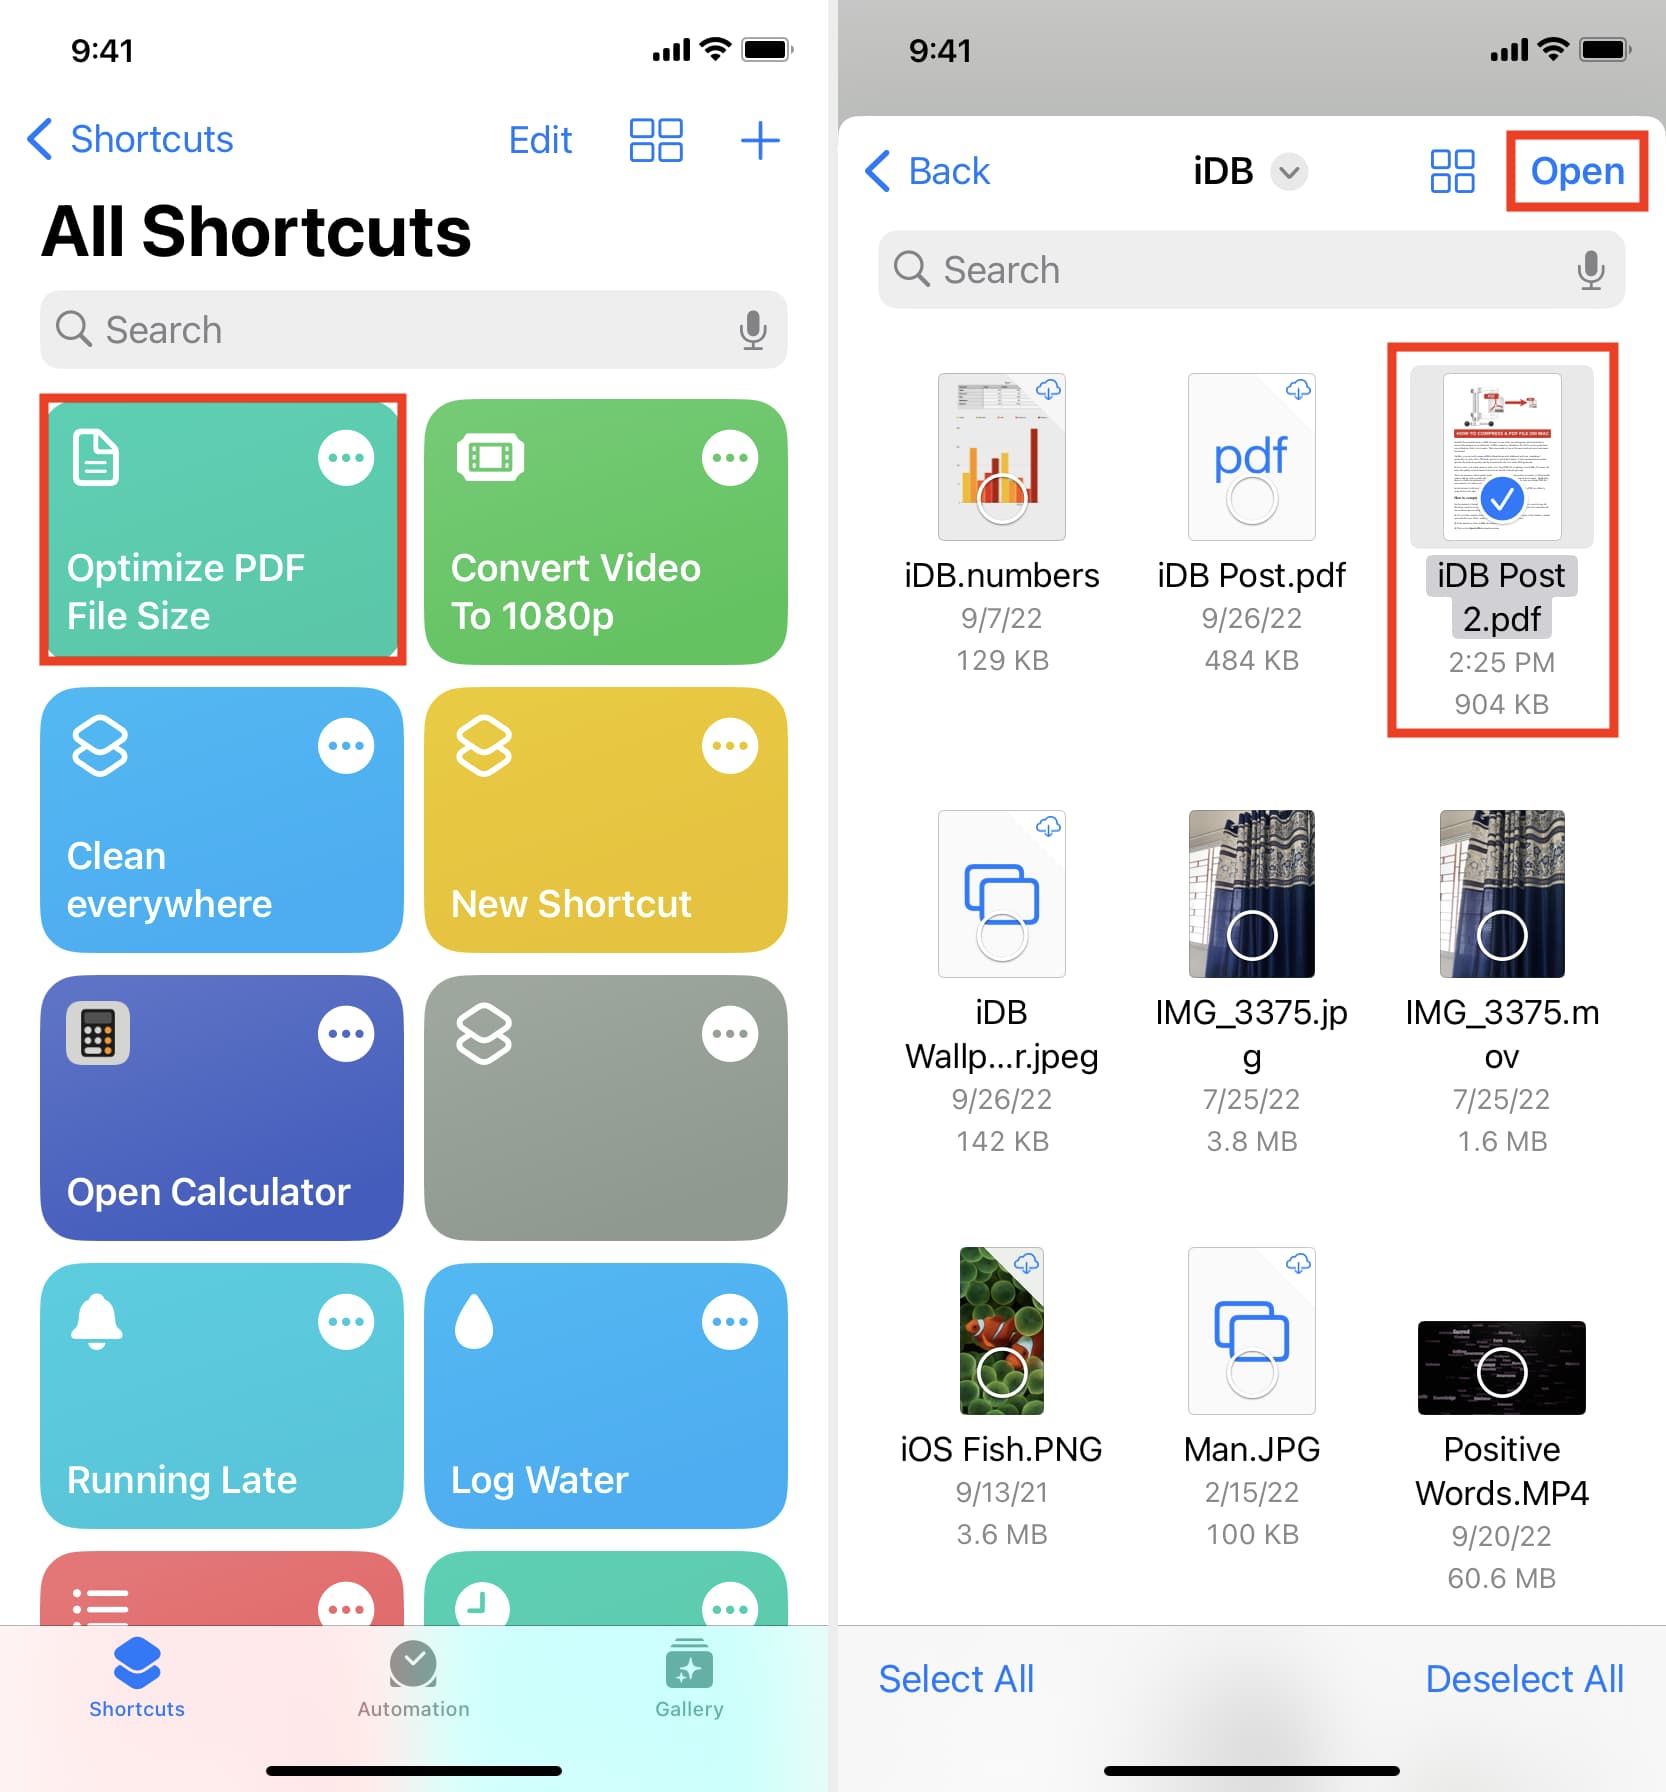
After compressing and making your PDF smaller, the automation will ask where to save a processed file, so navigate to a desired location and tap Open. Depending on the size of your PDF, the automation may take time to finish compressing and saving your file.
If the built-in methods mentioned above fail for a specific PDF, proceed with the solutions listed below.
Use offline apps to reduce PDF size
The App Store is home to many PDF-related apps, as evidenced by searching for “compress PDF” or similar. Some third-party apps upload PDFs to servers and many are paid. But don’t you worry a thing, we’ve rounded up PDF apps below that work offline and don’t require payment!
If you’re going to use them to compress PDFs containing confidential information, it may be a good idea to turn off Wi-Fi and cellular data on your device. Even though these apps don’t send your documents to servers, you can never be paranoid enough.
Mac
PDF Compressor Star: This app has the 1990s aesthetics, but gets the job done. Drag a PDF and drop it onto its window, then click the gear (settings) icon and adjust your compression level. Finally, hit Start, then choose the output location and click Save.
PDF Converter: Many advanced features are paid, but compressing PDFs is free.
PDF Compress+: Drag the file onto the app’s window and adjust the quality of PDF compression, then hit Compress, choose the output folder and click Compress again.
PDF Reader: Another app that lets you change PDF file size by choosing a desired compression level.
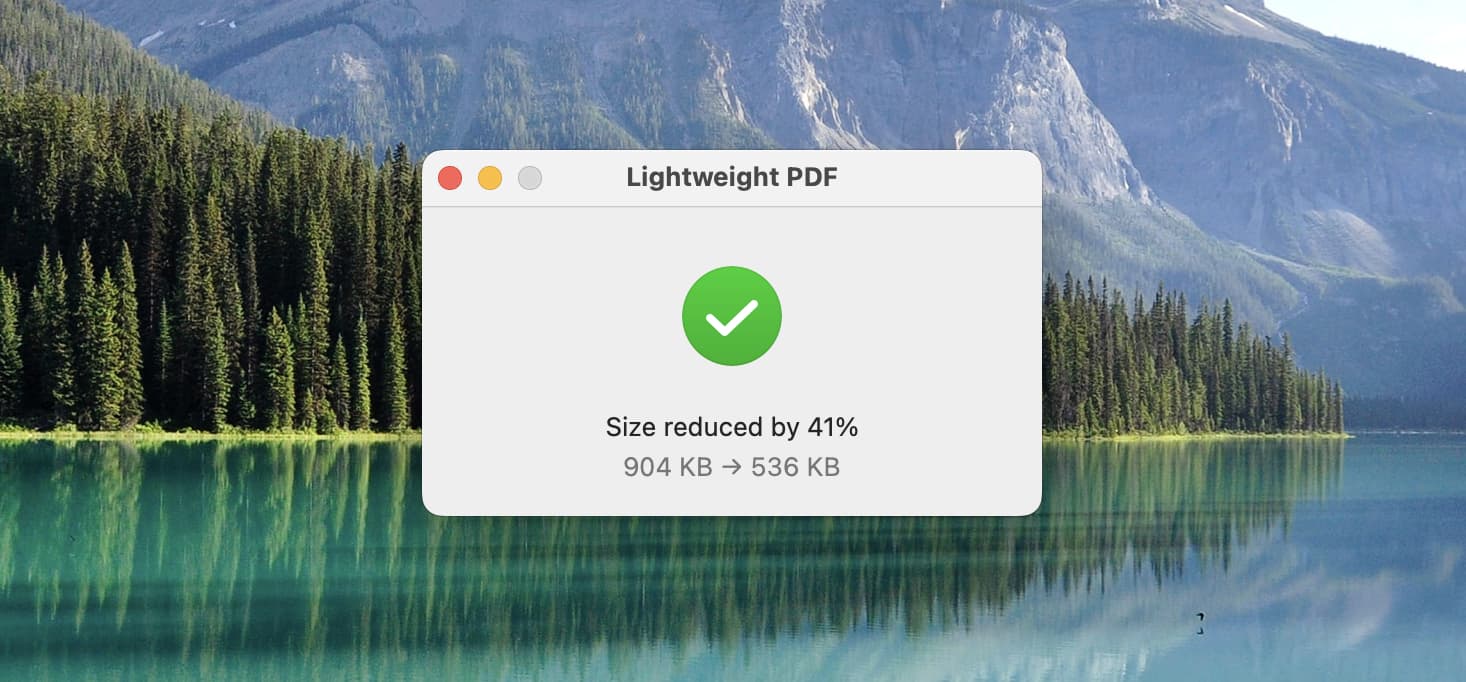
Lightweight PDF: This used to be a free app, but now costs $8. If you regularly work with PDFs, it consider paying because Lightweight PDF can decrease PDF file size by up to 90 percent. Drag a PDF document from your computer and drop it onto the Lightweight PDF window. After the app compresses and modifies your file, select it in the Finder and press Command + I to see its reduced file size.
iPhone and iPad
You can use this app for a certain number of times every day, and it works onApple silicon Macs. Download the PDF It All app from the App Store, open it, and choose the Compress PDF option. Now select Compression Level and pick between Low, Medium, High, or Super High.
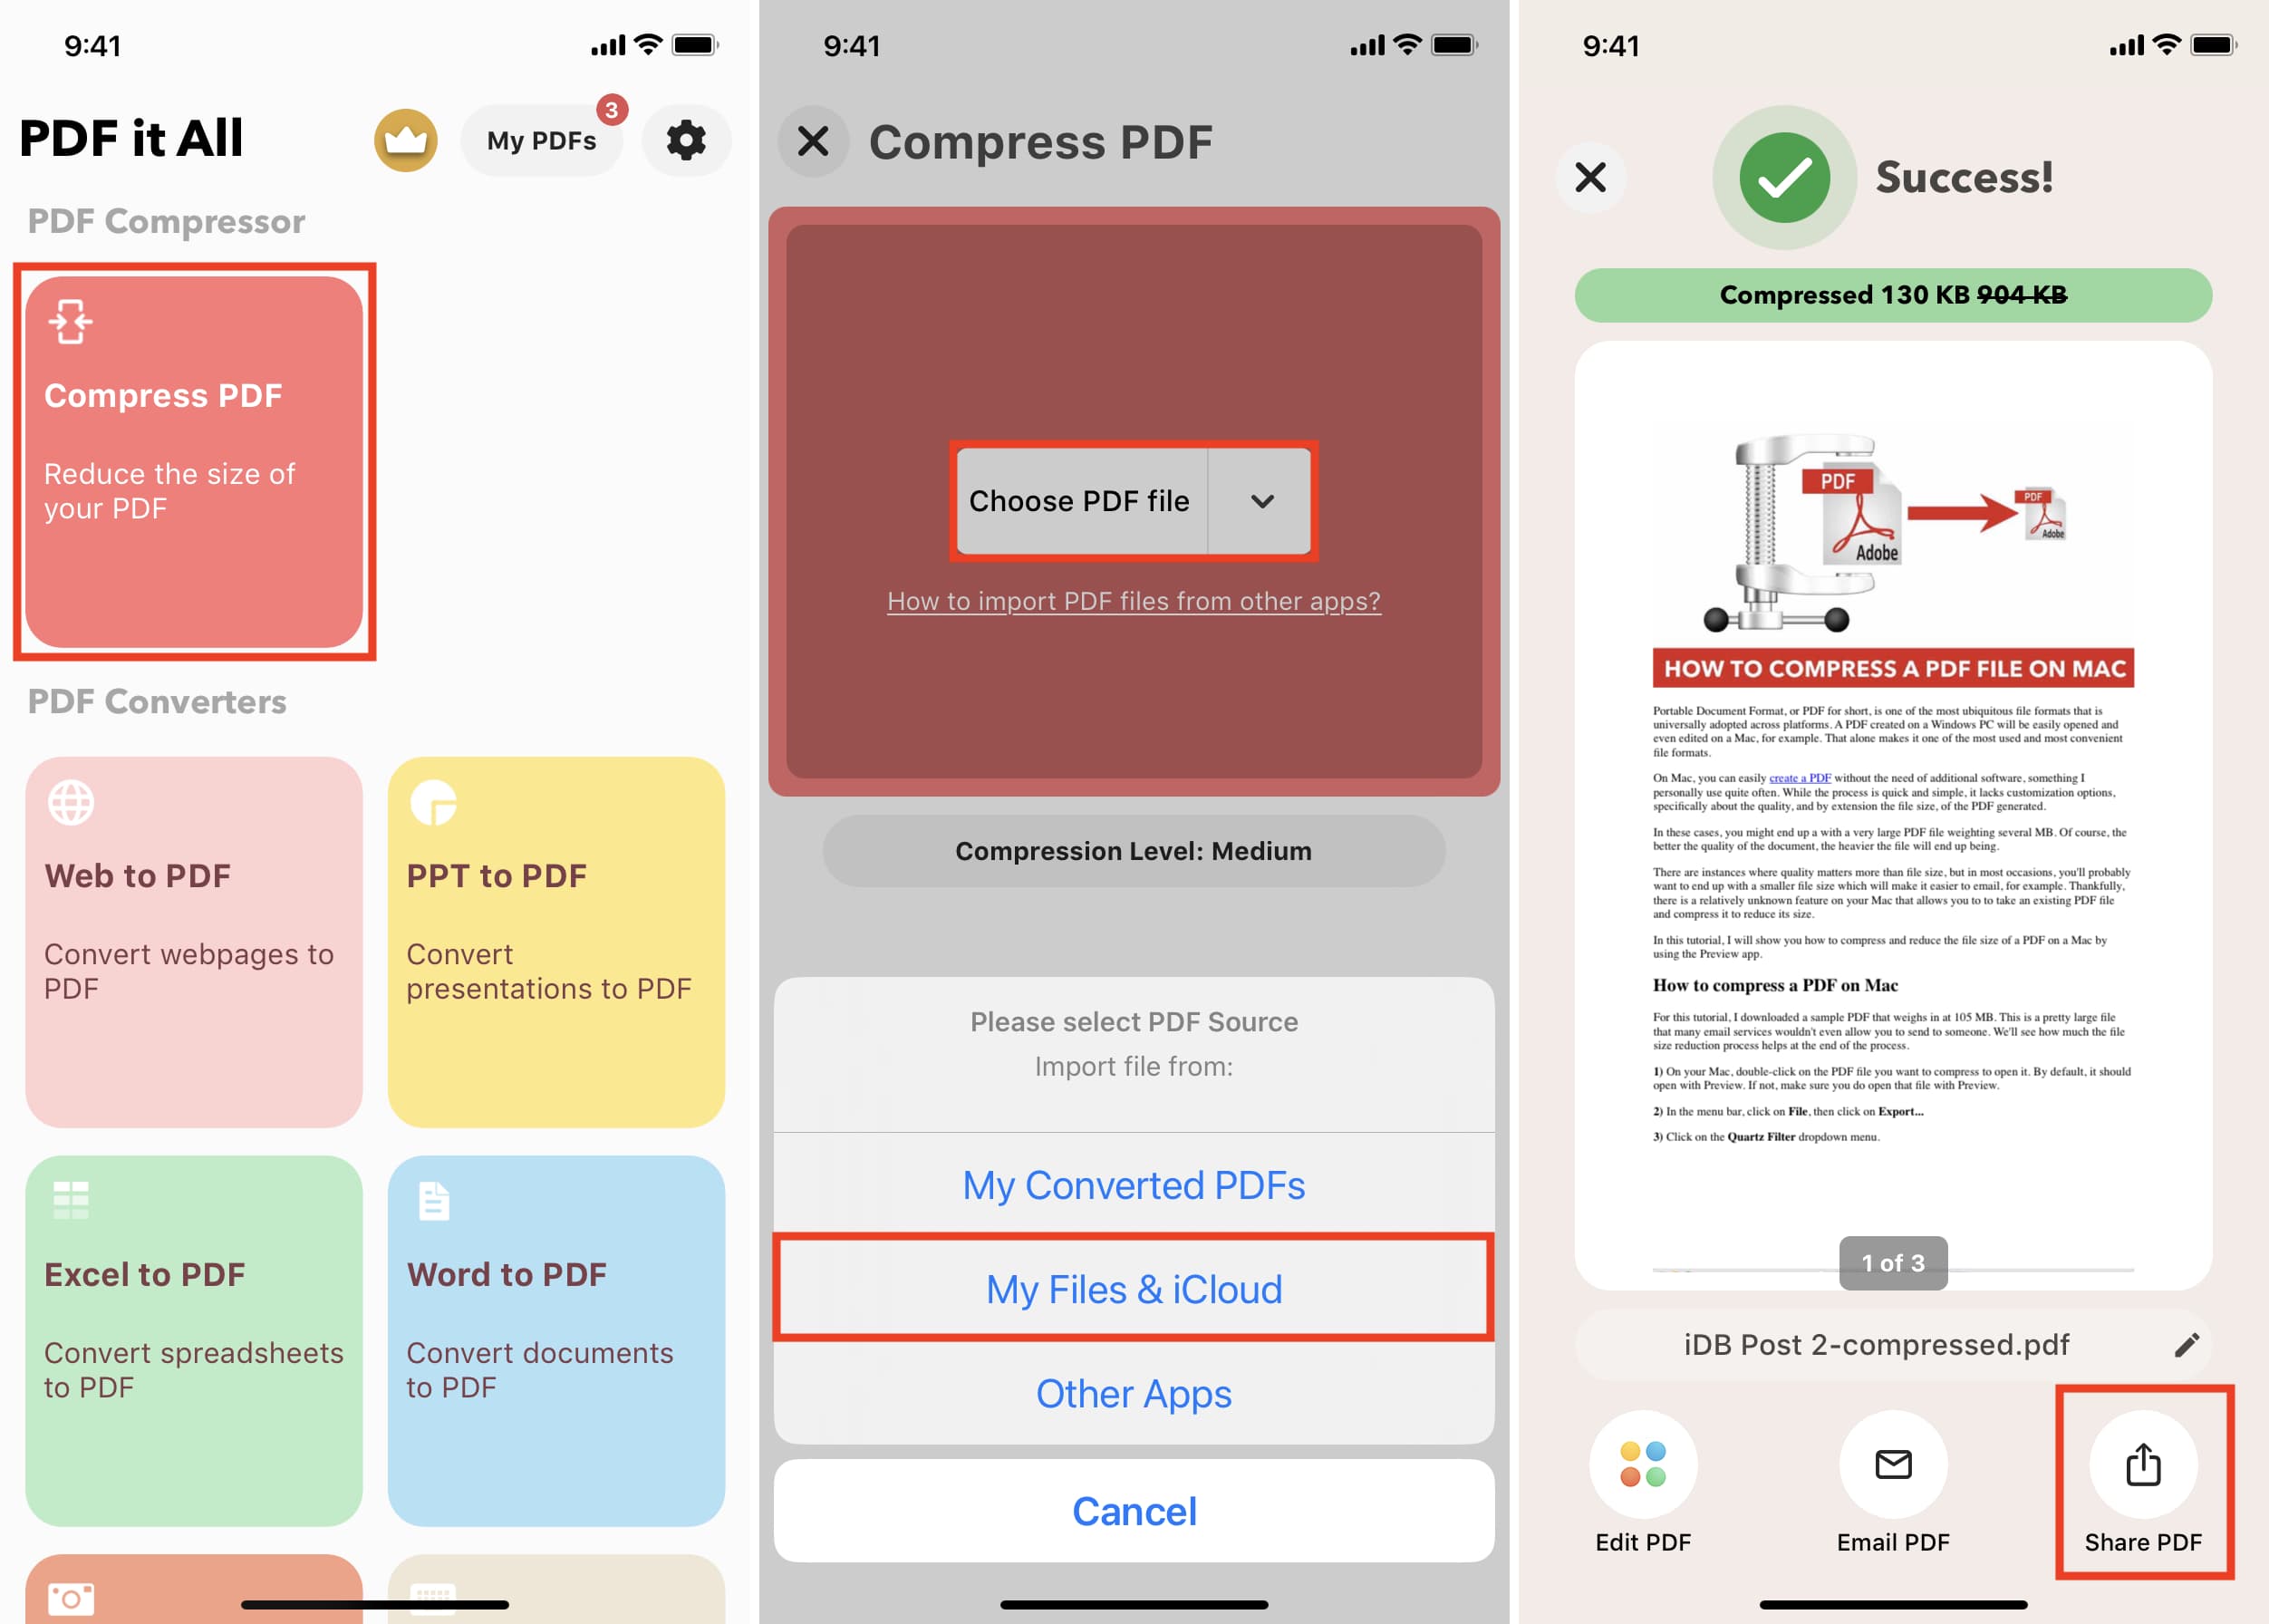
With the compression level set to your liking, tap Choose PDF file > My Files & iCloud and pick a PDF document you’d like to compress. Lastly, touch the Share PDF button and select how you’d like to share a compressed PDF (to save in the Files app, choose Save to Files).
Use specialized websites to compress PDF
The following websites require you to upload PDFs for compression. Many services claim that any uploaded files are automatically deleted after a short period of time. But if you’re hesitant, be sure to read their privacy policies before using them.
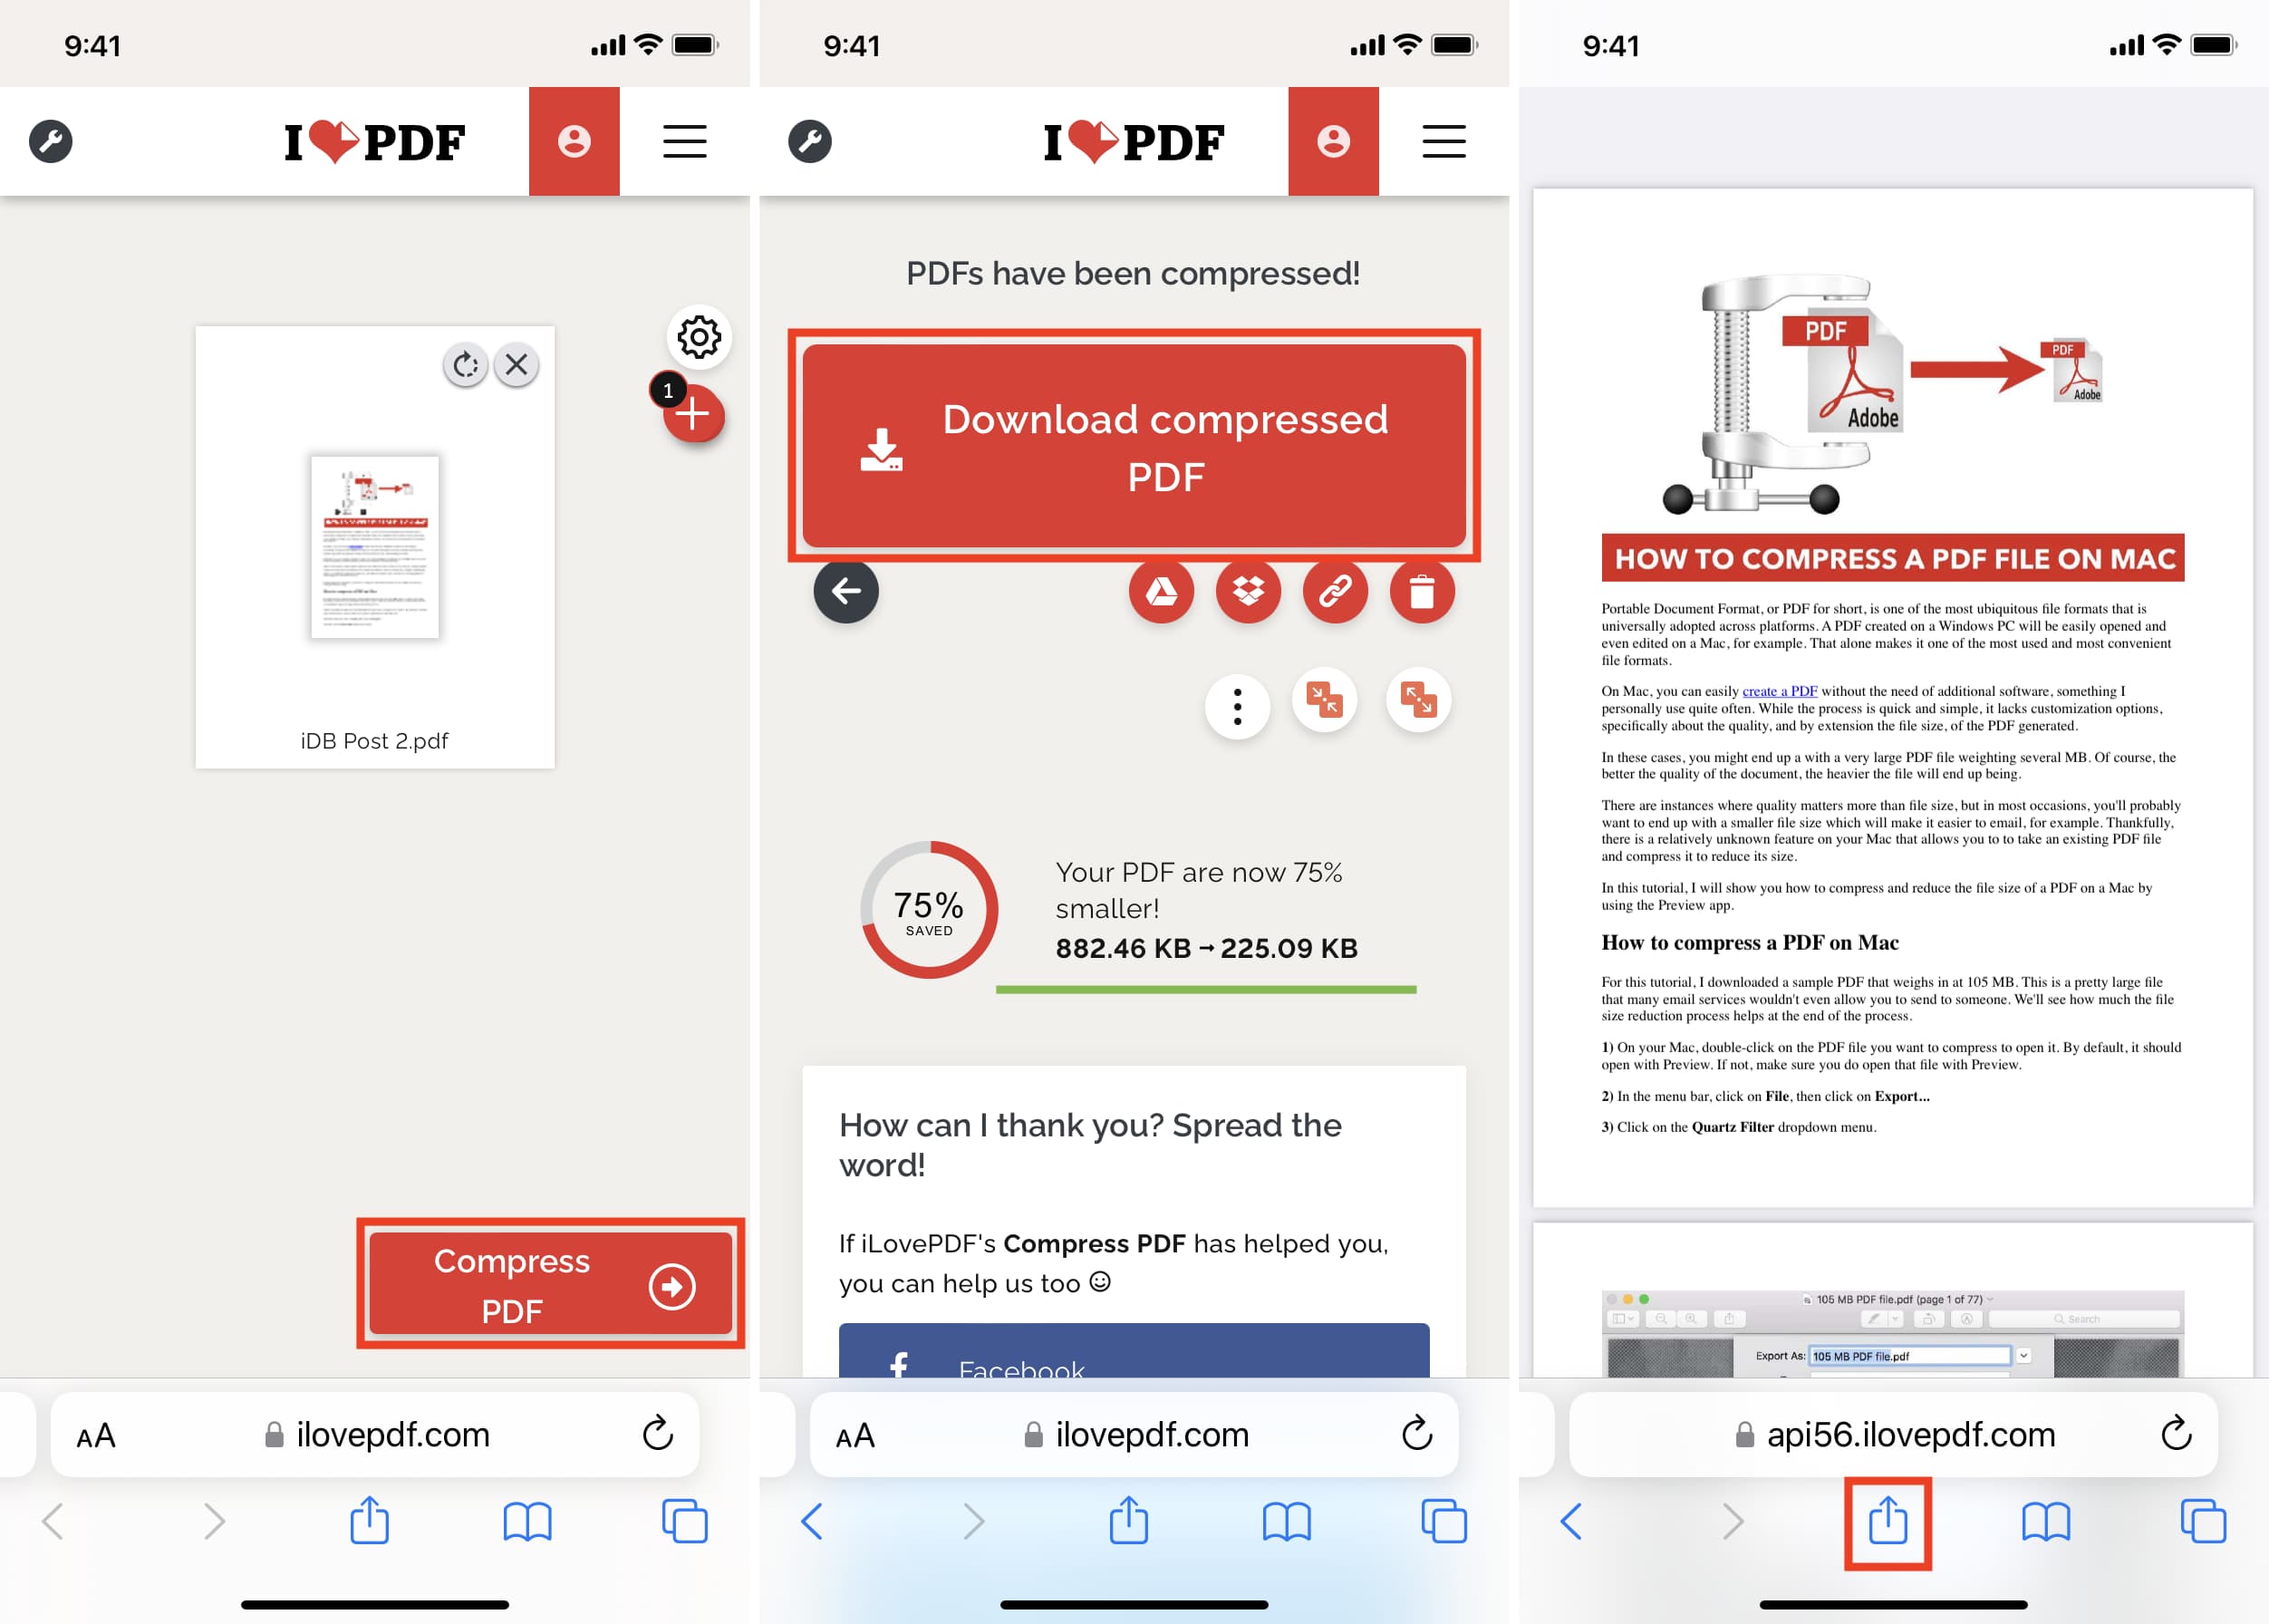
iLovePDF
I’ve been using this website for over six years because it caters perfectly to my PDF needs. Visit iLovePDF.com in a web browser on your iPhone, iPad or Mac and click the Select PDF files button to add your PDFs, then click Compress PDF. Compressed documents will automatically download in the Downloads folder on your Mac. To get the file on your iPhone or iPad, tap Download compressed PDF, hit the Share icon and choose Save to Files from the menu.
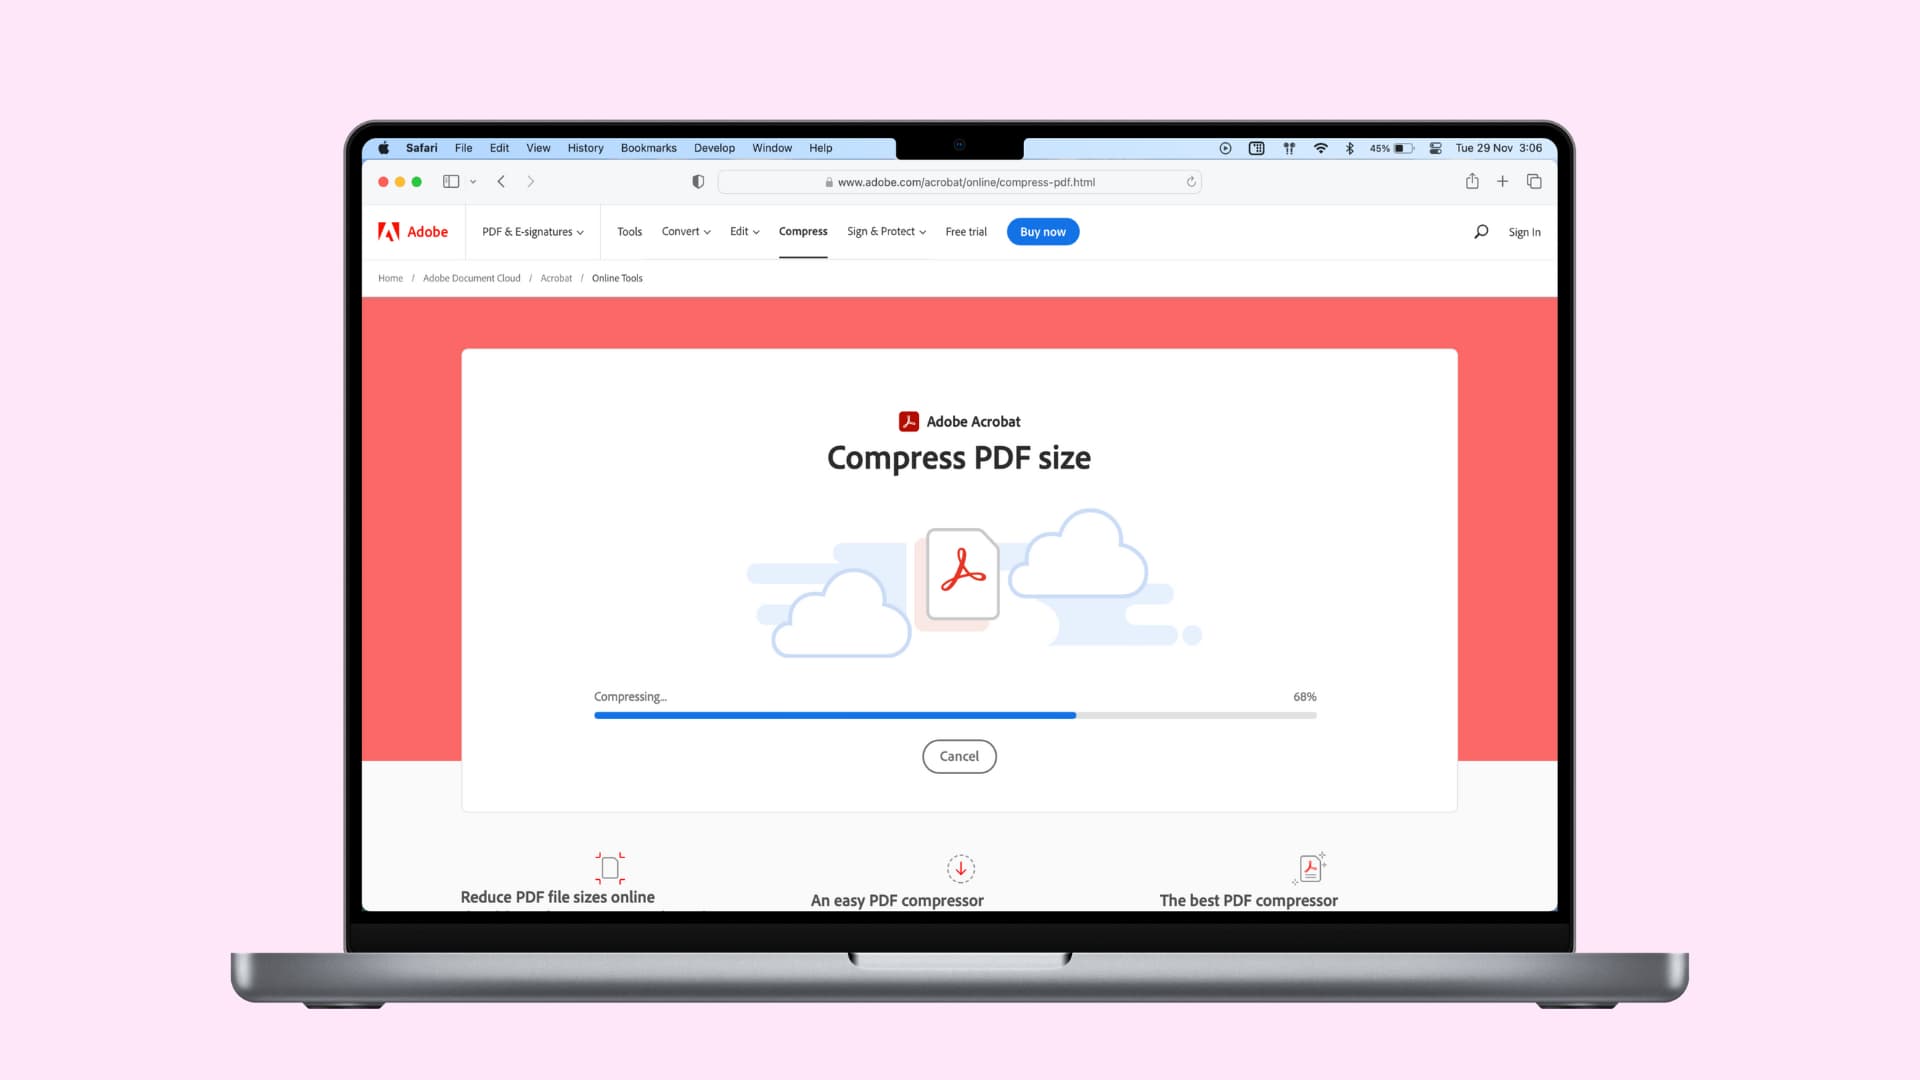
Use Adobe Acrobat in a browser
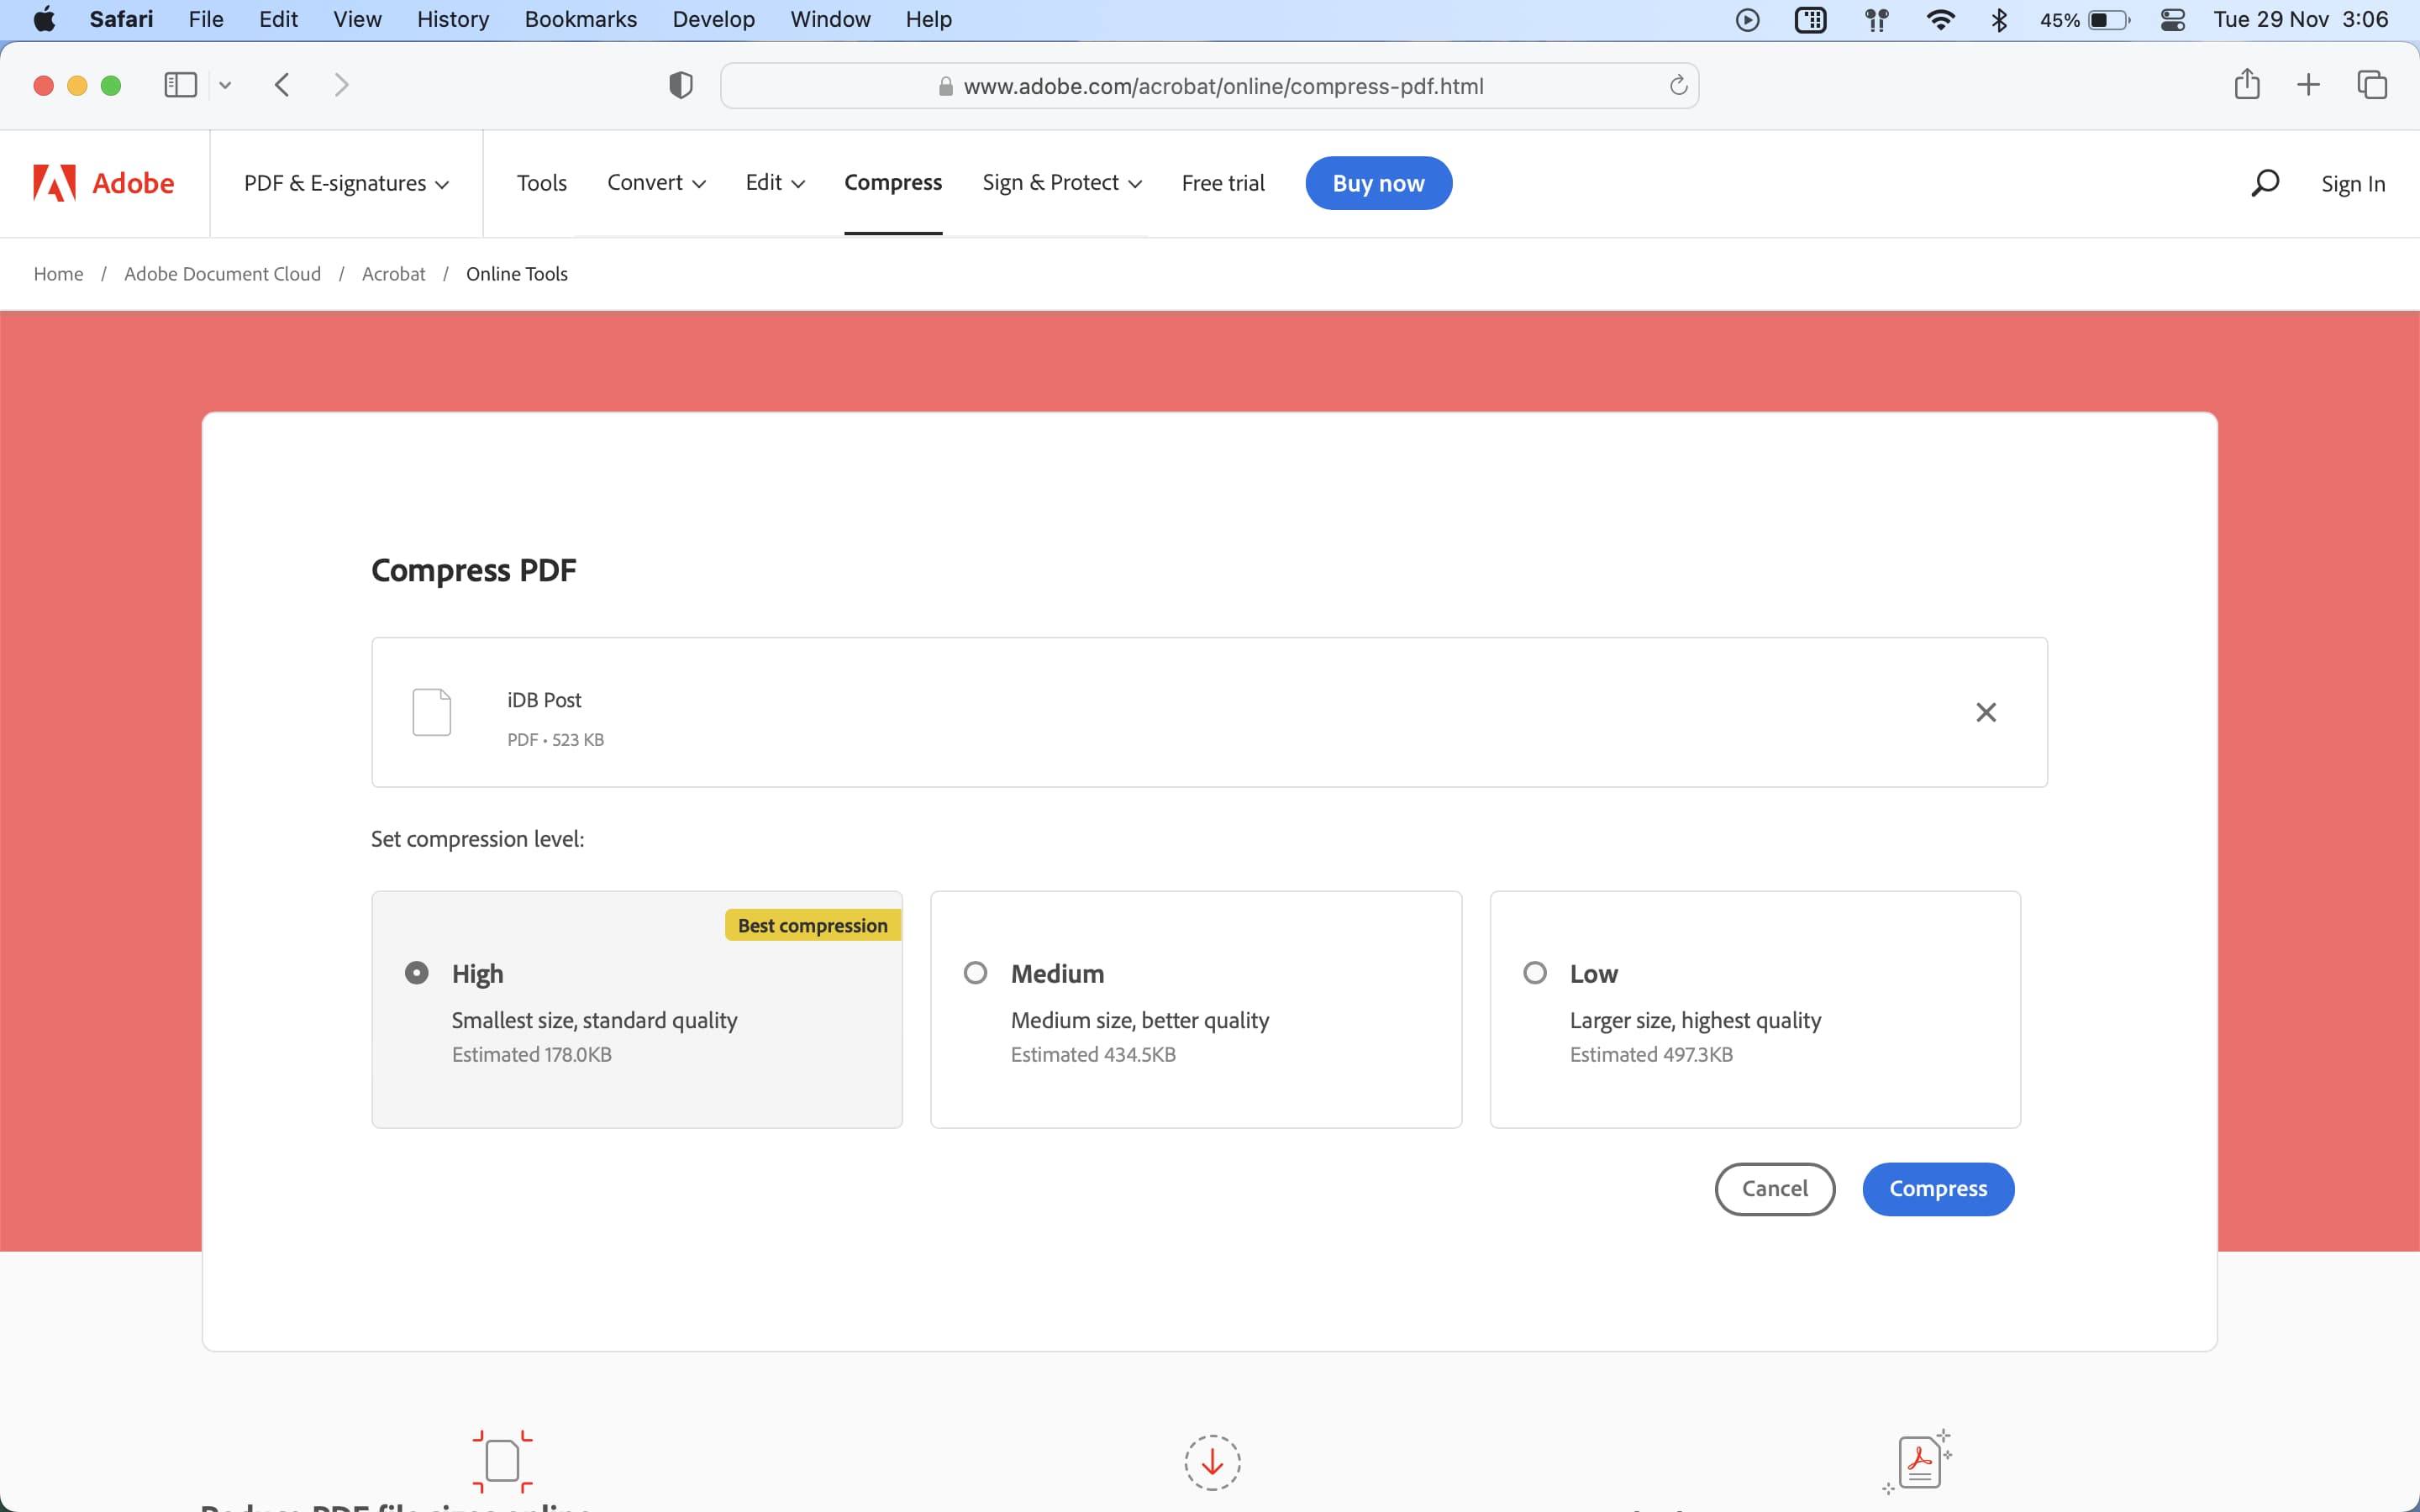
Adobe Acrobat lets you process and manage PDF files. To use Acrobat to shrink PDFs online, visit Adobe’s Compress PDF Size page in a web browser, choose Select a file and add a desired PDF. Once it finishes uploading, click Compression level, choose between High, Medium, or Low and hit Compress. With your PDF processed, click Download on your Mac or touch the Share button on iPhone and iPad and choose Save to Files.
When authoring your own PDF, you can reduce file size by using fewer images, getting rid of unnecessary pages, deleting empty white sheets, and so on. You can also use Preview on Mac to split a PDF into smaller parts.
More on PDFs: