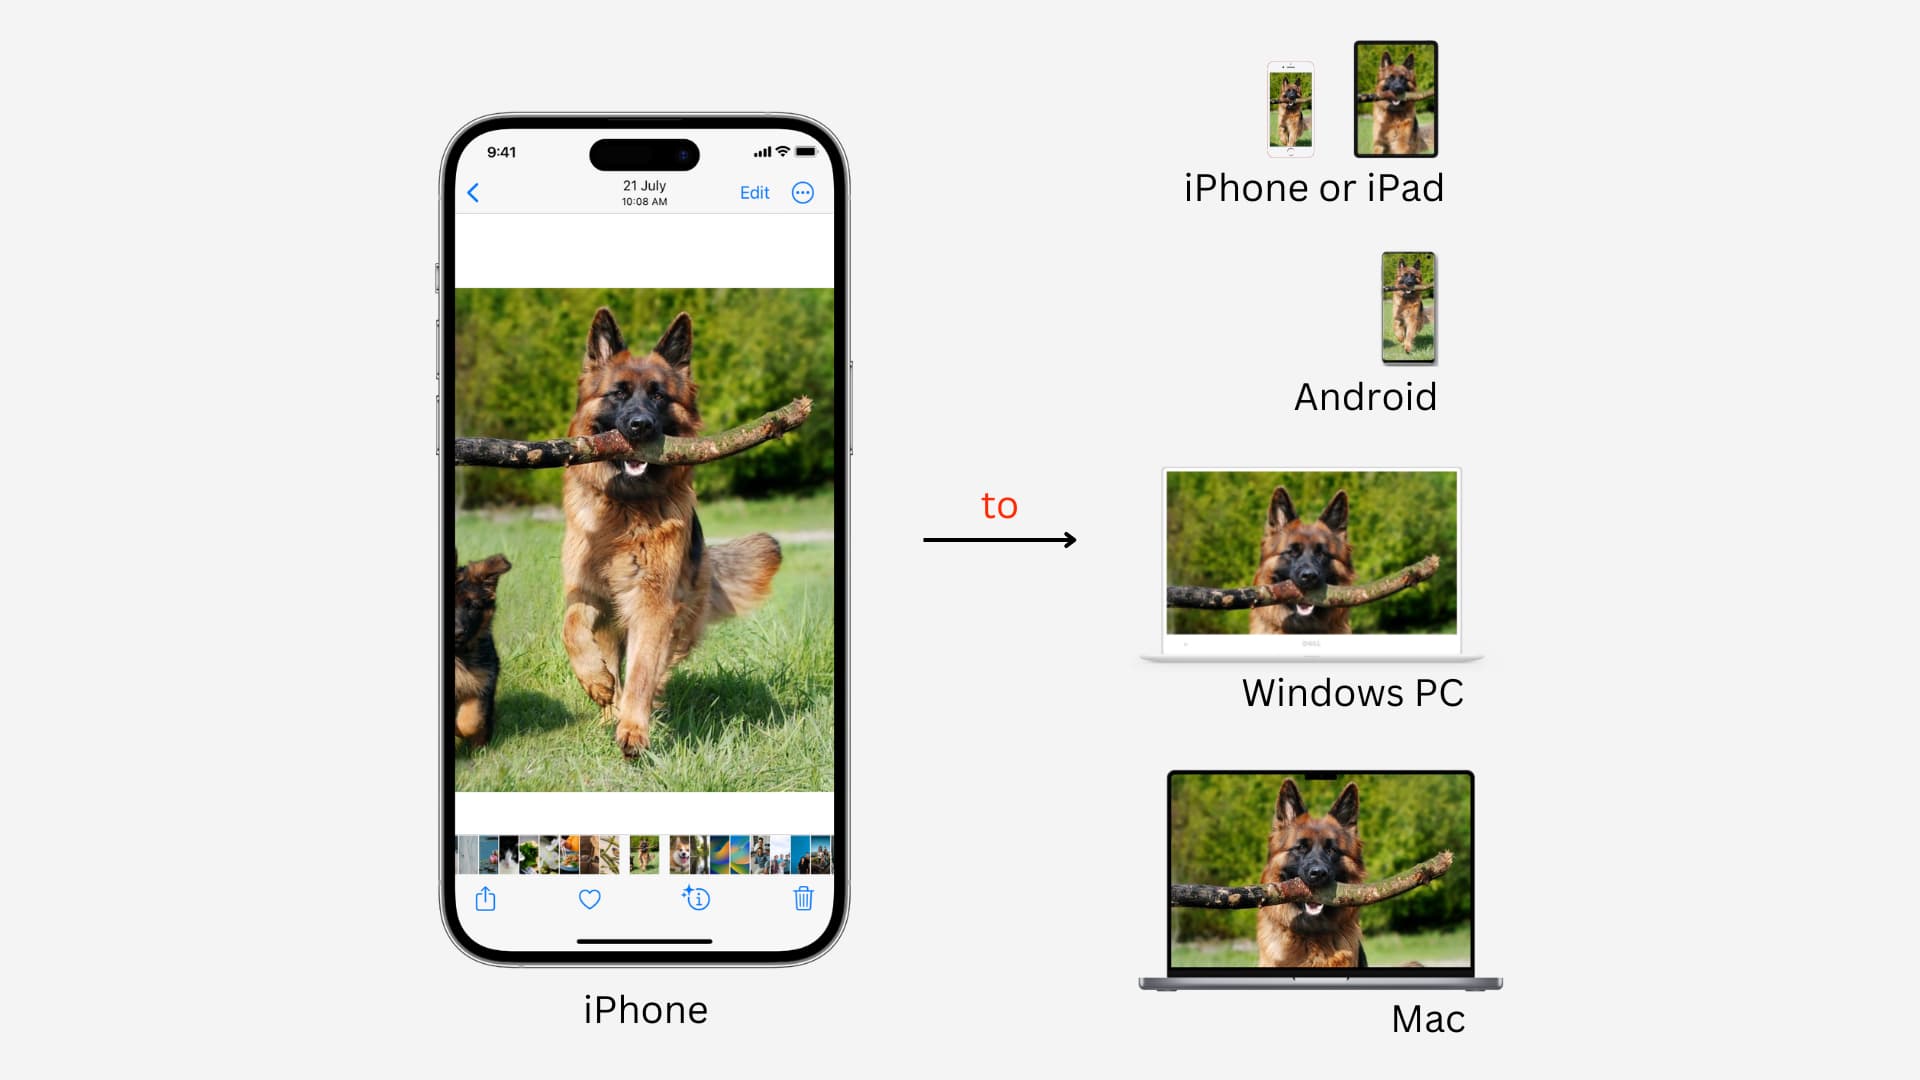
Learn how get photos and videos off your iPhone and transfer them to another iPhone, iPad, Mac, Android phone, or Windows PC.
All the methods described in this tutorial are free and work offline unless states otherwise. We’re only using official tools from Apple, Microsoft, and Google unless no solid option is available.
Transfer photos and videos from one iPhone to another
Here are three ways to transfer your media from your iPhone to another iPhone or iPad.
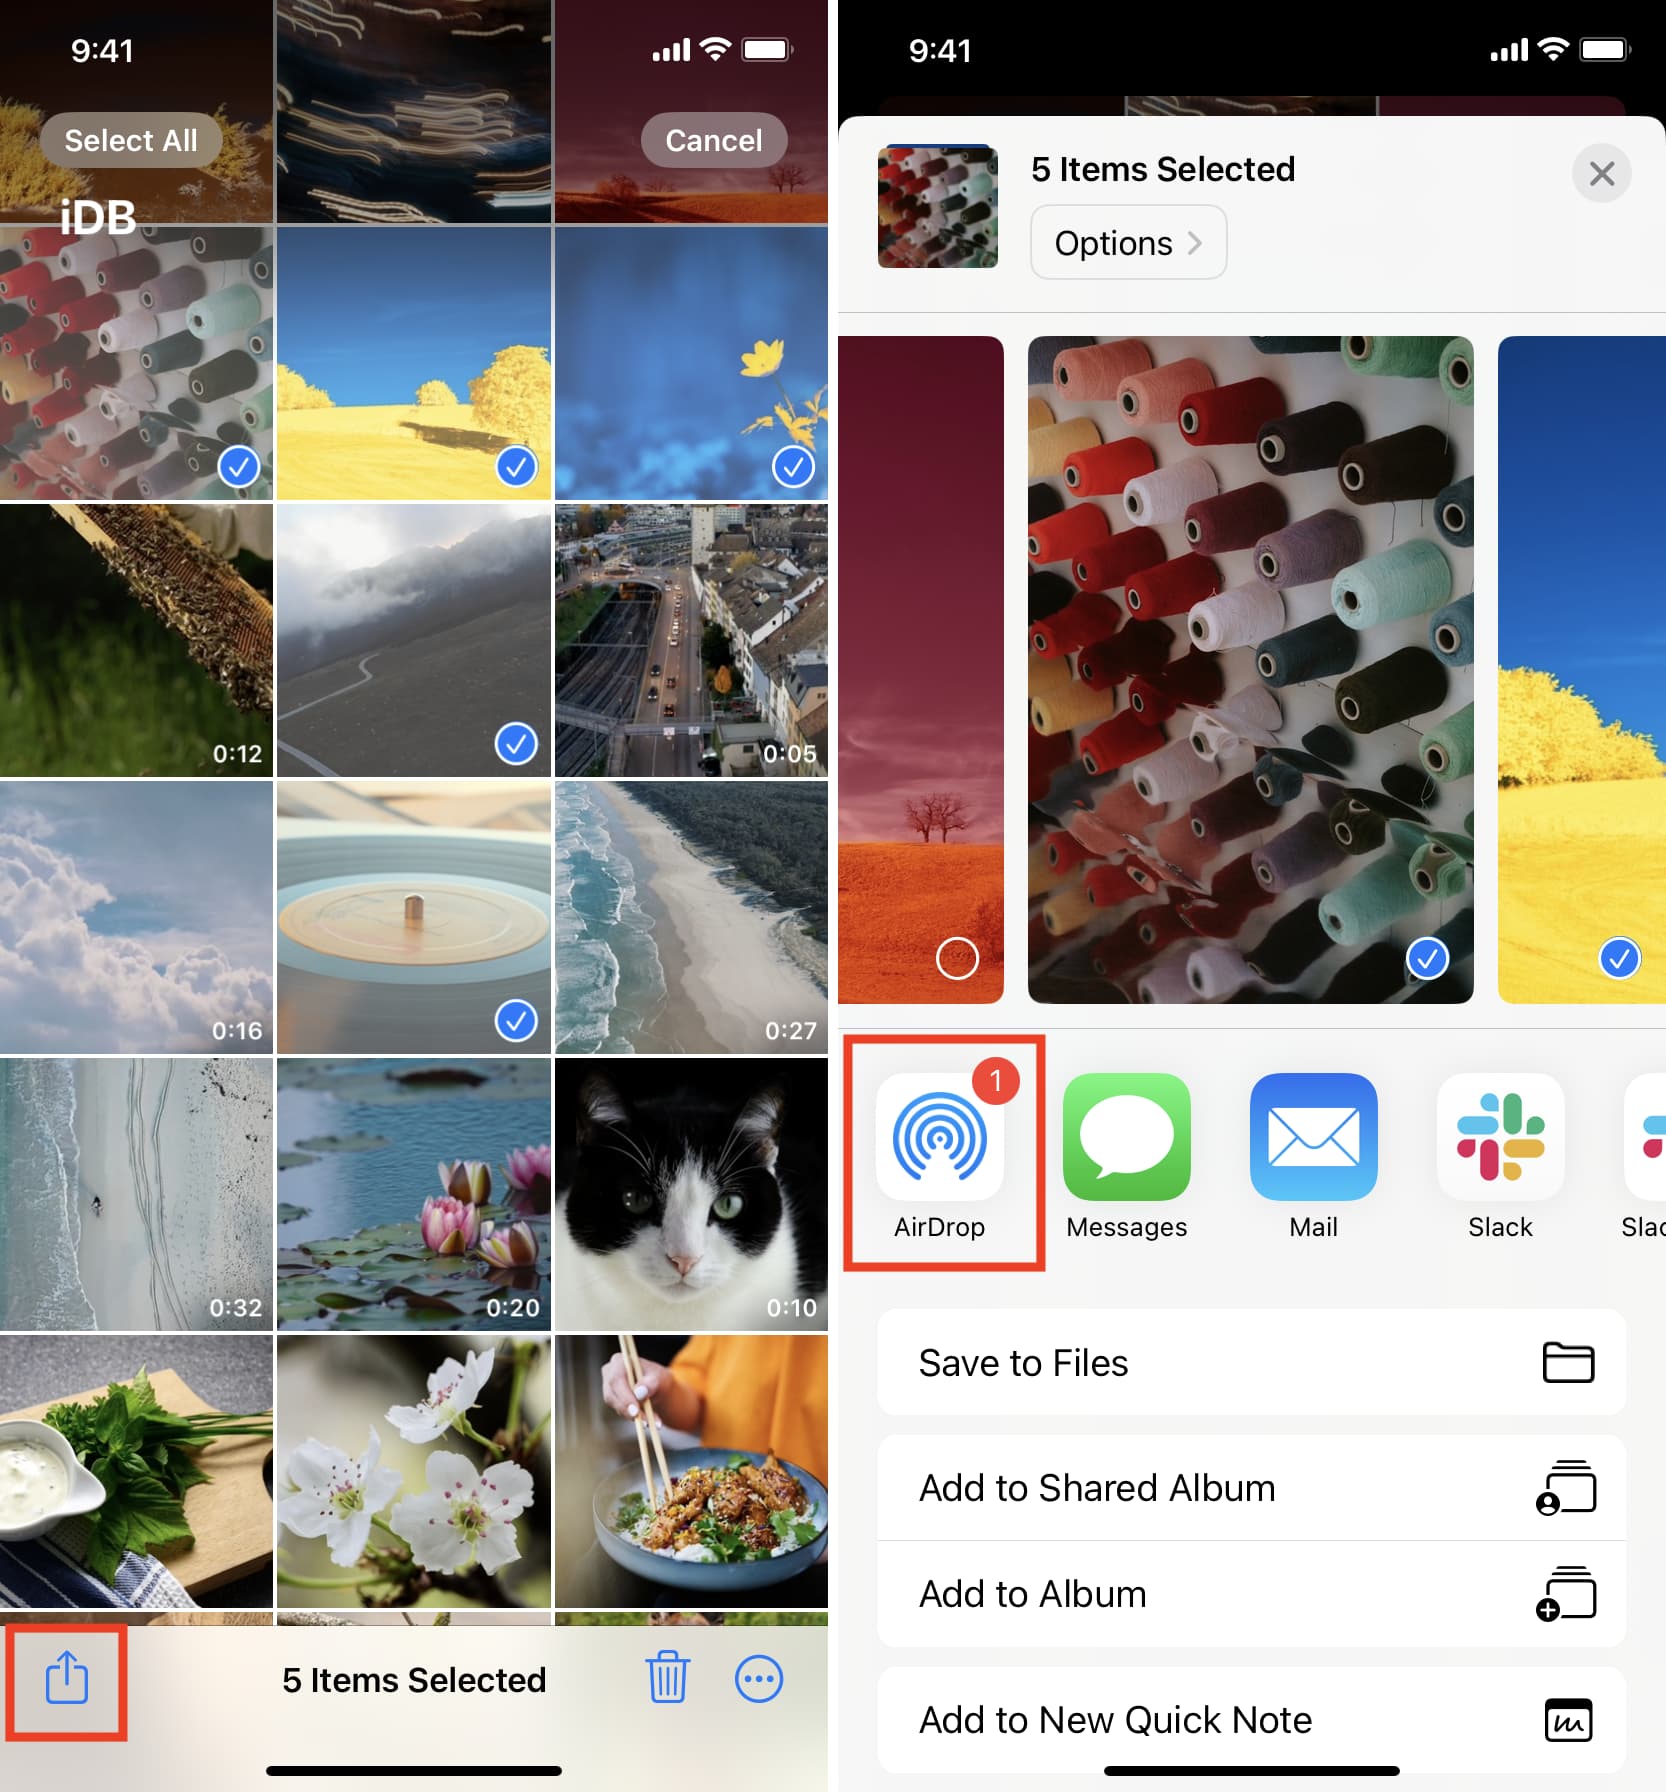
Using AirDrop
Sharing photos wirelessly with AirDrop is a piece of cake. Our tutorial on using AirDrop will get you started, and it covers cellular AirDrop which automatically kicks in when the devices are out of the Wi-Fi range. If you connect two devices with a USB cable, AirDrop even works over the wire!
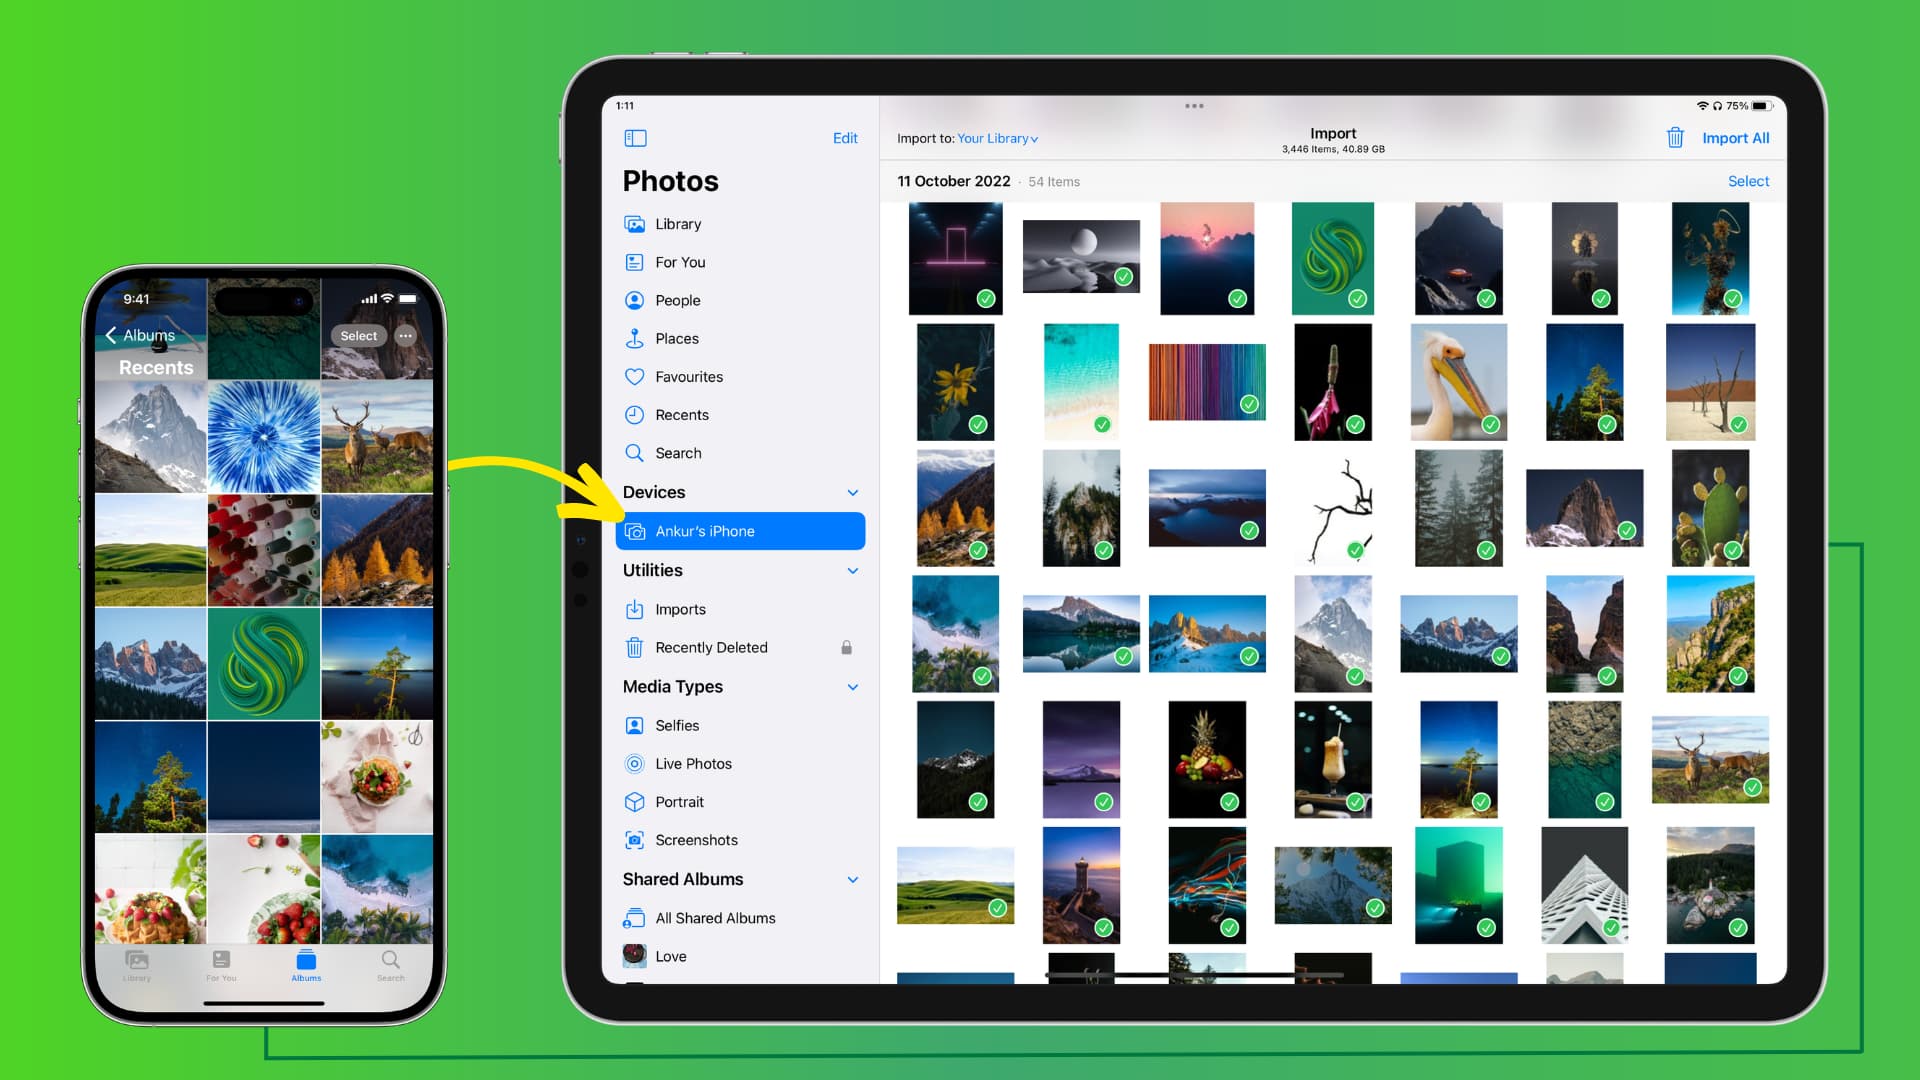
Using a direct wired connection
You can connect your iPhone and iPad with a USB cable and import media directly into the Photos app.
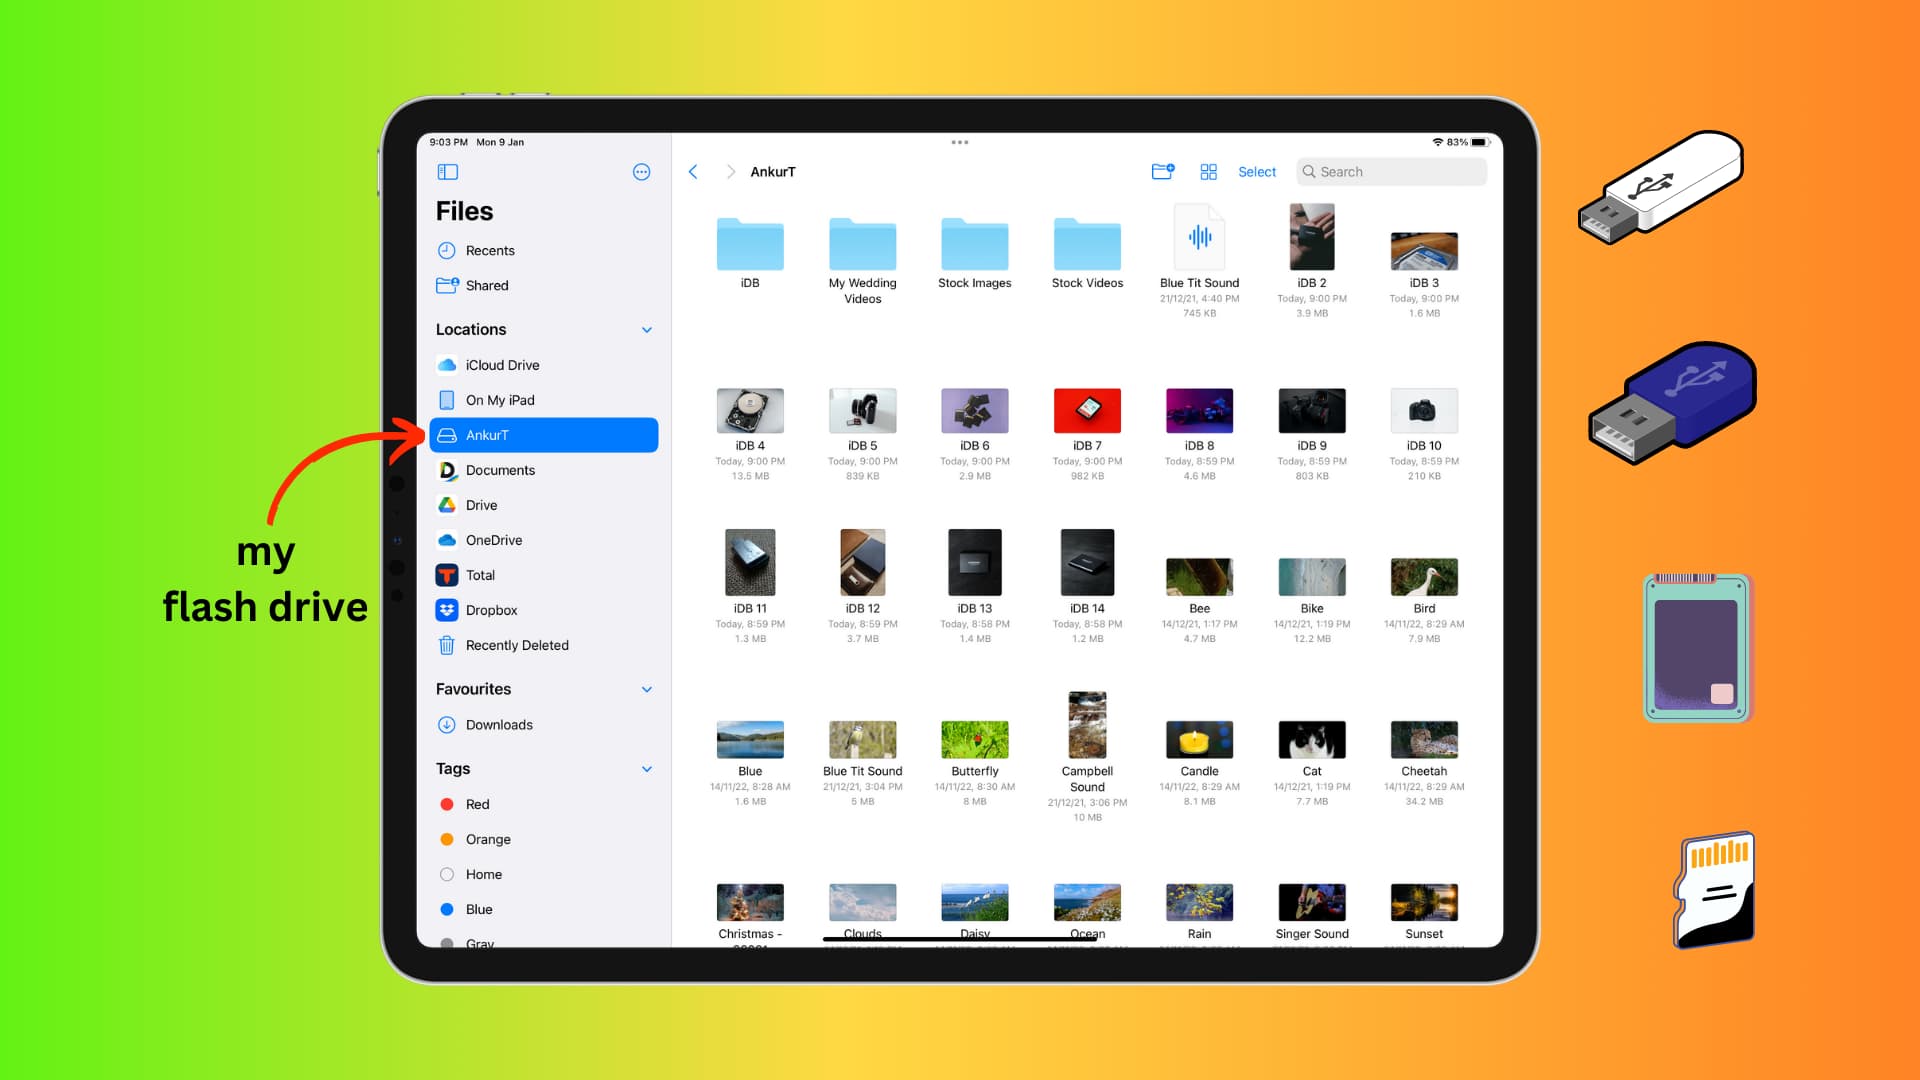
Using a thumb drive or another external drive
If your media files are in the Files app instead of Photos, copy them to an external thumb drive connected to your iPhone. You can then plug the drive into another iPhone or iPad to import your photos and videos into the Files app.
Transfer photos and videos from iPhone to Mac
Using AirDrop
AirDrop works on iOS, iPadOS, and macOS, allowing you to transfer photos and videos between iPhones, iPads and Macs with ease. Our guide on using AirDrop to send files has more on that.
Using Image Capture
Image Capture is a built-in Mac app for transferring images from digital cameras, and devices like iPhone and iPad, to a Mac.
1) Plug your iPhone into your Mac’s USB-C port.
2) Unlock your iPhone and go to the Home Screen.
3) Use Spotlight Search to open Image Capture on your Mac.
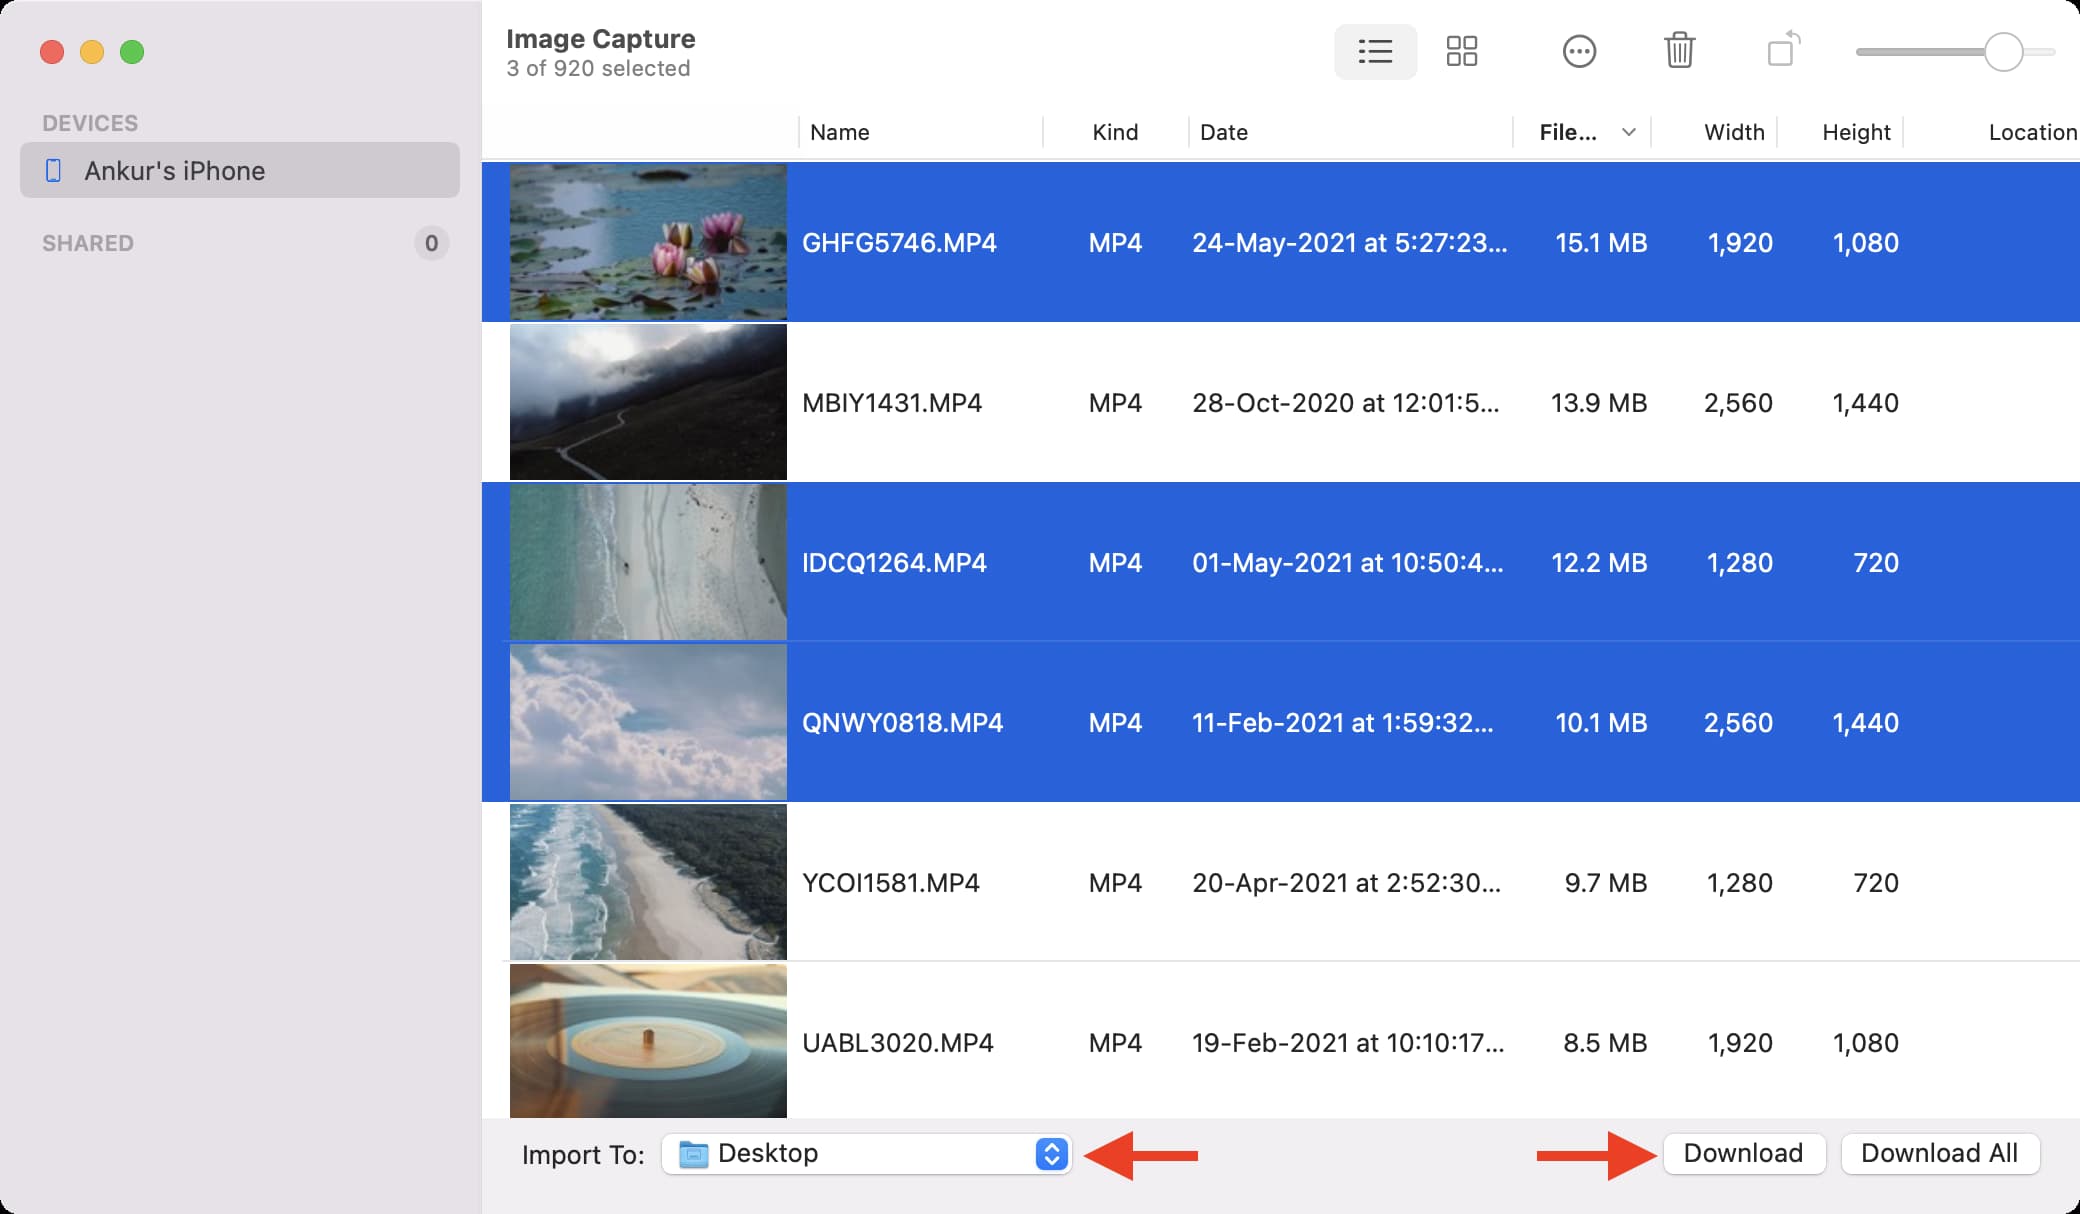
4) Your connected iPhone should appear in Image Capture (if not, unlock your iOS device and trust the device). Click the Import To dropdown menu in the bottom-left corner and select where to save transferred pictures and videos.
5) Select the items to transfer by holding the Command key and clicking them.
6) Once selected, hit Download. Image Capture will transfer the selected photos and videos from your iPhone or iPad to your Mac.
Using the Photos app
The Mac’s Photos app allows you to import images from various sources, including iPhones and iPads. The images will be saved into Photos, and you can easily drag them to the desktop or any other folder from there.
1) Plug your iPhone or iPad to a Mac using the cable that came with it.
2) Unlock your iOS device and go to the Home Screen.
3) Open the Photos app on your Mac.
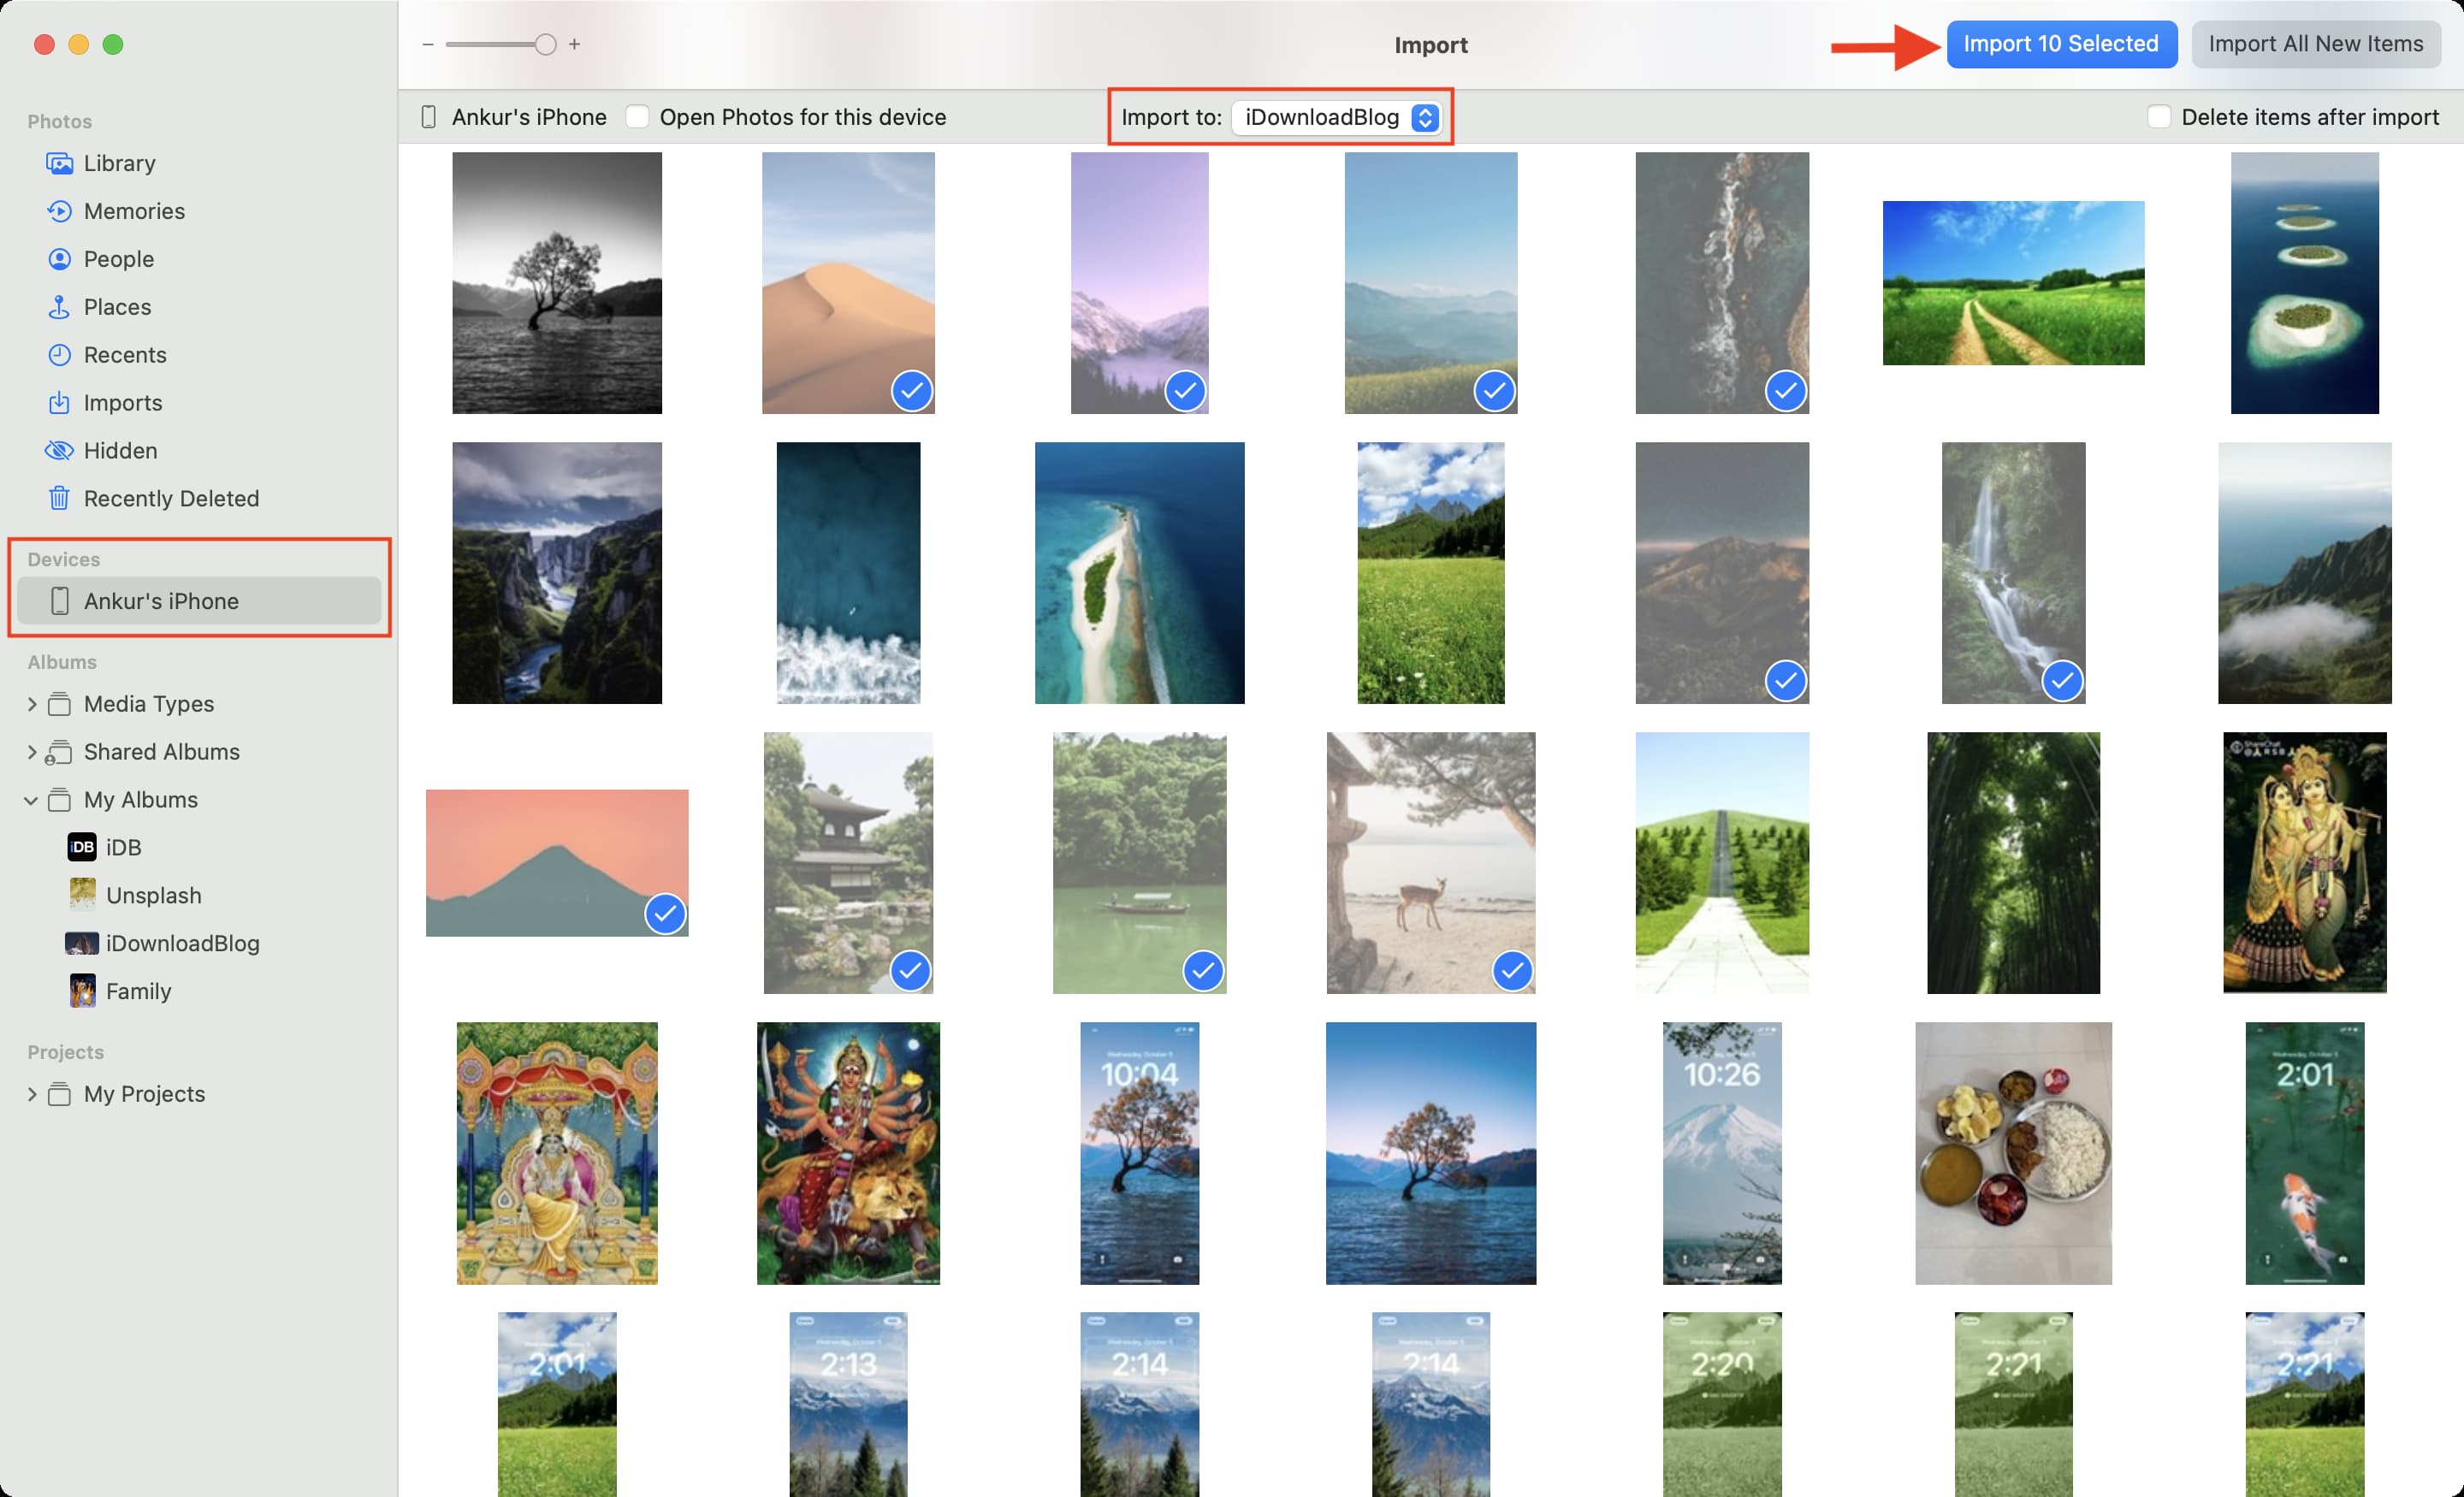
4) Click your iPhone name under Devices in the sidebar.
5) Click the Album/Import to dropdown menu at the top and choose an existing album or create a new one to import your pictures and videos into.
6) Click the picture and video thumbnails to select them.
7) Choose Import n Selected.
8) Check the Albums section in the sidebar, and you should see the album containing your imported media. Click the album name to see your imported pictures and videos.
Transfer photos and videos from iPhone to Windows PC
Before we get to it, open the Settings app on your iPhone and tap Apps > Photos, then scroll to the bottom and select Automatic under Transfer to Mac or PC. By default, your iPhone takes photos and shoots videos in the HEIF and HEVC formats. Other platforms may not be able to open HEIF images and HEVC videos, but the Automatic option fixes that by converting images and videos to compatible formats on the fly, when transferring them.
Using the Windows Photos app
The File Explorer method (explained below) shows your images in numerous folders, which can be confusing. A better approach is using the built-in Windows Photos app to transfer pictures and videos from an iPhone to a PC running Windows 10 or Windows 11.
1) Unlock your iPhone or iPad and connect it to your PC using a USB cable.
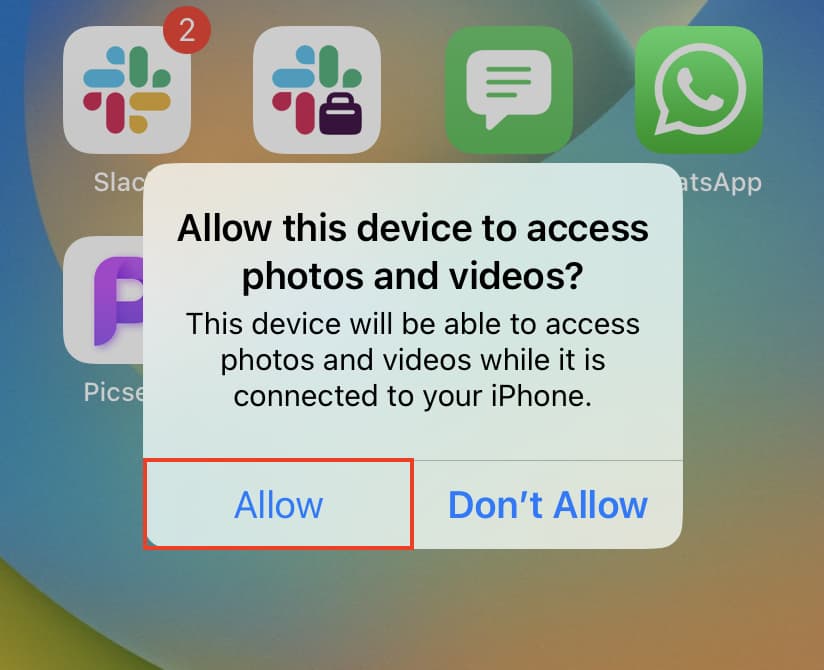
2) You should see an alert on your iPhone saying, “Allow this device to access photos and videos?” Tap Allow.
3) You may also see an alert on your PC asking you to choose what to do with this device. You can choose import photos and videos. Alternatively, open the Photos app on your PC by clicking the Windows Start button from the bottom left and choosing Photos.
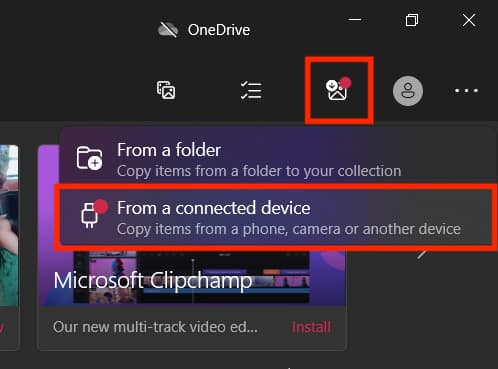
4) Click the import button from the top-right corner of the Photos app. When you connect your iPhone or iPad, it also shows a red dot signifying a new device.
5) Pick From a connected device.
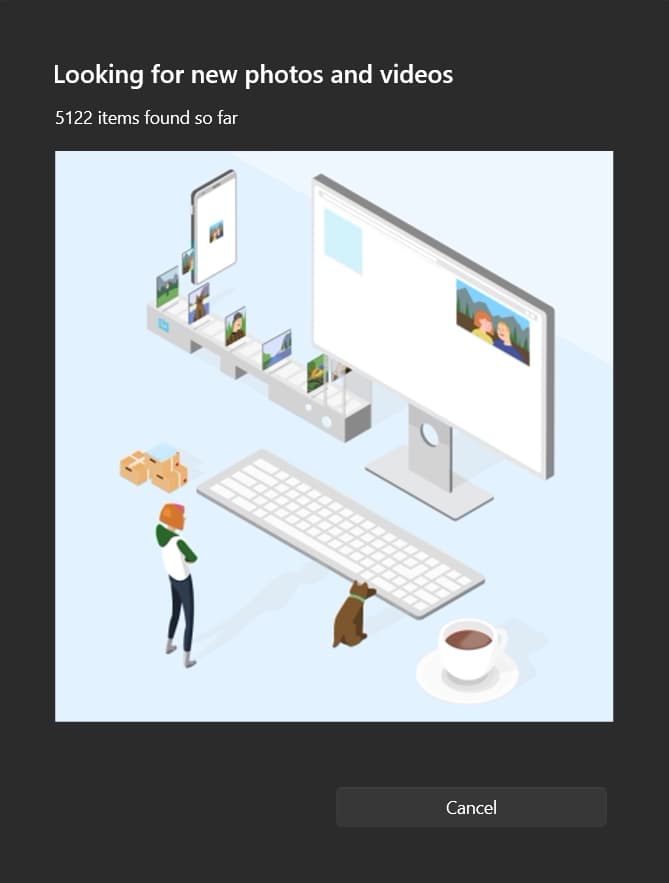
6) Windows PC will now look for your iPhone photos and videos, which may take a while.
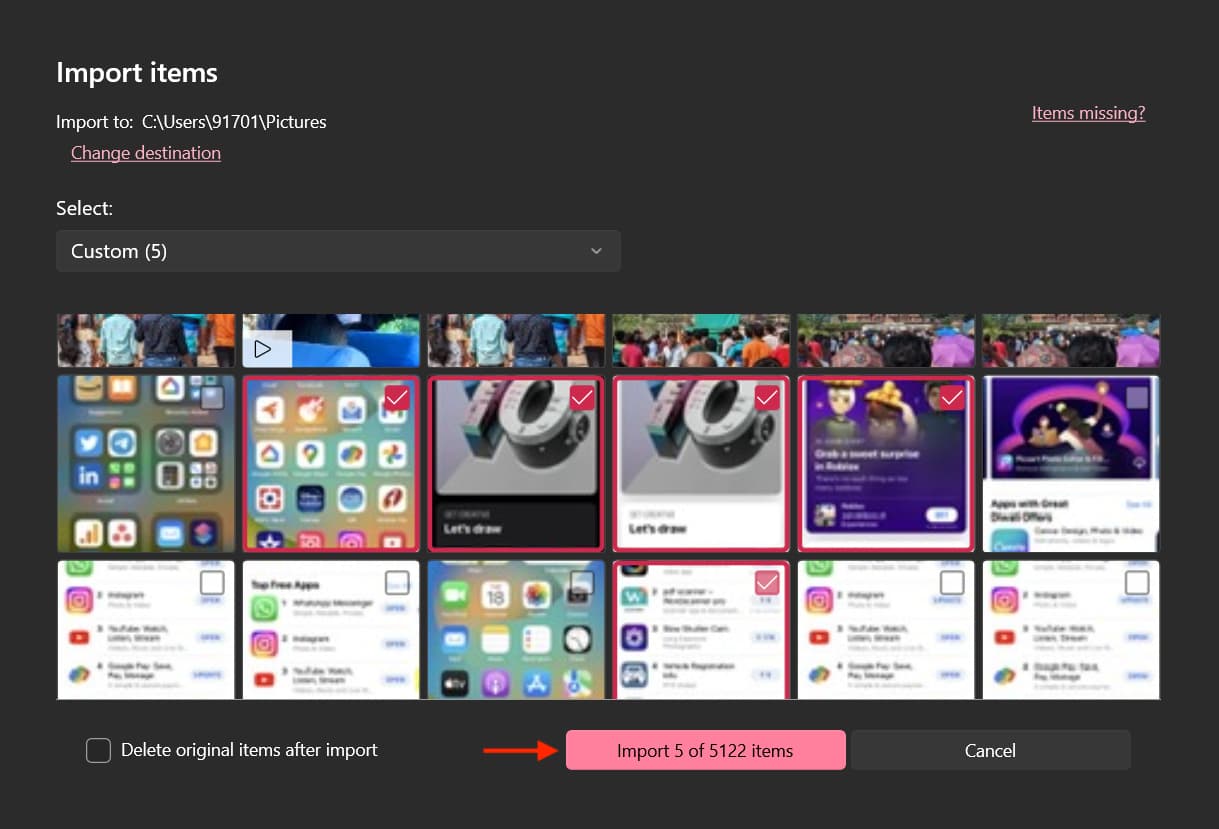
7) Once it has finished scanning, you will see a new Import items window. You can change the default import pathway clicking Change destination and picking a custom folder. Next, select your iPhone’s images and videos and click Import N of NN items.
Your PC will copy the selected items and put up an Import completed alert. Click Ok to dismiss it. You can see the imported pictures and videos in the Windows Photos app and the folder chosen in step 7.
Using Windows File Explorer
1) Unlock your iPhone or iPad and plug it into a USB port on your PC.
2) You’ll see an alert on your iPhone saying, “Allow this device to access photos and videos?” Tap Allow.
3) Windows File Explorer should open automatically with your iPhone selected. If not, open it manually and select your iPhone name in the sidebar.
4) Open Internal Storage and go to the DCIM folder.
5) You will see many sub-folders containing images and videos that you can copy to your Windows PC. Select multiple files by holding the Ctrl key and select the pictures or videos to transfer. You may skip coping AAE Files. AAE files contain the edit parameters for images you have edited on your iPhone.

iPhone not connecting to Windows PC?
Do the following if you don’t see your iPhone in the Photos app or File Explorer on a Windows PC:
- Unplug and reconnect the cable. Try using different USB ports on your PC.
- Be sure to keep your iPhone unlocked and choose Allow from the popup alert. If you accidentally choose Don’t Allow, restart your iPhone and your PC, and try again. If that doesn’t help, reset your iPhone’s location and privacy settings.
- I connected my iPhone to my sister’s PC running Windows 10. Even though her PC doesn’t have iTunes installed, it shows my iPhone in File Explorer and the Windows Photos app. If that doesn’t work for you, install iTunes or the Apple Devices app on your PC. If you already have the apps installed, be sure you have the most recent version.
Transfer photos and videos from iPhone to Android phone
Apple has AirDrop to share files between nearby iPhones, iPads, and Macs. Android phones have Quick Share (previously called Nearby Share) to send and receive files between nearby Android devices. But these two transfer tools are not interoperable, which makes transferring photos and videos between iPhone and Android difficult.
That doesn’t mean you have no options. Quite the contrary, let me share some relatively easy and free ways to transfer media from your iPhone to an Android phone.
For best results, connect both your iPhone and Android device to the same Wi-Fi network, then follow the steps below to transfer media between your iPhone and Android phone.
1) Open Safari on your iPhone and visit ShareDrop.io.
2) Tap the plus button in the top-right corner and you’ll see a URL and a QR code. Share the URL with the Android phone via text, WhatsApp, or another messaging app, then open it in the built-in browser. Alternatively, open the camera app on Android and scan the QR code on your iPhone to visit the ShareDrop page. Finally, on your iPhone scroll down to the QR code screen and tap Got it to exit the page.
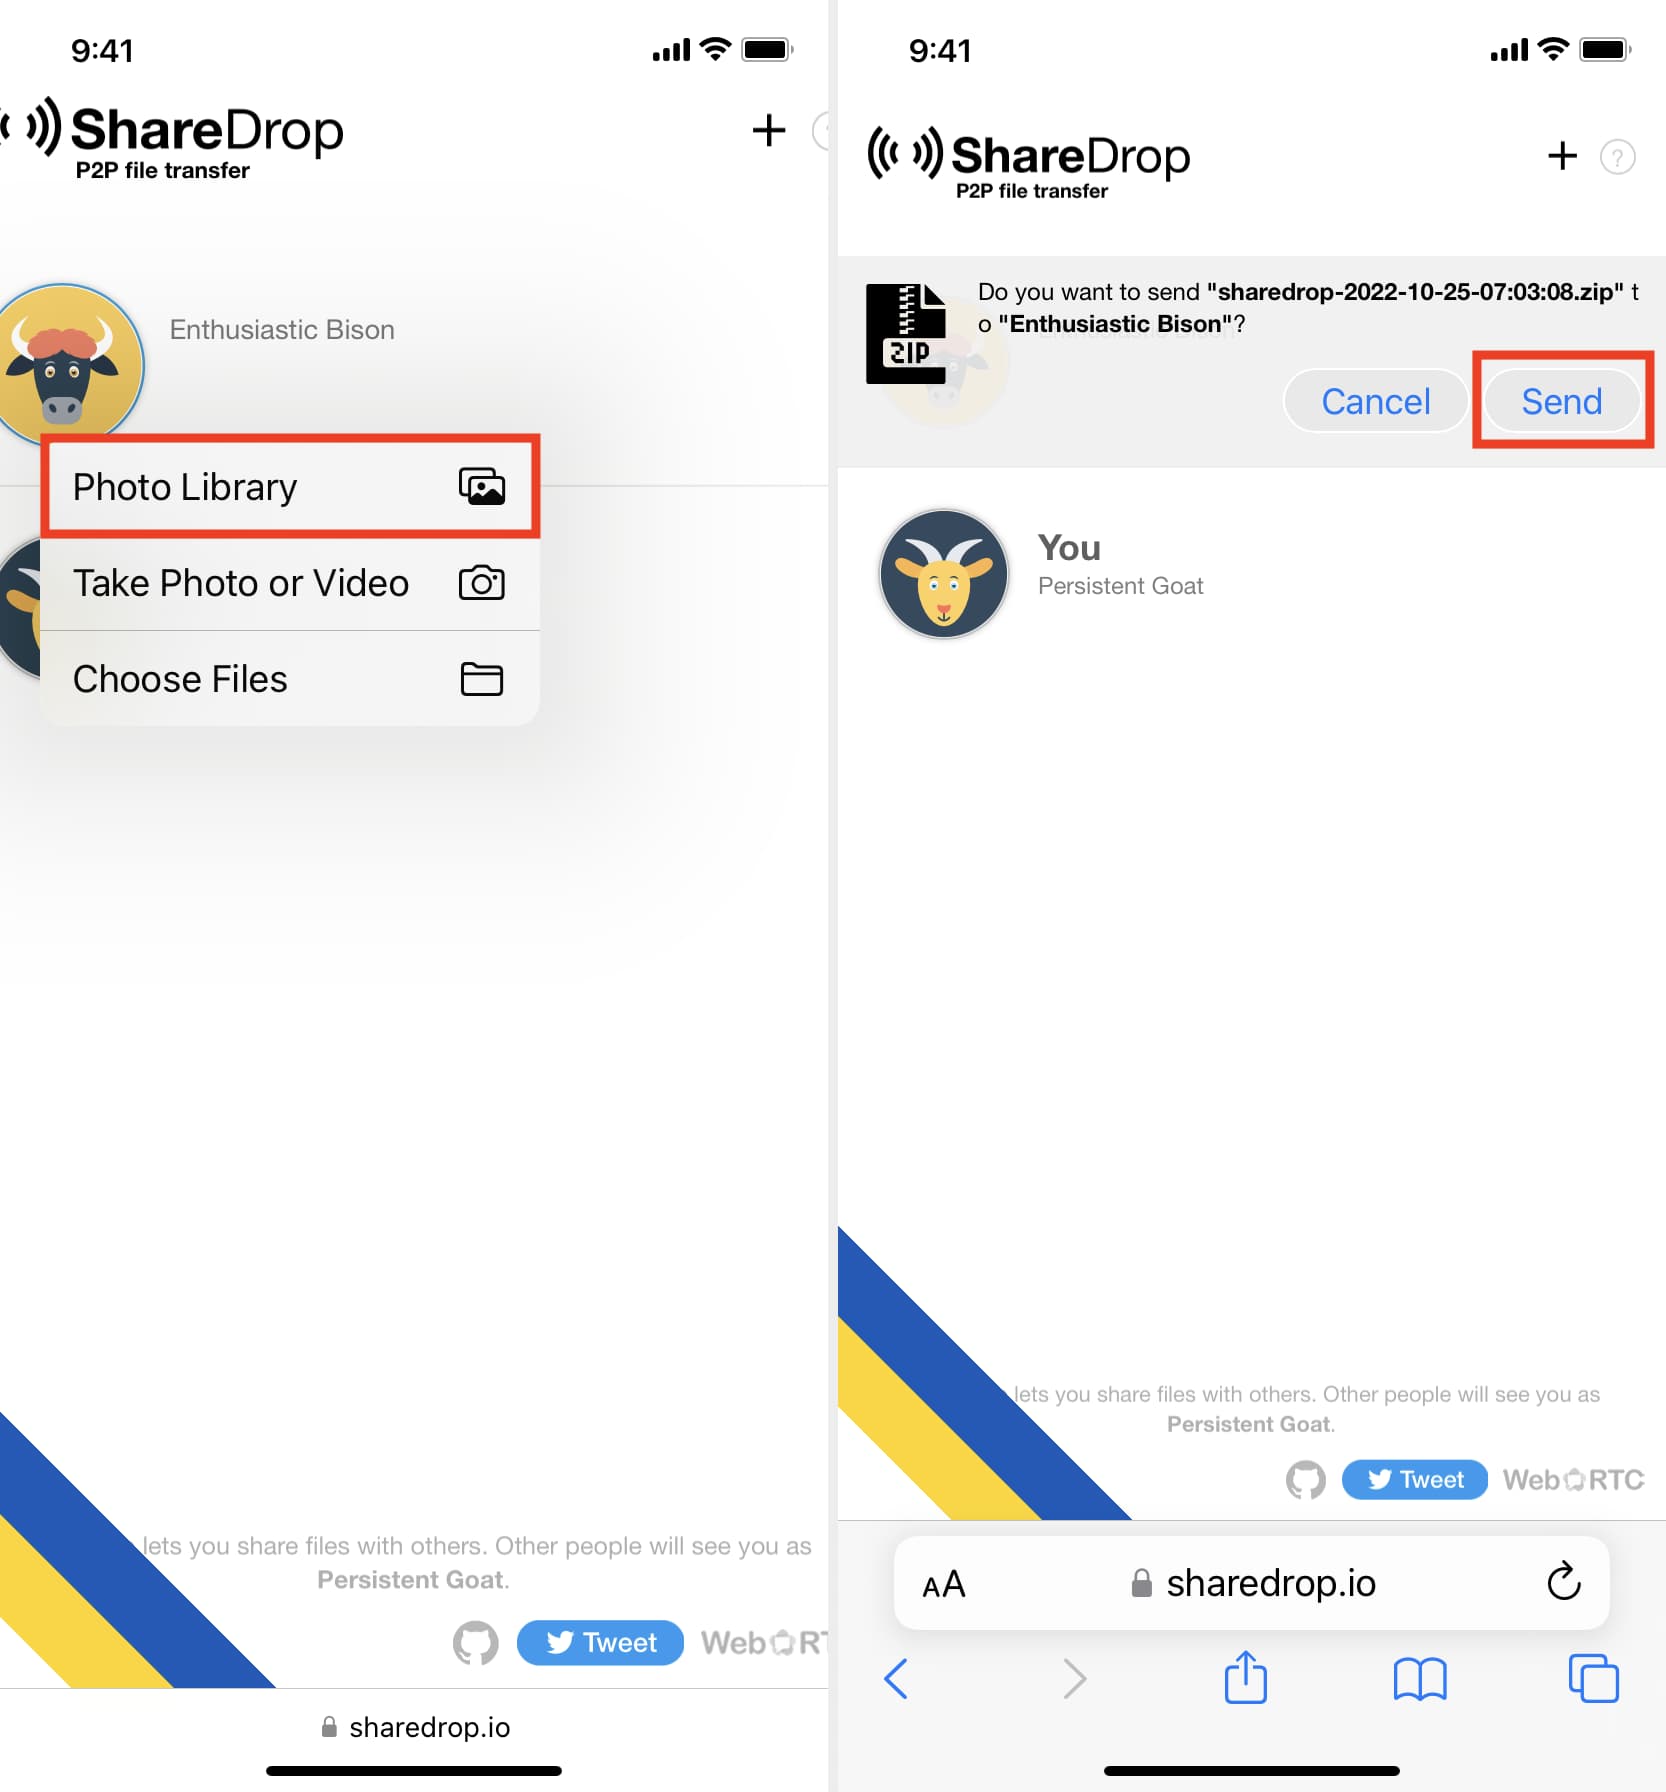
3) Tap the image of your Android phone on the ShareDrop page in Safari on your iPhone, then choose Photo Library. Now select one or more items from the Photos library and tap Add. After that, tap Send and confirm if needed.
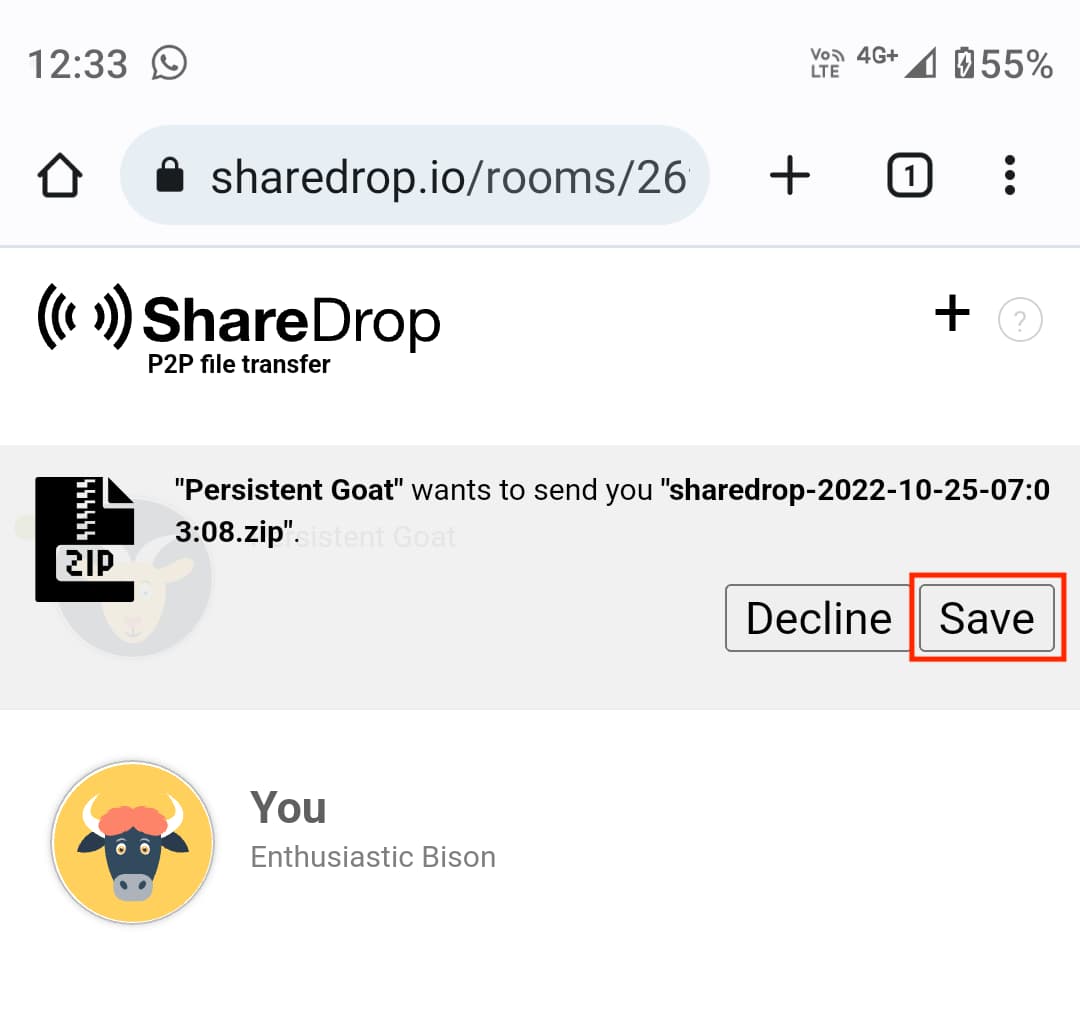
4) Finally, tap Save on the ShareDrop page on the Android device to receive incoming files. Any selected pictures and videos will be sent to the Android phone. You can later see them inside the Android Files app or the gallery app.
You can also use ShareDrop to transfer files from your iPhone to a Mac, PC, or other devices and vice versa.
Using Zapya and similar apps
Cross-platform apps like Zapya, ShareIt, Xender, ShareKaro, etc., can send and receive photos and videos from your iPhone to an Android phone and vice versa. These apps transfer files at high speeds even when the phones aren’t connected to the same Wi-Fi network.
Zapya does this by creating its own Wi-Fi hotspot on the Android phone (no internet needed) for your iPhone to join. Actual file transfer happens over that direct Wi-Fi connection.
The steps below assume your iPhone and Android device are not on the same Wi-Fi network. After installing the Zapya app, turn off mobile data on your iPhone and Android phone for increased privacy, then follow the steps below.
1) Download Zapya – File Sharing on your iPhone and Android phone.
2) Open Zapya on your iPhone and permit it to access all your photos or just ones you select. You may also choose to disallow the app to access your contacts. To send media from the Photos app, however, the app needs permission to access your Media & Apple Music, so allow that. Next, open Zapya on your Android phone and allow it to access photos and media on your device.
3) Once you’re inside the Zapya app on your iPhone and Android phones, tap the red arrow button from the bottom center of the screen on both phones.
4) On your iPhone, give the app access to your camera and tap Scan. It will open the camera interface, which you have to use in step 6 below.
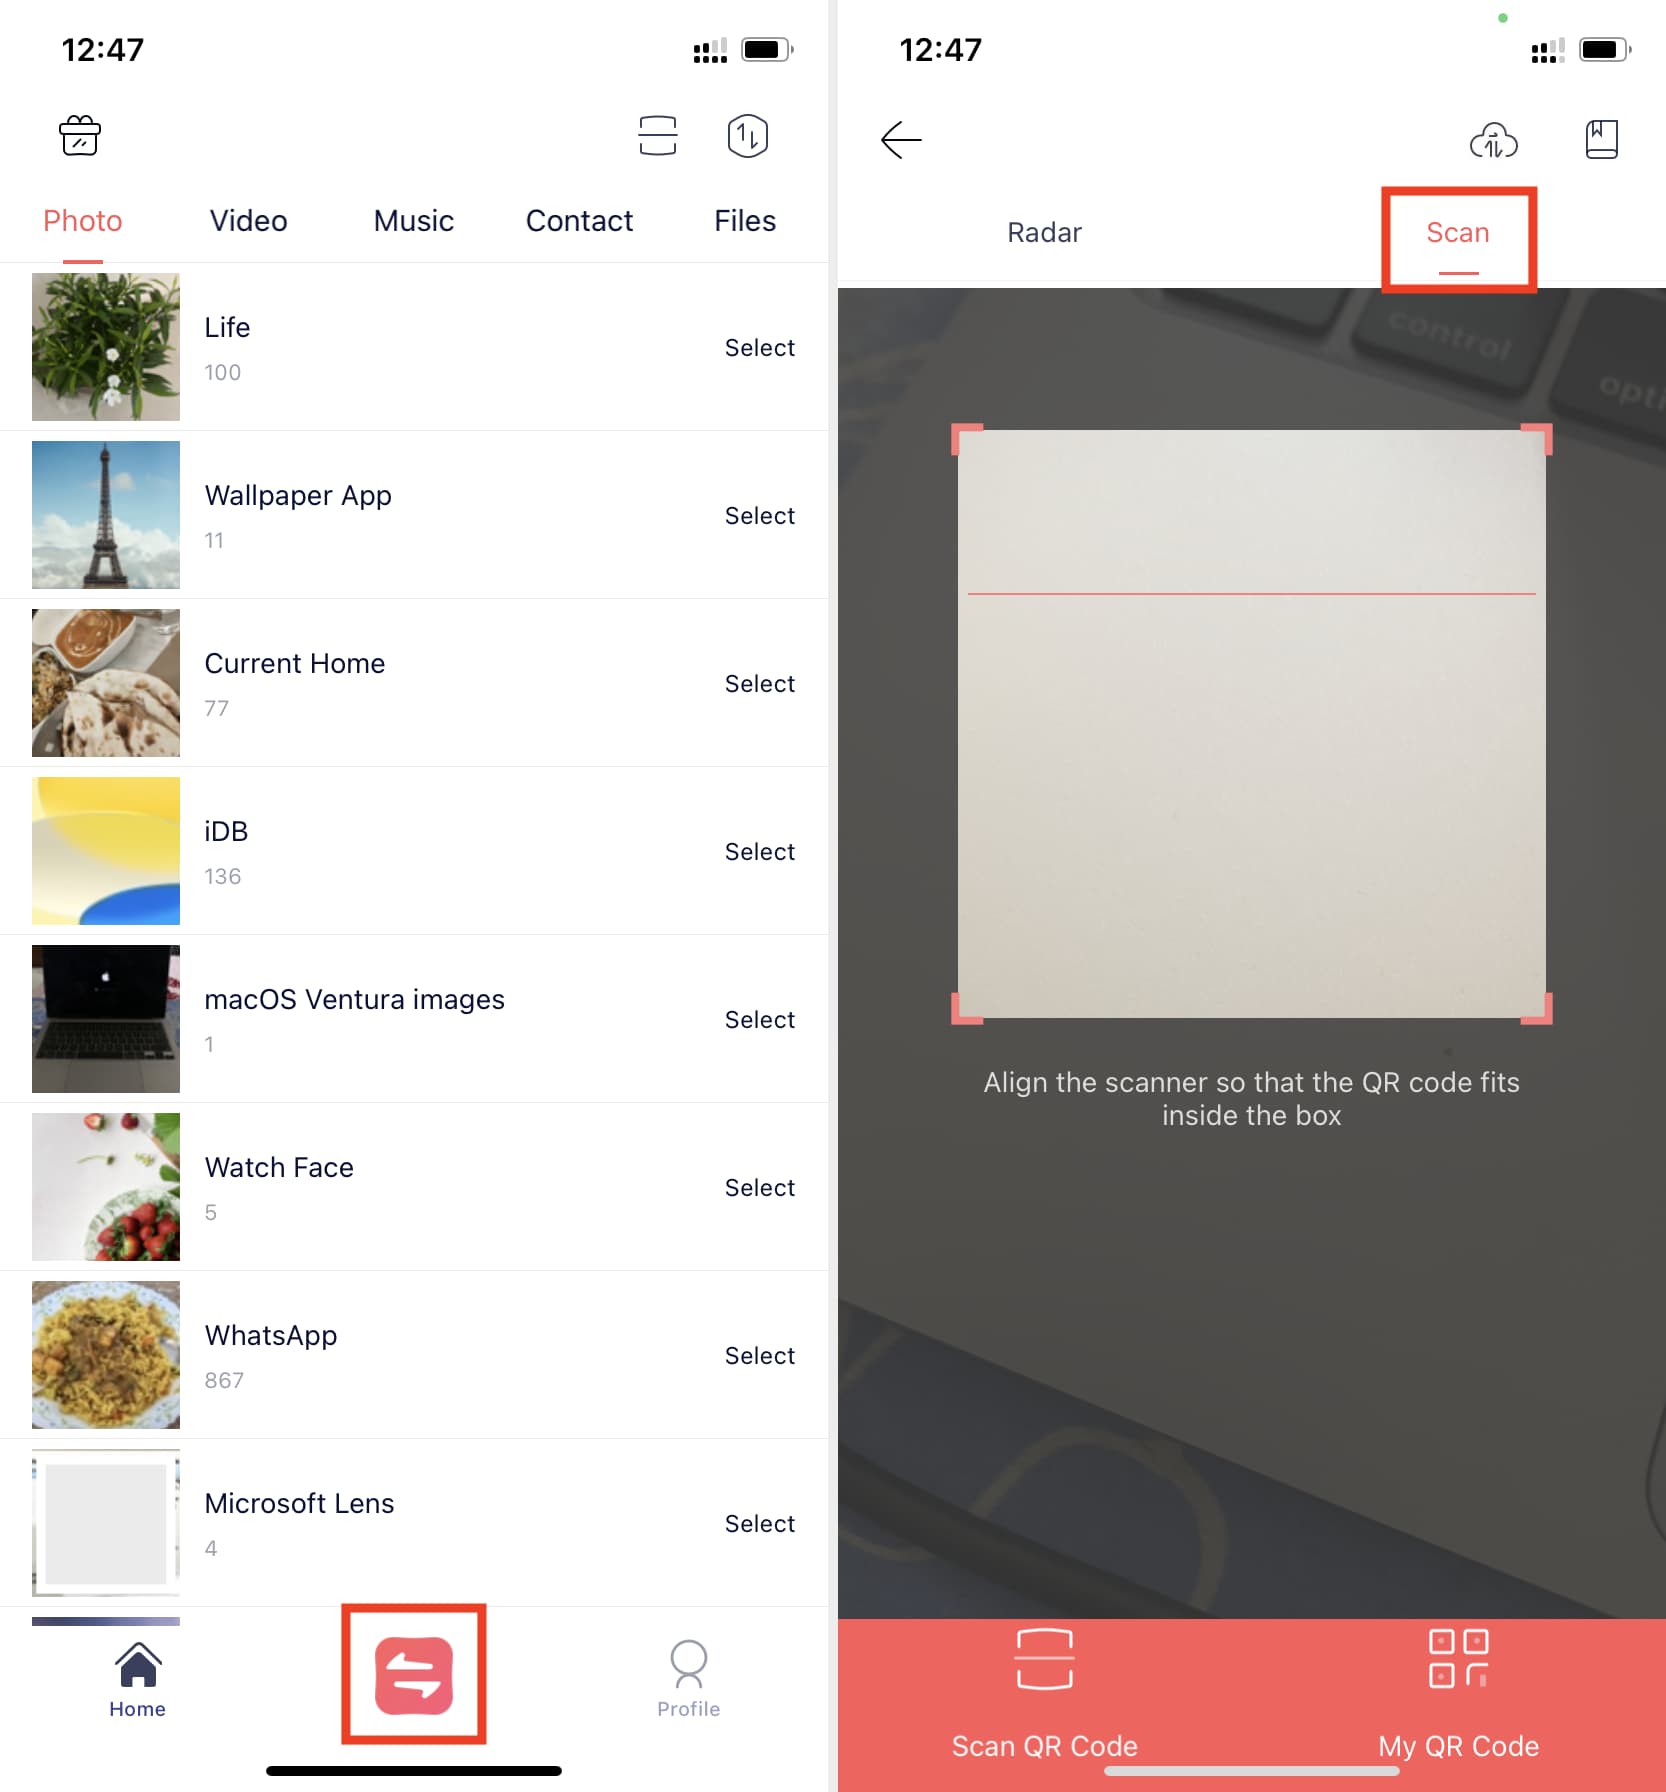
5) On the Android phone, tap the tiny two-arrow button and then choose Receive. Enable Wi-Fi, if not already, and grant it the location permission. After that, you will see a QR code.
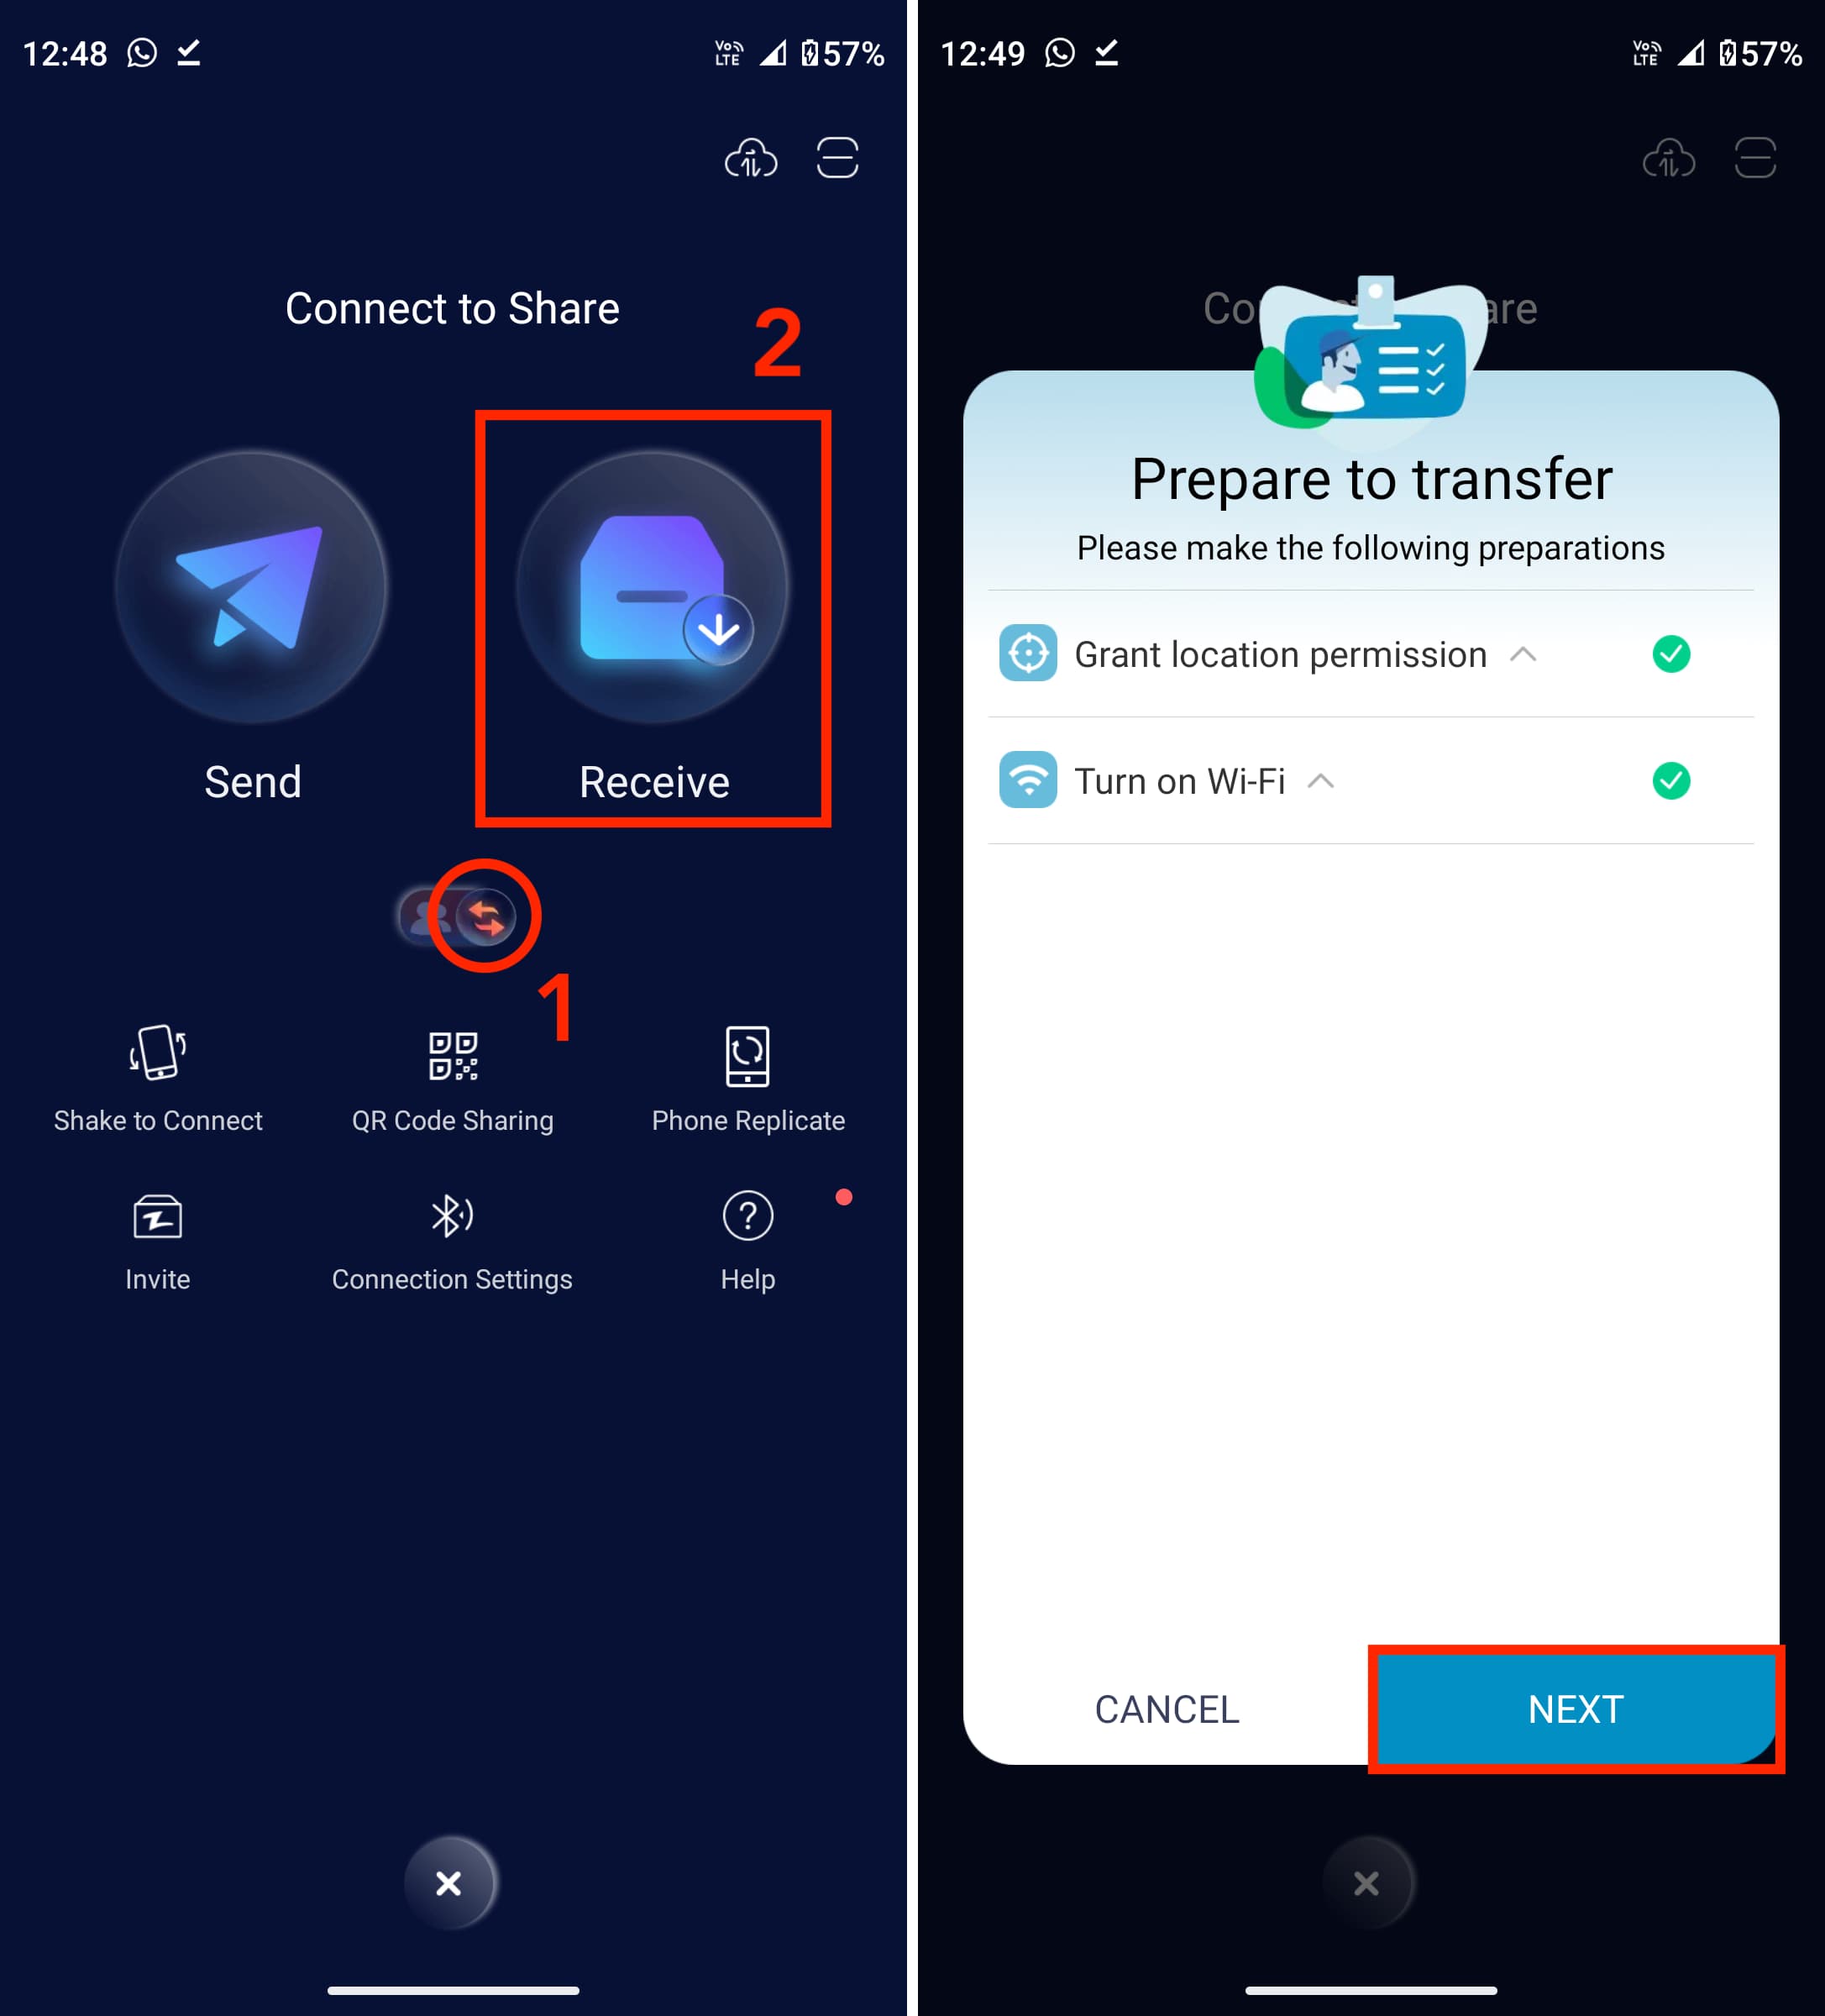
6) Scan this QR code using your iPhone (step 4). After that, you will see “Zapya” Wants to Join Wi-Fi Network “DIRECT-WD-Random Alphabets”? Tap Join. Within seconds, both phones should connect, and you will hear a tone.
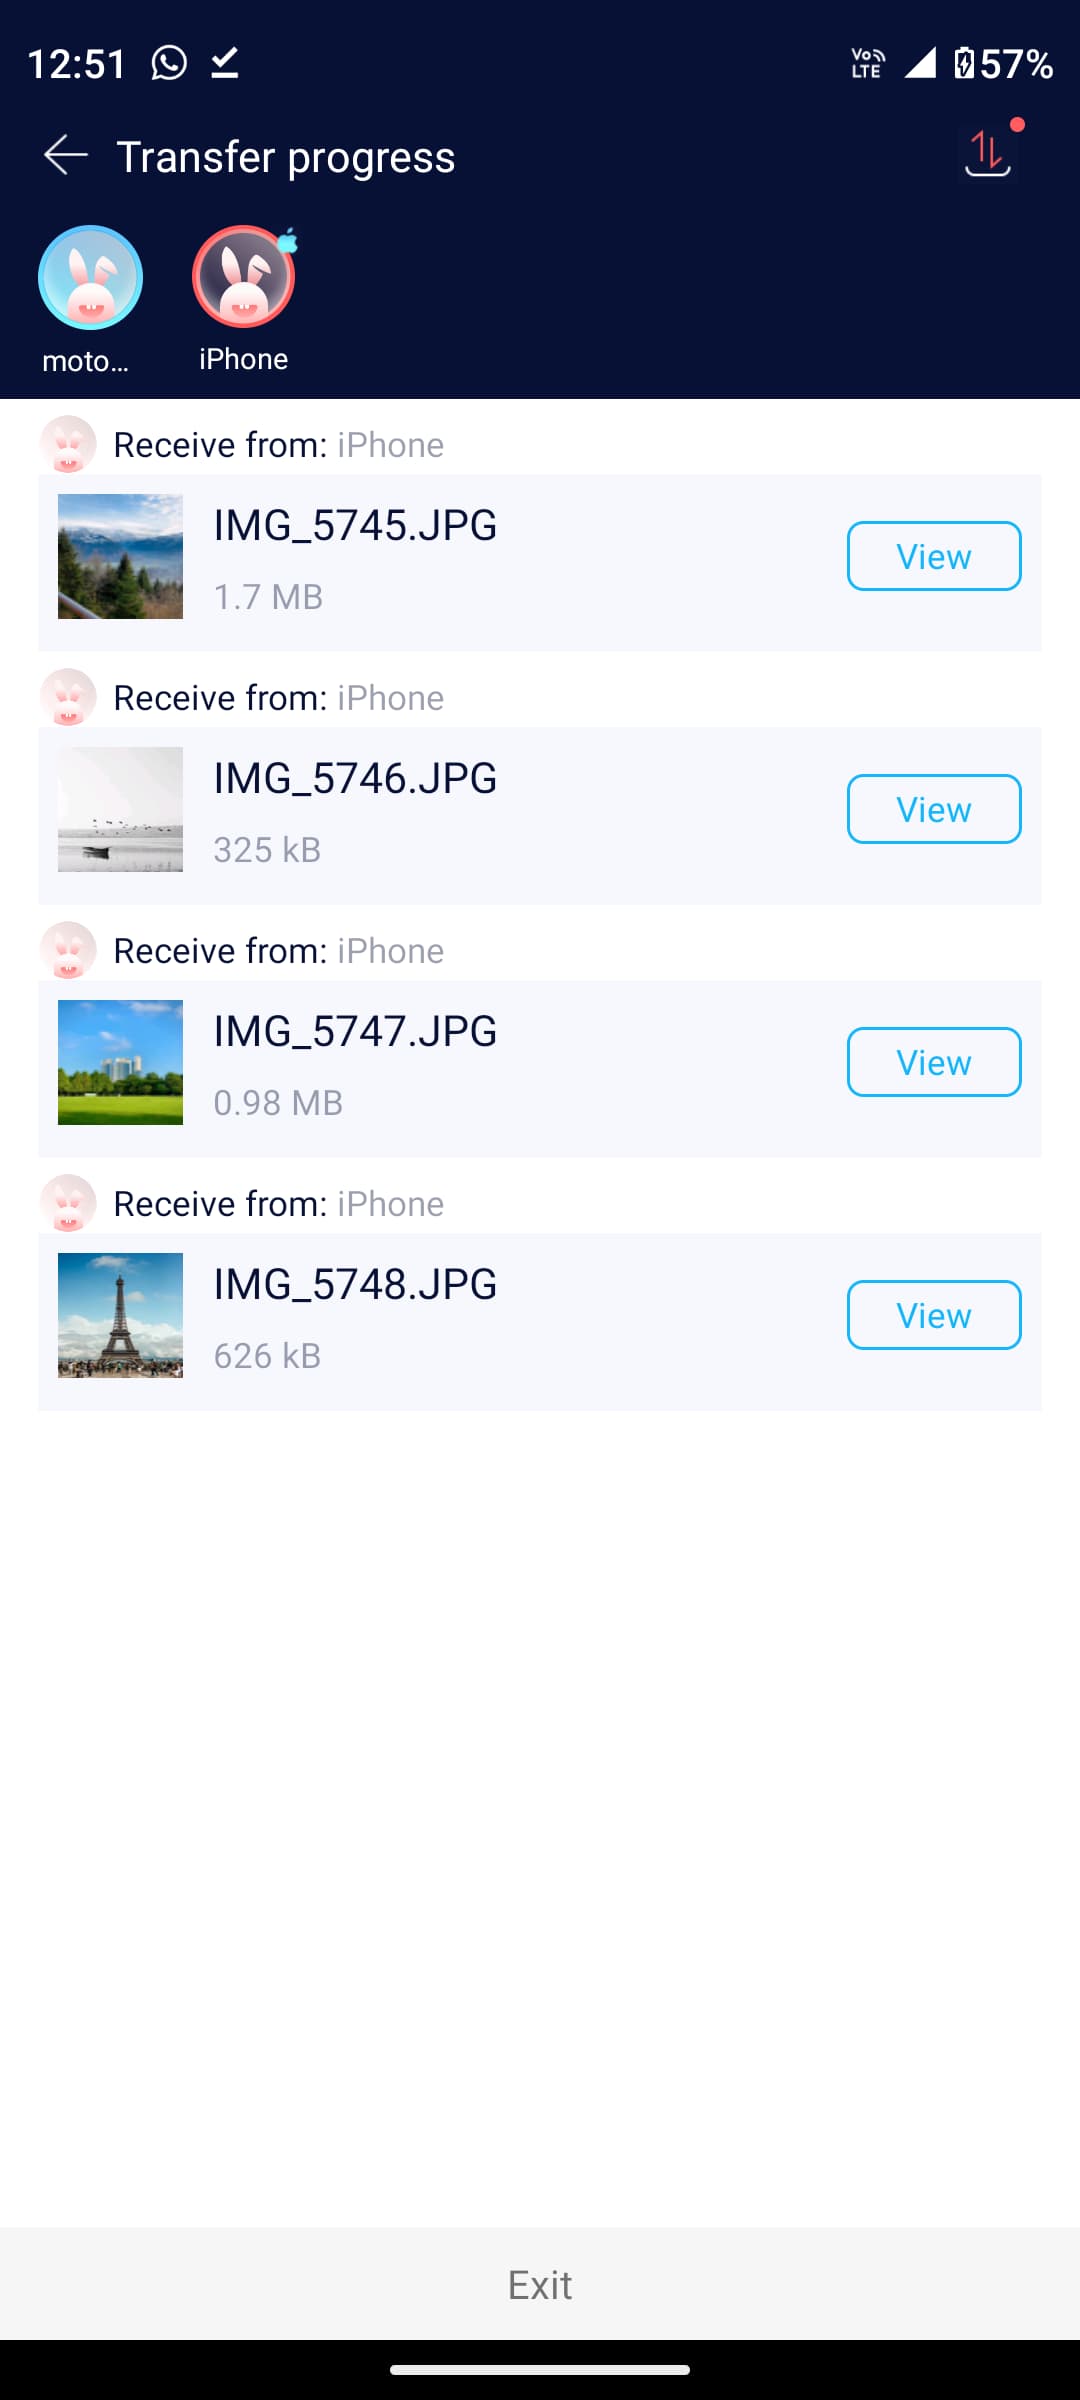
7) Make sure you’re in the Photo section within the Zapya app on your iPhone, then select the pictures you want to send by tapping the tiny black dot in the top-right corner of each photo thumbnail. Once you finish selecting the images, tap Transfer All (N).

These selected photos will be sent to the connected Android phone. You can now select Video from the top and follow the same steps to send video clips from your iPhone to your Android phone.
In place of Zapya, you can also use:
- SHAREit (iPhone, Android): Excellent app for media transfer that may be unavailable in countries like India.
- Xender (iPhone): Available on Apple’s App Store but not Google’s Play Store (get the APK file from the official website to use the app on your Android device).
- Send Anywhere (iPhone, Android): It uploads the files and lets you download them on Android.
Using a Mac or PC
Transferring photos and videos between iPhone and Android is much easier if you have a computer.
Mac:
Transfer photos and videos from your iPhone or iPad to your Mac using one of the methods mentioned above. After that, move those files from your Mac to an Android phone.
PC:
- Connect your iPhone and Android phone to a Windows PC.
- Use the File Explorer method to see your iPhone’s photos on your PC. From there, copy the files and paste them into your Android phone.
- Alternatively, you can use the Windows Photos app to drag your iPhone photos and videos to the desktop or a folder. Next, connect your Android phone, locate it in File Explorer, and move the files from your PC to the Android phone.
Common methods
In addition to the above ways, you can also use the following methods to share files from your iPhone to another iPhone, iPad, Mac, Windows PC, or Android phone.
Use iCloud link
If you use iCloud Photos on your iPhone, you can create a shareable link for several photos. Anyone with the link can then download the images on their device, even if they don’t use iCloud Photos. You can also create a public website of your images and videos from the Photos app and share that link with an Android phone.
Use Google Drive, Microsoft OneDrive, Google Photos, Dropbox, etc.
Add your iPhone photos to any third-party cloud storage services. Next, create a shareable link for the album or folder and send it to your friend or family. They will be able to see and download the contents of that folder or album.
These were all easy ways to transfer photos between devices. If you have other easy and secure methods, please share them in the comments box below.
Read next: 7 simple ways to safely back up your iPhone photos and videos