In this step-by-step guide, we’ll show you how to add an image, logo, or text as a watermark in your Google Docs documents.
You can use your name, email, company name, or words like Private, Confidential, Internal Use Only, etc., as a watermark. Alternatively, you can select your company logo or some other relevant image as the watermark.
Add a watermark in Google Docs
1) Go to Google Docs on your computer and pick an existing document, or click Blank to create a new one.
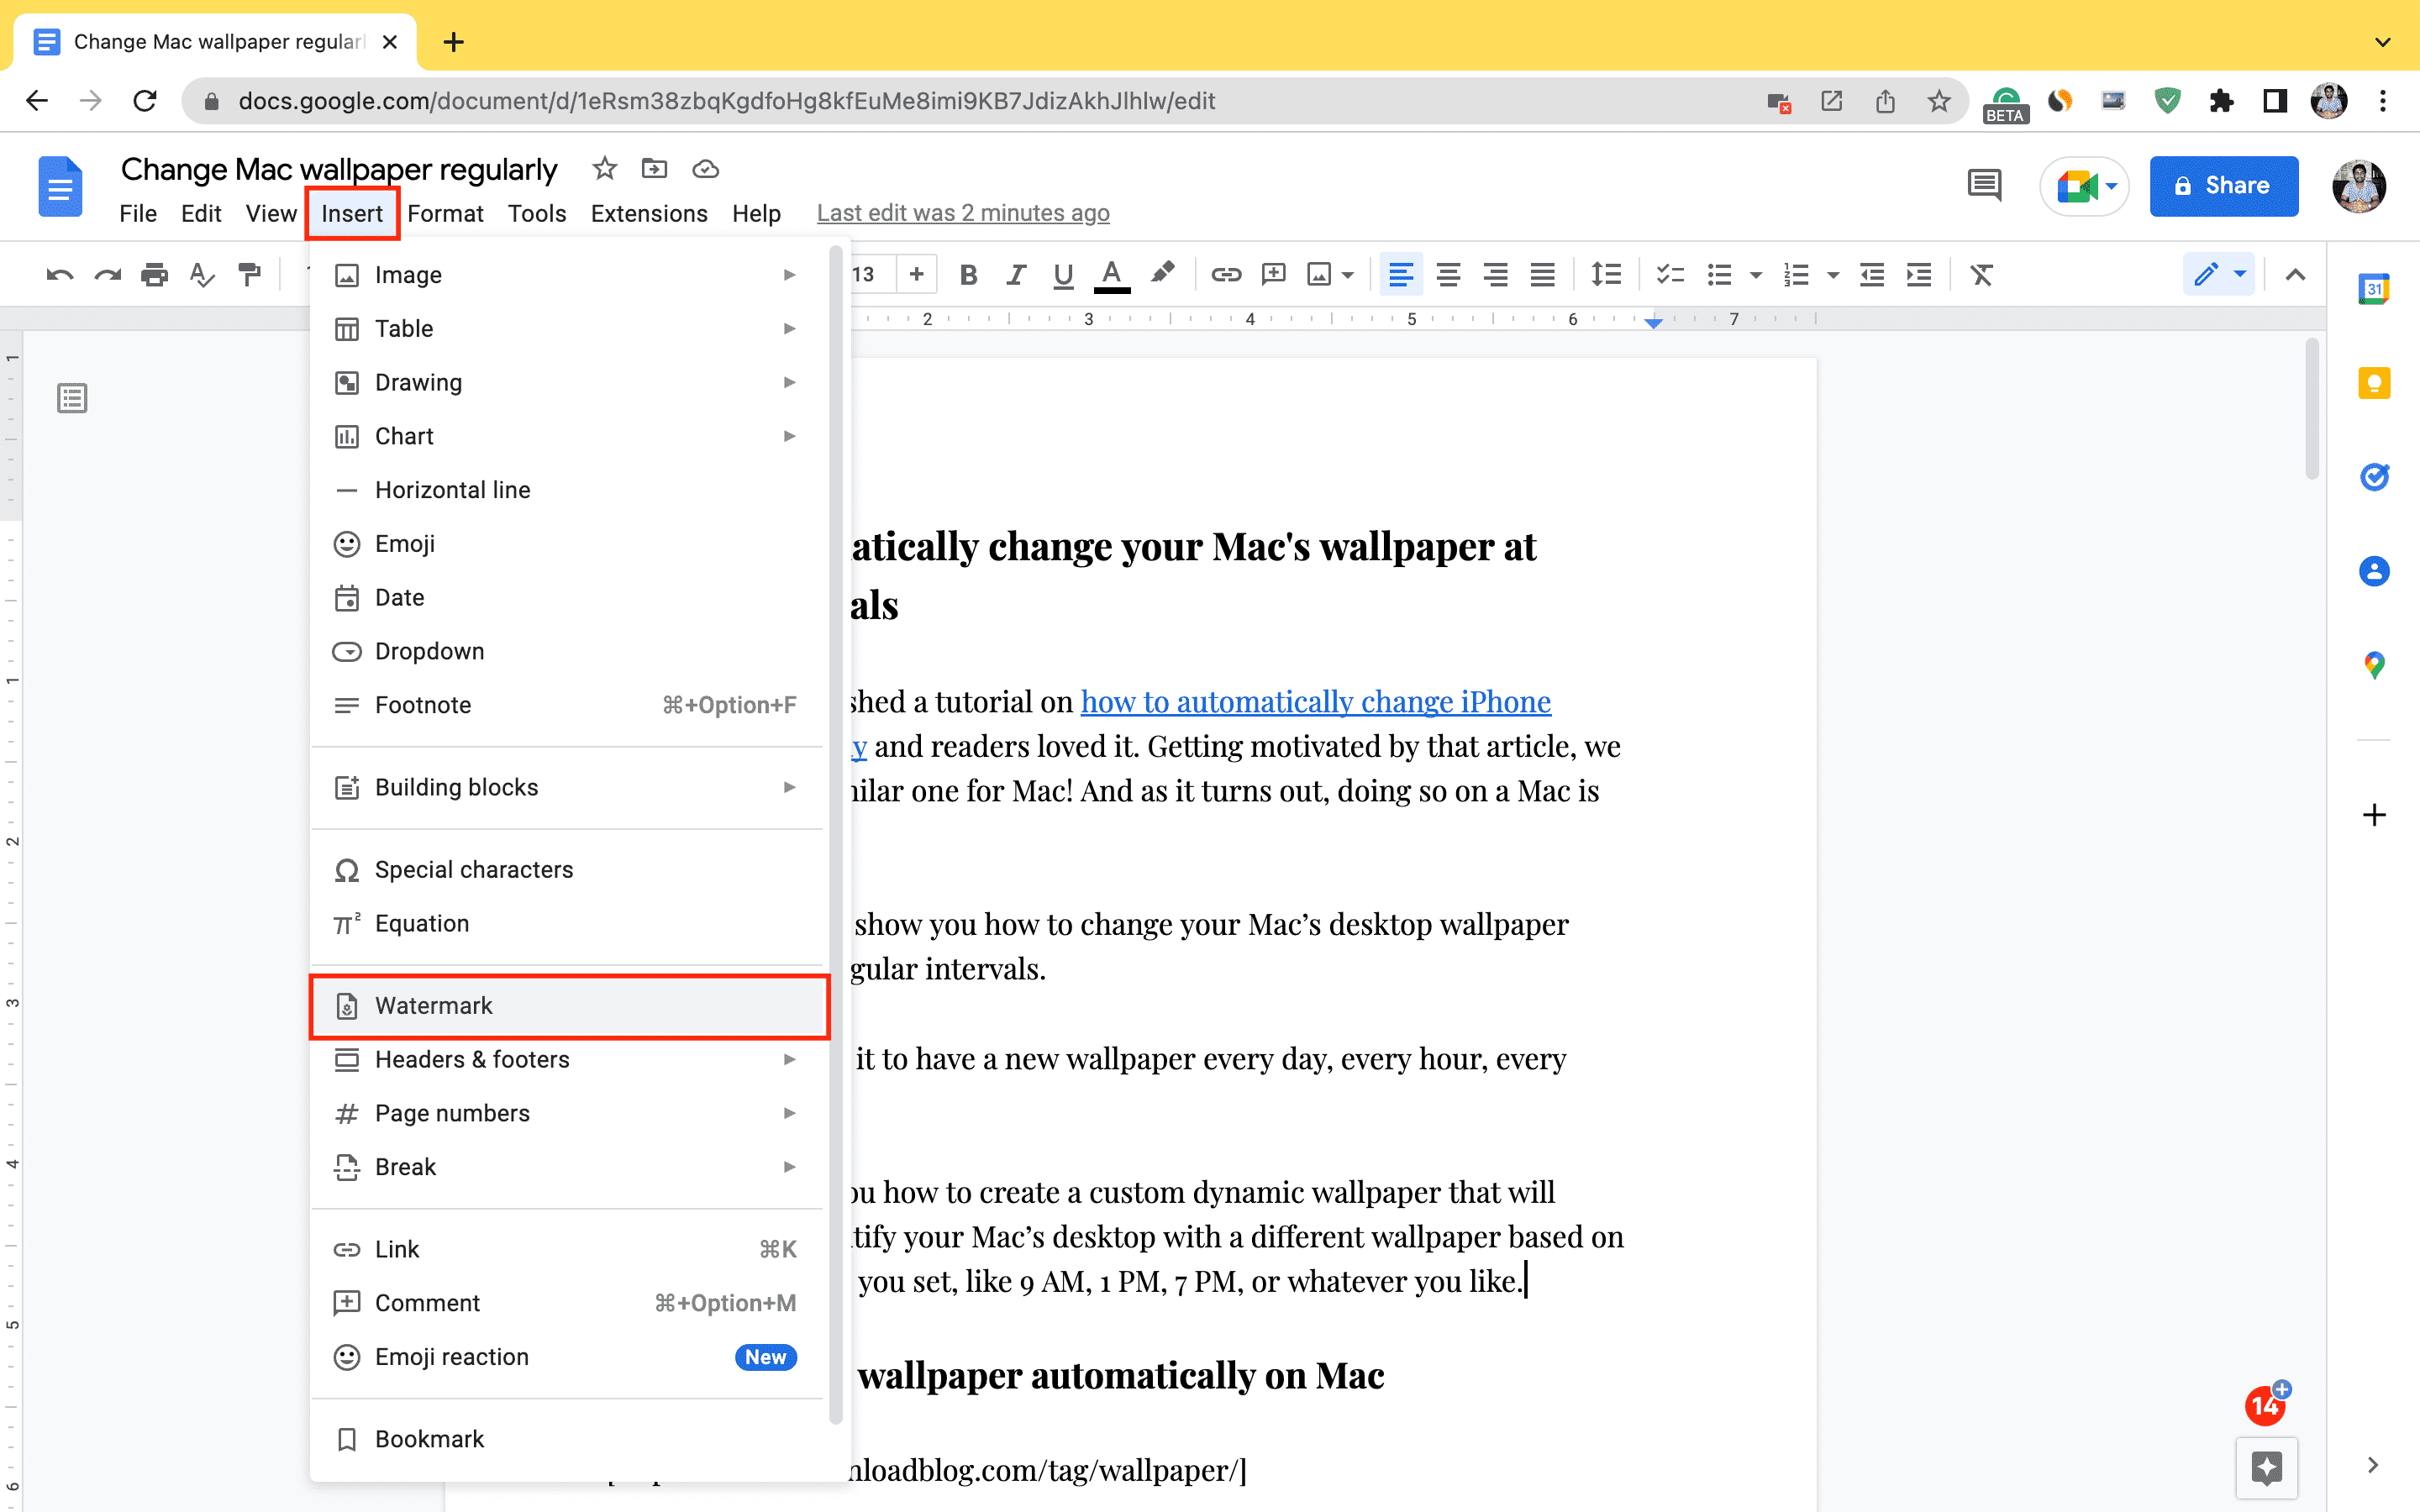
2) Click Insert from the menu bar and choose Watermark.
3) From the left sidebar, pick Image to add a photo/logo as your watermark, or click Text to use words as the watermark. Here are the steps for both:
Image watermark

Click Select Image and upload your desired image, or choose one from your Google Photos, Drive, etc. Once you select the image, it should appear as the watermark. You can then customize it to your liking with the following options:
Scale: Adjust the size of the watermark in percentages—50%, 100%, 150%, 200%, or 500%. For the best results, use 50% or 100%.
Faded: This option is selected by default, as the purpose of a watermark is to be subtle and not block the text. The faded effect provides a translucent appearance, but you can uncheck it if preferred.
Next, click More image options to access additional tools:
Size & Rotation: Use this to adjust the size of your watermark. The Angle option lets you rotate the watermark diagonally or at your preferred inclination. Additionally, you can double-click the watermark in the document and drag the edges to resize it.
Text Wrapping: This option is typically blurred out. When active, text wrapping allows you to control how text interacts with the image. You can choose if the image should appear inline with the text, wrap around it (left or right), break the text, or appear in front or behind the text. Since a watermark is typically placed behind text, this option may be unavailable.
Position: You can set the watermark’s position on the page by entering the X and Y values or selecting a layout under Quick Layouts.
Recolor: The recolor option lets you apply filters to the watermark image. It’s best to avoid using this feature if you’re using your company logo as the watermark, but the Negative filter (black-and-white) can be useful.
Adjustments: This option allows you to modify the Opacity or Transparency of the watermark. For a professional look, adjust the transparency so the watermark stays unobtrusive while the text remains visible. You can also change the brightness and contrast of the watermark. If you want to undo any changes, use the Reset button to start over.
Finally, when you’re finished, click the X to the left of Image options and then click Done to add the watermark to this Google Docs project. The watermark will appear on all the pages of the document.
Text-based watermark
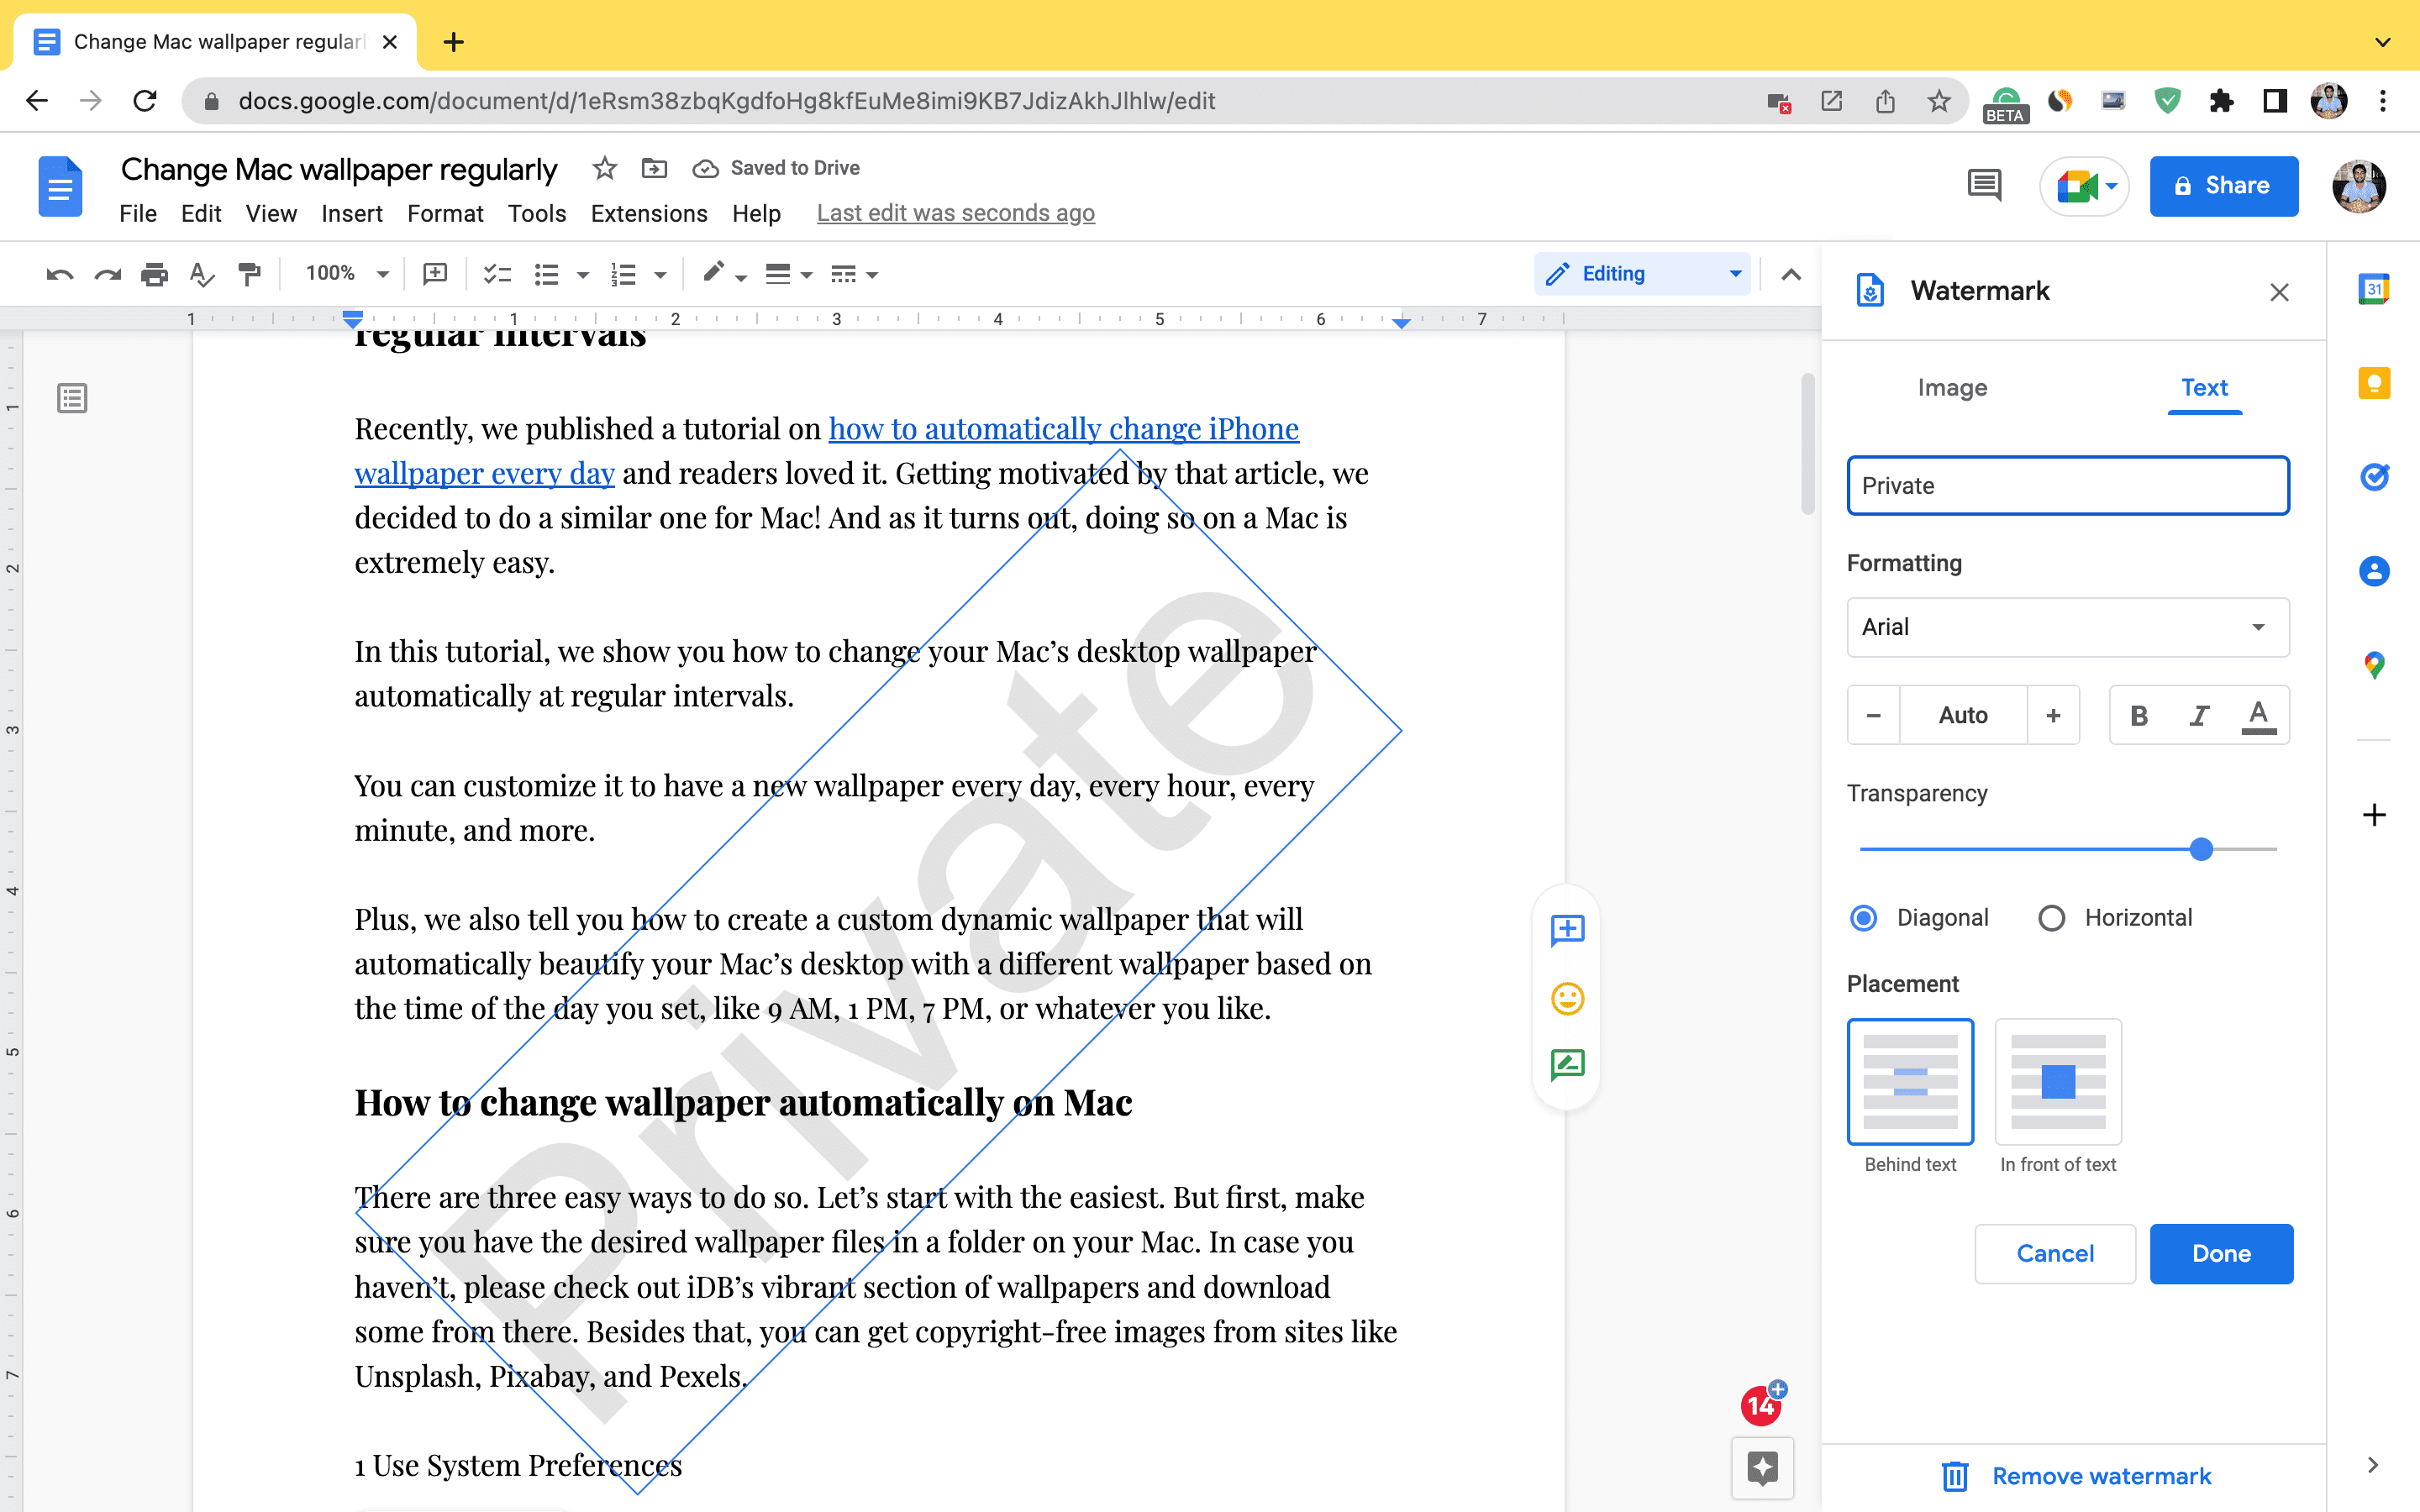
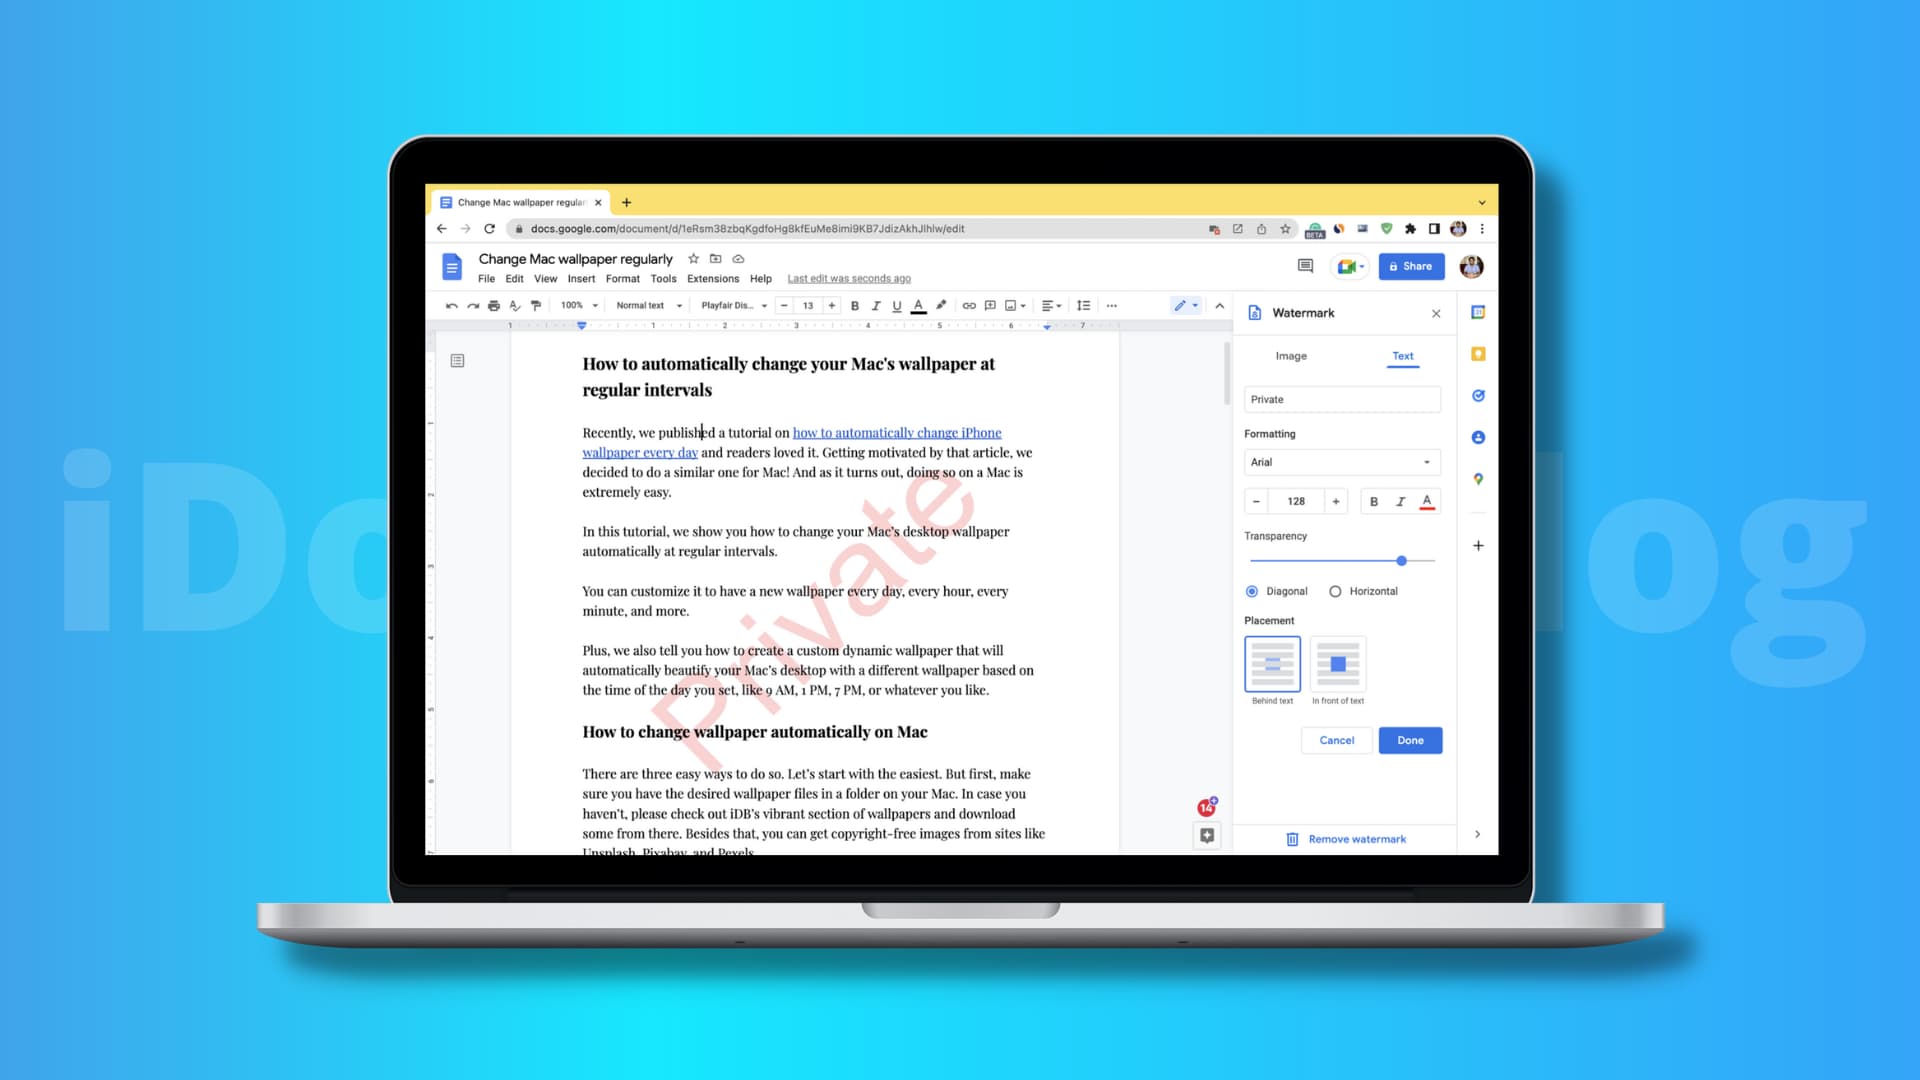
After clicking Text from the top right, type the desired watermark text in the Insert Text box, and it will appear as the watermark. If you’re happy with it, click Done. If not, you can customize it further with the following options:
Formatting: Use this to change the font type, size, make the text bold or italic, and adjust the color of the watermark text.
Transparency: Adjust the clarity or glassiness of the text watermark. To keep it subtle, set the transparency to around 75% or higher.
Diagonal and Horizontal: Experiment with these options to see which works best for your document. Typically, words like Private or Confidentiallook great in the diagonal format.
Placement: Finally, use these to position the watermark above or behind the text. In most cases, the watermark looks best when placed behind the text.
Working with watermarks in Google Docs
Once you’ve added the watermark, you can click File > Download to save the document locally with the watermark.
During my testing, I found that the image watermark may sometimes cause issues, appearing cropped or blocked behind the text. When the Text Wrapping option is grayed out, it can be difficult to fix. One workaround is to ensure your actual text is already in the document before adding the watermark. If your document is already completed, try copying it and pasting it into a new Google Doc, then adding the watermark there.
I also discovered that you can use either an image-based watermark or a text-based one, but not both.
Overall, watermarks in Google Docs are straightforward to use, and I hope this tutorial was helpful.
As of now, the Google Docs app for iPhone doesn’t support the watermark feature. However, you can add an image behind the text to serve as a watermark, though the experience isn’t as seamless.
Other handy tips you should check out: