In this tutorial, we show you how to have the menu bar stay on the screen even when you enter full-screen mode on your Mac.
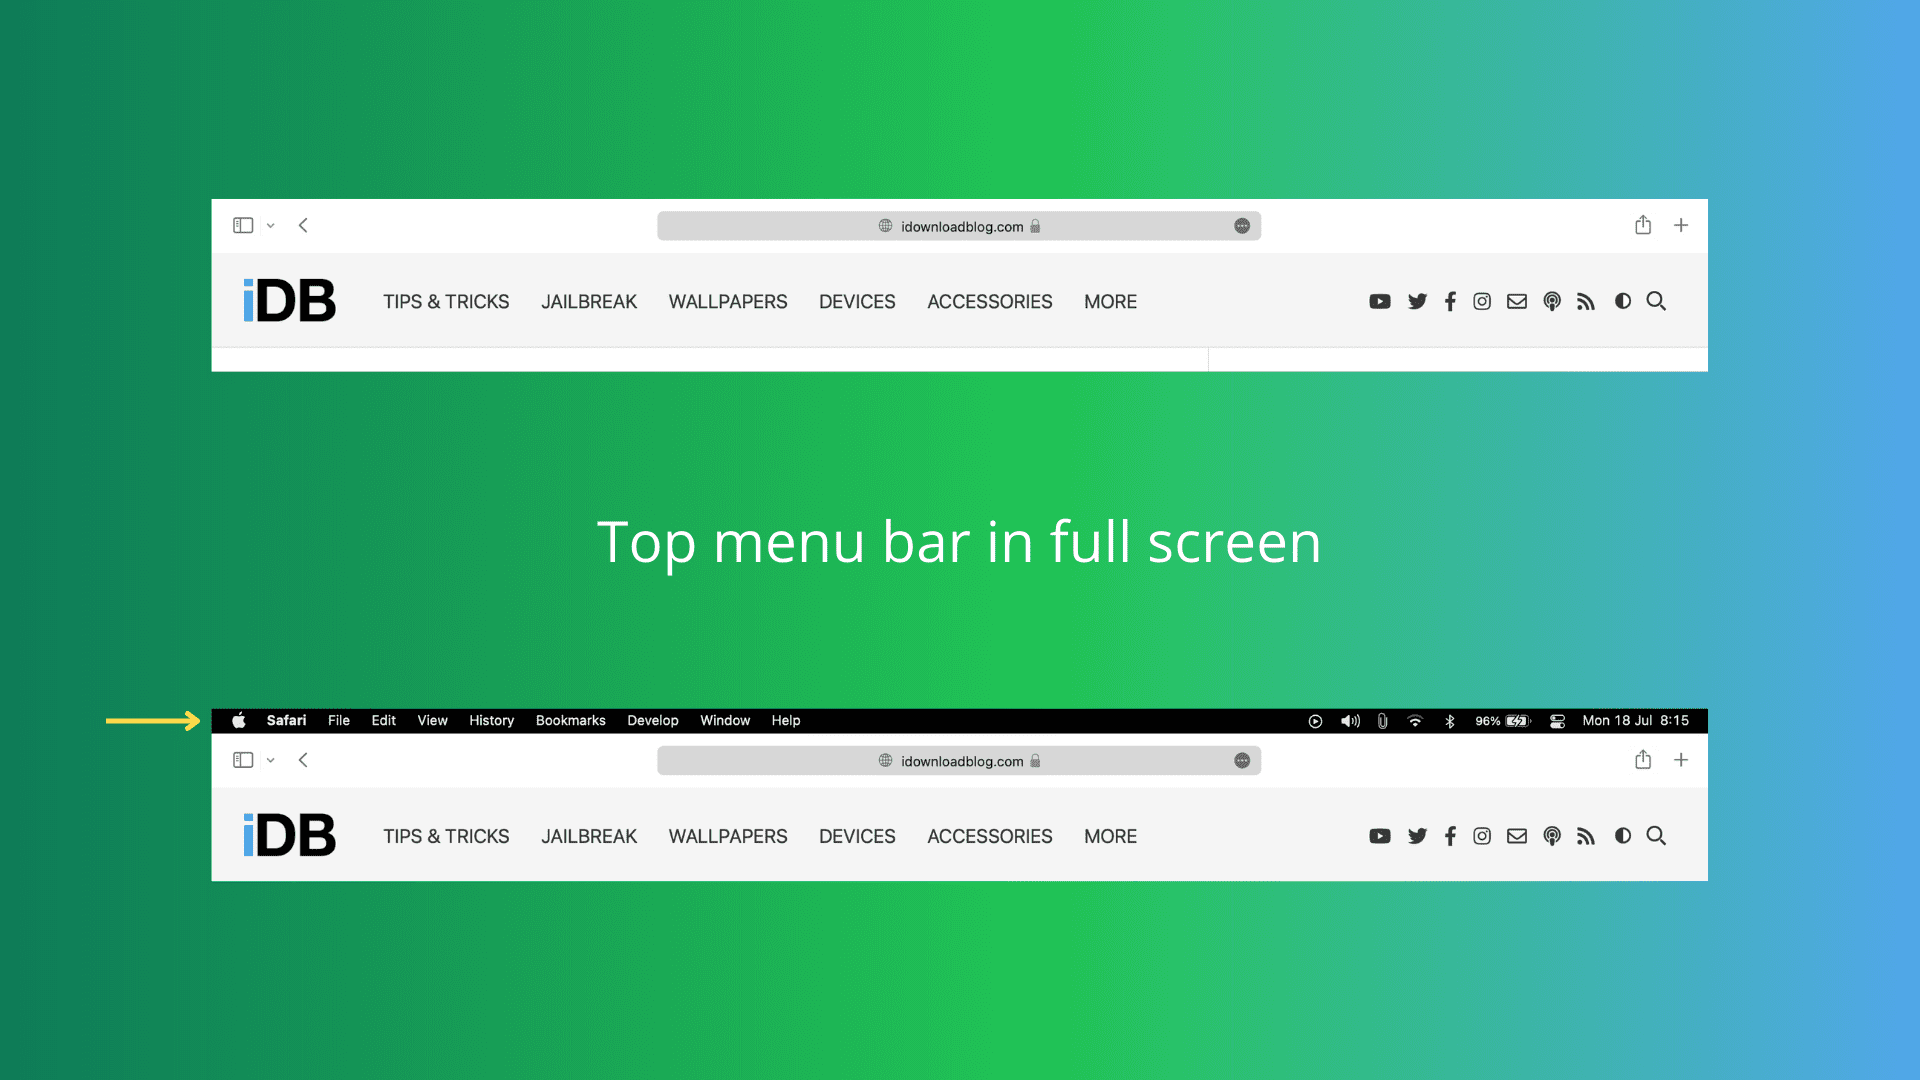
Full screen apps and menu bar
When you click the green button from the top left of an app’s window, it expands to take the entire screen. Another way to enter and exit full-screen mode on Mac is by using the keyboard shortcut: Control + Command + F.
As you might have noticed, when an app is in full screen, the menu bar disappears from the top, so you can take advantage of the whole screen.
However, the menu bar has handy options that let you perform various actions related to that app. Thus, you might want them to always appear on the screen for quicker access. This becomes indispensable if you don’t know the corresponding keyboard shortcuts for the actions mentioned in the menu bar.
Plus, the right side of the menu bar has handy icons like Bluetooth, Wi-Fi, Control Center, MacBook’s battery indicator, date and time, and third-party app buttons. Often, it helps to have them on the screen to change the audio output, glance at the battery level, note the date and time, etc.
Thankfully, macOS gives you the option to customize the visibility of the menu bar.
Make Mac’s menu bar permanently visible even in full screen
The steps differ based on which macOS version is installed on your computer.
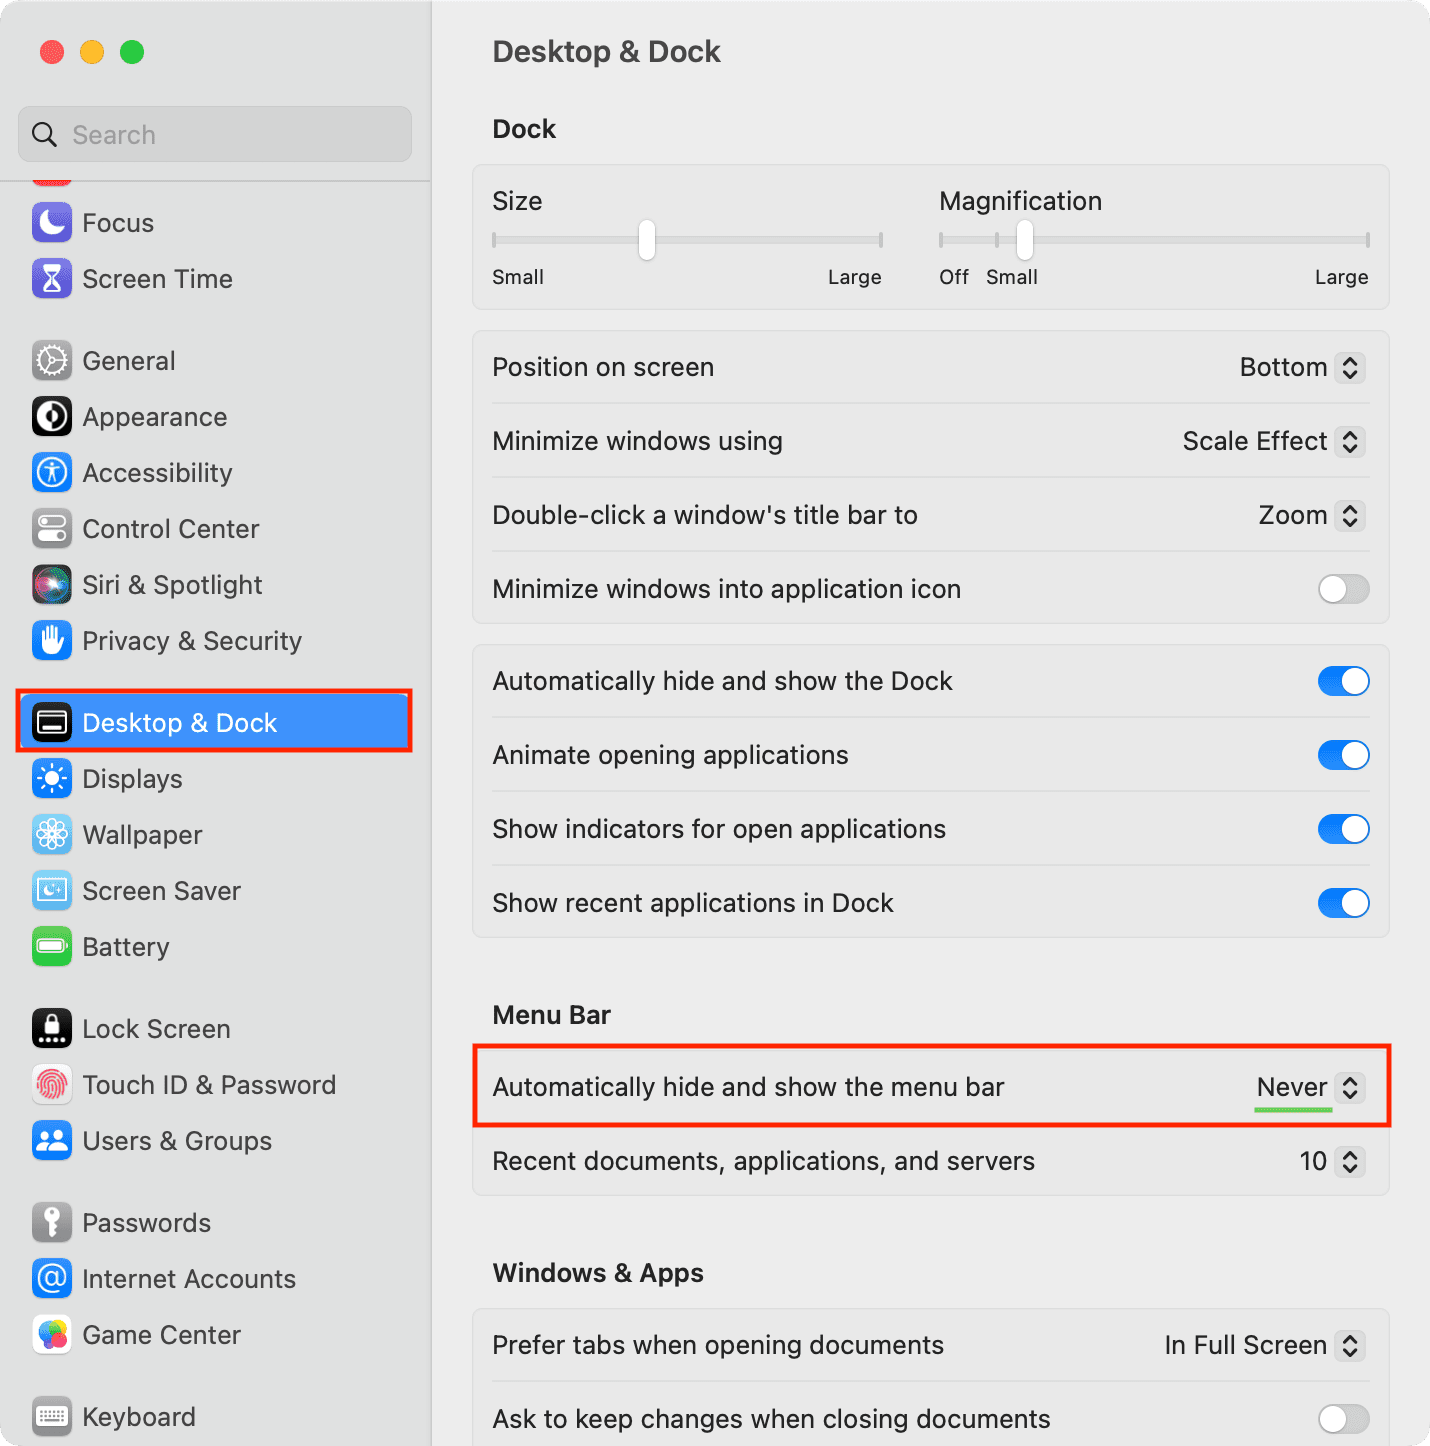
macOS Sonoma and macOS Sequoia
- Open System Settings.
- Select Control Center from the left side.
- Scroll to the bottom and set ‘Automatically hide and show the menu bar‘ to Never.

From now on, Mac’s top menu bar will stay visible even when you click the green button or press Control + Command + F to enter full screen.
macOS Ventura
- Open System Settings.
- Select Desktop & Dock from the left sidebar.
- Scroll to the Menu Bar section, click the drop-down menu next to ‘Automatically hide and show the menu bar,’ and choose Never.
macOS Monterey and earlier
- Click the Apple icon and choose System Preferences.
- Open Dock & Menu Bar settings.
- Make sure Dock & Menu Bar is selected in the left sidebar.
- Scroll down and uncheck the box for Automatically hide and show the menu bar in full screen.
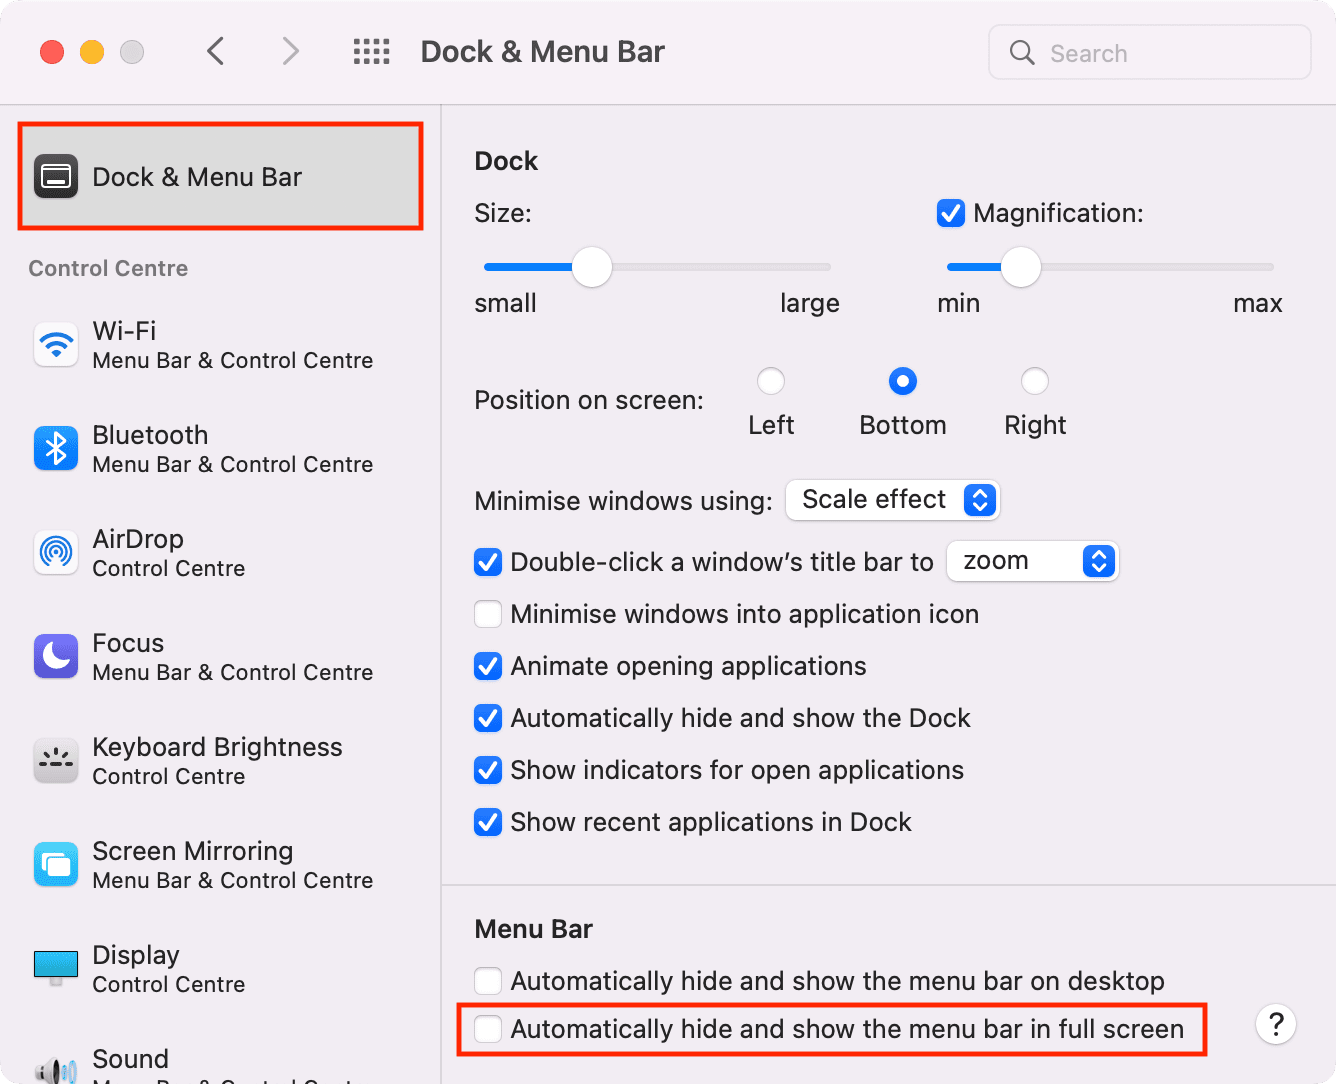
Down the line, if you want to revert this change and hide the menu bar in full-screen mode, follow the same steps and check the box for Automatically hide and show the menu bar in full-screen.
Automatically hide and show Mac’s top menu bar on desktop
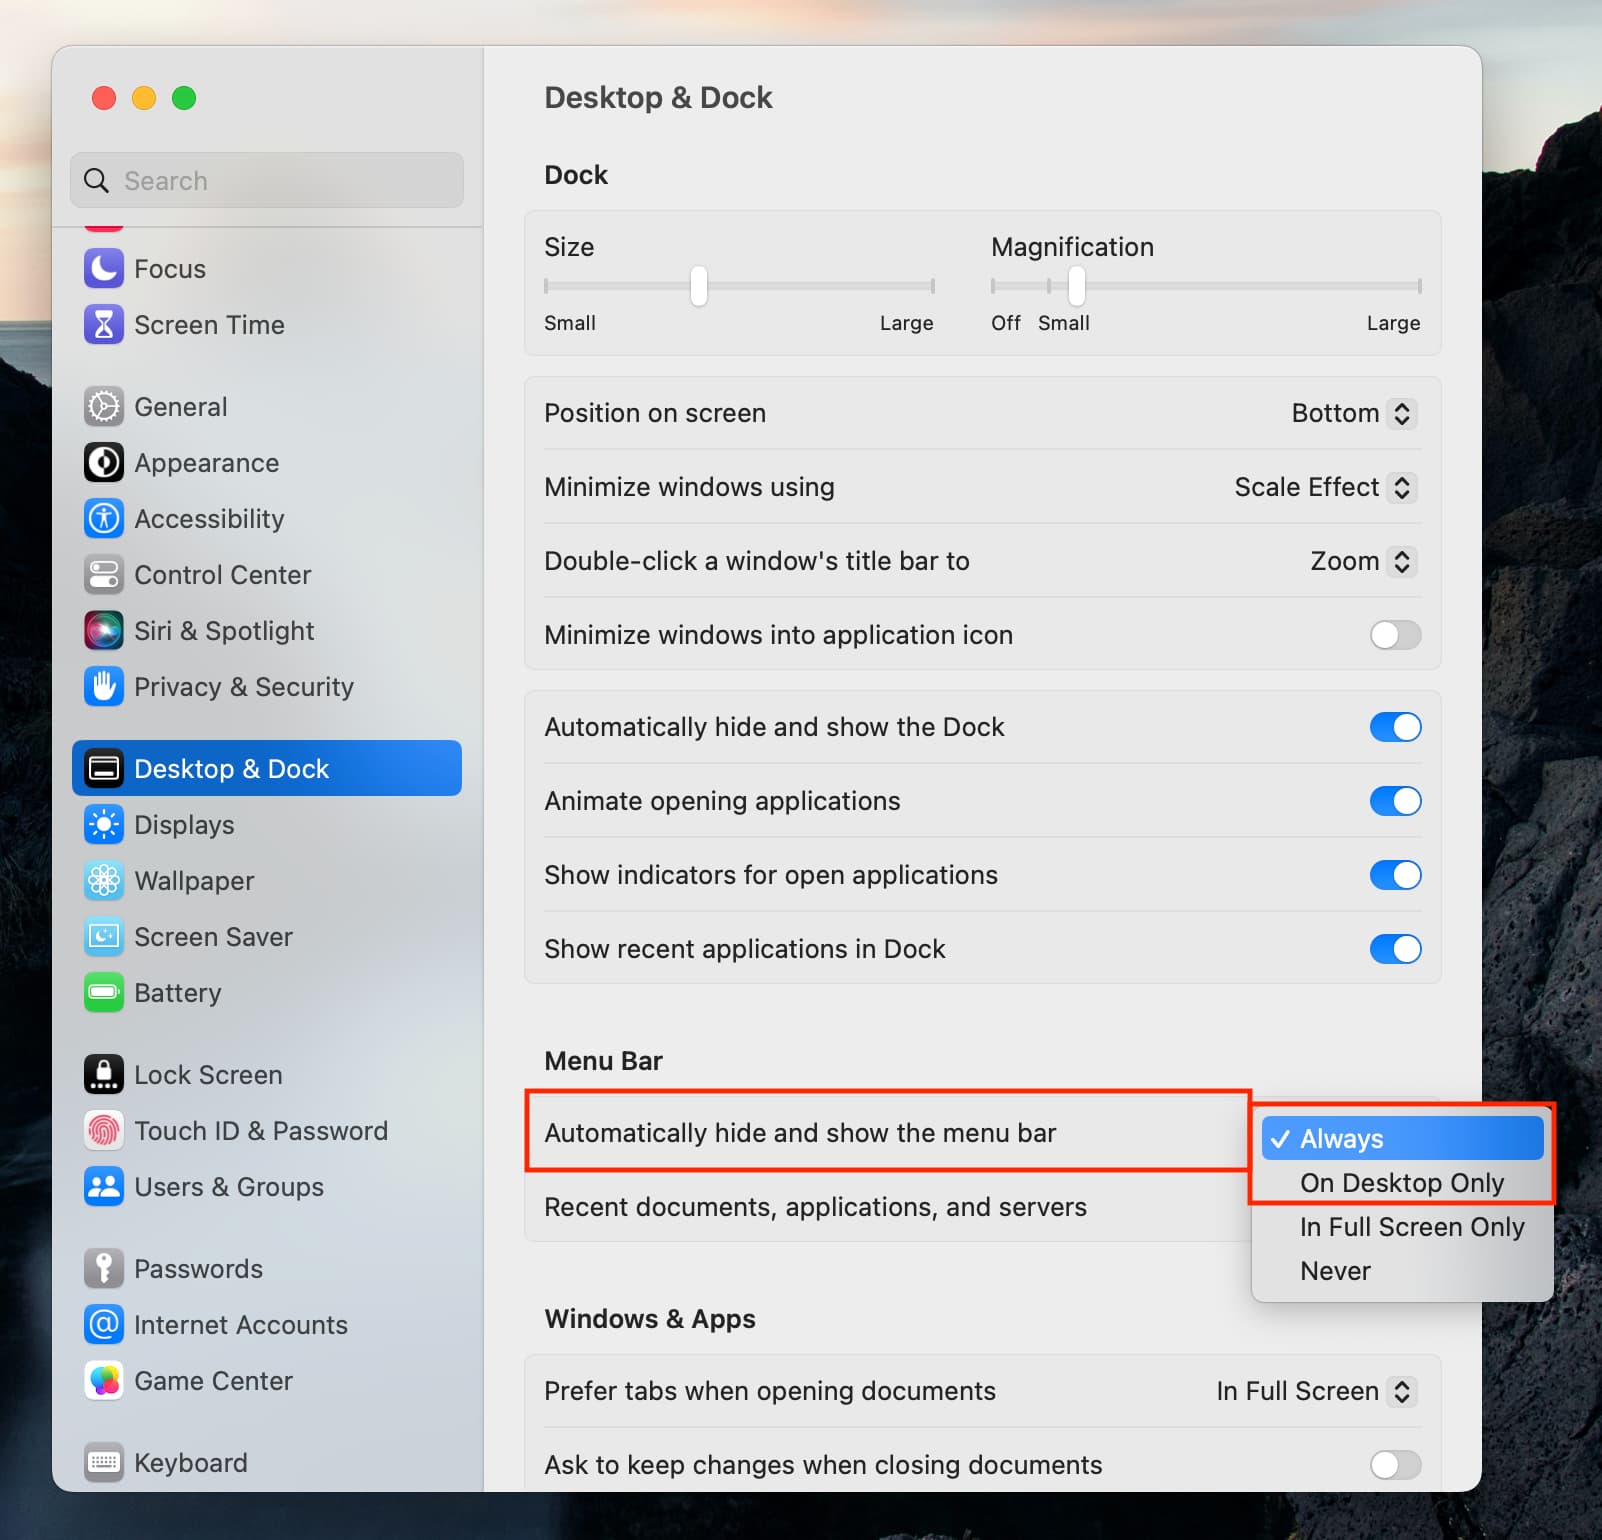
If you set “Automatically hide and show the menu bar” to On Desktop Only or check the box for “Automatically hide and show the menu bar on desktop,” then the top menu bar will stay hidden:
- until you open an app in full-screen mode
- or take the mouse pointer to the top of the screen
So, instead of following the above steps and setting “Automatically hide and show the menu bar” to “Never,” you can also make use of this approach to show the top menu bar only when an app is in full-screen mode. If an app is not in full-screen, the menu bar will stay hidden, unless you take the pointer to the top of the screen.
Other menu bar tips: