Learn how to blur or pixelate sensitive parts of an image on your iPhone and iPad before sharing with friends or online.
The following tips will help you conceal not only dirty laundry in the background or your kid’s face on images but also addresses, card numbers, license plates, etc. You should always hide sensitive information before posting images on social medias sites like X (Twitter), Facebook, or Instagram, or sharing them with people via email, iMessage, etc.
Also see: How to blur or pixelate images and screenshots on Mac
1. Use Markup in the built-in Photos app
Markup is a handy tool built right into the Photos app on your iPhone, iPad, and Mac(our step-by-step tutorial shows you how to use this feature). Markup can help you hide parts of a picture by following these steps.
1) Open an image in the Photos app on your iPhone or iPad, then hit the Edit icon at the bottom resembling three horizontal sliders.
2) Hit the Markup icon in the top-right corner that looks like a pen tip.

3) Use these tools to hide parts of your image, then tap Done to save your edits.
Pen or highlighter:
- Select the pen or highlighter icon, then hit the same icon again to select a thick brush.
- Next, tap the colored dot to pick a desired hue, but be sure to set the opacity to 100%. Anything below that will start revealing hidden parts, and that’s not what you want. To pick a custom color from your image, select the blue color picker icon from the top left.
- Finally, use your finger to draw a line or an arbitrary shape across image parts you’d like to hide. Just like drawing with a crayon on a piece of paper, the selected color will darken when dragging the finger repeatedly over the same area.

Use shapes:
- Tap the plus (+) icon, followed by Add Shape, then pick one. A square or circle usually works best.
- Place the selected shape over a sensitive area. Use two fingers to rotate the overlay shape and drag handles to change its shape and size so that it completely covers the part you’d like to hide. You can also adjust the shape color and opacity, and use other tools to adjust how it looks.

Use emoji:
Responsible parents usually put a huge emoji over their kid’s face to protect their Junior’s identity before sharing photos publicly. When posting Instagram Stories, for example, you can use Meta’s creative tools to do just that. Alternatively, follow these steps to plaster an arbitrarily-sized emoji over an image using free tools you already have on your iPhone or iPad.
- Tap the plus (+) icon on the Markup screen in Photos, then choose Add Text.
- Double-tap Text and add a desired emoji using your iPhone’s emoji keyboard.
- Hide the keyboard, tap the emoji, choose the AA button, and use text sizing options to make the emoji bigger. When satisfied, drag the emoji anywhere on the photo to hide that part.

Use stickers:
If you previously created some stickers, use those to hide parts of the image.
- Tap plus (+) button in Markup, then choose Add Sticker, and pick one.
- Drag the sticker over an area of the image you want hidden, then use pinching to change sticker size and rotate it.

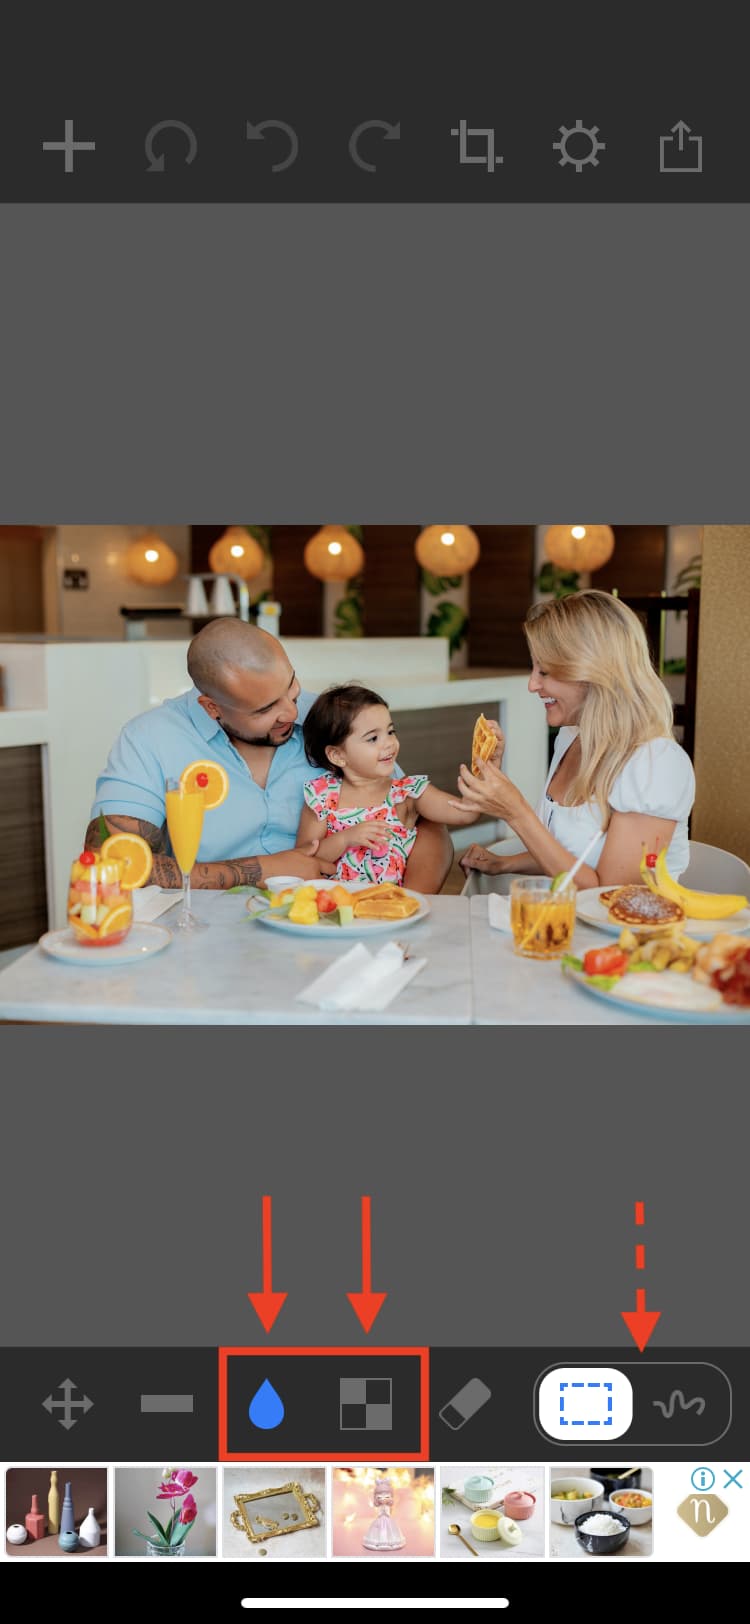
2. Try the free Censor app
Censor is a free app with optional in-app purchases that allows you to blur and pixelate images on your iPhone. Here’s how to use it.
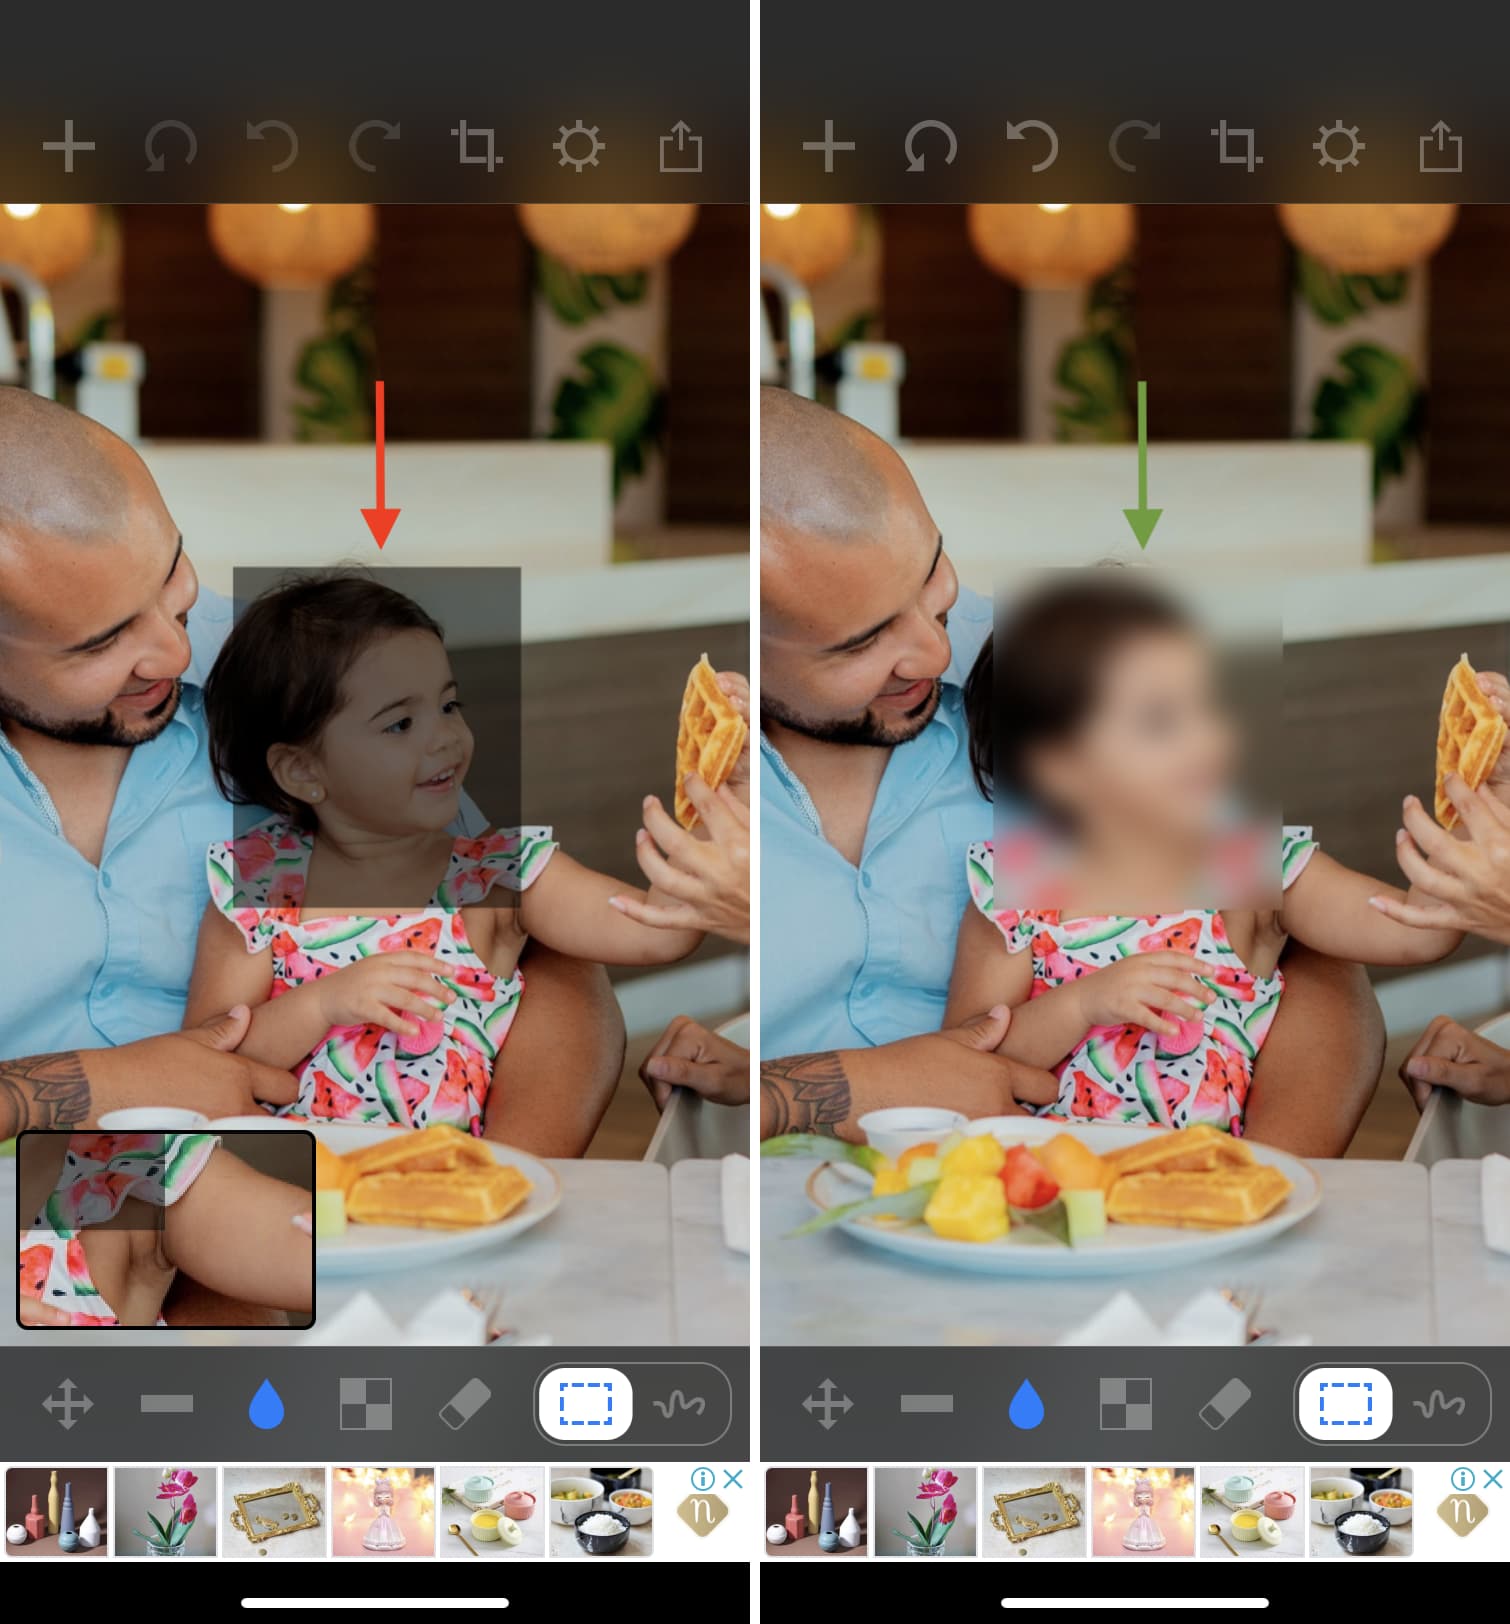
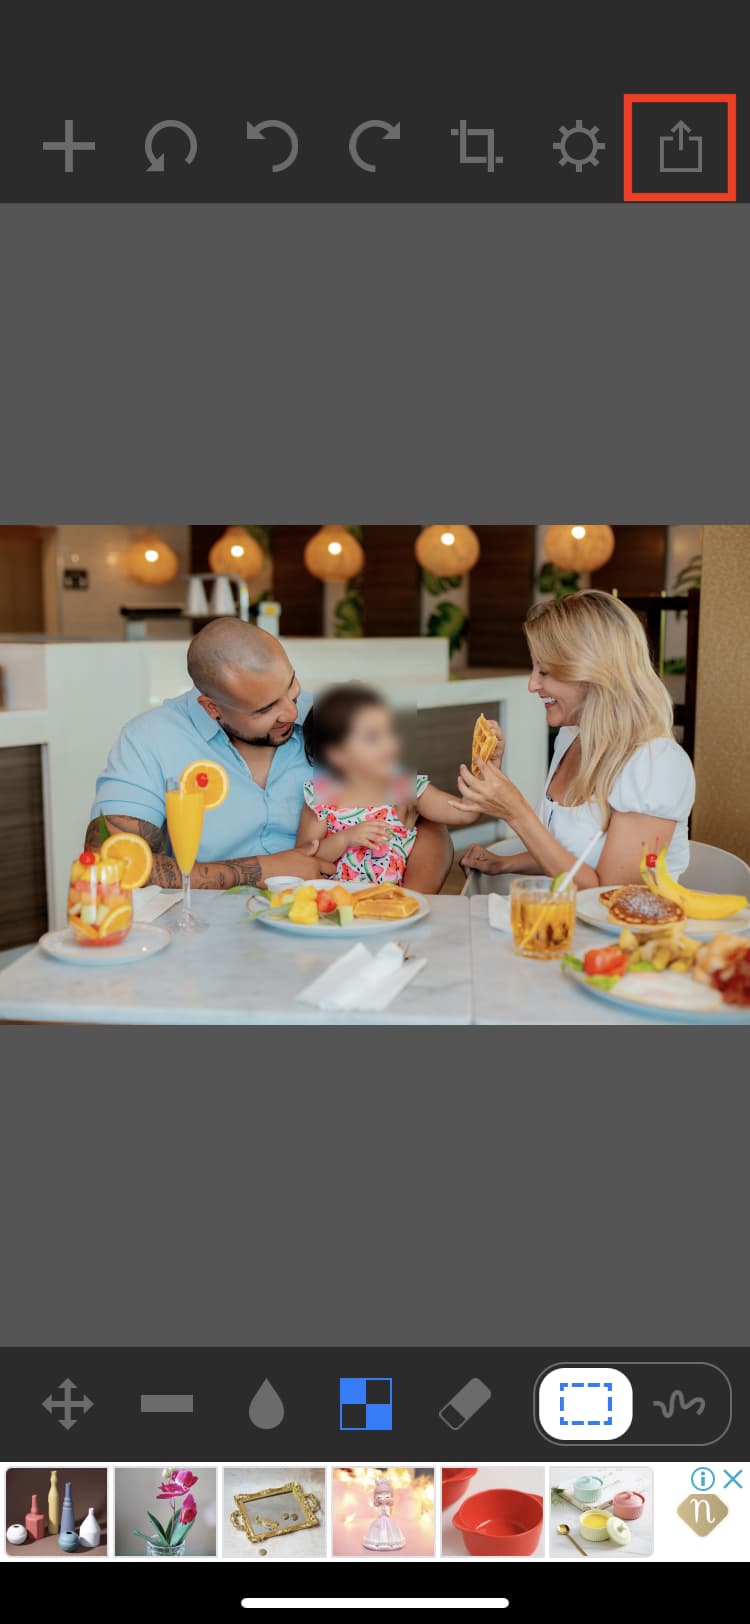
1) Download and open the Censor app, then open an image and select the water drop icon to blur or the square icon with four tiny gray and black squares to pixelate. You can choose to blur/pixelate with sharp borders or go free flow.
2) Draw over desired image areas with your finger to blur or pixelated them.
3) Once done, hit the Share icon to send your censored image via Messages, Mail, WhatsApp, AirDrop, etc. Or, choose Save Image to save a copy in your Photos library.
3. Use the Blur app
Blur app is a free iOS app with optional in-app purchases to blur or pixelate sensitive parts of your image by following the steps below.
1) Download and open the free Blur app, then tap the photos icon and pick an image from your Photos library.
2) Choose either the Blur or Pixelate option under the Filter section.
3) Adjust the size and intensity of your blur/pixelate effect.
4) Using your finger, draw a line or shape over any areas you’d like to hide.
5) When done, tap the check icon to save the image or share it with people, apps, or websites.
Hide sensitive info on images before sharing
Congratulations, you now know how to blur, hide, or pixelate specific areas on images for free. We suggest trying all of the methods above before settling on one that feels most comfortable. If you’d like to go down the paid route, here are a few recommended apps:
All images used in this article are from Unsplash.
On a related note: