In this tutorial, we’ll show you nine ways to hide one, multiple, or all phone numbers on your iPhone or make them harder to find for people with access to your phone.
With these tips and tricks, you can ensure that your iPhone contacts aren’t easily seen by someone else who has access to your iPhone.
Feel free to use the method that seems most suitable and secure for you.
1. Lock the Phone app
Good for: Hiding all contacts.
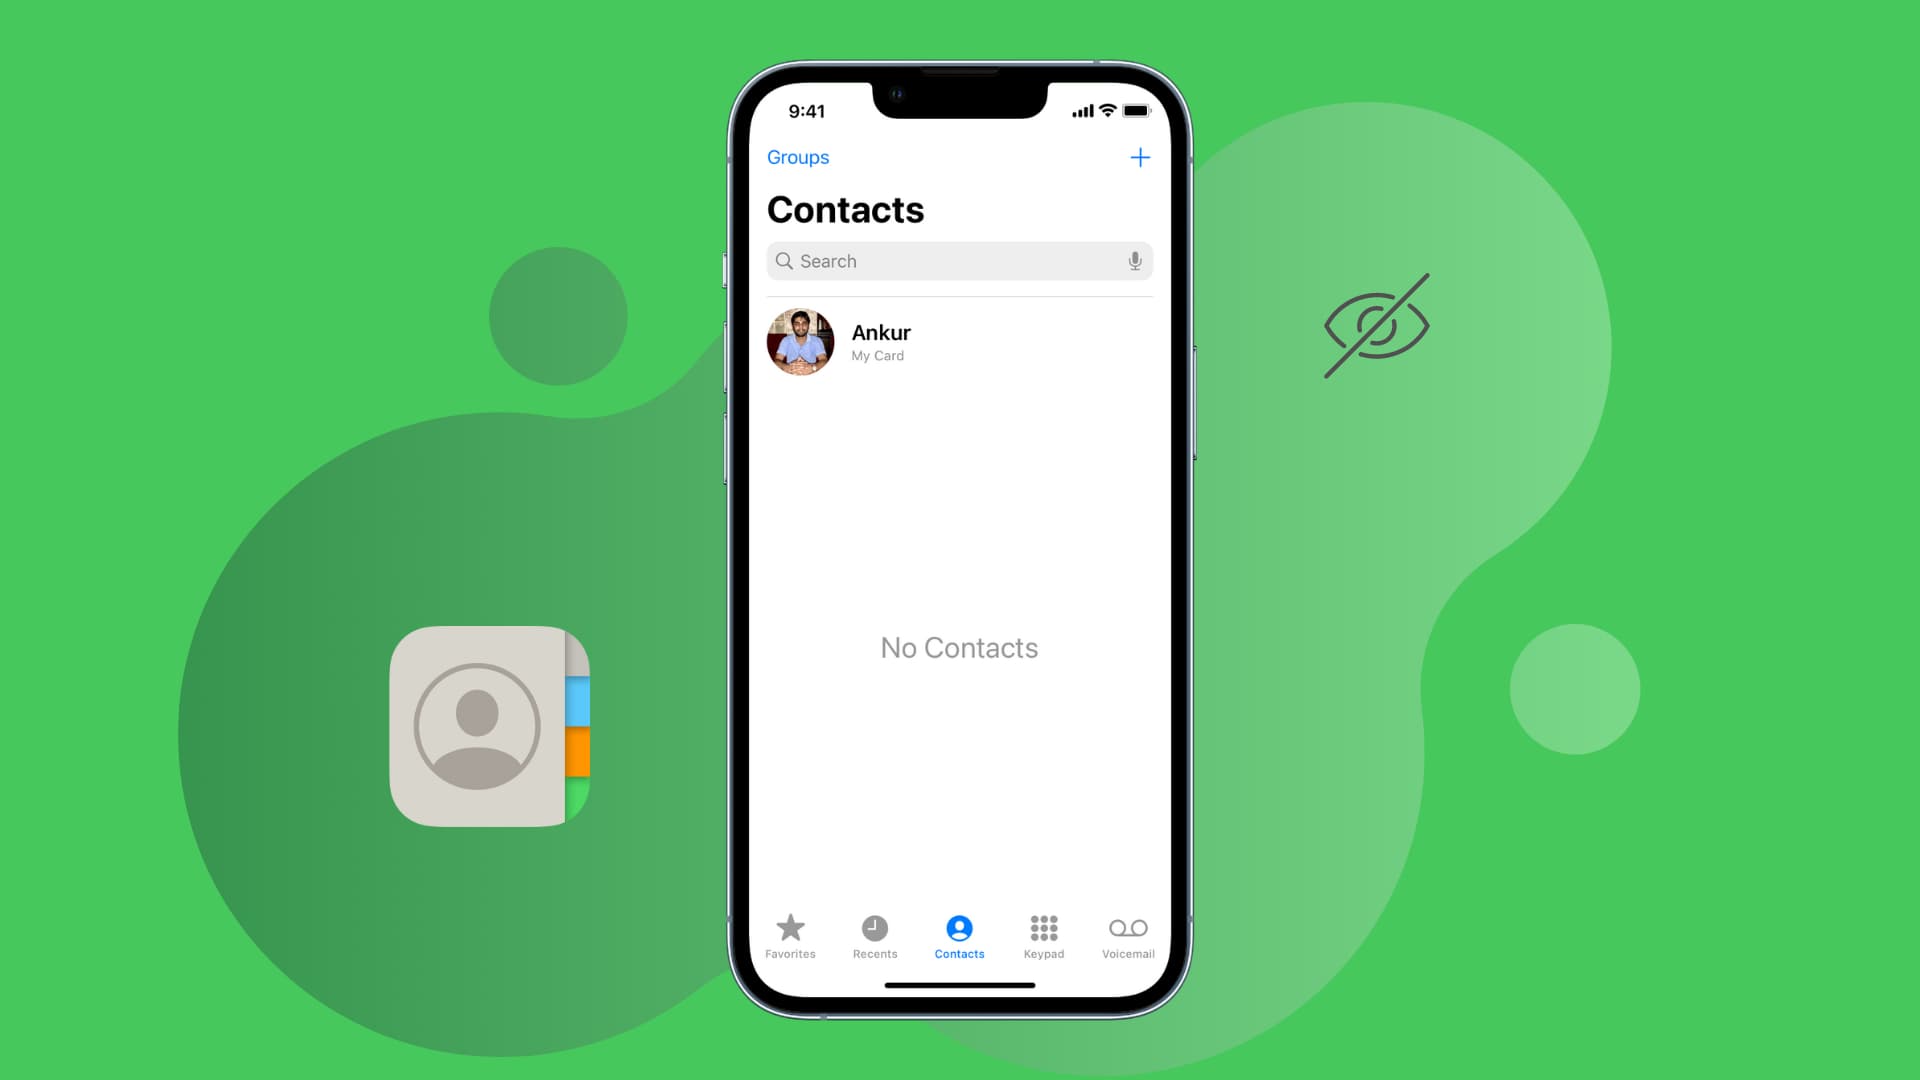
iPhone has a dedicated Contacts app that lists all your saved phone numbers. Additionally, the Contacts section of the Phone app does the same job.
To prevent others from seeing whose number you have saved, you can lock the Phone app on iOS 18 by touching and holding its icon and tapping Require Face ID. This simple action will secure your address book, recent call logs, and voicemail from unwarranted access.

However, you can’t lock the Contacts app, and it remains accessible without Face ID or Touch ID authentication even after locking the Phone app. So, it’s best to just delete the stock Contacts app from your iPhone.
Note: You don’t have to authenticate to pick up incoming calls even when the Phone app is locked by Face ID.
2. Don’t save the contact; memorize it!
Good for: Hiding one or a couple of contacts.
Obviously, you knew this!
One of the best and easiest ways to ensure a phone number isn’t seen by people having access to your iPhone is by not saving it to the iPhone Contacts app!
You can memorize that phone number or save it somewhere else on your iPhone (explained below). However, given our reliance on the mobile address book, it isn’t surprising that most people can’t remember more than a few contacts. So, if your only goal is to hide one or two phone numbers, you can try this method.
Note: Some apps like WhatsApp need access to the Contacts app, and the contact must be saved to start a chat. To circumvent this, you can:
- Ask the other person to start the chat, and then you can reply and continue the conversation.
- See how to message on WhatsApp without saving the contact.
- Save the contact, start a conversation, and then delete the contact. The conversation will stay in the chat app.
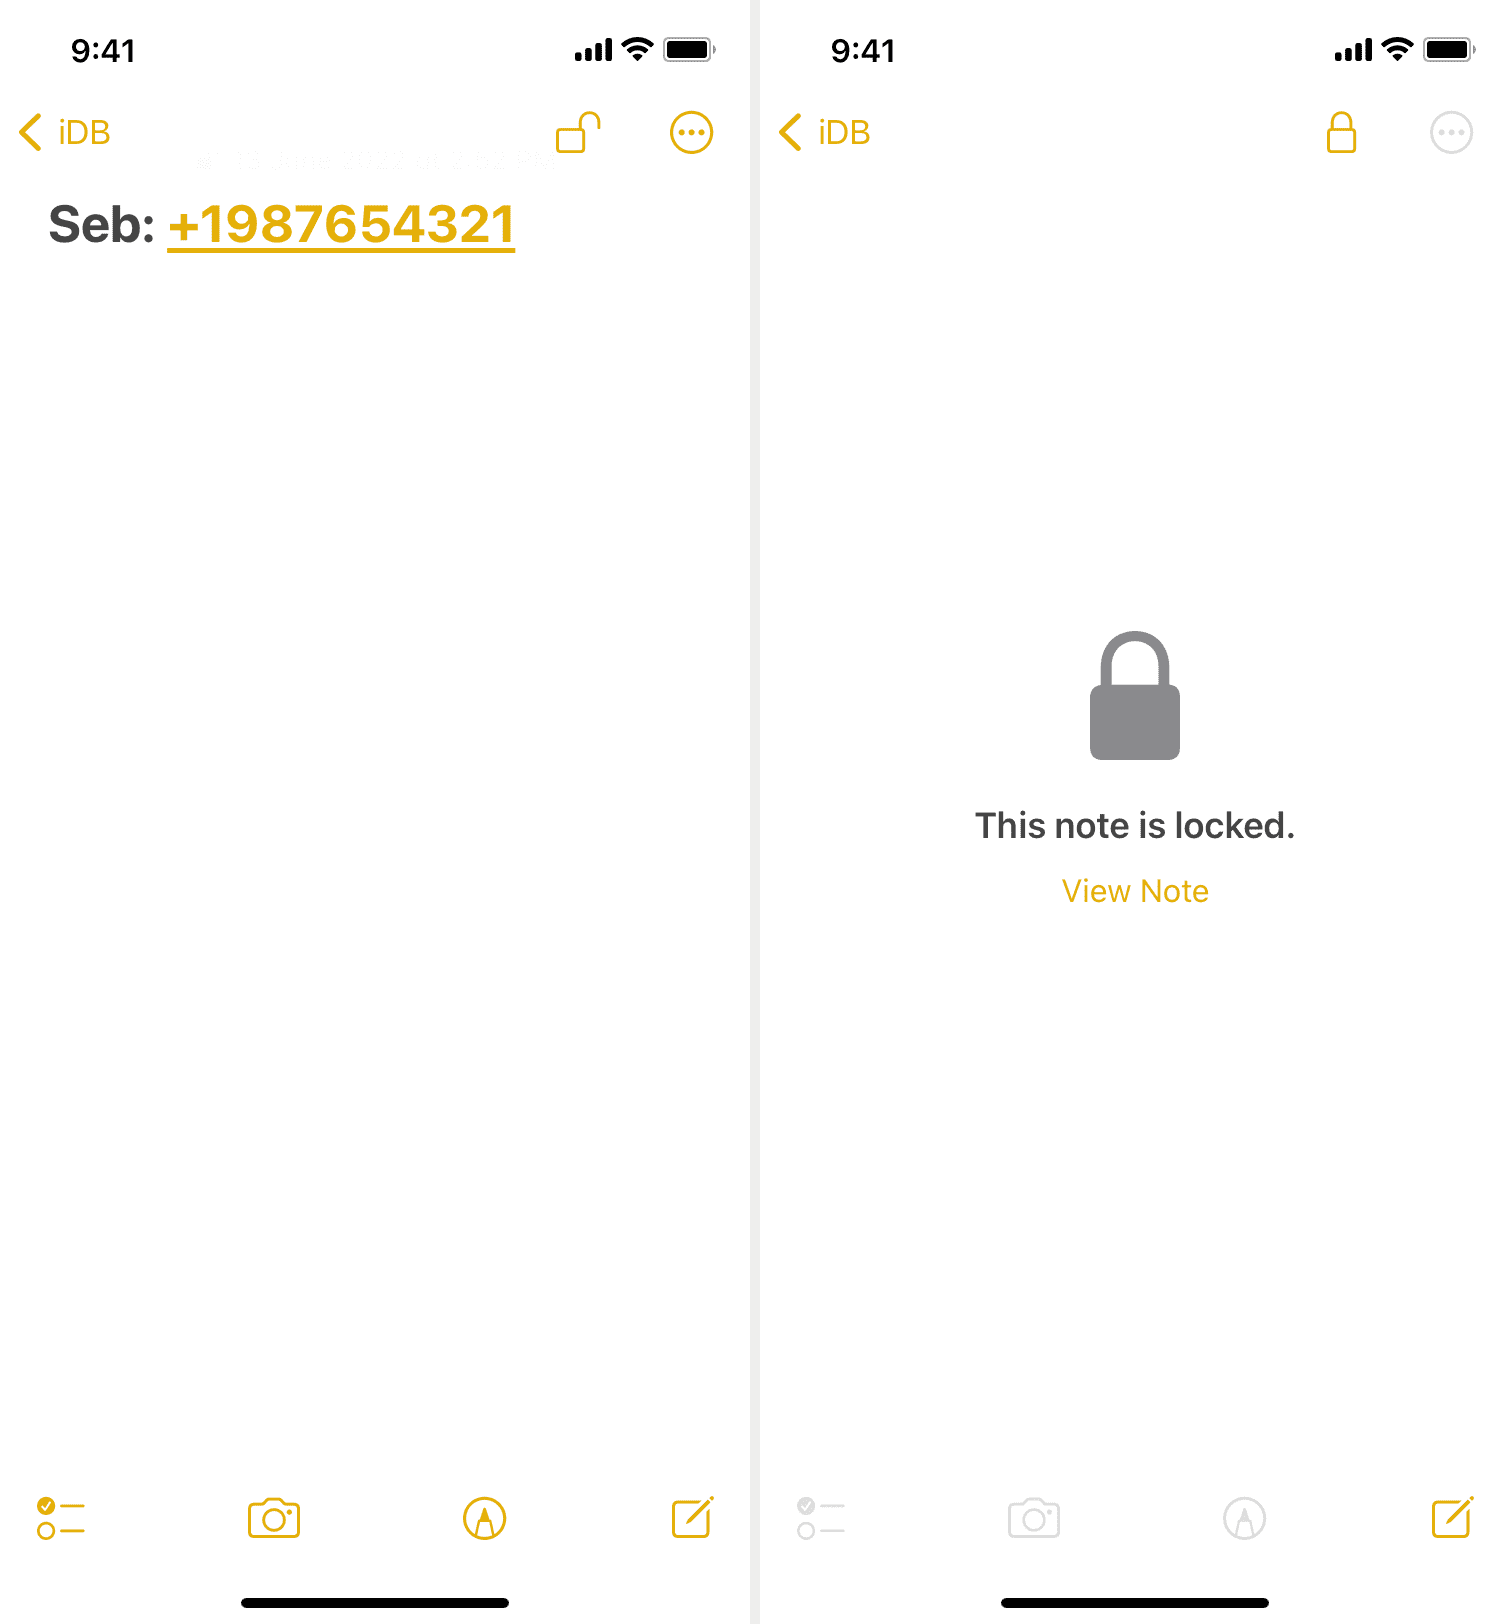
3. Save the contact in Notes and lock it with a password
Good for: Hiding one or a few contacts.
When a person takes your iPhone with the motive to find a person’s contact will go through the Contacts app or the Phone app.
But what if you don’t save the phone number there and save it to the Notes app! Even better, you can lock that iPhone note with a password of your choice. This password can be different from your iPhone Lock Screen password.
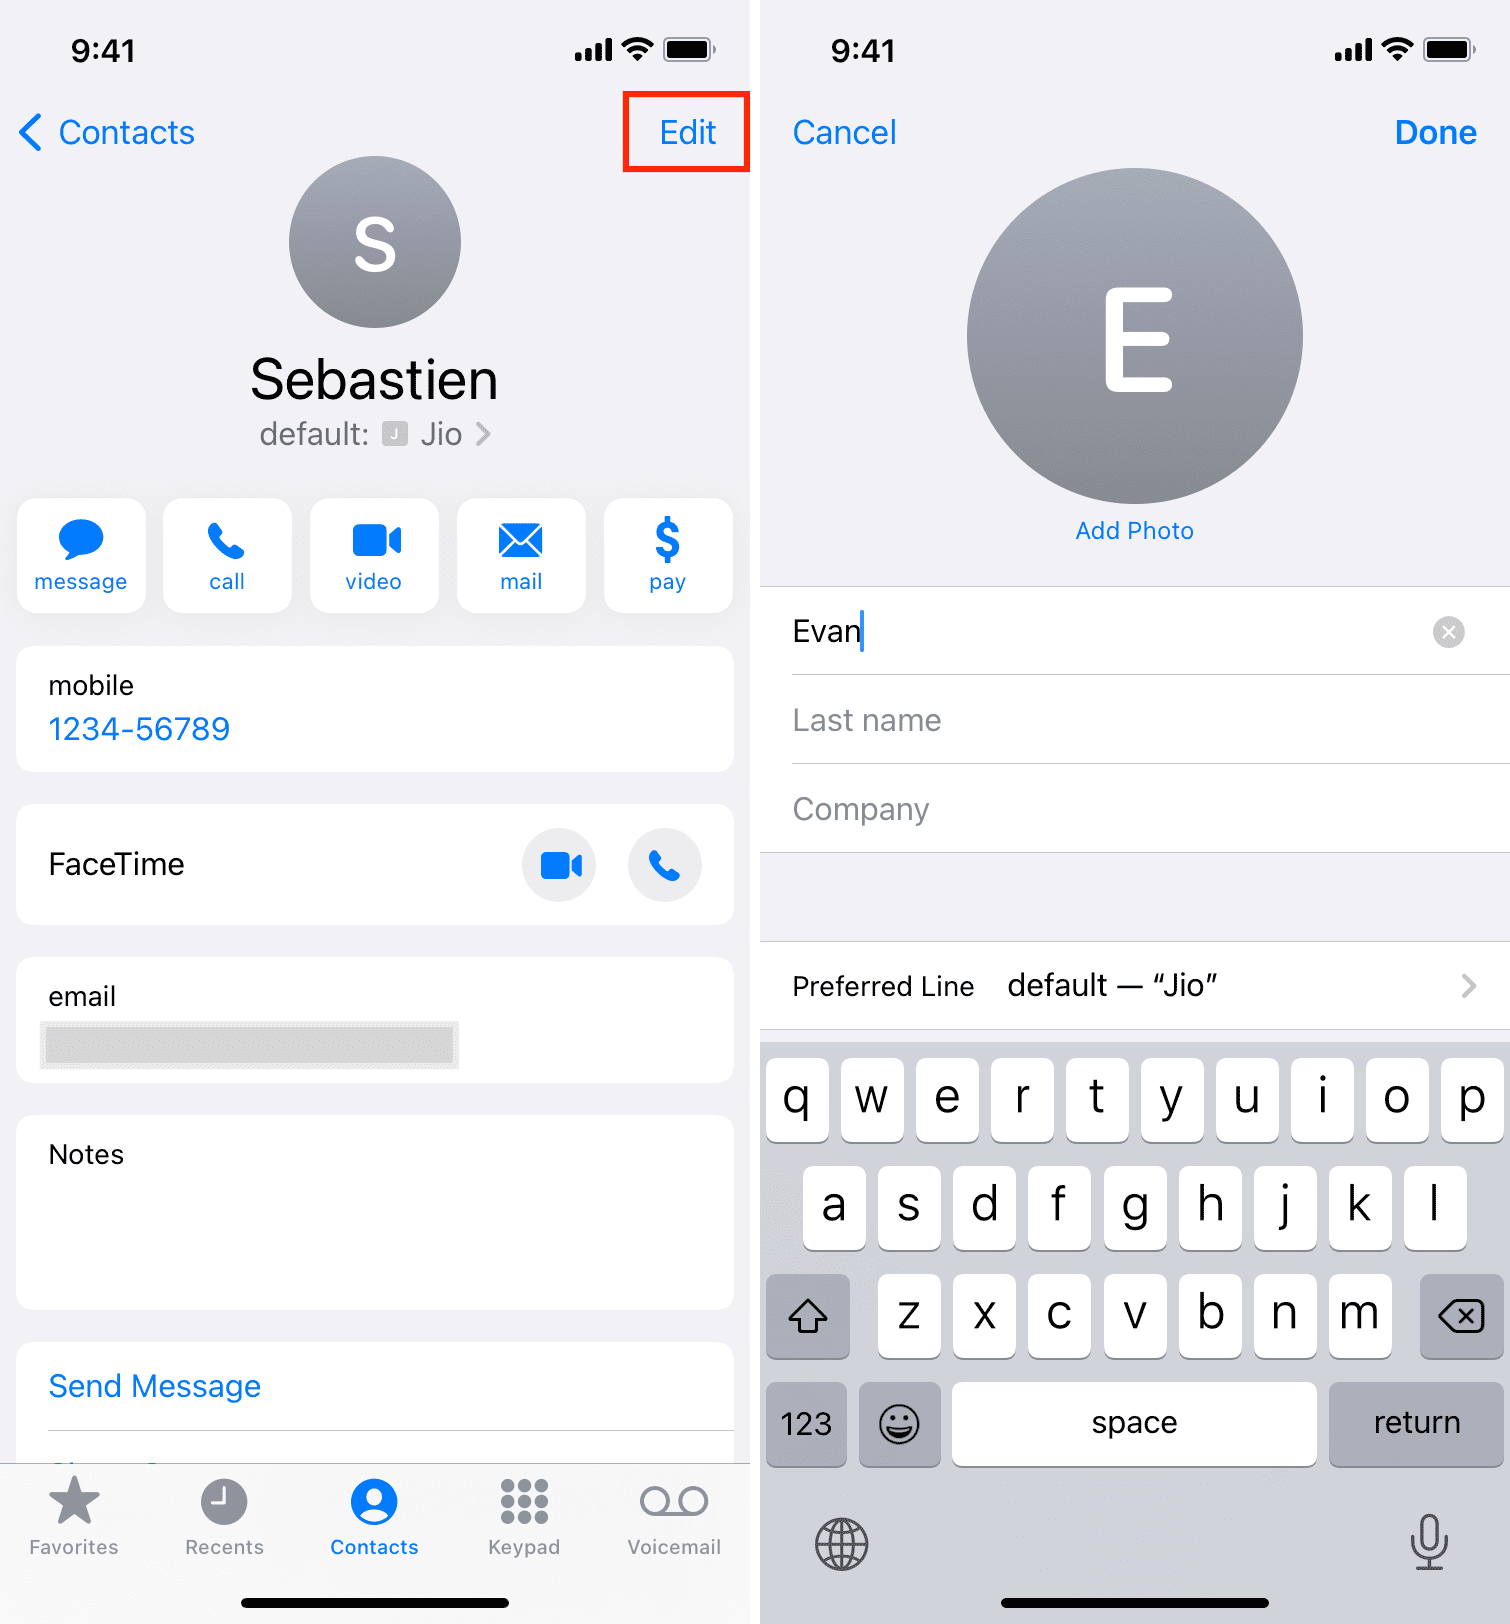
4. Save the contact with a nickname or something random
Good for: Hiding one or several contacts.
Another way to ensure a contact isn’t recognized by someone else is by saving it with a different name or nickname. To do that, go to the person’s contact and tap Edit. Replace the existing name with another name and tap Done.
5. Add contact to an iCloud group and hide (or show) that group
Good for: Hiding one or all contacts.
You may or may not know, but the built-in iPhone Contacts app supports groups. You can use this smart trick to hide desired contacts.
How it works:
- Create two contact groups: The first huge group will have all your contacts except the ones you want to hide. And the second group will have only the contacts you want to hide.
- Always show the first group in your iPhone’s Contacts app and keep the second group hidden. Per your convenience, you can hide or show the second group anytime to hide or see the contacts.
How to do this:
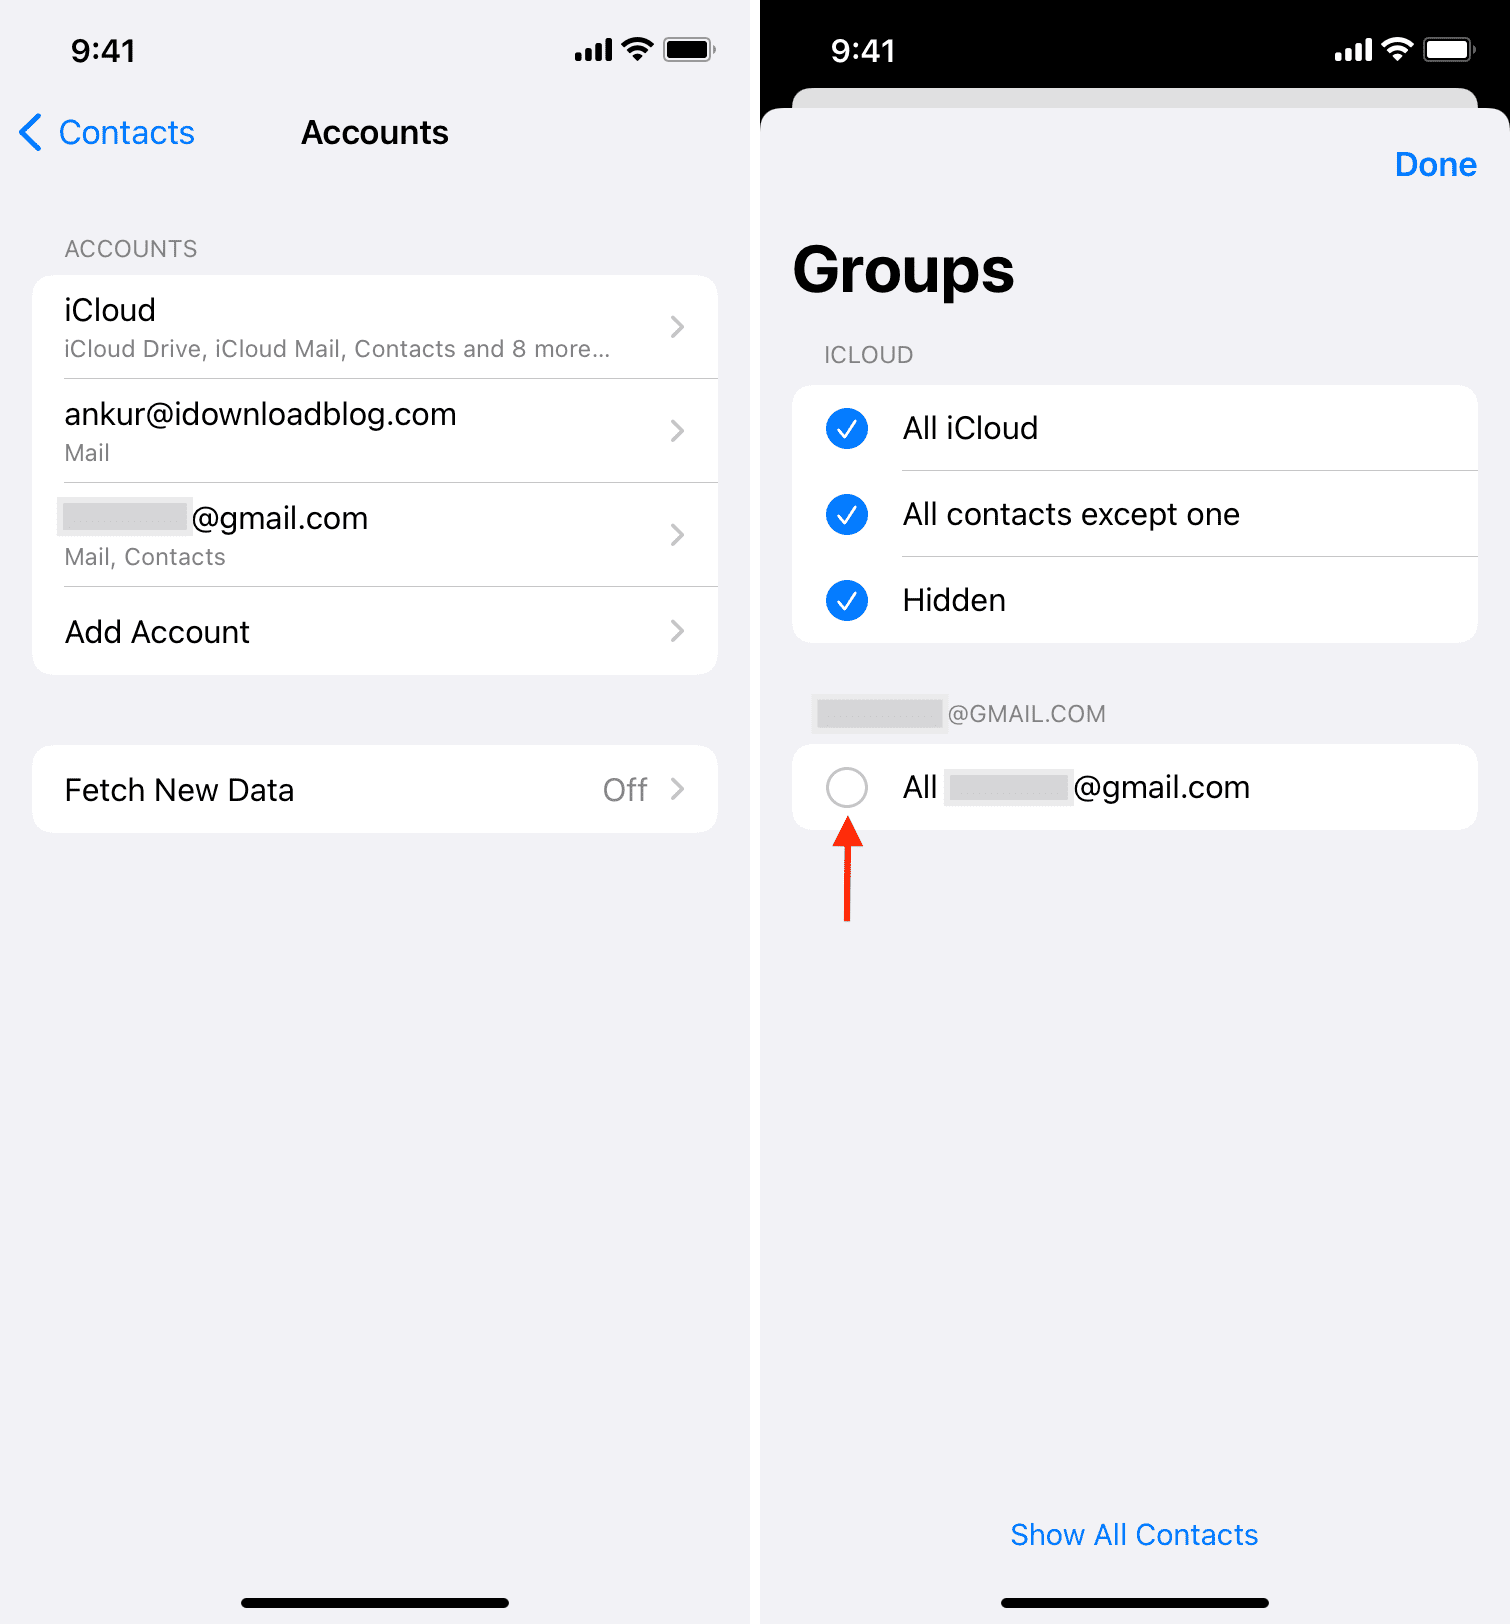
1) Create two contact groups or lists. You can do it on your iPhone. If you have a Mac, you can create groups in the macOS Contacts app, and these groups will sync to your iPhone. Additionally, you can also make a group on iCloud.com on a Windows PC. As stated, put all your contacts except the ones you want to hide in the first group. And add all the contacts you want to hide in the second group.
2) Open the iPhone Contacts app and tap Lists or Groups from the top left. If you don’t see Groups, that means the groups haven’t been created or synced. Make sure your iPhone is connected to Wi-Fi or cellular data, and wait for a while.
3) Uncheck All iCloud. This hides all the contacts from the Contacts app. They aren’t deleted and are still on the iPhone but just hidden. You can check All iCloud to unhide them anytime you like. After that, check the first big group with all the contacts (except the ones you want to hide) and tap Done.
If you are on a newer version of iOS, just tal the list you want to show in the Phone app.
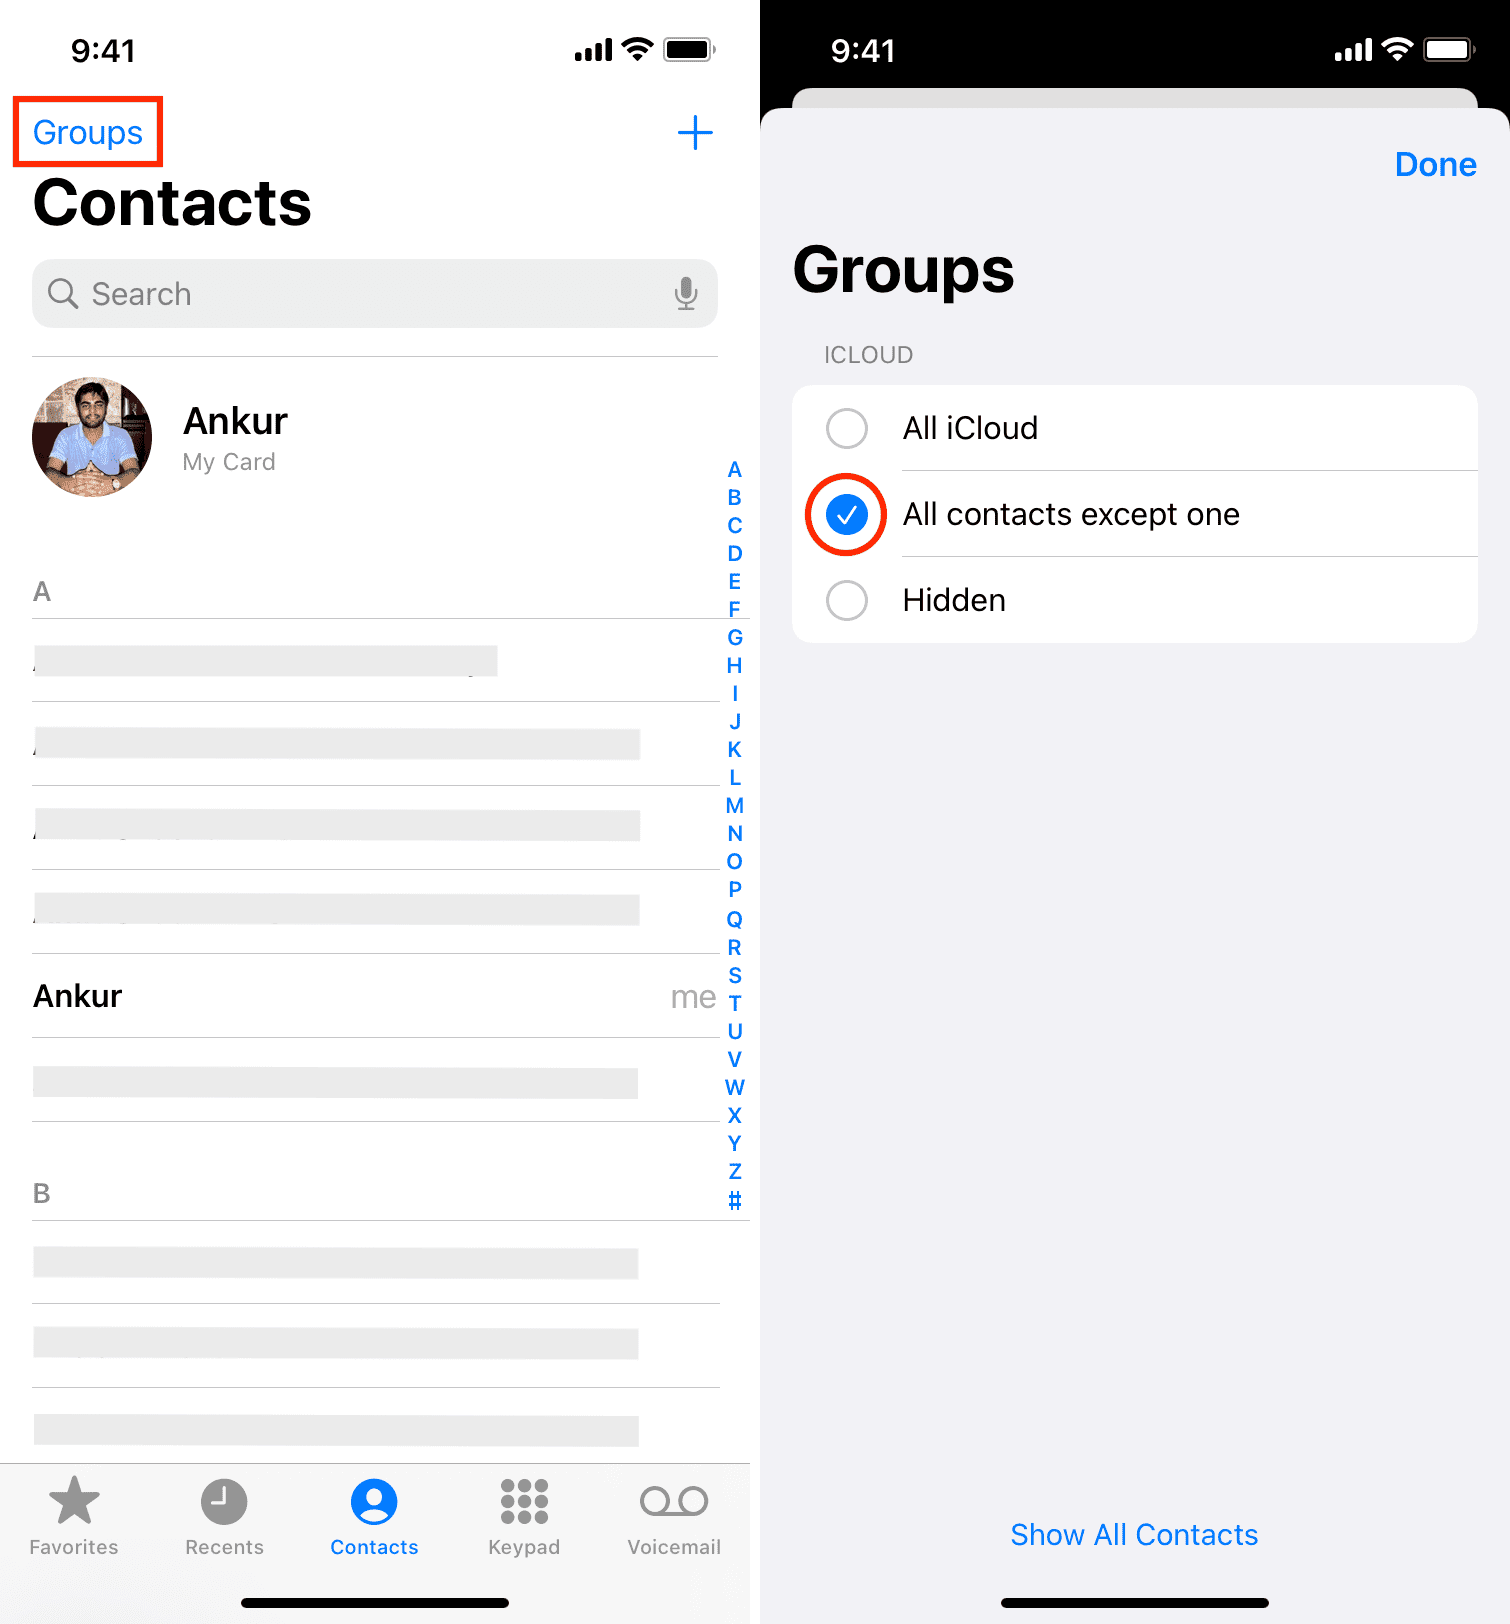
Now, your iPhone’s Contacts and Phone app will show all the contacts except the ones you wanted to hide (by not putting them in the first group). To unhide your iPhone contacts, tap Lists or Groups and select All iCloud or uncheck all the groups except the one with hidden contacts.
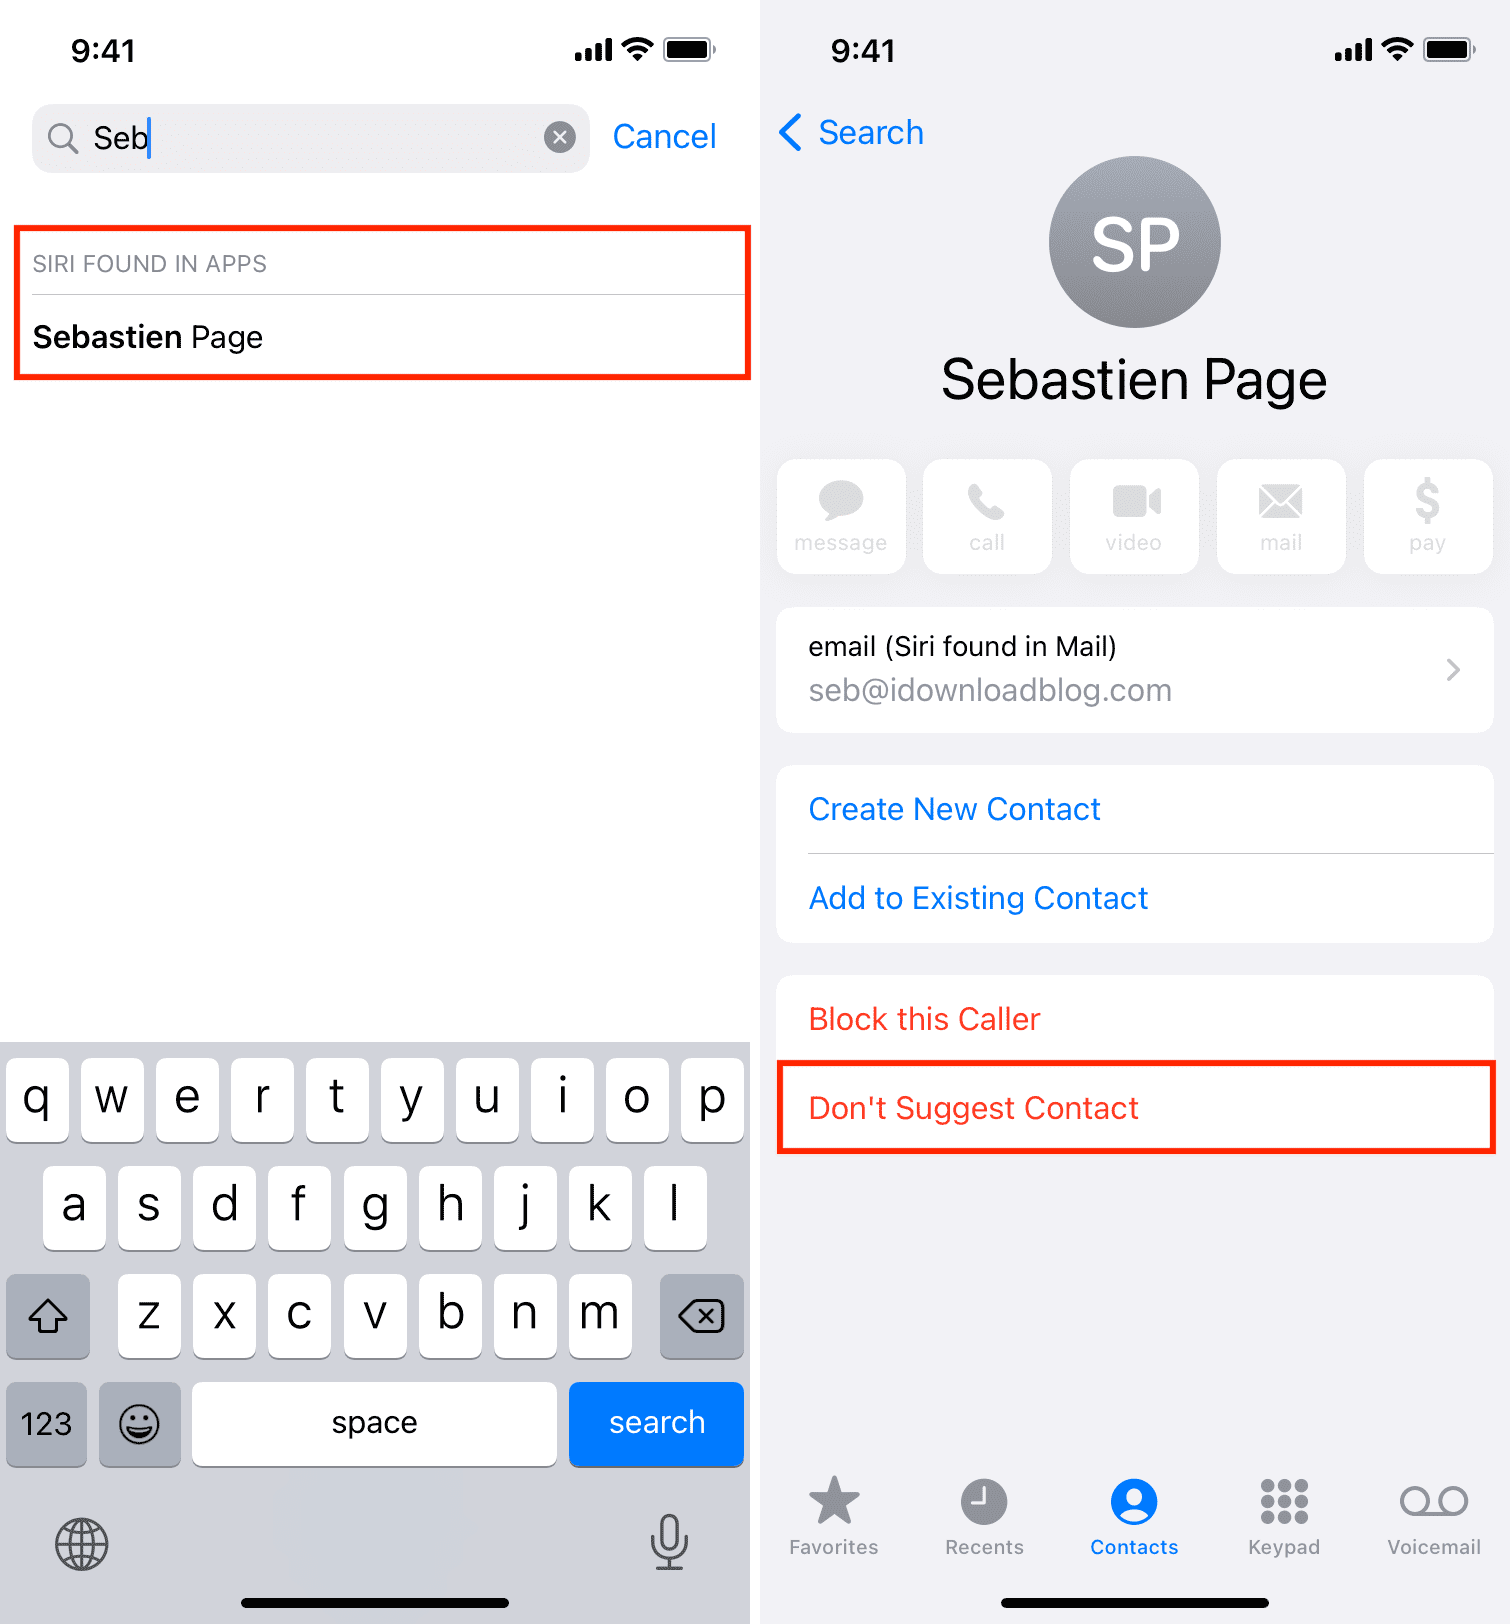
Note: When you search for a hidden contact, and if it still shows up as Siri Suggestions, tap the contact and then hit Don’t Suggest Contact.
6. Save contact to Google Contacts and access it via a browser
Good for: Hiding one or all contacts.
How it works:
- Save the contacts you want to hide to Google Contacts. If those contacts are already on your iPhone, simply export them as vCard (.vcf) file and import them to Google Contacts, accessed at contacts.google.com. After that, delete them from your iPhone. You can also create an entry for the contact in Google Contacts and delete them from your iPhone Contacts app.
- Whenever you want to access those hidden contacts, you can do so via an iPhone browser by visiting contacts.google.com.
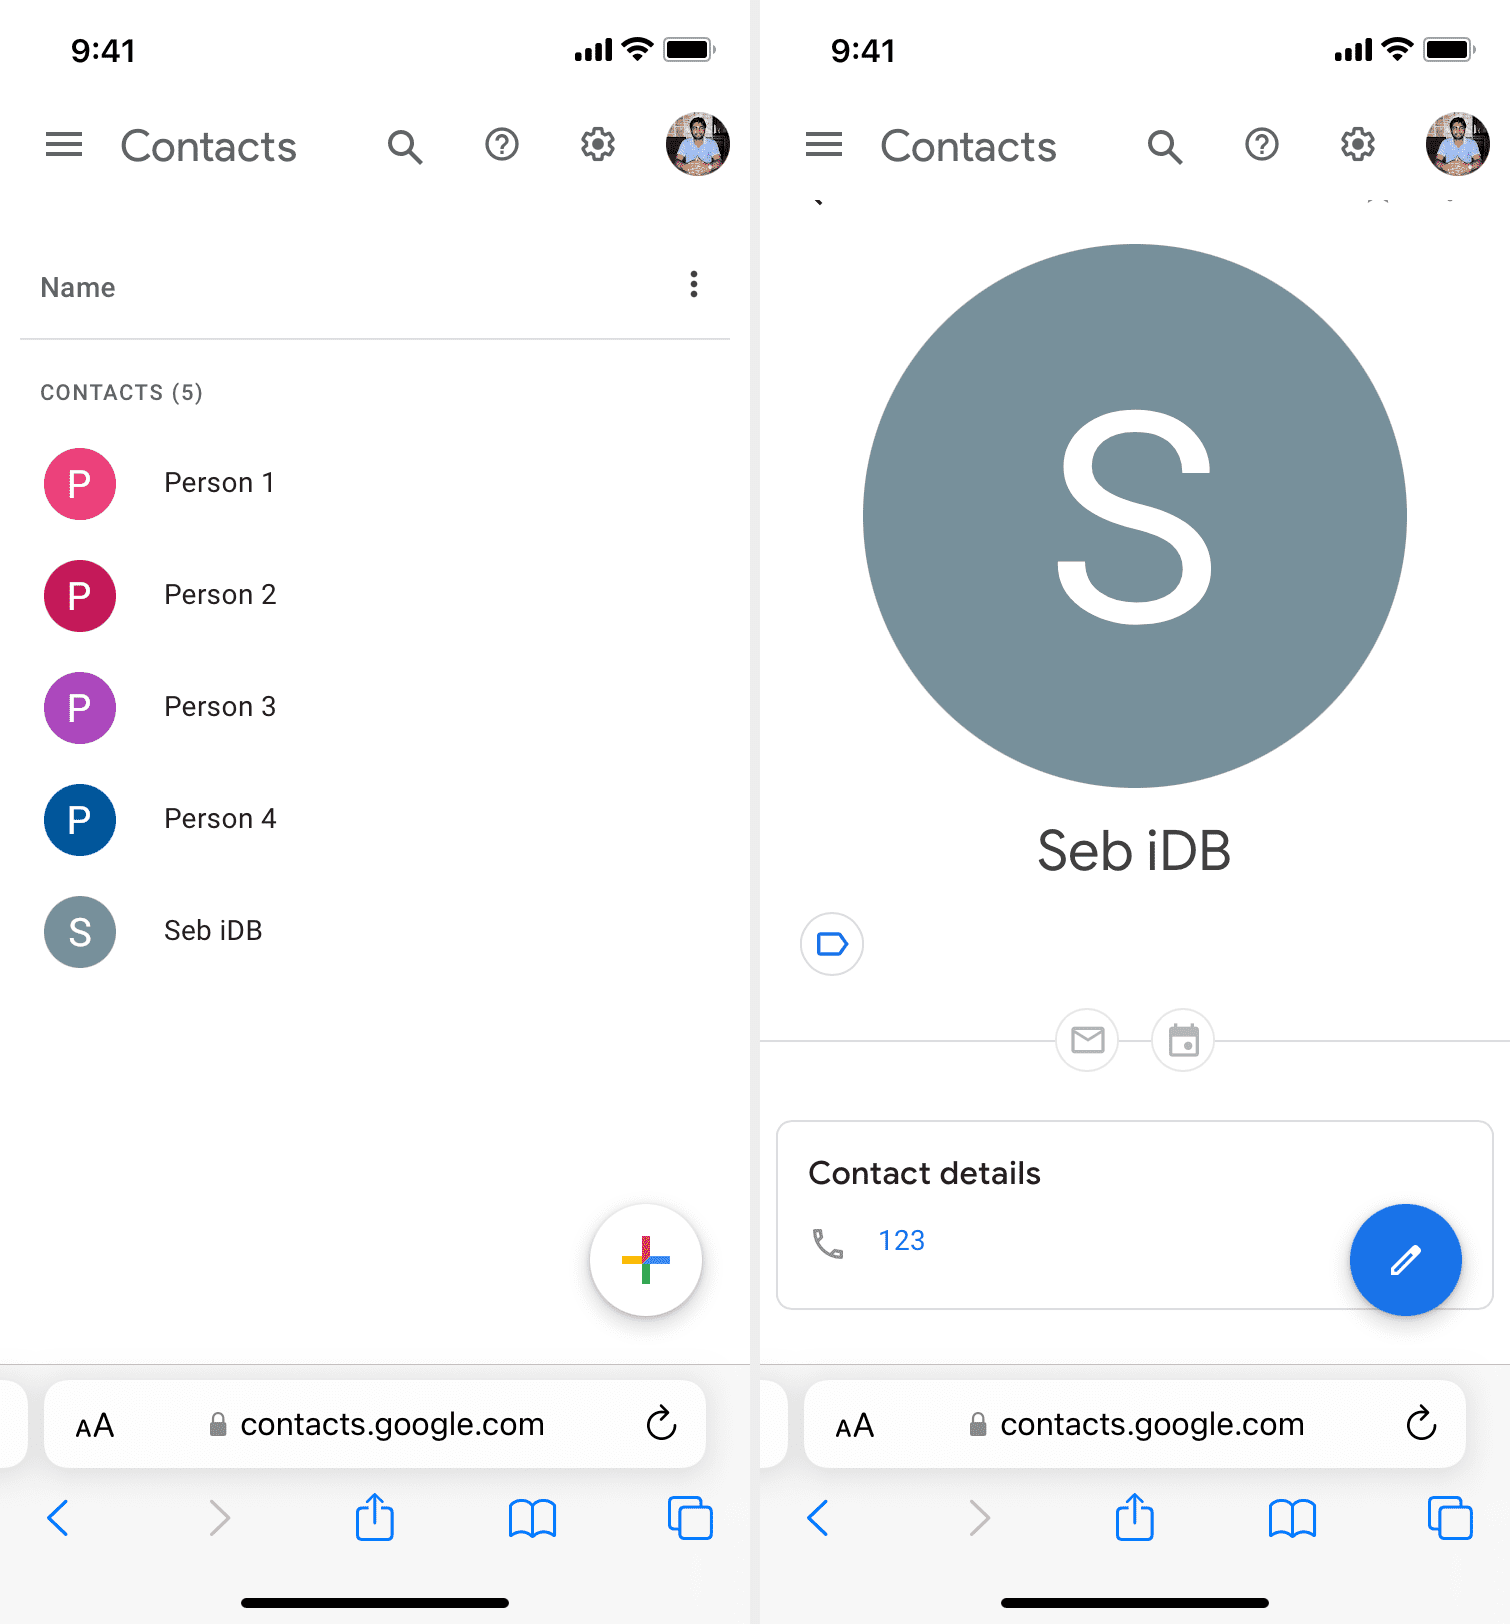
Tip: Once the contacts are on Google, you can add your Google account to your iPhone (left image). After that, open the Contacts app and tap Lists or Groups to hide or show your Google contacts (right image).
7. Use this vCard trick
Good for: Hiding one or a few contacts.
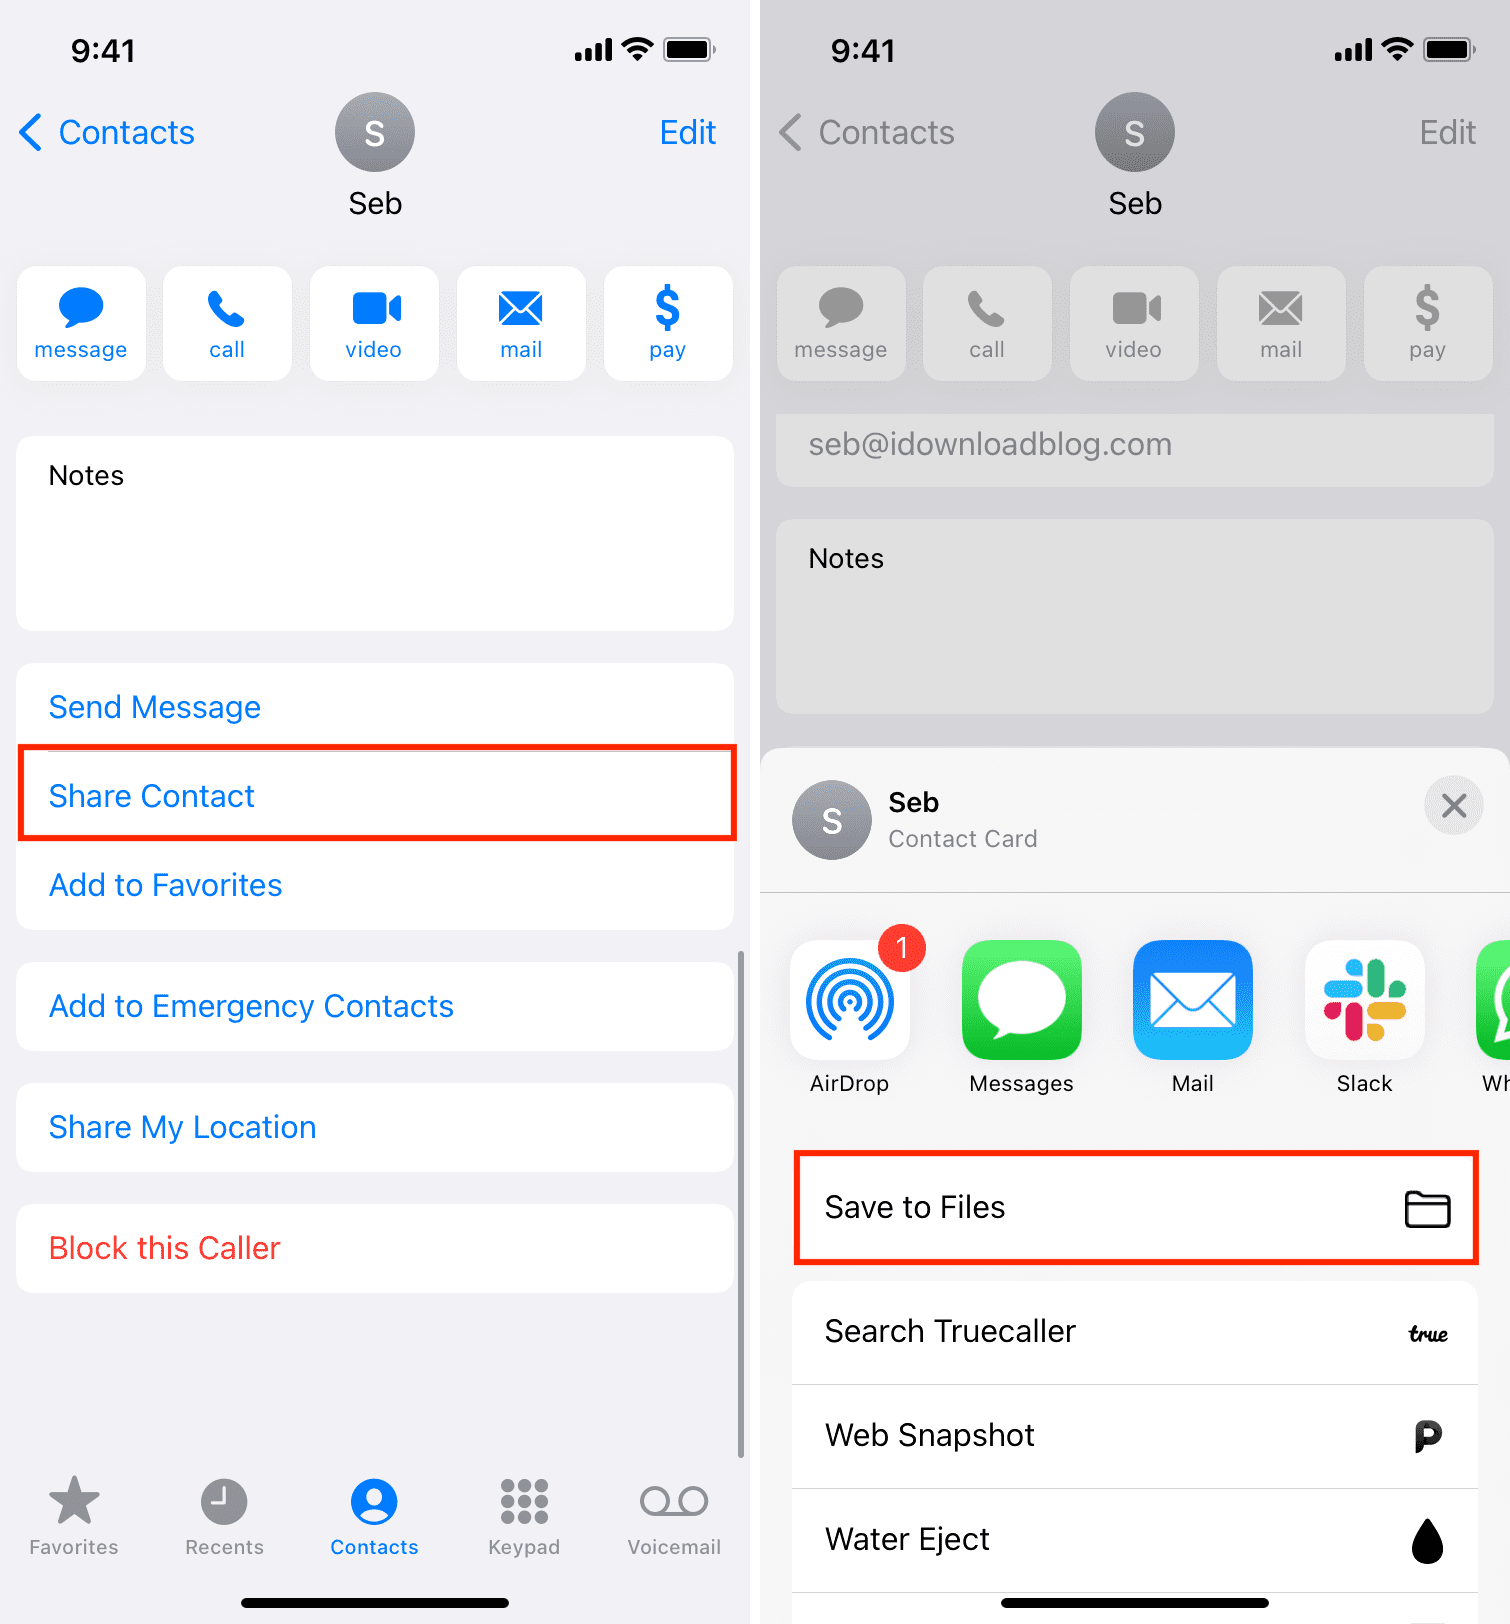
1) Open the Contacts app and tap the person’s contact you want to keep away from prying eyes.
2) Tap Share Contact.
3) Tap Save to Files > pick a folder > Save.
4) Now delete this contact by tapping Edit > Delete Contact.
5) Open the Files app and go to the folder where you saved the electronic business card for that person. From here, when you tap this file, it will show the phone number.
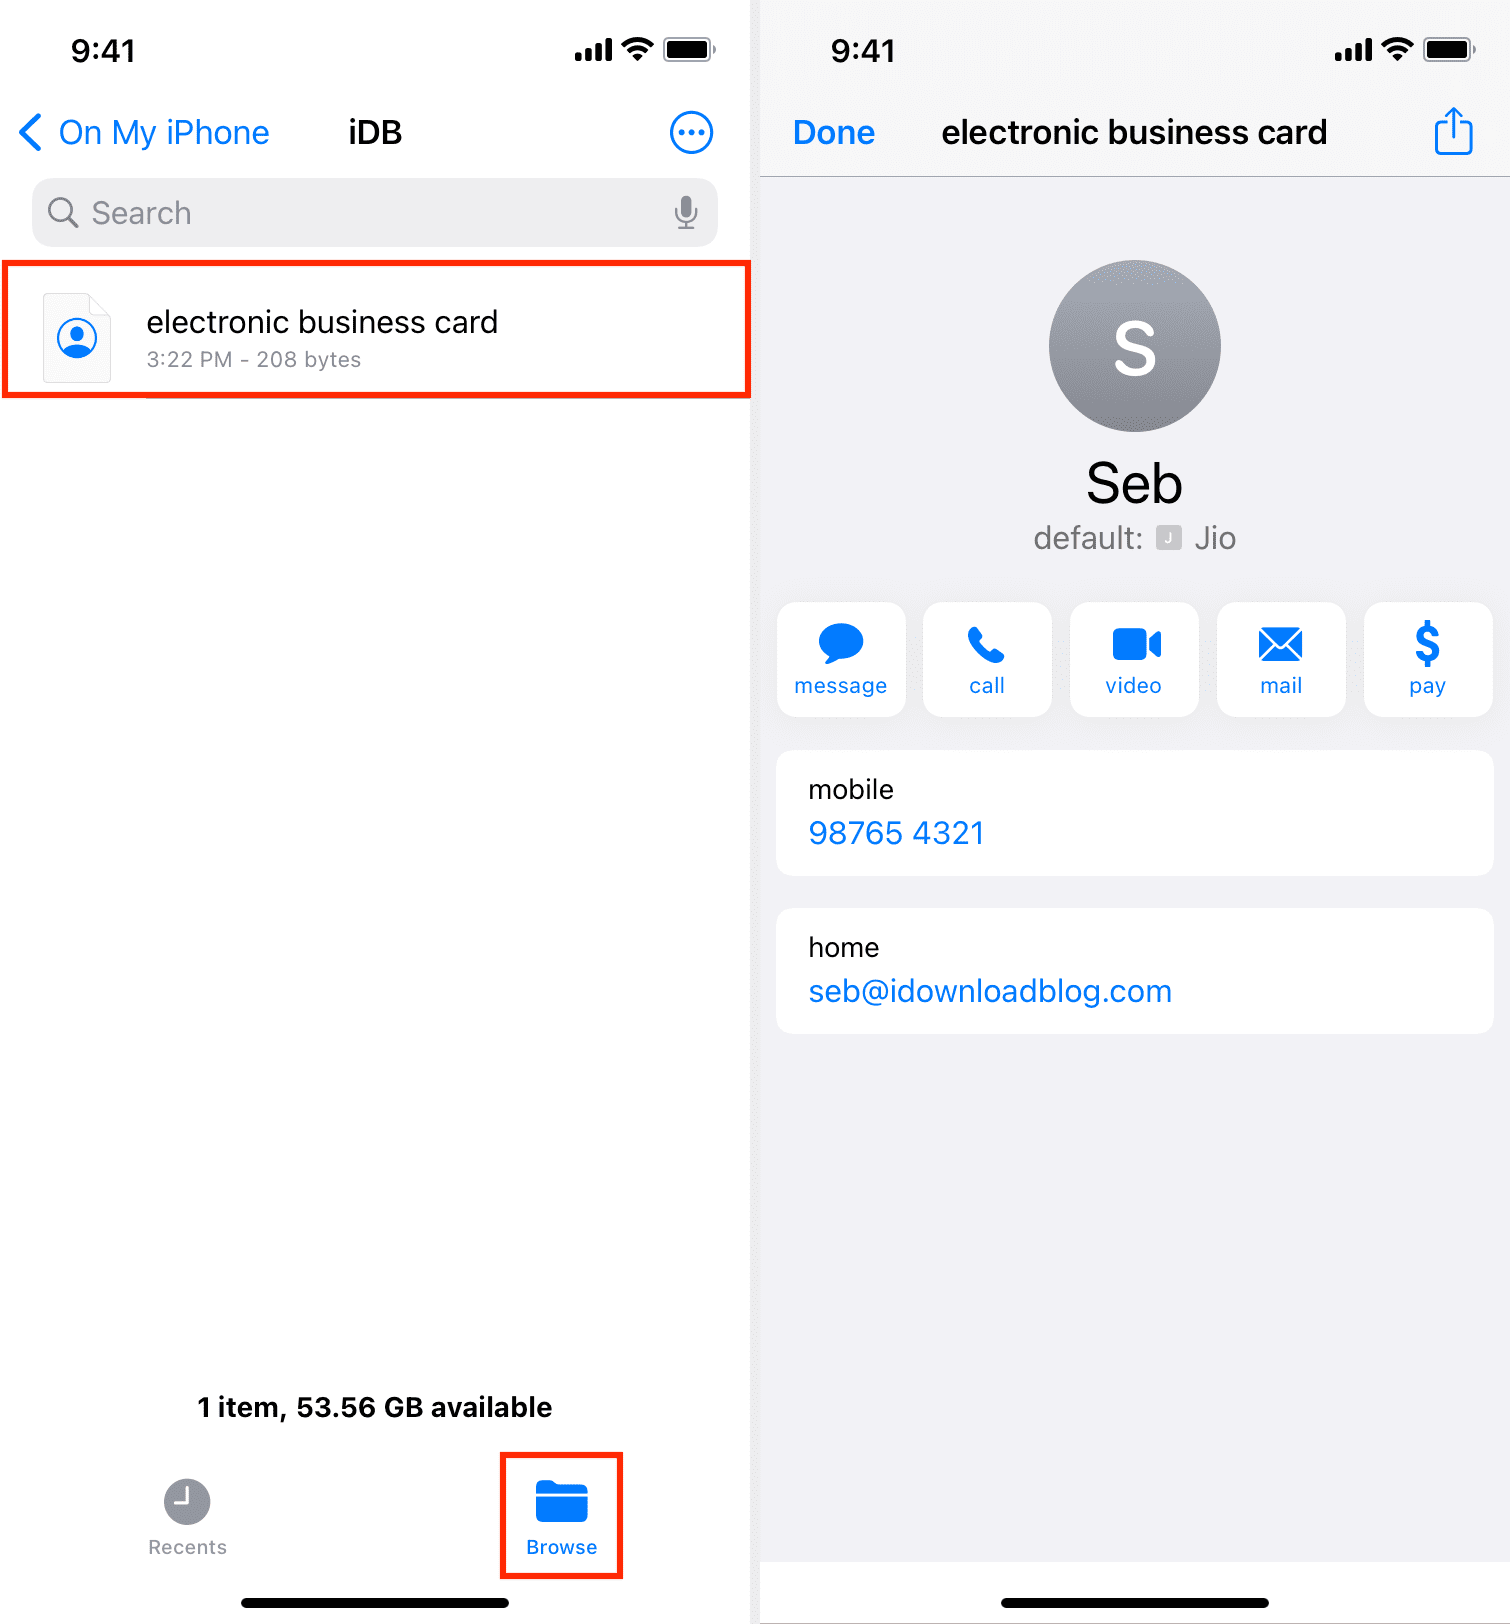
You know where the number is. But anyone else who is using your iPhone will never think to dig through the folder and look for a contact in the Files app. They will just check the Contacts app, and if they don’t find it, they will move on.
8. Hide contacts from Spotlight, Look Up, Siri suggestions, and widgets
Good for: Hiding all contacts from search and suggestions.
Spotlight or Search is the central place to find almost everything on your iPhone. When you pull down the Home Screen and type a person’s name, it shows the contact card for that individual.
Additionally, if you use the handy Siri Suggestions widget, it might suggest to call, message, or email a person.
If you like, you can prevent all this by asking Siri and Search to stay out of your Contacts and Phone app.
On iOS 18 and later:
- Go to iPhone Settings > Apple Intelligence & Siri or Siri > Apps > Contacts and turn off all the switches.
- Next, go to Settings > Search > Contacts and turn off all the switches.
Repeat the above steps for the Phone app
On older versions of iOS: Go to iPhone Settings > Siri & Search > Contacts and turn off all the switches you see here. Repeat the steps for the Phone app to stop seeing Siri call suggestions.
9. Export your contact as an Excel file and open it in Numbers
Good for: Hiding one, a few, or all contacts.
Finally, you can export your iPhone contacts as an Excel file and store it in iCloud Drive or the On My iPhone section of the Files app. Whenever you want to view the phone numbers, simply open that Excel file in Numbers (a free app by Apple) or another third-party app that can open .xls files.
Anytime you want to unhide the hidden iPhone contacts, just follow the same steps, and you should be able to view the contact.
Finally, to leave no traces, make sure you delete the call logs and the messages with the person whose contact you wanted to hide in the first place.
Check out next: