Learn how to use Grammarly on your iPhone as a keyboard, Safari extension, and an editor to make corrections and improve your writing.
Grammarly is a handy writing tool that helps fix grammatical errors and typos, rewrite sentences, and more. Like me, if you have been using it on your computer, you might want it on your iPhone, too.
Given the small screen size, the Grammarly experience on iPhone is not on par with a computer or iPad browser, but you can still use it to make your typing and writing error-free.
Also see: How to use Apple’s AI Writing Tools on iPhone, iPad, and Mac
1. Use Grammarly as an iPhone keyboard
Just like SwiftKey or Gboard, you can use Grammarly as your iPhone’s main keyboard. It will suggest corrections and help you fix them as you type.
1) Download Grammarly from the iOS App Store, open it, and go through the tutorial. You can also sign in if you have a free or premium Grammarly account.
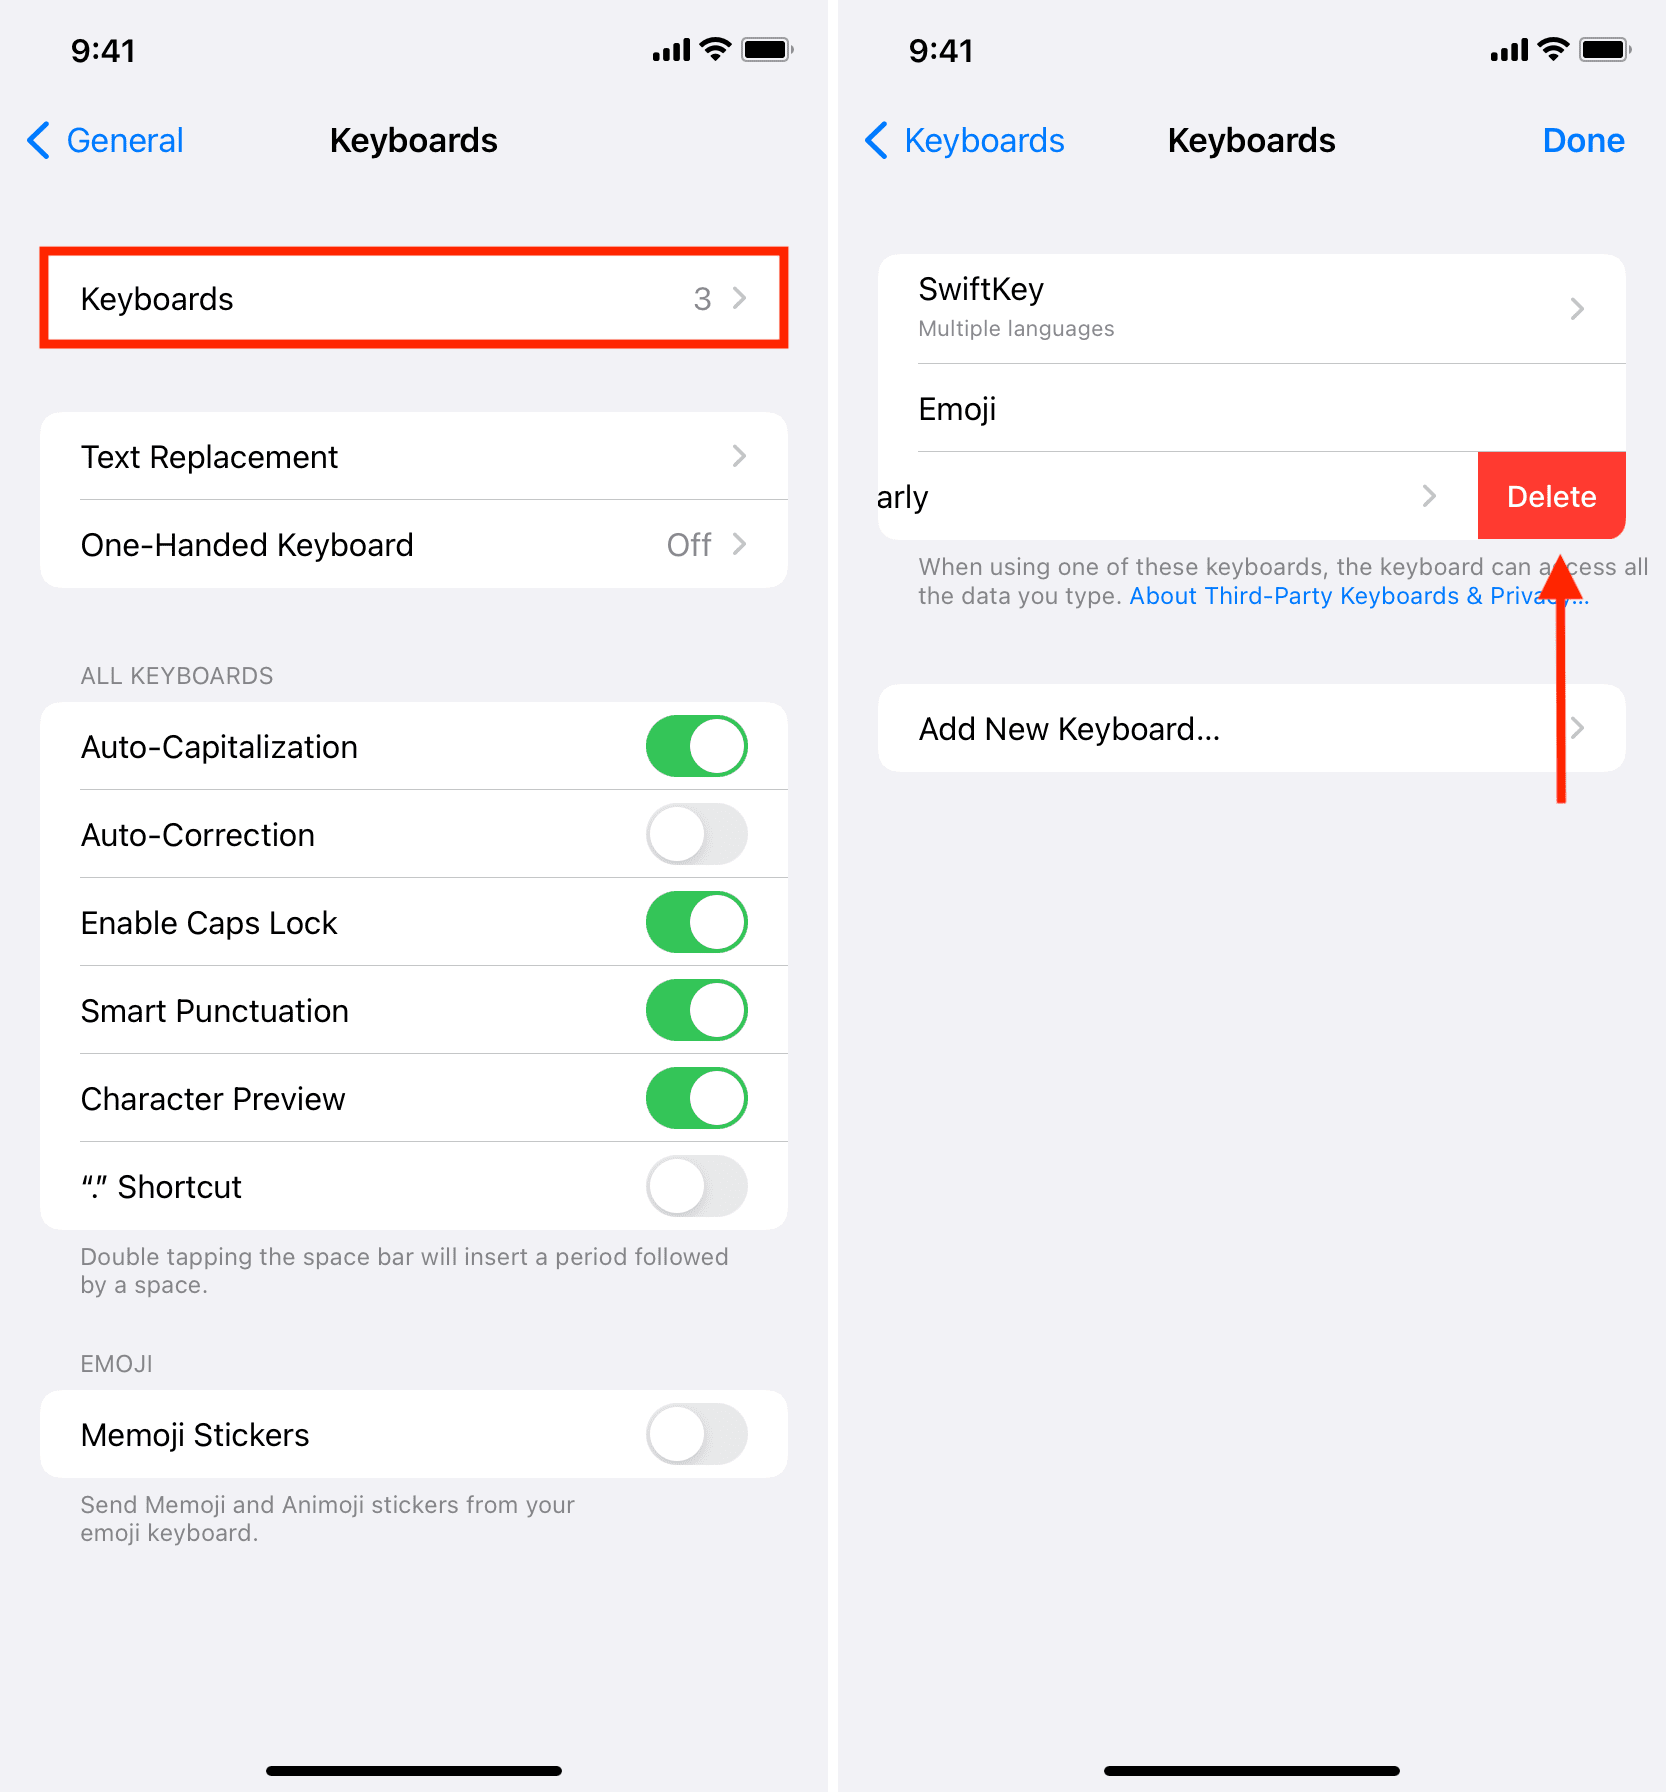
2) Tap Add Grammarly Keyboard or go to iPhone Settings > General > Keyboard.
3) Tap Keyboards.
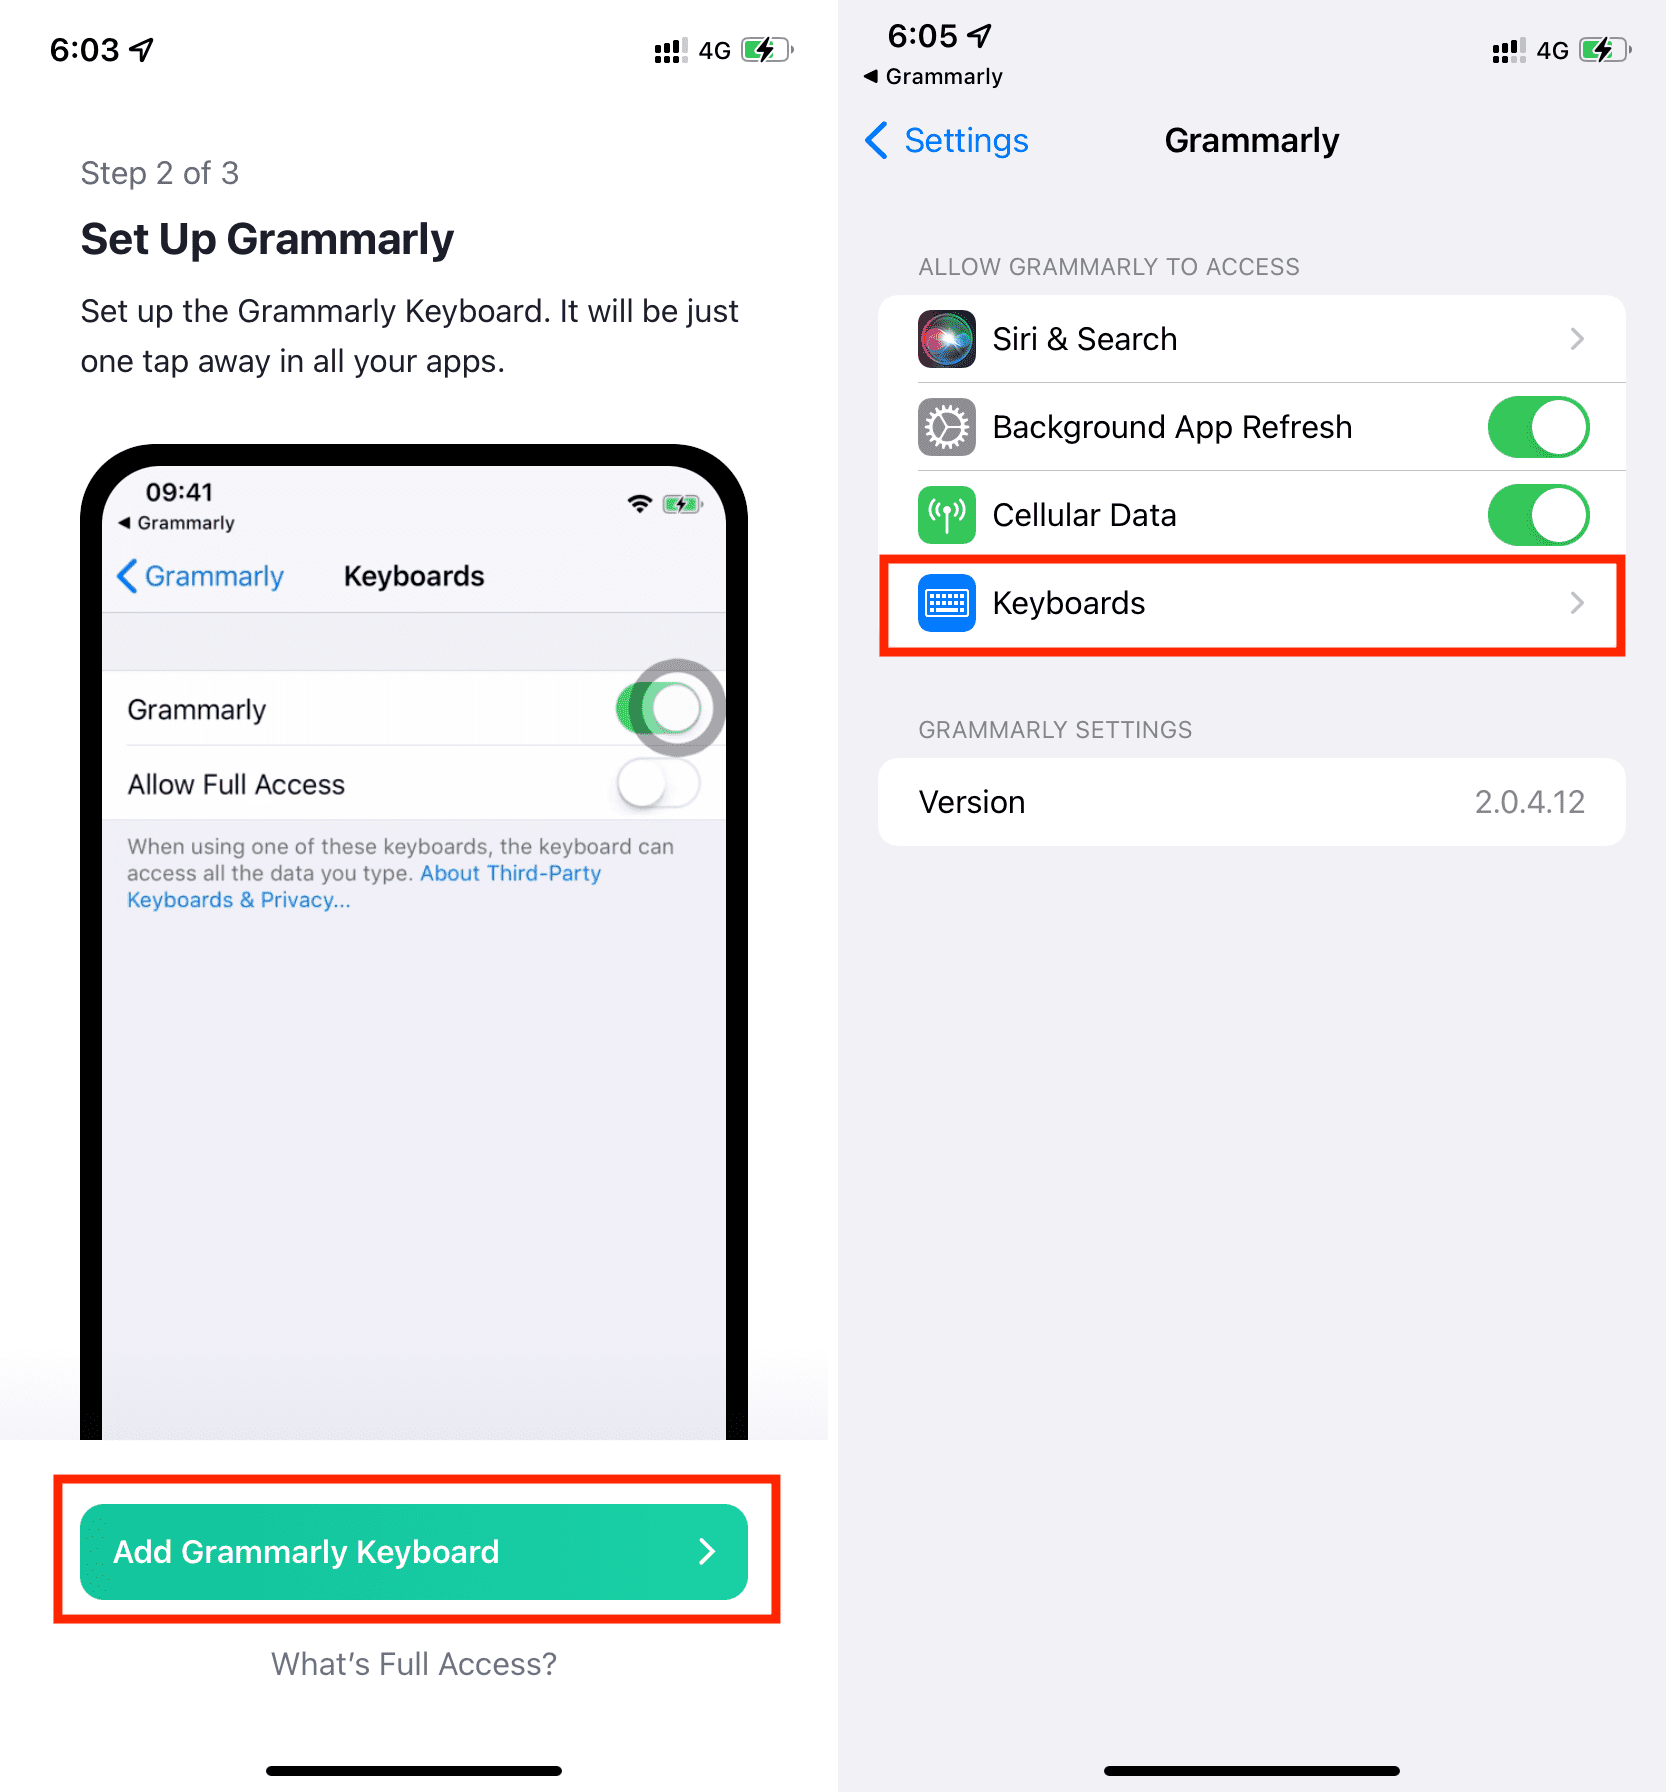
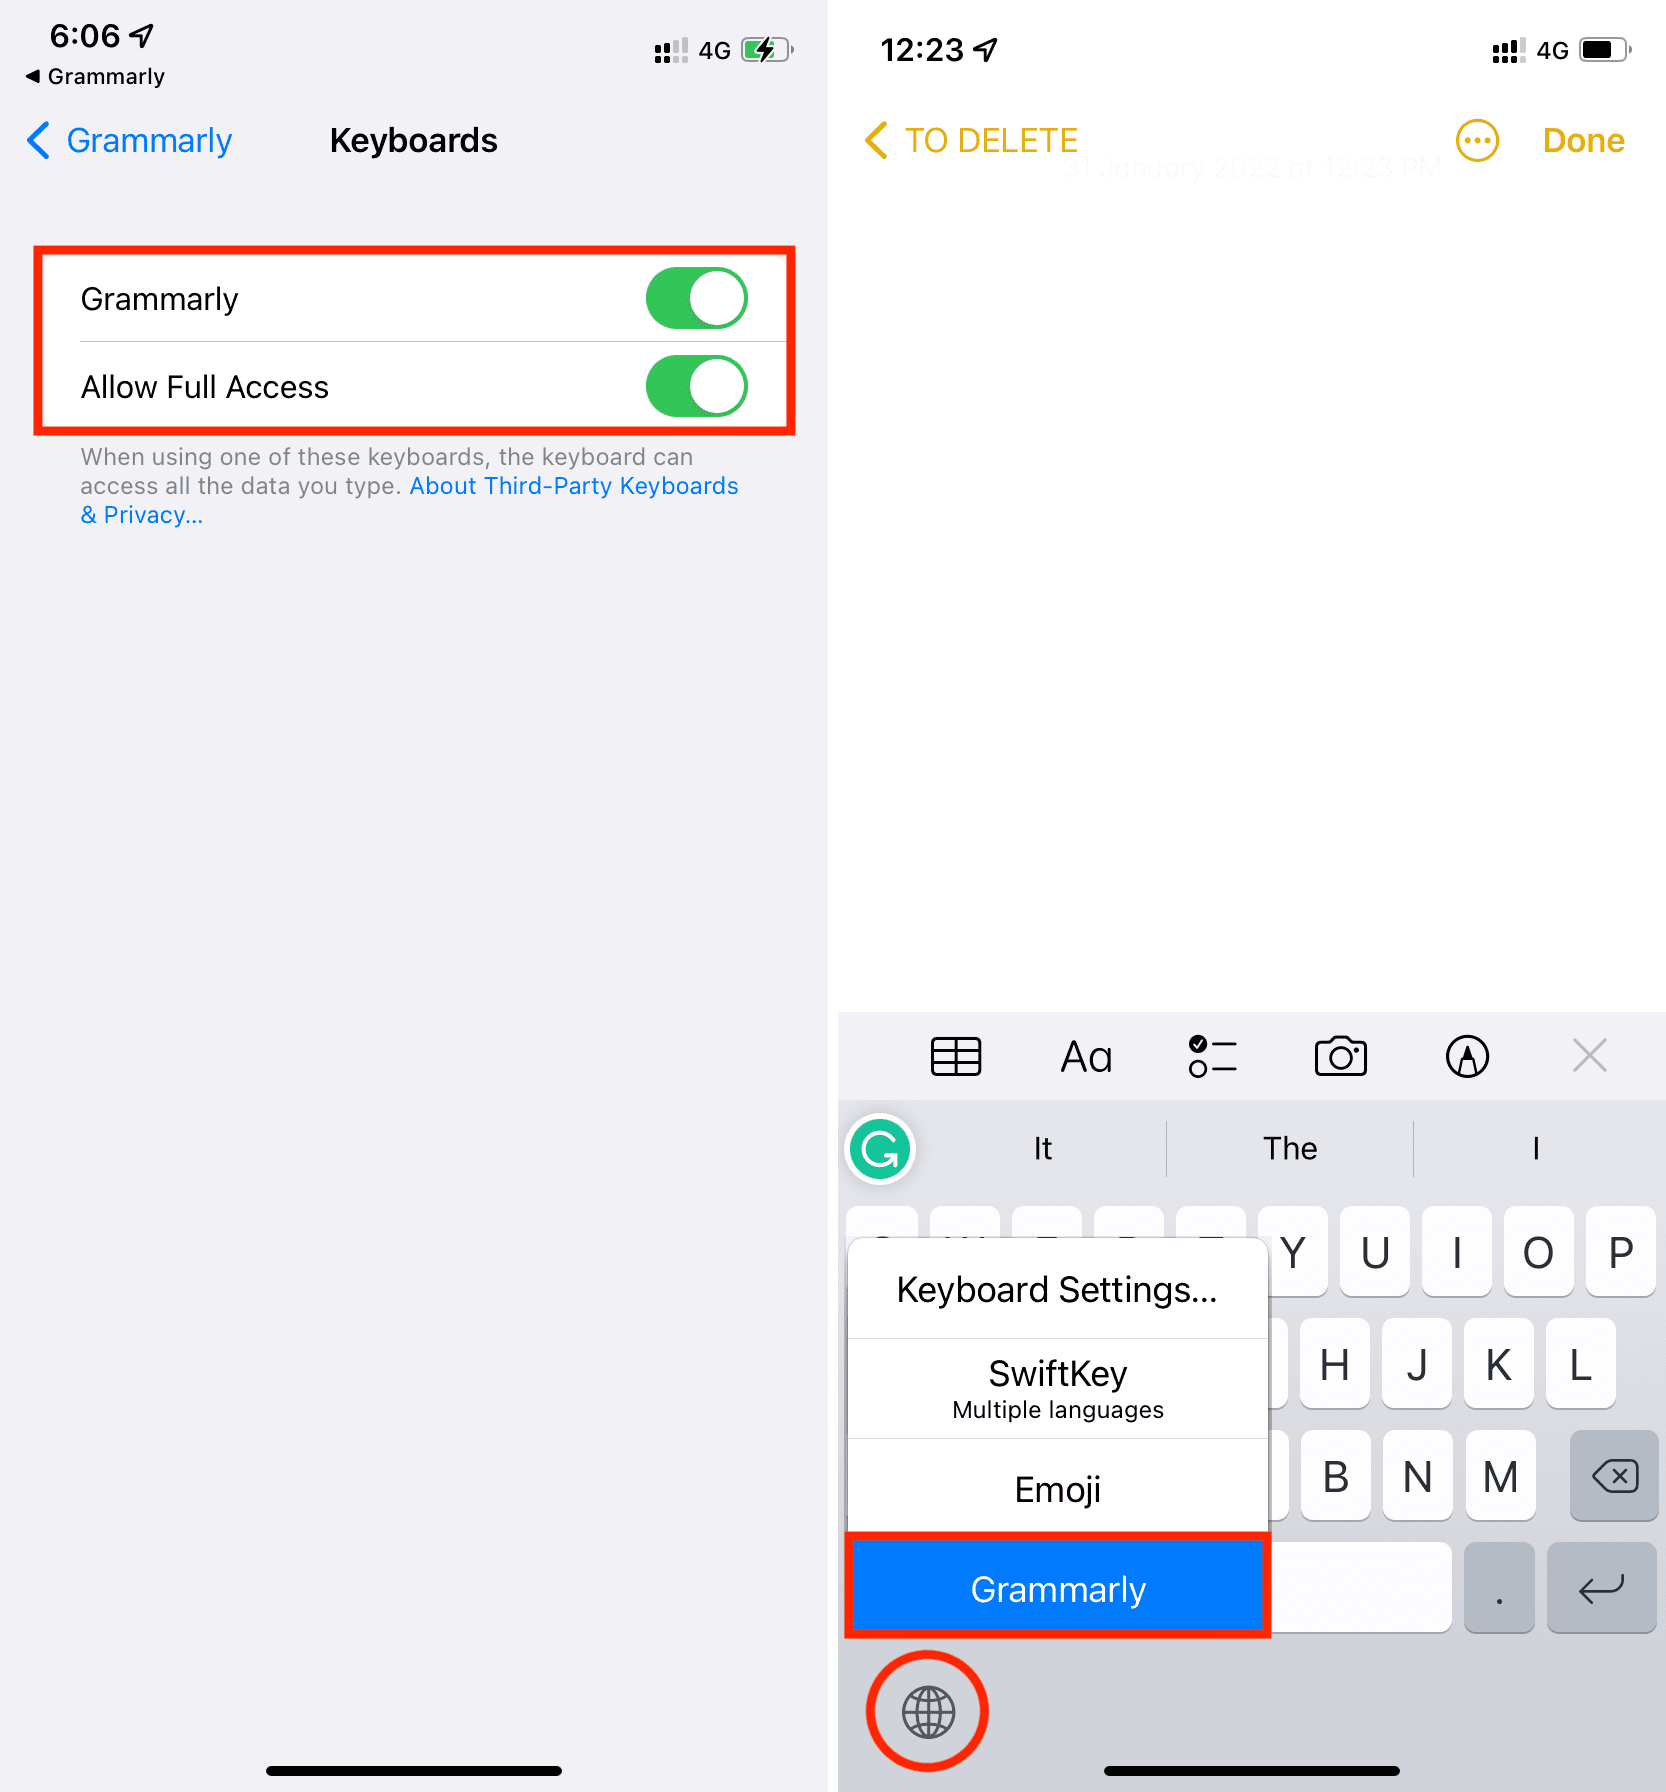
4) Enable Grammarly and turn on the switch for Allow Full Access.
5) Now, open Notes or an app to type. Touch and hold the globe icon on your current keyboard and choose Grammarly.
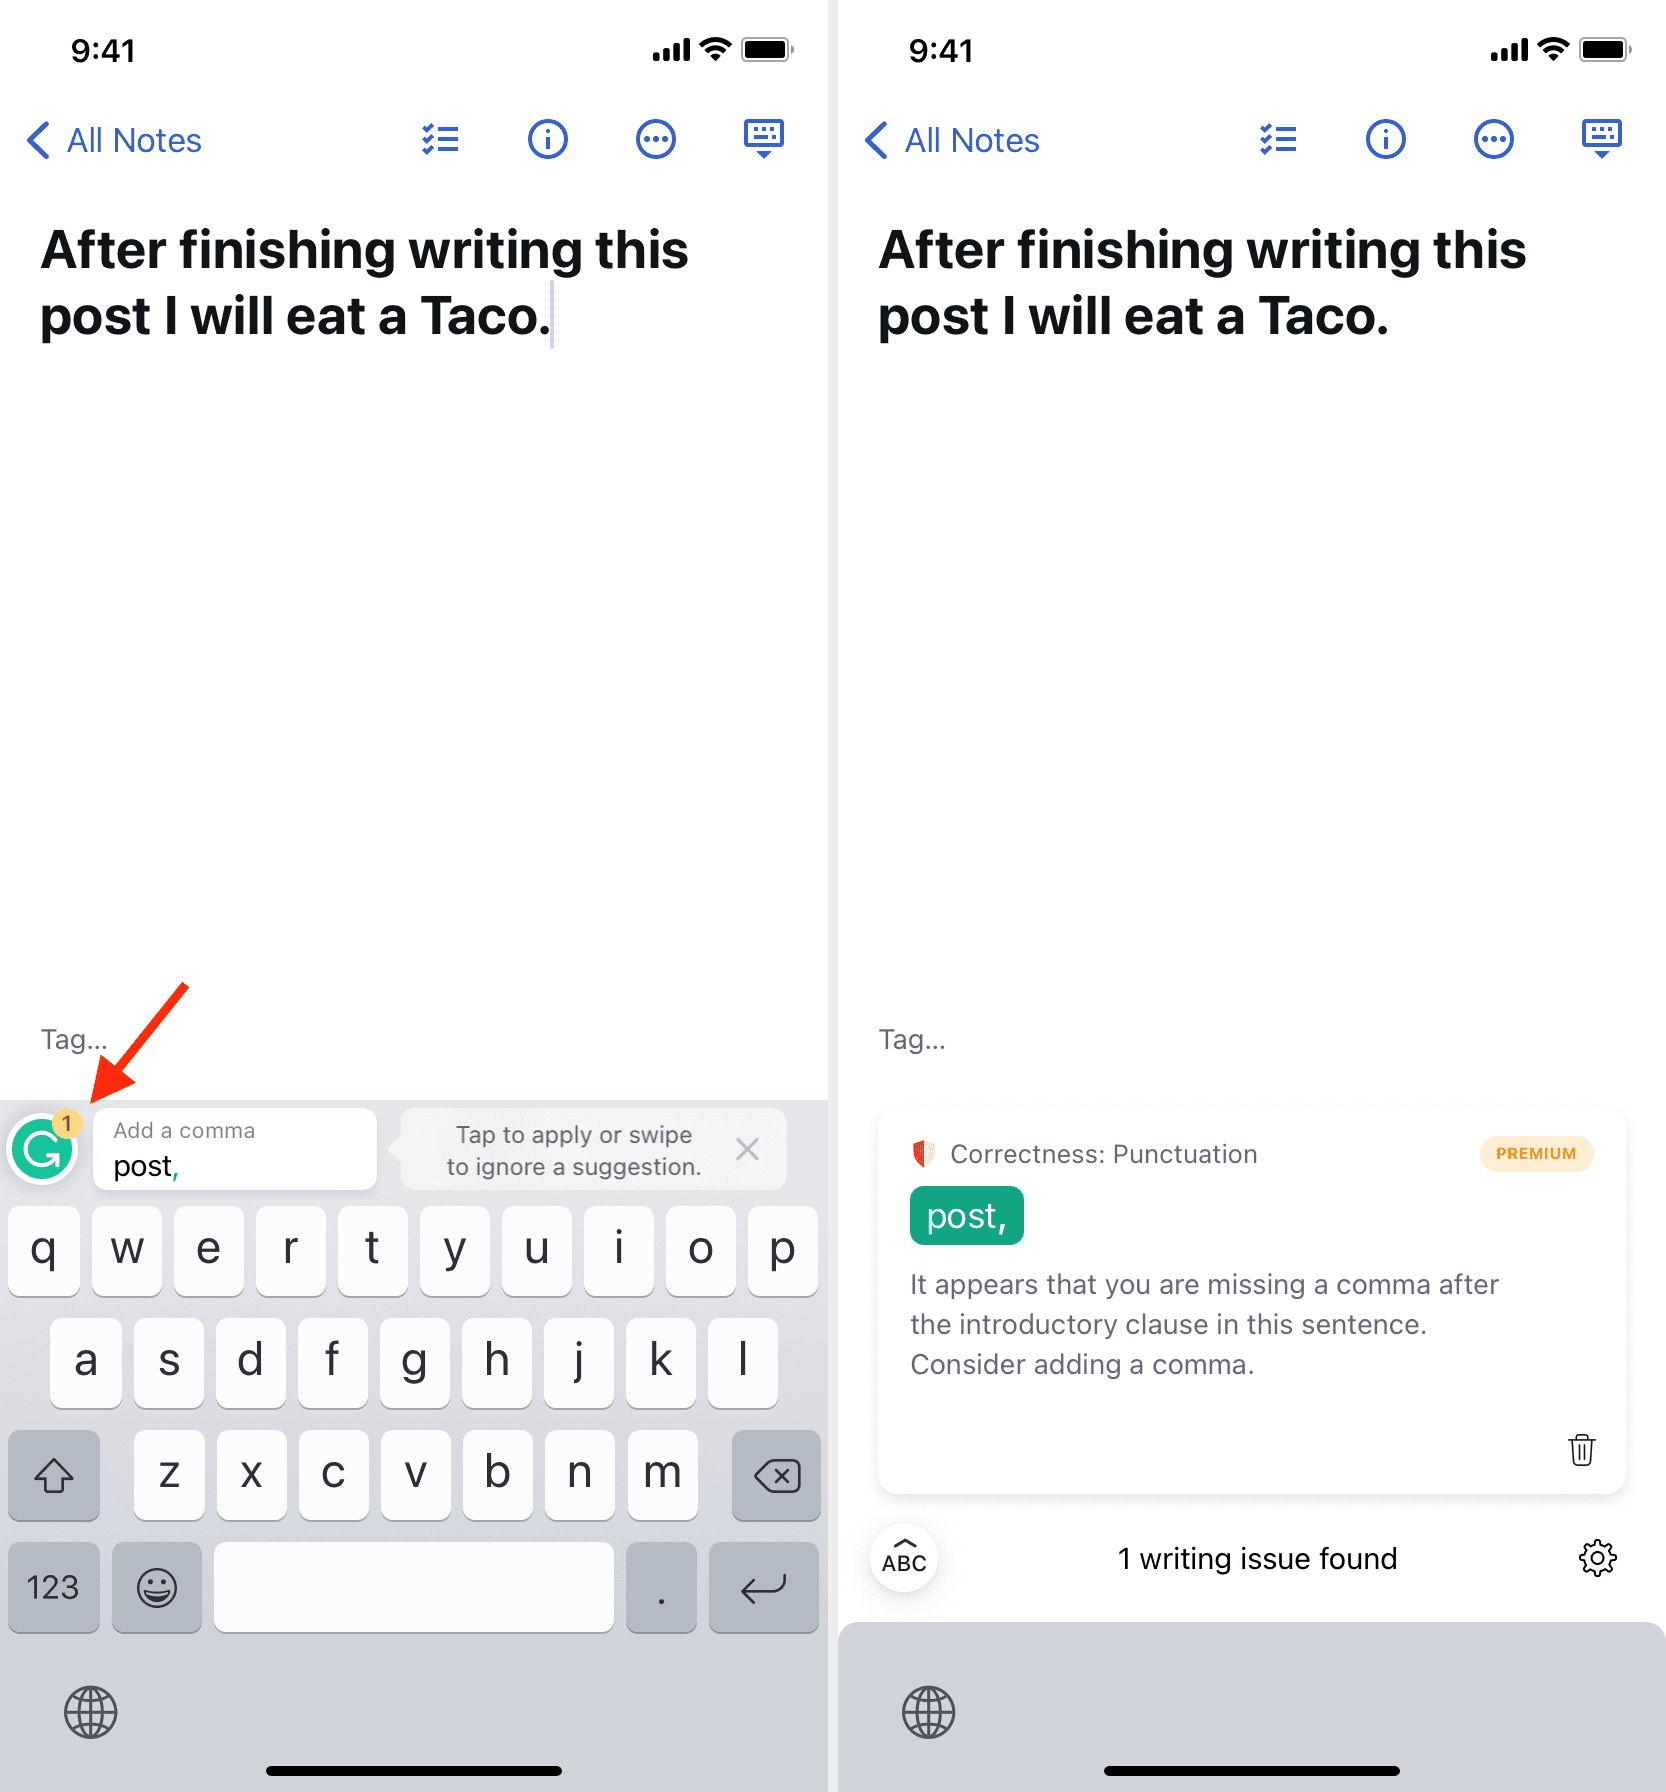
You have successfully enabled the Grammarly keyboard on your iPhone. Type your text, and Grammarly will correct it. It will also offer suggestions (suggested words), which you can tap to enter in your writing or swipe to ignore.
The keyboard looks similar to the standard iOS keyboard with nice, dark keys, sound, haptic feedback, emojis, and even swipe to type (QuickPath).
Tap the Grammarly icon from the top of your iPhone keyboard to enter Revision Mode, where the app checks the entire text you wrote and provides more corrections and insights. Swipe left or right to see your corrections.
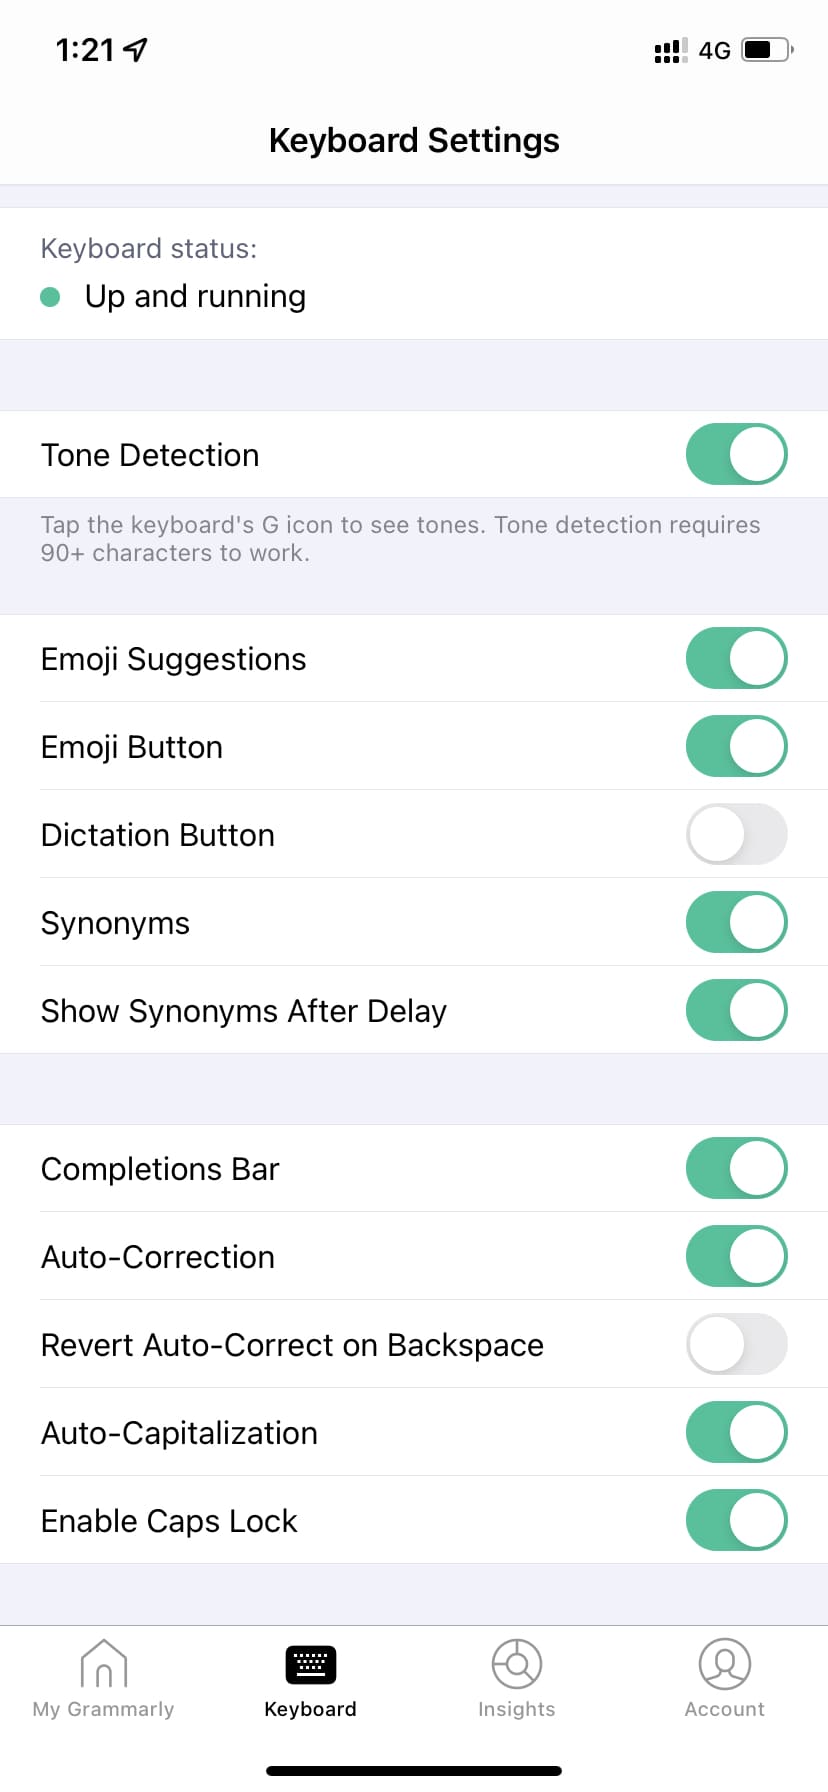
Open the Grammarly app and tap Keyboard from the bottom row to customize your Grammarly keyboard settings.
If you ever feel you don’t want to use the Grammarly keyboard temporarily, touch and hold the globe icon and choose another keyboard.
To permanently stop using Grammarly as an iOS keyboard, go to iPhone Settings > General > Keyboard > Keyboards, swipe left on Grammarly, and tap Delete.
2. Use the Grammarly extension in Safari on iPhone
Once you have downloaded the Grammarly app, its Safari extension is also available. But it’s deactivated by default. So, you will have to turn it on in Safari Settings by going to the iPhone Settings app > Apps > Safari > Extensions. Now, select Grammarly and turn on the Allow Extension switch. If you have more than one Safari profile, turn on the switch next to the profile name.

Now, visit a website like wordcounter.net and allow Grammarly to run there. The steps for this are similar to other Safari extensions on iOS.
Once you allow Grammarly, the suggestions should appear as underlines in the text field. You will also see the Grammarly icon in the bottom right of the text field. From here, you can turn off the suggestions if required.
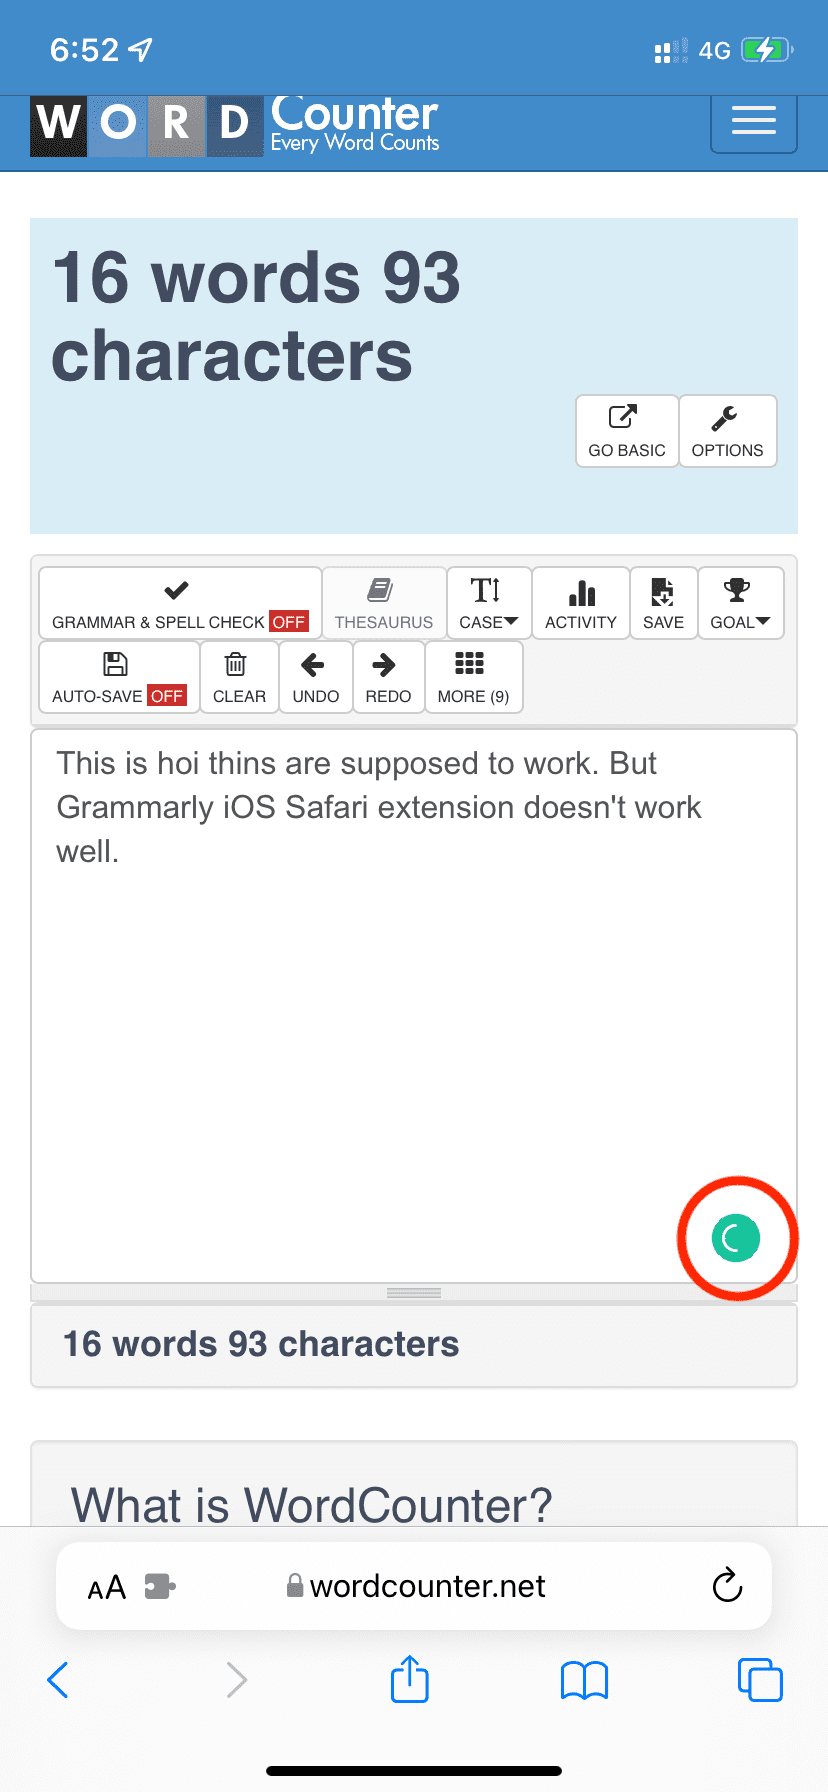
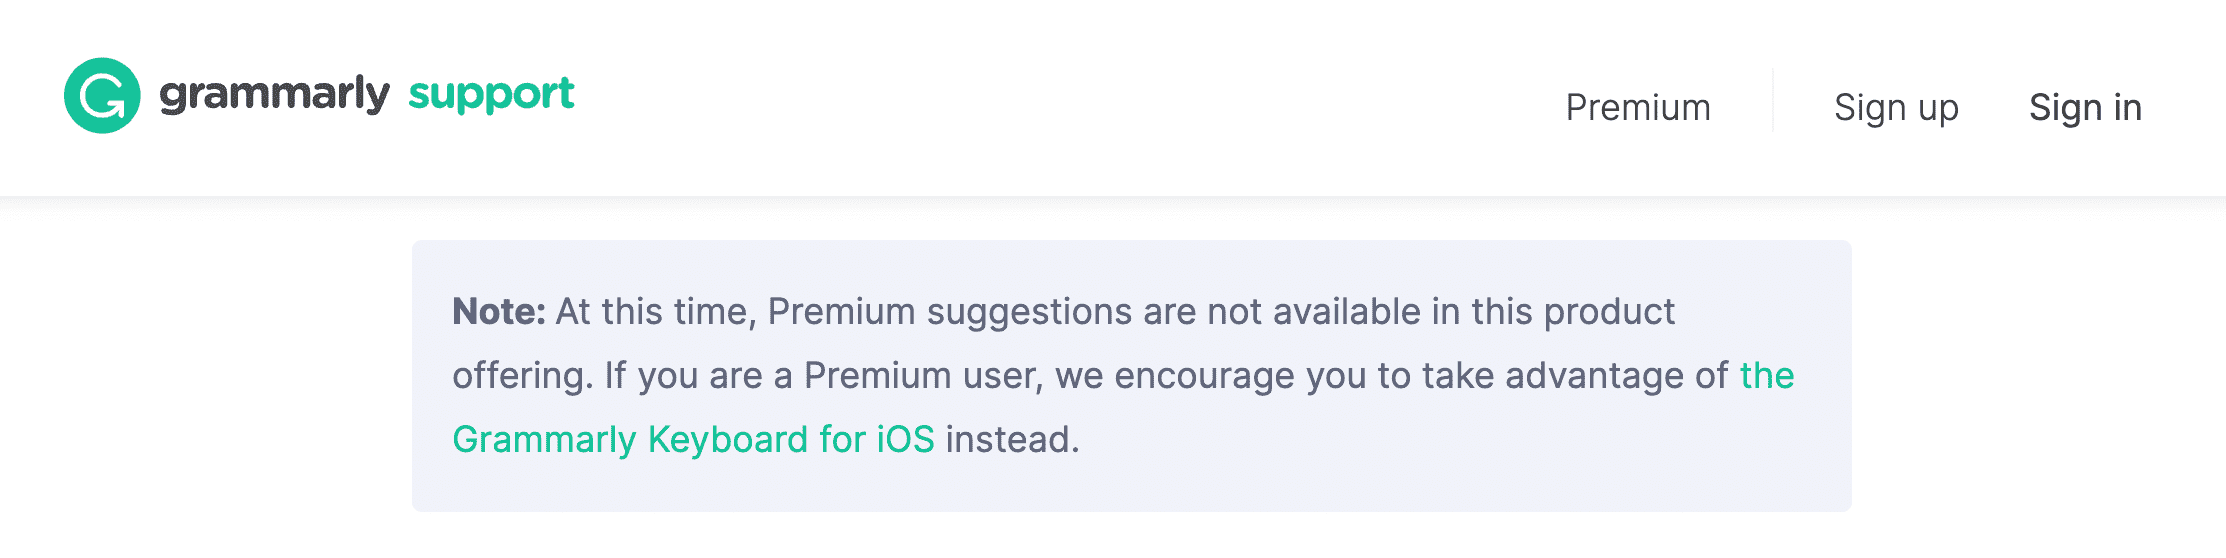
In my use, I found that it does not work well. The icon keeps rotating and yet it misses obvious errors. Plus, on several occasions, even if you have a premium Grammarly subscription, these “premium suggestions” aren’t supported in the iPhone Safari extension. To get premium suggestions, use the Grammarly iOS keyboard or the editor (explained below).
To remove the Grammarly iOS Safari extension, you’ll have to delete the Grammarly app. If you don’t want to do that, disable the Grammarly extension from your iPhone’s Safari Settings page.
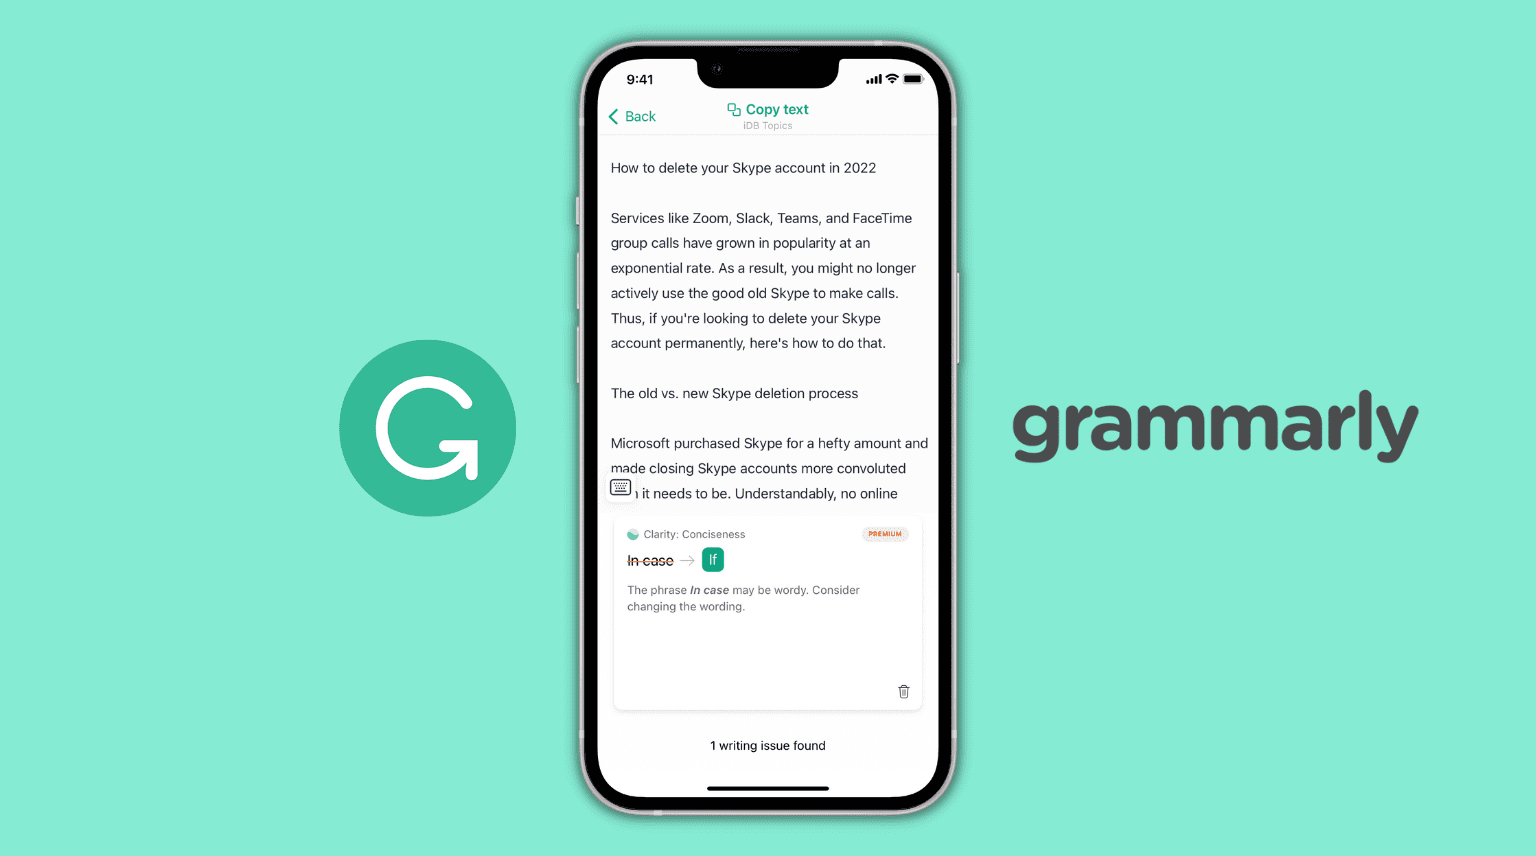
3. Use the editor inside the Grammarly app
Finally, if you’re a long-time Grammarly user in a web browser, you might be familiar with its editor, which is accessed at app.grammarly.com.
On iPhone, you can access the editor in the My Grammarly tab inside the official Grammarly app. Here, you’ll see all your existing documents. You can open, make corrections, or create a new document from there. You can also create a new document in the Grammarly app and correct it.

Furthermore, You can also force Safari or other iPhone browsers to show the desktop version of app.grammarly.com, but the experience is poor.
My experience of using Grammarly on iPhone
This is how you can use Grammarly on your iPhone. If you already love it on your Mac or PC, you might be tempted to get and use it on your iOS device, too. But, the experience overall is mediocre.
The Grammarly keyboard suggestions are fine. But the Grammarly Safari extension on iPhone is poor and frustrating. Maybe things will improve in the future.
The thing that I love about Grammarly on iPhone is its editor inside the app. As far as making corrections on the smaller iPhone screen goes, it does a very good job. Plus, I can access all my Grammarly docs in one place on my phone, which is an excellent addition. At times, when Universal Clipboard between my Mac and iPhone doesn’t work, I use the iOS Grammarly app to copy my writings.
In summary, I have been using Grammarly Premium on my Mac for more than five years and have no plans to stop or switch to a cheaper alternative like LanguageTool. But currently, Grammarly on my iPhone is not something I use every day.
On a related note: