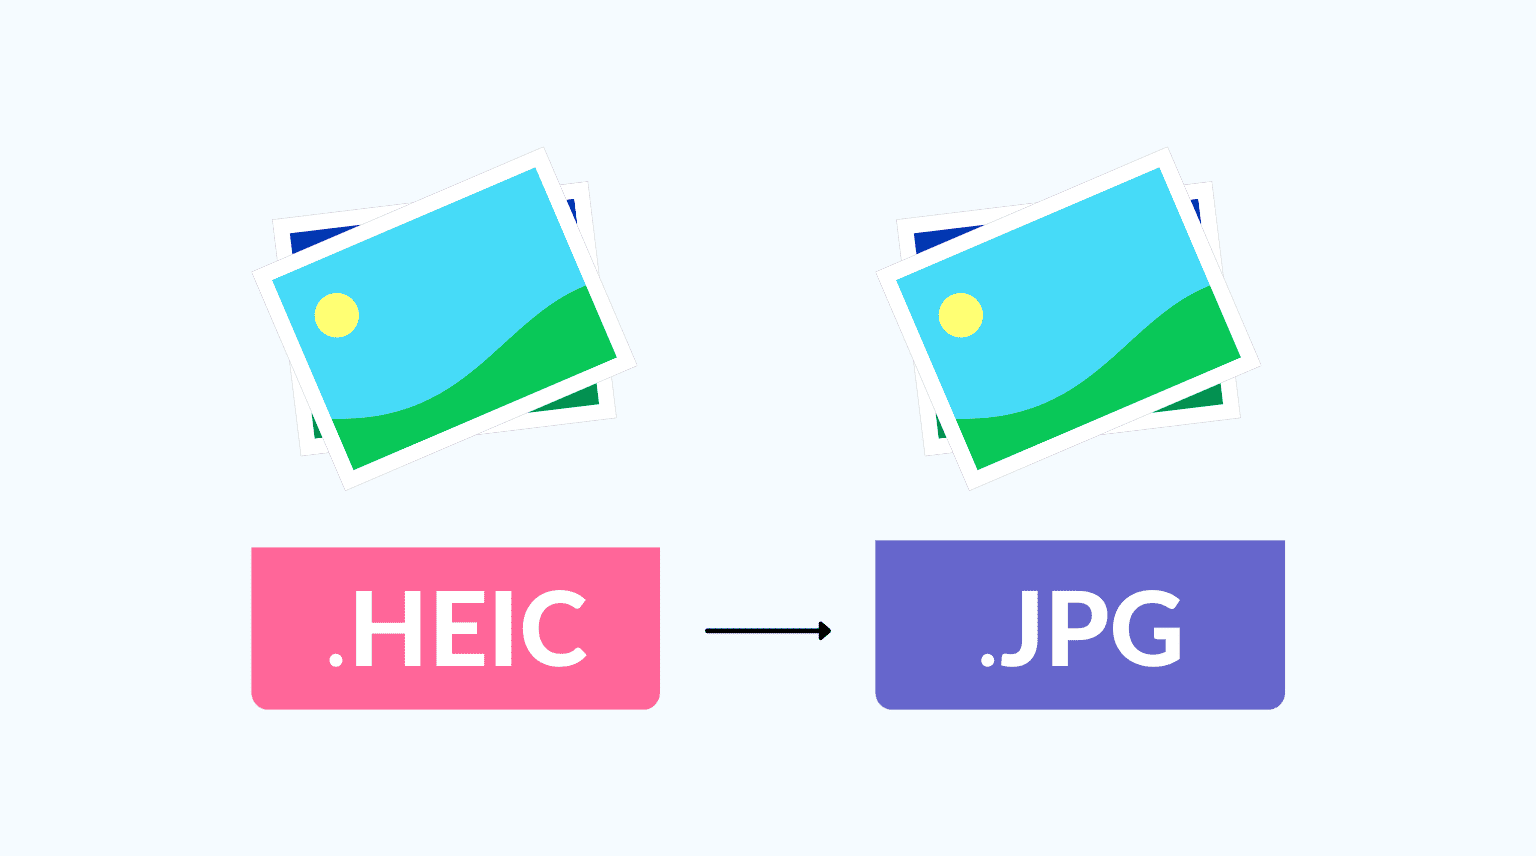
Check out the best free methods to convert HEIC photos to JPG on your iPhone, iPad, and Mac to ensure universal compatibility.
By default, the pictures you take using your iPhone or iPad camera are saved in HEIC/HEIF instead of JPG or PNG.
HEIF — developed by Moving Picture Experts Group (MPEG) — stands for High-Efficiency Image Format. On a related note, HEIC (High-Efficiency Image Container) is a variant of the High-Efficiency Image Format that Apple uses on iOS, iPadOS, and macOS. In simpler terms, consider HEIF as “smartphone” and HEIC as “iPhone.”
HEIC offers better compression without compromising the picture quality. As a result, the image size is considerably smaller while maintaining excellent visuals.
However, not every operating system, browser, app, website, or service supports HEIC. For instance, most government, bank, and exam websites only allow you to upload images in JPG or PNG formats. Additionally, old phones and computers do not support HEIC.
Because of these reasons, you might want to convert HEIC to JPG or PNG formats to get universal compatibility.
How to know if an image is HEIC or not
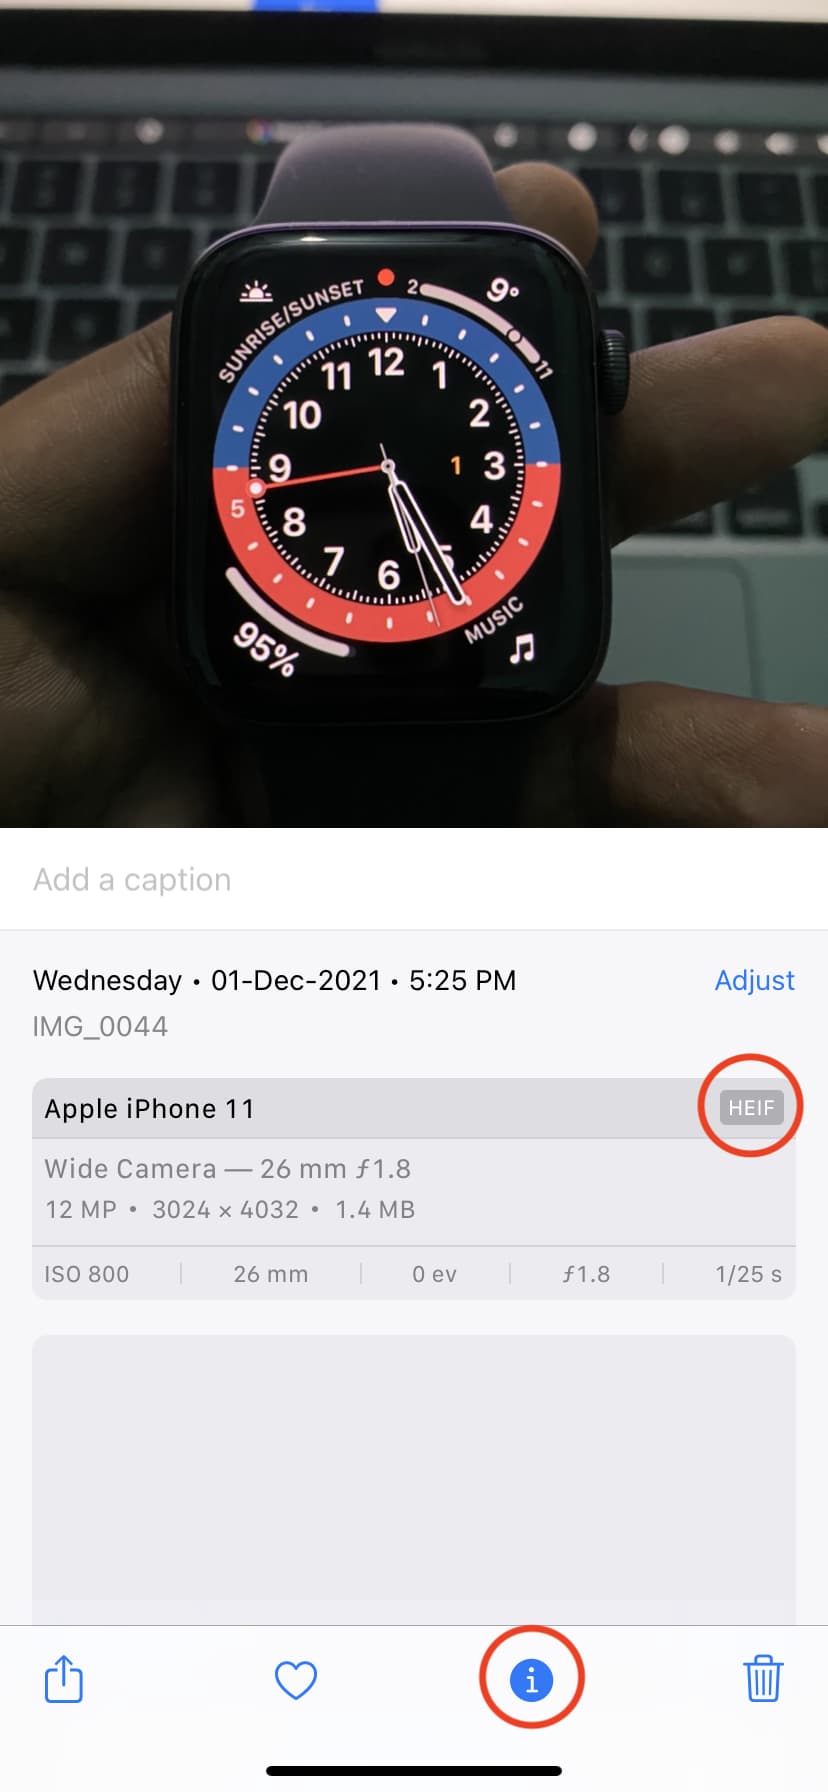
You can see the image format inside the iPhone Photos app by swiping up or tapping the info button ⓘ.
You can also use apps like Exif Metadata to see the image format.
If you’re on a Mac, you can find out the image format by looking at the extension at the end of the file name or by selecting the file and pressing the Command + I keys.
Now that you have the basics cleared, go through these methods to change HEIC to JPG on your iPhone, iPad, or Mac.
iPhone or iPad
Method 1: Use the Files app
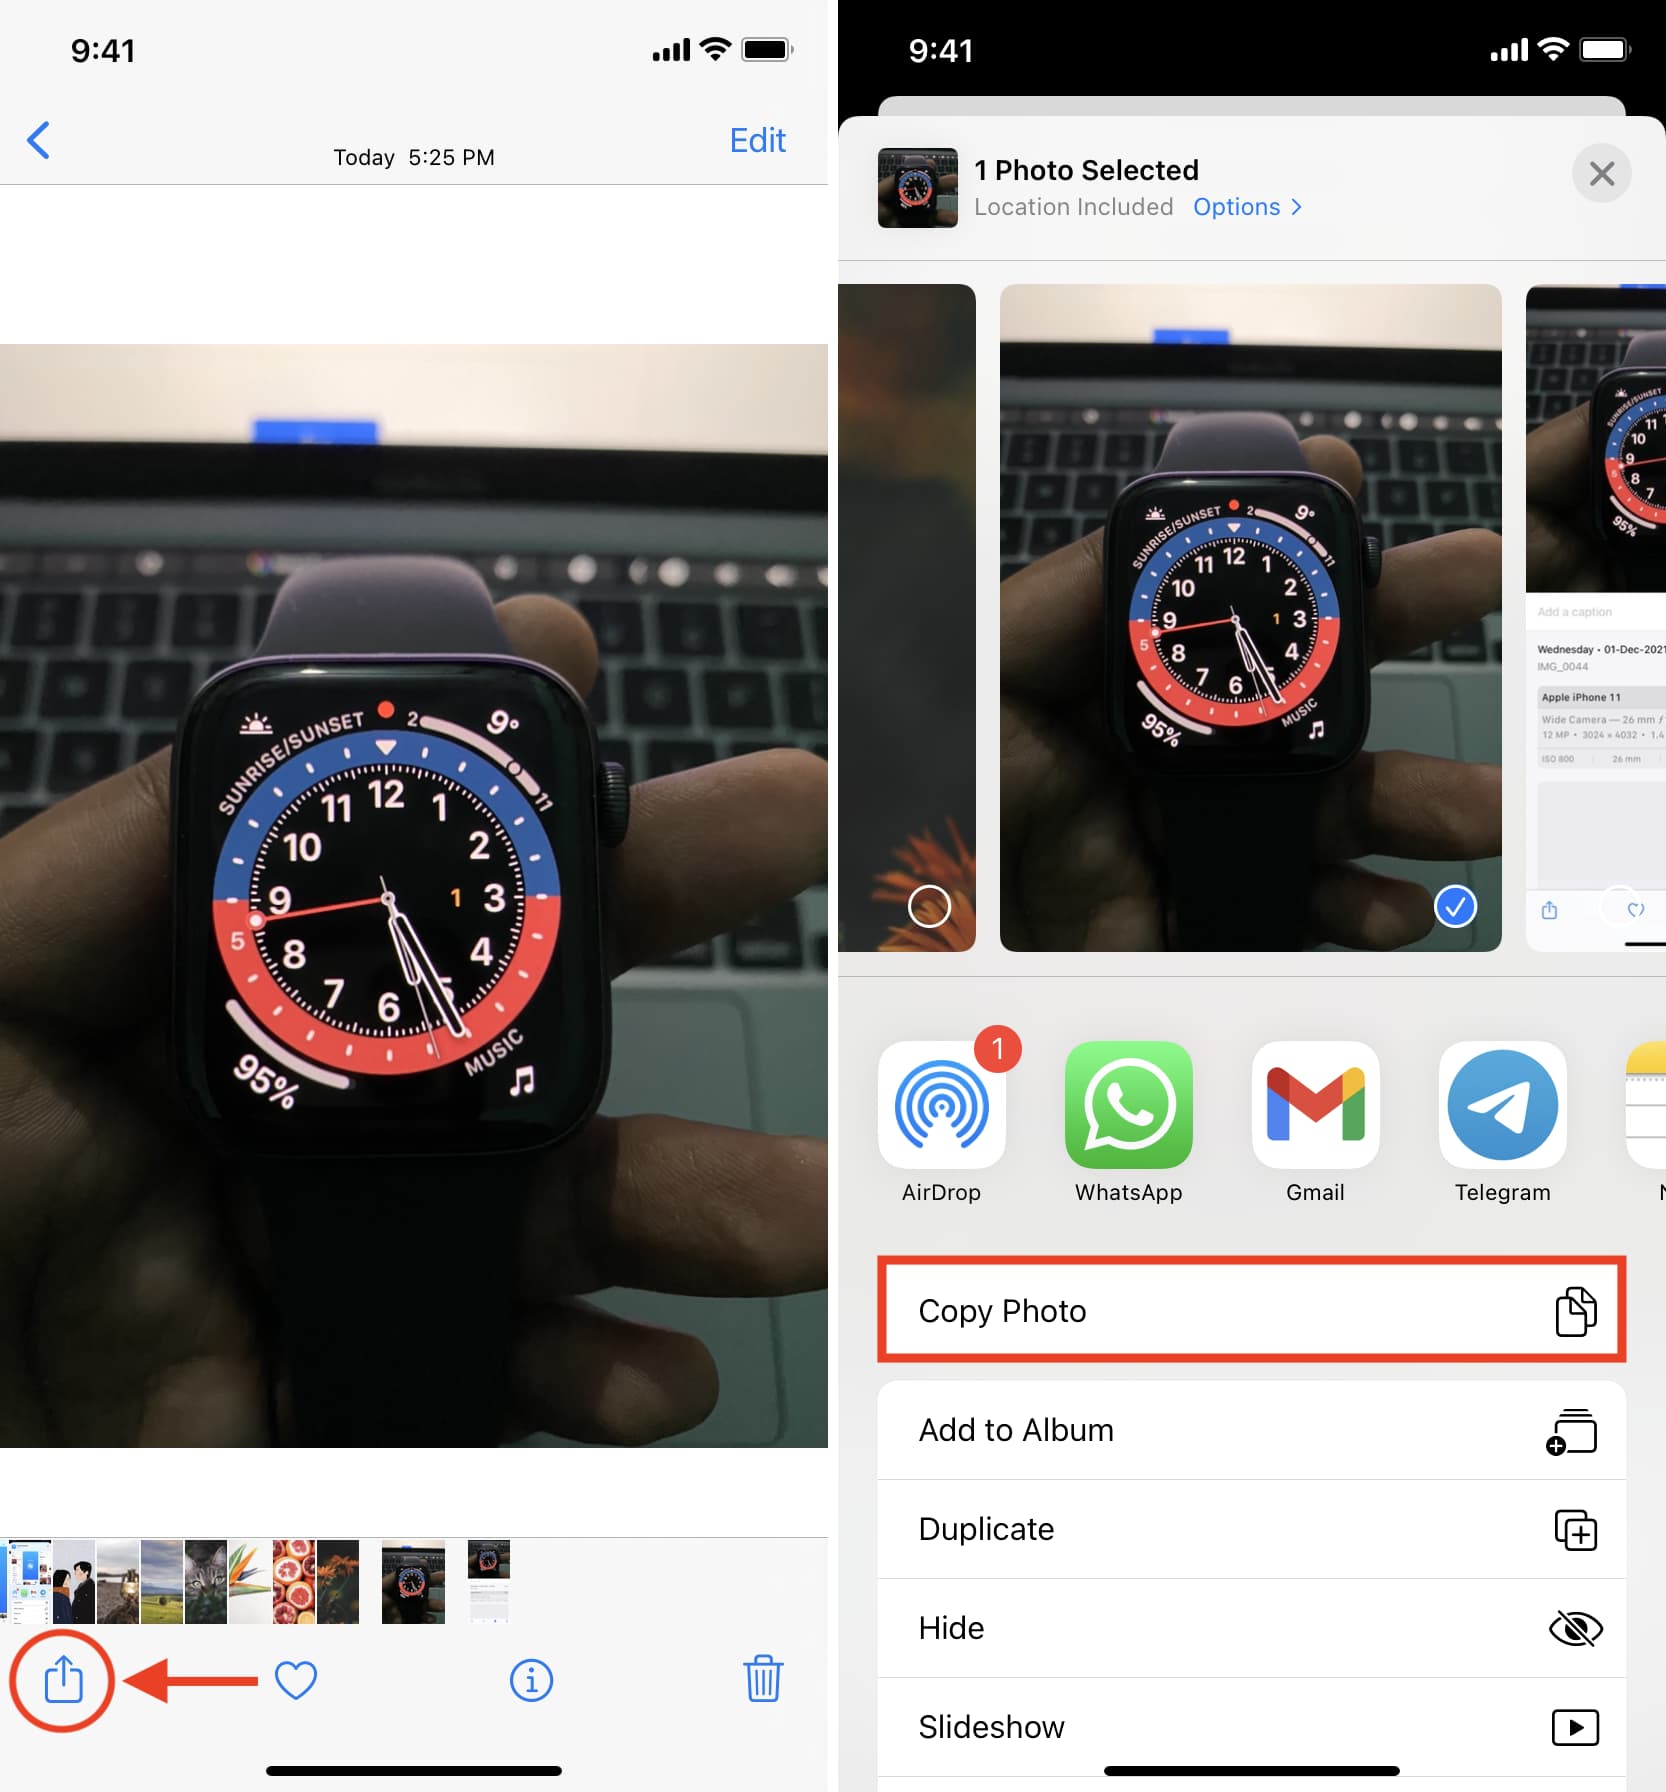
1) Open the image in the Photos app and tap the share icon.
2) Tap Copy Photo.
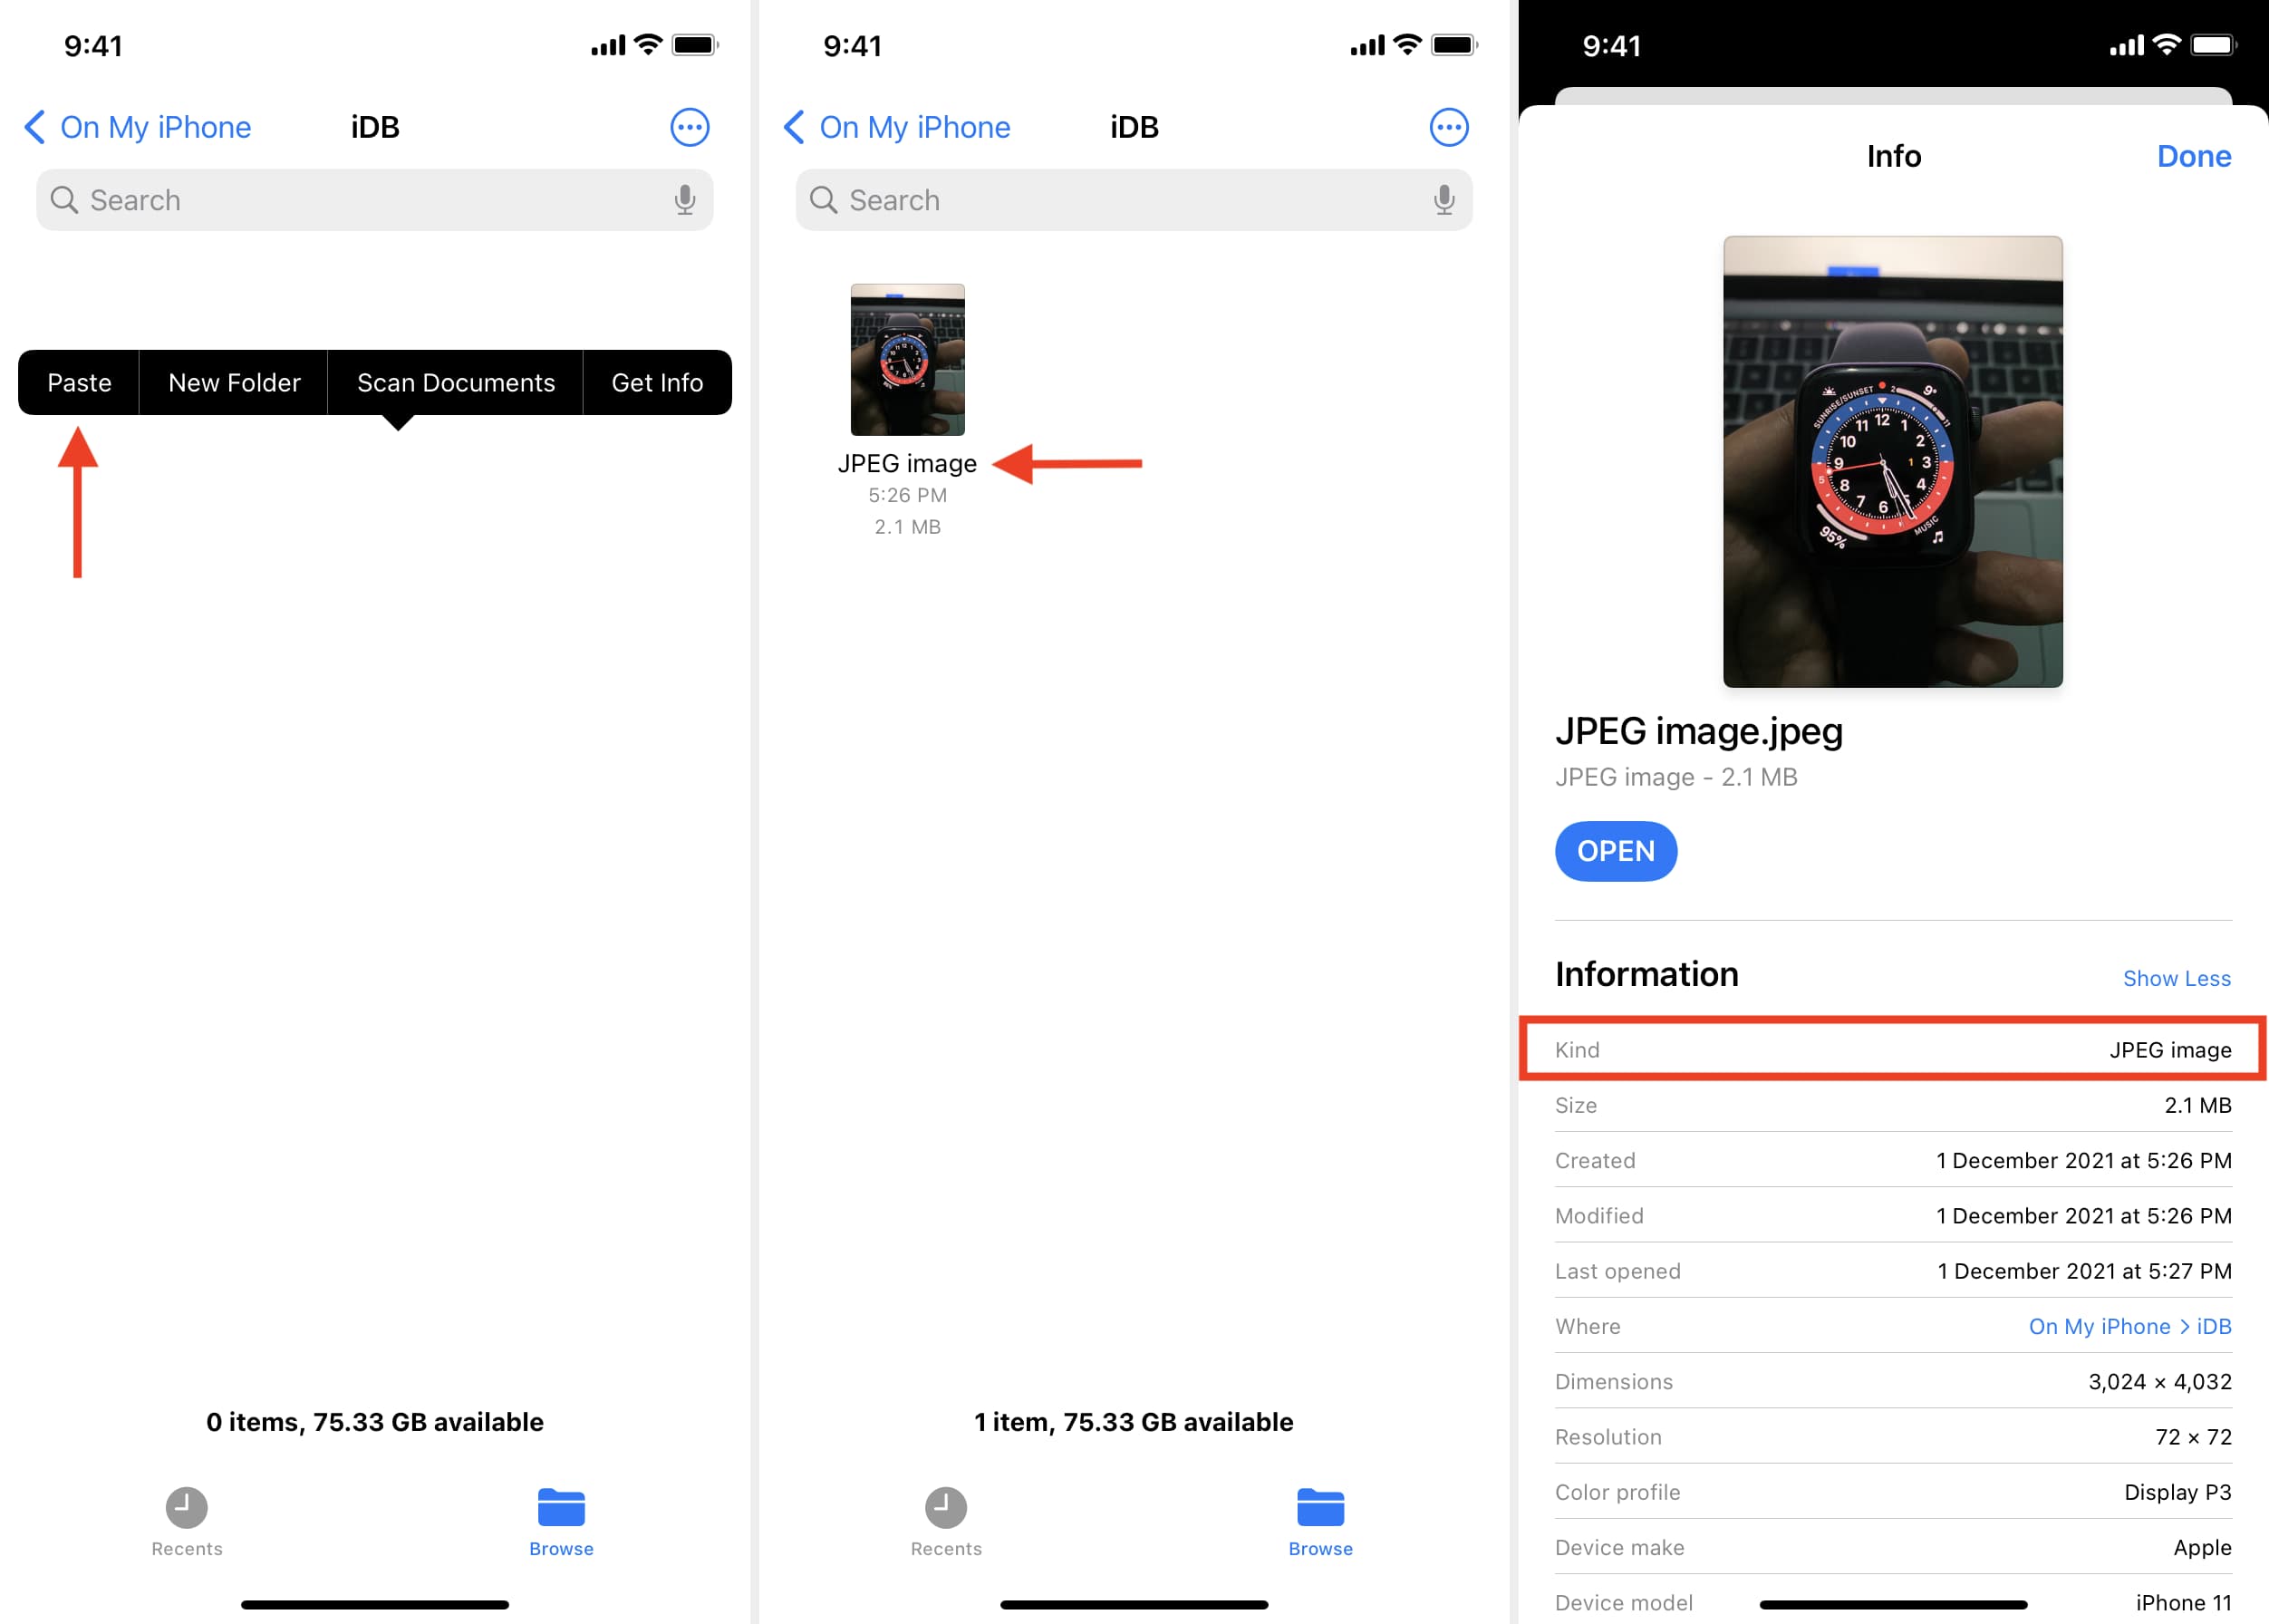
3) Open the Files app and go to a location/folder in the On My iPhone section.
4) Touch and hold an empty area and tap Paste. This will instantly convert the HEIC photo to JPG. You can confirm by touching and holding the image thumbnail and choosing Get Info.
5) With the image converted, you can open it and tap the Share icon to send it via AirDrop, email, or other apps. You can also tap Save Image to have the JPEG version in the Photos app
Method 2: Use a HEIC to JPG converter app
You can turn HEIC images into JPEG or PNG one at a time or in bulk using dedicated HEIC converter apps. The process is usually faster than manually copying and pasting.
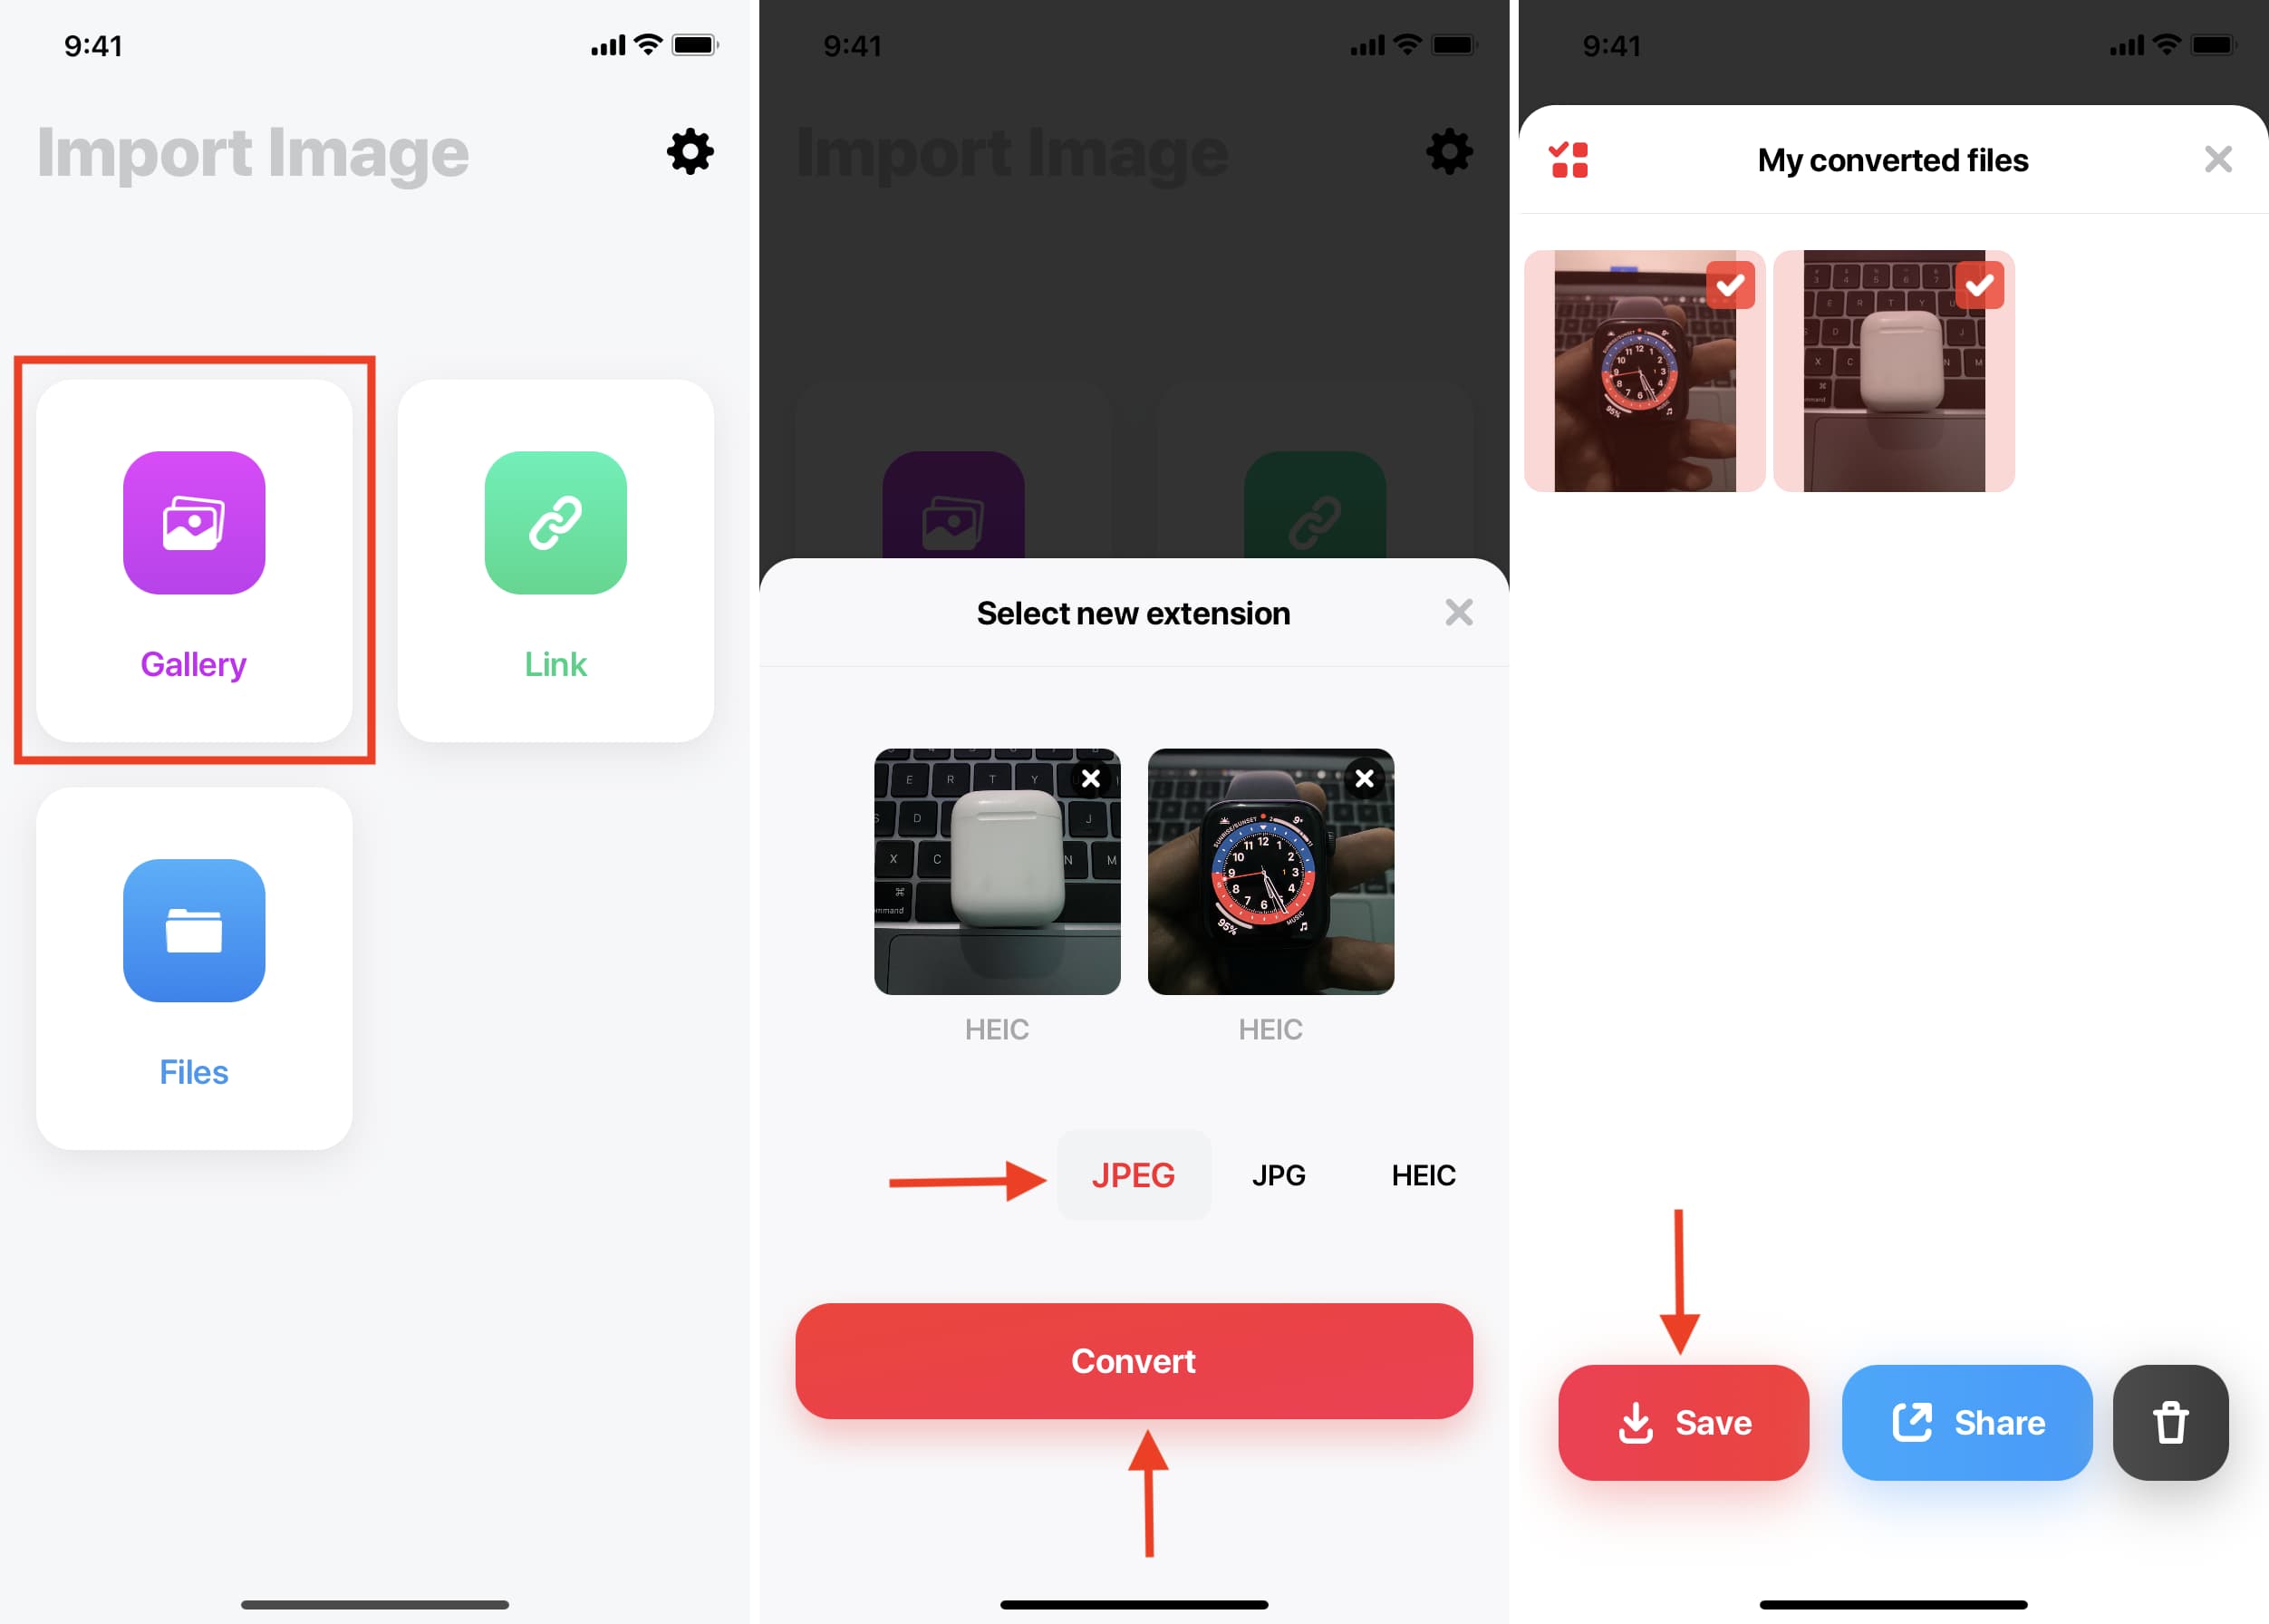
1) Download Image Converter from the App Store.
2) Open the app and tap Gallery.
3) Tap Allow Access to All Photos or Select Photos and choose the images. Below each image, it’ll show its format.
4) Tap JPEG, JPG, PNG, GIF, BMP, PSD, WEBP, WBMP, PS, TIFF, PDF, or one of the formats and then tap Convert.
5) Once the conversion completes, tap Save (or Share) to add the JPG images to the Photos app (or other apps).
iOS App Store has several such apps. Feel free to search for “HEIC to JPG” and use one with good ratings.
Method 3: Use CloudConvert website
Tip: If you have several HEIC images to convert, put them into an album so that it’s easier to select them.
Note that you’ll be uploading your image to a website’s server. Only proceed if you’re comfortable having your photos temporarily on some outside server. If not, use the other methods mentioned in this tutorial.
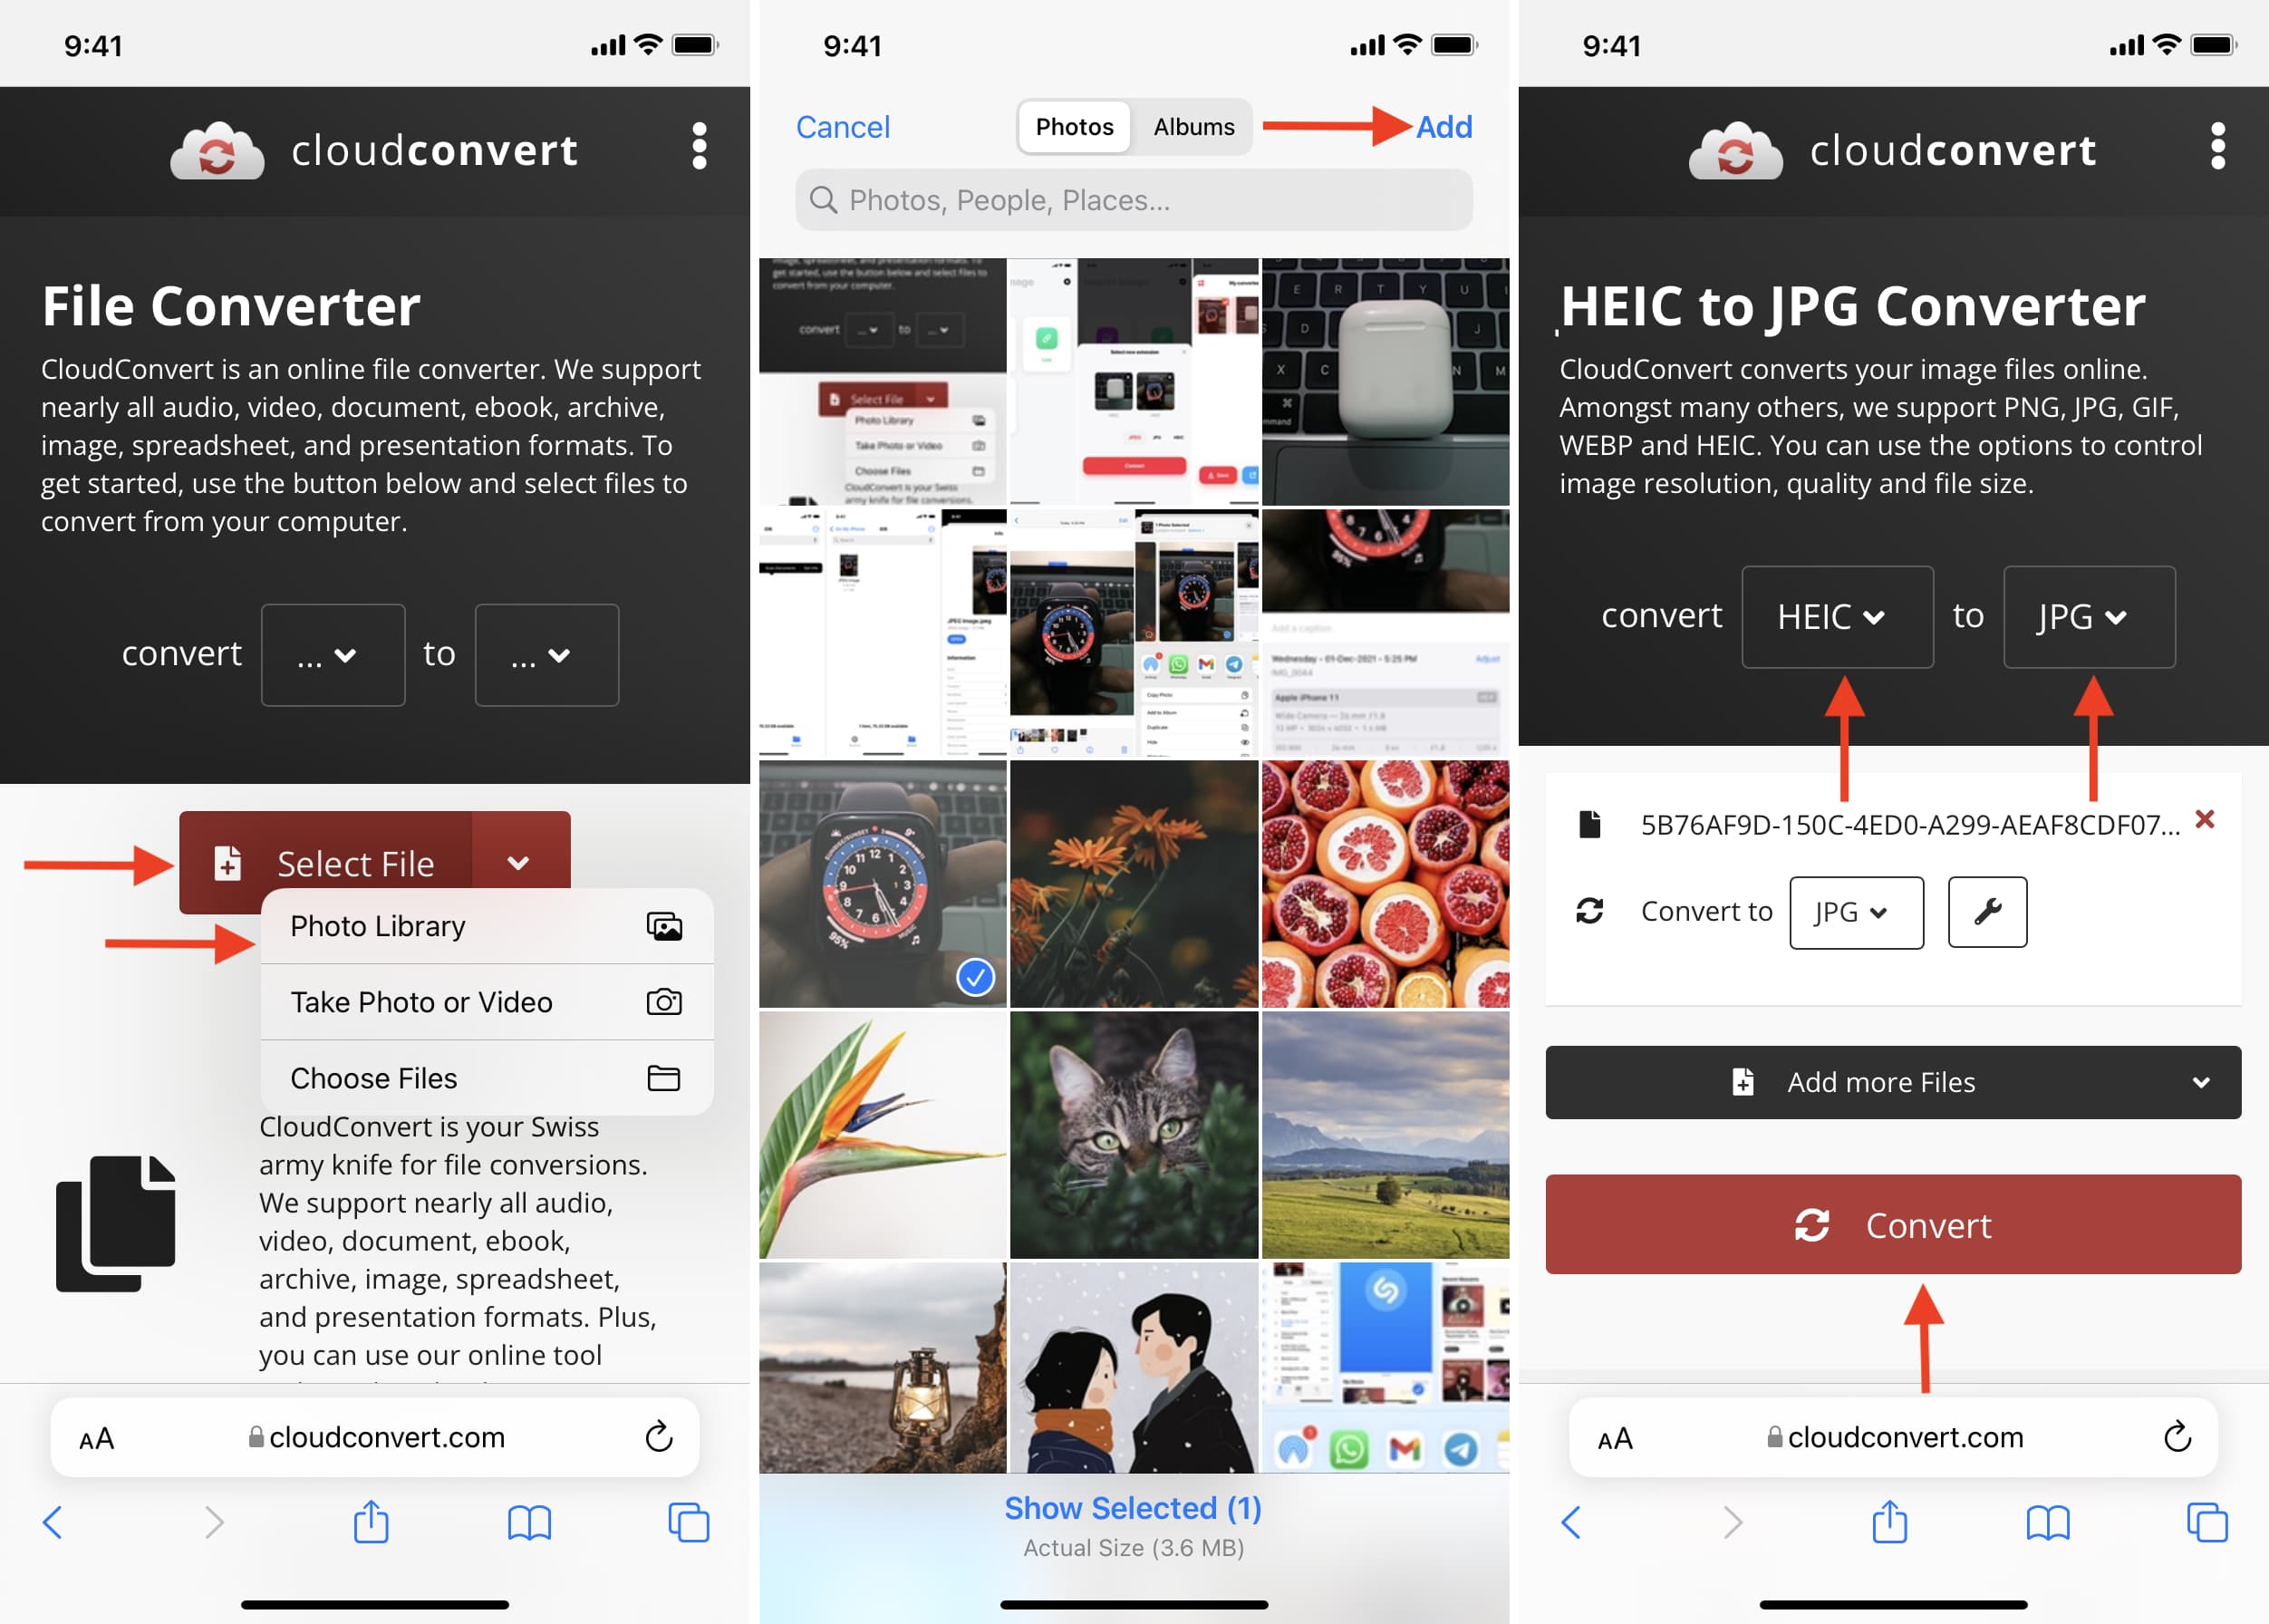
1) Visit CloudConvert.com. Tap Select File > Photo Library, choose the HEIC image, and tap Add.
2) From above, tap the dropdown menu next to convert and choose HEIC.
3) Tap the other dropdown menu and choose JPG, PNG, TIFF, BMP, GIF, WEBP, etc.
4) Tap Convert.
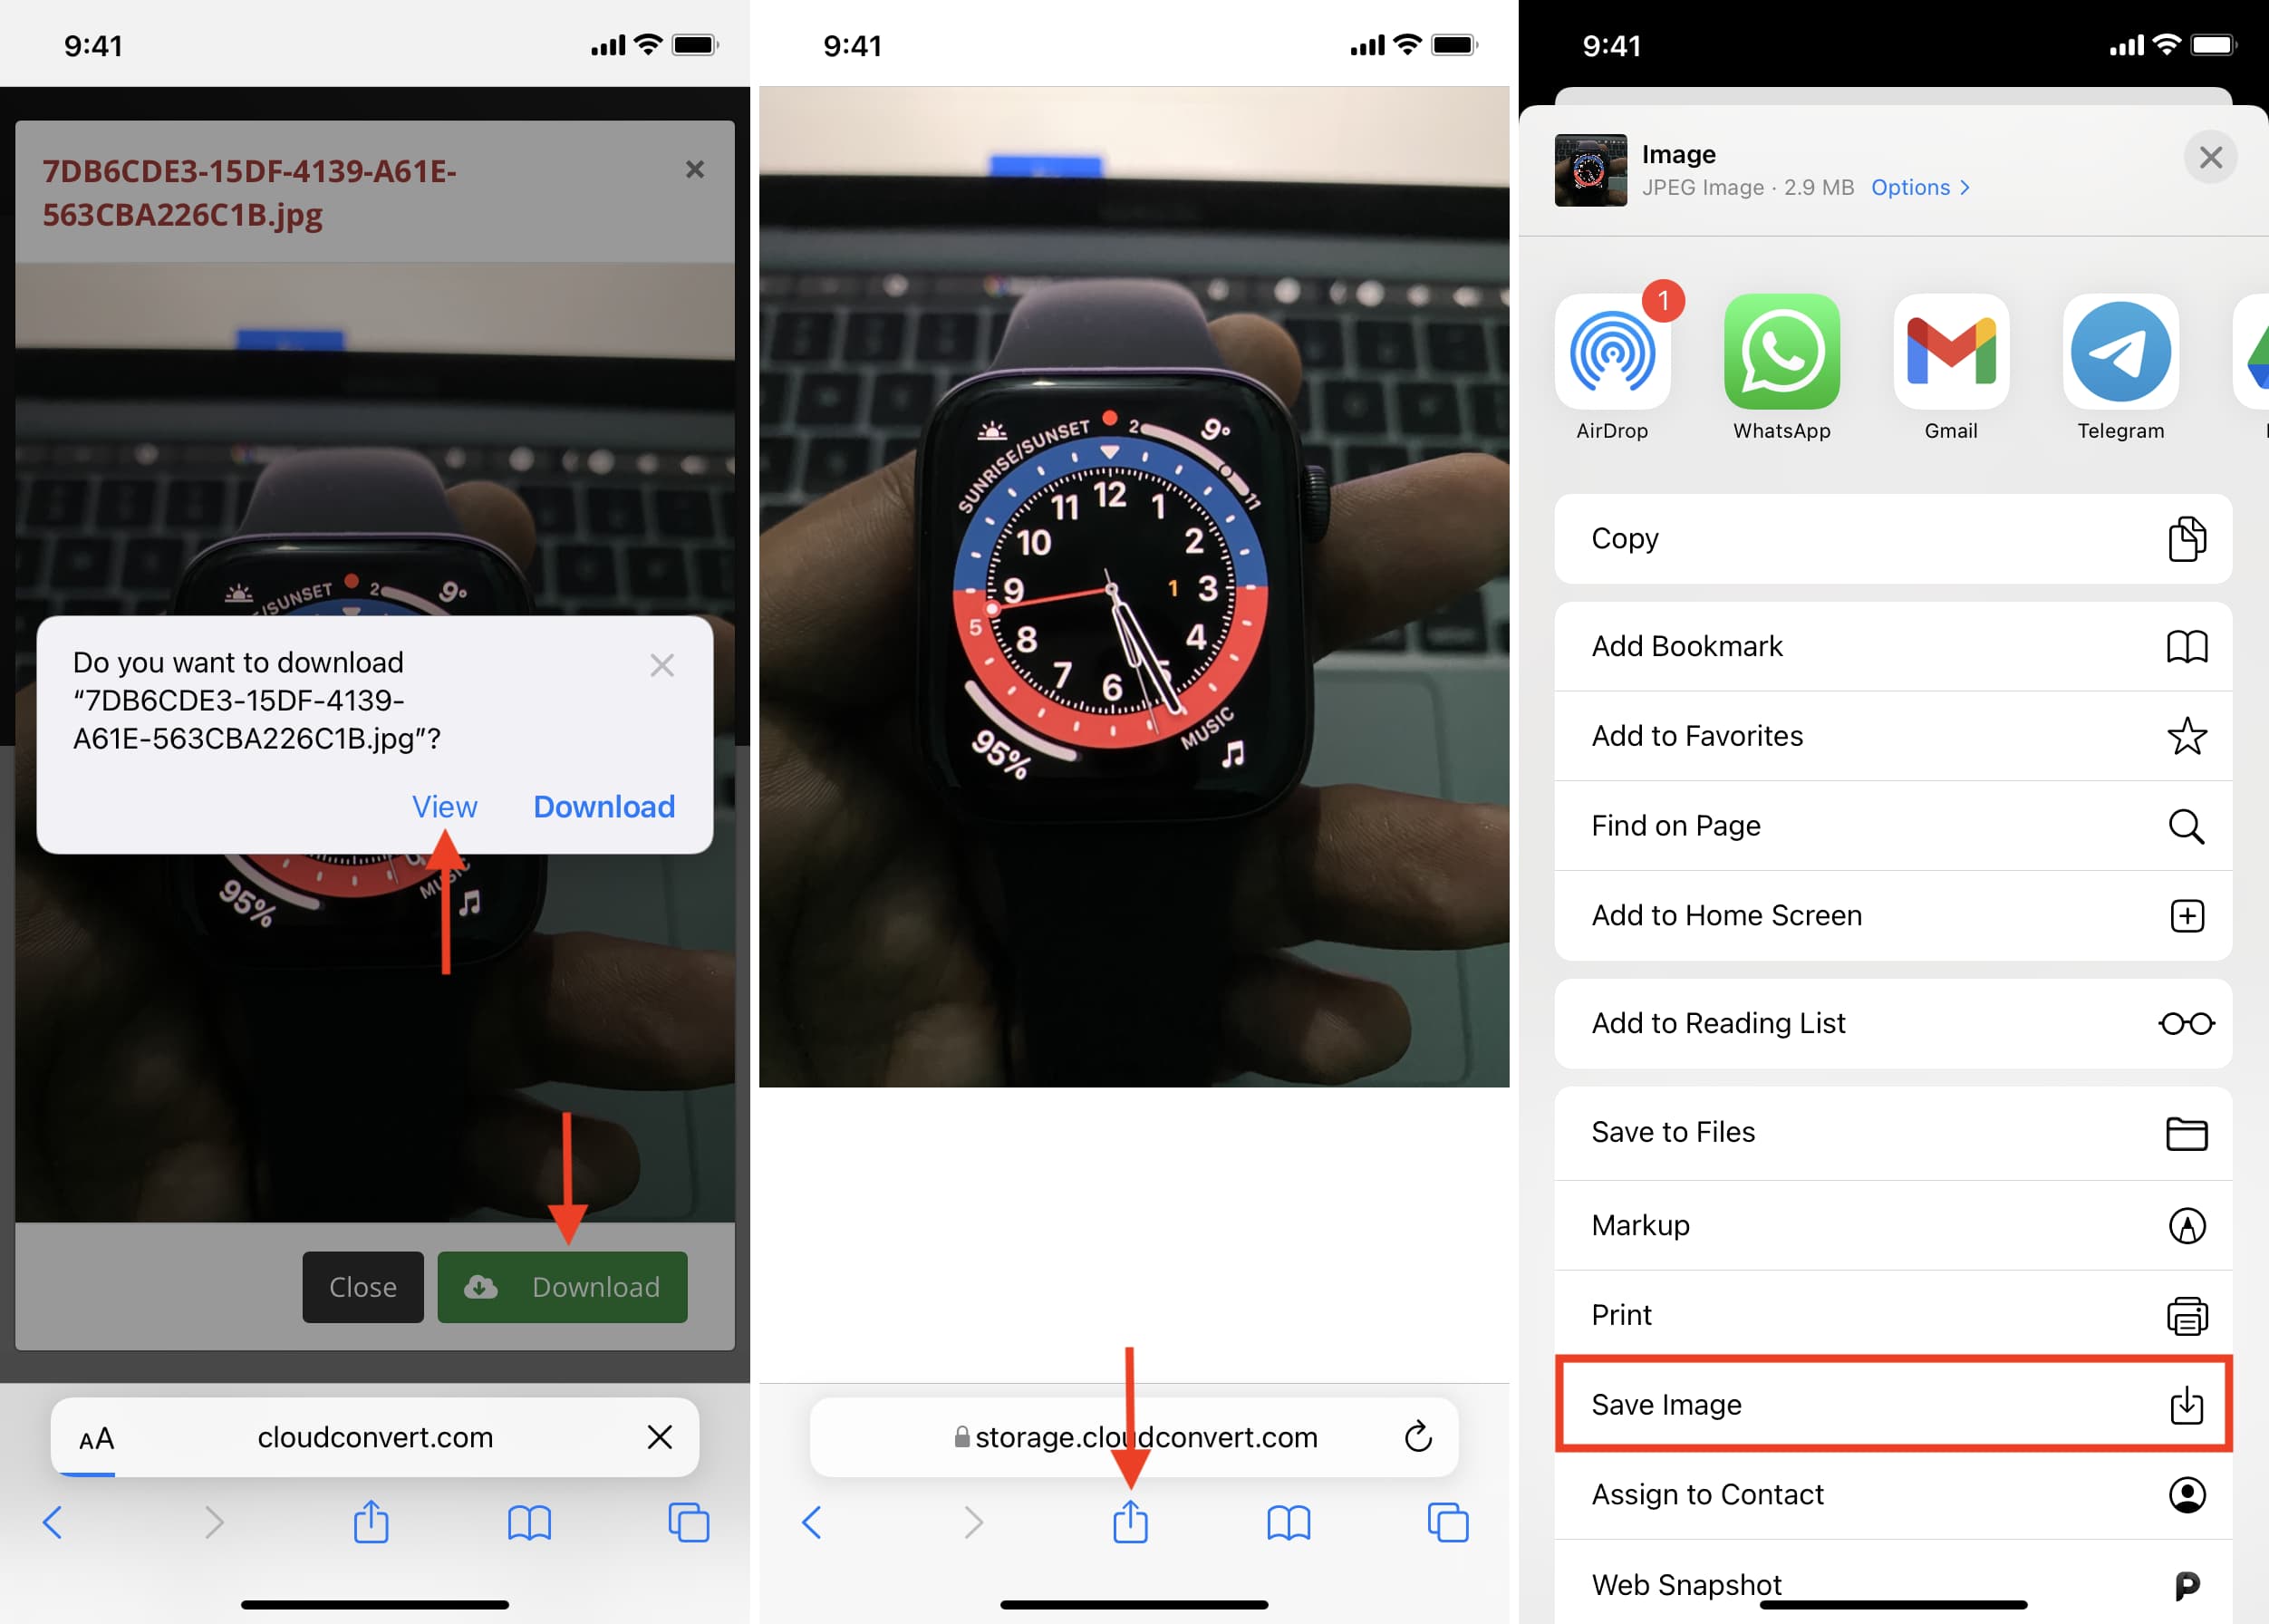
5) Once done, tap Download > View > share icon > Save Image or one of the options.
Stop iPhone from taking HEIC photos
Until now, you have learned how to convert a HEIC image to JPG or other formats. But if conversion is too much of a hassle and you have to do it repeatedly, you can put an end to this by asking your iPhone not to shoot pictures in HEIC.
Automatically have iPhone transfer photos in JPG or compatible format
Lastly, even if you shoot in HEIC, your iPhone is smart enough to transfer pictures in a compatible format to another device. All you need to do is go to Settings > Photos > and choose Automatic under Transfer to Mac or PC. After this, your iPhone will check for compatibility, and it’ll transfer original files (in HEIF/HEVC formats) only if the computer supports it. If it doesn’t, your iPhone will automatically convert them before transferring.
On Mac
Method 1: Use Finder Quick Actions
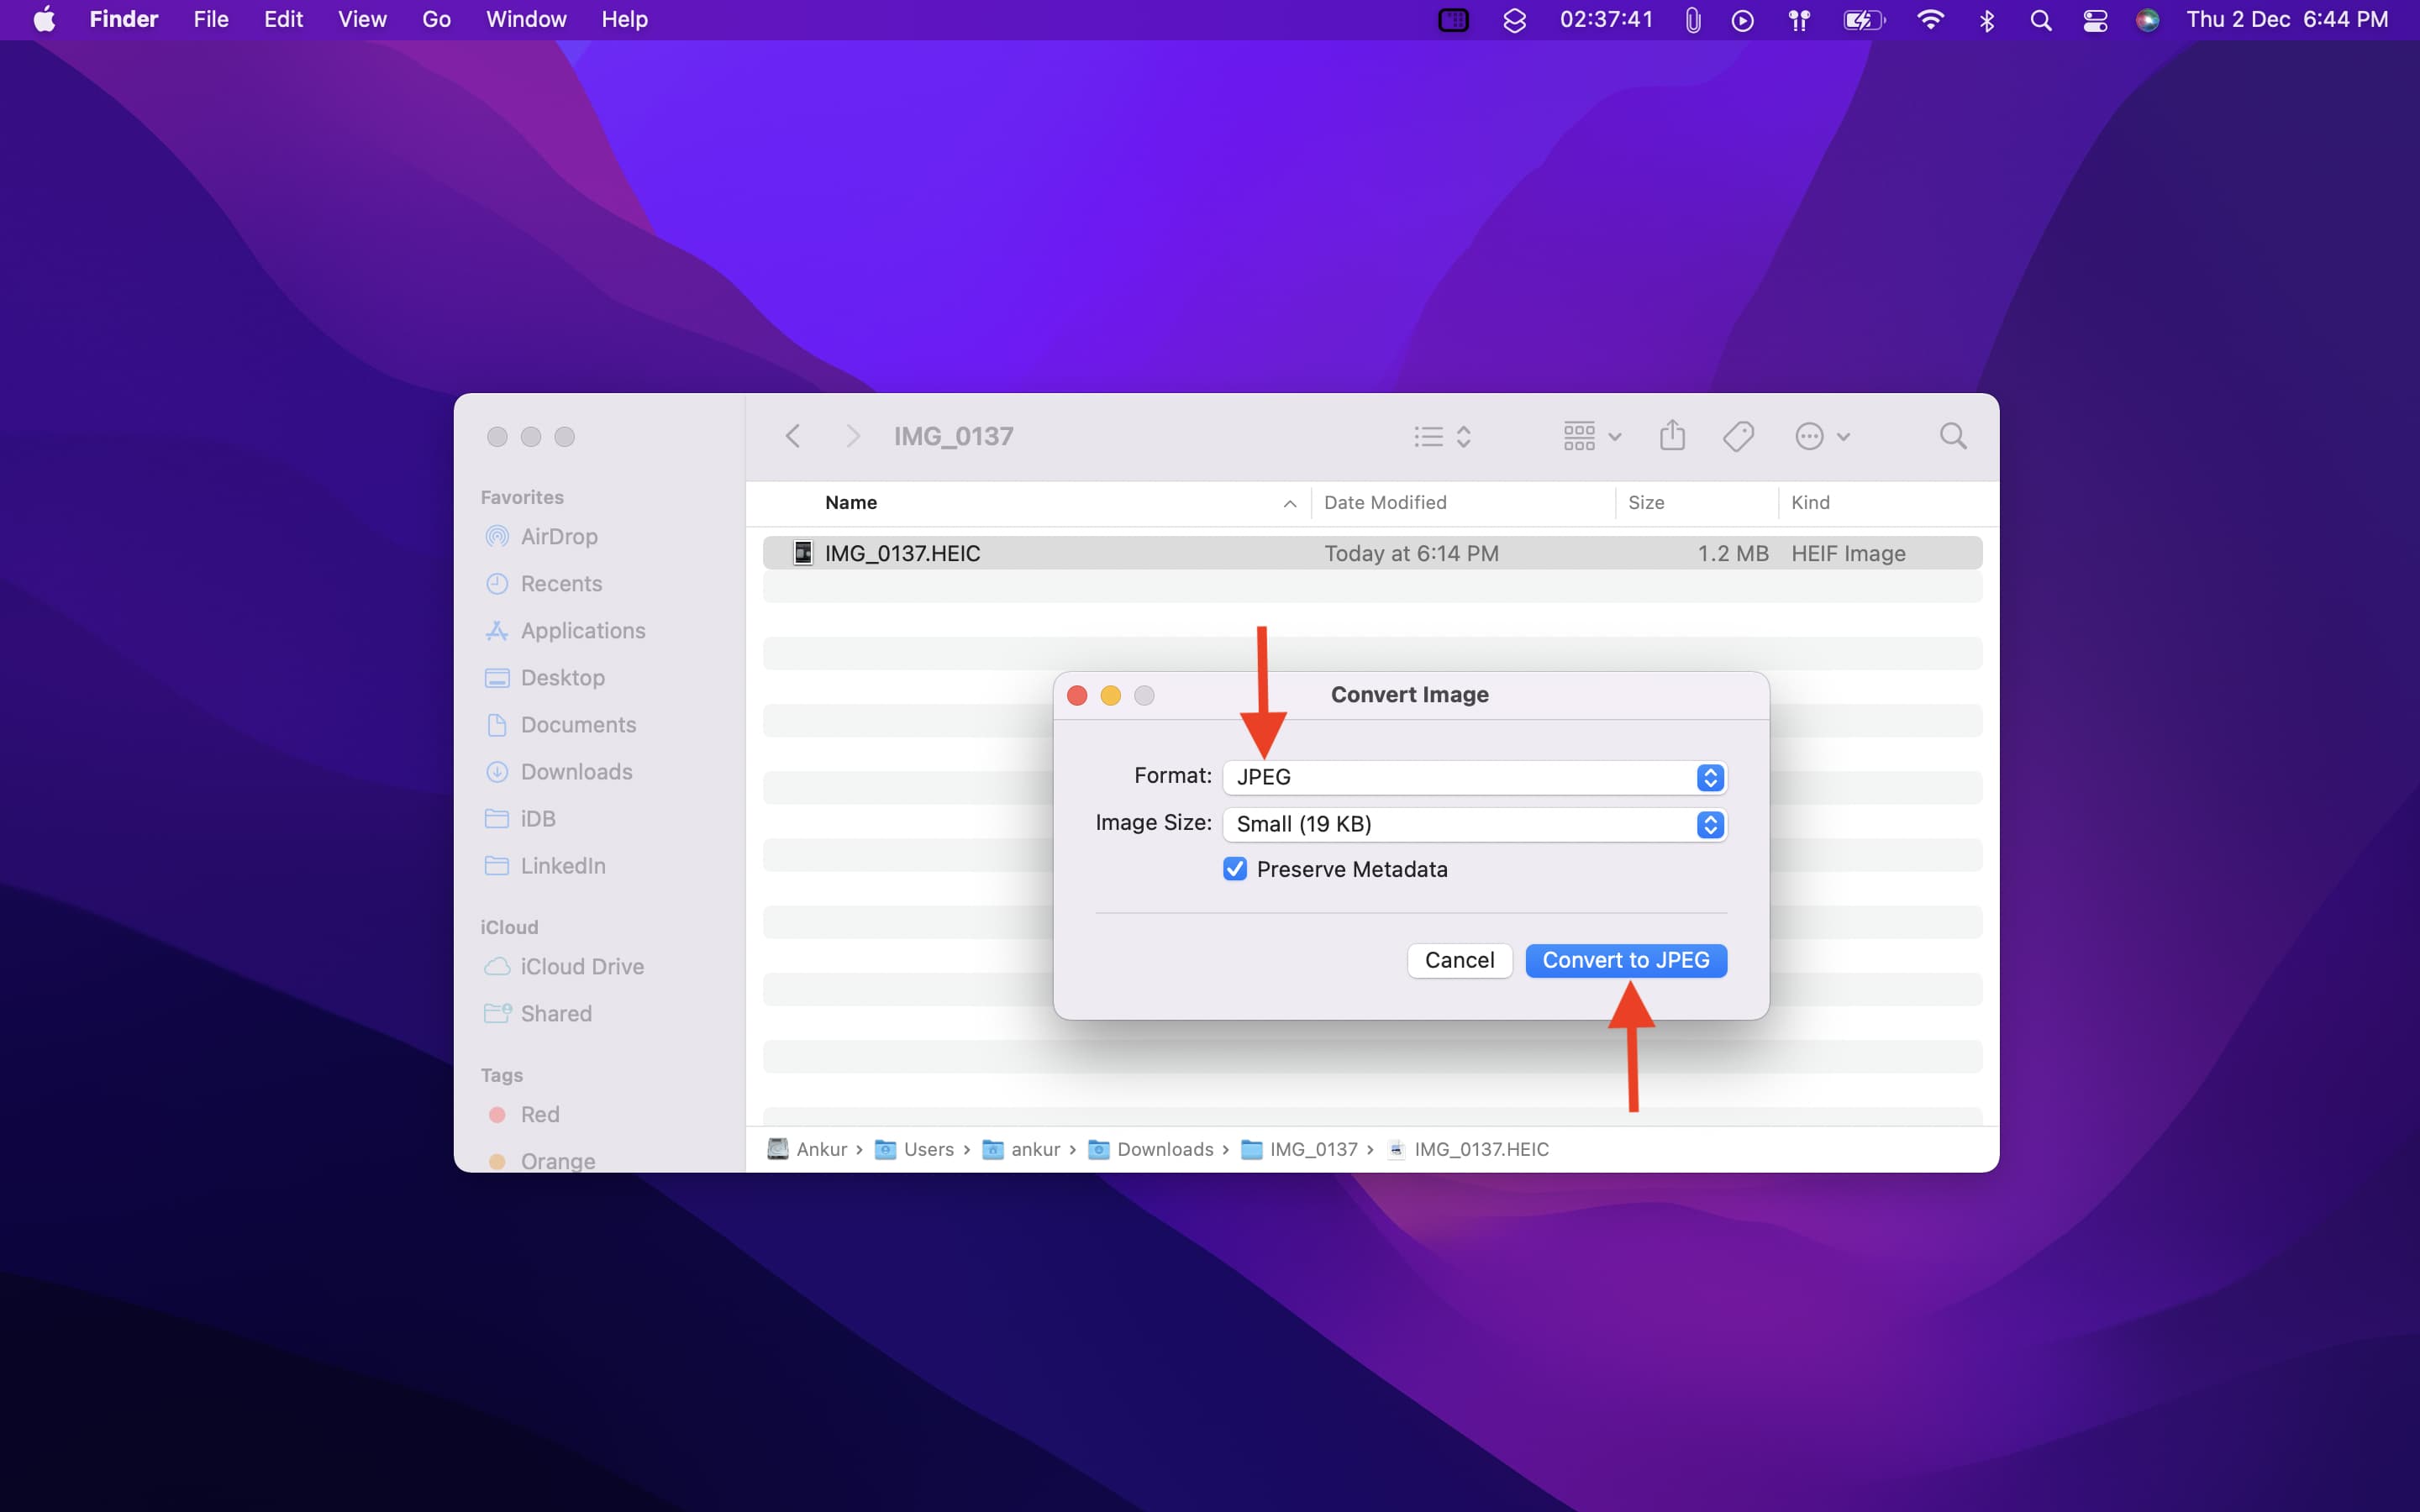
1) Right-click on one or multiple selected HEIC images and choose Quick Actions > Convert Image.
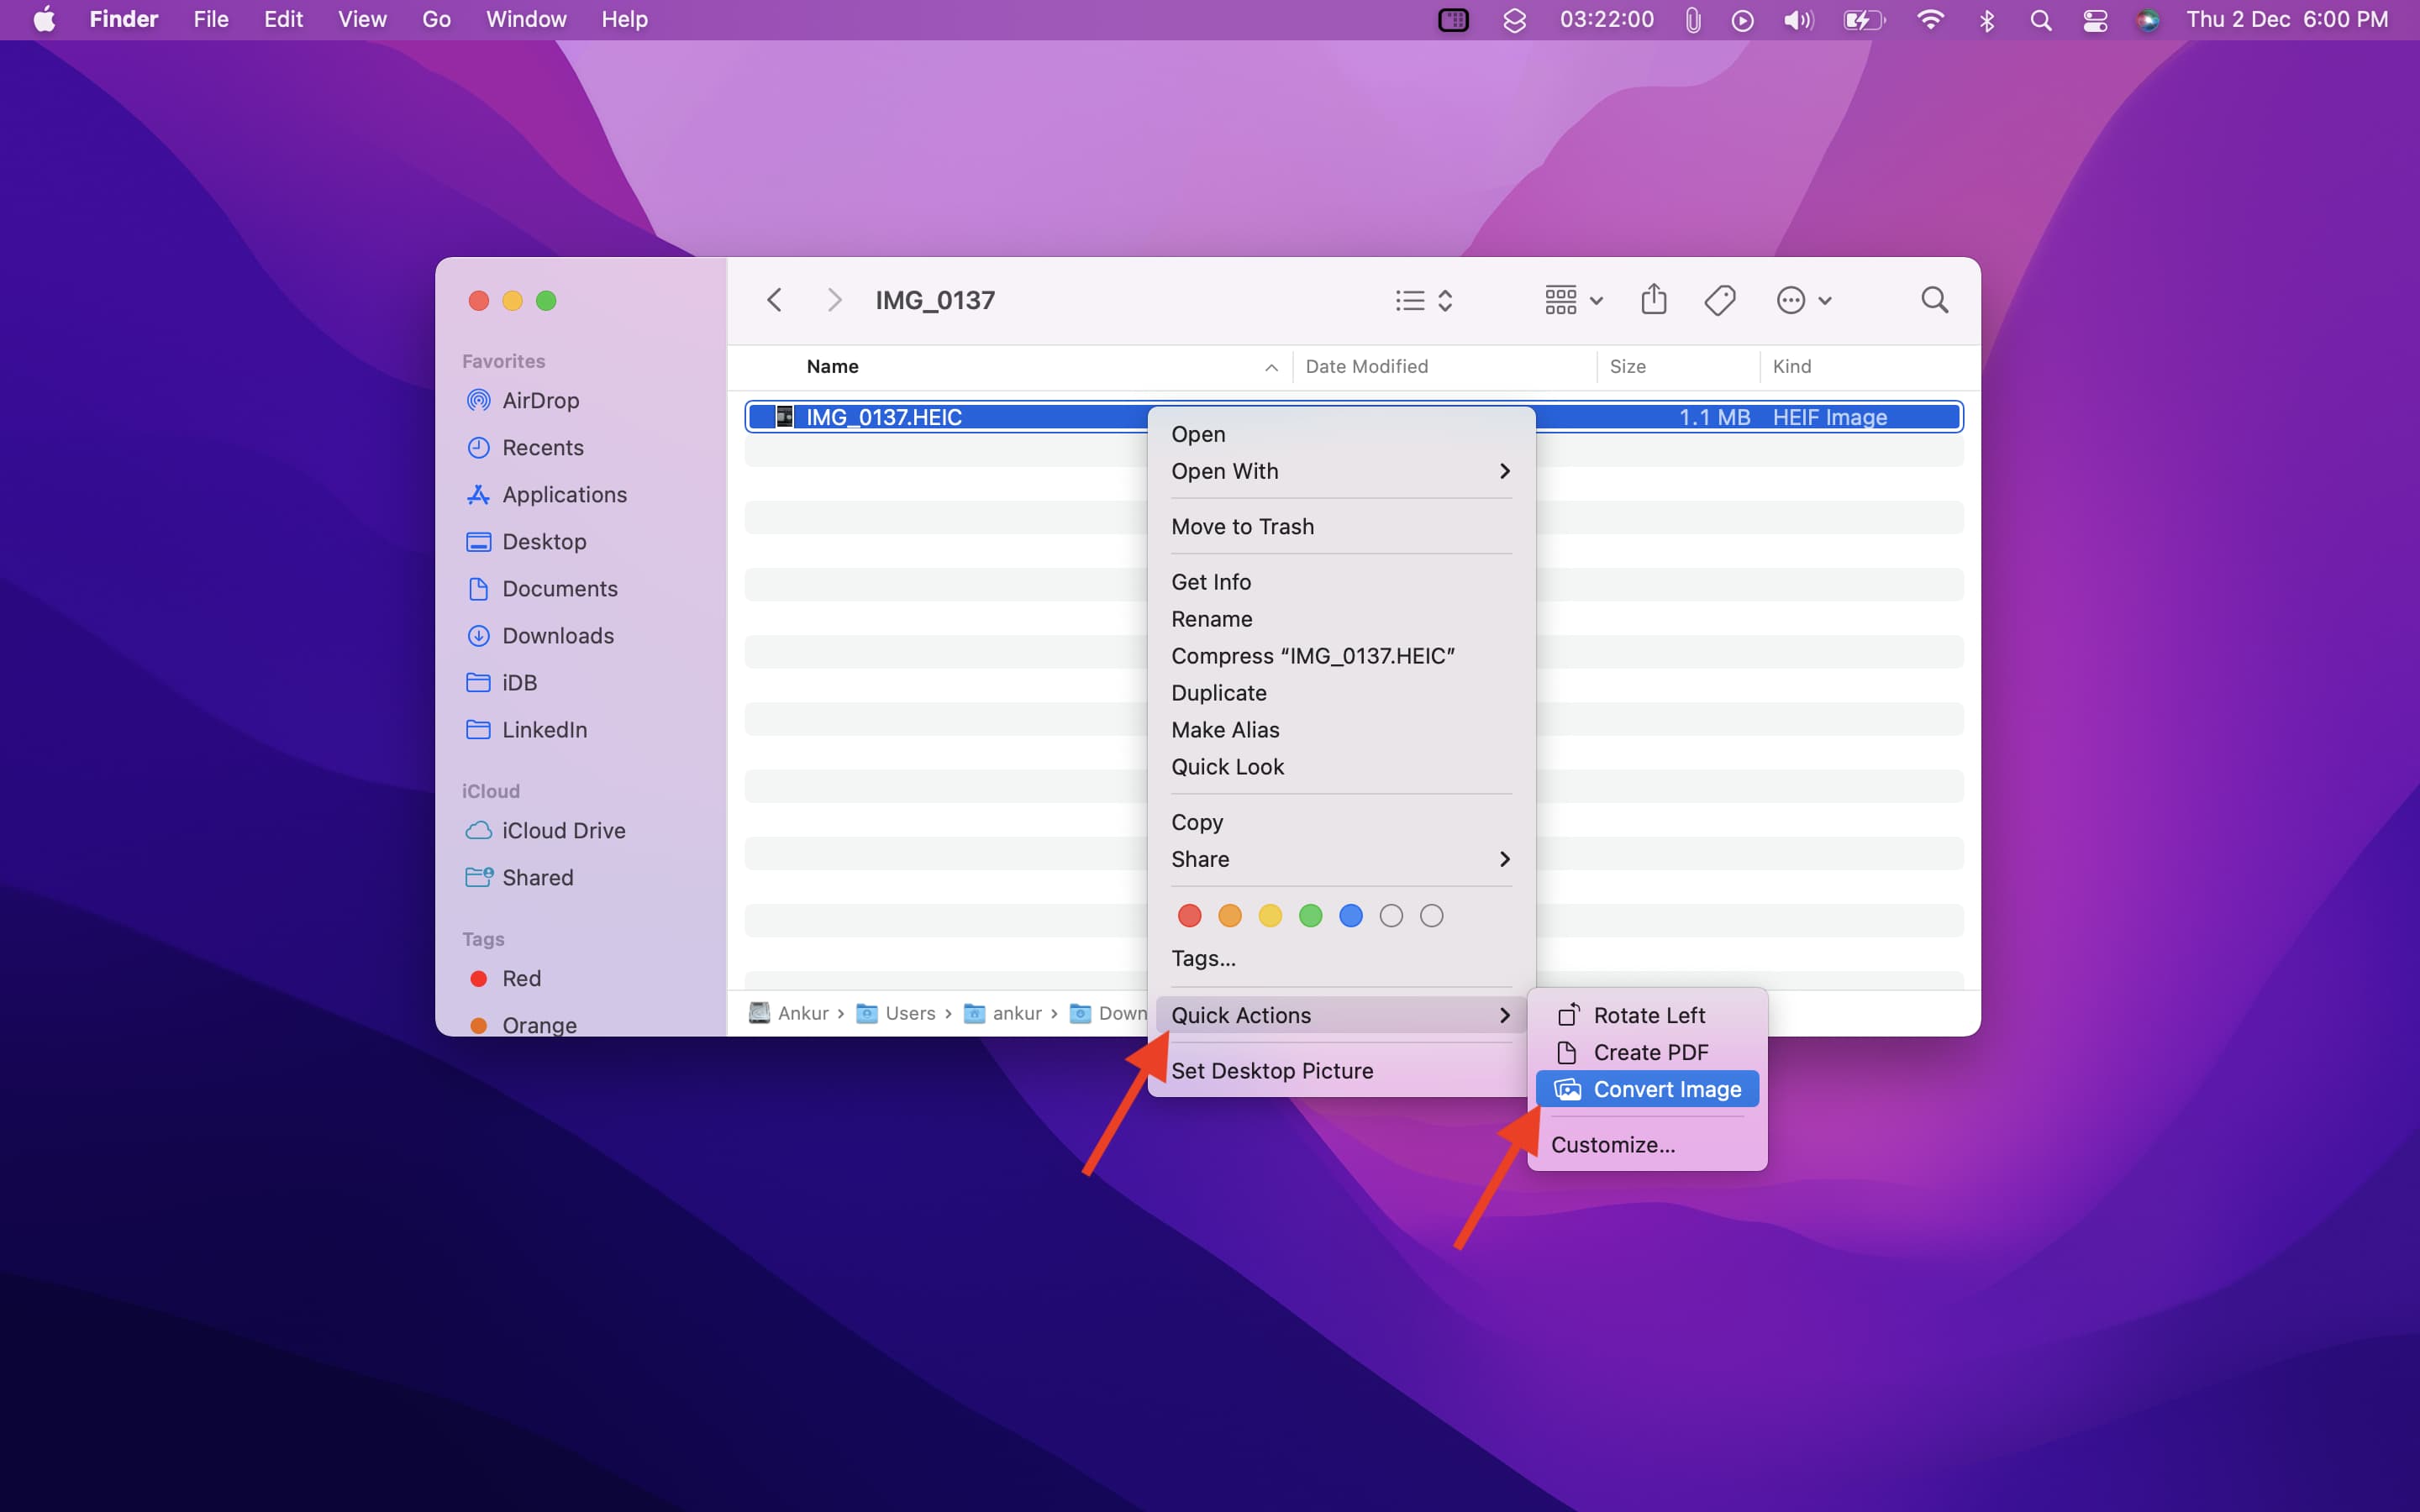
2) Make sure it says JPEG next to format.
3) Click Image Size and choose Actual Size, Large, Medium, or Small.
4) Click Convert to JPEG.
Method 2: Use Preview
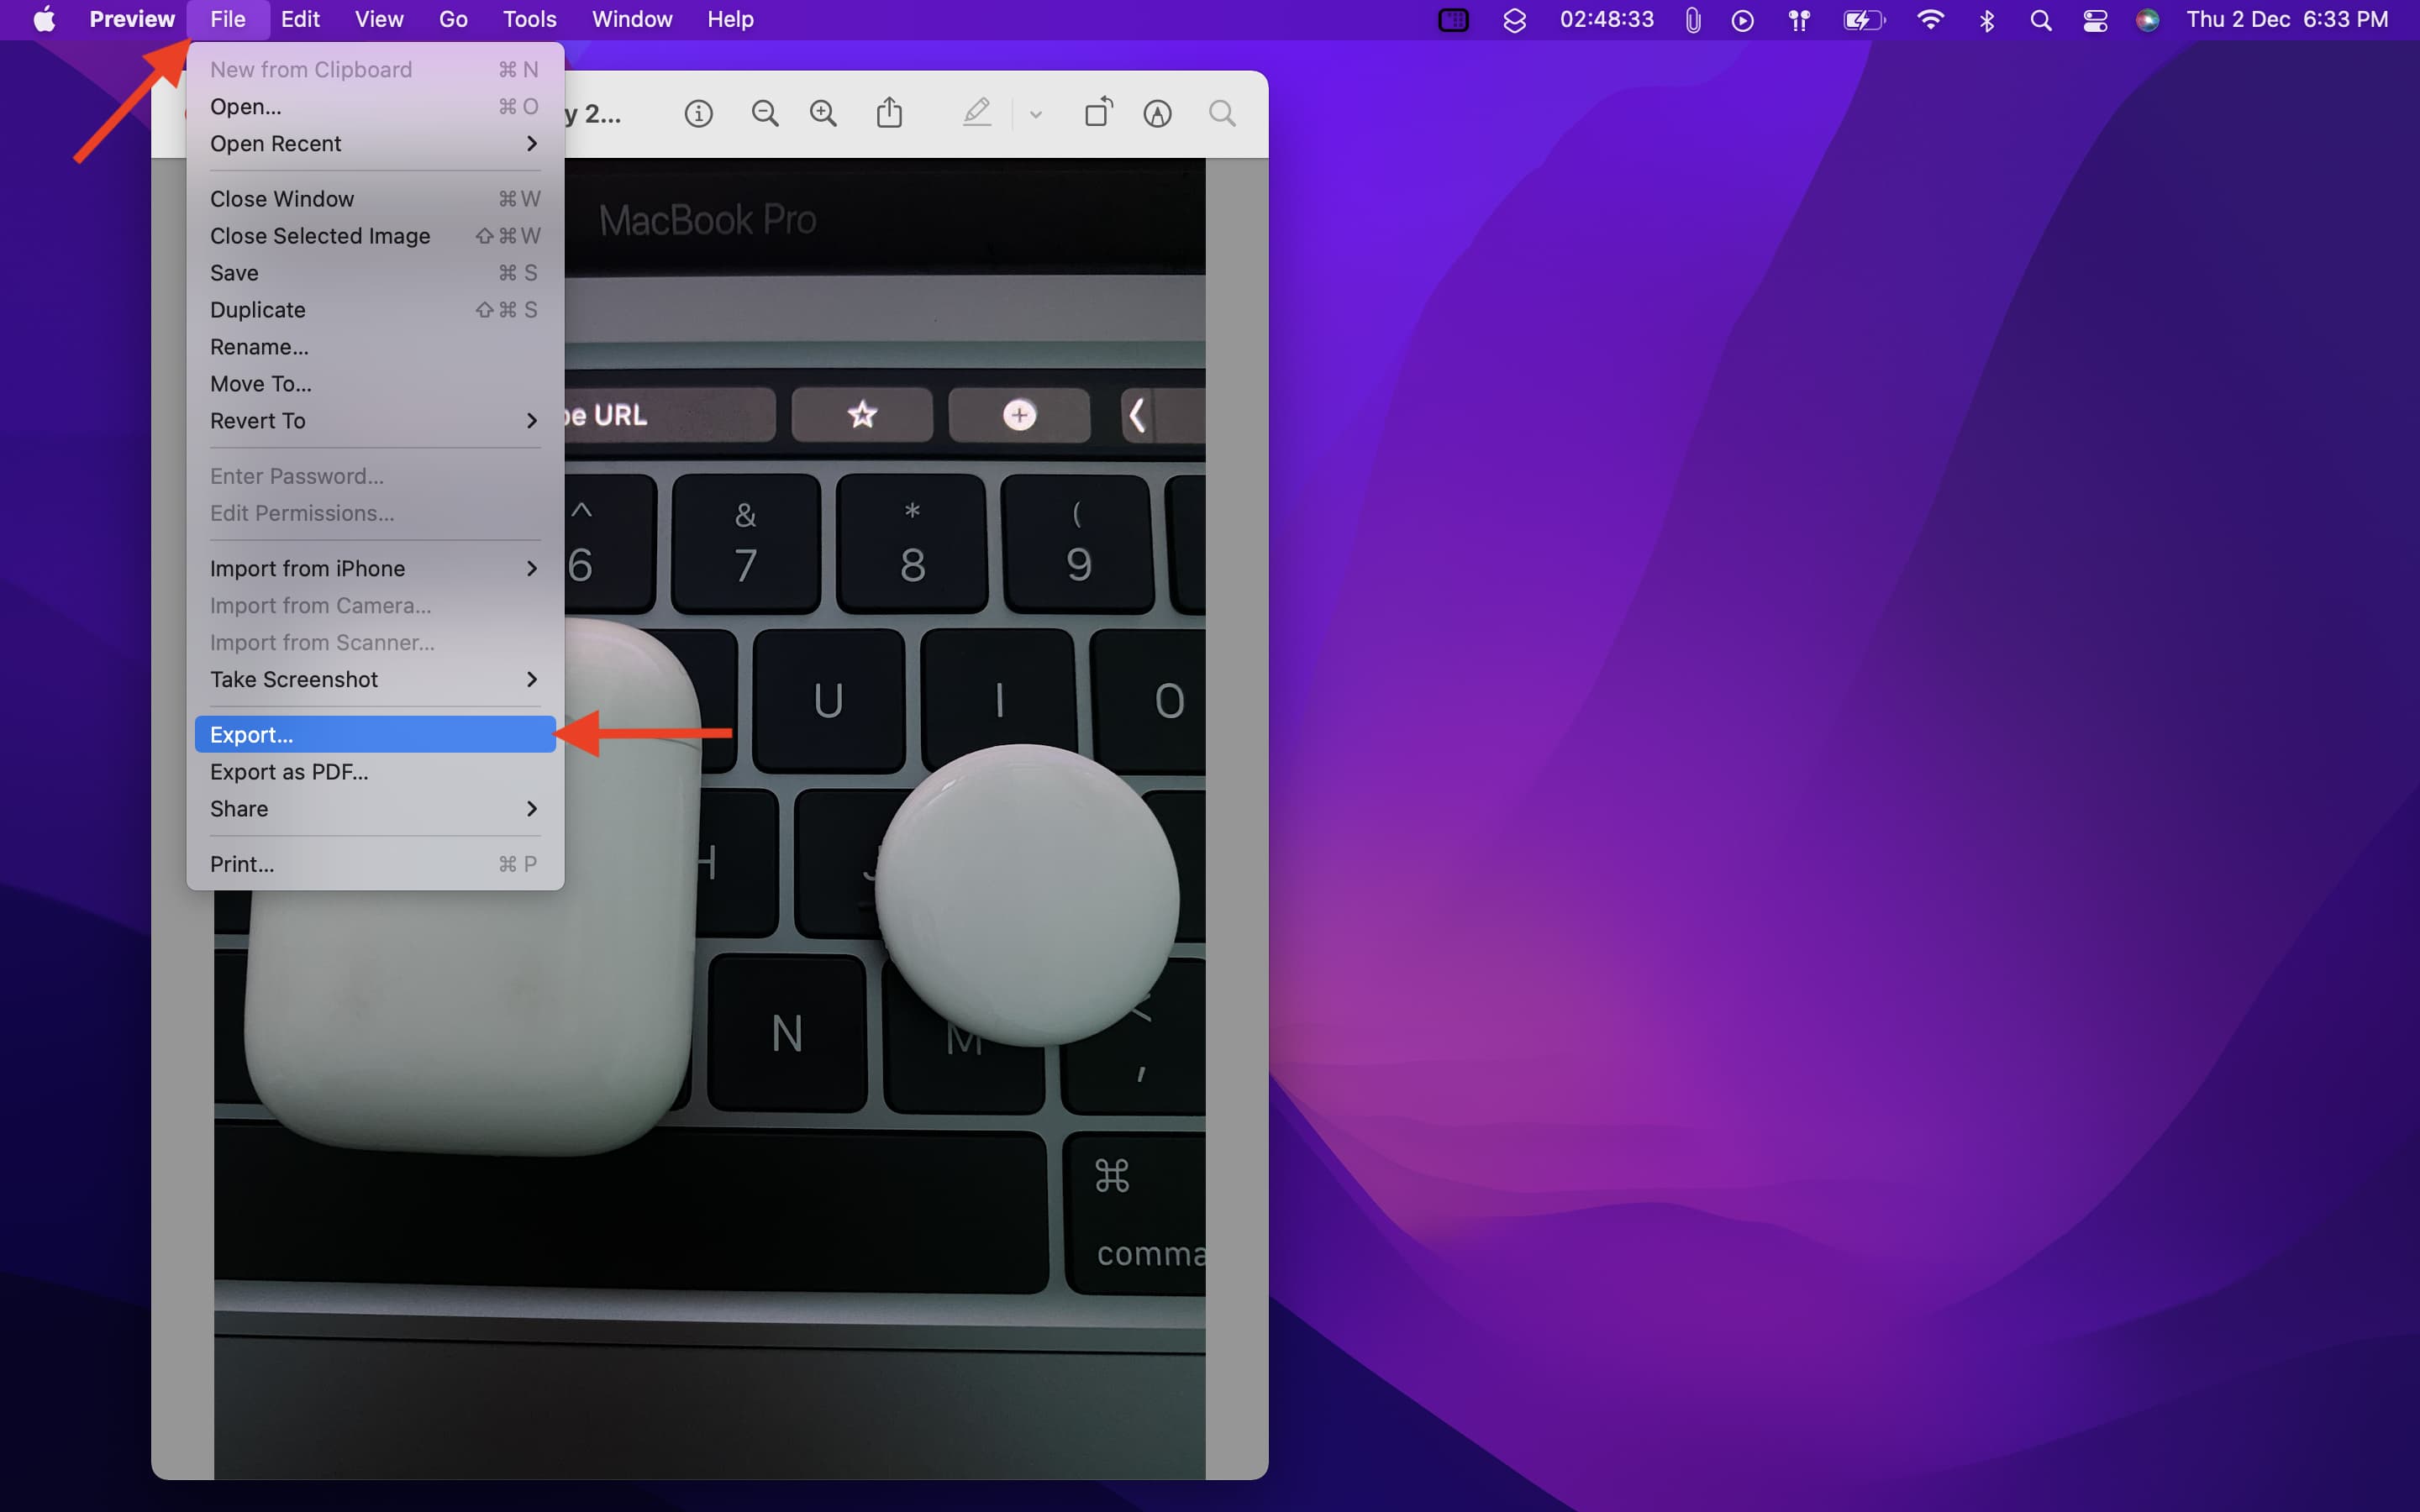
1) Double-click the HEIC image, and it should open in Mac’s Preview app. If it doesn’t, right-click on the image > Open With > Preview.
2) Click File > Export from the top menu bar.
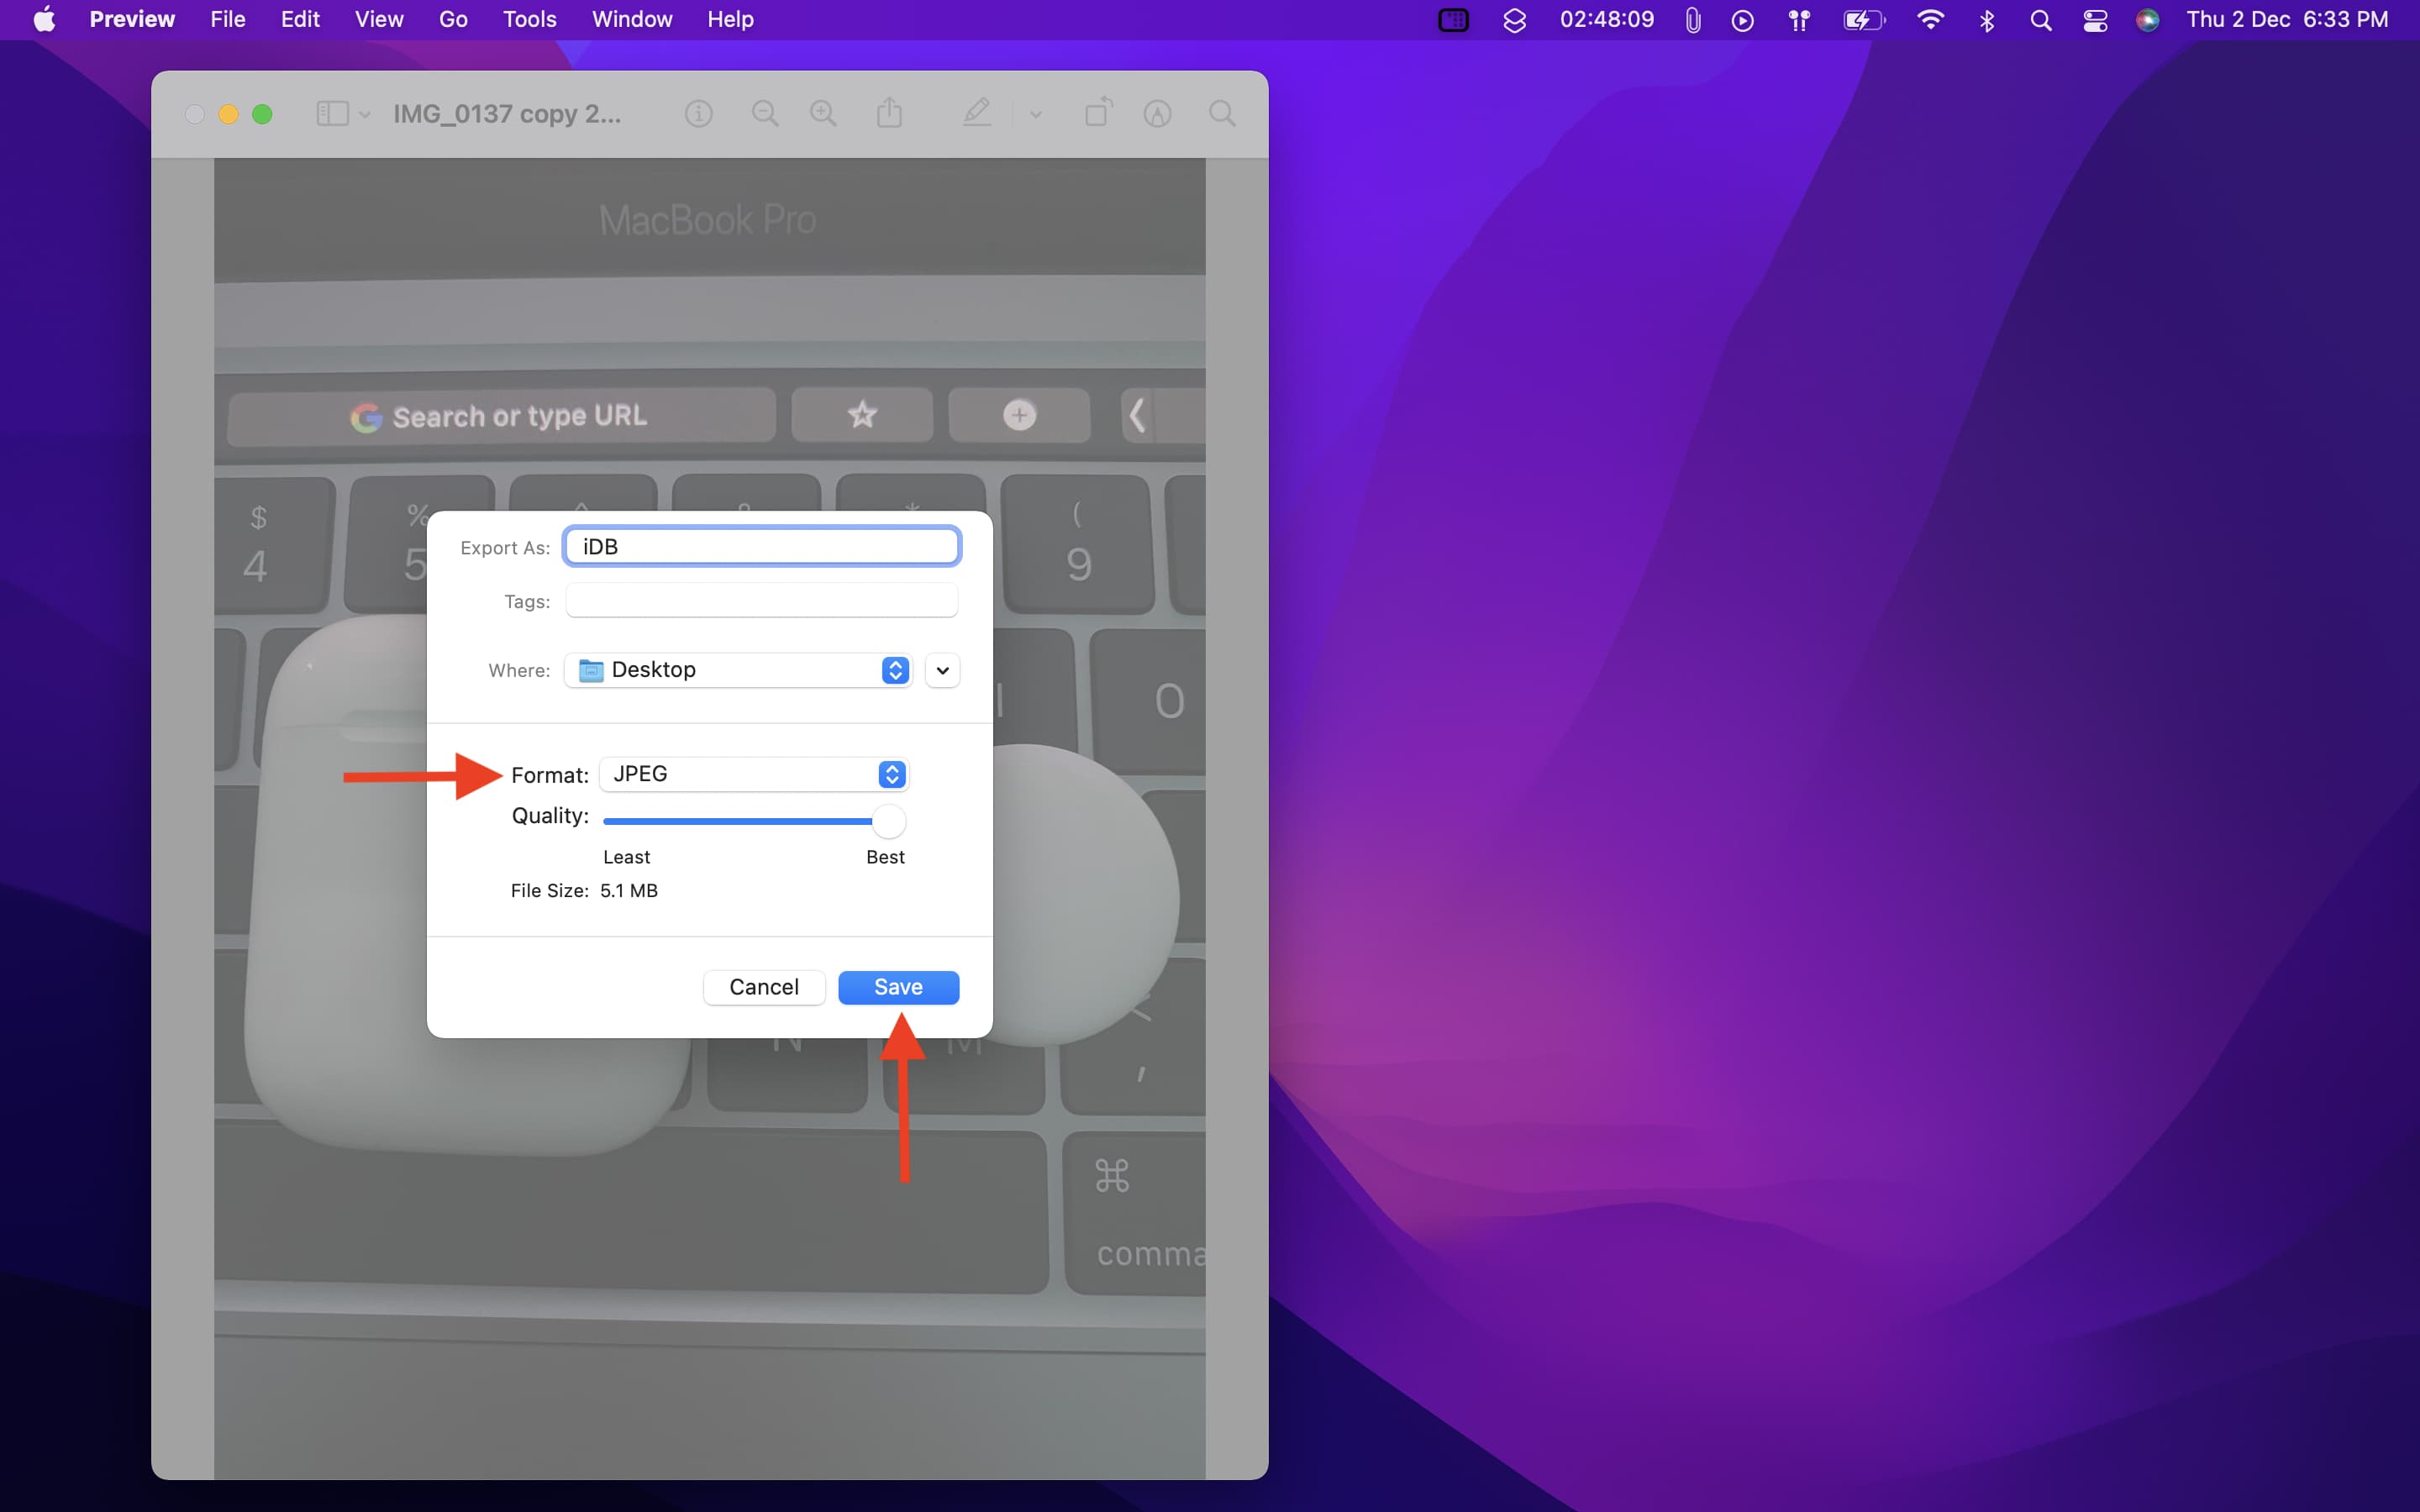
3) Click the dropdown menu next to “Format” and choose JPEG, PNG, TIFF, etc.
4) Optionally, you can set the quality, file name, and choose the location to save the file.
5) Finally, click Save.
To check, select the image and press Command + I. It will say JPEG image in the Kind section.
If you are on macOS Sierra or earlier, the Mac’s Preview app may not open the HEIC image. In this case, and if you’re on a Windows PC, you can use third-party apps like iMazing or websites like HEIC to JPG.
Method 3: Use the Photos app
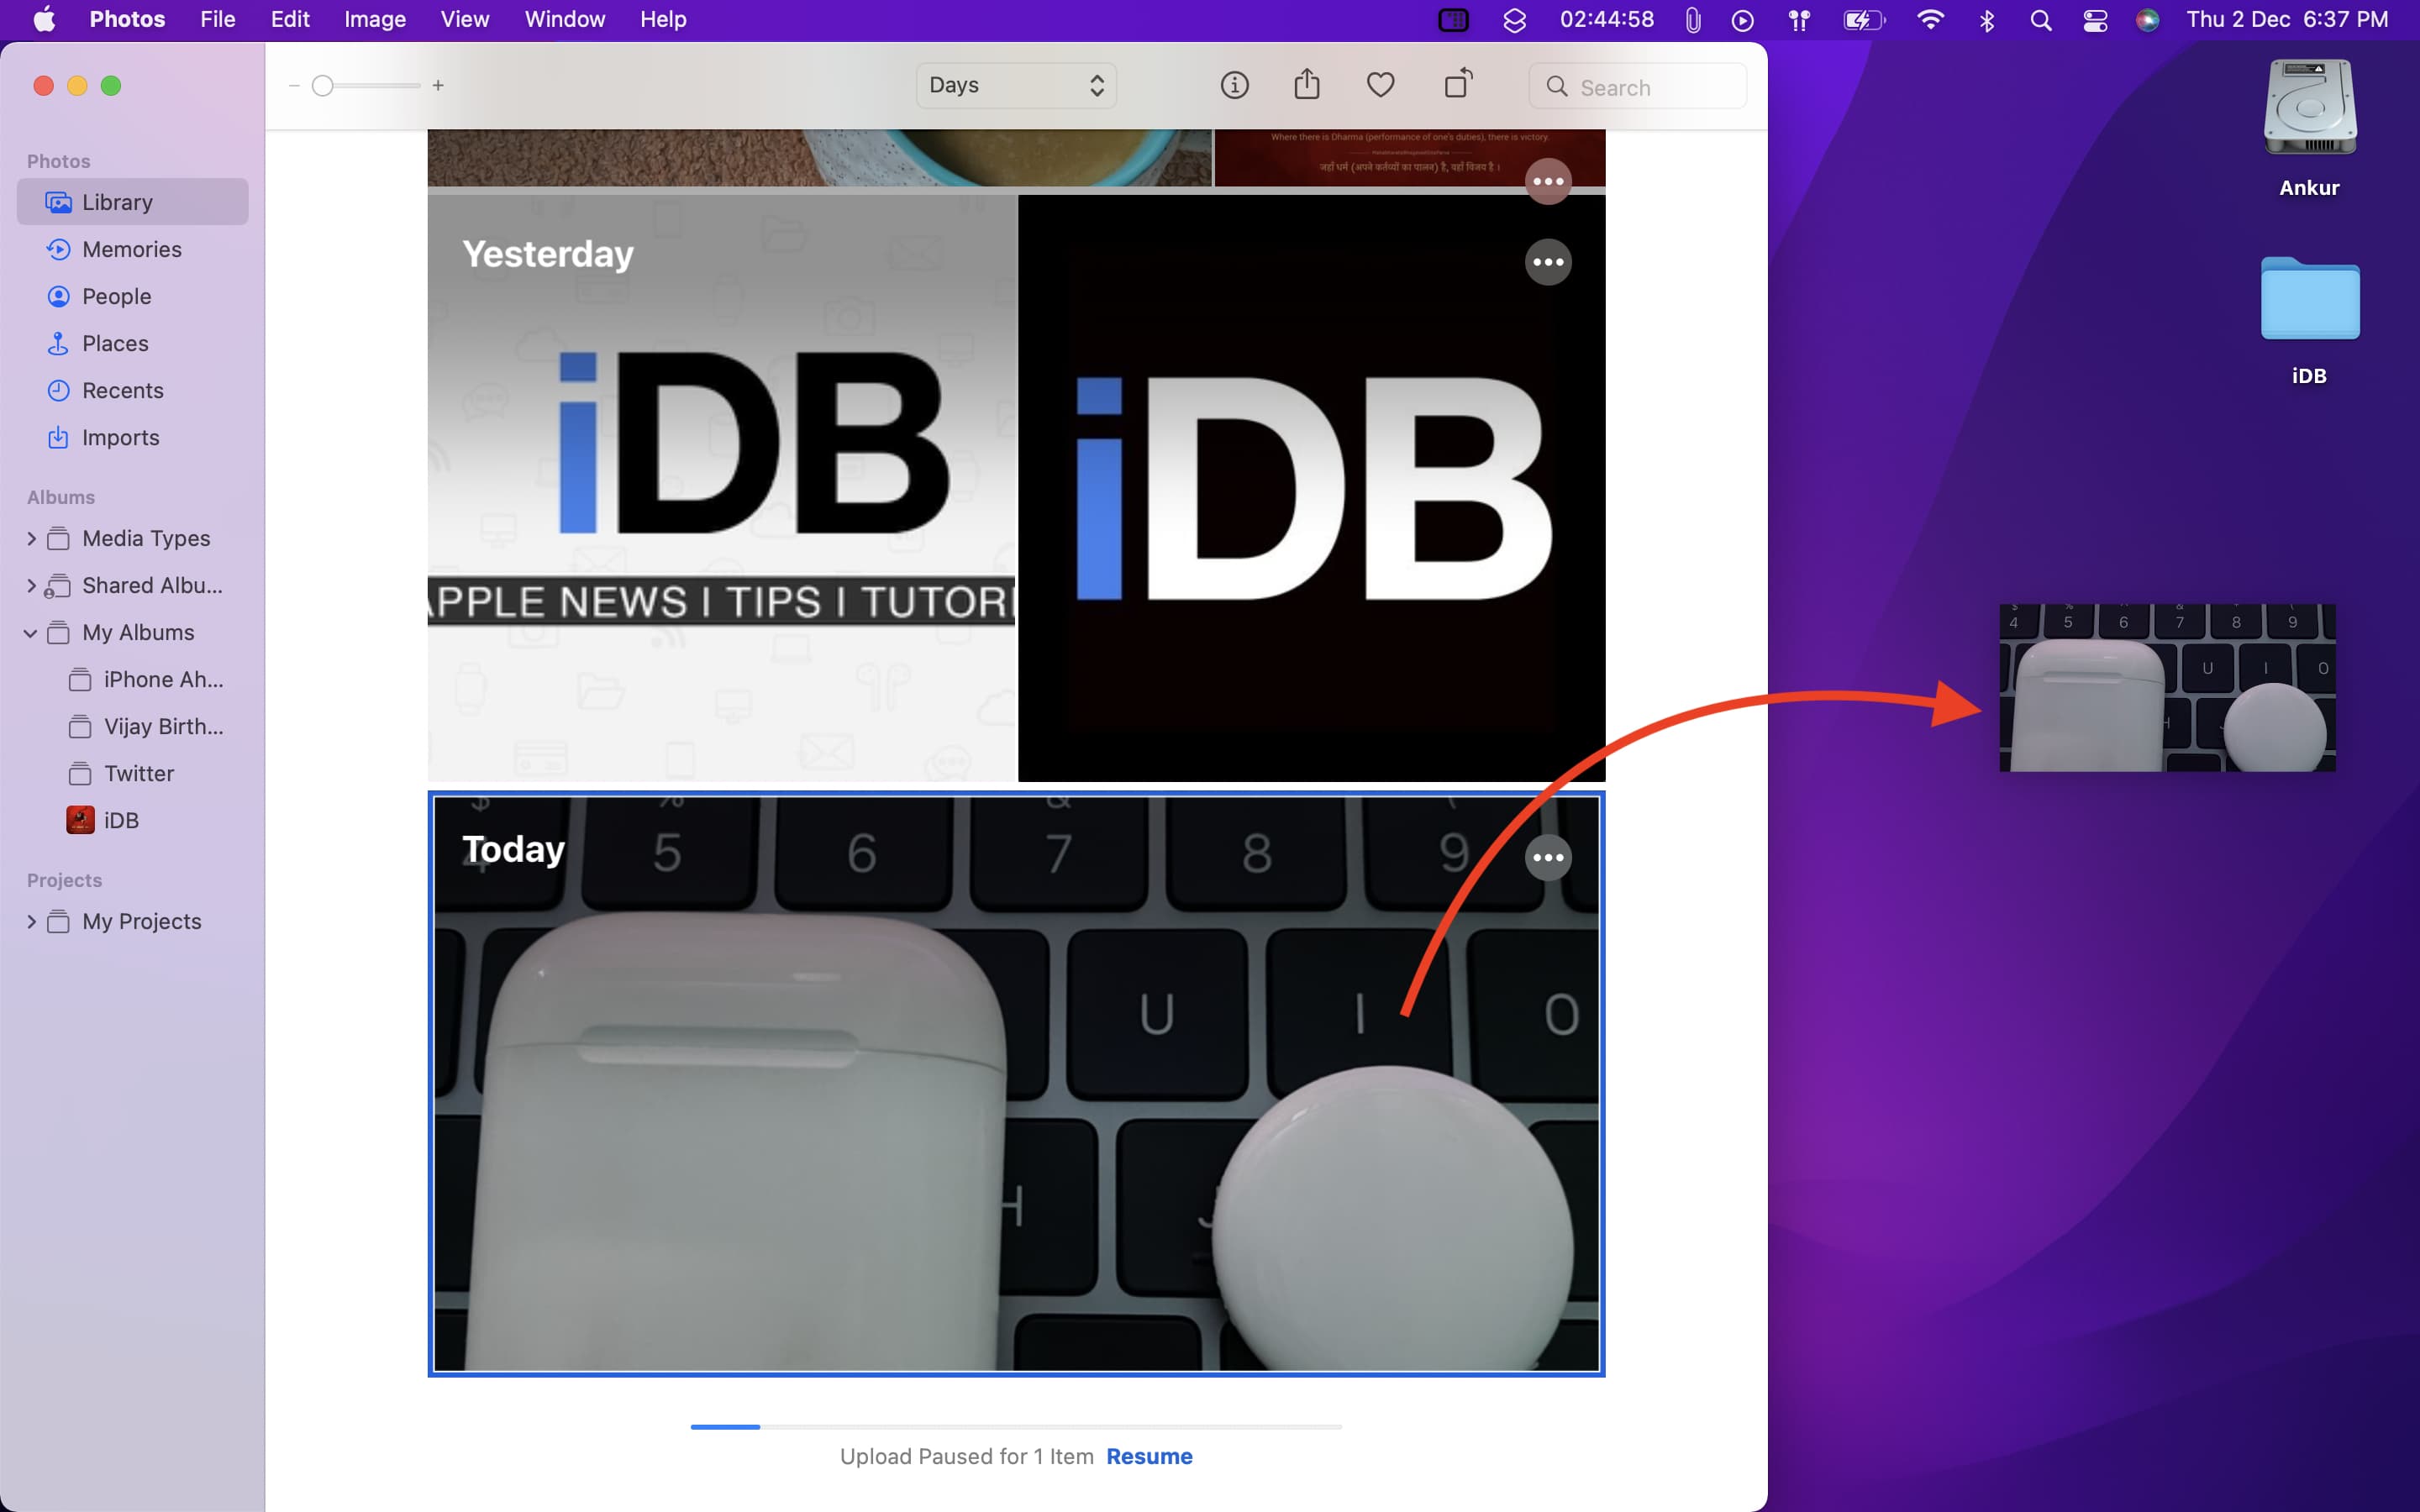
1) Add the image to your Mac’s Photos app by dragging them to the Photos app window or by selecting the HEIC images > right-click > Open With > Other > Photos app > Open.
2) Now, locate the image in the Library section of the Photos app.
3) Resize the Photos app window so you can see Mac’s desktop or one of the Finder folders.
4) Drag the HEIC image from the Photos app onto the desktop or Finder folder, and it will automatically convert to JPEG.
On a related note: