Check out these solutions if you cannot connect to the internet or browse the web on your Mac using Wi-Fi or Ethernet.
When Wi-Fi or Ethernet is not working on your Mac, you are cut off from accessing the web. This affects everything from using essential work apps like Slack to browsing social media, enjoying YouTube, or shopping online.
This guide will walk you through some troubleshooting steps to take if your MacBook is not connecting to Wi-Fi, or seems to be connected to Wi-Fi but there’s no internet, or if you are facing other similar network connectivity issues.
1. Figure out where the problem lies
Imagine your Mac is connected to your home or office Wi-Fi, but the internet isn’t working. Before moving to the fixes, it is essential to know whether the issue is with the particular network or your computer.
To check this, connect another device, like your phone, to the same Wi-Fi and try visiting a website.
If you cannot use the internet even on other devices, the problem is with the network and not your Mac. In this case, contact your internet service provider and ask for a fix. See if their service is temporarily down or if you have a pending bill or if you have blown past the data cap. Restarting the router will also help.
In case you can access the internet on other devices, that means the problem lies on your Mac and not the network. Please continue reading to fix this issue.
2. make sure you are connected to the right network
When you are in a place with multiple known or free open Wi-Fi networks, your Mac may connect to such a network that has no internet access or offers extremely poor speed.
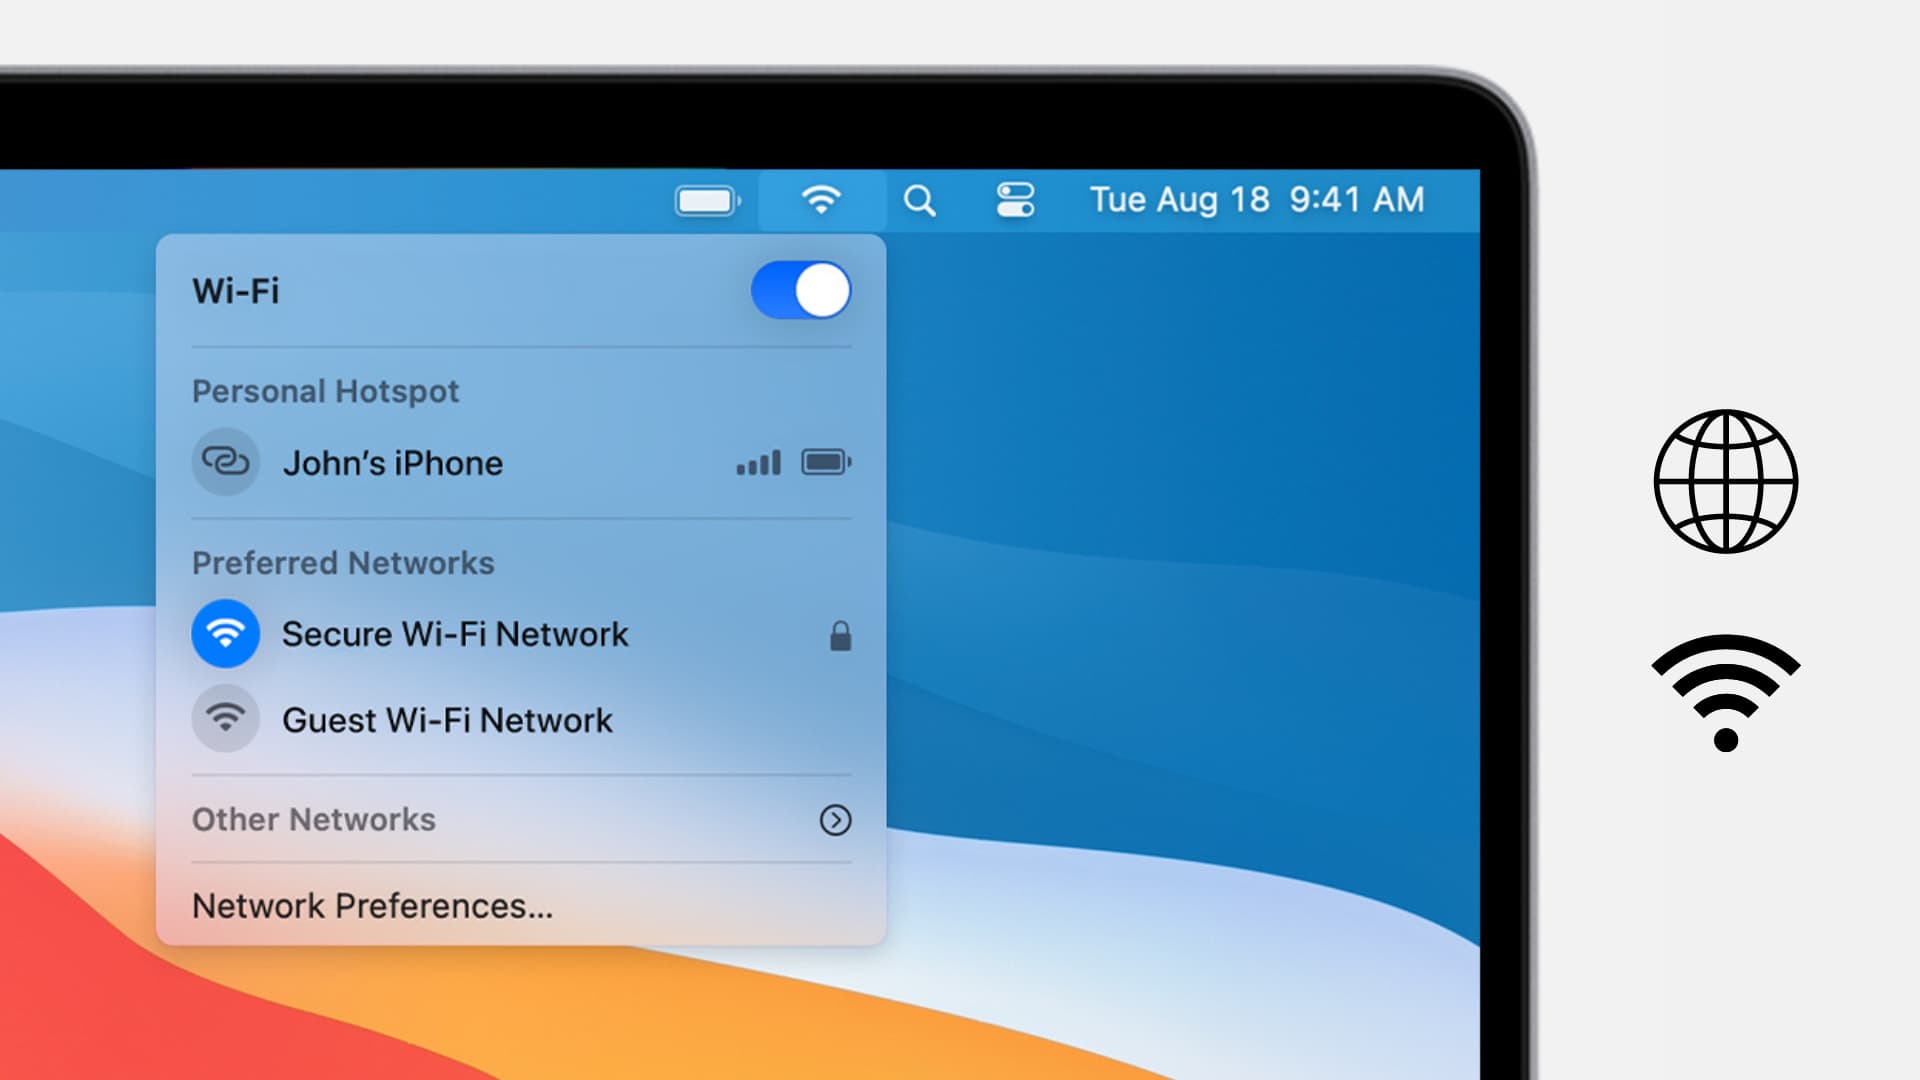
To check this, click the Wi-Fi icon from the top menu bar and see if the Mac is connected to the right network or not.
Do you see an exclamation mark next to a Wi-Fi name? If so, that means the network currently has no internet. In this situation, your Mac will stay connected to this Wi-Fi, but you cannot access the web. To fix this, switch to another Wi-Fi and follow the other solutions mentioned below.
3. Disconnect Wi-Fi and connect again
While pressing the Option key, click the Wi-Fi icon from the top menu bar. Now click Disconnect from [network name]. You may stop pressing the Option key now. After a few seconds, reconnect to the same or other known Wi-Fi network.
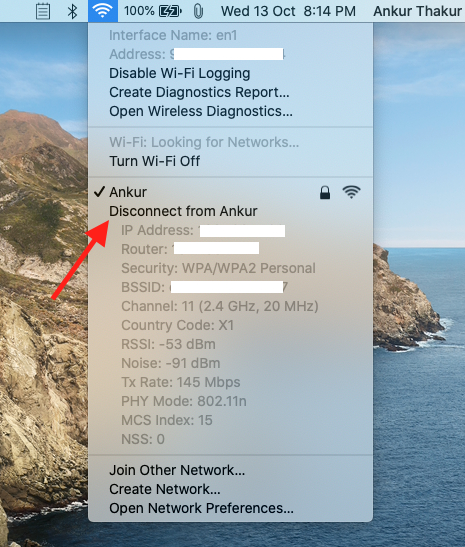
In newer versions of macOS, simply click the connected Wi-Fi network name to disconnect from it.
4. Turn Wi-Fi off and back on
Turn off Wi-Fi from the menu bar, Control Center, or System Settings. Wait for 15 seconds and turn it back on. Once your Mac connects to the correct network, everything should work as expected.
5. Restart your Mac
Usually, this is a quick and reliable solution to fix such issues. Start by saving your ongoing work. After that, click the Apple icon from the top left and choose Restart. Once the Mac turns on, the Wi-Fi issues should be fixed.
6. Check the Wi-Fi router and cables
One of the handy fixes is to turn off your Wi-Fi router using its main power switch and turn it back on after a few seconds.
Secondly, make sure the primary cable coming from your ISP is attached perfectly to the router.
If you are using Ethernet, ensure it’s connected snugly to your Mac’s Ethernet port, the USB-C dongle, or iMac’s power adapter.
7. Set correct date and time on Mac
Internet, FaceTime, and some other things may not work if your computer’s date and time are not correct.
You can fix this by letting Mac set it automatically. To do this, go to System Settings > General > Date & Time. Now, turn on the switch for Set time and date automatically and Set time zone automatically using your current location. While you are here, make sure your correct Time Zone is displayed.

If you’re on an older version of macOS, go to System Preferences > Date & Time to make these changes. If the options here are grayed out, click the lock icon and enter your Mac’s password.

8. Check Wi-Fi, Ethernet, or iPhone USB connections status
Is your MacBook connected to Wi-Fi, but there is no internet connectivity? In this situation, follow these steps to check the connection status.
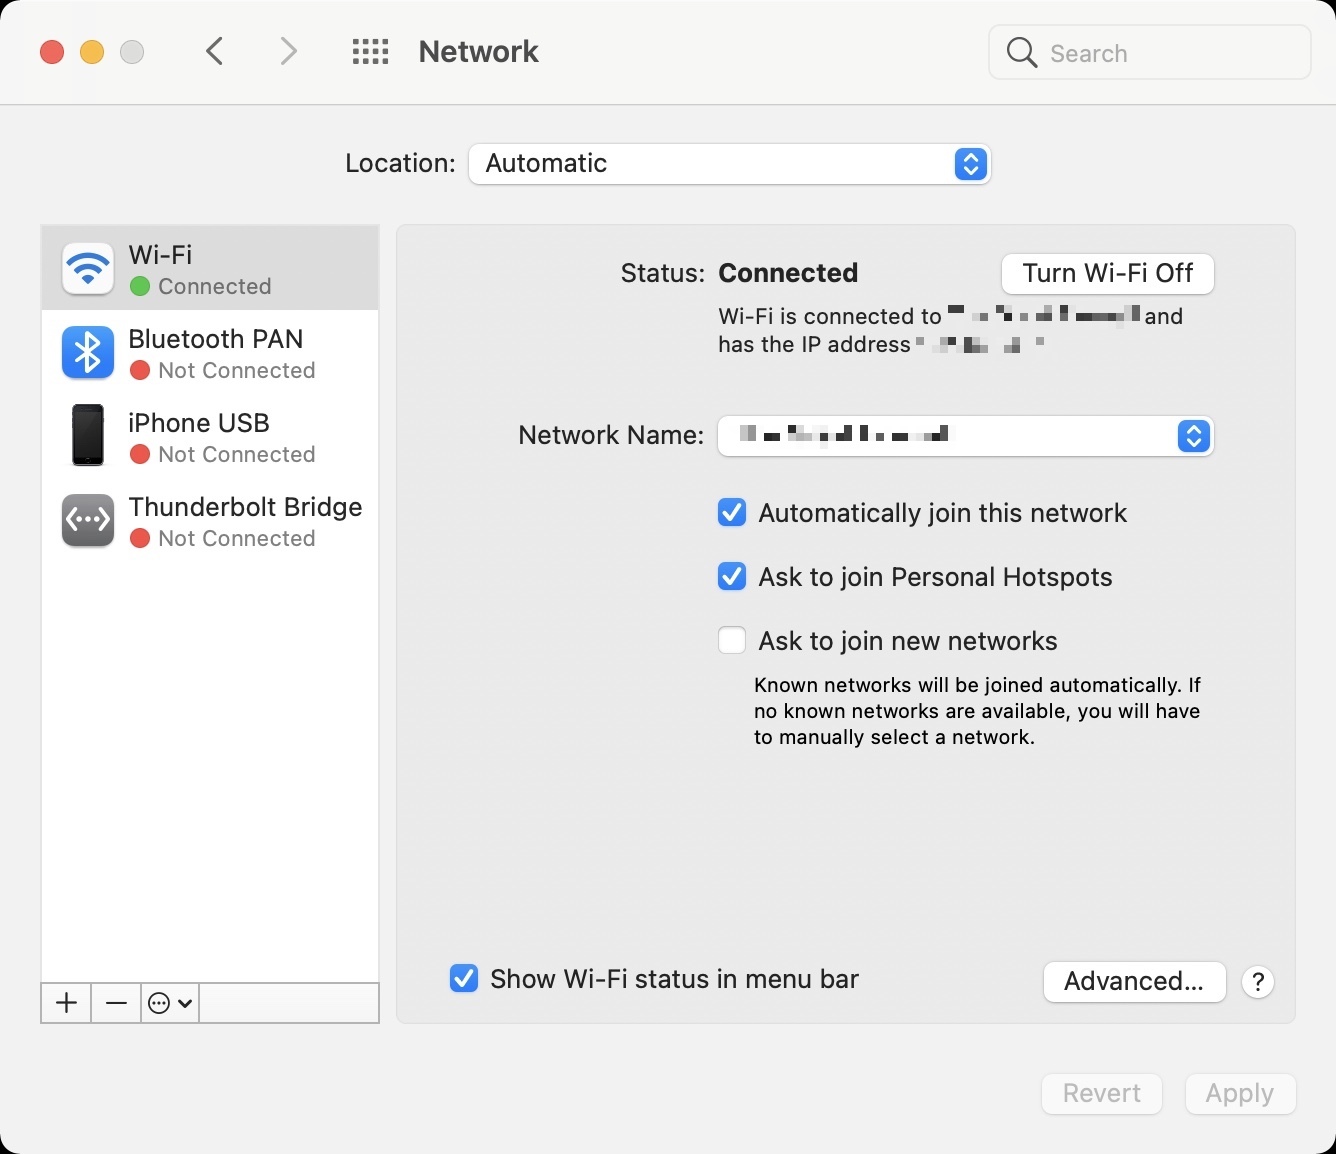
- Open System Settings and select Network.
- If you see a green dot and the word “Connected” for a network, that means things should work fine.
- If it shows a yellow dot, that means this network is available, but Mac is not using this network currently. When the green connected network becomes unavailable, your Mac should automatically start using this yellow one. You can also turn off or disable the other connected networks, and your Mac will start using the yellow network.
- If a network shows a red dot, that means it is not connected or set up. To fix this, make sure the wires are attached or the Wi-Fi router is on.

In case you are on an older version of macOS, go to System Preferences > Network to access and adjust the above changes.
9. Remove duplicate network entries
In the screenshot below, we have two Wi-Fi networks – Wi-Fi and Wi-Fi 2. When the internet is not working on your Mac, it does not connect to a network, or is connected but has no internet access, consider removing the other entries of the same network. In my case, I will remove Wi-Fi 2.
- Go to System Settings > Network and select the other network kind.
- Click the Delete Service button.
If you’re on an older version of macOS:
- Go to System Preferences > Network, and select the other network.
- Click the minus (-) icon and hit Apply.

Note: To add a new network, click the plus (+) icon.
10. Set Service Order in Mac’s Network Settings
If you often have multiple types of connections like Ethernet, Wi-Fi, iPhone hotspot, etc., you can rearrange the order of networks. Your Mac will prefer and use the one on the top.
For instance, if you are in your office with Ethernet and Wi-Fi, you may set Ethernet on top. This will ensure you get faster speeds (as usually wired connections are faster than wireless ones).
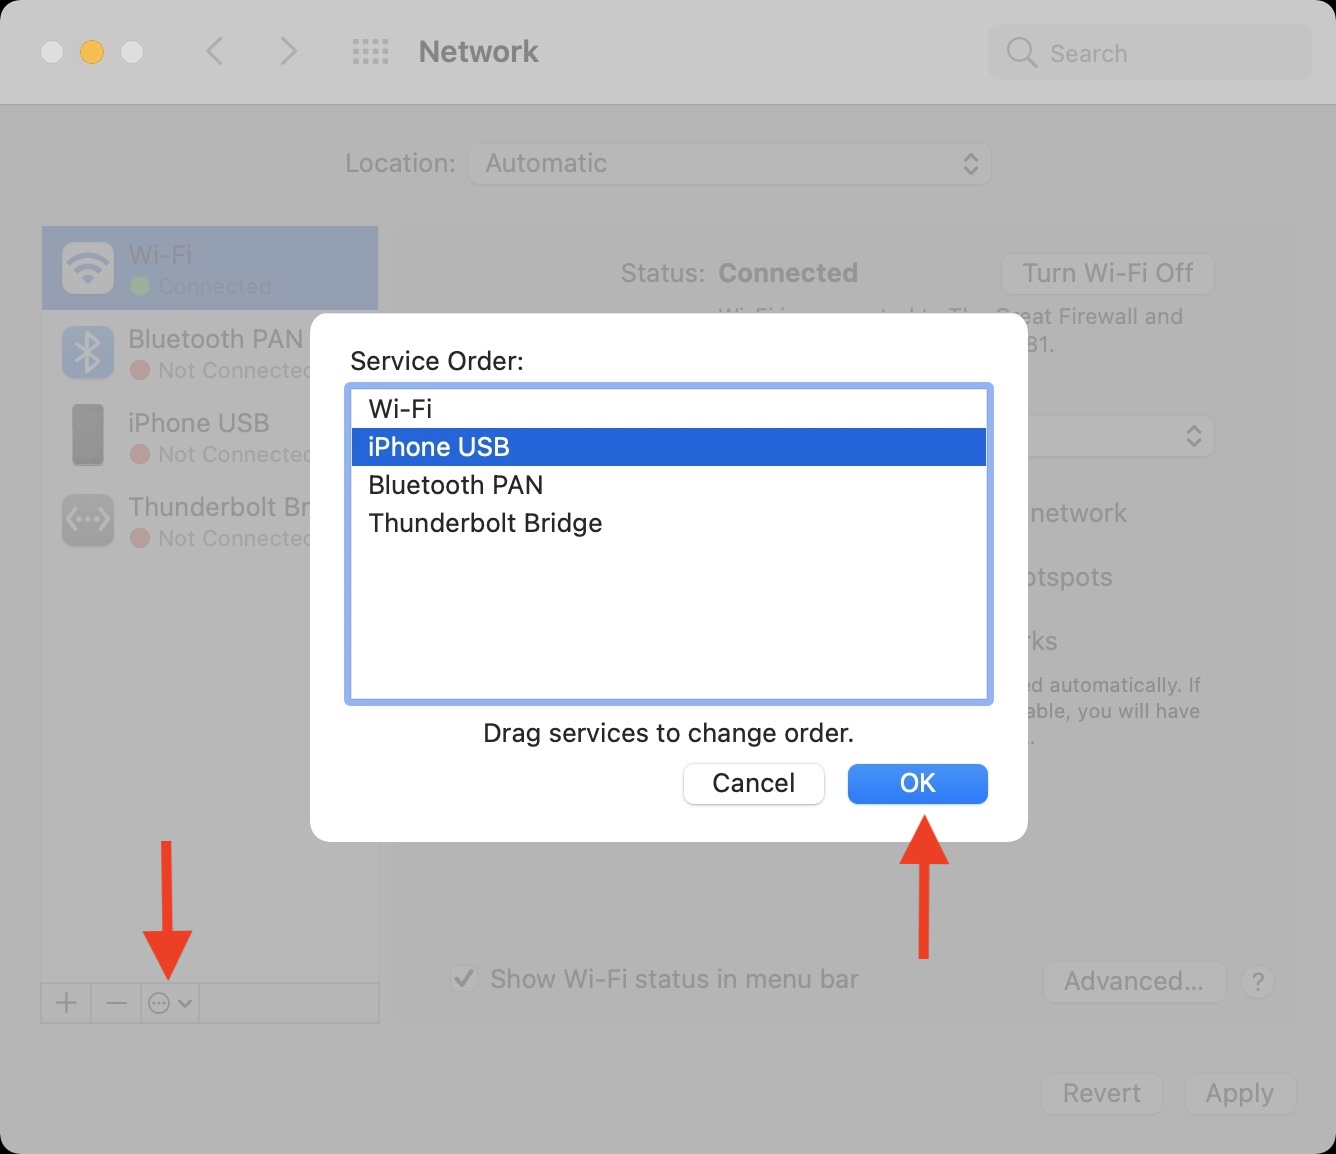
- Open System Settings and select Network.
- Click the three dots button at the bottom and select Set Service Order.
- Drag the desired network on the top and click Ok.

On older versions of macOS:
- Go to Mac’s System Preferences > Network.
- Click the three dots icon (or settings icon) from the bottom left and choose Set Service Order.
- Drag the desired network type on the top and click Ok.
- Finally, click Apply.
11. Forget Wi-Fi and reconnect
Before you follow these steps, make sure you have the Wi-Fi password for this network.
- Open System Settings and select Wi-Fi.
- Click the Details or three dots button for a network and click Forget This Network.
- Restart your Mac and then reconnect to this network.

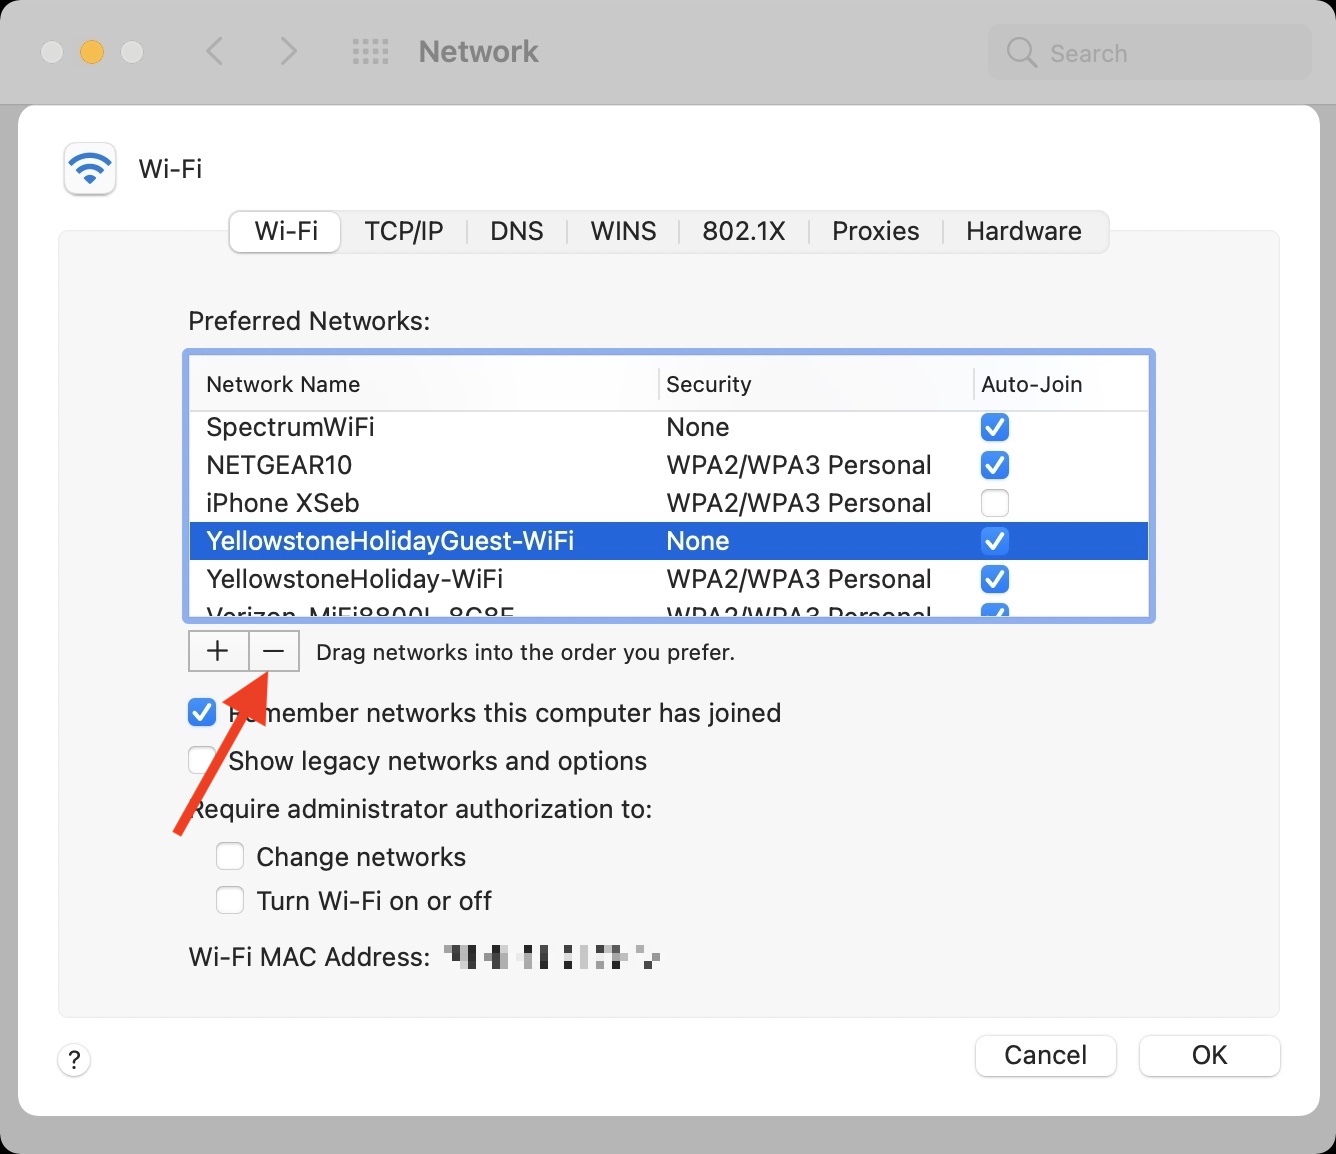
If your Mac is on an older version of macOS, follow these steps instead:
- Open System Preferences and select Network.
- Select Wi-Fi from the left sidebar and click Advanced.
- From the Wi-Fi tab, select the network. Now, click the minus icon > Remove > Ok > Apply.
- Restart your Mac.
- Click the Wi-Fi icon in the top menu bar, choose the Wi-Fi network and enter its password to reconnect. Everything should work correctly now.
12. Change your Mac’s DNS
If you have difficulty visiting specific websites, changing Mac’s DNS can fix this issue. When Slack was down; changing the DNS helped access it. You can also refer to these easy steps to use the free Google DNS on your Mac.
13. Renew the DHCP Lease
If your MacBook connects to Wi-Fi but does not load webpages, renewing the DHCP Lease can solve this issue.
- Open System Settings, select Wi-Fi and click the Details button for the connected network.
- Go to the TCP/IP section.
- Hit the Renew DHCP Lease button.

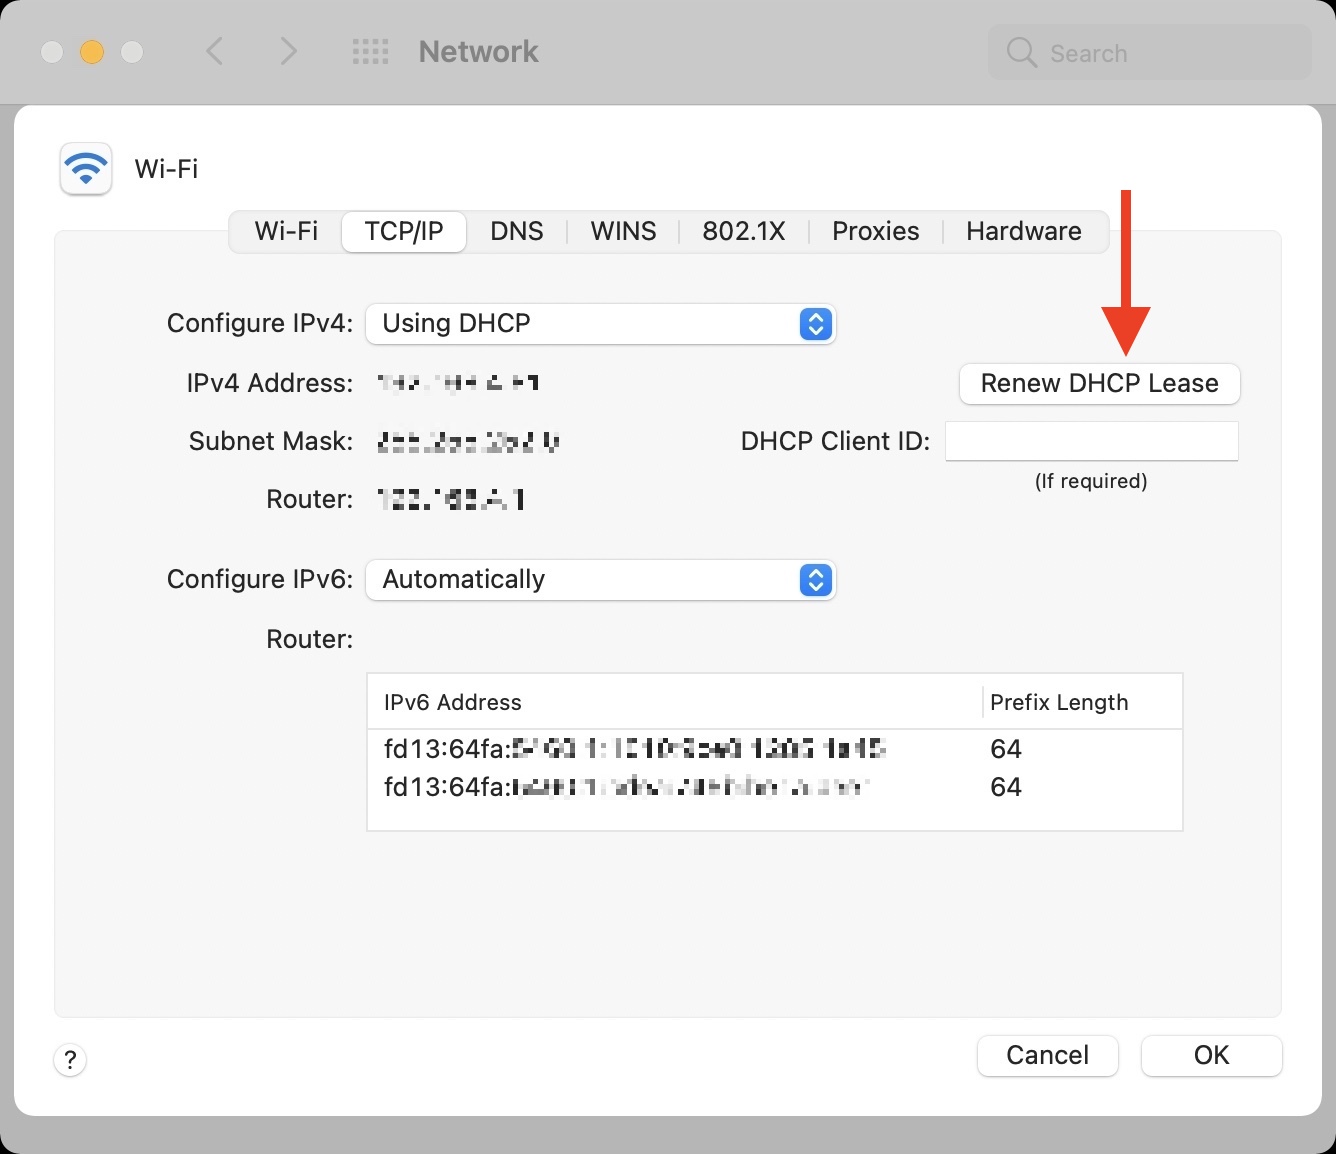
The process is slightly different on older versions of macOS:
- Go to System Preferences > Network.
- Select Wi-Fi from the left sidebar and click Advanced.
- Click TCP/IP.
- Click Renew DHCP Lease > Ok.
14. Run Wireless Diagnostics on your Mac
Wireless Diagnostics tool cannot fix the problem, but it can analyze your Wi-Fi and show you a list of issues, information, and solutions to correct it.
- Quit all apps. To do this, right-click on an open app icon in the Dock and choose Quit.
- Press and hold the Option key and click the Wi-Fi icon from the top menu bar.
- Click Open Wireless Diagnostics and follow the instructions.
15. Reset your Mac’s network preferences
When the above solutions do not work for you, consider resetting all network connections by following these steps.
- Open Finder and click Go > Computer from the top menu bar.
- Click your drive name (or Macintosh HD if you do not see your name) > Library > Preferences > SystemConfiguration.
- From here, delete the network plist files. Note: You may not see all of these here. Delete the ones you see.
- com.apple.airport.preferences.plist
- com.apple.wifi.message-tracer.plist
- NetworkInterfaces.plist
- preferences.plist
- com.apple.network.identification.plist
- Restart your Mac and connect to Wi-Fi. Your computer should let you access the web now.

16. Other helpful solutions to fix Wi-Fi problems
- Turn off Mac’s Bluetooth and see if this helps.
- Go to System Settings > General > Sharing and make sure Internet Sharing is disabled.
- Update your Mac by going to System Settings > General > Software Update.
- Remove connected accessories like external dongles, wireless mouse and keyboard, and such. See if this helps fix the Wi-Fi problems.
- Run Apple Diagnostics to identify if there are serious issues related to Wi-Fi hardware.
- Start your Mac in Safe Mode and check if you can access the internet now or not.
- If you have an Intel-based Mac, reset NVRAM and the SMC. If you have a new Mac with Apple Silicon, these do not apply to you.
On a related note: What to do when your iPhone or iPad can’t connect to Wi-Fi