Learn how to print specific events or events in a certain timeframe from the Calendar app on your Mac so you can have your schedule in hand on a physical piece of paper.

You can use the Calendar app for more than business meetings or doctor’s appointments. You might use it to set up a vacation itinerary, class schedule, or conference agenda.
What’s nice about the print options for Calendar on Mac is the flexibility. You can print a certain view or a list, choose which even types to include, and select the timeframe. For example, if you only want to print selected events for a time period, you can do just that. Or you can print all events displayed within a day, week, month, or list. The choice is yours!
Print specific Calendar events from your Mac
1) Open the Calendar app and select multiple events by holding your Command key as you click each one. Going to the Month tab makes it easier to see and select many events.
2) Click File > Print from the menu bar.
3) Click the View drop-down box and choose Selected Events.
4) Optionally select a Paper size.
5) Check the Options you want to display. These include showing a Mini Calendar and Calendar Keys along with printing in Black and White.
6) Pick the Text size from small, medium, or big.
7) Click Continue.
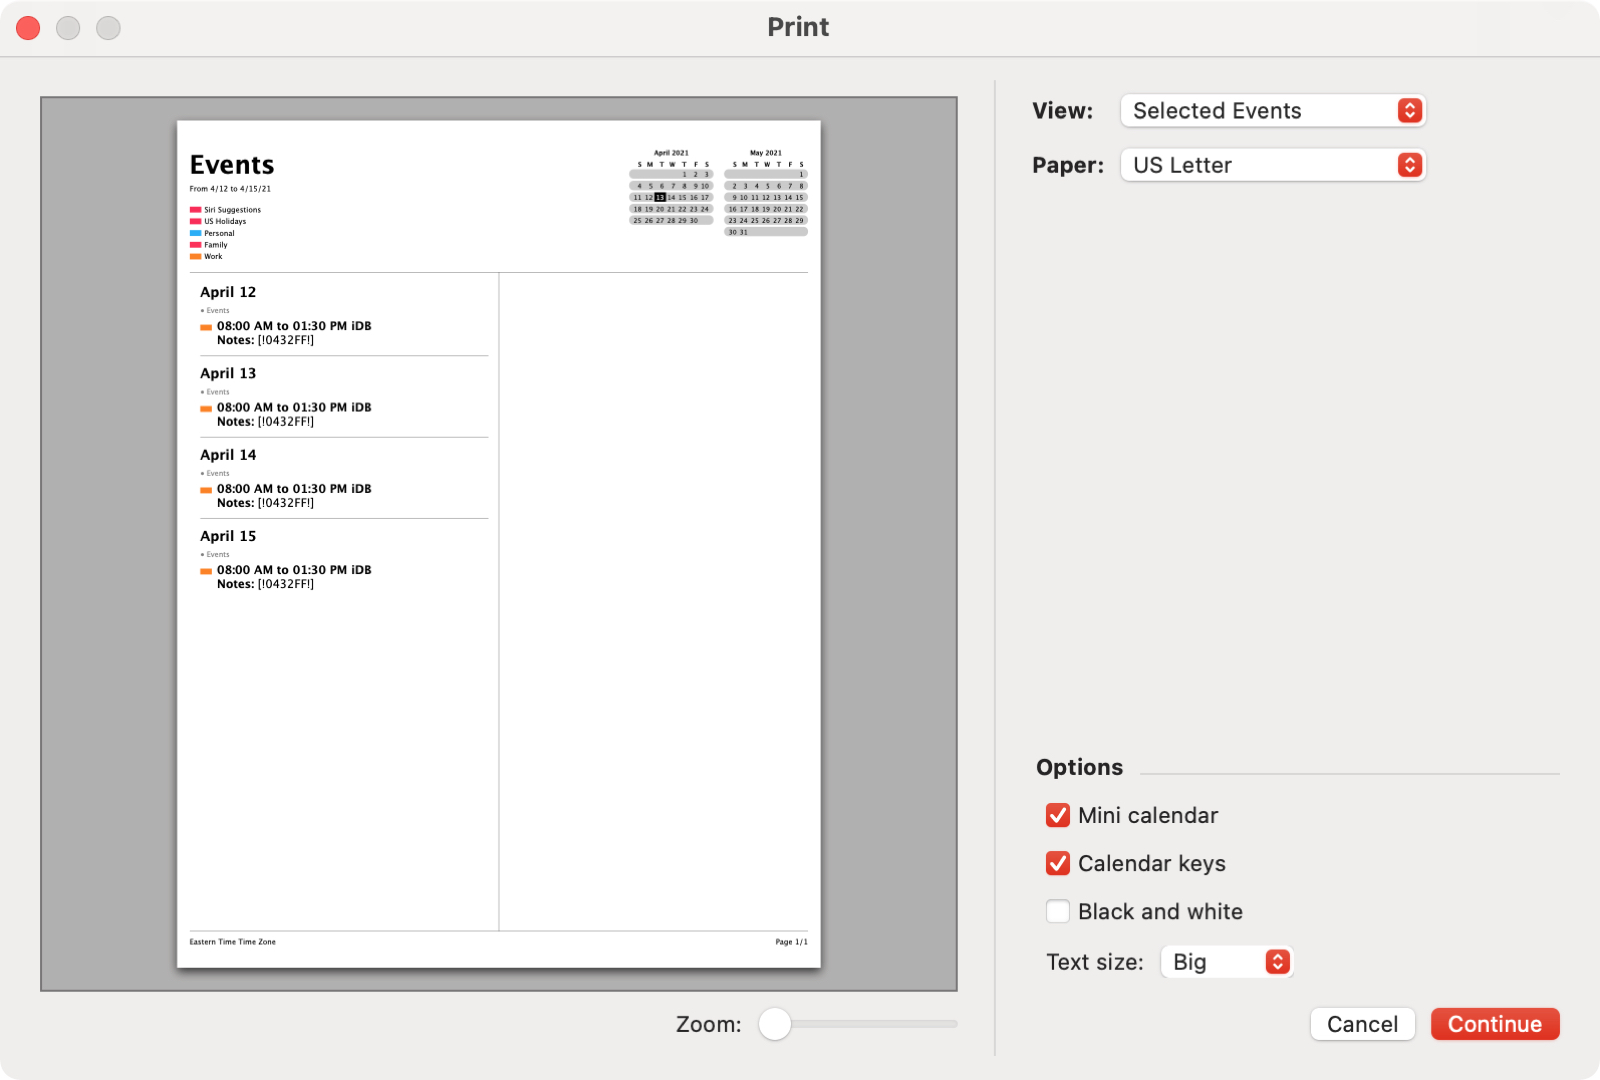
8) You’ll then be on the printer options screen, where you can choose your printer, number of copies, and pages to print. Make your adjustments and hit Print when you’re ready.
Print Calendar events in a time range
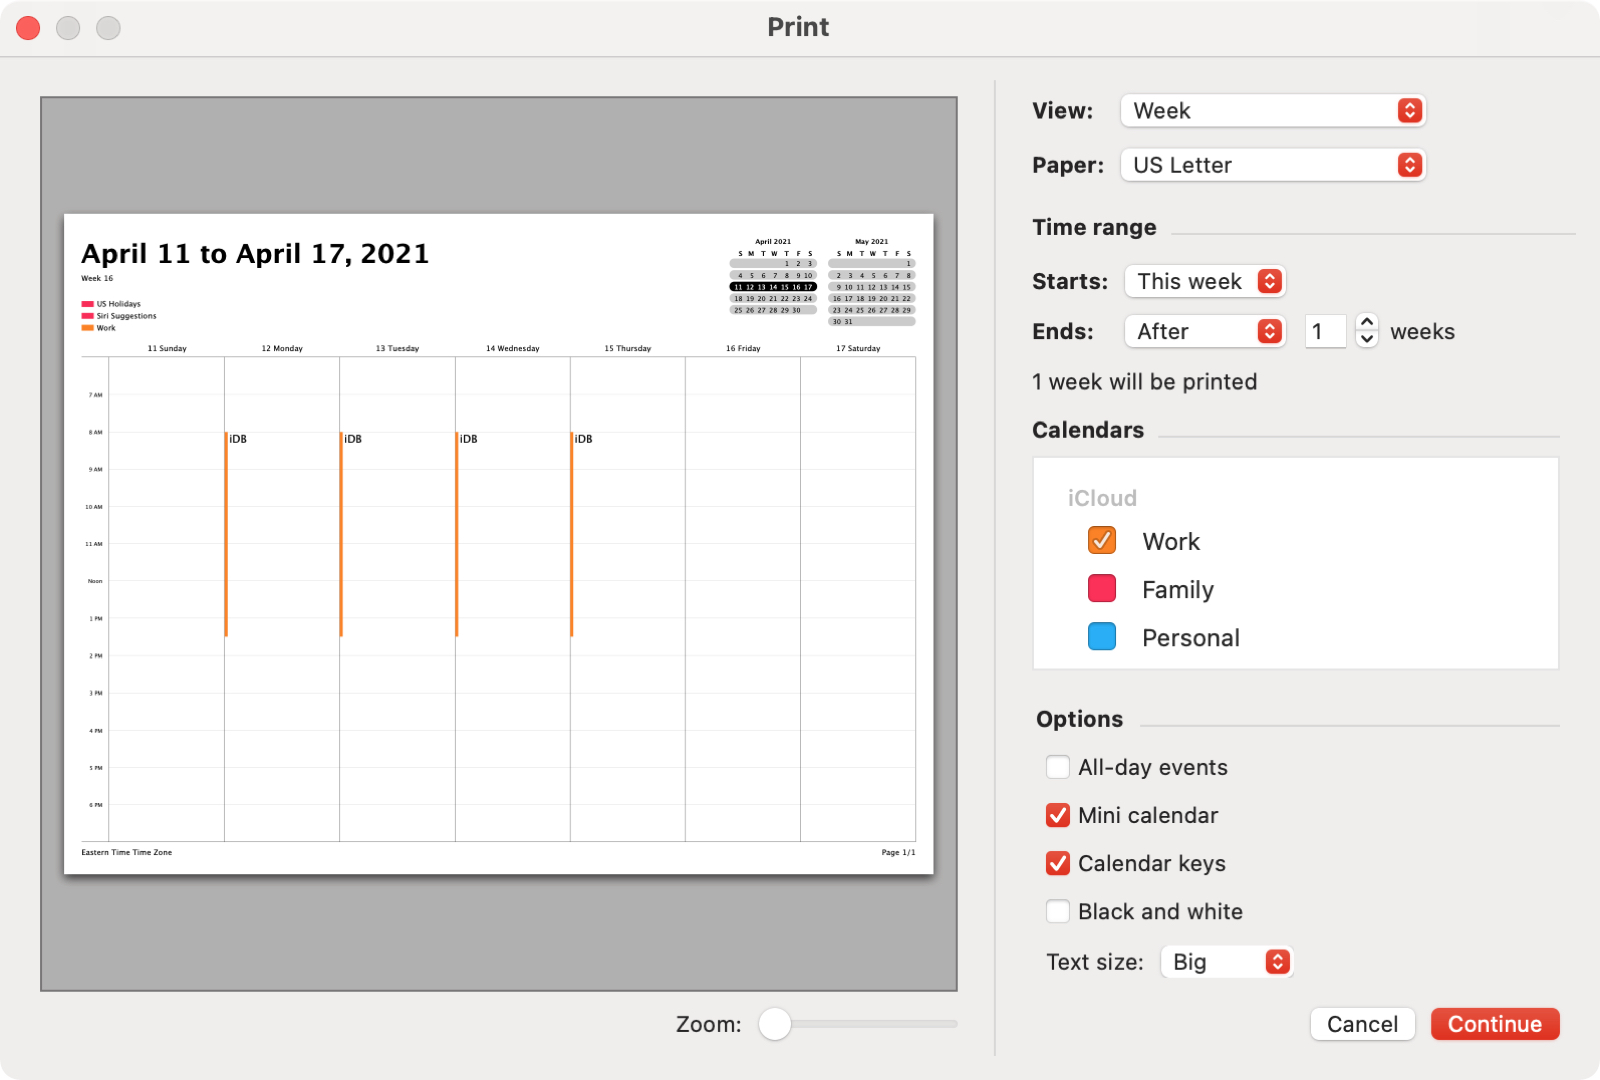
To print all events in a timeframe, you can set everything up in the print area without selecting anything in Calendar first. Go directly to click File > Print in the menu bar.
1) Click the View drop-down box and choose Day, Week, Month, or List. Depending on the timeframe you choose, the Time Range and Options beneath will adjust.
2) Optionally select a Paper size.
3) Use the Time Range section to pick the timing for what you want to print using the Starts and Ends settings. This gives you a lot of flexibility to print exactly what you need corresponding to the View you select in Step 1.
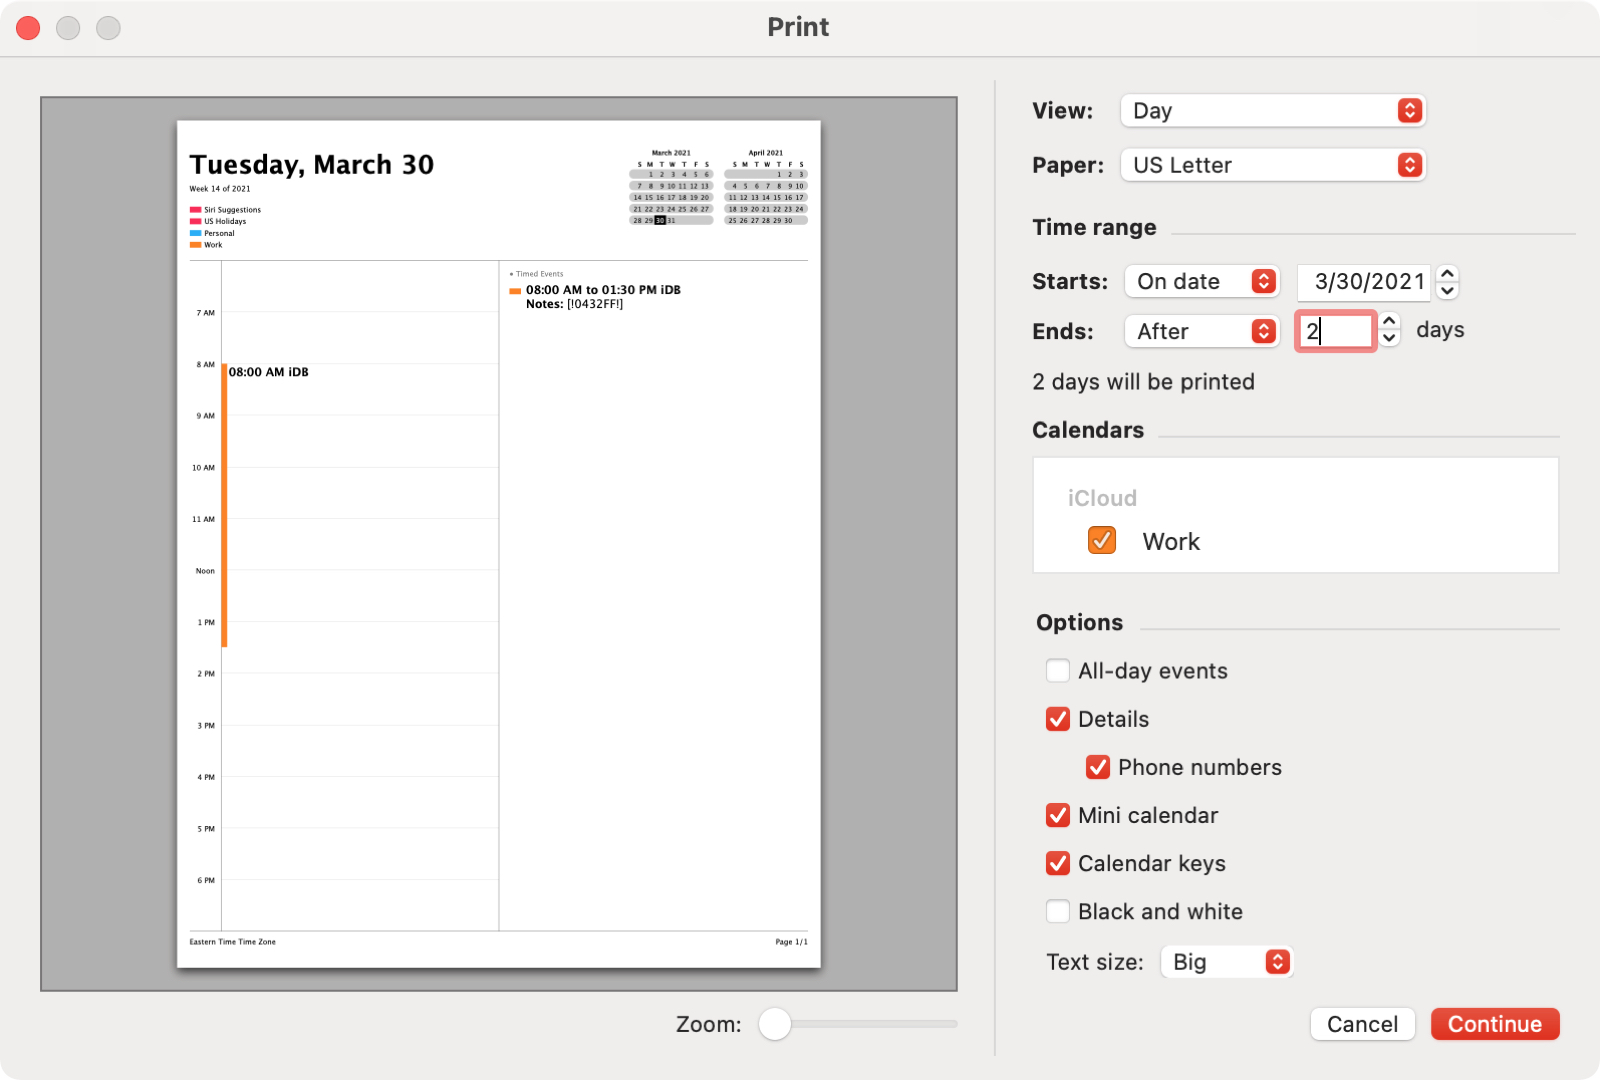
4) Choose the Calendars for the events you want to print.
5) Check the boxes for the Options you want to display. These vary depending on your View, too. For instance, if you print a Day view, you can include details like phone numbers. If you print a Week or Month view, you can choose to see all-day events.
6) Each View lets you choose the Text size for your printed material.
7) Click Continue and then select your printer options.
If you want a physical copy of your agenda for yourself, need to leave your schedule with the babysitter, or prefer your class schedule in hand as you walk through campus, the Calendar on Mac gives you the print options you need to make it happen. Are you going to take advantage of it?
More on Calendar: