Learn how to adjust Auto FPS settings for your iPhone or iPad camera, and improve video quality when shooting in low-light conditions.

You can record normal videos on your iPhone or iPad at 24, 30, or 60 frames per second (fps). However, increasing the recording frame rate often leads to lower image quality when shooting in low-light environments, especially indoors. But this can be somewhat circumvented by turning on the Auto FPS settings.
With Auto FPS enabled your iPhone or iPad camera can smartly reduce the frame rate to 24 fps (even when you have set it to record at 30 fps or 60 fps), thus improving the video quality. Lowering the frames per second ensures that each frame can receive more light, thus making the video brighter and visually more pleasing.
Use Auto FPS to improve video quality in low-light
- Open the Settings app on your iPhone or iPad.
- Scroll down and tap Camera.
- Select Record Video.
- Tap Auto FPS and set it to Auto 30 fps to apply this to only 30-fps video, or select Auto 30 & 60 fps to apply it to both 30- and 60-fps video.

This’ll prompt your iPhone or iPad to automatically reduce the frame rate when it detects you’re shooting low-light video — from 30 fps or 60 fps down to 24 fps — so each frame receives more light. As a result, the video quality will improve. Moreover, the video file size will be lower than without the Auto FPS setting.
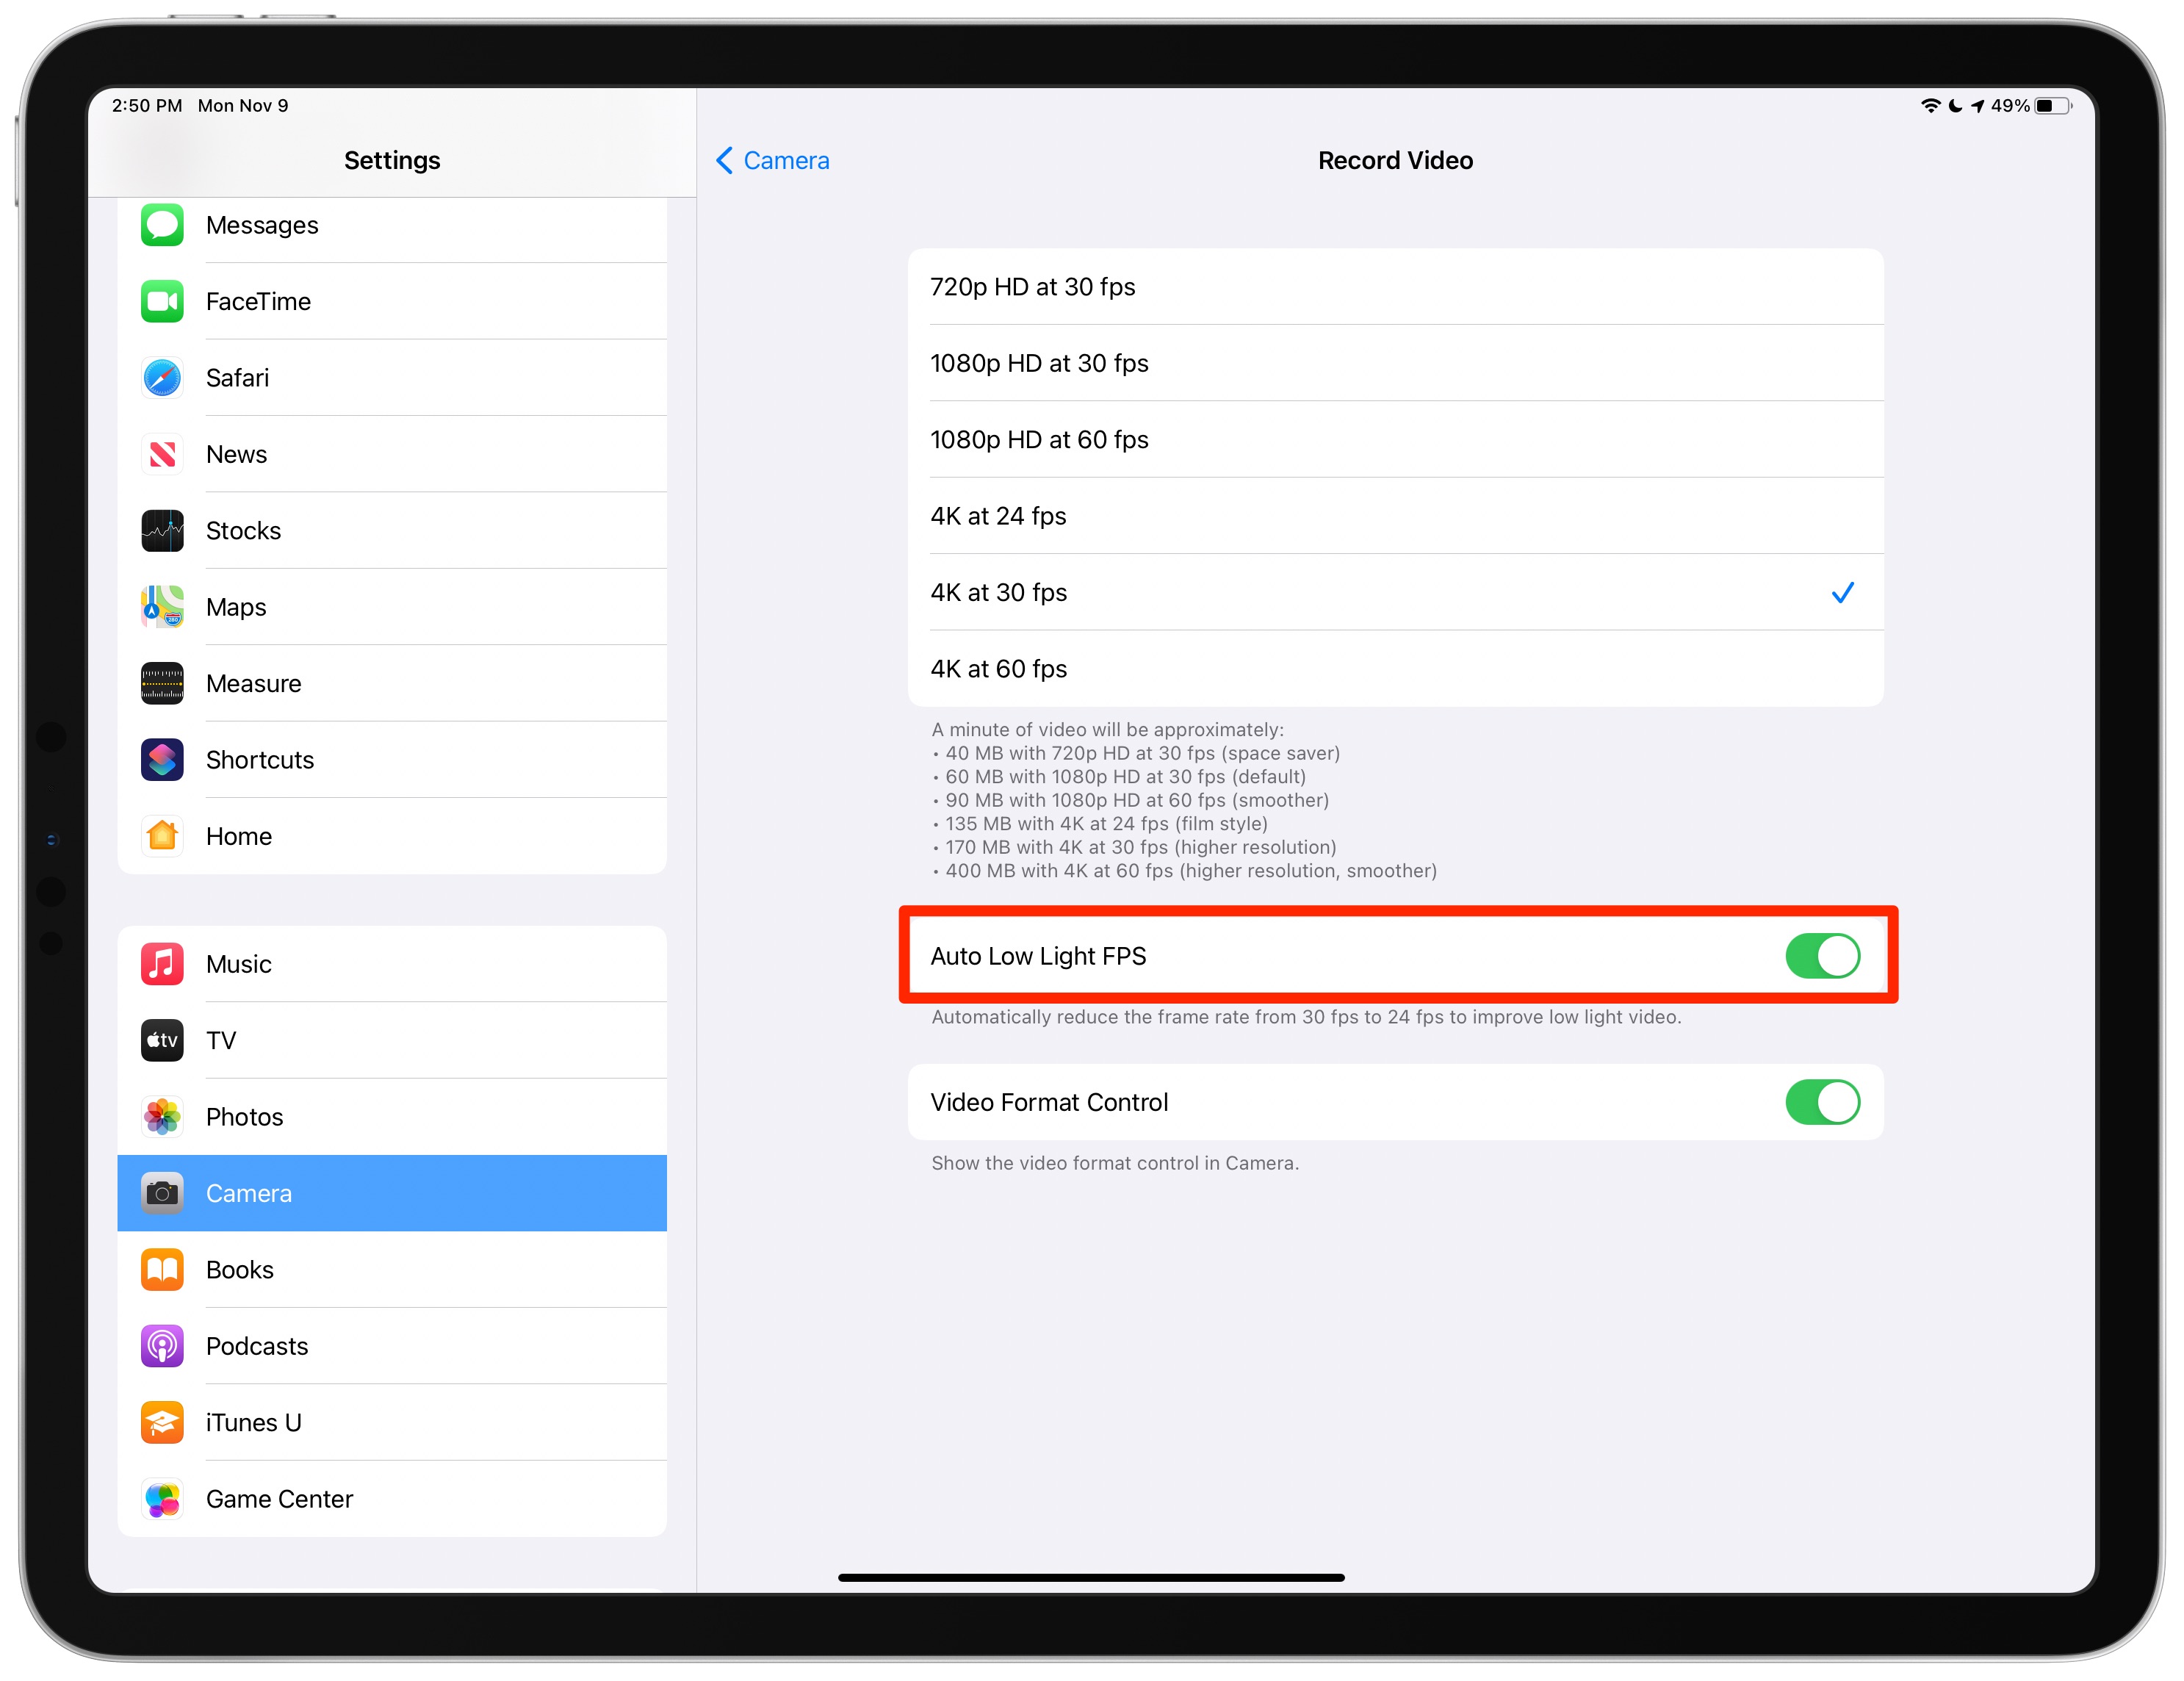
Note that you won’t see the Auto 30 fps or Auto 30 & 60 fps options on older models. In this case, turn on the Auto Low Light FPS toggle,
More camera tips: