Learn how to use groups in Finder to easily sort and manage files for a more streamlined and efficient experience.
Finder on Mac is your primary tool for accessing documents, applications, folders, and more. You can connect an iPhone, view iCloud Drive files, and browse other locations on your computer.
Quick and easy sorting is essential for efficiently using Finder. The toolbar offers options to view items as icons, lists, columns, or in gallery view. Another helpful way to sort in Finder is by using Groups, a lesser-known macOS feature that simplifies sorting and searching.
About Groups in Finder
Before we begin, note that Groups are not available in the Gallery view of Finder. While this might seem unusual, it makes sense when you see how grouping works. Ensure your Finder window is set to icon, list, or column view before proceeding.

When you use Groups in Finder, the folder you’re viewing will typically be sorted by the types of items within it by default. This is helpful for folders with various items like documents, images, videos, and subfolders.
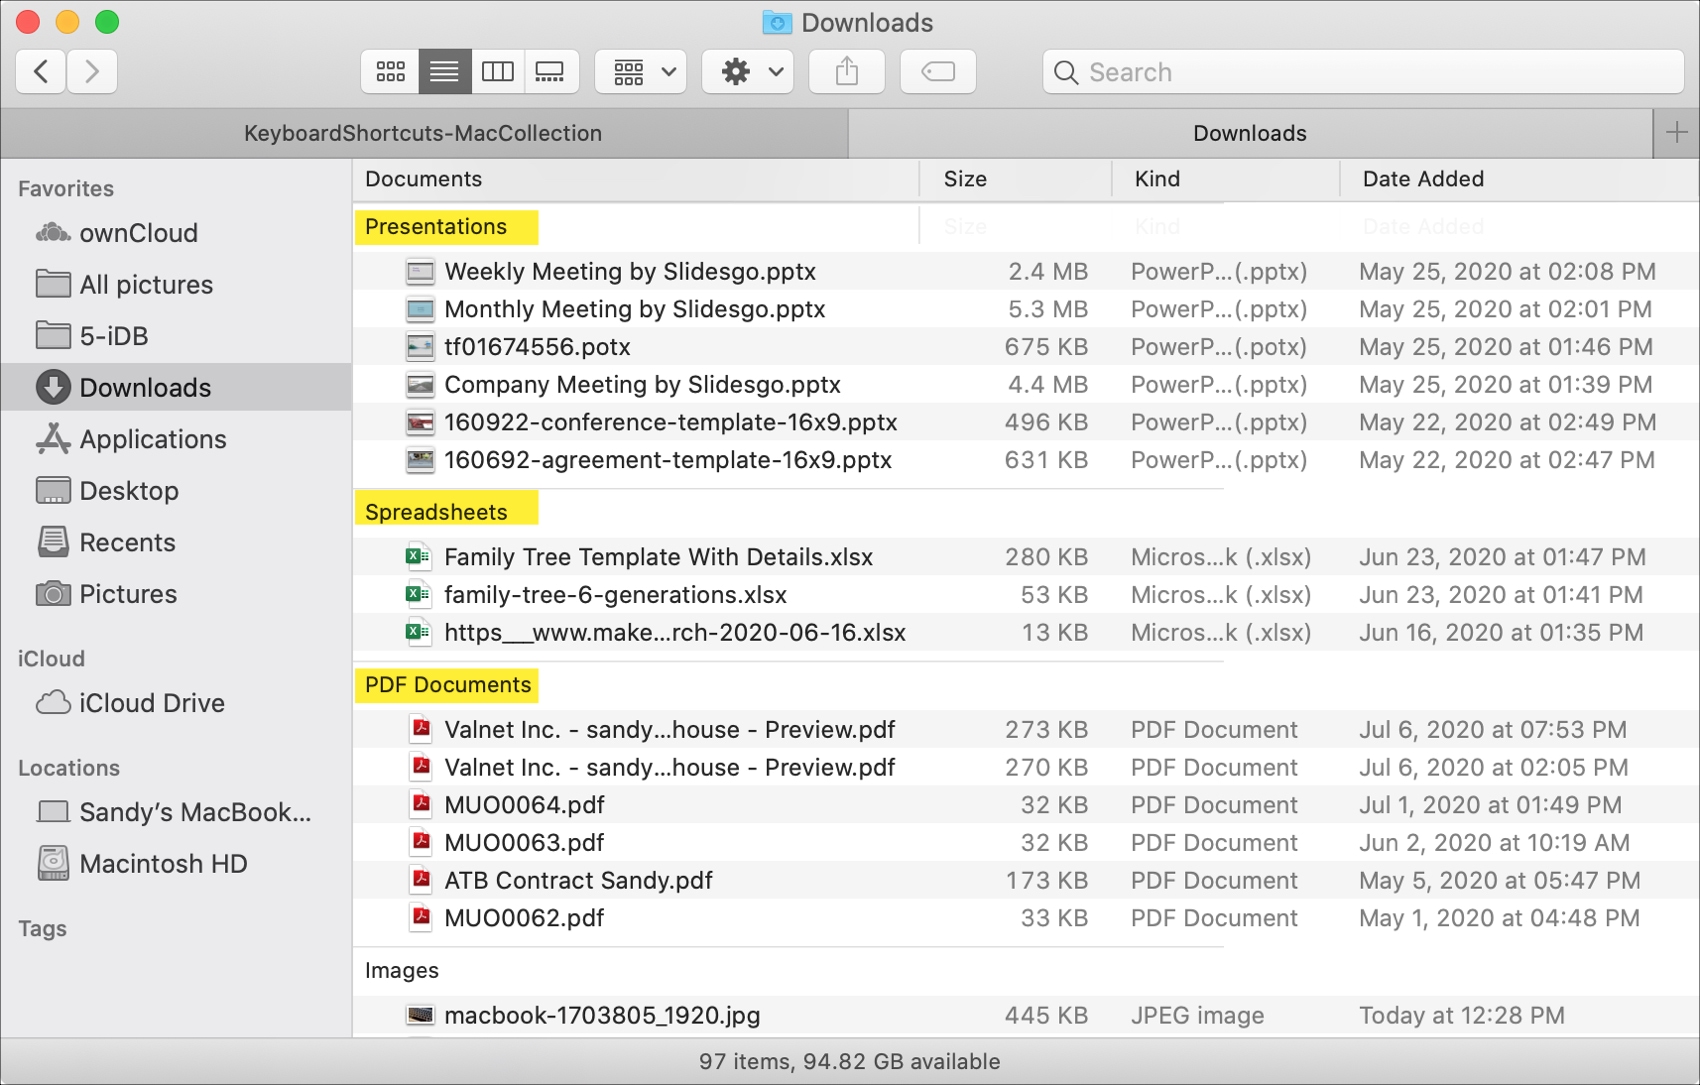
Additionally, your documents will be grouped by kind, such as PDF documents, presentations, and spreadsheets. You can also adjust how the groups are sorted, as we’ll show you below.
One last note: When you choose to use Groups in Finder, it will only apply to the current folder you’re viewing. This gives you the flexibility to only use groupings when it’s helpful to you.
Use Groups
To use Groups in a Finder folder, do one of the following:
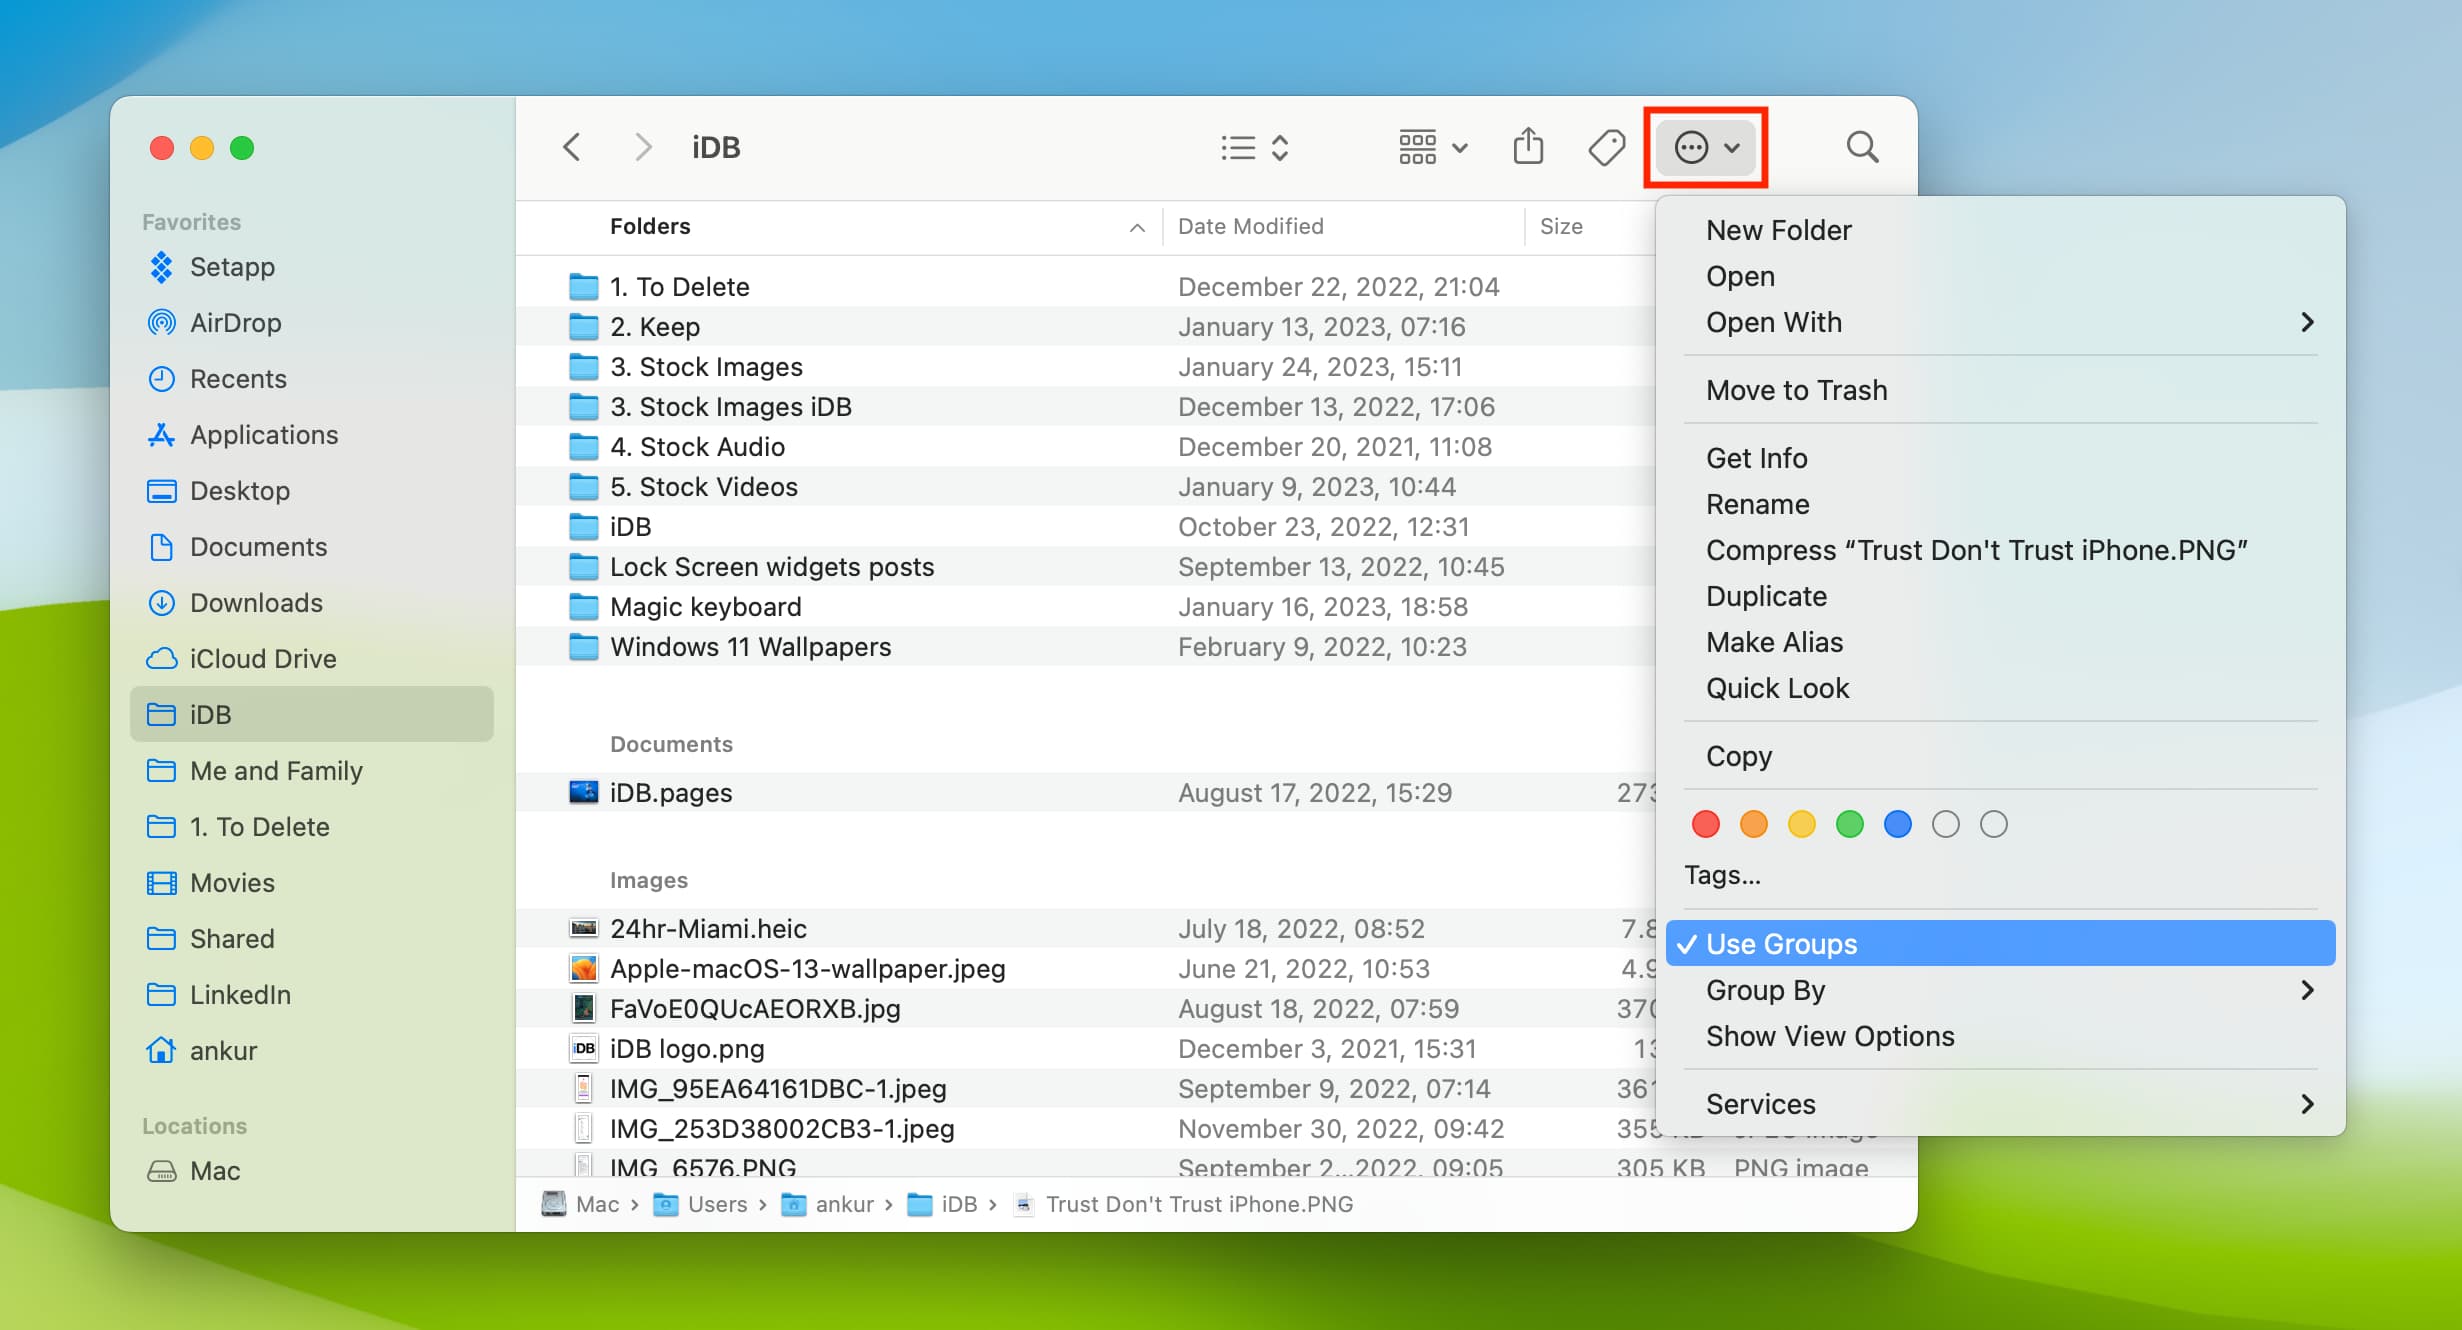
- Click the menu icon in the Finder toolbar and select Use Groups (screenshot below).
- Choose View from the top menu bar and select Use Groups.
- Right-click within the folder and select Use Groups.
You’ll immediately see the folder adjust and group your items.
Even if you see Use Groups checked when you follow the above steps, uncheck and check it again.
Use sort by in Group
You might prefer to group items by date, size, tags, or application instead of by kind. Adjusting this is just as simple as enabling Groups in the first place.
Use the same locations where you turned on Groups in Finder to change the grouping.
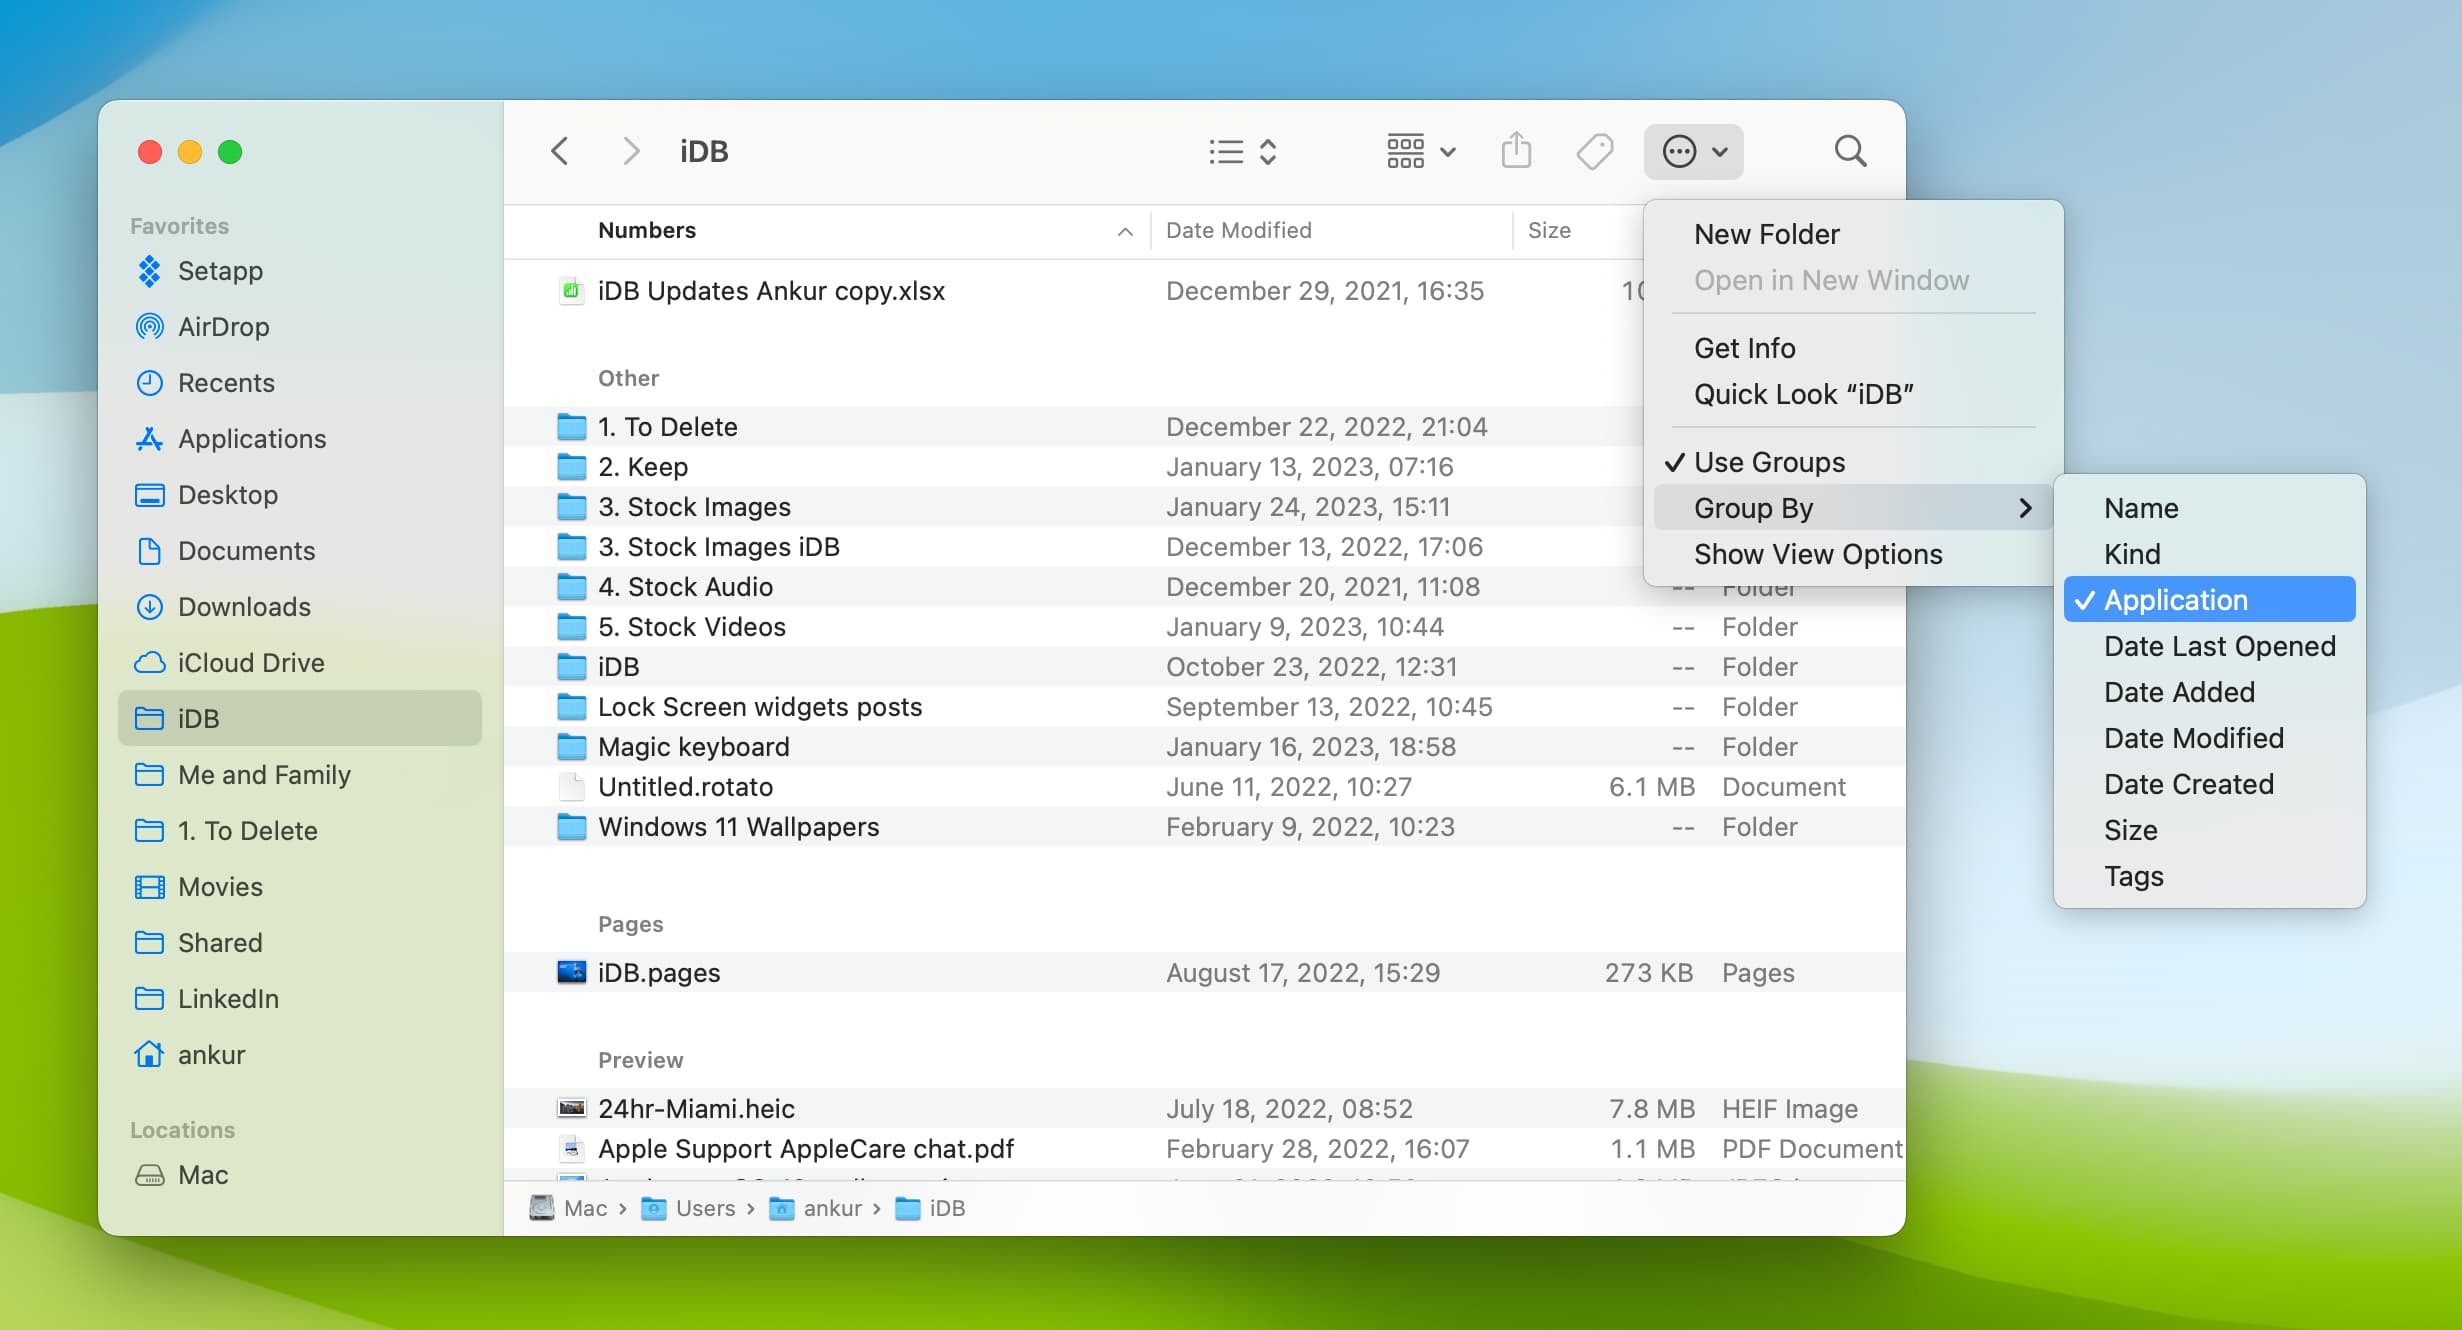
- Click the menu icon in the Finder toolbar and select Groups By.
- Choose View from the top menu bar and select Groups By.
- Right-click within the folder and select Groups By.
Then, choose the option you want to group by from the pop-out menu. There are nine options available, making it versatile for various types of folders:
- Name
- Kind
- Application
- Date Last Opened
- Date Added
- Date Modified
- Date Created
- Size
- Tags
Stop using Groups
To disable Groups in Finder, use the same method as enabling them and click Use Groups again to uncheck it.
Groups can be a helpful tool for organizing your files. Whether you group by kind, date, or size, this view might be exactly what you need to sort your items efficiently. Will you give Groups a try?
More Finder tips: