Learn how to add captions and titles to photos, videos, shapes, and other objects in Pages, Numbers, and Keynote to provide descriptions, citations or references.

The steps are similar for all Apple iWork apps on iOS, iPadOS, and macOS, namely Pages, Numbers, and Keynote.
On Mac
1) Open your document, presentation, or spreadsheet and head to the area containing the object you want to add the title or caption for.
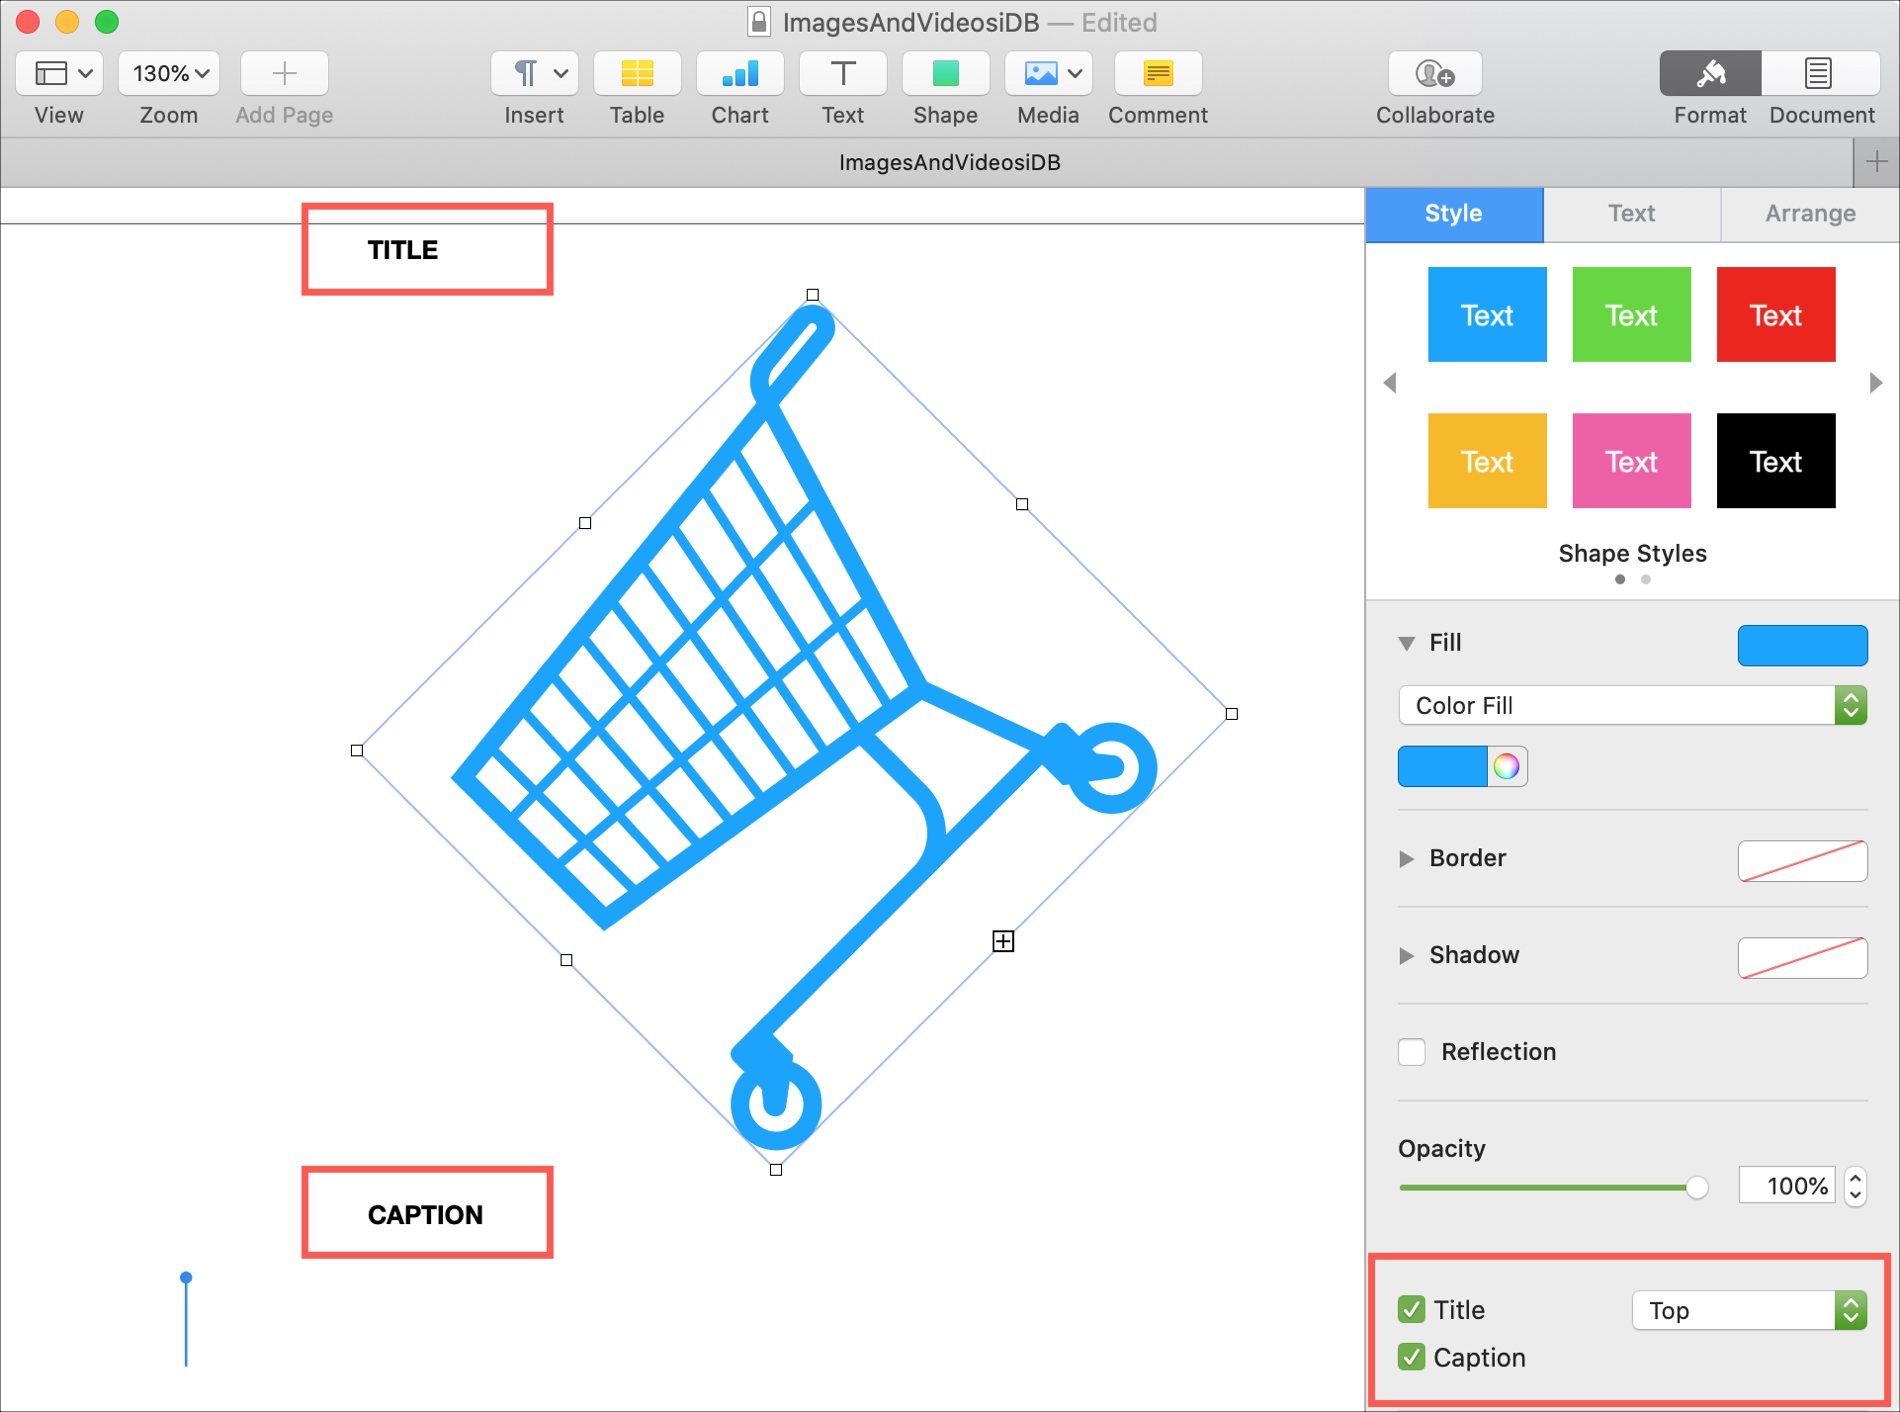
2) Select the object and click the Format button to open the sidebar. Then, click the Style tab at the top.
3) Scroll down to the bottom, and you’ll find the checkboxes for Title and Caption. You can use both, or just one.
For the Title, select whether it appears at the top or bottom of the object. Captions always appear below the object.
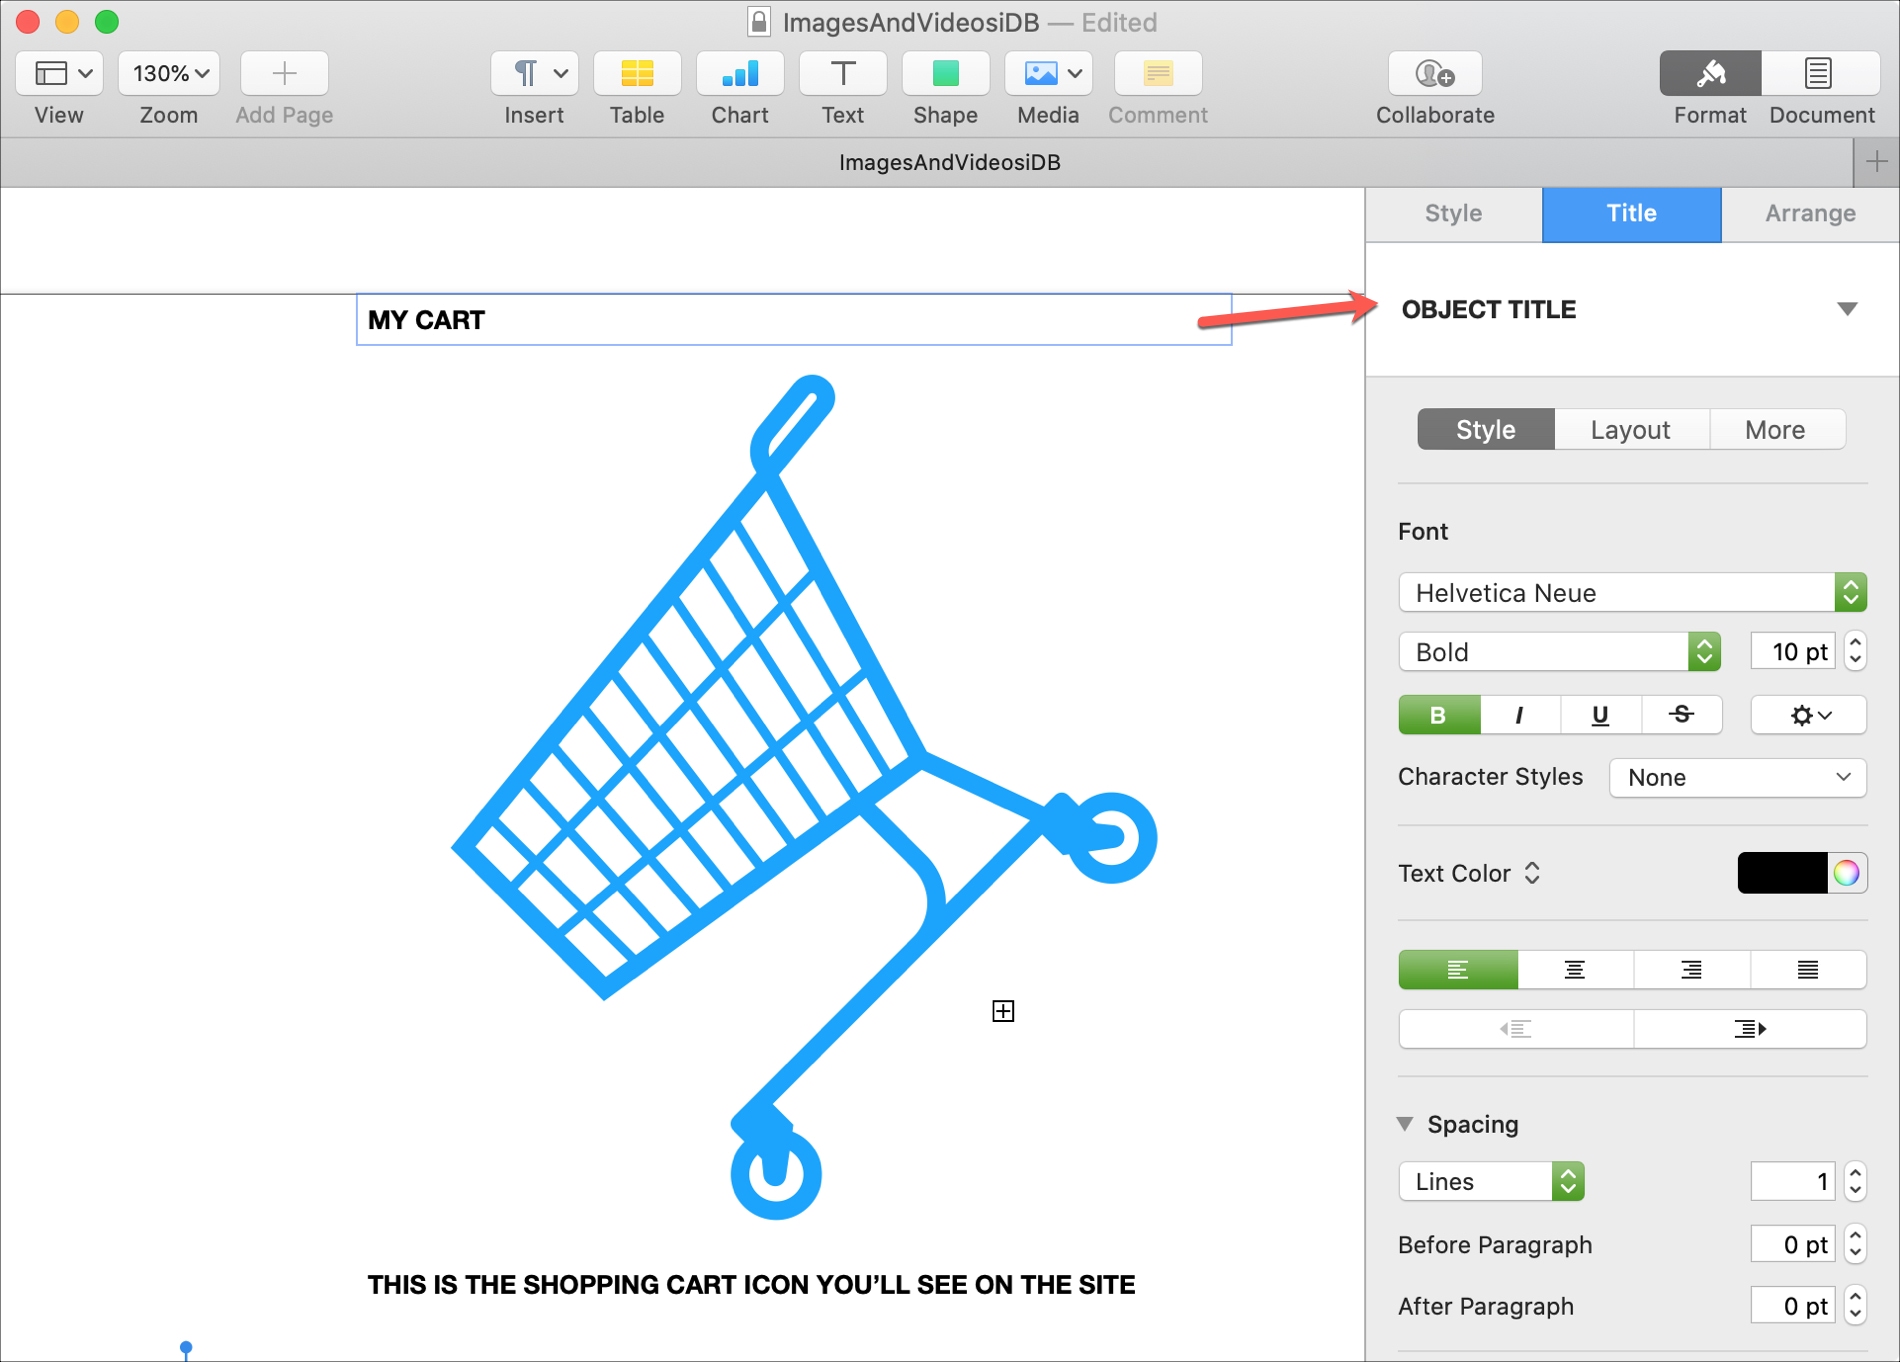
4) Once you check the box for Title or Caption, you’ll see that item added to your document. Select the text (“Title” or “Caption”) and insert your own.
5) If you keep the Format sidebar open with either the Title or Caption selected, you can click the corresponding tab to format your text.
On iPhone or iPad
1) Open the document, spreadsheet, or presentation in Pages, Numbers, or Keynote, select the object, then tap the Format button (brush icon) at the top.
2) In the Format window, tap the Style tab, then tap Title and Caption from the bottom, and enable the toggle(s). You can use both or just one and choose top or bottom for the Title.

3) Select the text for the Title or Caption near your object and insert your own.
4) Tap the Format button with your Title or Caption selected and tap the corresponding tab to format your text. Finally, tap Done when you finish.

Adding captions to photos, graphics, and shapes in your documents, spreadsheets, and presentations can enhance clarity and provide useful context for your audience. Since they’re simple to create and customize, it’s worth using them!
Do you have any similar tips you’d like to share with our readers?
For more, check out: