Learn how to watermark your documents in Apple’s Pages app on the iPhone, iPad, and Mac with custom text like “confidential” or an image like a brand logo.

Apple’s Pages app preinstalled on the iPhone, iPad, and Mac lets you craft documents using beautiful templates. For internal business documents like contracts and non-disclosure agreements, you may want to watermark every single page.
Whether a custom word like “confidential” or “private” or your company logo, Pages makes watermarking documents a cinch, and here’s how.
Add a watermark in Apple Pages for Mac
We’re going to start with the Mac instructions because you have more workspace and options on your computer than on a mobile device.
1) Open an existing document in the Pages app on your Mac or create a new one. For existing documents, you’re recommended to add a blank page and create the watermark there because you’ll have more space.
2) Choose the watermark type in the Pages toolbar. Text works great for simple words and phrases. To use a company logo or any image instead, click Media > Photos. After adding your watermark, click the Format button in the toolbar to open the sidebar with formatting options, letting you resize and rotate your watermark. Finally, position the watermark where you’d like it to appear on each page.
3) Now select the watermark, click Style in the sidebar, and drag the Opacity slider to adjust transparency.

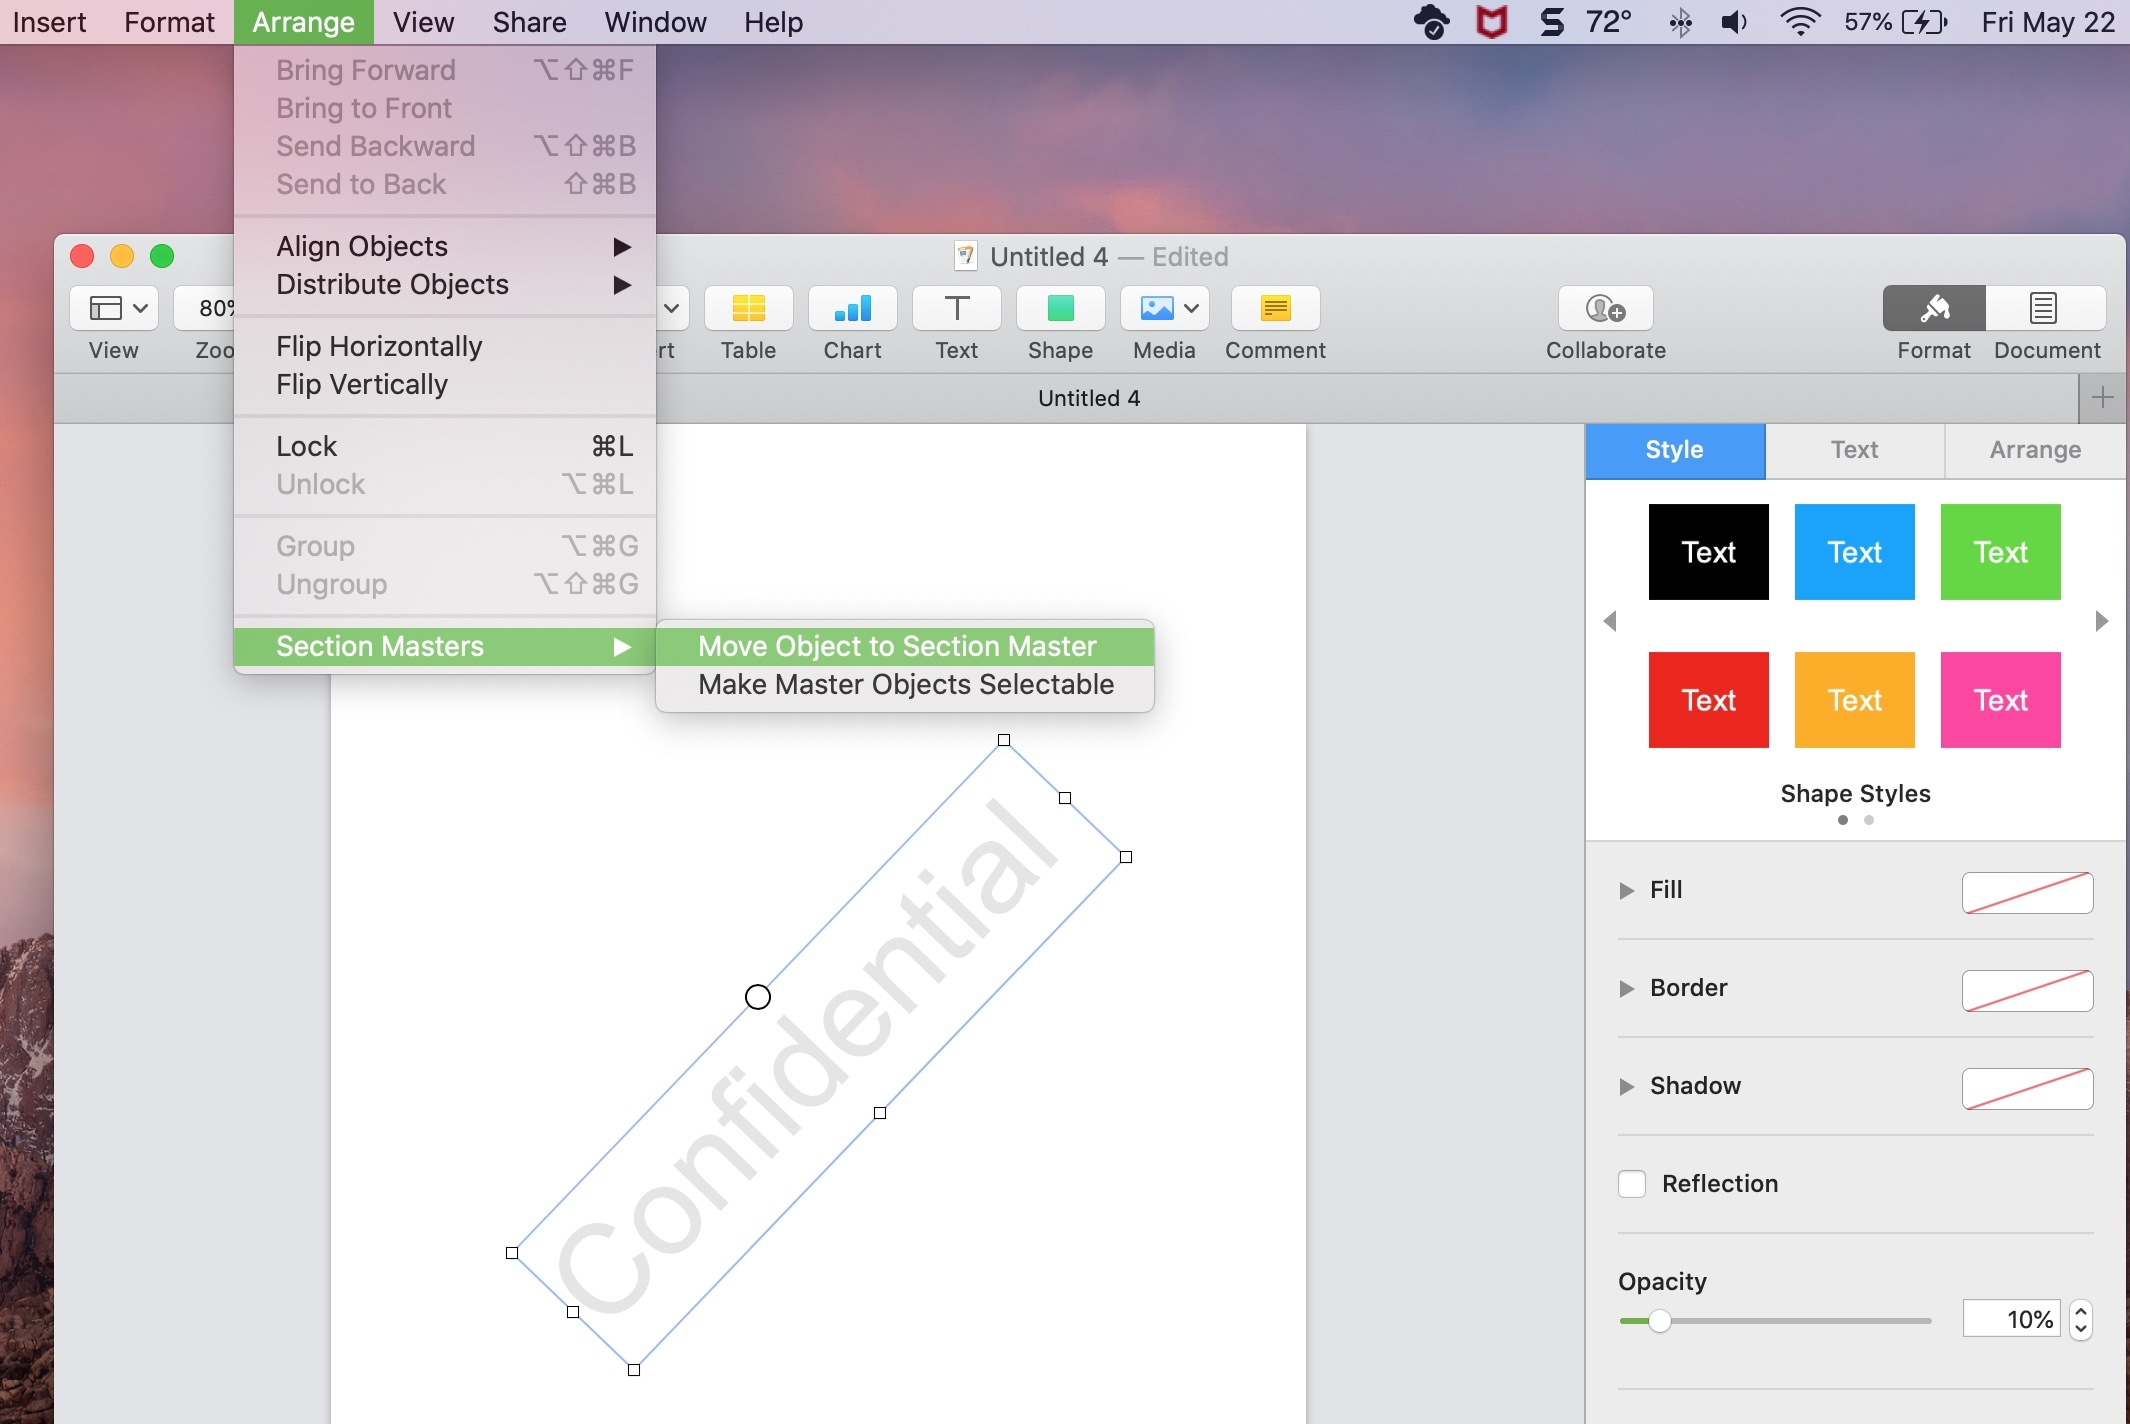
4) If everything looks fine, click the Arrange menu and select Section Layouts or Section Masters, then choose Move Object to Section Layout or Move Object to Section Master to make the watermark appear on every page of the document.
Edit a Pages watermark on a Mac
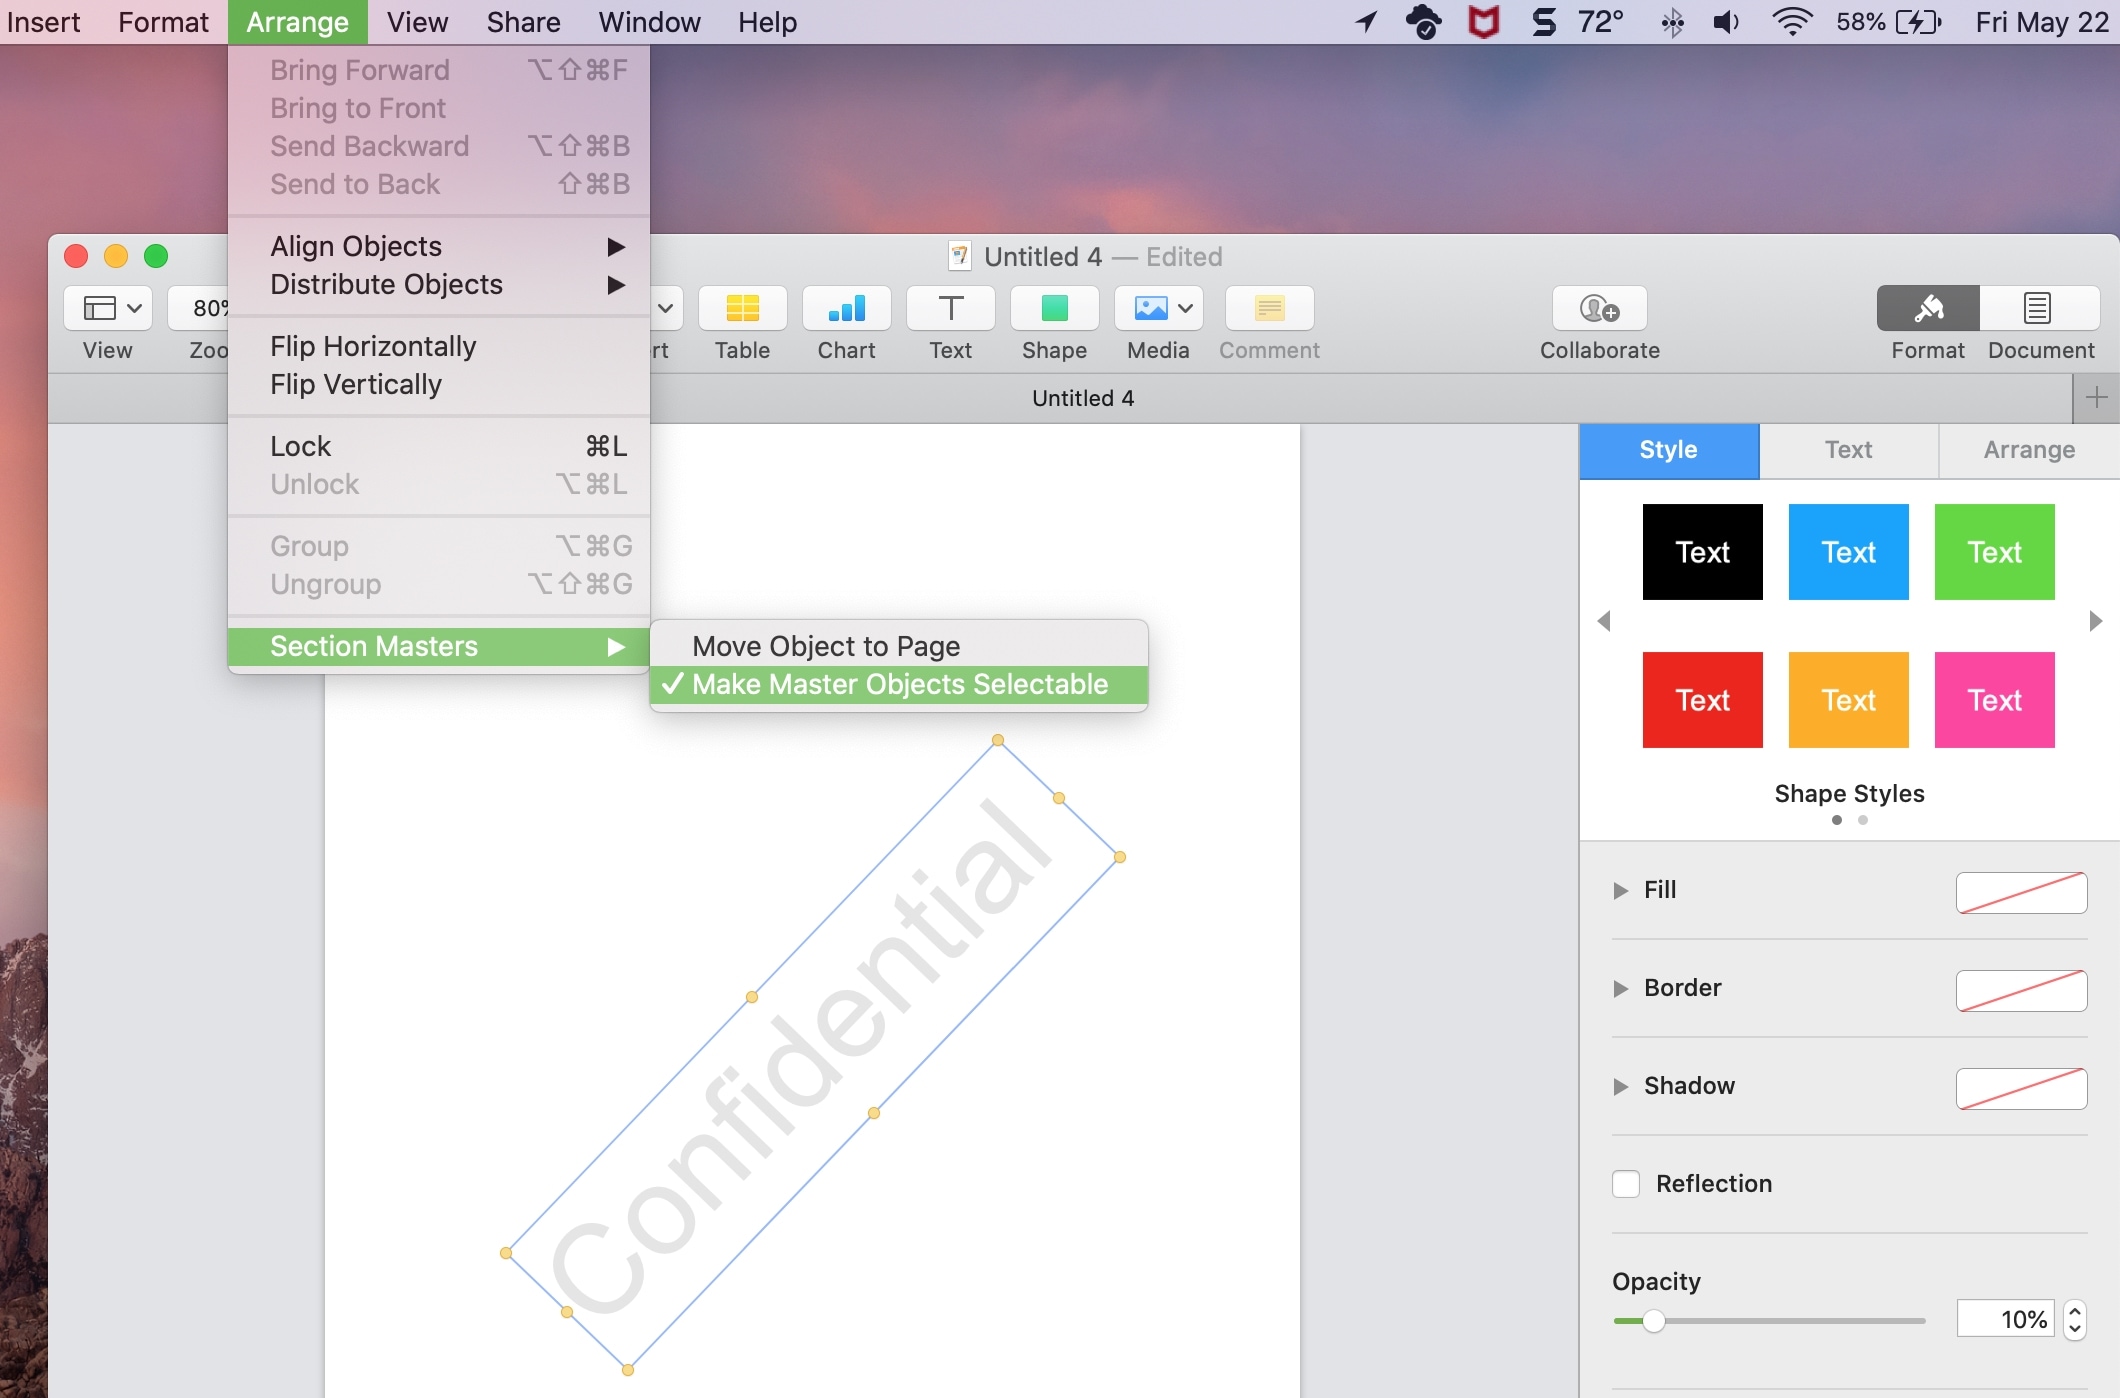
To edit or remove an existing watermark in a Pages document, click the Arrange menu and select Section Layouts or Section Masters, then ticj the option labeled Make Master Objects Selectable; now you can edit the watermark or delete it. When done, be sure to untick Make Master Objects Selectable in the menu.
Watermark Pages documents on an iPhone or iPad
Watermarking Pages documents on a mobile device like an iPhone is more cumbersome, and you have fewer controls.
1) With your document open, touch an empty space on any page without selecting an object and hit the three-dotted menu in the top-right corner, then choose Document Options > Document Setup.
2) Now select the Document tab and hit More Options.

3) Tap the plus button (+) at the top and select a text box in your document or insert a photo, then adjust its size and placement on the page.

4) With the watermark selected, tap the Style icon at the top, which resembles a paintbrush. Now select the Style tab and scroll down, then drag the Opacity slider to achieve the level of transparency you want.

5) Now select the Arrange tab and choose Lock at the bottom to prevent further edits, then hit Done in the top-left corner. Your watermark should appear on every page of the document. As you edit the document, add or remove pages, and so forth, the watermark stays in place.

Editing Pages watermarks on mobile
To edit or reposition the watermark, follow the steps above to go to the Document Setup section, then select the watermark and hit Unlock. If you’re going to edit the watermark instead of deleting it, lock it again when done to prevent further changes.

Watermarking documents may be convenient in certain cases and required in others. Bookmark this tutorial in case you need to watermark documents in the Pages app but forgot the steps.
Also, check out: