Save time and be more productive by taking a moment to customize these useful Mac Finder preferences and settings.
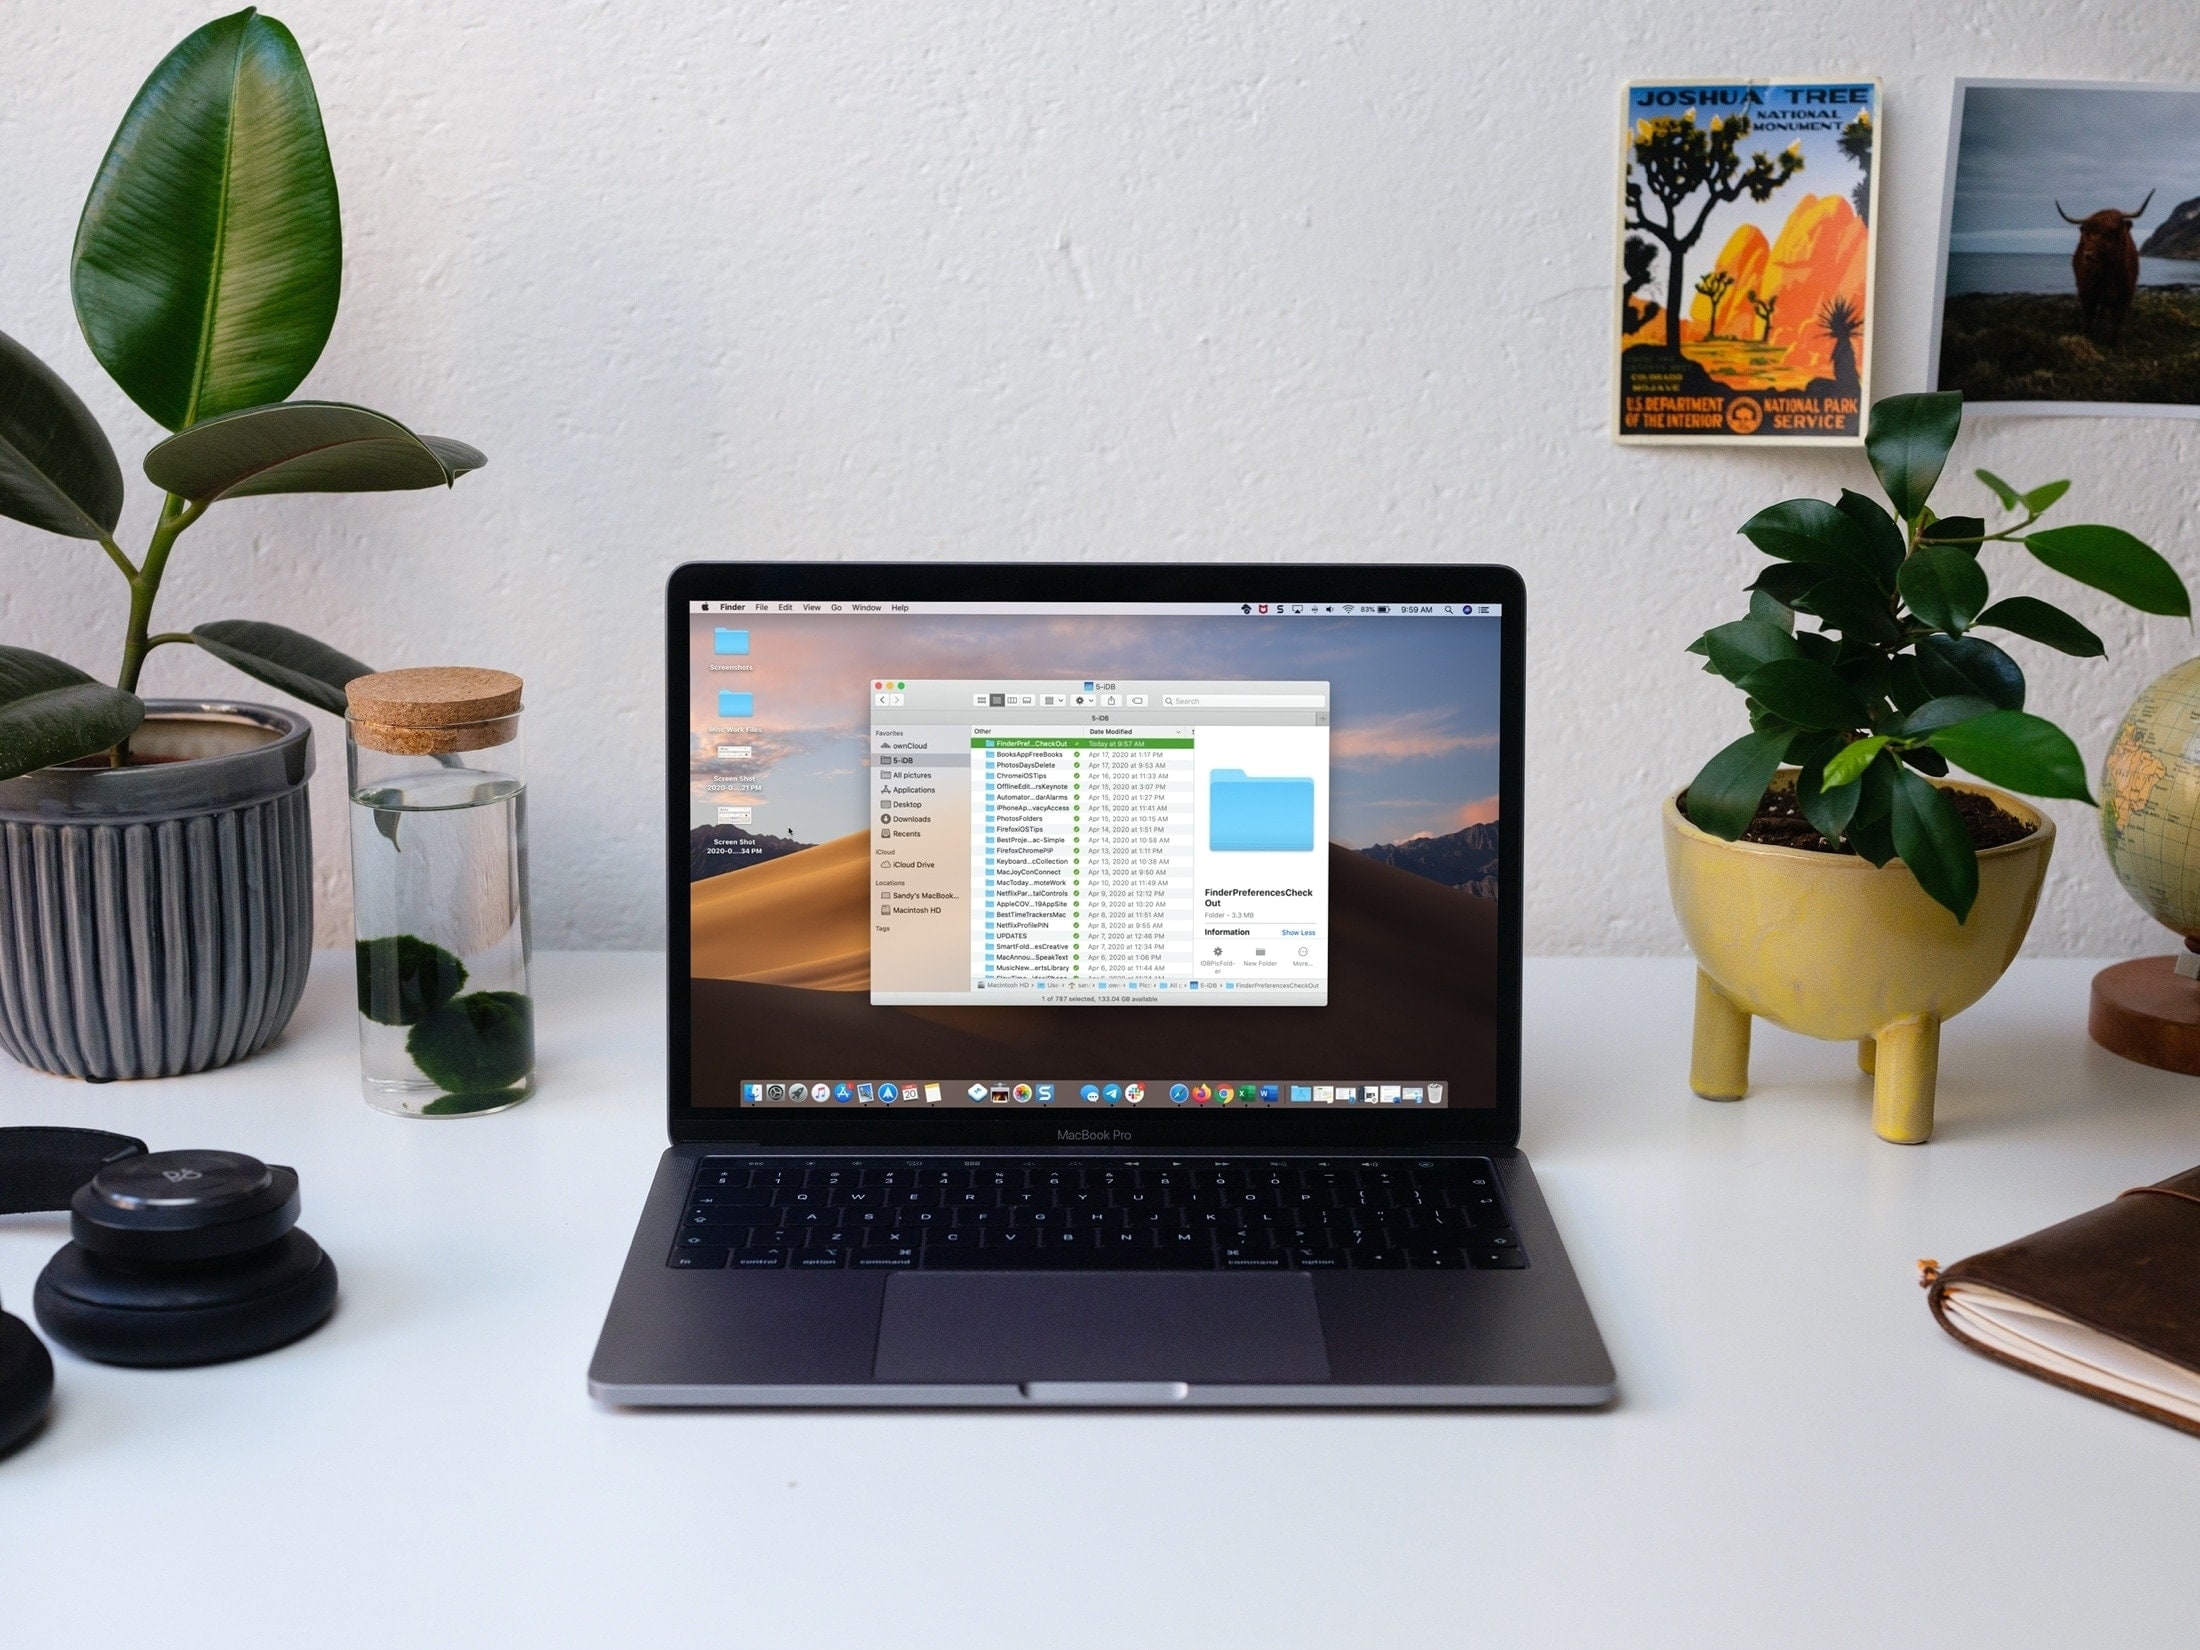
Many of us take the time to customize things on our Macs. From the wallpaper and screen saver to the Dock and menu bar; you want your Mac to look and work per your preference. But when it comes to Finder, do you take the time to customize it as well?
Finder is one of those Mac tools that most people take for granted. And if you’re new to Mac, you might not even realize all that Finder can do.
So, in this tutorial, we will list some of the Mac Finder settings you should take a moment to check out. You might just find one or two that you want to adjust.
View warnings
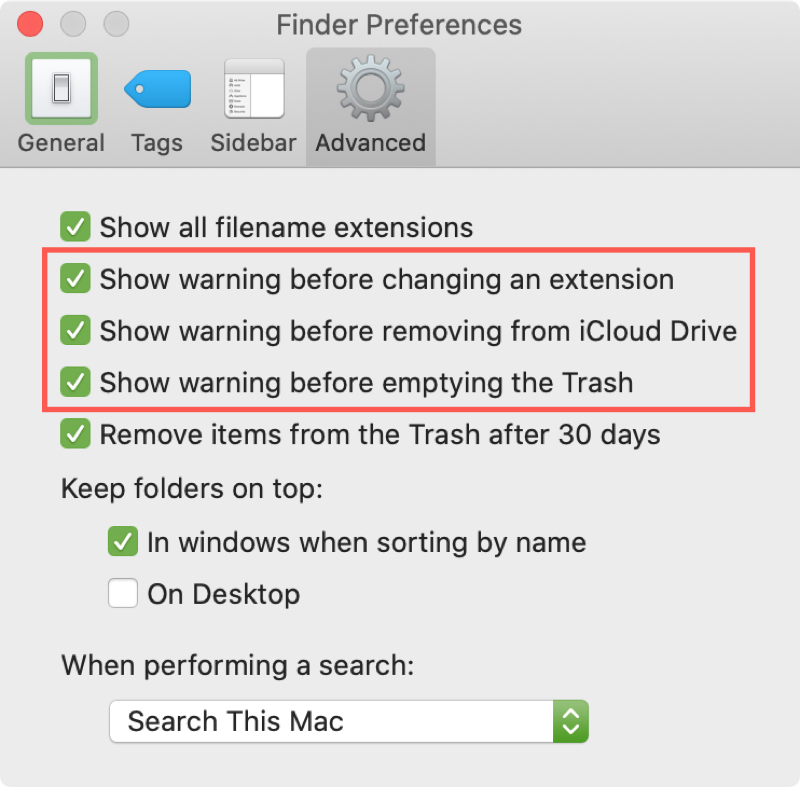
When you do things on your Mac that you don’t mean to, it’s nice to have an alert about it. You can enable warnings before changing an extension, removing from iCloud Drive, and emptying the trash.
Open Finder and click Finder > Settings or Preferences from the top menu bar. Now select the Advanced option and then check the boxes for one or all three of those warnings.
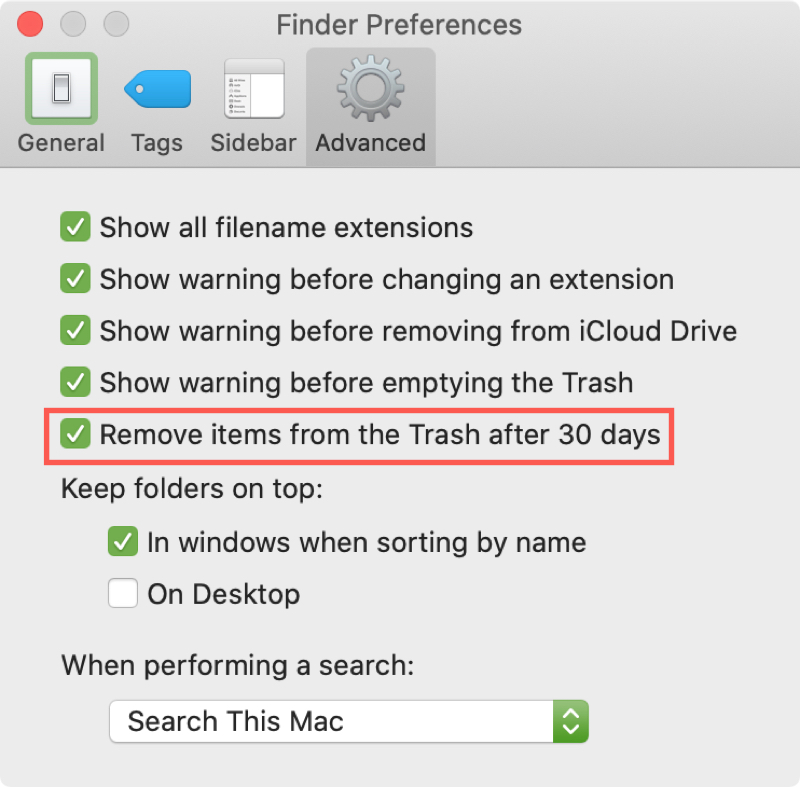
Take the Trash out regularly
You’ll also notice an option for your Trash in Finder Advanced Settings. Instead of manually emptying the Trash when you think to do it, check the box to Remove items from the Trash after 30 days.
This can help you save some space by having those items automatically and permanently deleted regularly.
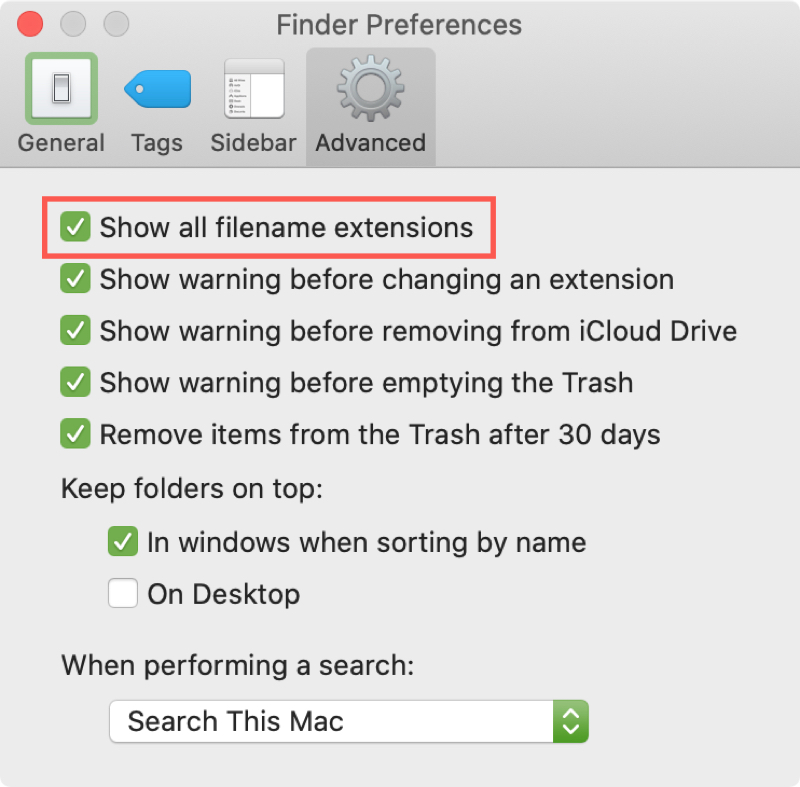
Show filename extensions
If you use your Mac for business or are in situations where you pay a lot of attention to file names, then this setting is for you.
In Finder Advanced settings, you can check a box to Show all filename extensions.
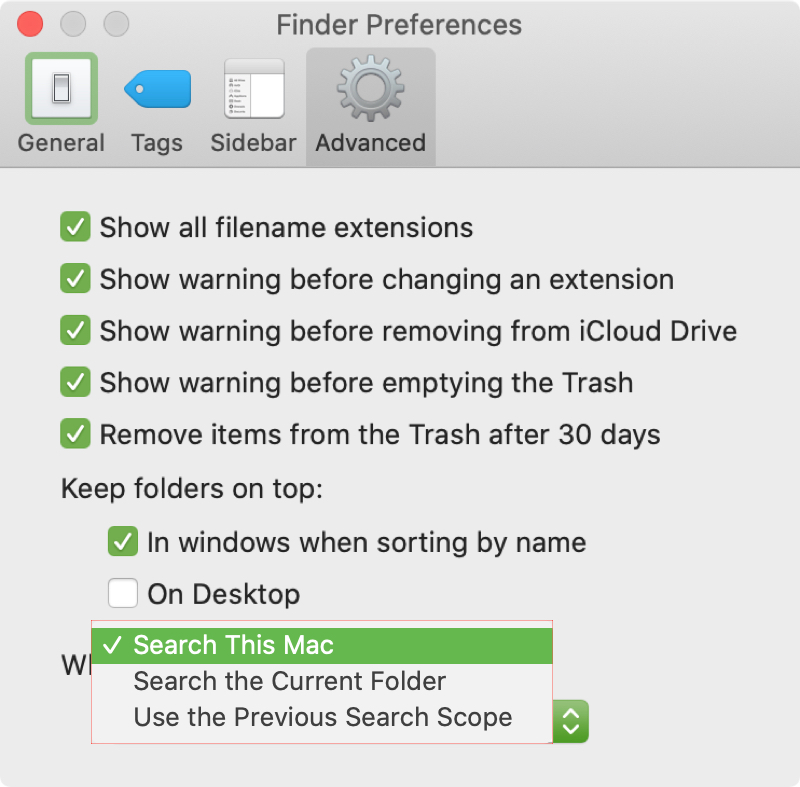
Adjust your default Finder search
When you open Finder and use the search feature, you’ll likely assume you’re searching the folder you’re in. But maybe whenever you search in Finder, you want to search your entire computer instead.
Again, go to Advanced Finder Settings and head to the drop-down box at the bottom to make your selection in When performing a search section. You can choose to search your Mac, current folder, or use your previous search scope, by default.
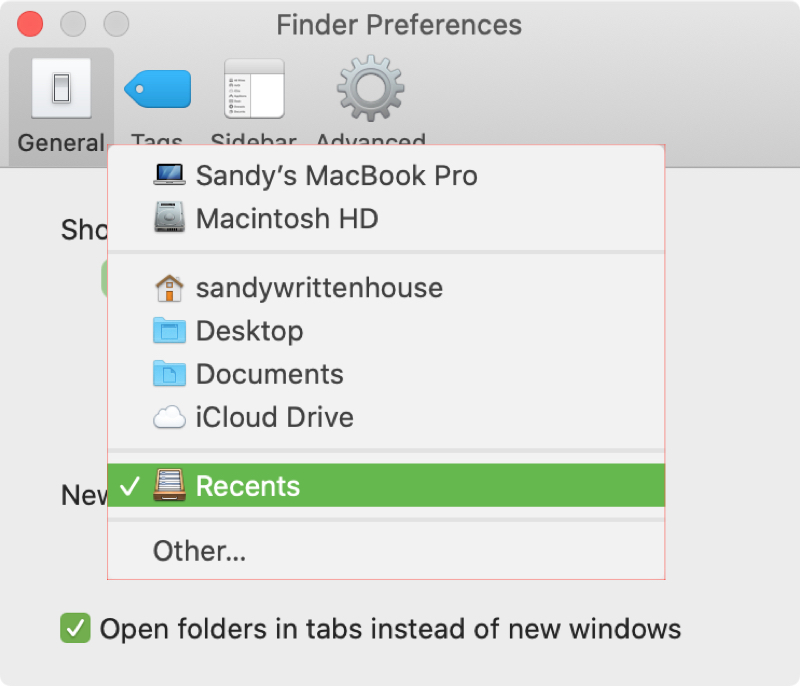
Pick your Finder window folder
Each time you open Finder, you may always head to the same folder. Maybe it’s Recents, maybe it’s Documents, or maybe it’s something completely different. Rather than navigating to that folder each time, have your Finder window open to that folder by default and save yourself a few seconds.
Open Finder and click Finder > Settings or Preferences. Now, select the General option. Click the New Finder windows show drop-down box, and choose the folder you want to open. You’ll see common options in the list but can click Other to choose any location on your Mac.
See the status bar
The Finder status bar is a handy tool. It can tell you how many items you have in a folder, how many of those items you have selected, and how much space you have available.
With Finder open, click View > Show Status Bar from the menu bar. You’ll see the status bar open at the bottom of your Finder window. And with every new Finder window you open moving forward, that status bar will display unless you click View > Hide Status Bar.
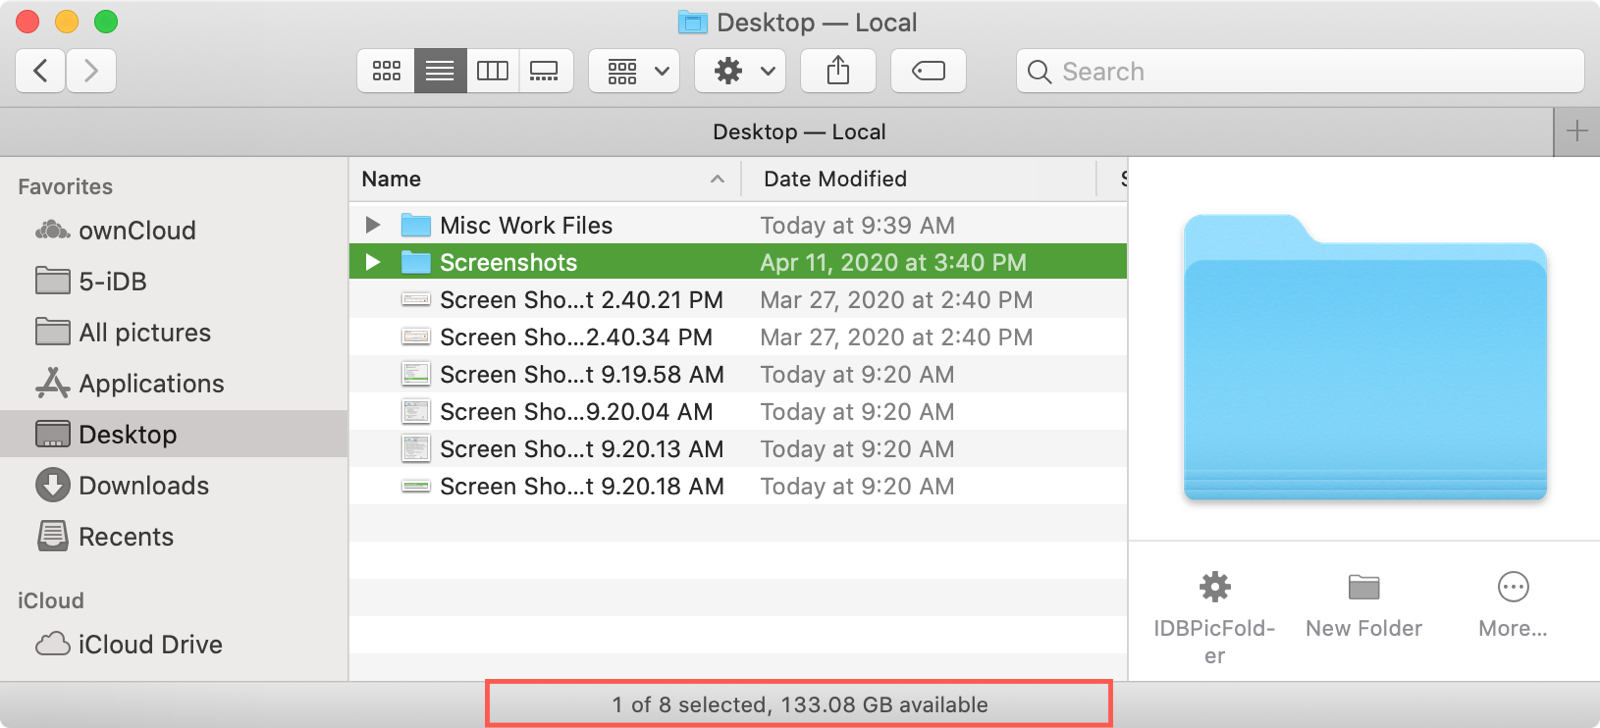
This is an unobtrusive tool that can be very useful.
View the path bar
Similar to the status bar, the path bar in Finder is another useful tool for seeing the complete path of an item on your Mac.
Click View > Show Path Bar from the menu bar. This will also display at the bottom of your Finder window and remain until you turn it off (View > Hide Path Bar). And if you have the status bar enabled, it will lay on top of that.
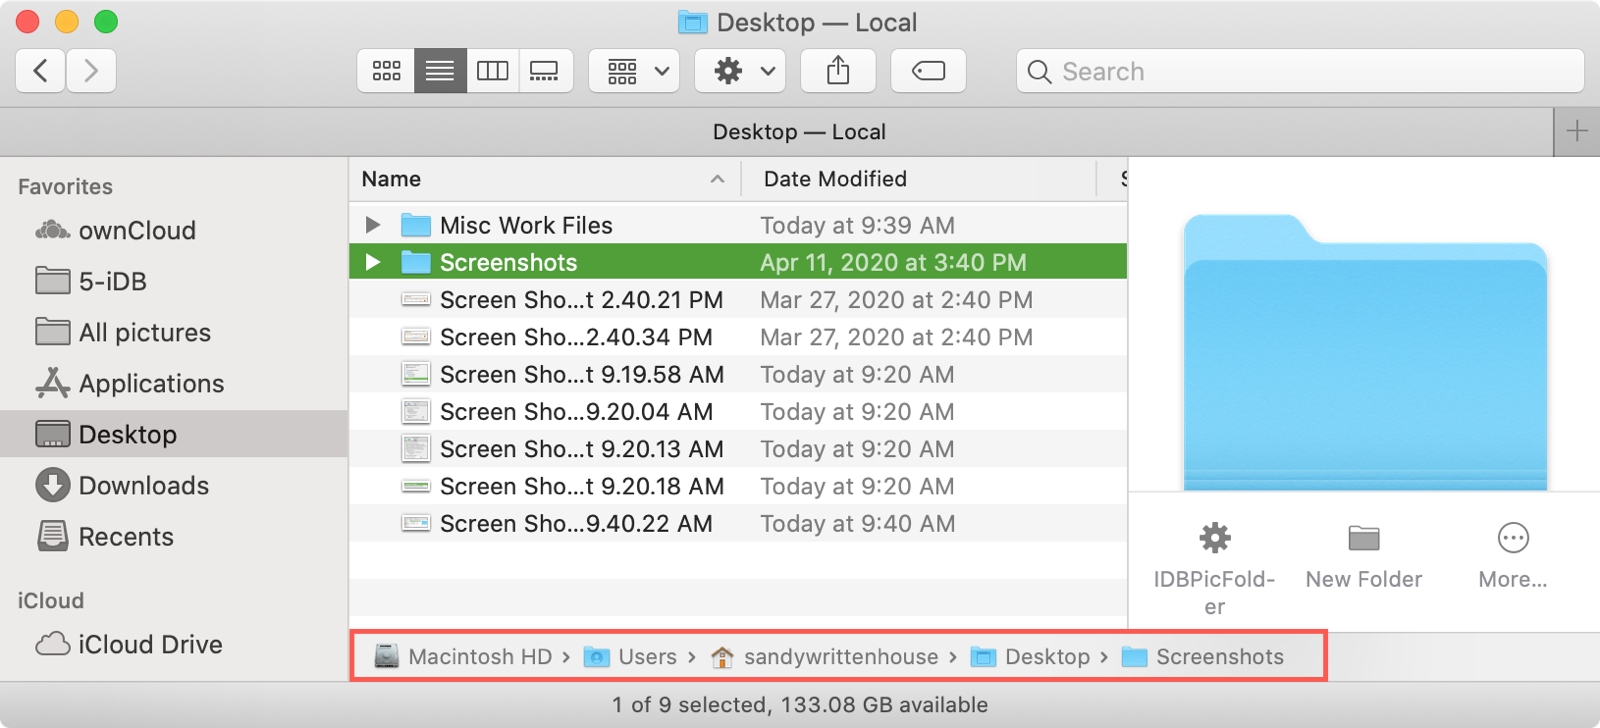
In addition to being a good way to see the entire path of your items, you can use the path bar. To jump to a location in a file path, just double-click it in the path bar.
What types of customizations do you perform on your Mac? Let us know below.
Customize Finder further: