In this tutorial, we will walk you through four handy keyboard accessibility features to help you get the best typing experience if you have difficulty using the Mac’s keyboard in its standard configuration.

There are a few basic accessibility settings for the keyboard on your Mac that you can enable to make typing just a bit easier.
Go to accessibility keyboard settings
- Open System Settings on your Mac and select Accessibility.
- Click Keyboard under the Motor section.
If you’re on an older version of macOS, go to System Preferences > Accessibility and select Keyboard.
Now, you can manage Sticky Keys, Slow Keys, and Accessibility Keyboard from this screen.
Enable Sticky Keys
When you use keyboard shortcuts, you’ll often see instructions like “press Command + Shift + N.” (Which includes modifier keys like Command, Option, and Control.) This indicates you should press all three keys at the same time to perform the action. But by using Sticky Keys, you can press a set of modifier keys in a sequence rather than all at the same time.

Turn on the switch to enable Stick Keys, and then click the information button ⓘ to customize your preferences. Check the boxes for those items you want to use. If you choose to enable the option to show the keys on the screen as you press them, you can pick which corner of your screen you’d like them to display. Click OK when you finish.

Enable Slow Keys
By enabling Slow Keys, you can adjust the time for when you press and key and then when it’s activated. And of course, you have some options to pick from for this setting too.
Switch on Slow Keys and then click the info button ⓘ to customize your preferences.

Use the slider to set the amount of delay you want to use and check the box at the top if you want to hear the click sounds. If you choose to hear the sounds, you’ll hear one when you press the key and another at the time it’s activated. Click OK when you’re done.
Use the Accessibility Keyboard
If you want to use an onscreen accessibility keyboard that you can use with your mouse or trackpad, turn on the switch for Accessibility Keyboard. This will pop a keyboard onto your screen that you can customize per your preferences.

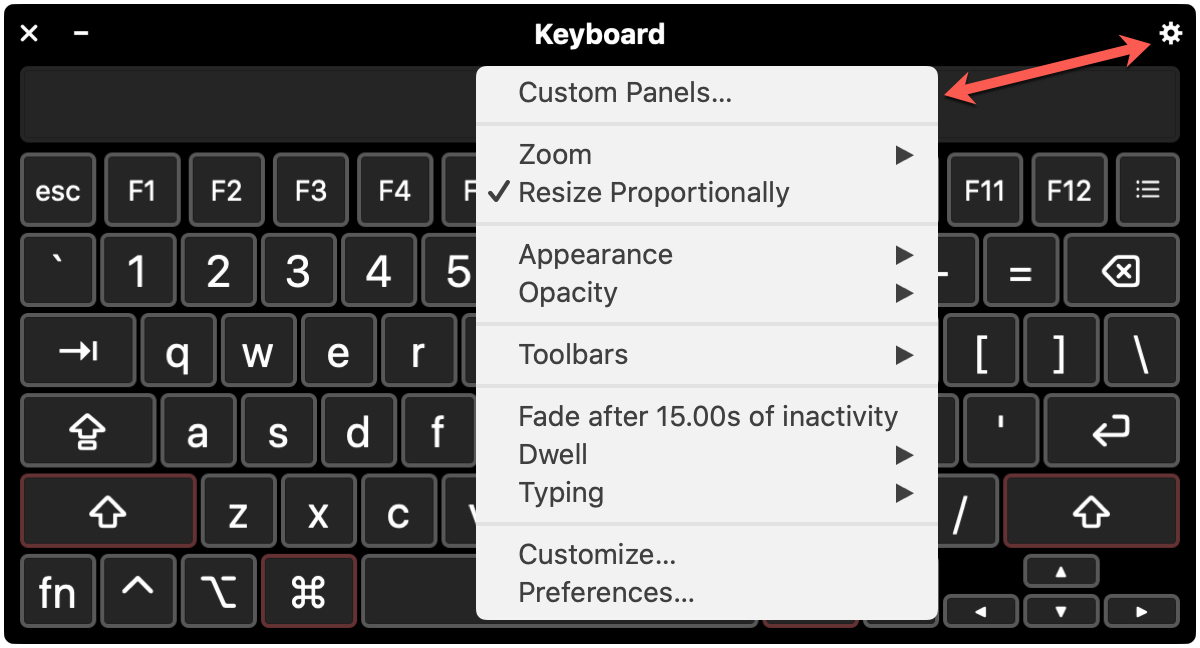
If you click the menu icon or the gear icon on the top right, you can adjust things like zoom, appearance, opacity, toolbars, and more.
Alternatively, you can click the information button ⓘ next to Accessibility Keyboard in System Settings to manage other options.
If you want to go a bit further, you can click to open the Panel Editor in System Settings > Accessibility > Keyboard.

This cool tool lets you add custom panels to the accessibility keyboard (or if you use Switch Control). So you can configure actions and tasks, insert the buttons you want to use, control the appearance, and more.

Plus, you can choose to see the panel for specific applications you choose from the drop-down list. And you can get to all custom panels you create with the Panel Options button on the accessibility keyboard.
Enable Typing Feedback
Another helpful setting for accessibility is to receive feedback as you type. This means as you type, your Mac will speak what you’re typing. In addition, you’ll hear what you select and what you press on the keyboard.
Go to Mac System Settings > Accessibility > Spoken Content. Now, turn on the switch for Speak typing feedback. You can also customize its settings by clicking the info button ⓘ. Here, you can decide what you want to hear and how. Enable the boxes for those items you want to use and click OK.

If you are on an older version of macOS, check the box to Enable Typing Feedback right on the Keyboard Accessibility settings pane, and then click the Options button to customize your preferences.
Making your keyboard work for you is one of those Mac customizations you should take the time to adjust. And with the accessibility keyboard options, you have some good flexibility. Are you going to make any of these adjustments to the accessibility keyboard for yourself or for someone else who uses your Mac?
On a related note: