Check out these 10 simple yet powerful trackpad gestures you can use on your iPad to boost your productivity.
iPadOS offers the power of Multi-Touch technology to compatible trackpad and mouse. It gives you another way to use your iPad apart from touch and ink (Apple Pencil).
iPadOS supports a few dozen gestures for trackpads and mice, but we’ve distilled Apple’s list down to ten essential gestures that all iPad Pro owners should memorize to save time and increase productivity.
Note that in addition to the official iPad Magic Keyboard, these gestures also work on other supported third-party trackpads and even when you use your Mac’s trackpad wirelessly with your iPad.
If you’re more of a visual person, watch this hands-on video walkthrough from our videographer, Harris Craycraft.
In case you prefer written instructions, here are those for your perusal.
1. Swipe left or right
To perform a swipe to the left or right, use two fingers instead of one.
2. Swipe up or down
Similarly, you can scroll in apps by sliding two fingers up and down on the trackpad.
3. Zoom in and out
Use two fingers to zoom in and out in apps like Safari, Photos, Photoshop, and so forth. Bring the fingers closer together to zoom out or spread them apart to zoom in.
4. Go to the Home Screen
Swipe up with three fingers to get to the Home Screen from wherever you happen to be.
5. Get to App Switcher
Swipe up with three fingers, then pause abruptly to enter the iPadOS App Switcher.
Note: You can also pinch in with five fingers to see the App Switcher and then repeat this gesture to get to the Home Screen.
6. Cycle between apps
Instead of swiping horizontally across the Home indicator on your tablet, swipe with three fingers on the trackpad to go to the next or previous app. Bonus tip: Swiping right with three fingers on the Home Screen takes you back to the last-used app.
7. Slide Over
Move the pointer with one finger to the right edge of the screen, then swipe right to move it past the screen edge and enter Slide Over. To hide Slide Over, swipe right again.
8. Open Notification and Control Center
Click the trackpad pointer over the batter indicator section to open Control Center. And when you have to open the Notification Center, click the time and date indicator from the top left corner.
9. Tap to click
Enable the option Tap to Click in Settings > General > Trackpad or Trackpad & Mouse so that all taps performed on your trackpad or touch-sensitive mouse are interpreted as clicks.
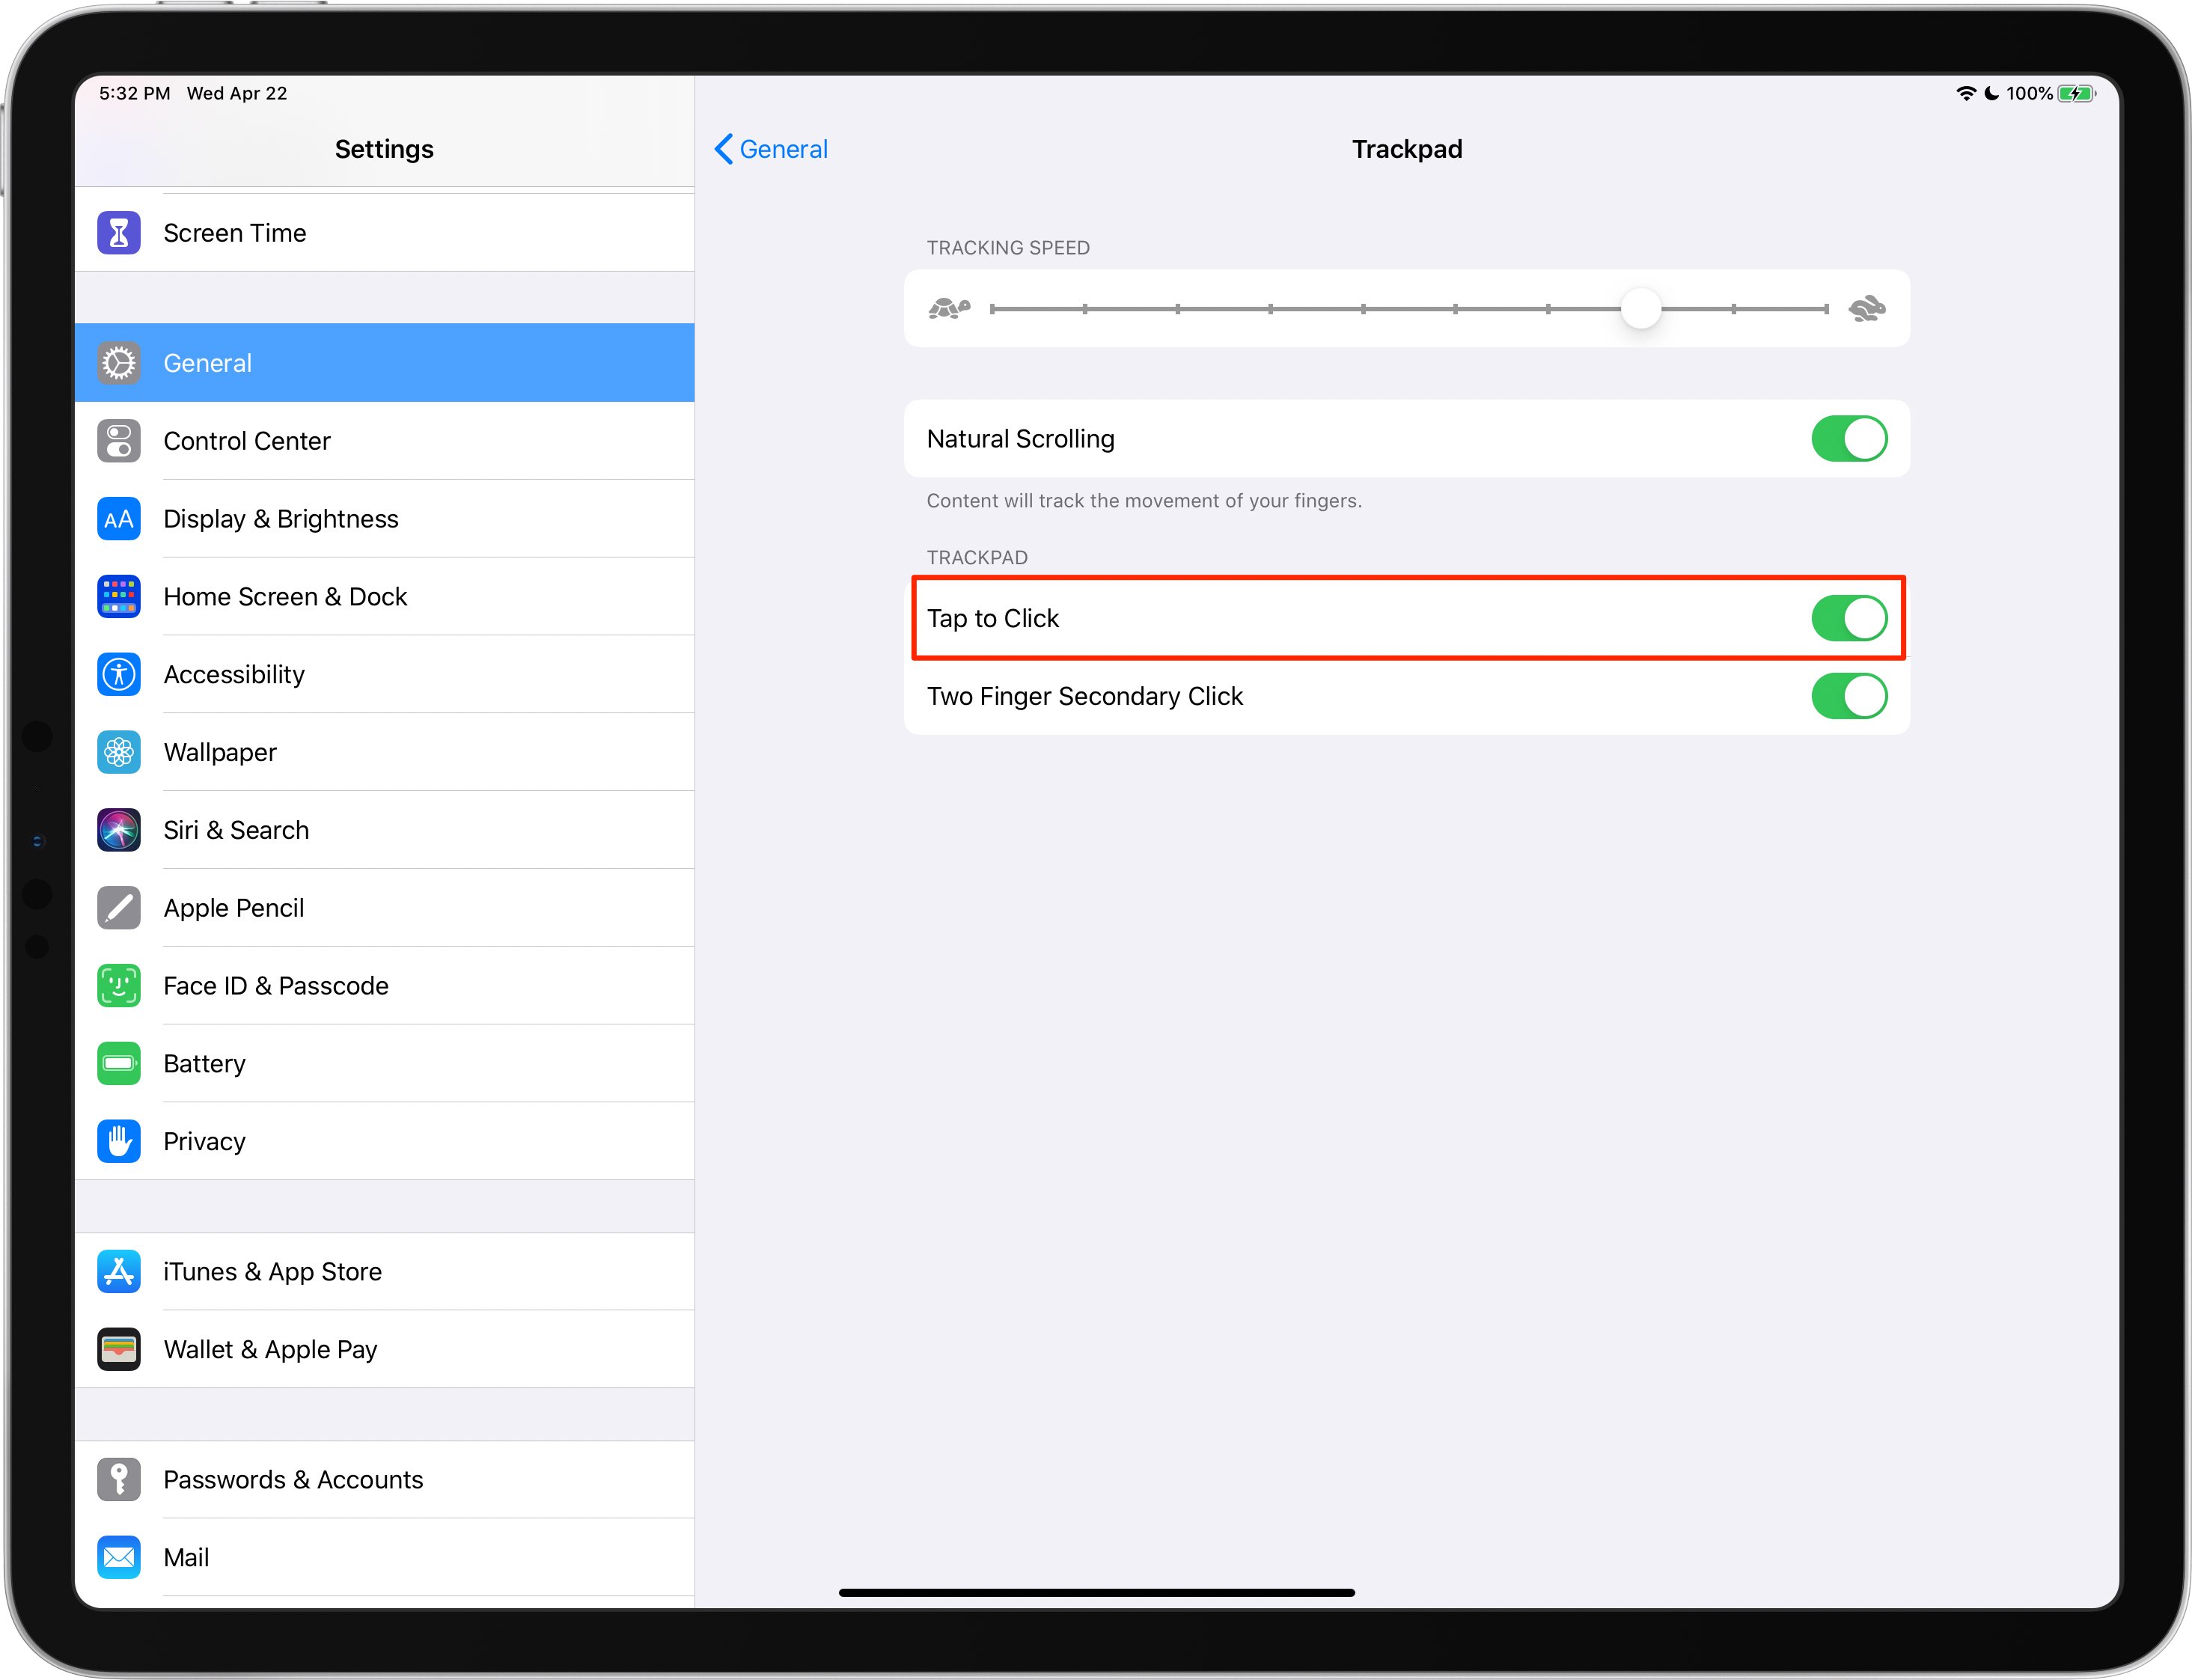
10. Two-Finger Secondary Click
Enable this option in Settings > General > Trackpad or Trackpad & Mouse so that a tap with two fingers on the trackpad is interpreted as a long tap or secondary click. You can use this on the Home Screen and in apps to quickly open the contextual menu.
Our power users may want to learn about additional iPad trackpad gestures, too.
In your mind, what are the top five Multi-Touch gestures on the Magic Keyboard (or any trackpad, for that matter) that really make sense when using your iPad Pro? And while we’re at it, which trackpad gestures are counterintuitive and need more work? Chime in with your thoughts in the comments section below.
On a related note: