From customizing pointer settings to setting up Hot Corners, boost your productivity with these tips for using a mouse and trackpad on your iPad.
iPadOS has proper mouse and trackpad support, complete with multi-touch trackpad gestures, interactive mouse pointer, and other perks. Because none of that is managed from one central place, we’ve decided to come up with a bunch of tips to explain the intricacies of mouse/trackpad support in iPadOS, how to customize it to your liking, and more.
If you haven’t already tried out support for wireless or USB mice and trackpads on iPadOS, you’re missing out on a major enhancement that will change the way you use your iPad and make you much more productive vs. touch-only interactions.
Our video editor, Harris Craycraft, has put together a quick ten-minute video that walks you through each tip, explaining how it may benefit you whilst providing a few use cases.
And if you prefer written instructions, here are the tips themselves.
1. Three levels of settings
Customizations are available from three different places:
- Settings > General > Mouse or Trackpad or Trackpad & Mouse (depending on what you have connected). From there, feel free to change how fast the interactive onscreen pointer moves, which direction the mouse/trackpad will scroll, enable tapping the trackpad to simulate a click, and choose whether your secondary click is right or left.
- Settings > Accessibility > Pointer Control. Control trackpad inertia and scrolling speed, as well as change pointer appearance and size or turn on/off morphing when the pointer is near buttons, tabs, and other user interface elements.
- Settings > Accessibility > Touch > Assistive Touch. Assign different functions to trackpad/mouse buttons in the Devices section underneath the Pointer Devices heading.
2. Customizing pointer appearance
If you’re finding it overly difficult to spot the round pointer as it moves across the iPad screen, you can easily increase or decrease its size, as well as choose a different pointer color, like red or green, to make it stand out from the background. Aside from making the pointer comically large, you can also increase its contrast and change the stroke size for the pointer outline. Try enabling a colored pointer, then switch to Notes and highlight some text to see your changes in action.
Head to iPad Settings > Accessibility > Pointer Control to make these changes.
3. Static or animated pointer?
Disabling Pointer Animations in Settings > Accessibility > Pointer Control will still ensure that the various user interface elements are automatically highlighted as you hover over them with the pointer, but the pointer itself will no longer dissolve itself right into a nearby button.
4. AssistiveTouch visibility
Button customizations require that the AssistiveTouch accessibility feature be enabled, which prompts iPadOS to display a button that acts as a shortcut to your AssistiveTouch features. While you can drag it to any edge of the screen, this button stays on the screen all the time.
To avoid distractions, you can tap Idle Opacity in your AssistiveTouch settings to reduce the visibility of that menu button when not in use down to fifteen percent, the lowest allowed value.
To completely turn off this button, disable the feature Always Show Menu. You should keep in mind that hiding the AssistiveTouch menu will prevent you from using the Hot Corners feature or customizing actions assigned to your mouse/trackpad buttons.
5. Hot Corners
You can have Hot Corners on your iPad just like you have it on your Mac.
To get started with it, tap the Hot Corners option in your AssistiveTouch settings to turn it on or off. From there, you can cherry-pick a desired action for each of the four screen corners that will be automatically performed when you reach that corner with the pointer. For instance, you may dedicate your top-right corner to Control Center and the bottom-right corner to the app switcher or even to a custom shortcut. How cool is that?
Or, you can assign the Screenshot action to your top-left corner, which is great for automatically taking a screenshot as soon as you dwell the pointer in that corner. To avoid accidental screen shooting and change the amount of time you need to hold the pointer in place for the Hot Corners, you must customize Dwell Control, which is a feature that triggers the action after you rest the pointer on the item that you want to click for a set amount of time.
To do that, go back to the AssistiveTouch settings where you set up Hot Corners.
Right below that, change the Dwell Control using the plus and minus buttons for the number of seconds. You’re also recommended to choose Pause Dwell as your Fallback Action for Dwell Control. Keep in mind that Dwell Control is required for the Hot Corners feature to function.
6. Customizing mouse/trackpad buttons
To assign different functions to the buttons on your mouse or trackpad, go to your AssistiveTouch settings and tap the option Devices underneath the Pointer Devices heading, then tap your connected device. You can tap a button to assign it a different action than the default one.
If your button isn’t listed, tap Customize Additional Buttons, then press a mouse button to choose an action. For instance, you could set your middle mouse button to act as a quick trigger for the iOS App Switcher or the screenshot function or one of your existing shortcuts.

Perhaps the best use for the middle mouse button would be setting it to perform a hold-and-drag action, which is much faster than having to hold an item and wait until it lifts up.
7. Accessing iOS features faster
With mouse and trackpad support, you can access iOS features like Control Center, Notification Center, the App Switcher, and so forth — i.e., to get to Control Center, you simply move the pointer to select the iOS status icons in the top-right corner of the screen, then click.
But you don’t have to click at all — simply use one finger to swipe the pointer past a screen section that invokes a feature, then swipe the pointer past that screen edge again.
For instance, you can get to your Notification Center by highlighting the iOS status icons in the top-left corner with the pointer, then click. Alternatively, you can simply use one finger to move the pointer past the top of the screen near the middle — no additional action required.
8. Use keyboard shortcuts
Using a pointing device like a mouse or trackpad will instantly boost your iPad productivity, but you know what else will? Keyboard shortcuts.
Just like on the Mac, you can press certain modifier keys on a physical iPad keyboard to perform various actions faster.
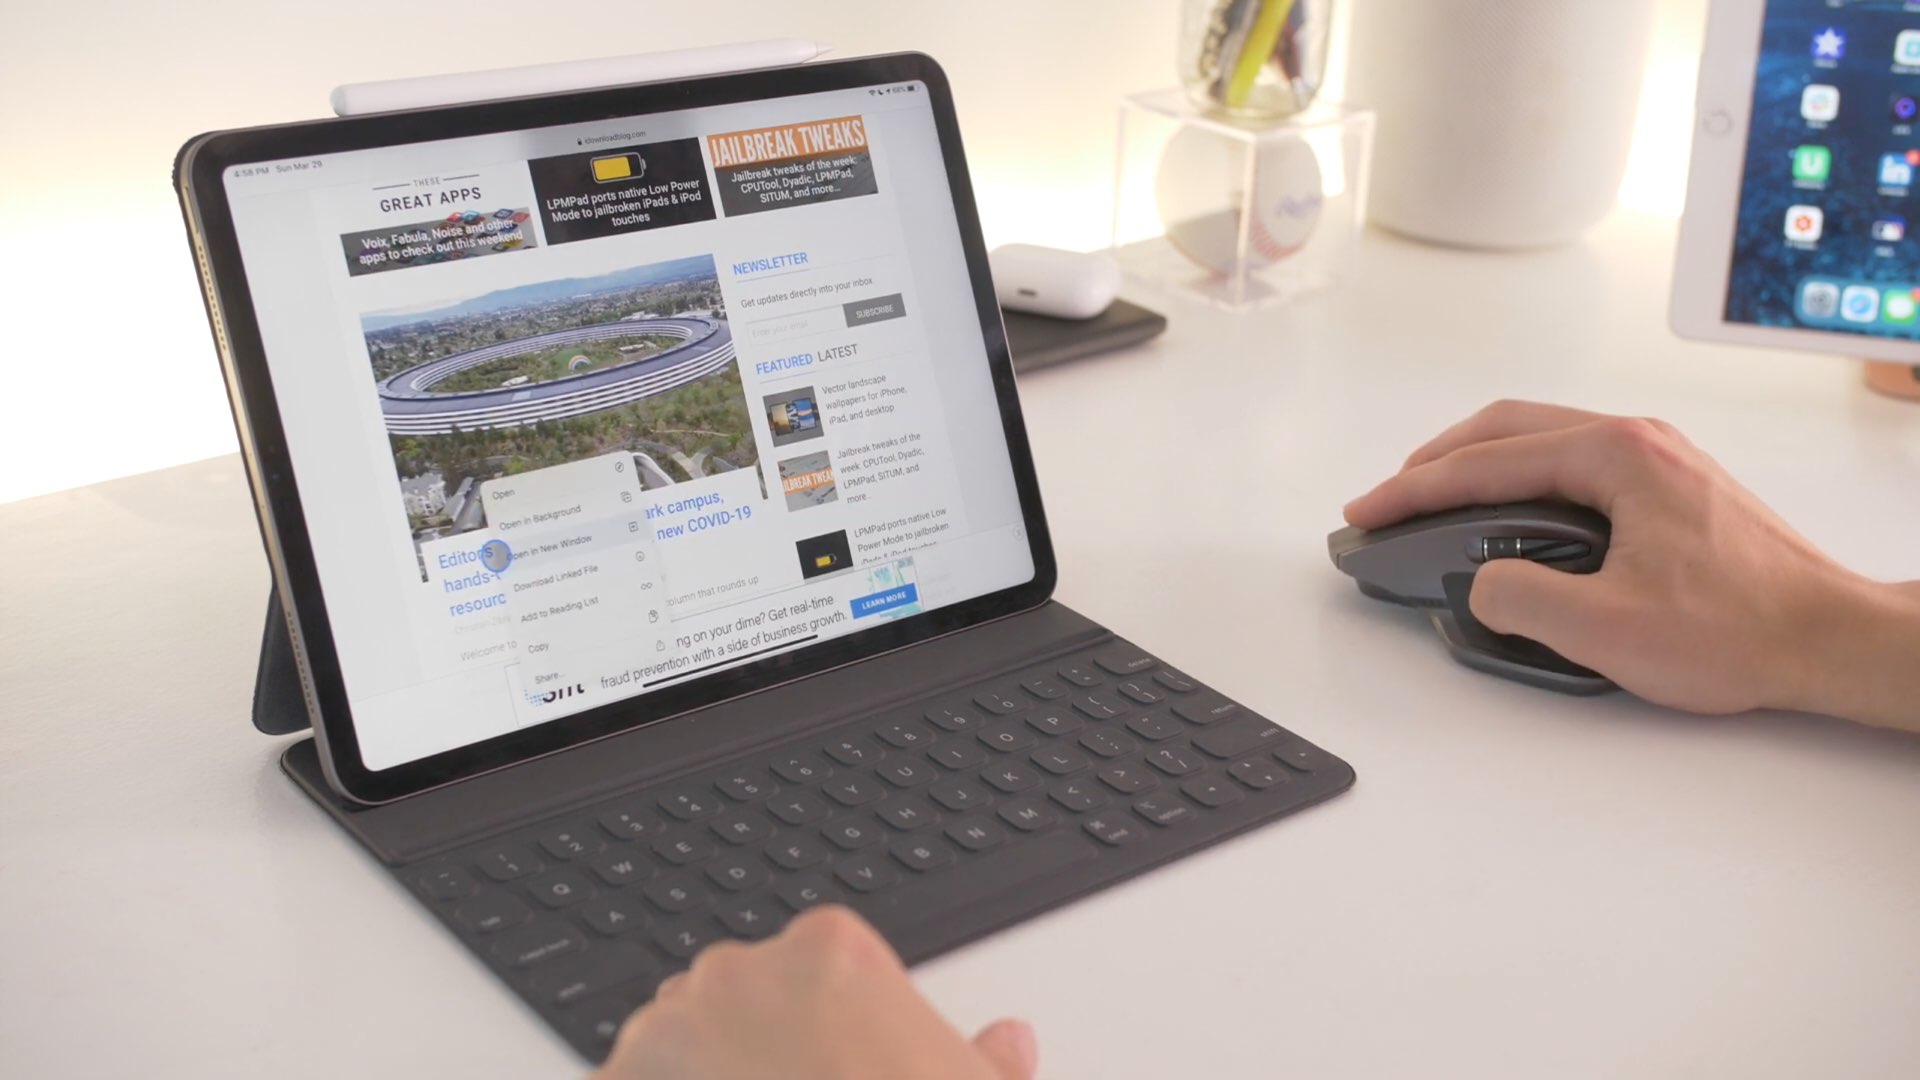
In Safari, you can Control-click something to pull up the right-click function, which is handy if you don’t have a secondary mouse button that you can map to the right-click function. This works in all apps that support iPadOS’s contextual menus and standard tap-and-hold action.
Must see: How to use Full Keyboard Control for touch-free control of your iPad
You may Control-click an image to reveal options to save it or, say, Control-click a link to bring up options to open the URL in a new tab, saved the linked file, and so forth. Control-clicking a Safari link brings up the contextual menu without also previewing the URL, which is super nice.
You can even Control-click the Dock icons to reveal appropriate actions.
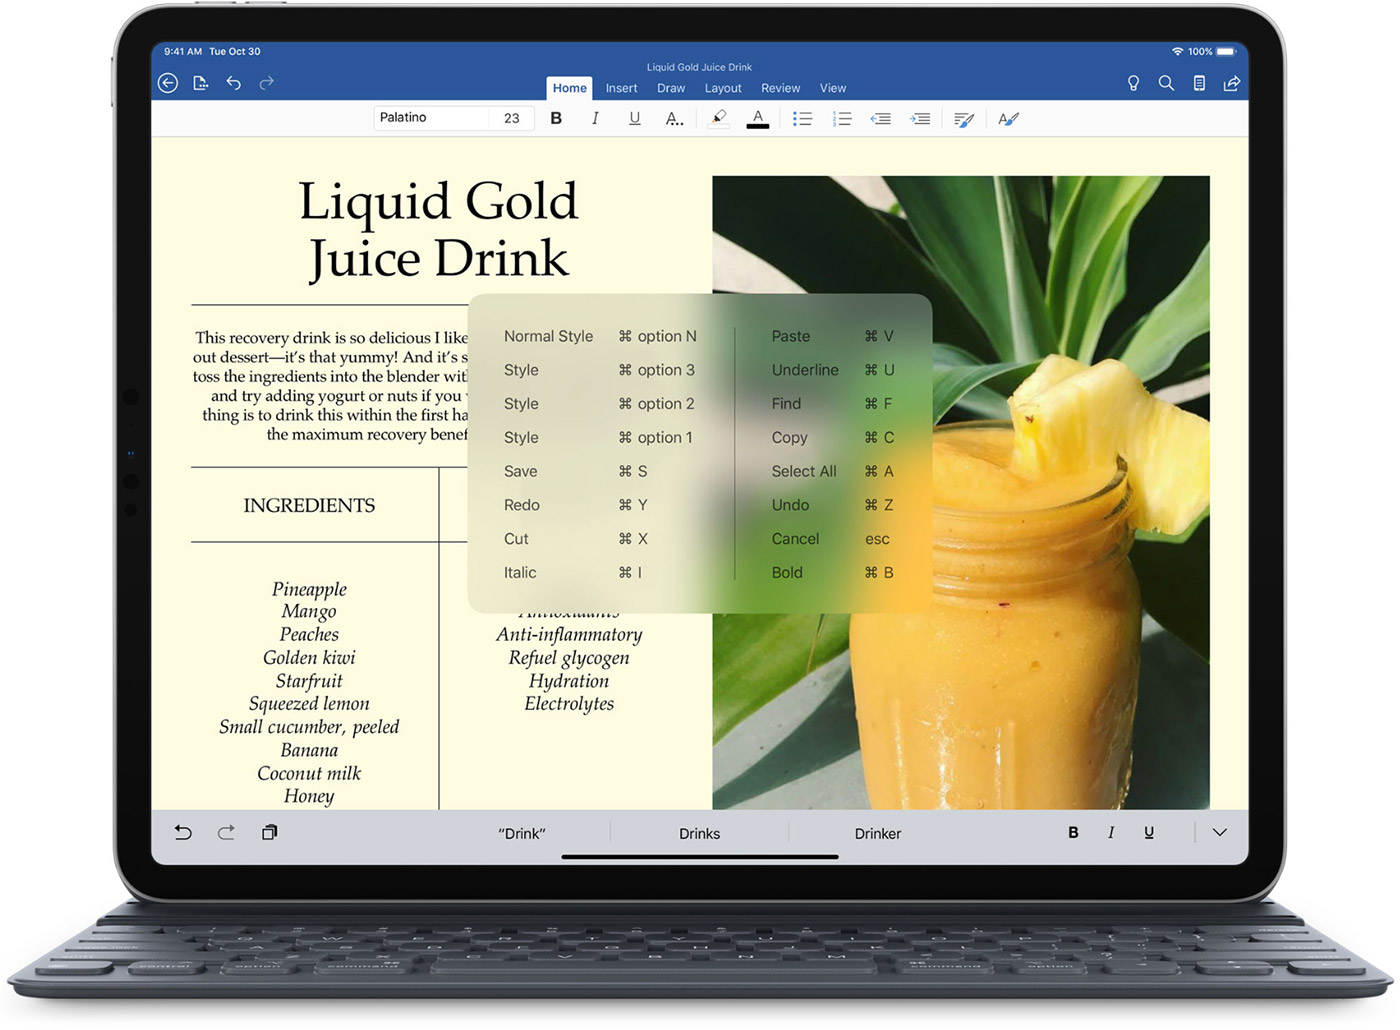
Option-clicking a URL in Safari will download the linked file to your Downloads section, while Command-clicking a URL will open up its webpage in a new Safari tab in the background. And don’t forget that you can display a list of all of the keyboard shortcuts in an app by pressing and holding the Command key on your hardware keyboard.
9. Yes, you can right-click
Why bother with Control-clicking stuff when you can simply right-click?
To enable emulating right-clicking on your trackpad by tapping with two fingers, venture into Settings > General > Trackpad, then slide the switch next to the option Two Finger Secondary Click found underneath the Trackpad heading to the ON position.
To enable left-clicking, enable the option Tap to Click.
For your mouse, tap the option Secondary Click underneath the Mouse heading, then choose a mouse button that you’d like to perform the right-click function. You can right-click to access contextual menus in a number of apps, including Messages, Safari, and Notes, as well as right-click icons on the Home Screen, in the Dock, and so forth.
10. Long-clicking in Safari previews stuff
Tapping-and-holding a URL in Safari previews the underlying website in the contextual menu.
If you’re using an iPad mouse or trackpad, you can right-click to open the contextual menu, but another shortcut that does the same thing is long-clicking. So, whenever you’d like to preview a webpage in Safari without clicking the link, simply long-click the URL to see a quick preview.
If you have a few tips of your own, share them in the comments.
On a related note: