Whether you want to keep copies of scans in Notes or just add one as a reference, here’s how to manage your scanned documents in the Apple Notes app on Mac.

If you use your iPhone or iPad to scan documents and save them in the Notes app, then you can manage those scans in Notes on your Mac. The features in Notes allow you to capture a scan from your device, view it on your Mac, and then crop, rotate, or apply filters.
Capture a scan
If you already have a scanned document in the Notes app, you can skip down to another section. But if you want to capture a scan from Notes on your Mac using your iOS device, here’s how.
1) Open an existing note or create a new one.
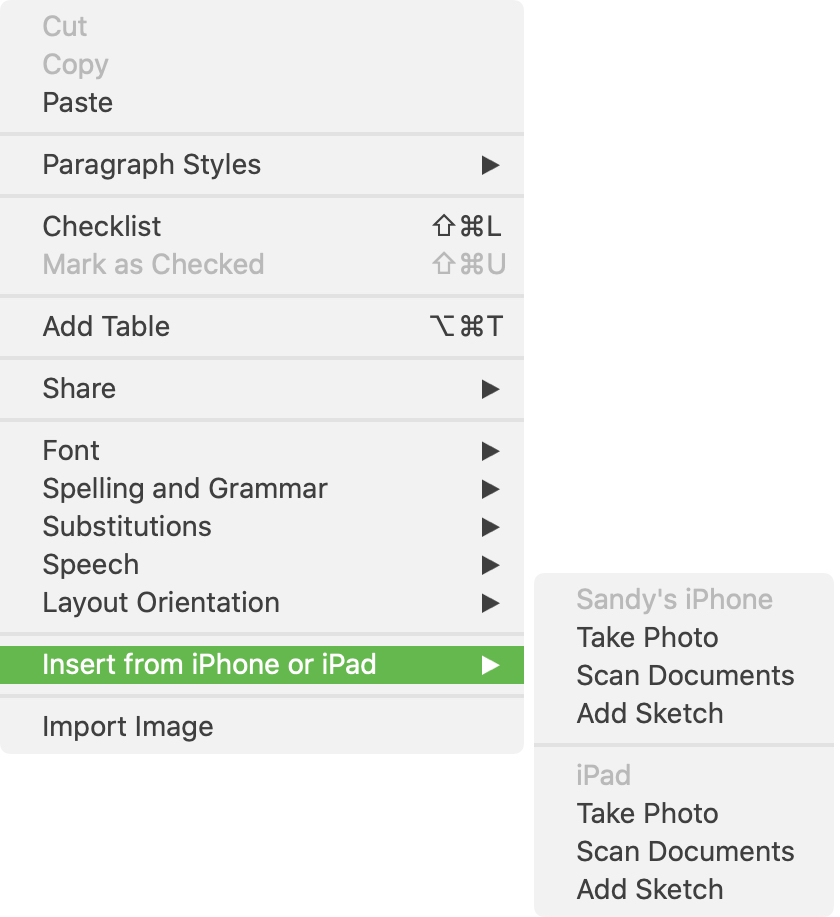
2) Click File > Insert from iPhone or iPad from the menu bar, and choose Scan Documents for the device you’re using.
Alternatively, click the Media button in the Notes app toolbar and select Scan Documents.
You can also right-click in the Notes body and select Insert from iPhone or iPad > Scan Documents.
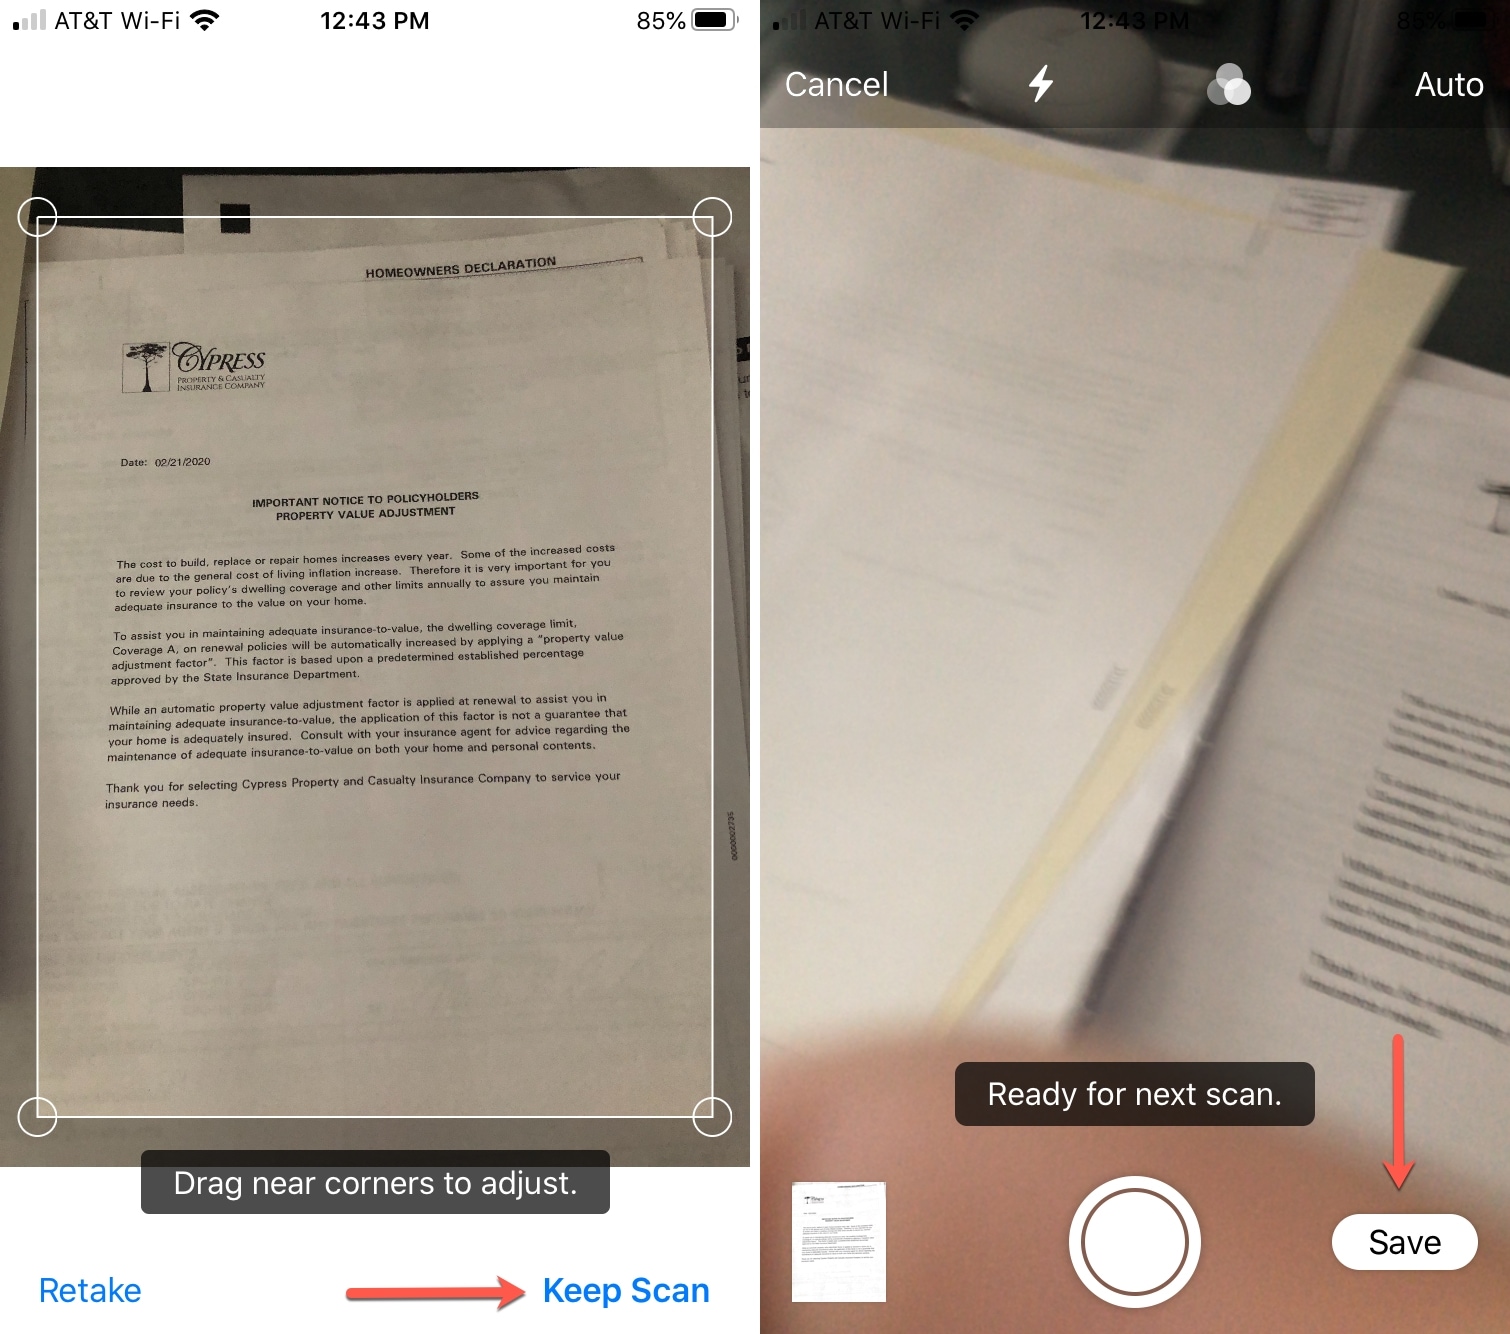
3) Unlock your iOS device, and you should see the Scan tool open right up on your iPhone or iPad for you to capture the document.
4) After you capture the scan, you can adjust the corners if necessary. Then tap Keep Scan and then Save when you finish.
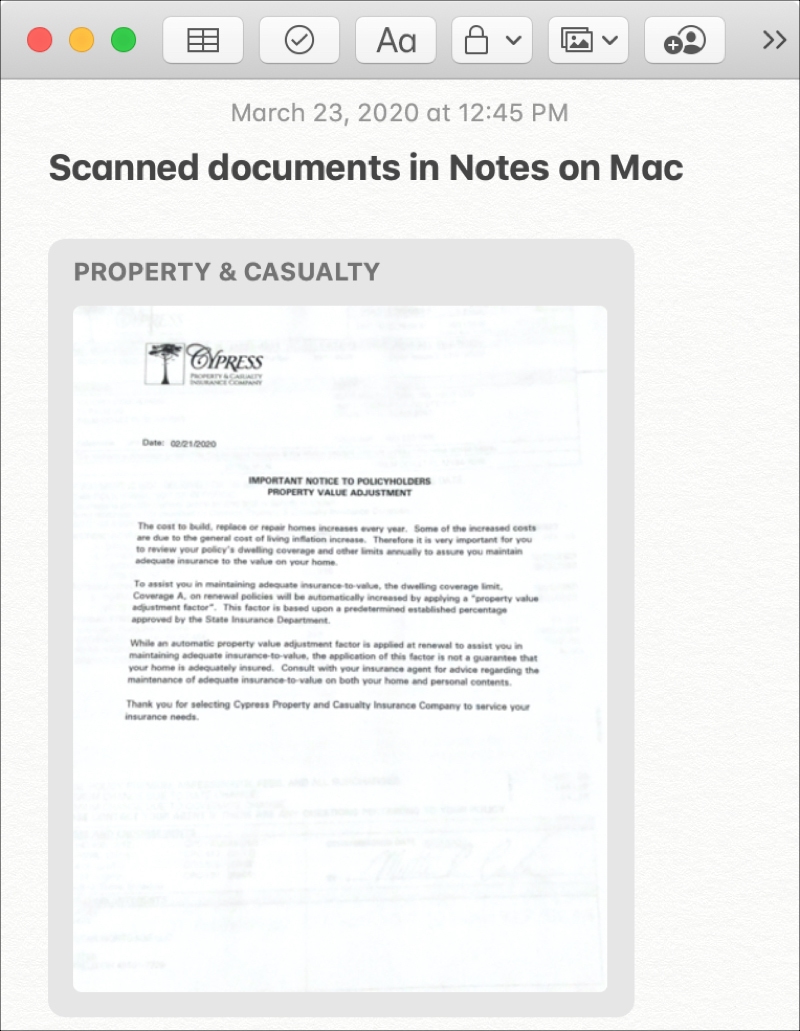
Your scanned document should appear in your note within the Notes app on your Mac.
Find and view a scanned document
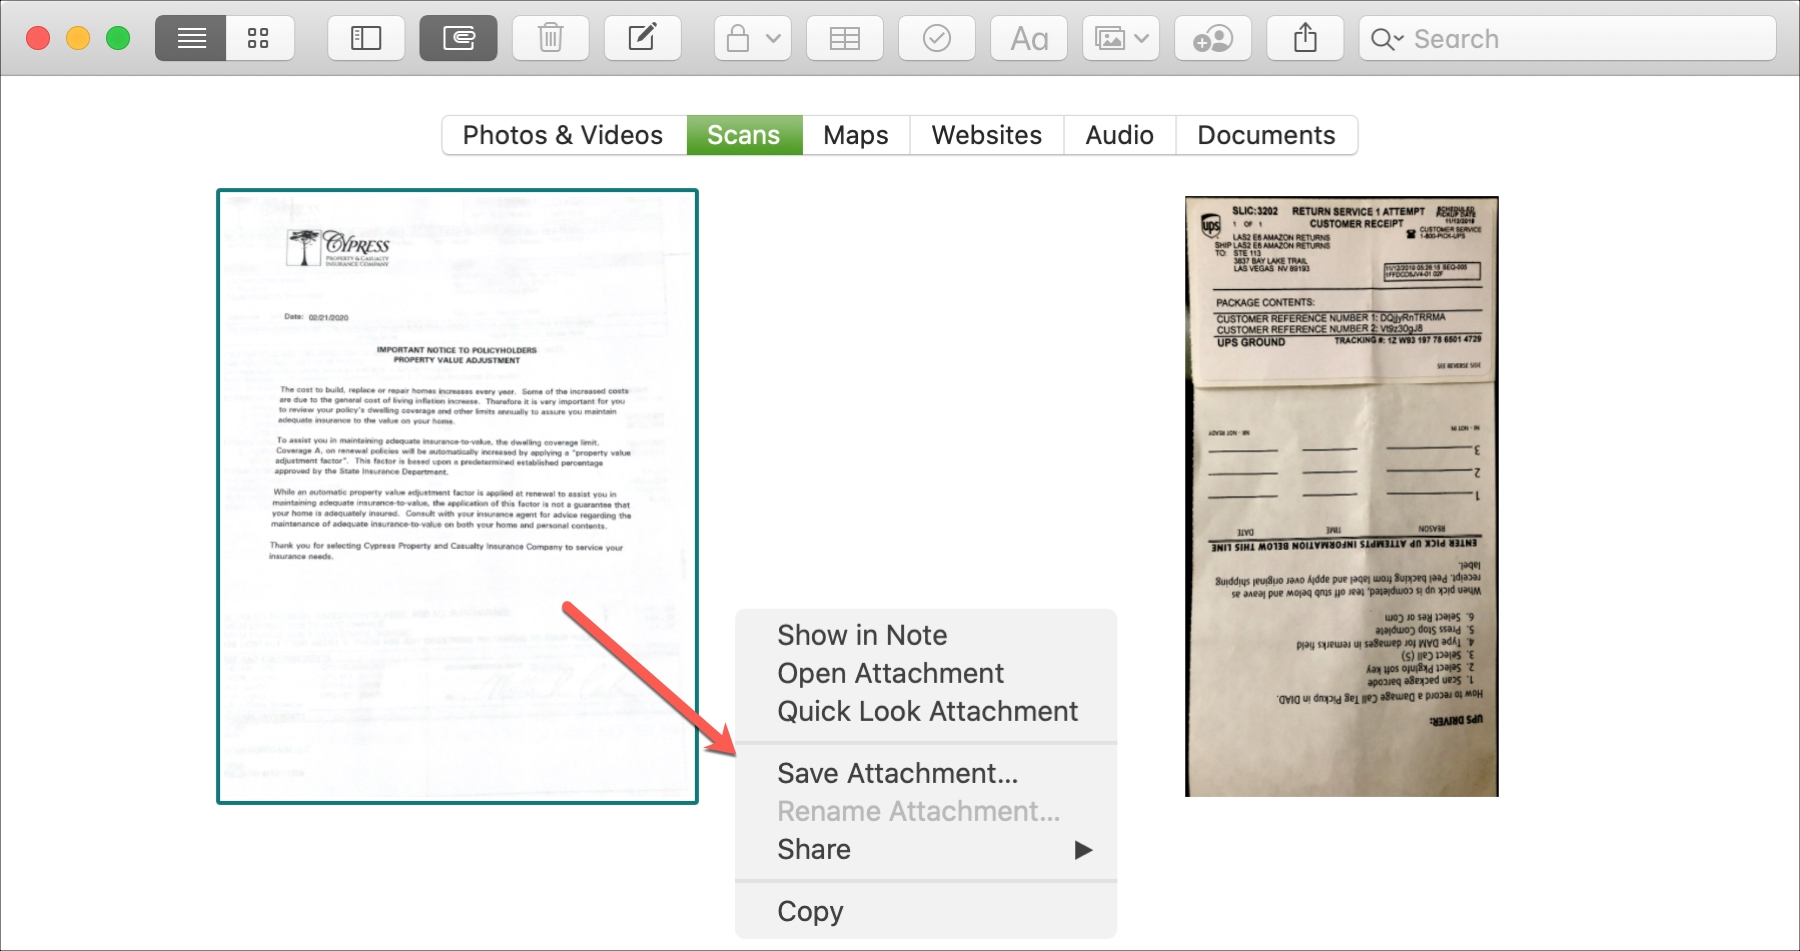
1) Open the Notes app on your Mac and click View > Show Attachments Browser from the top menu bar.
2) Select Scans.
3) When you find the scan, you can double-click it to open it in the Preview app editing window. Alternatively, you can right-click on the scanned document and choose Show in Note, Open Attachment (same as double-clicking it), or Quick Look Attachment, depending on what you’d like to do with it.
You can also use the Search tool in Notes to find a scan by its name.
Rename the scanned document
Go to the note where your scanned document is. Now, click the tiny arrow next to it and choose Rename Attachment. Give your scan a new name and click Save.
Crop, rotate, and markup your scanned document
Double-click to open the scan in the Preview app editing window. Or, click the tiny arrow next to the document name inside the note and choose Markup. You can now markup your document. The process is similar to annotating photos on Mac.
- Crop a scan: Click the Crop button in the toolbar. Then, drag the corners to enclose the part of the document you want to keep. Click Done when you finish.
- Rotate a scan: Click the Rotate button in the toolbar. This will rotate the scan counterclockwise. You can continue to click the button until the scan is rotated as you want it.

Similarly, you can use the other markup options here, like adding shapes, signature, and more.
Note: It’s best to annotate your document after you crop or rotate it because those edits will be deleted if you crop or rotate the scan.
Apply a filter to a scan
You can apply a filter to your document to enhance it. So you can click each filter to see which looks best.
1) Go to the note where your scanned document is.
2) Now, click Show Thumbnails.
3) Right-click over the thumbnail and choose Filters > Color, Grayscale, Black & White, or Photo.

Working with scanned documents in Notes on Mac is easy and convenient. Whether you simply want to view a scan or make edits to it, you have the tools you need.
Do you use the Notes app to hold onto scans you want to save? Or do you only attach a scan if it pertains to a note? Let us know your thoughts!
Check out next: How to scan documents directly from the Files app on iPhone and iPad