Learn how to selectively exclude specific fields before sharing a contact via your iPhone, iPad, or Mac to avoid accidentally sending unwanted information.
The contact card in the built-in Contacts app stores various pieces of information such as mobile phone numbers, addresses, social media handles, company names, notes, birthdays, job titles, contact photos, and more. When sharing a contact, however, you don’t necessarily want to send all that information. For instance, you may only want to share a colleague’s office number when asked for it, which can be done by unchecking their personal phone number when sharing.
Share specific contact details from iPhone
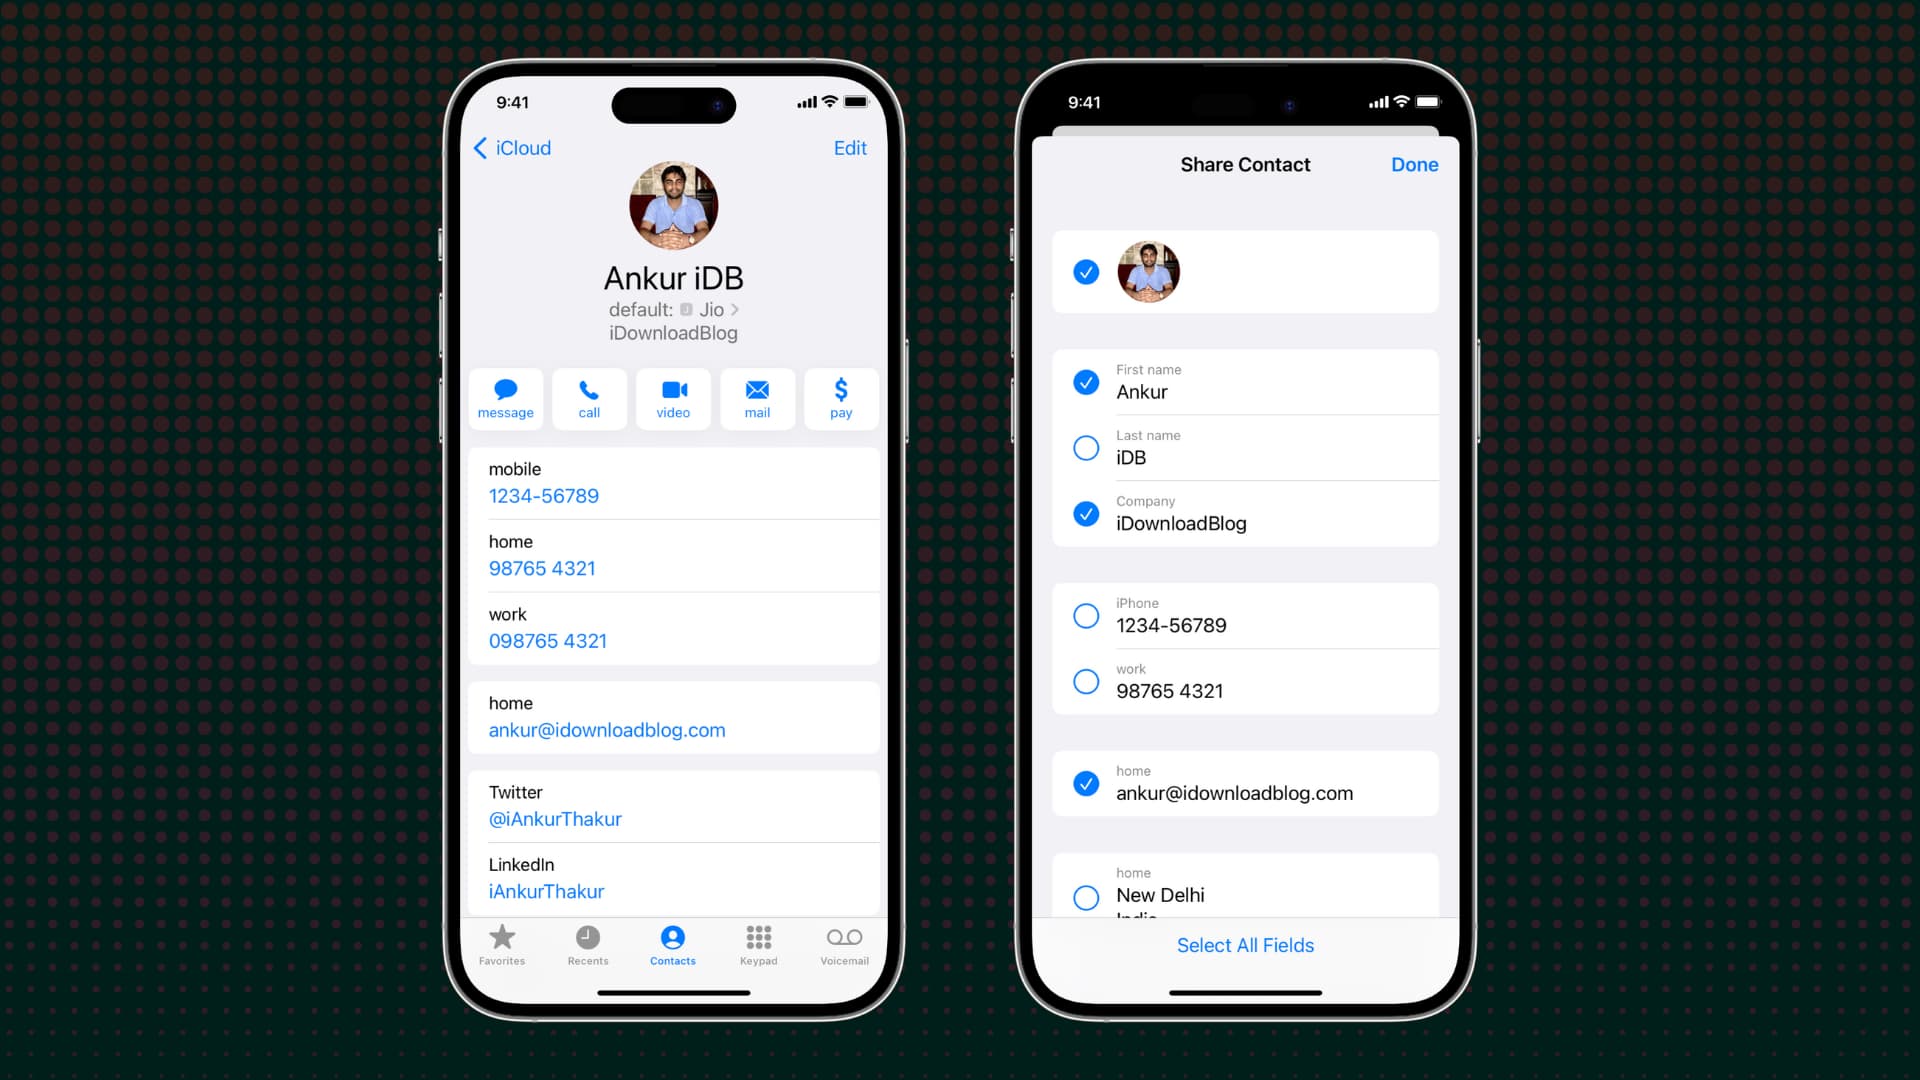
1) Open the Contacts app or go to the Phone app and select the Contacts tab at the bottom.
2) Touch and hold the contact you want to share, then choose Share from the menu.
3) All fields are selected by default, so go ahead and untick those you want to be excluded from sharing, then hit Done. You can also hit Deselect All Fields, but that leaves nothing to share.
4) Choose AirDrop, Messages, Mail, or another app or service to share the selected contact fields.

If you change your mind after deselecting some options, tap the “Shared Info” button on the share sheet and tick or untick the desired fields again. You can then share a contact’s vCard (.vcf file) containing just the ticked fields.
If your device runs an older operating system version, choose Filter Fields and then uncheck the details you don’t want to share.
What about Mac?
The Mac’s built-in Contacts app doesn’t have the option to exclude contact fields before sharing. What you can do instead is exclude specific fields while sharing your own contact card. Additionally, the Mac’s Contacts app lets you exclude the notes field and profile pictures when sharing contact cards.
1) Open the built-in Contacts app on your Mac and click Contacts > Settings or Preferences in the menu bar.
2) Select the vCard tab.
3) Check the box for Enable private me card.
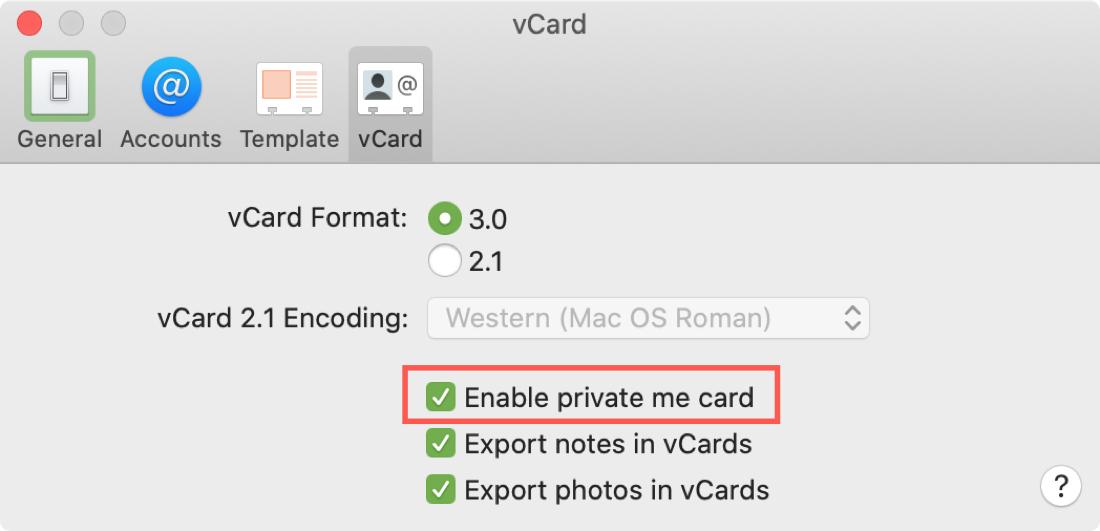
Optionally, uncheck the boxes for Export notes in vCards and Export photos in vCards. Otherwise, any notes or photos attached to the contact card will be included when sharing a contact.
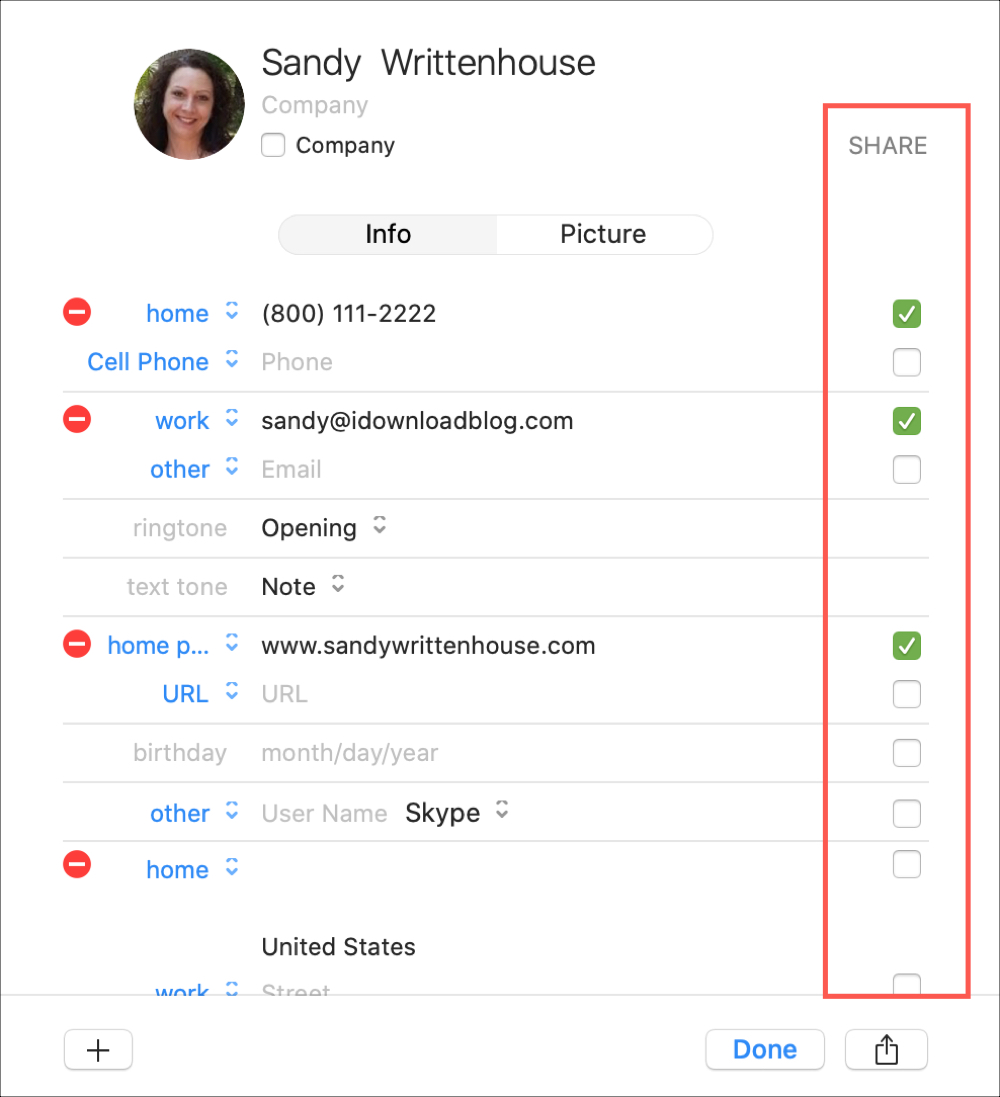
4) Open your own contacts card by clicking Card > Go To My Card in the menu bar and hit the Edit button at the bottom.
6) Tick the checkboxes in the Share column for any fields you’d like included in your Me Card.
7) Click Done to save the changes.
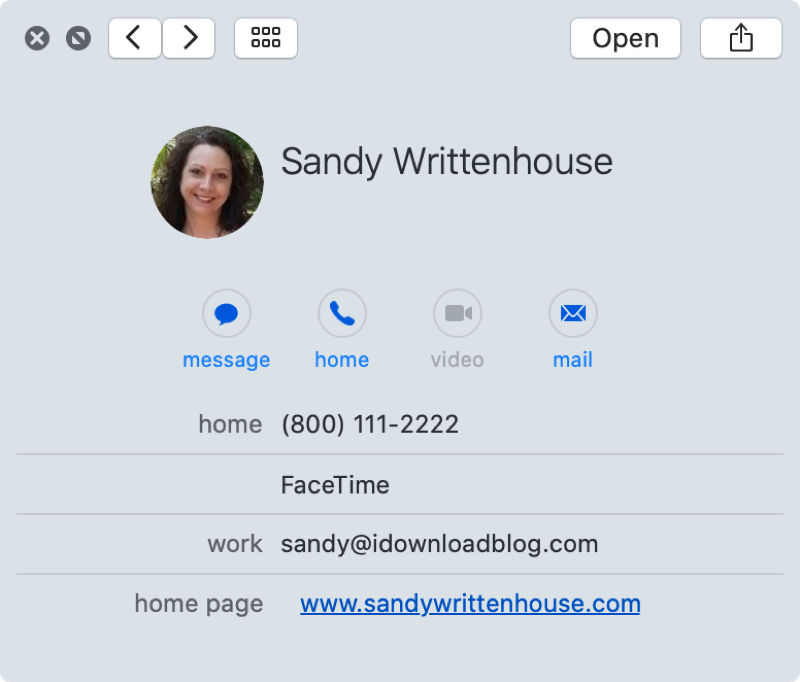
8) To test if everything looks OK, share this card with yourself using the Share button in the bottom-right corner. When you open your contact card, you should only see the fields you’ve explicitly allowed.
You can’t be too careful with your personal information. If you’re the type of person who likes to store detailed contact information, including things like private information in the Notes field, you need to be extra careful when sharing such contact cards. If you don’t want to set up a separate contact card with only the details you’re comfortable sharing, the Me Card option is another way to go.
Do you have any tips for the Contacts app that are similar to this one? If so, feel free to share them in the comments section down below!
More contact tips for you: