Whether you’re hanging out with friends or passing time alone, here’s how to have fun with photos and videos using Photo Booth on your Mac.
Photo Booth may not be a new way to have fun with your photos, but if you’re new to Mac (or haven’t used the app on iPad), then it is new to you, right?
This app lets you add cool effects to photos and videos that you capture with your Mac’s camera. It’s really easy to use and can be a lot of fun to play around with, especially if you’re hanging out with family or friends.
In this tutorial, we’ll show you how to capture a photo or video, make a few edits, and entertain yourself or others with Photo Booth on Mac.
Open Photo Booth
You can open the Photo Booth app via the Applications folder on your Mac or by using Spotlight for a quick search.
As soon as you open Photo Booth, it’s ready to go. You don’t have to do anything special to start using it.
Get ready and capture
The capture button at the bottom of the window should be red, indicating that it’s ready to, well, capture. But before you do, let’s that a look at the options.
Select your shot
On the bottom left, you’ll see three buttons:
- Click to snap four quick photos
- Take a still-shot
- Shoot a video

Choose an effect
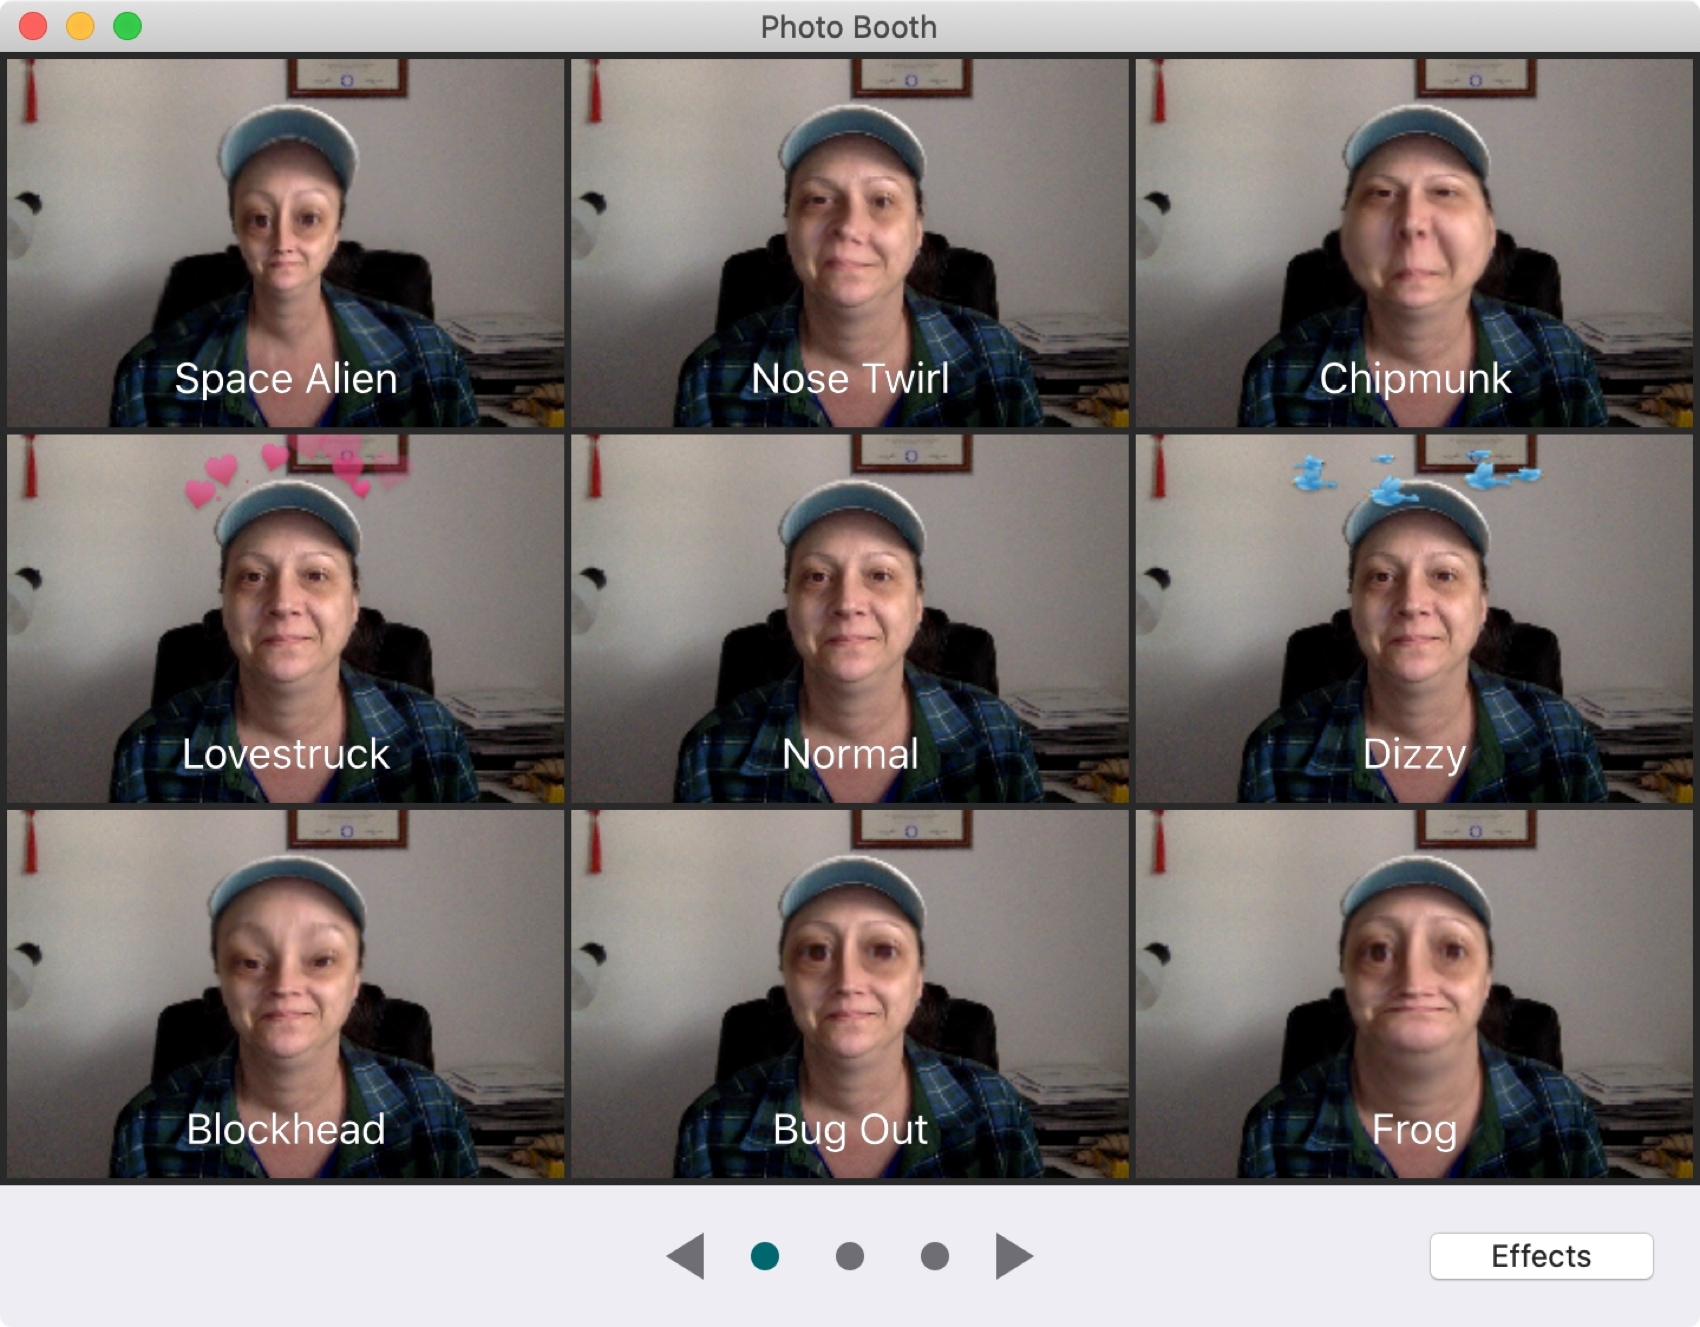
On the bottom right, you’ll see the Effects button. This is where the real fun begins with Photo Booth. Go ahead and click that button, and you’ll see all of the neat filters you can choose from for your photo or video:
Page 1 (Effects):
- Space Alien
- Nose Twirl
- Chipmunk
- Lovestruck
- Normal
- Dizzy
- Blockhead
- Bug Out
- Frog
Page 2 (Filters):
- Sepia
- Black And White
- Plastic Camera
- Comic Book
- Normal
- Color Pencil
- Glow
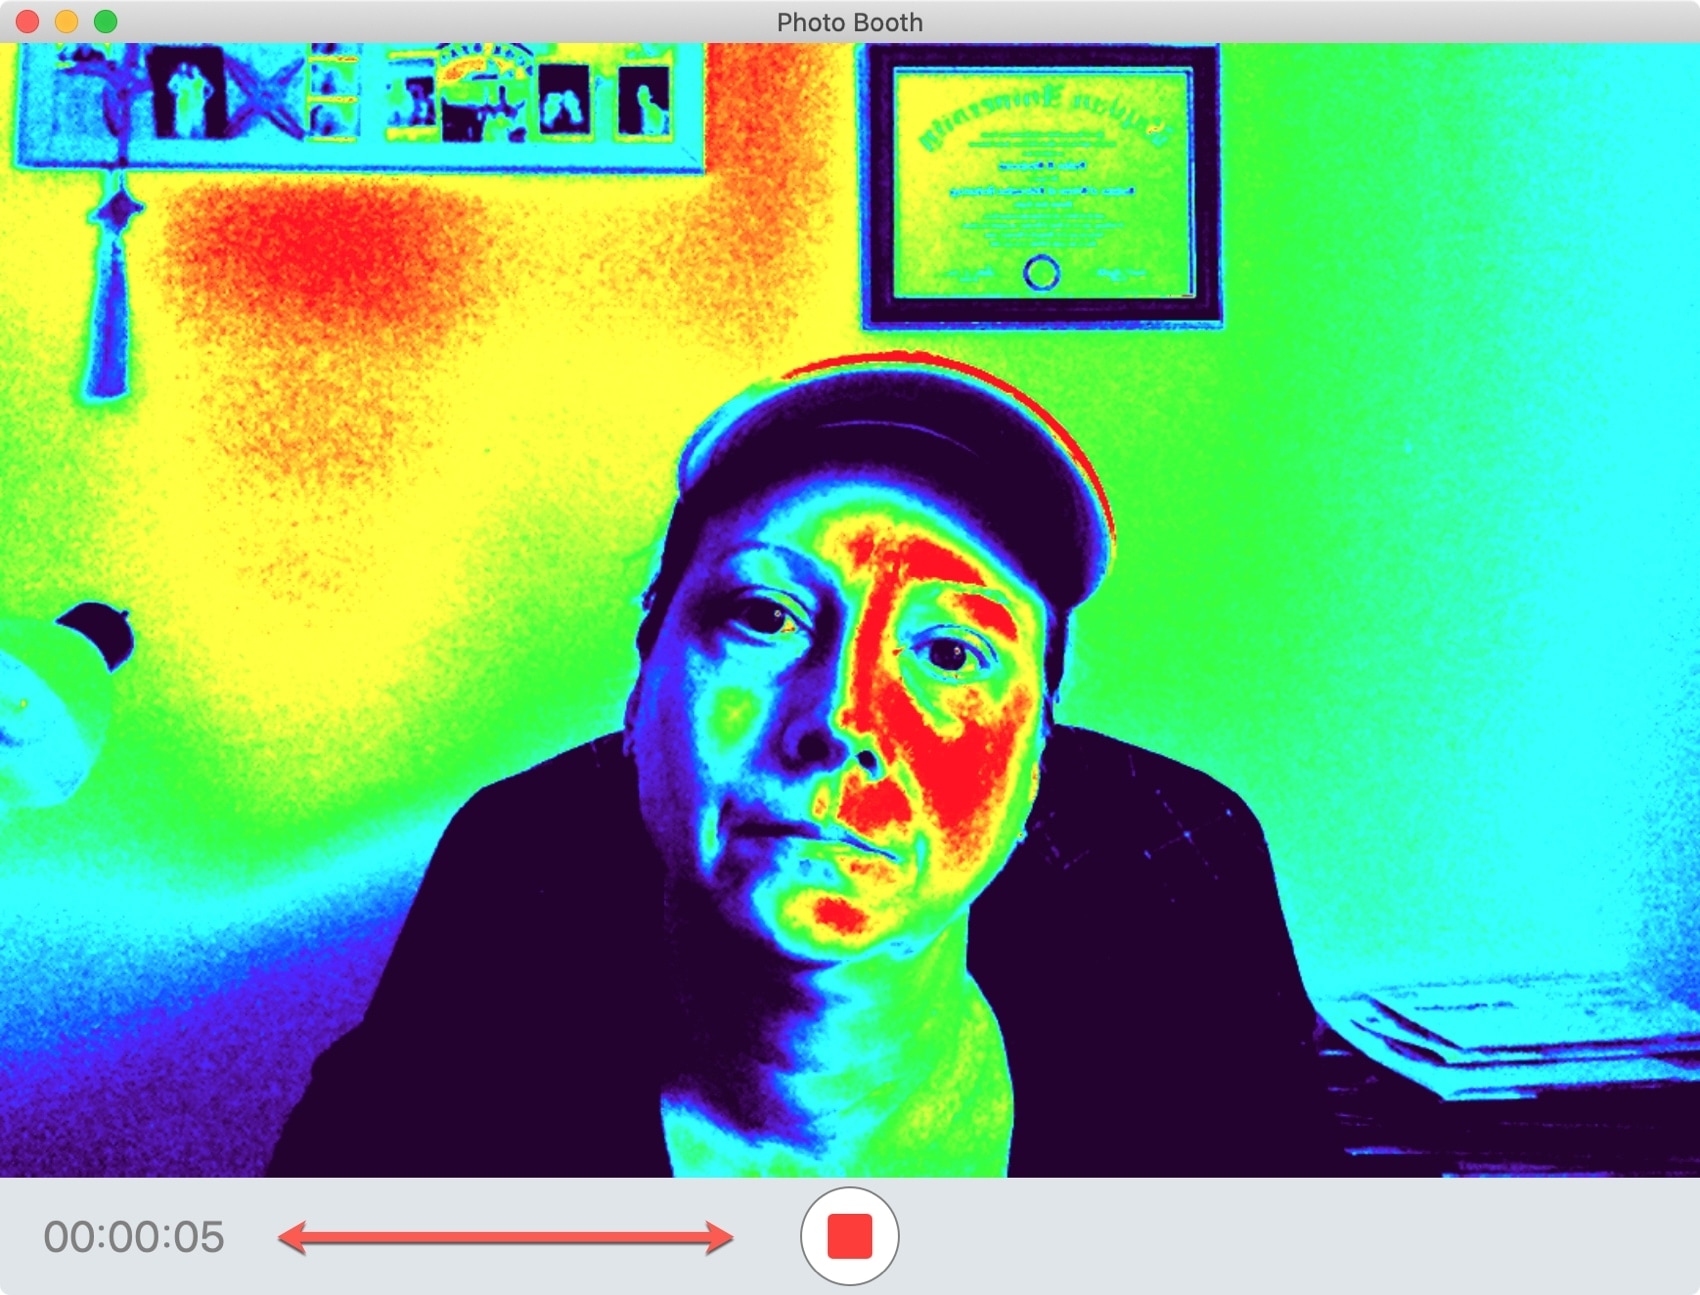
- Thermal Camera
- X-Ray
Page 3 (More effects):
- Bulge
- Dent
- Twirl
- Squeeze
- Normal
- Mirror
- Light Tunnel
- Fish Eye
- Stretch
Turn yourself into a space alien, chipmunk, or frog. Use a comic book look, thermal camera, or X-ray filter. Make your face bulge, your head twirl, or create a light tunnel. Use the arrows at the bottom to move through all the effects, then click to see a preview of one with the view that’s in the camera.
Capture your photo or video
Once you have the type of shot you want and an effect you like, click the capture button. The app will count down from three to one so you can prepare.
If you’re shooting a video, at the bottom, it shows the duration as it records. Just click the red square button to stop recording.
Tip: If you want to disable the countdown, hold the Option key while you click the capture button.
Photo Booth settings and options
Photo Booth has a few settings you’ll want to know about, as well as options for editing and sharing your photos and videos.
Enable or disable the screen flash
Just like your iPhone, your Mac camera can create a ‘flash’ effect by lighting up the entire screen. To turn the flash off or on, click Camera > Enable Screen Flash from the menu bar. A checkmark next to the feature indicates it’s turned on.
Alternatively, you can hold the Shift key when taking a picture in Photo Booth, and it won’t flash the screen.
Photo Booth uses your Mac’s Share Menu options. So, if you’d like to share a photo or video via Mail, Messages, or another app, select it and then click the Share button in the bottom right of the window.
Export photos or videos
Along with the Share Menu options, you can export a photo or video from Photo Booth by clicking File > Export or Export Original in the top menu bar. You can also just drag a photo out of Photo Booth and drop it on the Desktop or a Finder folder.
Edit photos or videos
It’s important to keep in mind that Photo Booth is not an image editing app. It’s there for you to capture quick photos and videos, and then you can export them to your preferred editing app to make changes. However, there are two quick editing tools you can use.
You can flip a photo horizontally by selecting it and clicking Edit > Flip Photo in the menu bar.
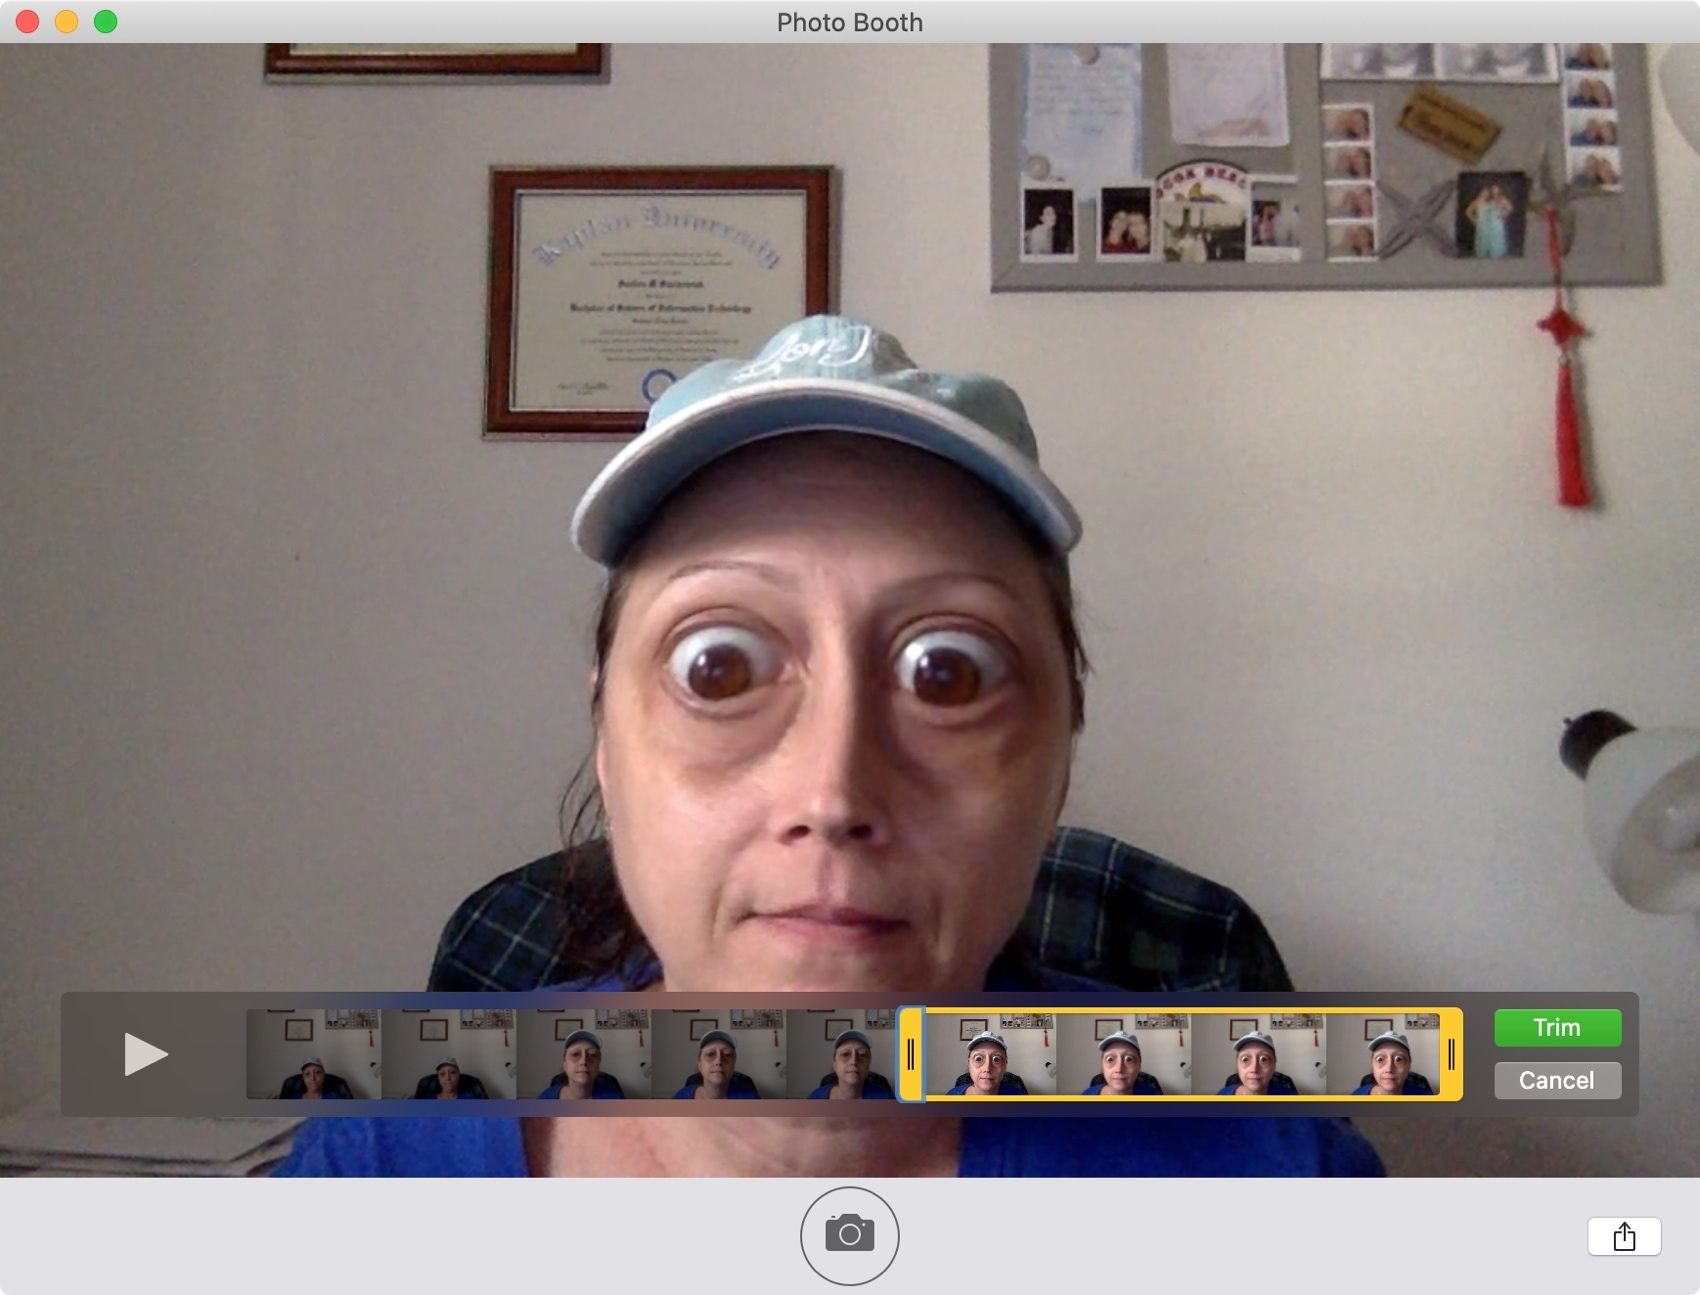
You can also trim a video by selecting it and clicking Edit > Trim Movie in the menu bar. Slide the yellow bar to capture the part of the video you want to keep, then click Trim, and the rest of the video will be removed.
Delete pictures and videos from Photo Booth
1) Select a photo or video thumbnail and hit the X icon to delete that media.

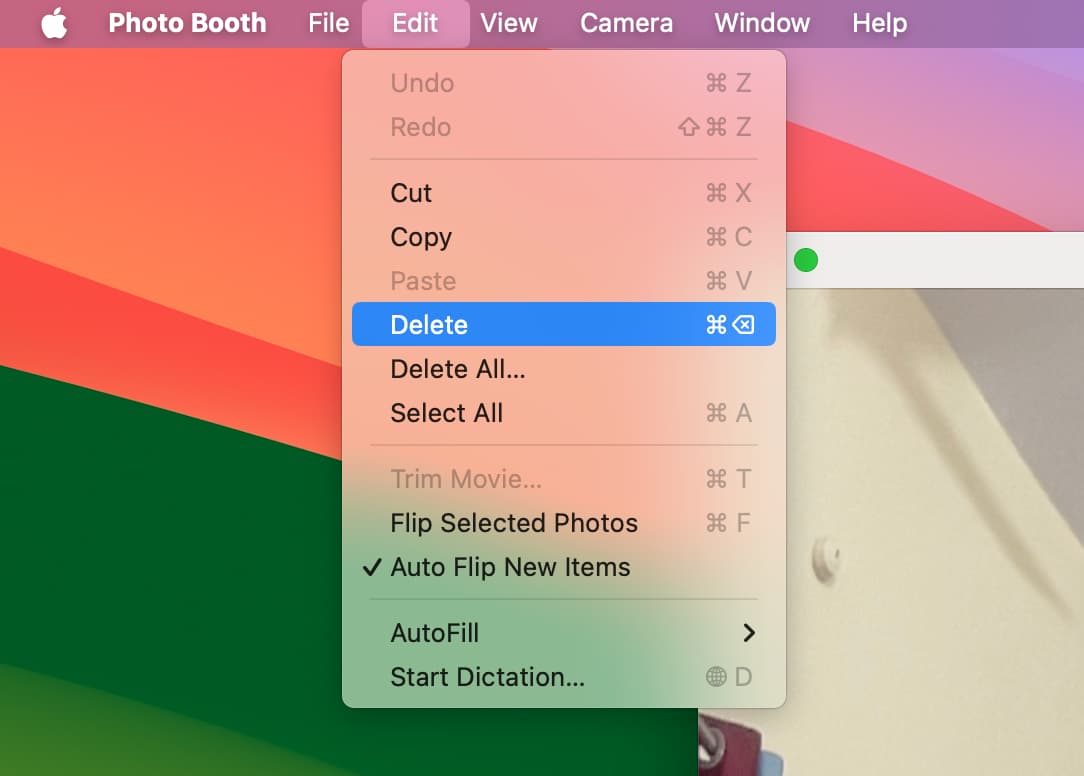
2) You can also hold the Command key to select multiple items and then click Edit > Delete in the top menu bar.
3) To get rid of all media taken from Photo Booth, click Edit > Delete All in the menu bar.
Recover deleted media
You can recover deleted images and videos from Photo Booth by clicking Edit > Undo Delete. Repeat this several times to recover multiple recently deleted images.
Note:
- The Undo Delete button (after you click Edit) may be grayed out if you exit the Photo Booth app and go inside it again.
- You can’t recover deleted images if you choose Edit > Delete All.
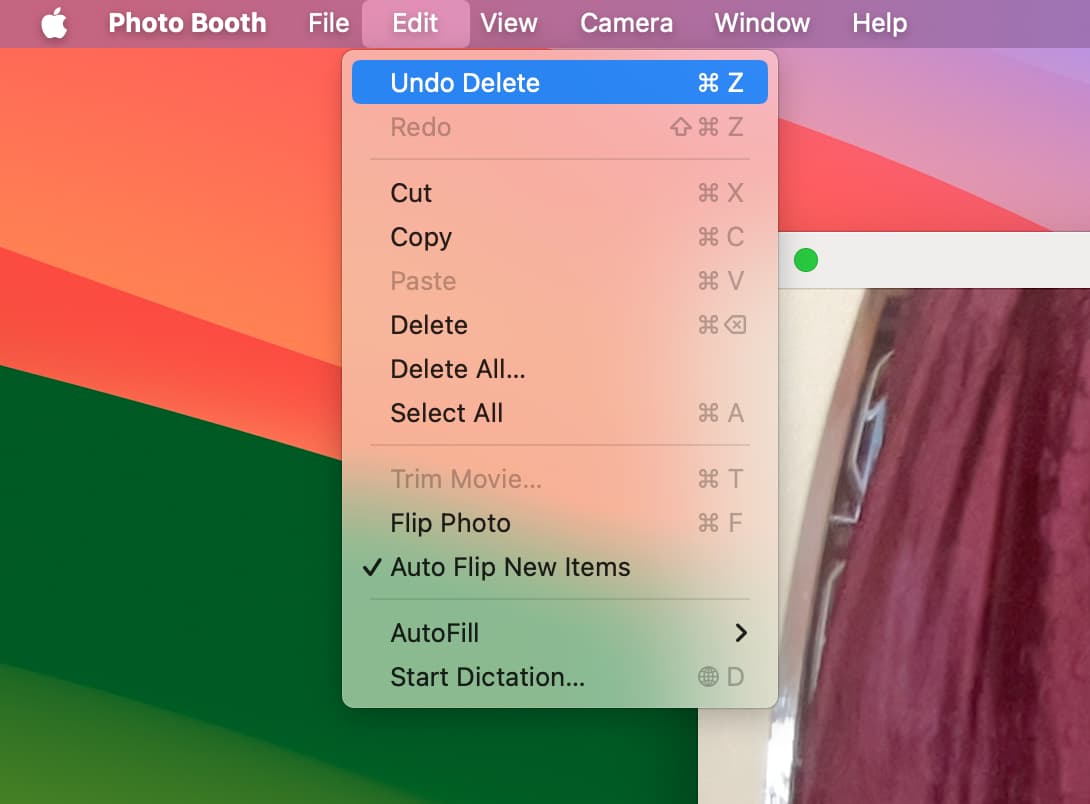
Photo Booth is one of those built-in apps that many people take for granted. But for gatherings with friends or family, snapping a goofy photo of yourself for your spouse, or just killing time when you’re bored, Photo Booth can be a lot of fun.
What are your thoughts on Photo Booth? Are you going to give it a try on your Mac? Let us know!
More camera tips for Mac: