Learn how to enhance your text documents on Mac by creating tables or lists in Apple’s TextEdit app.

TextEdit on Mac is a straightforward tool for creating plain or rich text documents, making it ideal for quickly setting up tables or lists. With rich text enabled, adding tables and lists is easy, and there are a number of customization options.
Make sure to use rich text
If you’ve adjusted your TextEdit preferences to use rich text for all of your new documents, then you can skip down to creating the table or list.
But if your default is set to plain text, you’ll need to switch to rich text for this task. Thankfully, you don’t need to change your default settings—you can simply enable rich text for the current document.
With your document open in TextEdit, click Format > Make Rich Text from the menu bar. Keep in mind that this will affect the text you already have in the document.

Create and format a table in TextEdit
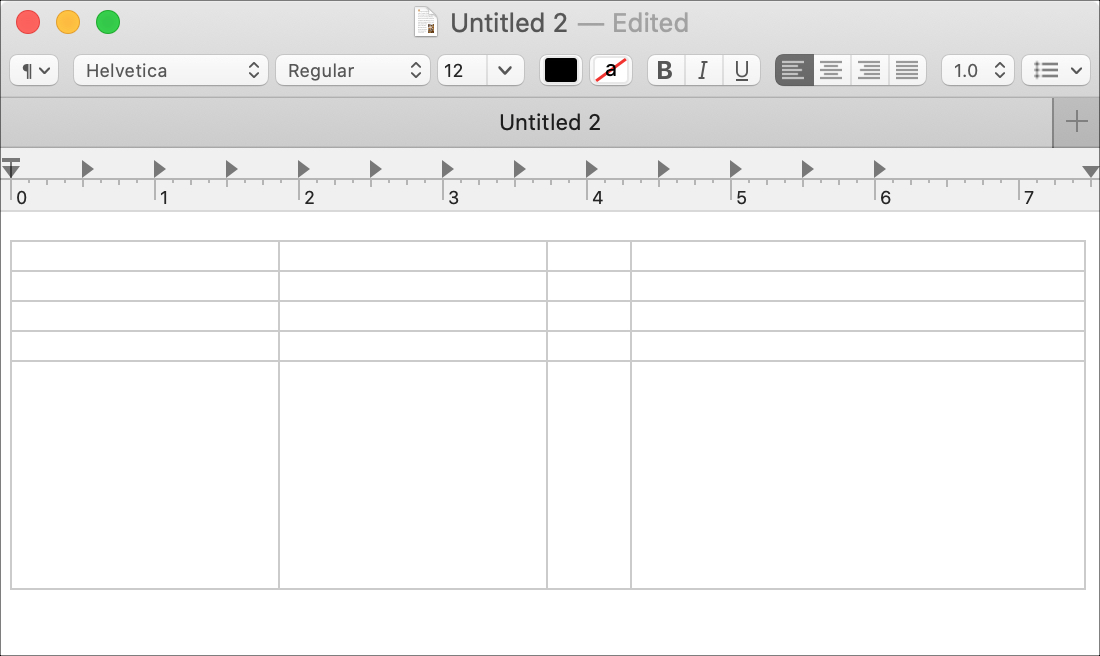
To insert a table in TextEdit, click Format > Table from the menu bar.

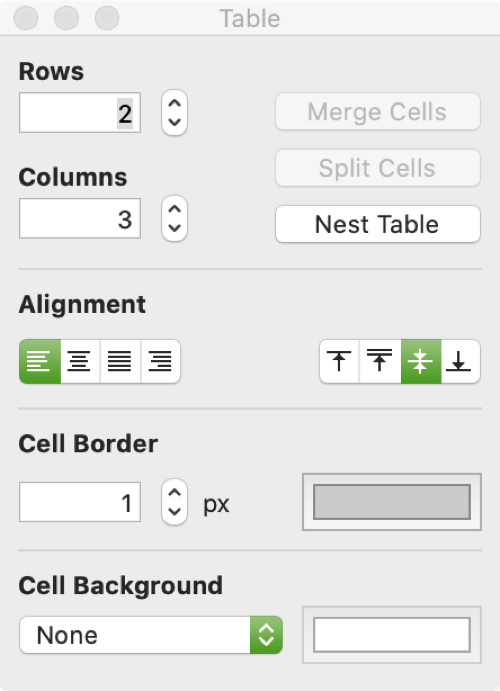
The table formatting window will pop open for you to configure your table settings. You can select the number of rows and columns for the table and even use a nested table if you like.
You also have settings for the selected cell. You can adjust the text alignment within the cell both vertically and horizontally, choose a cell border and color, and a cell background and color. Hitting the arrow under the Cell Border section changes the selected cell border padding as you increase the pixel count.
After you create your table, you can go back and edit it using the menu once again. This allows you to add or remove rows or columns and change any of the cell settings.
Resize a column or row
To adjust the width of a column or height of a row, put your cursor over the border, and when the two-sided arrow appears, just drag.
Merge or split cells
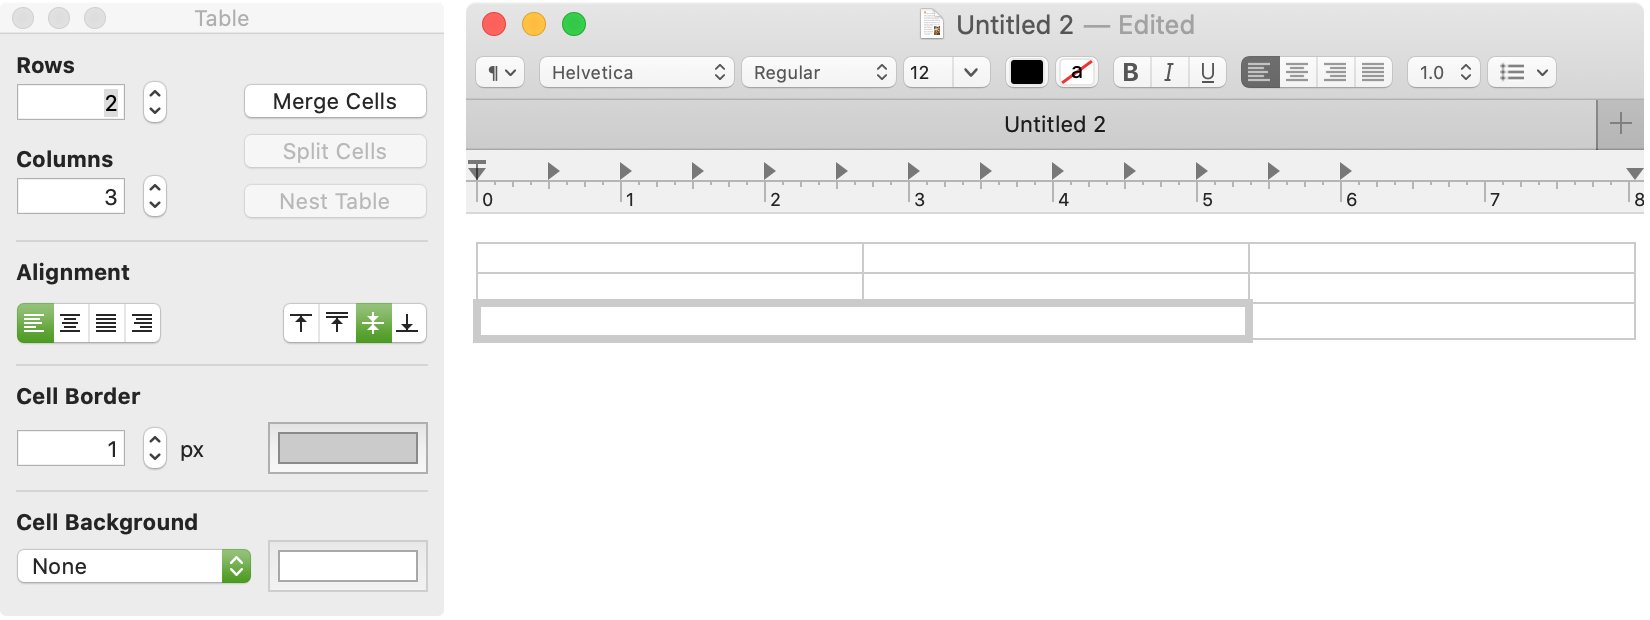
To merge cells, select them in the table, open the formatting window (Format > Table), and click Merge Cells.
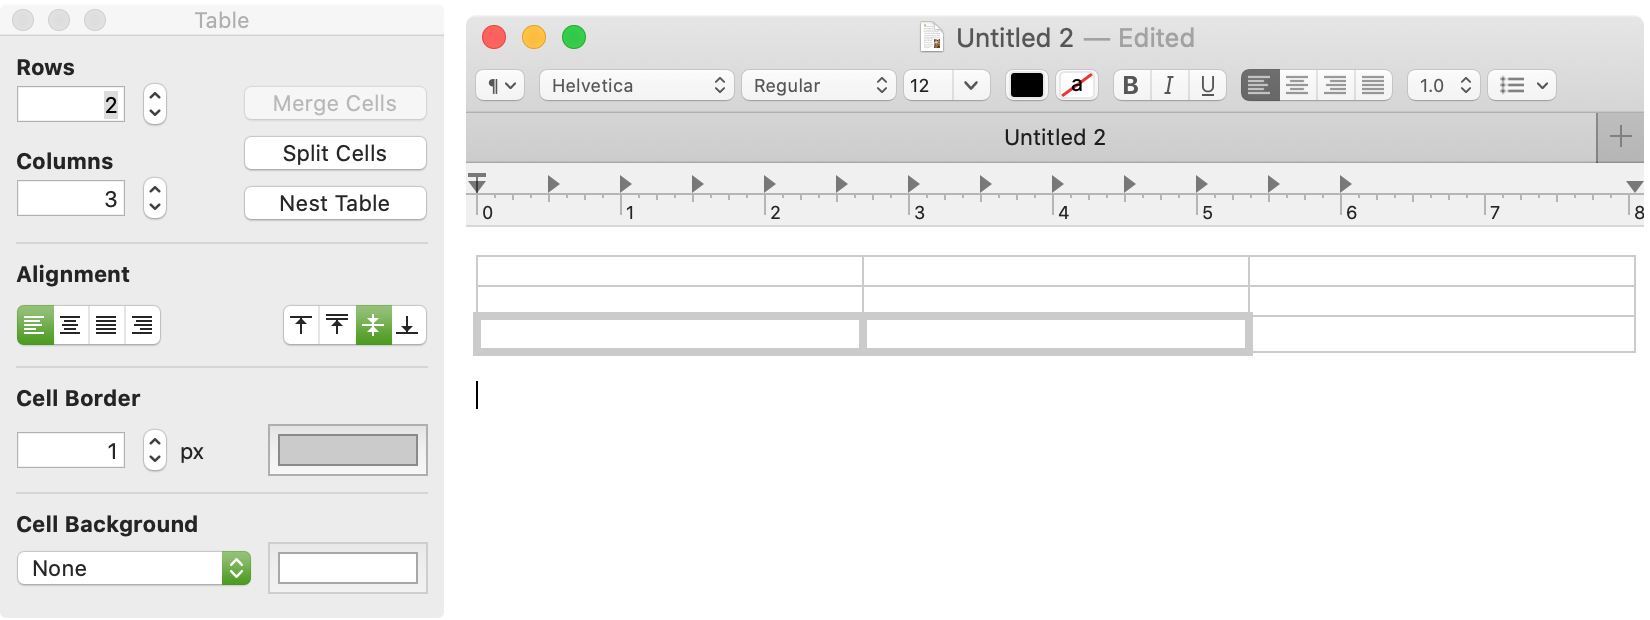
To split merged cells, follow the same steps and click the Split Cells button.
Delete rows, column, or table
Click the bottom arrow in the little Table window (Format > Table) to delete rows or columns.

To delete a table in TextEdit, drag through to select the entire table and hit the Delete key.
Create and format a list in TextEdit
To insert a list in TextEdit, click Format > List from the menu bar. You can do this before you create the list or after you already have text. If you do the latter, select the text first and then click Format > List to convert your text into a list.
When the formatting box opens, you can configure your list with some flexible options.
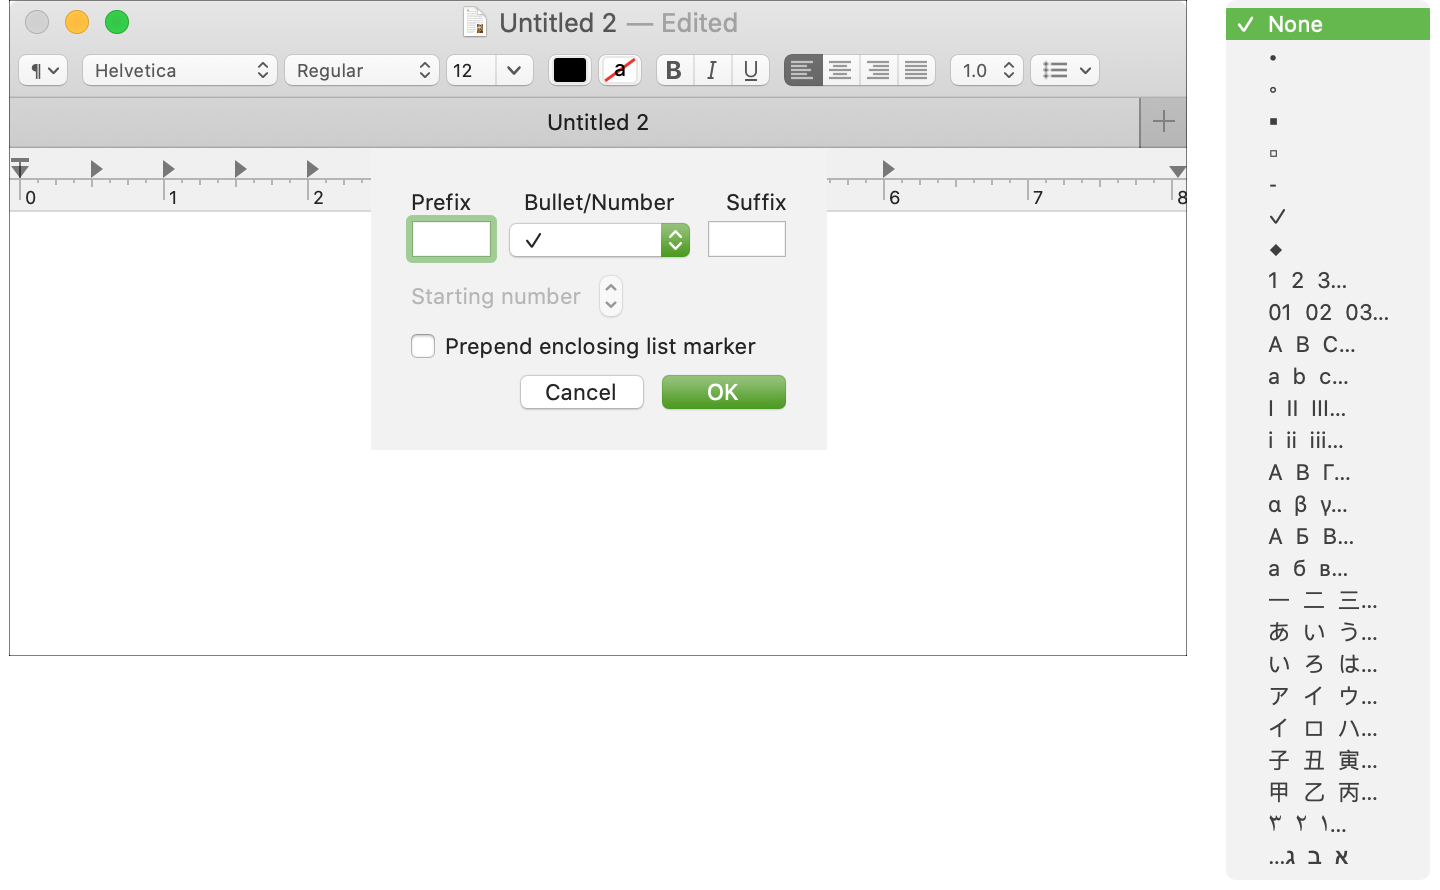
Prefix: Select a character as a prefix before the list marker.
Bullet or Number: Choose the list marker style. You have several options for both bulleted and numbered lists.
Suffix: Select a character as the suffix for the list marker.
Starting number: For numbered lists, you can choose the number to start with.
Prepend enclosing list marker: If you’re going to create sublists, like an outline, marking this box will add the enclosing list marker to the sublist.
For instance, if you use capital letters like A, B, C as list markers and want to create a sublist under C, you can include the letter C before the sublist markers (a, b, c) for better clarity, as illustrated in the screenshot below.

To continue adding items to your list, simply hit your Return key after each list item. To end your list, hit the Return key twice.
Like working with tables in TextEdit, you can edit your lists anytime as well. This is especially important for formatting sublists, as described above. To edit the way a list is formatted, select the text and then click Format > List in the menu bar.
Working with tables and lists in TextEdit is a simple way to format these types of items. And if you’re interested in creating a table for an email, you can use TextEdit; check out our tutorial.
Do you use TextEdit for creating rich text documents or even plain text files? What are your thoughts on the tool and what are some of your favorite features?
More table tips for Mac apps: