Learn how to create albums in the built-in Apple Photos app on your Mac to group pictures and videos and organize your media library.

Albums are a great way to organize your media. The Mac’s Photos app offers a comprehensive search feature, but with albums, you can get to groups of very specific photos much faster. If you want to manage your media library in Photos for Mac, do create some albums for special events such as holidays and vacations or for your kids, pets, and so on.
We’ve already covered working with shared albums and albums on your iPhone, and this tutorial will show you how to create and manage albums in Photos for Mac.
About the built-in Photos albums
The Photos sidebar provides shortcuts to the built-in Favorites, People, and Places albums. While not labeled as albums, they do contain collections of images, videos, Live Photos, and other media that make it a cinch to find memories of specific people or places you’ve visited. Any shared albums you’ve created are listed under their own section in the sidebar.
If you use iCloud Photos
The iCloud Photos feature backs up your media library, syncing it across devices using the same Apple Account. Your albums are synced as well; if you’ve created custom albums in Photos for iPhone, they’ll automatically appear in Photos for Mac, and vice versa.
Create an album
To create a new album in Photos for Mac, select the Albums section in the sidebar and click the plus sign, then choose Album. The app will create a new album named “Untitled Album” but you can enter your own to distinguish it from others. All your albums are available from the Albums section in the sidebar.

Create an album from an image selection
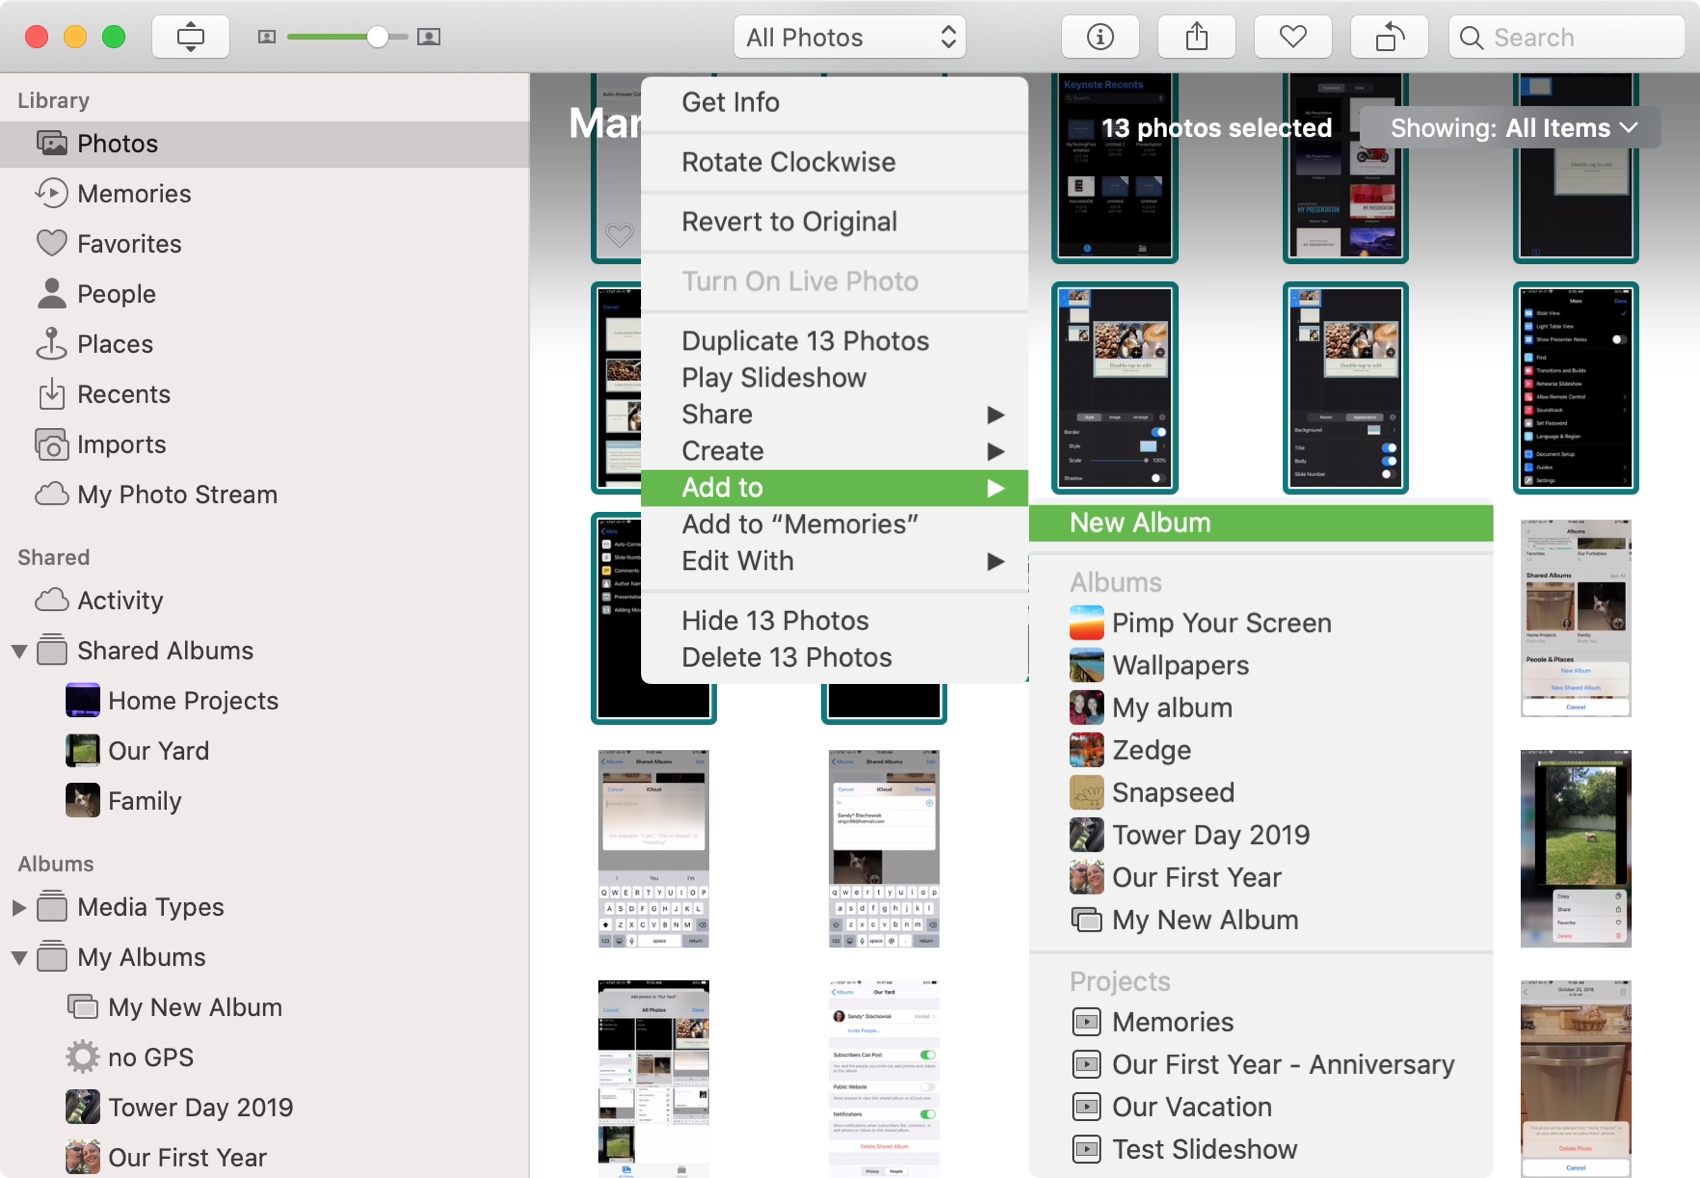
To create an album from several photos, select them by holding the Command key while clicking, then do any of the following:
- Right-click or Control-click the selection and click Add To > New Album in the menu.
- Click File > New Album with Selection in the menu bar.
Add photos to an album
You have a couple of ways to add photos to an existing album:
- Drag photos from the main screen to an album in the sidebar.
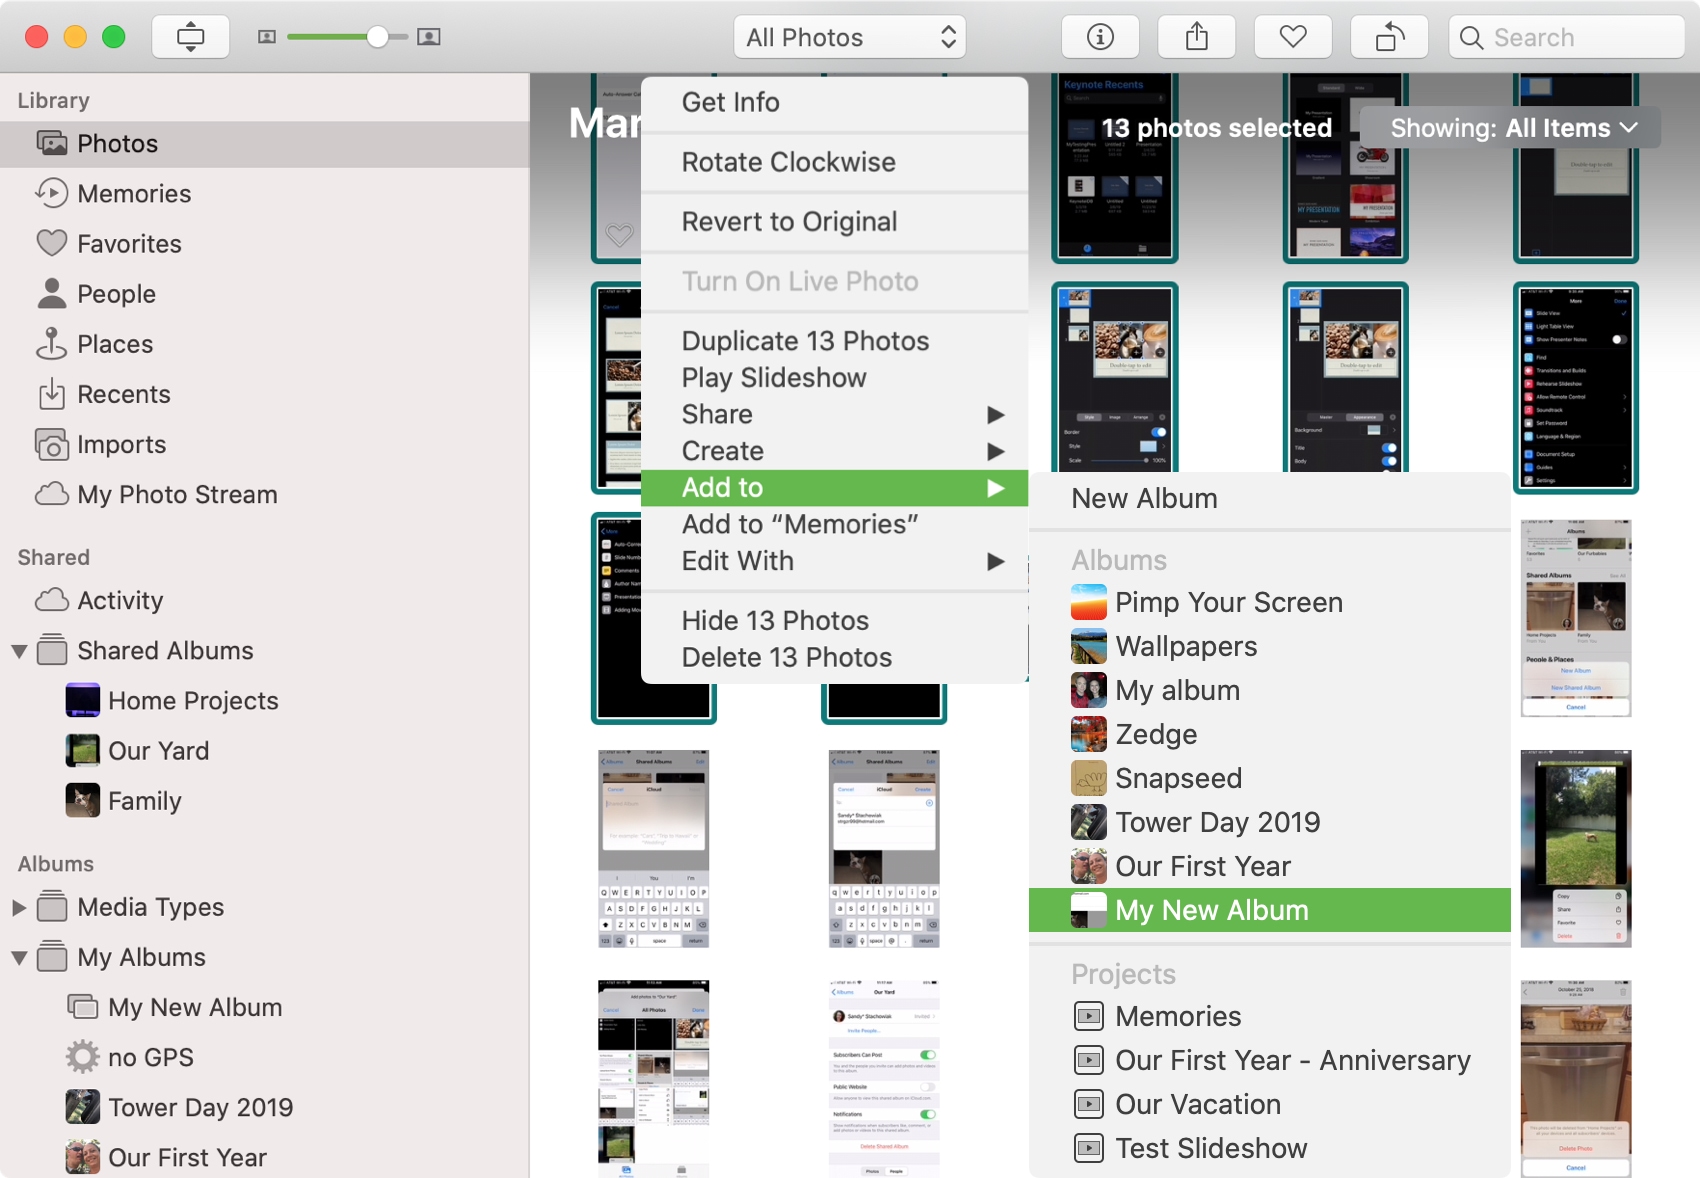
- Right-click the selection and choose Add To in the menu, then pick an album.
Remove photos from an album
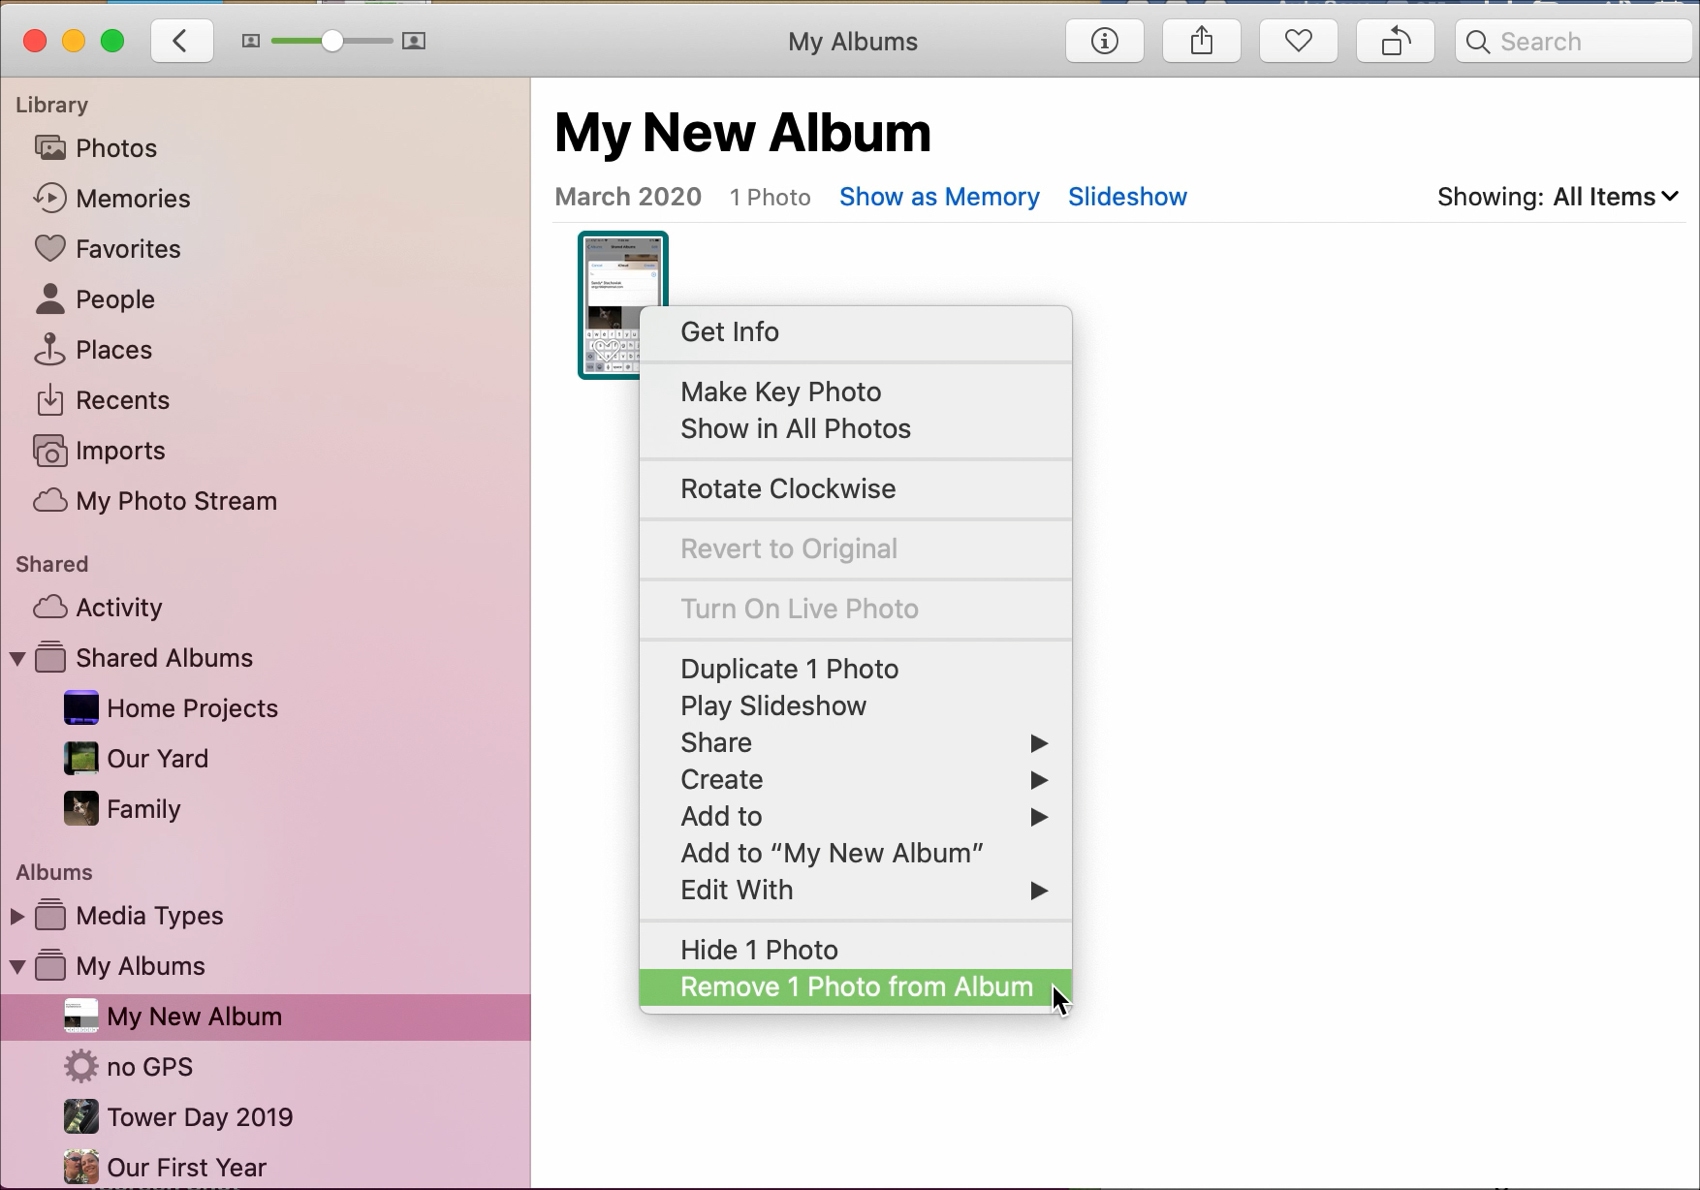
You can remove photos from an album without actually deleting the images. Go to an album, select multiple photos you’d like to delete, and do any of the following:
- Right-click the selection and choose Remove [X] Photos from Album from the menu.
- Click Image > Remove [X] Photos from Album in the menu bar at the top.
To empty an album, press Command + A on the keyboard to first select everything in it, then Control-click the selection and choose Remove [X] Photos from Album from the menu. You now have an empty album that you can rename, delete, and more.
Rearrange, rename, or delete albums
You can also reorder your albums in the sidebar. Simply drag an album in the sidebar and drop it into a new spot.

To rename or trash an album, right-click it directly in the sidebar or in the album view and choose Rename Album or Delete Album from the menu.

Create album folders
The Photos app enables you to organize different albums into folders, which can be helpful when you have dozens of custom albums.
Create smart albums
Smart albums are regular albums that dynamically update their contents based on a set of conditions. After creating a smart album with custom criteria, any Photos items matching the specified conditions will automatically be added to the album. The fundamentals are similar to Smart Folders in Finder & Notes and Smart Playlist in the Music app.
1) Click the plus button (+) next to Albums in the Photos app sidebar and select Smart Album.
2) Give a name to your Smart Album.
3) Then, set the desired conditions and hit Done.
For instance, I want a Smart Album that has all the pictures that were taken with flash. So, I will select “Flash” in the first dropdown menu and “did fire” in the second. From now on, the Photos app will automatically add new pictures taken with flash active to this Smart Album.

Are you going to create an album or two on your Mac?
Related tips for the Photos app: