Learn how to control your Mac cursor with head movements, toggle it with a custom keystroke, and adjust the available head-tracking options to your liking.
Controlling the Mac cursor with head movement is made possible thanks to a built-in feature called Head Pointer. It’s primarily an accessibility option for people who have issues using their mouse. The same capability has been available on iOS for some time, and it’s called Head Tracking, which can be found in Settings > Accessibility > Switch Control.
Like iPhone and iPad Head Tracking, Head Pointer in macOS uses the camera in your Mac notebook to track the movement of your head to control the cursor.
Control the Mac cursor with head movement
Follow the steps below to learn how to use the Head Pointer feature in macOS to control the Mac cursor with head movement.
1) Open System Settings and go to Accessibility > Pointer Control.
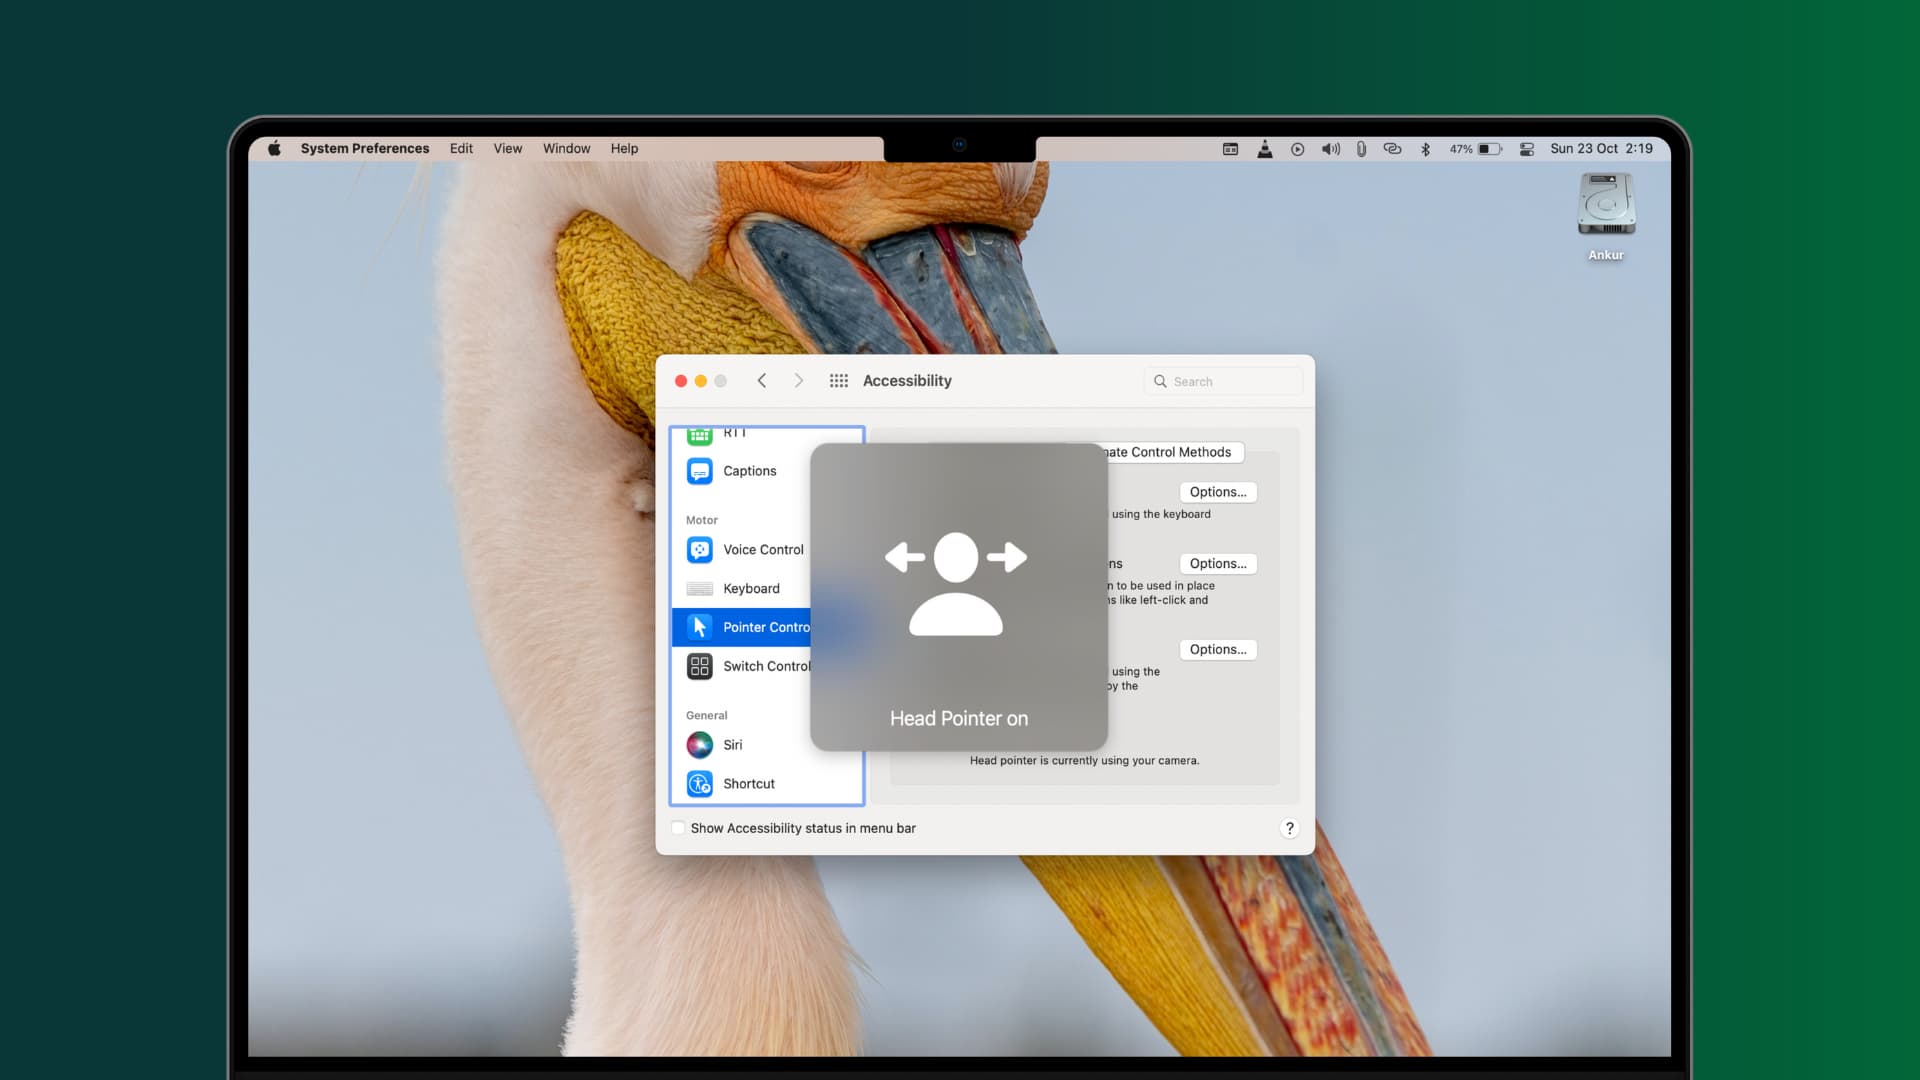
2) Turn on the switch for Head pointer to activate this feature.

3) Next, click the info button ⓘ for Head pointer to customize the following settings and hit OK to save the changes.
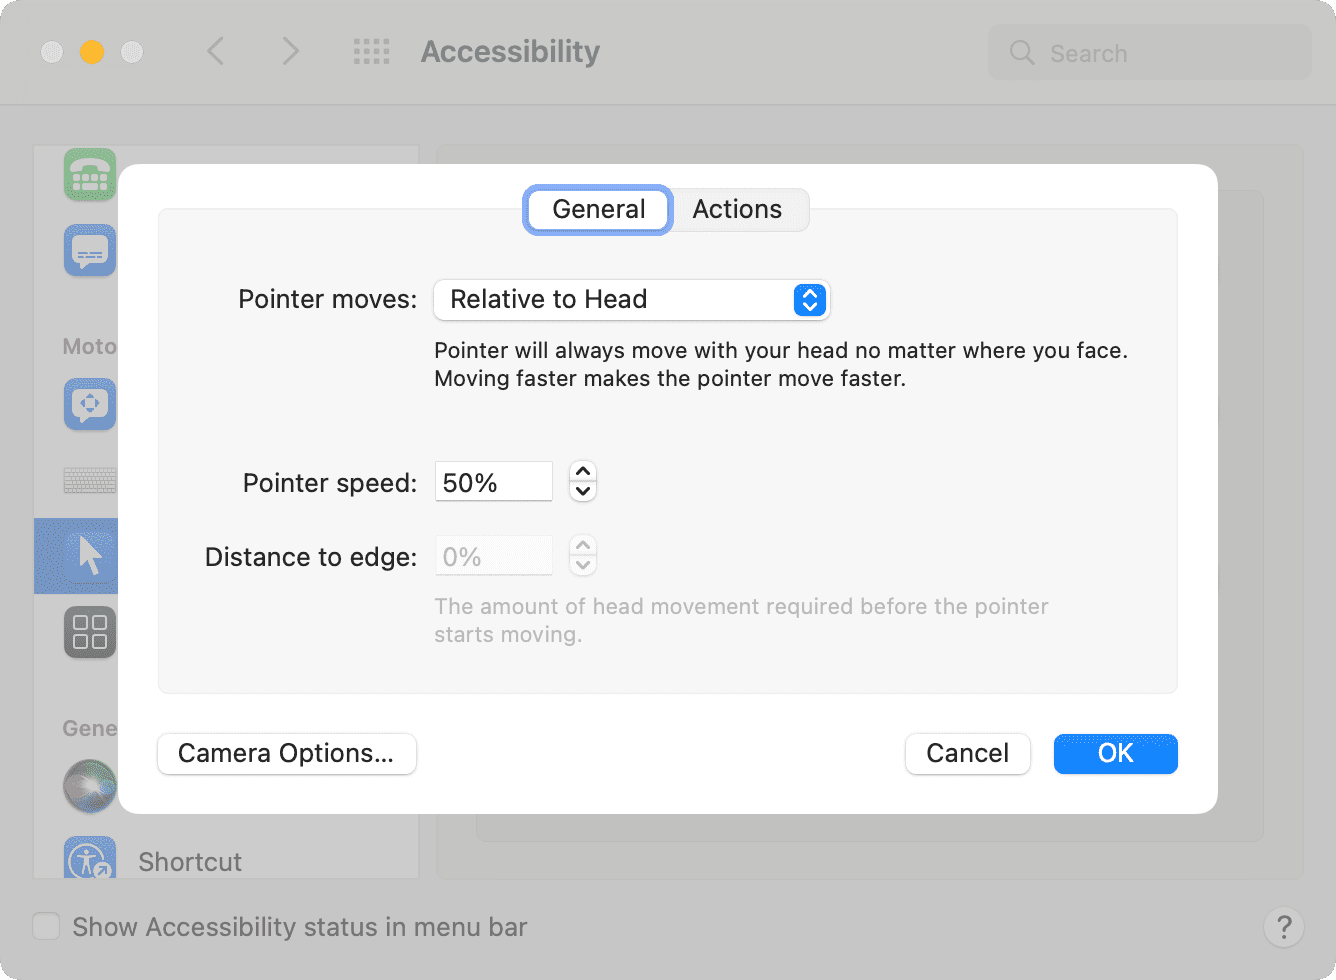
Tracking method
You can change how the “Pointer moves.” The best approach is to set the tracking option to “Relative to head” to ensure the Mac cursor always moves relative to your head, no matter the direction you face.

Pointer speed
Adjust the Mac Pointer speed by entering a number or click the up/down arrow to increase/decrease pointer speed in five percentage point increments.
Movement threshold
Moving faster makes the Mac cursor move faster, but you can easily change the amount of head movement required before the cursor starts moving — simply input a new threshold (0-100 percent) in the field next to “Distance to edge.” This will be active only when you select When facing screen edges under the Pointer moves section.
Toggling Head Pointer
This is where you choose how to enable or disable Head Pointer on the fly.
Option 1: To use Head Pointer as an always-on feature, turn off “Use a switch or facial expression to pause or resume.” In this mode, Head Pointer works all the time and cannot be disabled with a keystroke.
Option 2: If you’d like to use Head Pointer with a switch to pause and resume, turn on “Use a switch or facial expression to pause or resume,” and you’ll be able to pause this control method with a keyboard shortcut (F10 by default).
To choose a custom keyboard shortcut, click the info button ⓘ next to this option, select Physical switch, and hit Next. Now, press the keyboard shortcut you want to use.

Option 3: Additionally, you can also choose to pause and resume controlling the Mac pointer by facial expression like a smile. It works very well, in my experience, and you can activate it by clicking the info button ⓘ next to “Use a switch or facial expression to pause or resume,” selecting Facial expression, and choosing which facial expression you want to assign: Smile, Open Mouth, Stick Out Tongue, Raise Eyebrows, Eye Blink, Scrunch Nose, Pucker Lips Outwards, Pucker Lips Left, Pucker Lips Right.
Recalibrate the pointer
Just like the above-mentioned option, you can choose to recalibrate the pointer and move it to the center of the screen by using a keyboard shortcut or a facial expression. Just click the info button ⓘ for “Use a switch or facial expression to recalibrate” and make your selection.
Adjust camera options
Click the Camera Options button and then select an imaging device to be used for Head Pointer. By default, this will be the FaceTime HD Camera built into your MacBook, but you can also use a web camera built into your Apple display or even a standalone external video camera connected to your computer.
Additionally, you can use this screen to adjust the level of facial expression you want to make (slight, default, or exaggerated) to pause, resume, or recalibrate Head Pointer.

If you are on an older version of macOS
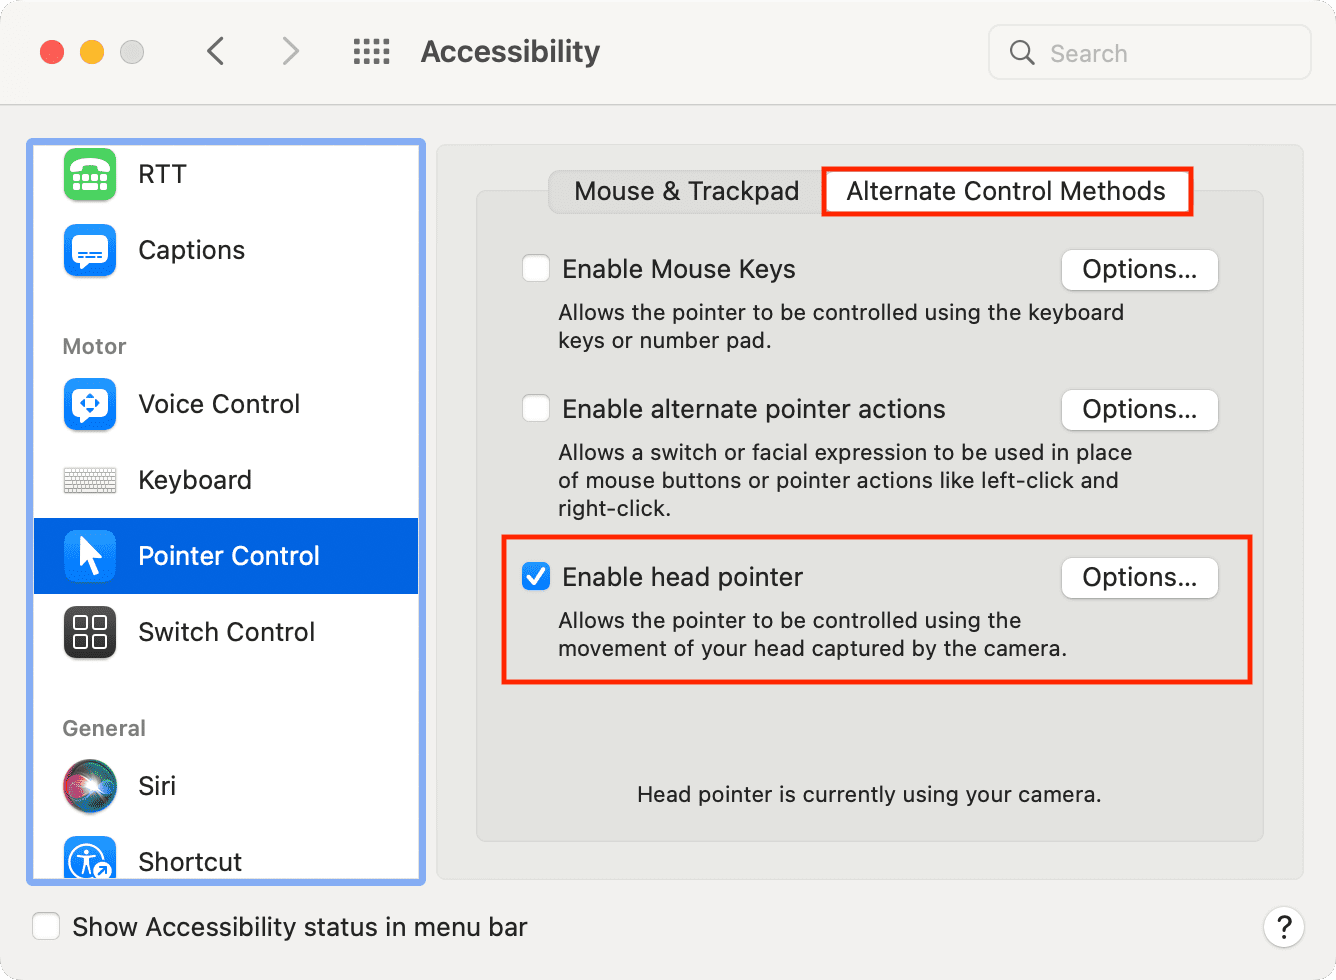
1) Go to System Preferences > Accessibility.
2) Scroll down and pick Pointer Control underneath the Motor heading in the lefthand column.
3) Now click the tab labeled Alternate Control Methods in order to reveal the new head-based method of controlling the Mac cursor.
4) From here, check the box for Enable head pointer to activate your Mac’s cursor with head movement. Try it out. And if required, follow the next step to tweak how it works.
5) To customize your experience, click Options next to Enable head pointer and adjust the settings in both the General and Actions tabs. What they do is similar to what we have explained in the above section for newer macOS versions.
Can you perform a click?
If you’ve ever used iOS Head Tracking, you’ll love Head Pointer on Mac. Unfortunately, it’s currently not possible to simulate a mouse click by blinking like on iOS. On macOS, you can use another control method, such as Voice Control, to simulate mouse clicks.
Check out next: