In this tutorial, we will show you how to add a location to your Calendar events on iPhone, iPad, and Mac so you can be alerted when it’s time to leave for the meeting and get directions to get to it.

You can do a lot more by adding the location to your Calendar event than just seeing where you need to go. Why not get directions, receive an alert when it’s time to leave, and view your event location plotted on a map? This is not just handy for you but for those you invite to your events too.
Working with locations in Calendar on Mac
When you create an event in the Calendar app on your Mac, you can add the location in any view you’re using to set up the event; day, week, or month.
1) Create your event as you normally would, and in the Location area of the event window, start typing the name of the spot.

2) You should see suggestions pop up for nearby locations, so just select the one you want.
3) Immediately, you’ll see your location on a map for your event.

Get directions to the event
The map you see for your event location gives a nice overview if you’re familiar with the area. But for exact directions, just double-click the maps section in the calendar event popout. Your Apple Maps app will open directly to a large view of the map. Click the Directions button at the top, and you’ll see how to get to that spot.

Receive an alert when it’s time to leave
Now that you know how to get to the location, the Calendar app can also alert you when it’s time to leave. This alert is based on your current location, the time of the event, and traffic conditions.
1) To enable this alert, open the Calendar app and click Calendar > Preferences from the menu bar.
2) Select the Alerts tab.
3) Check the box for Time to Leave.

Now on the day of the event, you can continue working on your Mac and will see a notification when it’s time for you to wrap things up and get on the road.
Working with locations in Calendar on iPhone and iPad
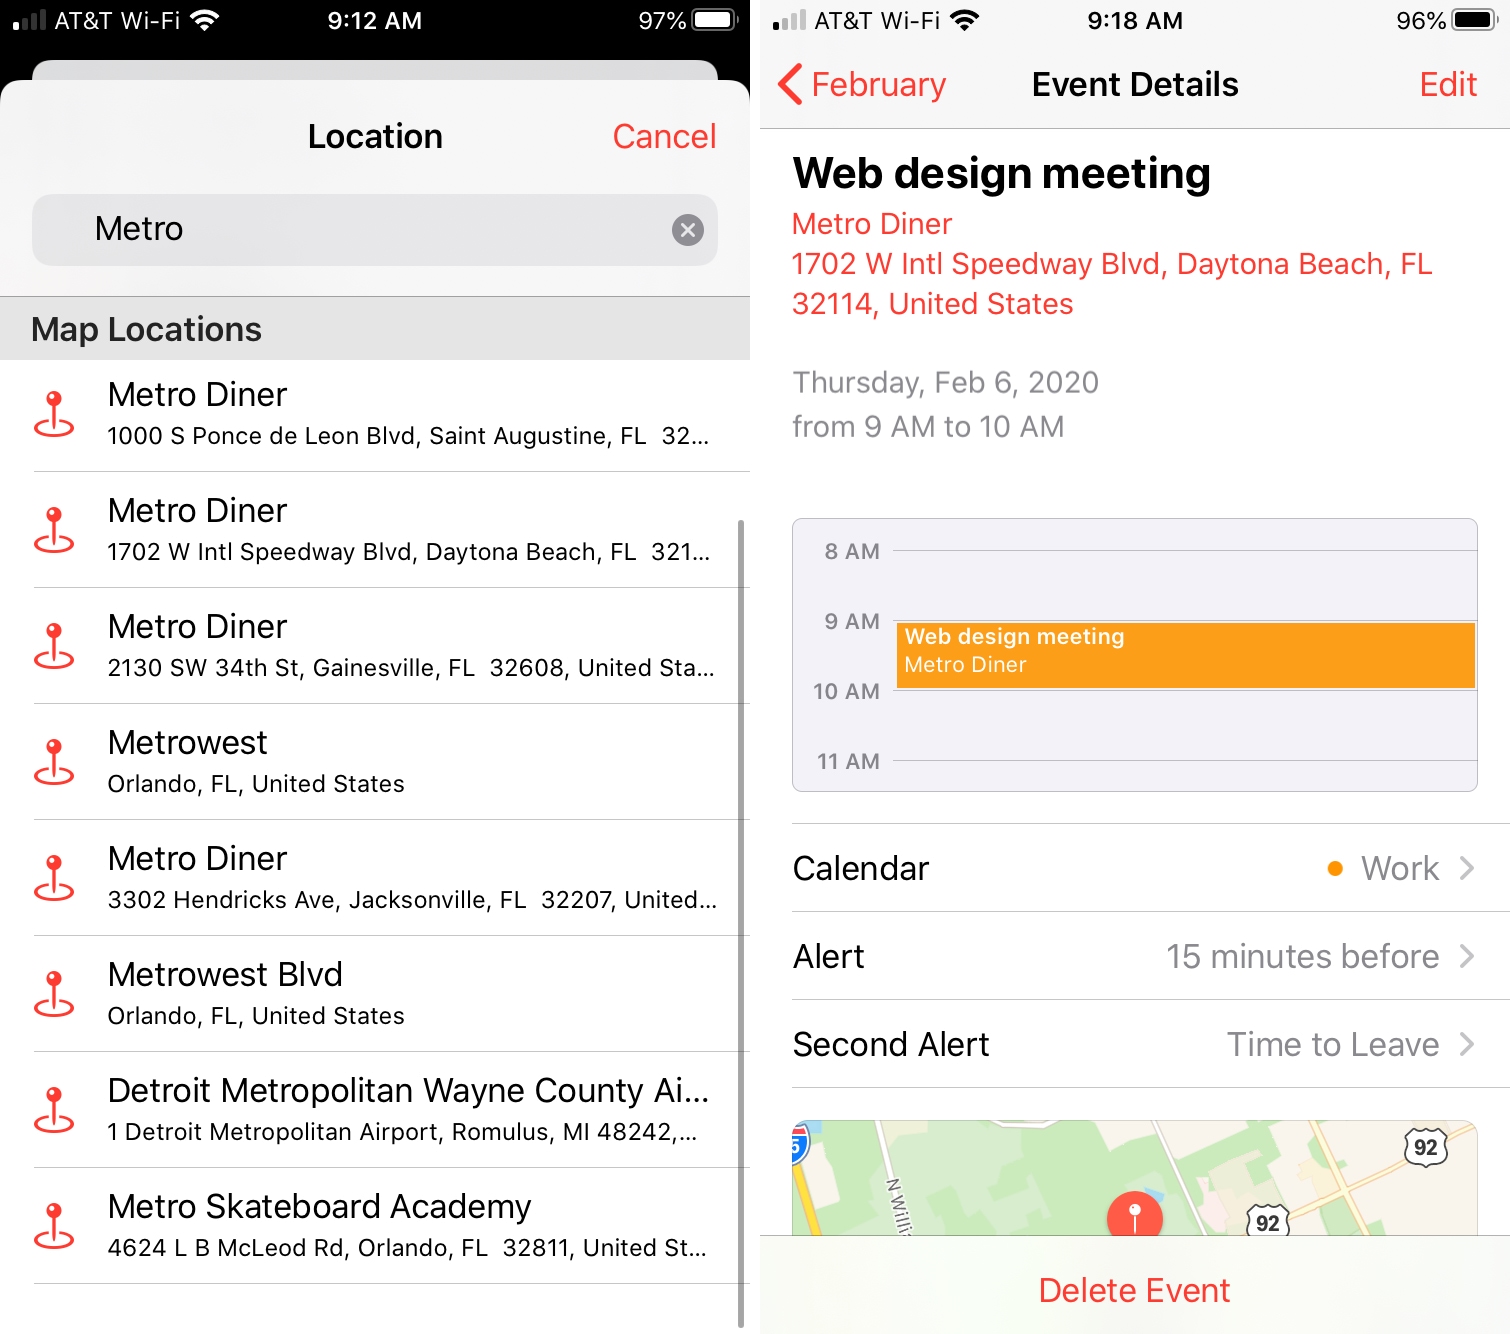
1) Create your event, and in the Location area, start entering the name of the spot.
2) You should see suggestions pop up for nearby locations, so just select the one you want.
3) After you enter all of the details, tap Add to save the event.
Get directions to the event
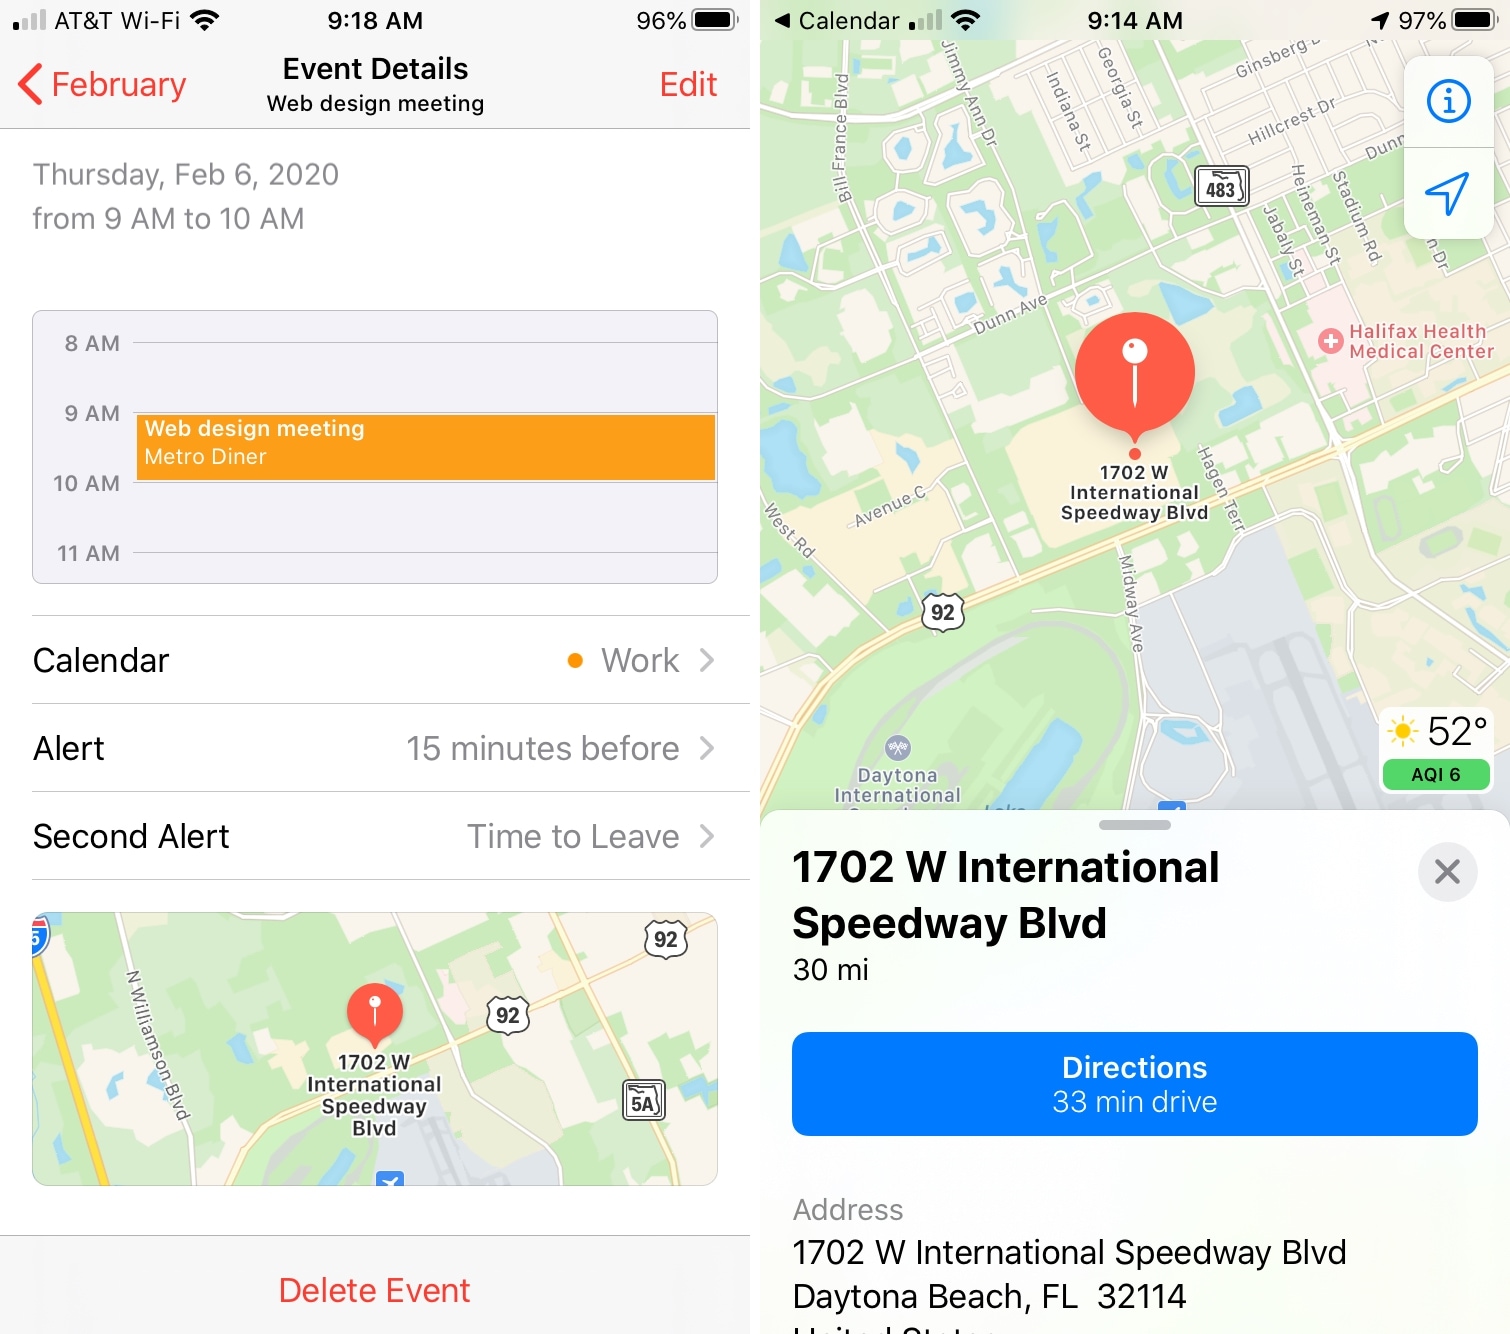
When you tap to open the event you created, you’ll see a map at the bottom. You can either tap the map or the location address at the top. Apple Maps will open now, and you can tap Directions to see exactly how to get to the spot.
Receive an alert when it’s time to leave
At the time of or after you create the event, you’ll see the Alert and Second Alert options. When you add a location to an event, the Alert section automatically populates with Time to Leave. If for some reason it’s not, just tap Second Alert and select that option.

In addition, you can use the Travel Time feature listed for the event. Check out our full tutorial on how to use Travel Time with the Calendar app.
If you and your event attendees use the Calendar app, the location feature can be a time saver. Not only can you see a map of the spot, but get driving directions and an alert when it’s time to leave. This way, no one will get lost or be late…hopefully!
Check out next: How to see your calendar events as a list on iPhone, iPad, and Apple Watch