Learn how to add Automator workflows that are saved as Quick Actions to the Touch Bar of your Mac. Doing so will let you easily run your favorite macOS automation shortcuts at any time because they’ll be just two taps away.
About Quick Actions
The Quick Actions feature on macOS Mojave and later lets you run custom scripts and Automator workflows, such as adding a watermark to large sets of images from places like Finder windows, the Services menu or even the Touch Bar on a Mac that has one.
You can create Quick Action workflows in the Automator app on your Mac, then choose the ones you want to have at the ready via the Touch Bar.
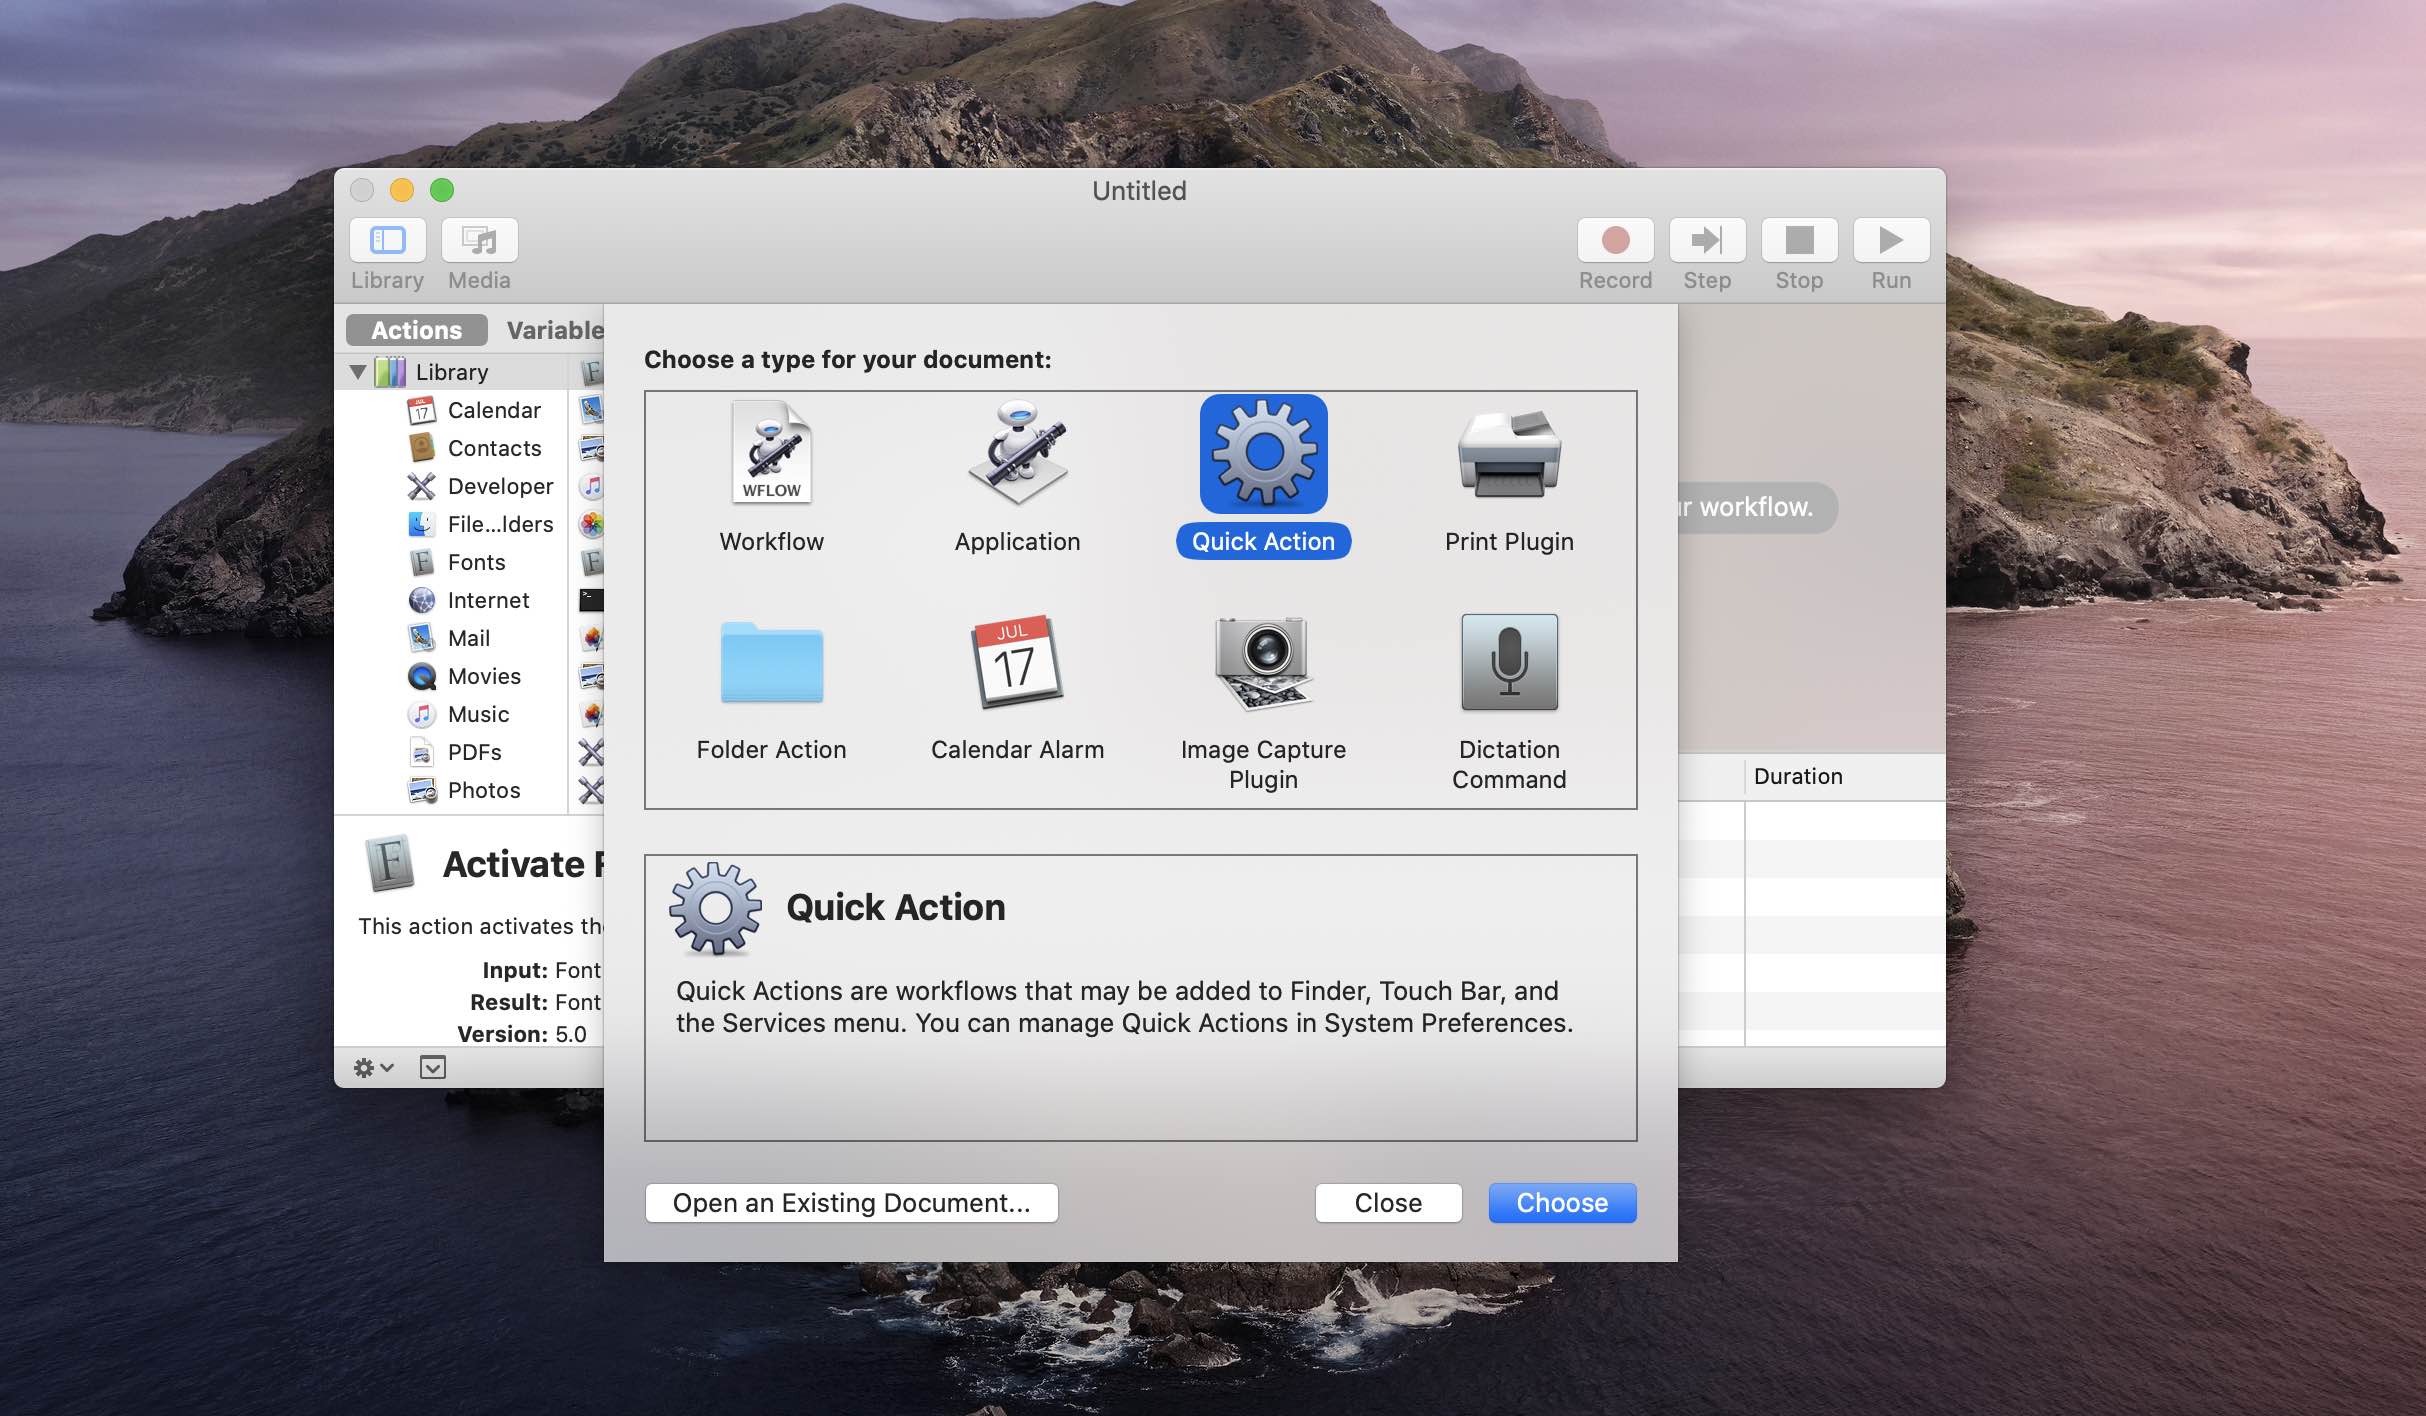
To create a Quick Action, open the built-in Automator app on your Mac and click File > New > Quick Action. Now, drag the Actions from the left side onto the builder to create your Quick Action workflow. Once you are done, save it by clicking File > Save from the top menu bar.
Also see: 10 cool things you can do with Automator on Mac
Extra info: By default, macOS saves your Quick Actions to the Library > Services sub-folder within your Mac account’s home folder. Your Mac hides the Library folder for security reasons, but you can get to it by holding the Option key while choosing the entry Library from the Finder’s Go menu.
How to run Quick Actions from Mac’s Touch Bar
After you have saved a few Quick Actions, add the ones you need the most to the Touch Bar.
On newer versions of macOS
1) Open System Settings and select Privacy & Security.
2) Scroll down and click Extensions.
3) Select Touch Bar.
Don’t see the Touch Bar entry? That means you don’t have a Mac with a Touch Bar, or the Touch Bar is currently unavailable, which happens when the lid is closed while using your Mac in clamshell mode.
4) Check the box for your Automator Quick Actions. You can recognize the Quick Action by the name and icon you gave it when you created it. You will also see your compatible Shortucts and app shortcuts, which you can decide to assign to the Touch Bar.

On older versions of macOS
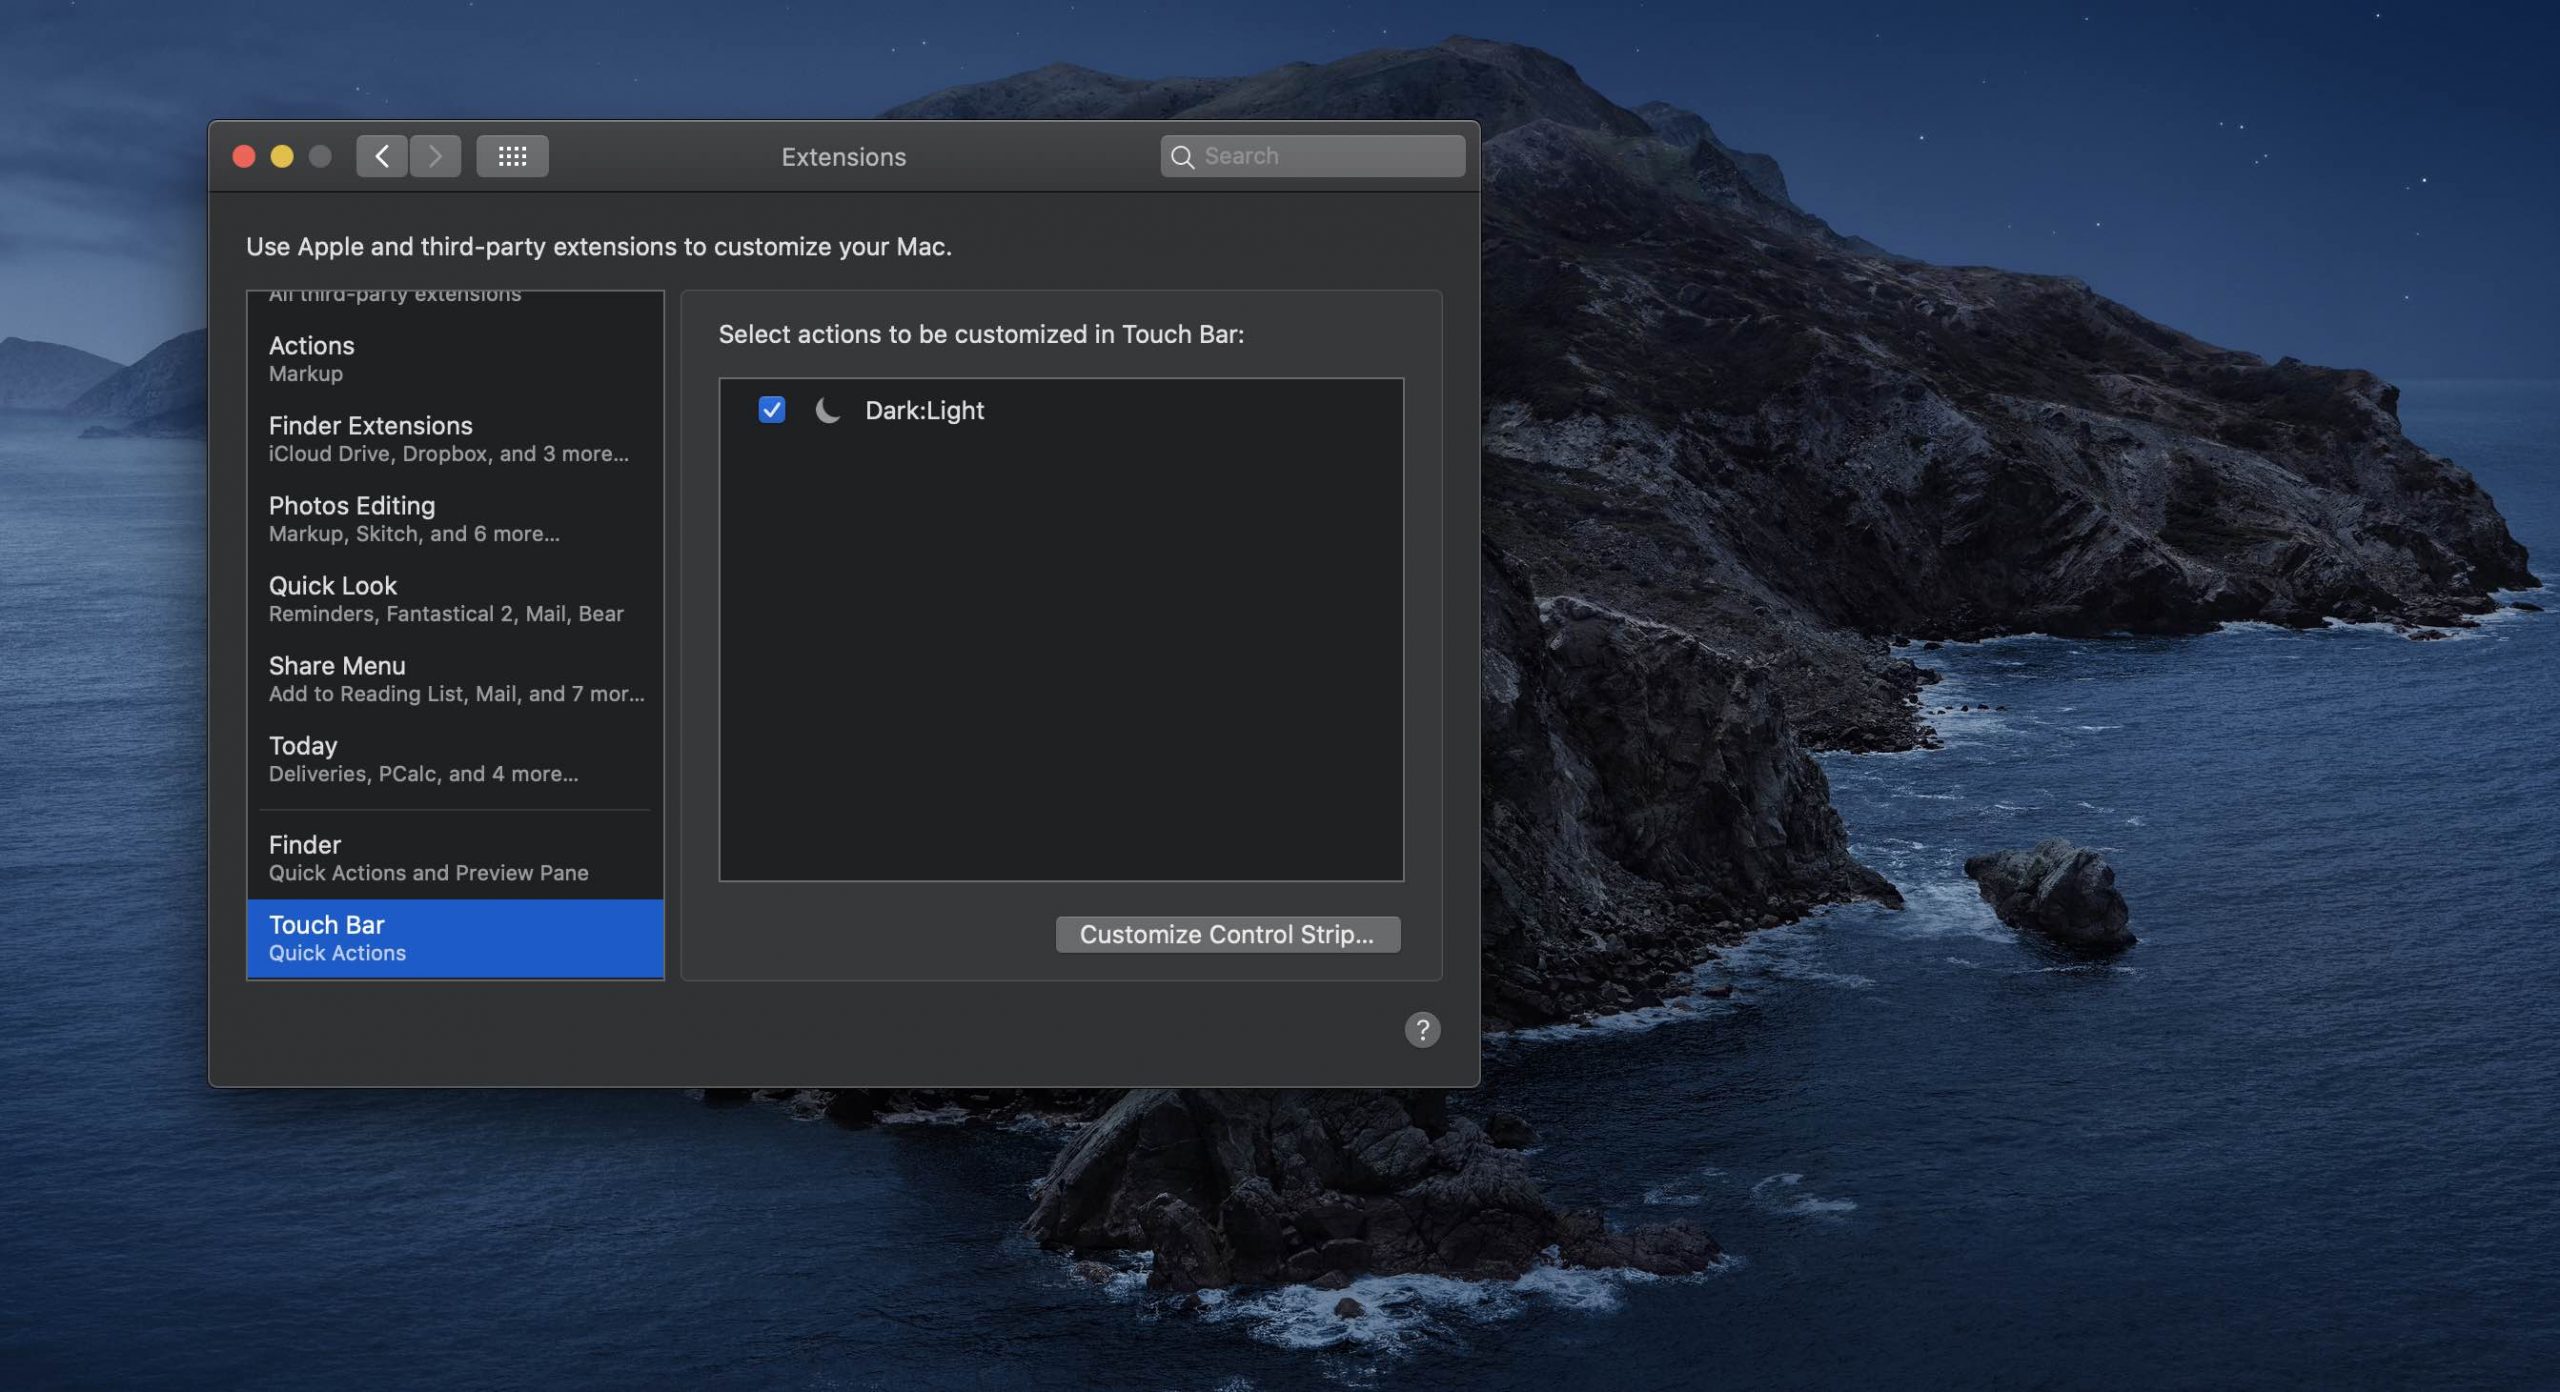
1) Open System Preferences and click the Extensions icon.
2) Click Touch Bar.
3) You will be presented with a list of available Quick Actions in the righthand column. Simply click the box next to your saved Automator workflow to toggle that action.
Set the Touch Bar to show Quick Actions
After you have followed the above steps, you need to make sure the Quick Actions are shown on the Touch Bar. You have two primary ways to ensure this:
- Add the Quick Actions button to your Touch Bar strip.
- Set the Touch Bar to always show Quick Actions or set it to show the Quick Actions when you press and hold the function (fn) key.
Add the Quick Actions button to your Touch Bar strip
1) Go to System Settings > Keyboard > Touch Bar Settings.
2) Click Customize Control Strip.
3) Drag the Quick Action button down to the Touch Bar and click Done.

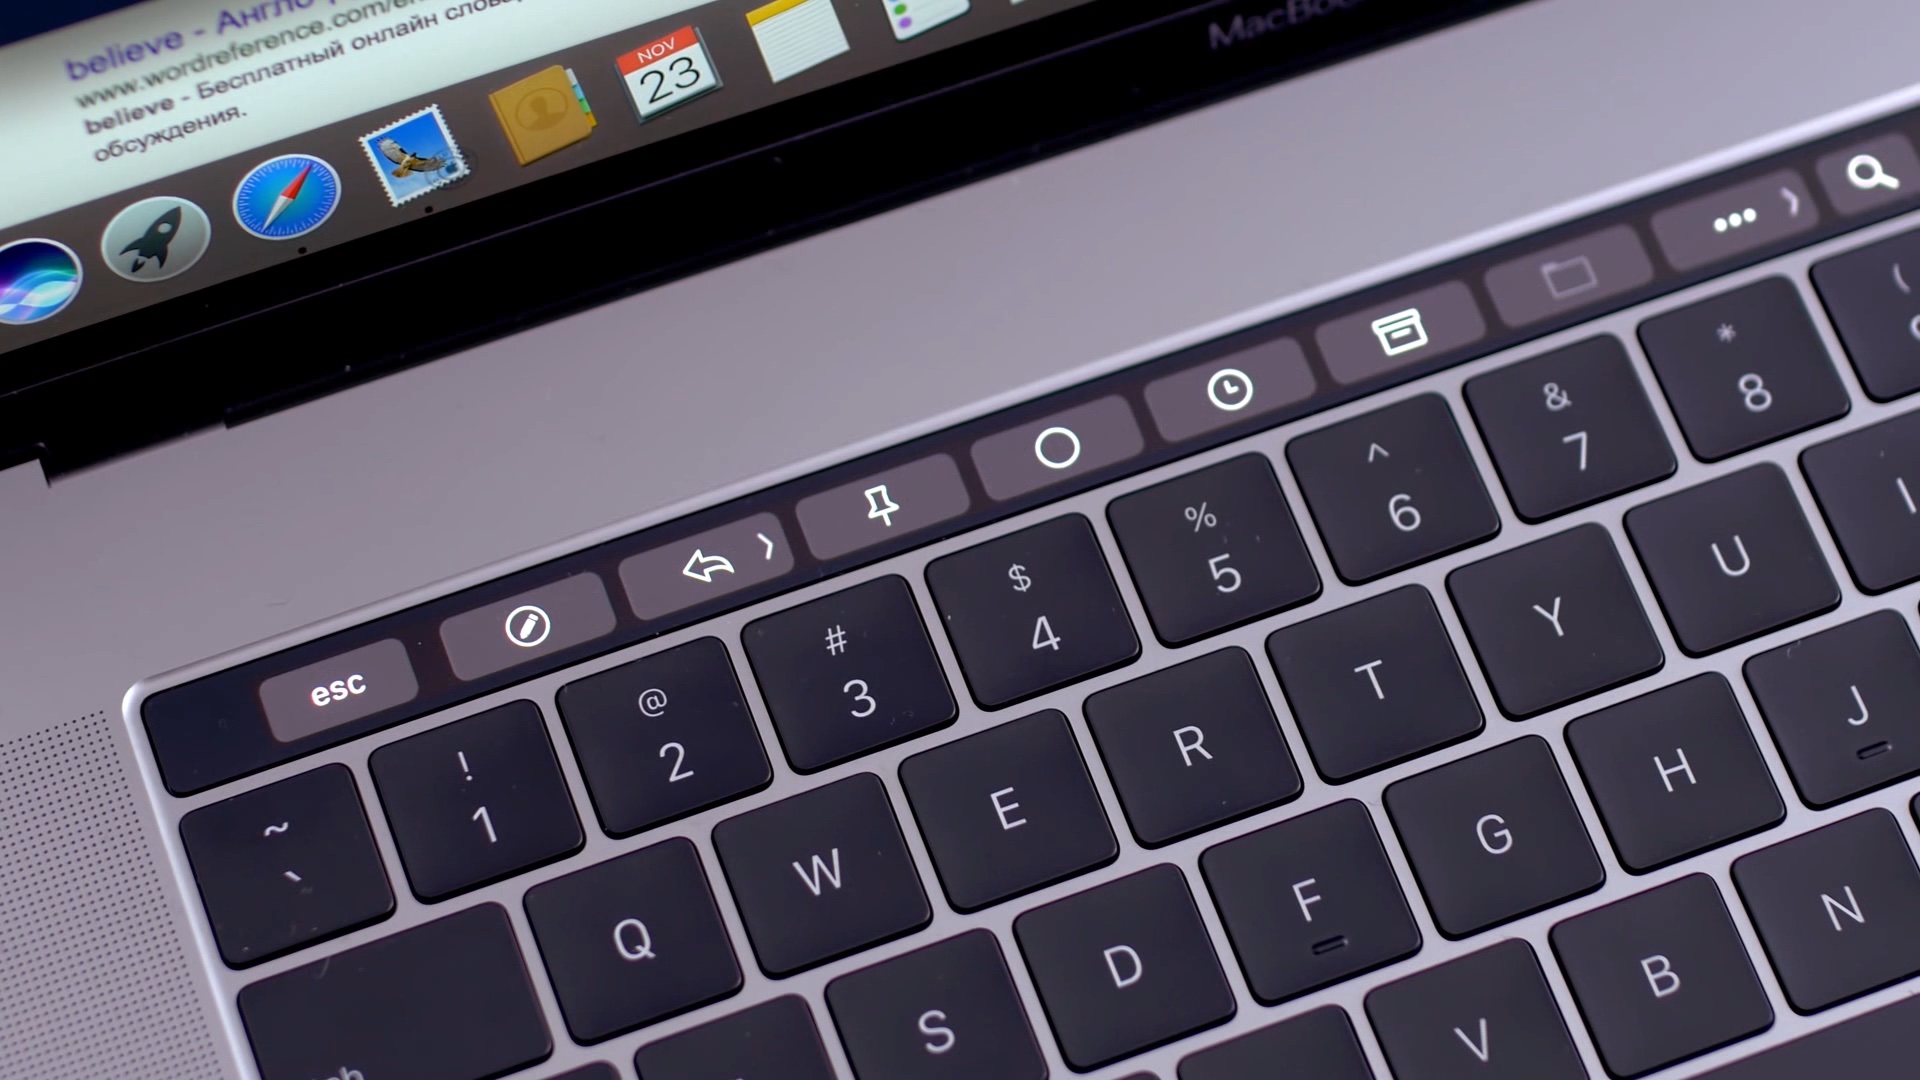
From now on, you can reach your favorite shortcuts by tapping the Quick Actions icon in the Control Strip of the Touch Bar (tap #1), then choose the Automator workflow to run (tap #2).

As I said, it only takes two taps to get to your favorite Quick Actions from the Touch Bar.
Set Touch Bar to show Quick Actions
1) Open System Settings and select Keyboard > Touch Bar Settings.
2) Set Touch Bar Shows to Quick Actions or set “Press and hold fn key to” Show Quick Actions.

Extra info: You can also access the Quick Action in the Finder Preview pane.
On a related note: