Learn how to add the Ken Burns effect to your images and video clips in iMovie to make them appear as though the camera is moving or zooming in and out, creating a beautiful cinematic effect.
If you’re unfamiliar with the Ken Burns effect, it’s a fun way to add motion to your still images. Named after the renowned documentary filmmaker, it uses zooming and panning to give life to your photos.
Although primarily designed for still images, the Ken Burns effect can also be applied to your videos to make your movies feel dynamic and unique.
Use the Ken Burns effect on Mac
1) Open your video editing project in iMovie on your Mac and click the photo or movie clip in the Timeline.
2) Click the Cropping button from the top.
3) Select the Ken Burns button. You’ll see two boxes appear in your clip inside the Viewer for Start and End.
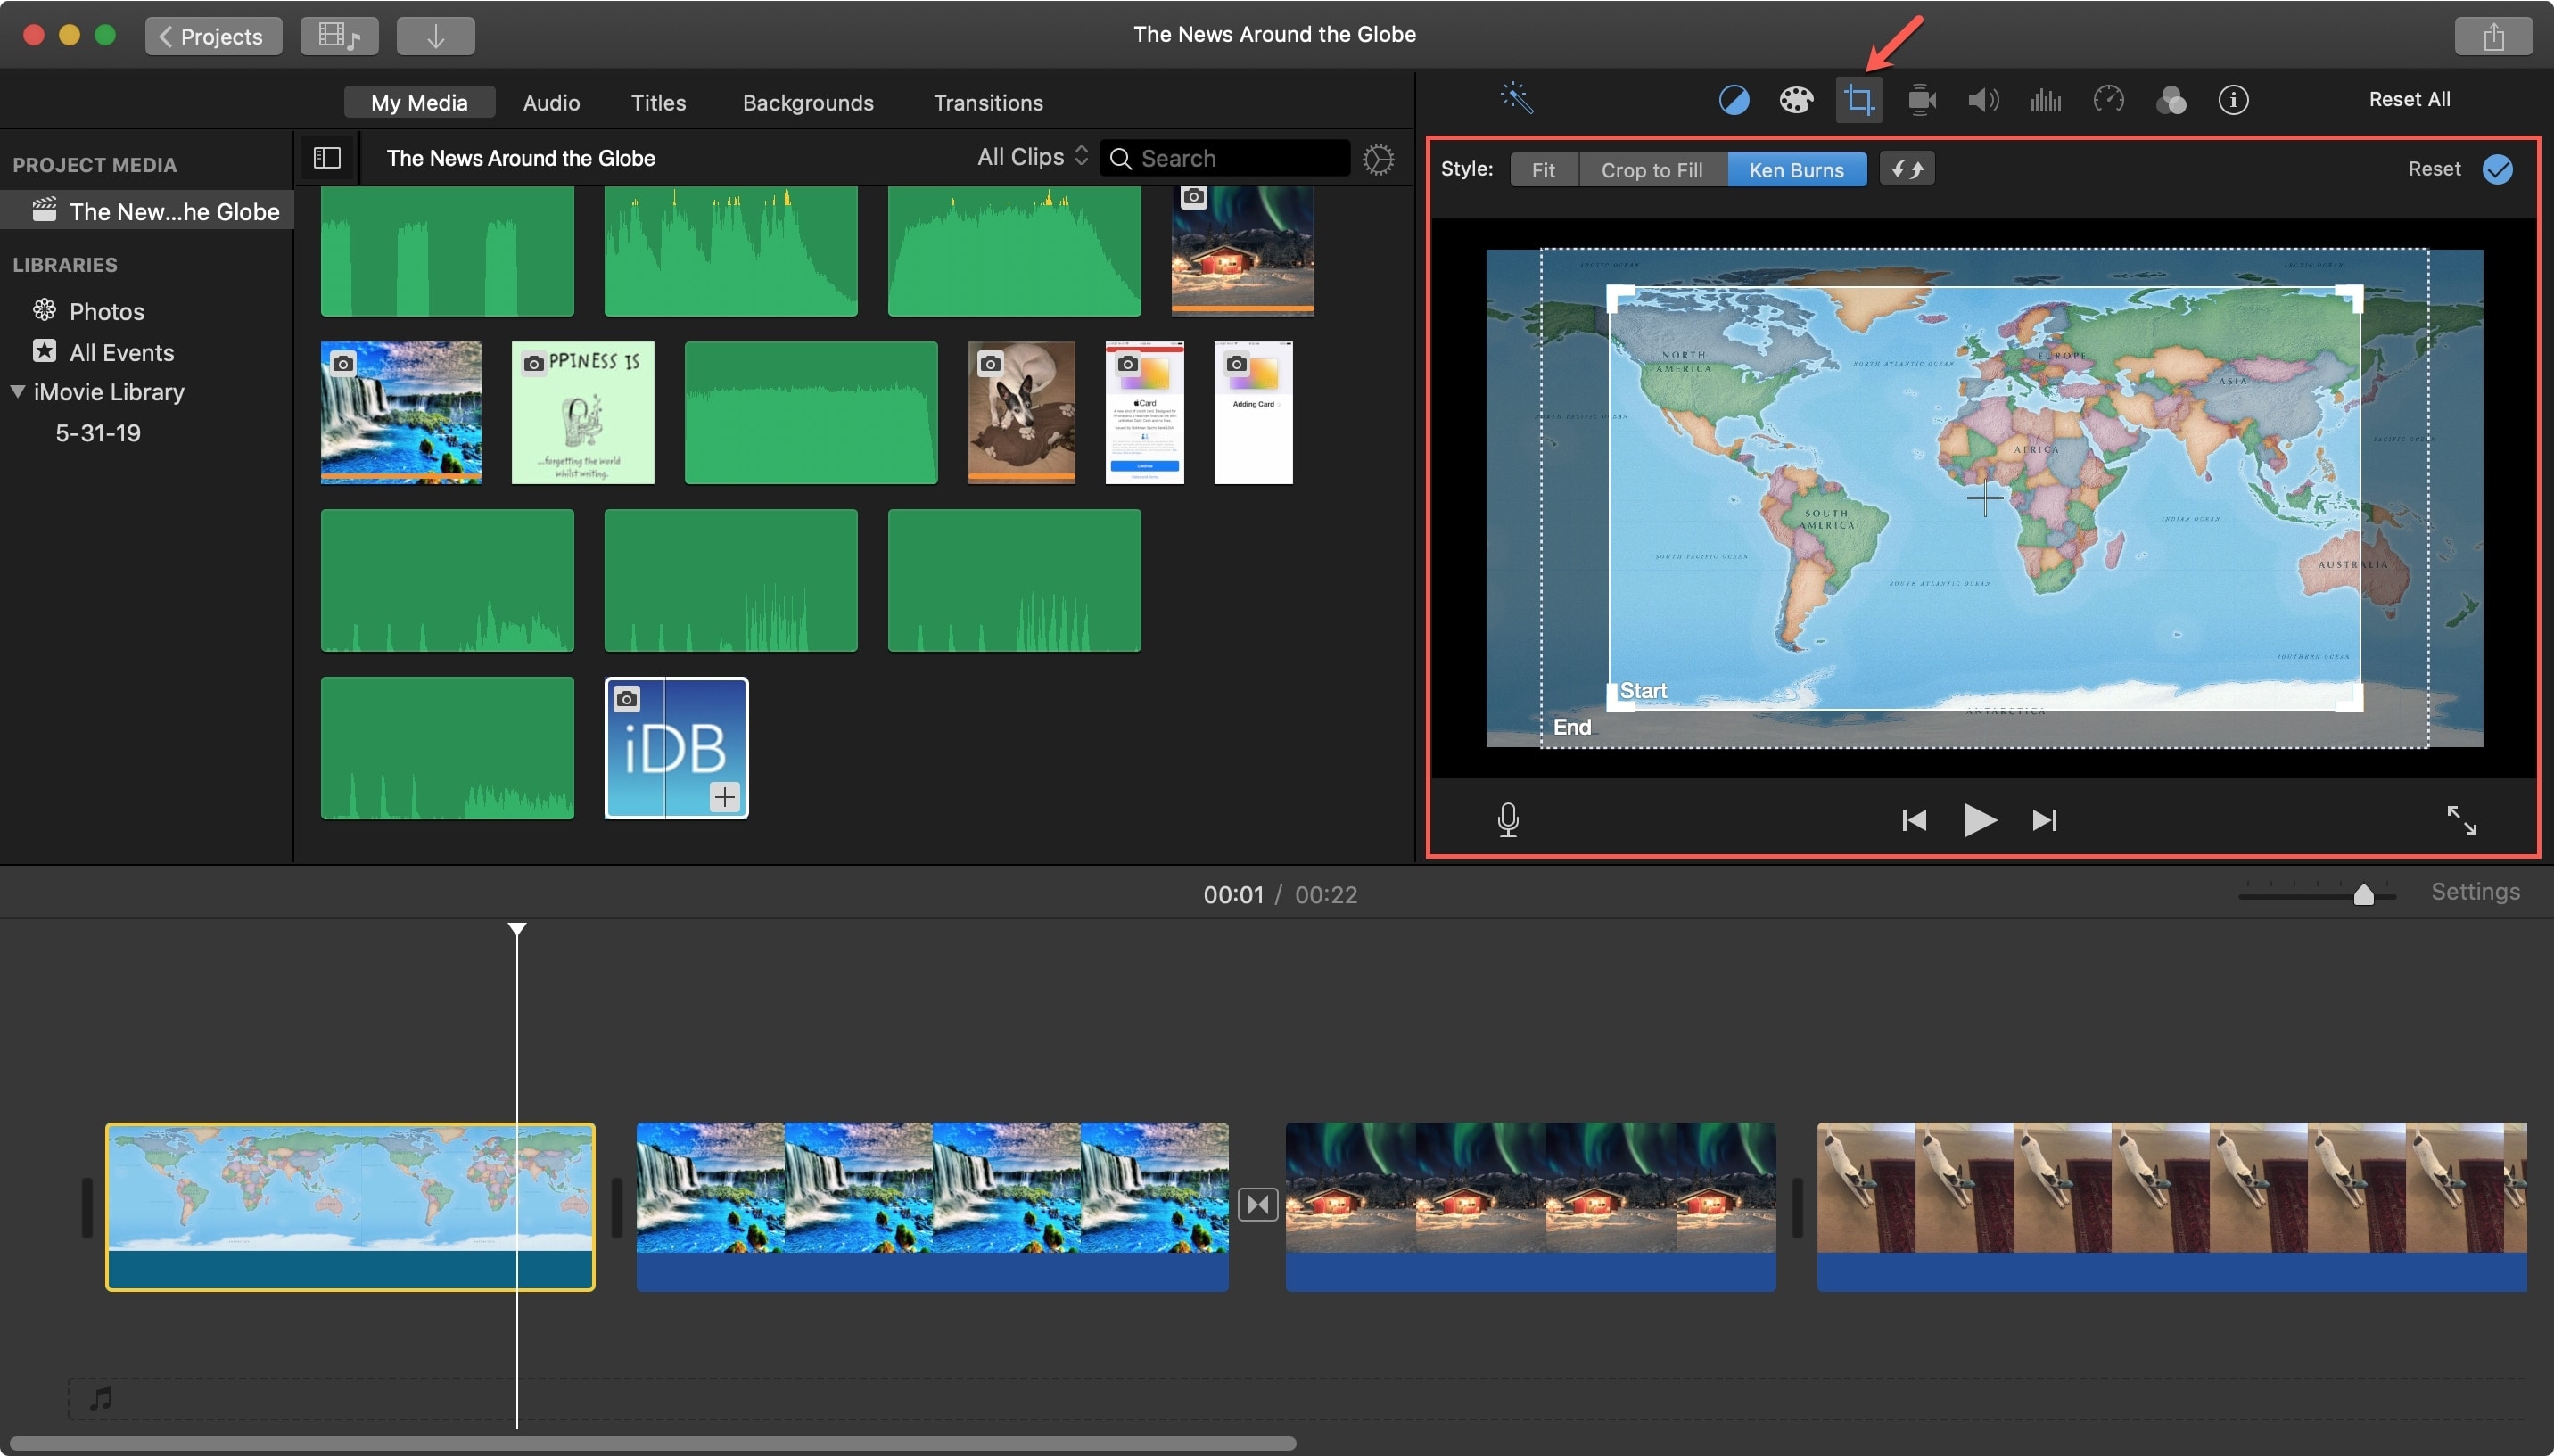
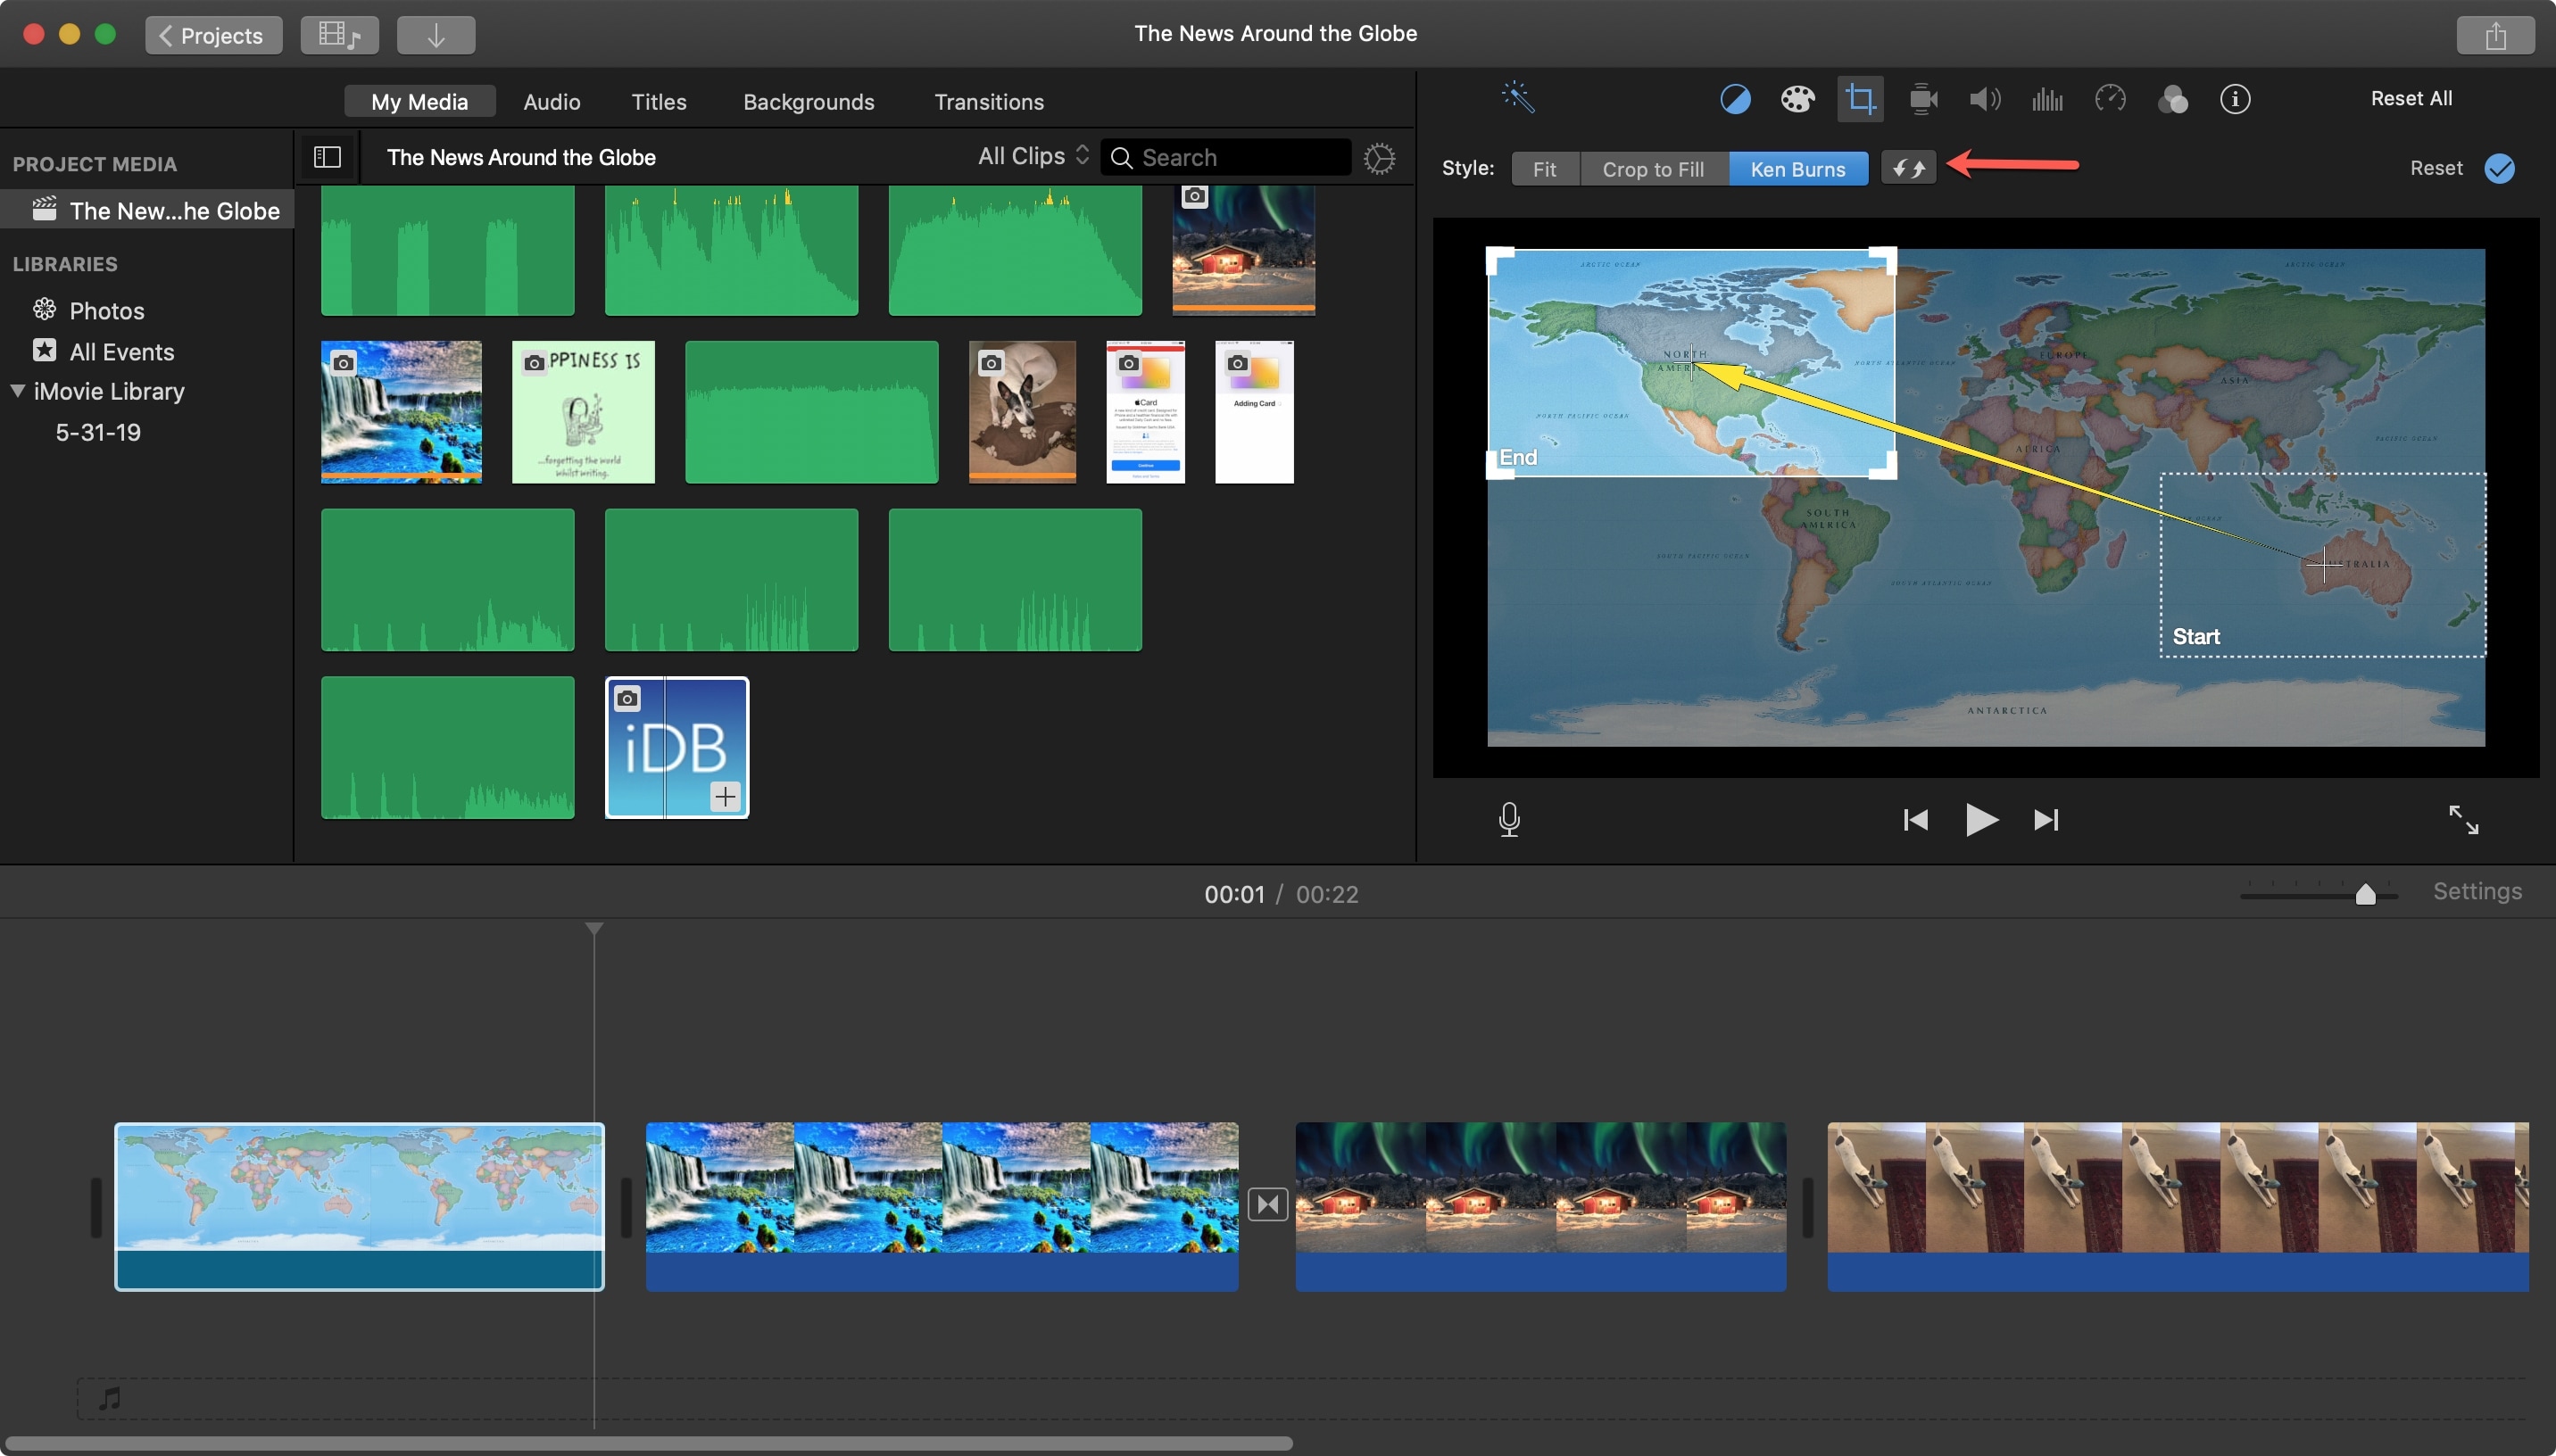
4) Select the Start box and resize it by dragging its corners. You can move it by dragging it from the center. The yellow arrow will show you the direction it will move towards the End Box.
5) Select the End box and then resize and/or move it as needed.
6) Once you’re done, play the clip to see if it turns out as expected.

If you want to swap the Start and End of the Ken Burns effect, click that Swap button to the right of the Ken Burns button.
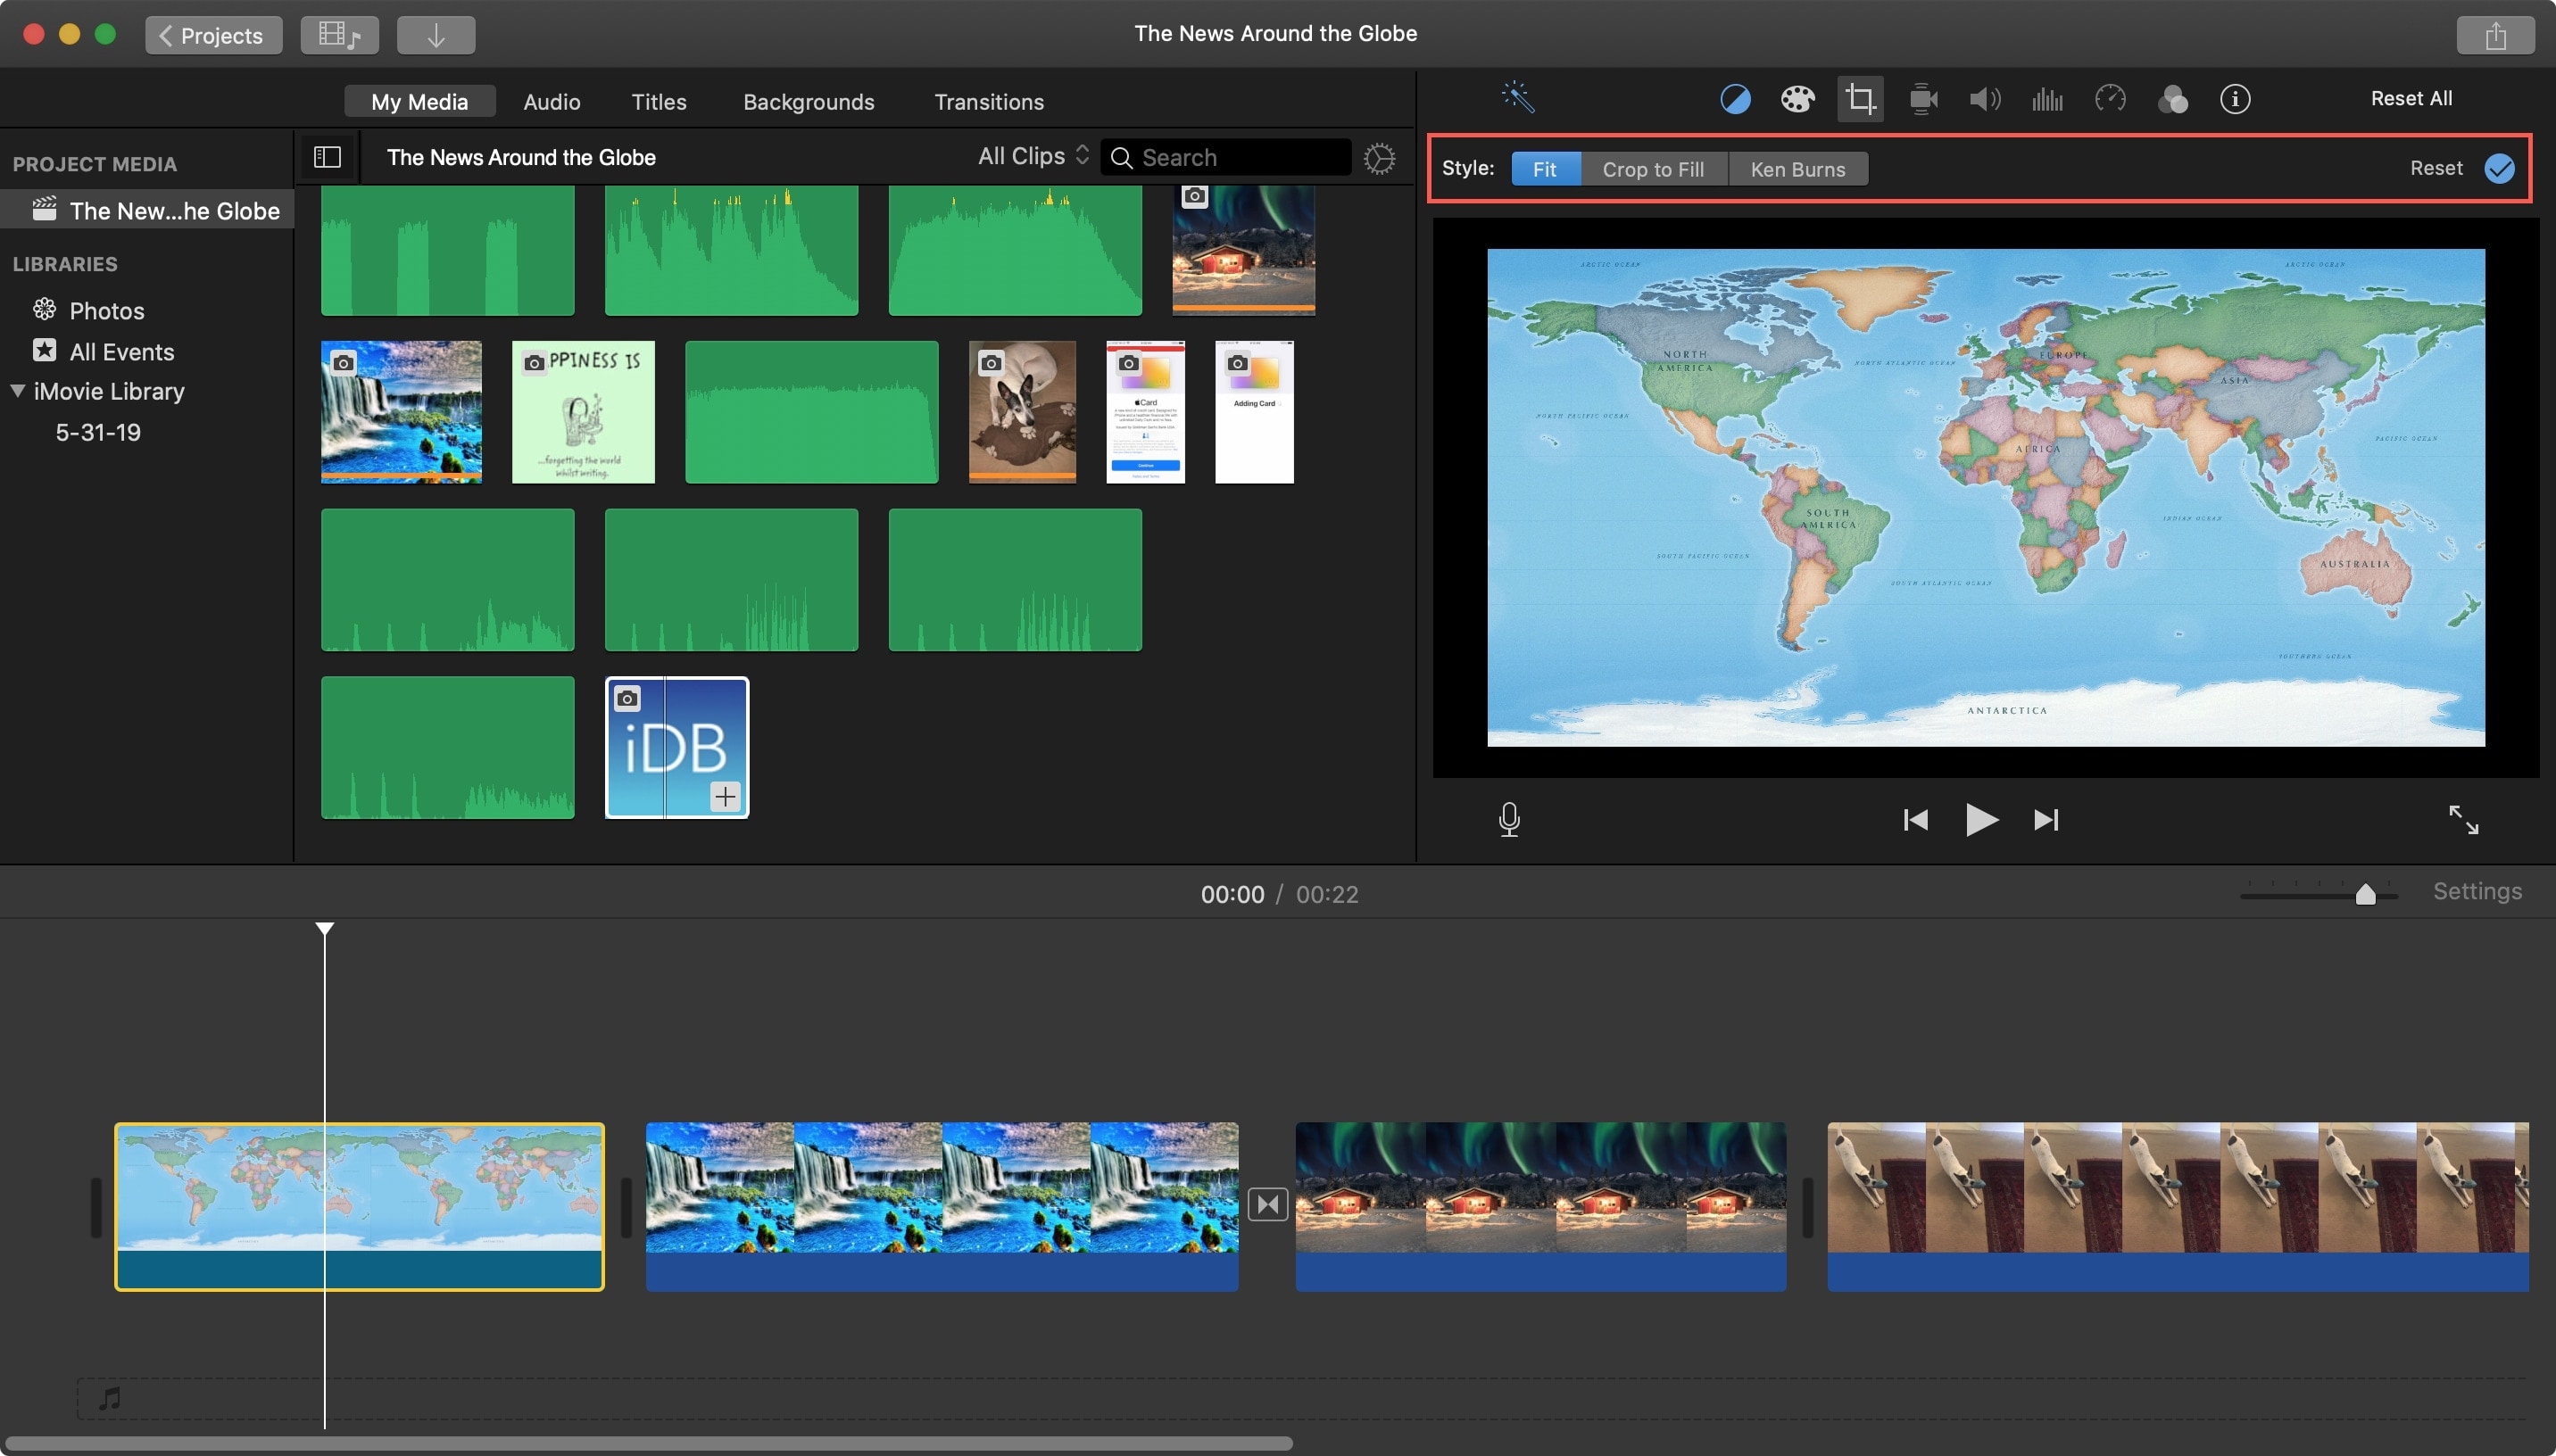
If you want to remove the Ken Burns effect, you can click Reset on the right side of the Cropping screen. You can also click the Fit or Crop to Fill buttons to adjust the way the clip fits.
Use the Ken Burns effect in iMovie on iPhone and iPad
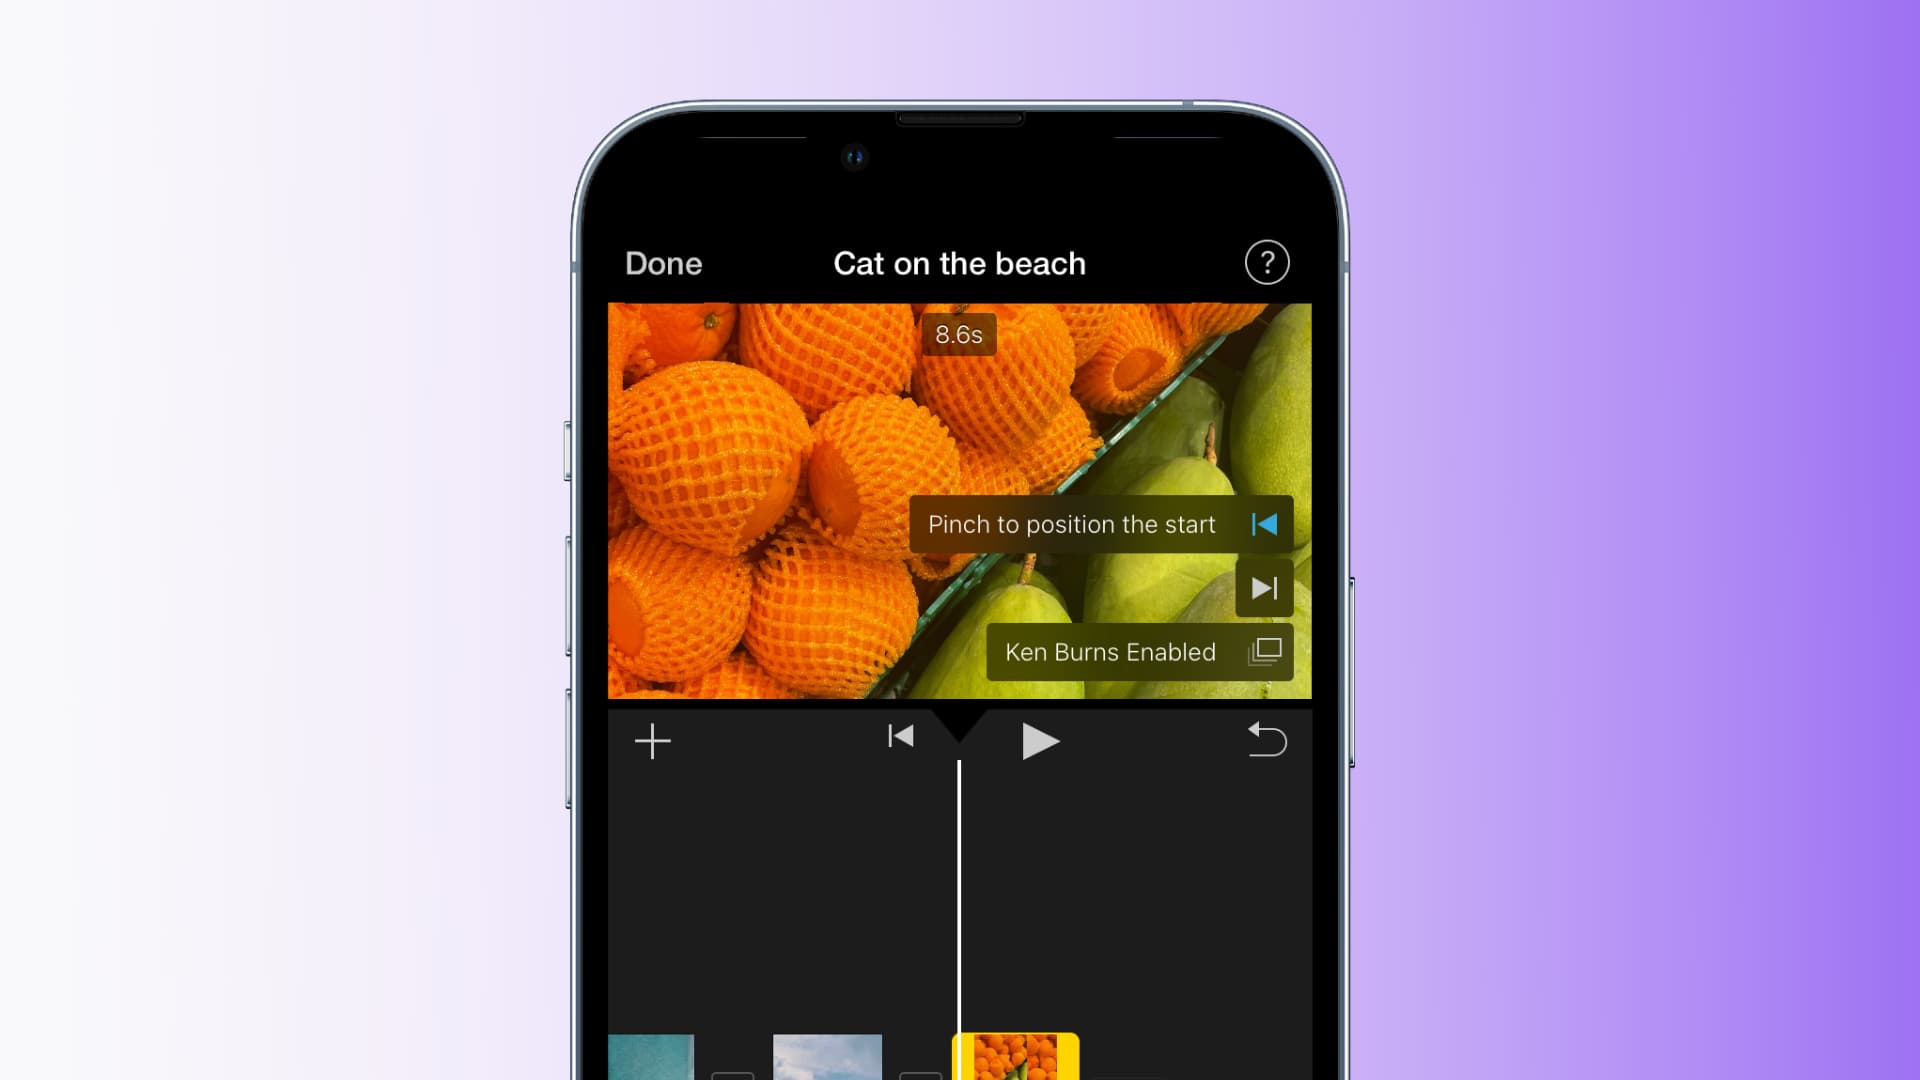
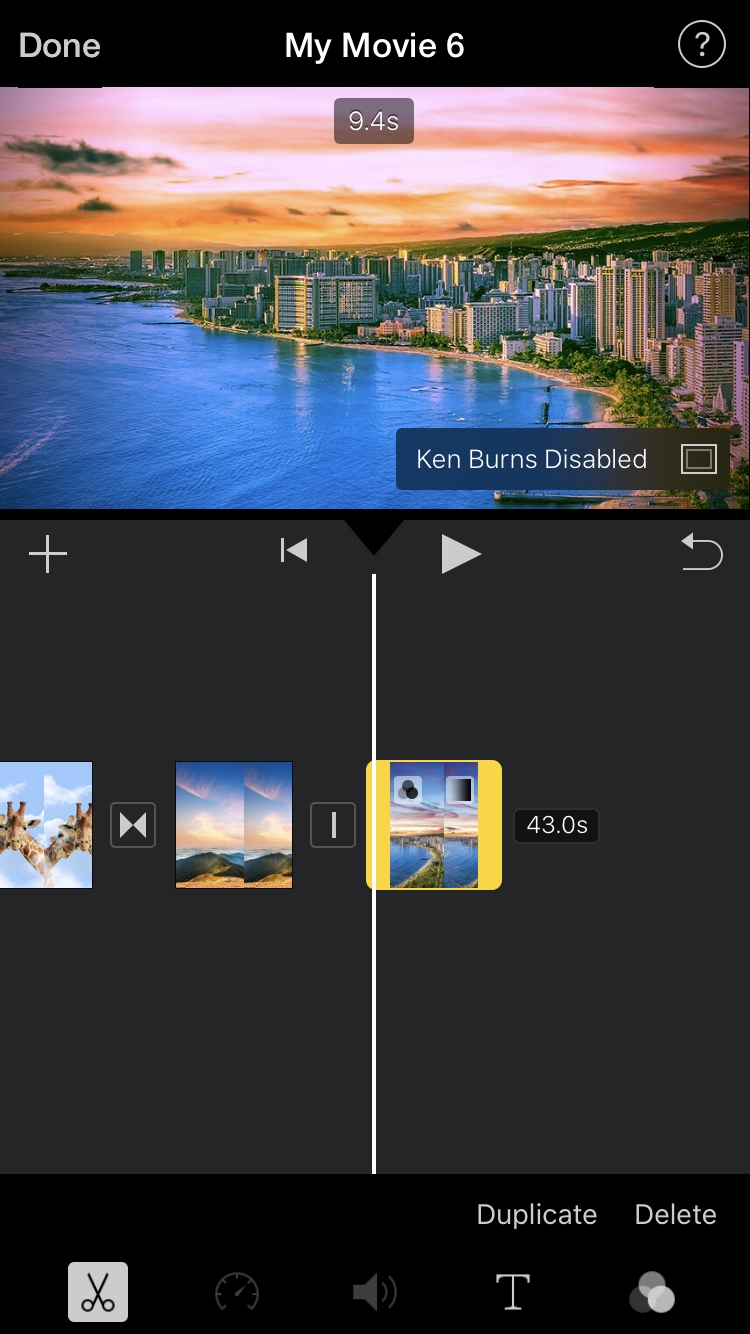
1) Open iMovie, go to your project, and tap the image in the movie Timeline. Unlike with the Mac, you can’t add the Ken Burns effect to a video clip on iOS.
2) In the Viewer at the top, tap Ken Burns Disabled.
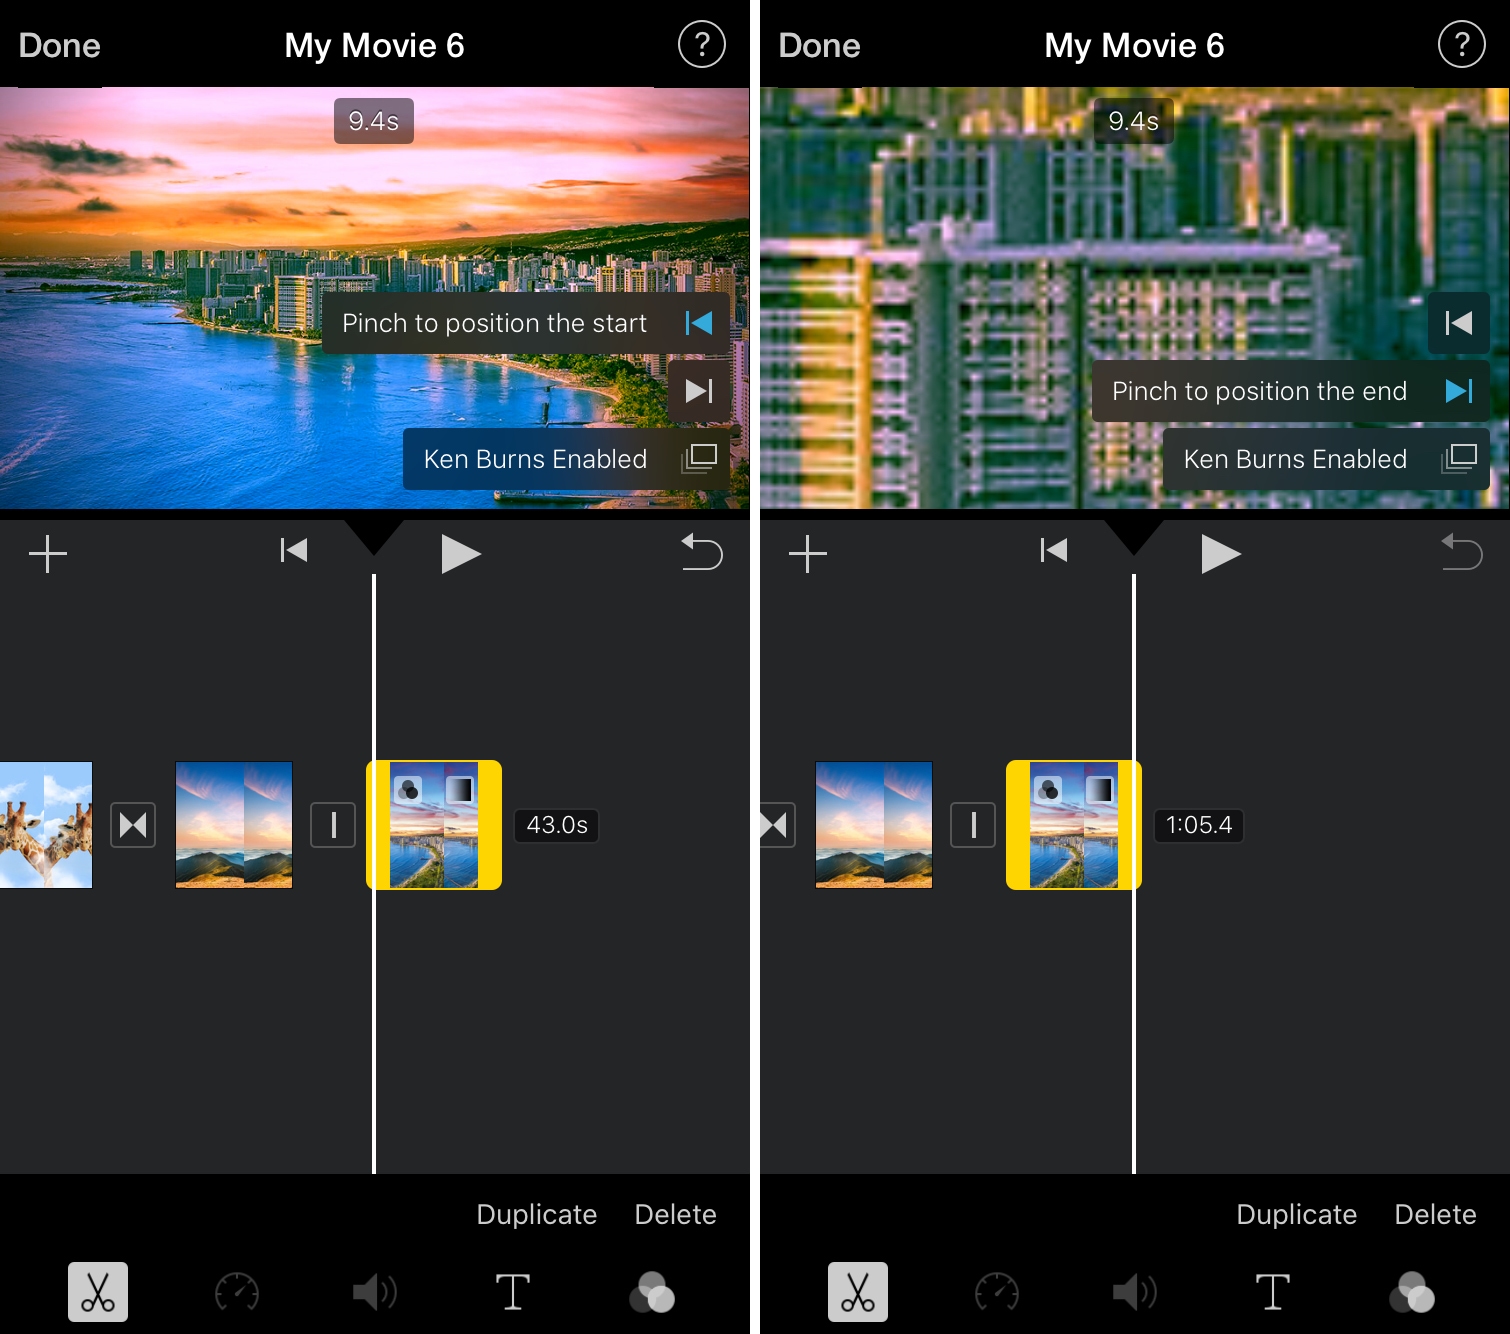
3) You’ll then see Pinch to position the start. This works just like the Start box in iMovie on Mac. Resize and/or move the clip in the Viewer to set the starting position for the effect.
4) Tap the arrow below Pinch to position the start, and it will expand to Pinch to position the end. This works just like the End box on Mac, so resize and/or move it to set the ending position for the effect.
5) When you finish, tap to play the clip to see the effect.
If you want to remove the Ken Burns effect, tap Ken Burns Enabled in the Viewer to turn it off.
More iMovie tips: