Learn how to showcase two clips simultaneously using the Picture in Picture effect in the iMovie video editor on your Mac, iPad, and iPhone.
Picture-in-Picture (PiP) is a useful tool for creating various types of videos. This effect places a smaller window inside a larger one, allowing you to view both simultaneously.
For the movies you create, it’s a convenient way to show a narrator speaking while the larger video plays or to display a close-up view of the main scene. It’s also perfect for how-to videos or creating a zoom effect on the larger image.
Note: Another option for having two images on the screen in iMovie is Split Screen, and we have a tutorial to cover that effect as well. So be sure to check it out.
Create Picture-in-Picture in iMovie on Mac
1) Open your movie in iMovie, navigate to your movie timeline, and select the first clip that you want in the Picture-in-Picture view. This will be the picture you want in the smaller window.
2) Drag this clip onto the second clip you want as the full-screen background, then release it.
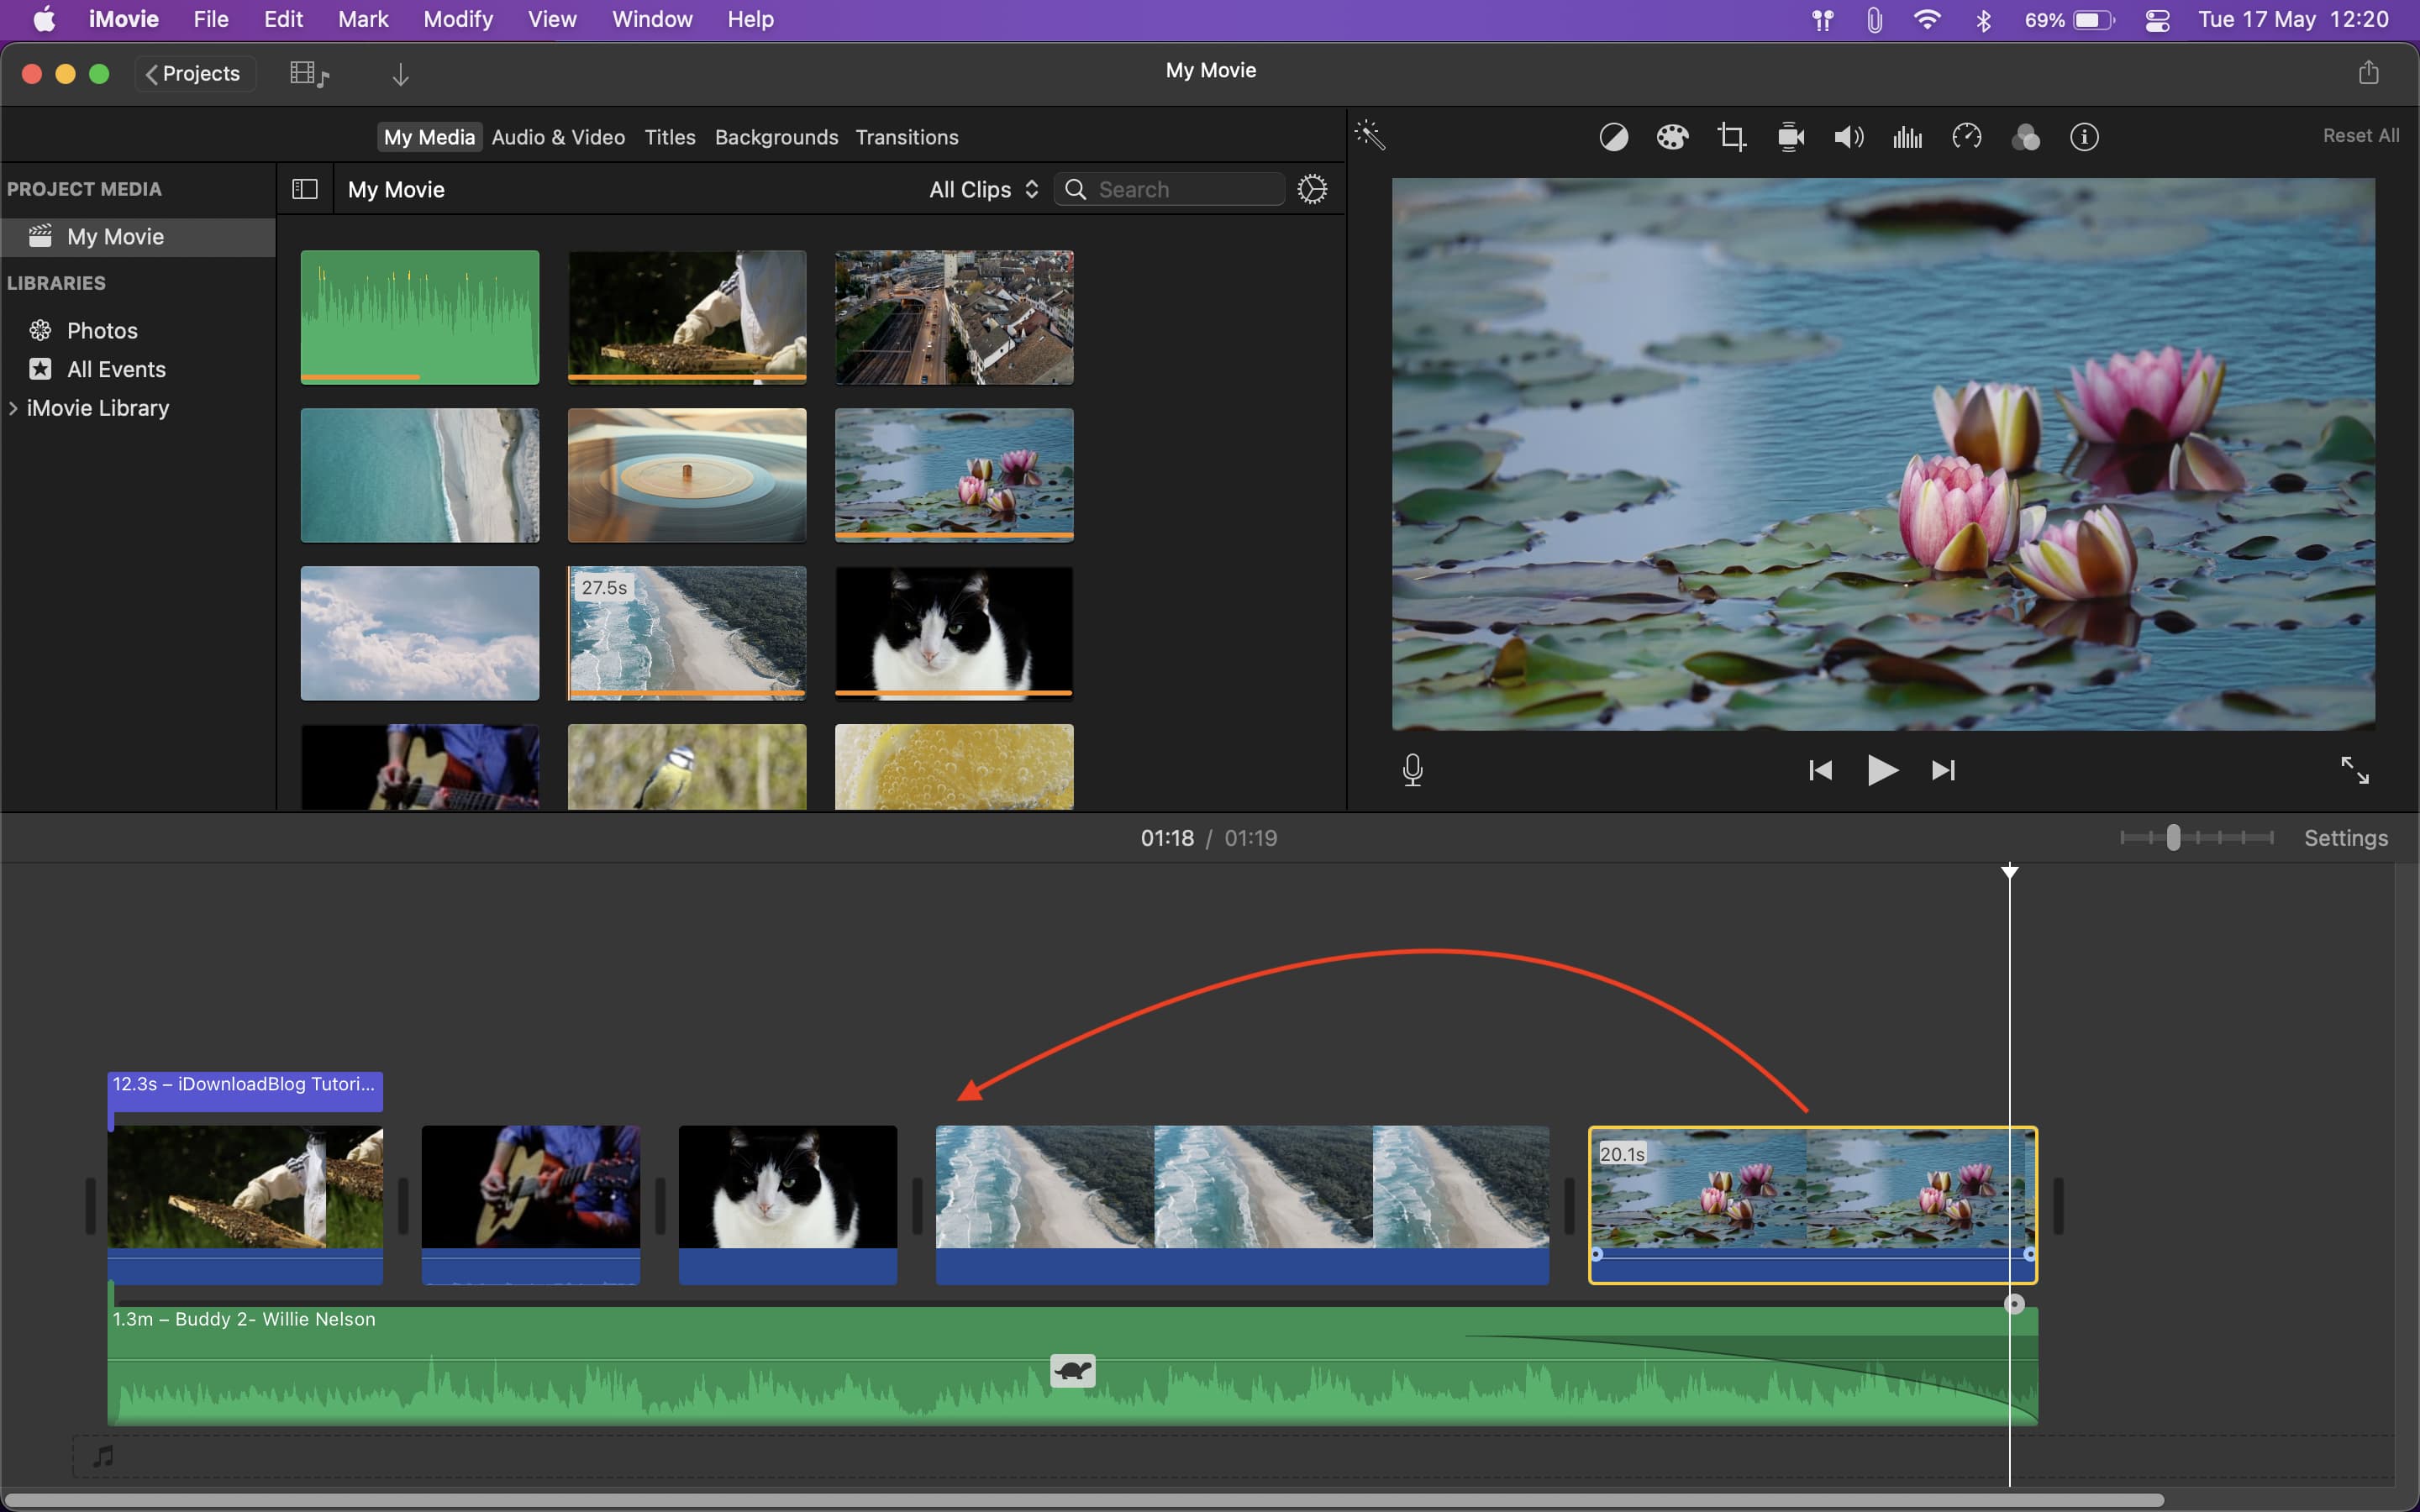
3) Click the Video Overlay Settings button at the top of the Viewer.
4) Select Picture in Picture in the drop-down on the left.
You should now see your image or video clip in the Picture-in-Picture view.
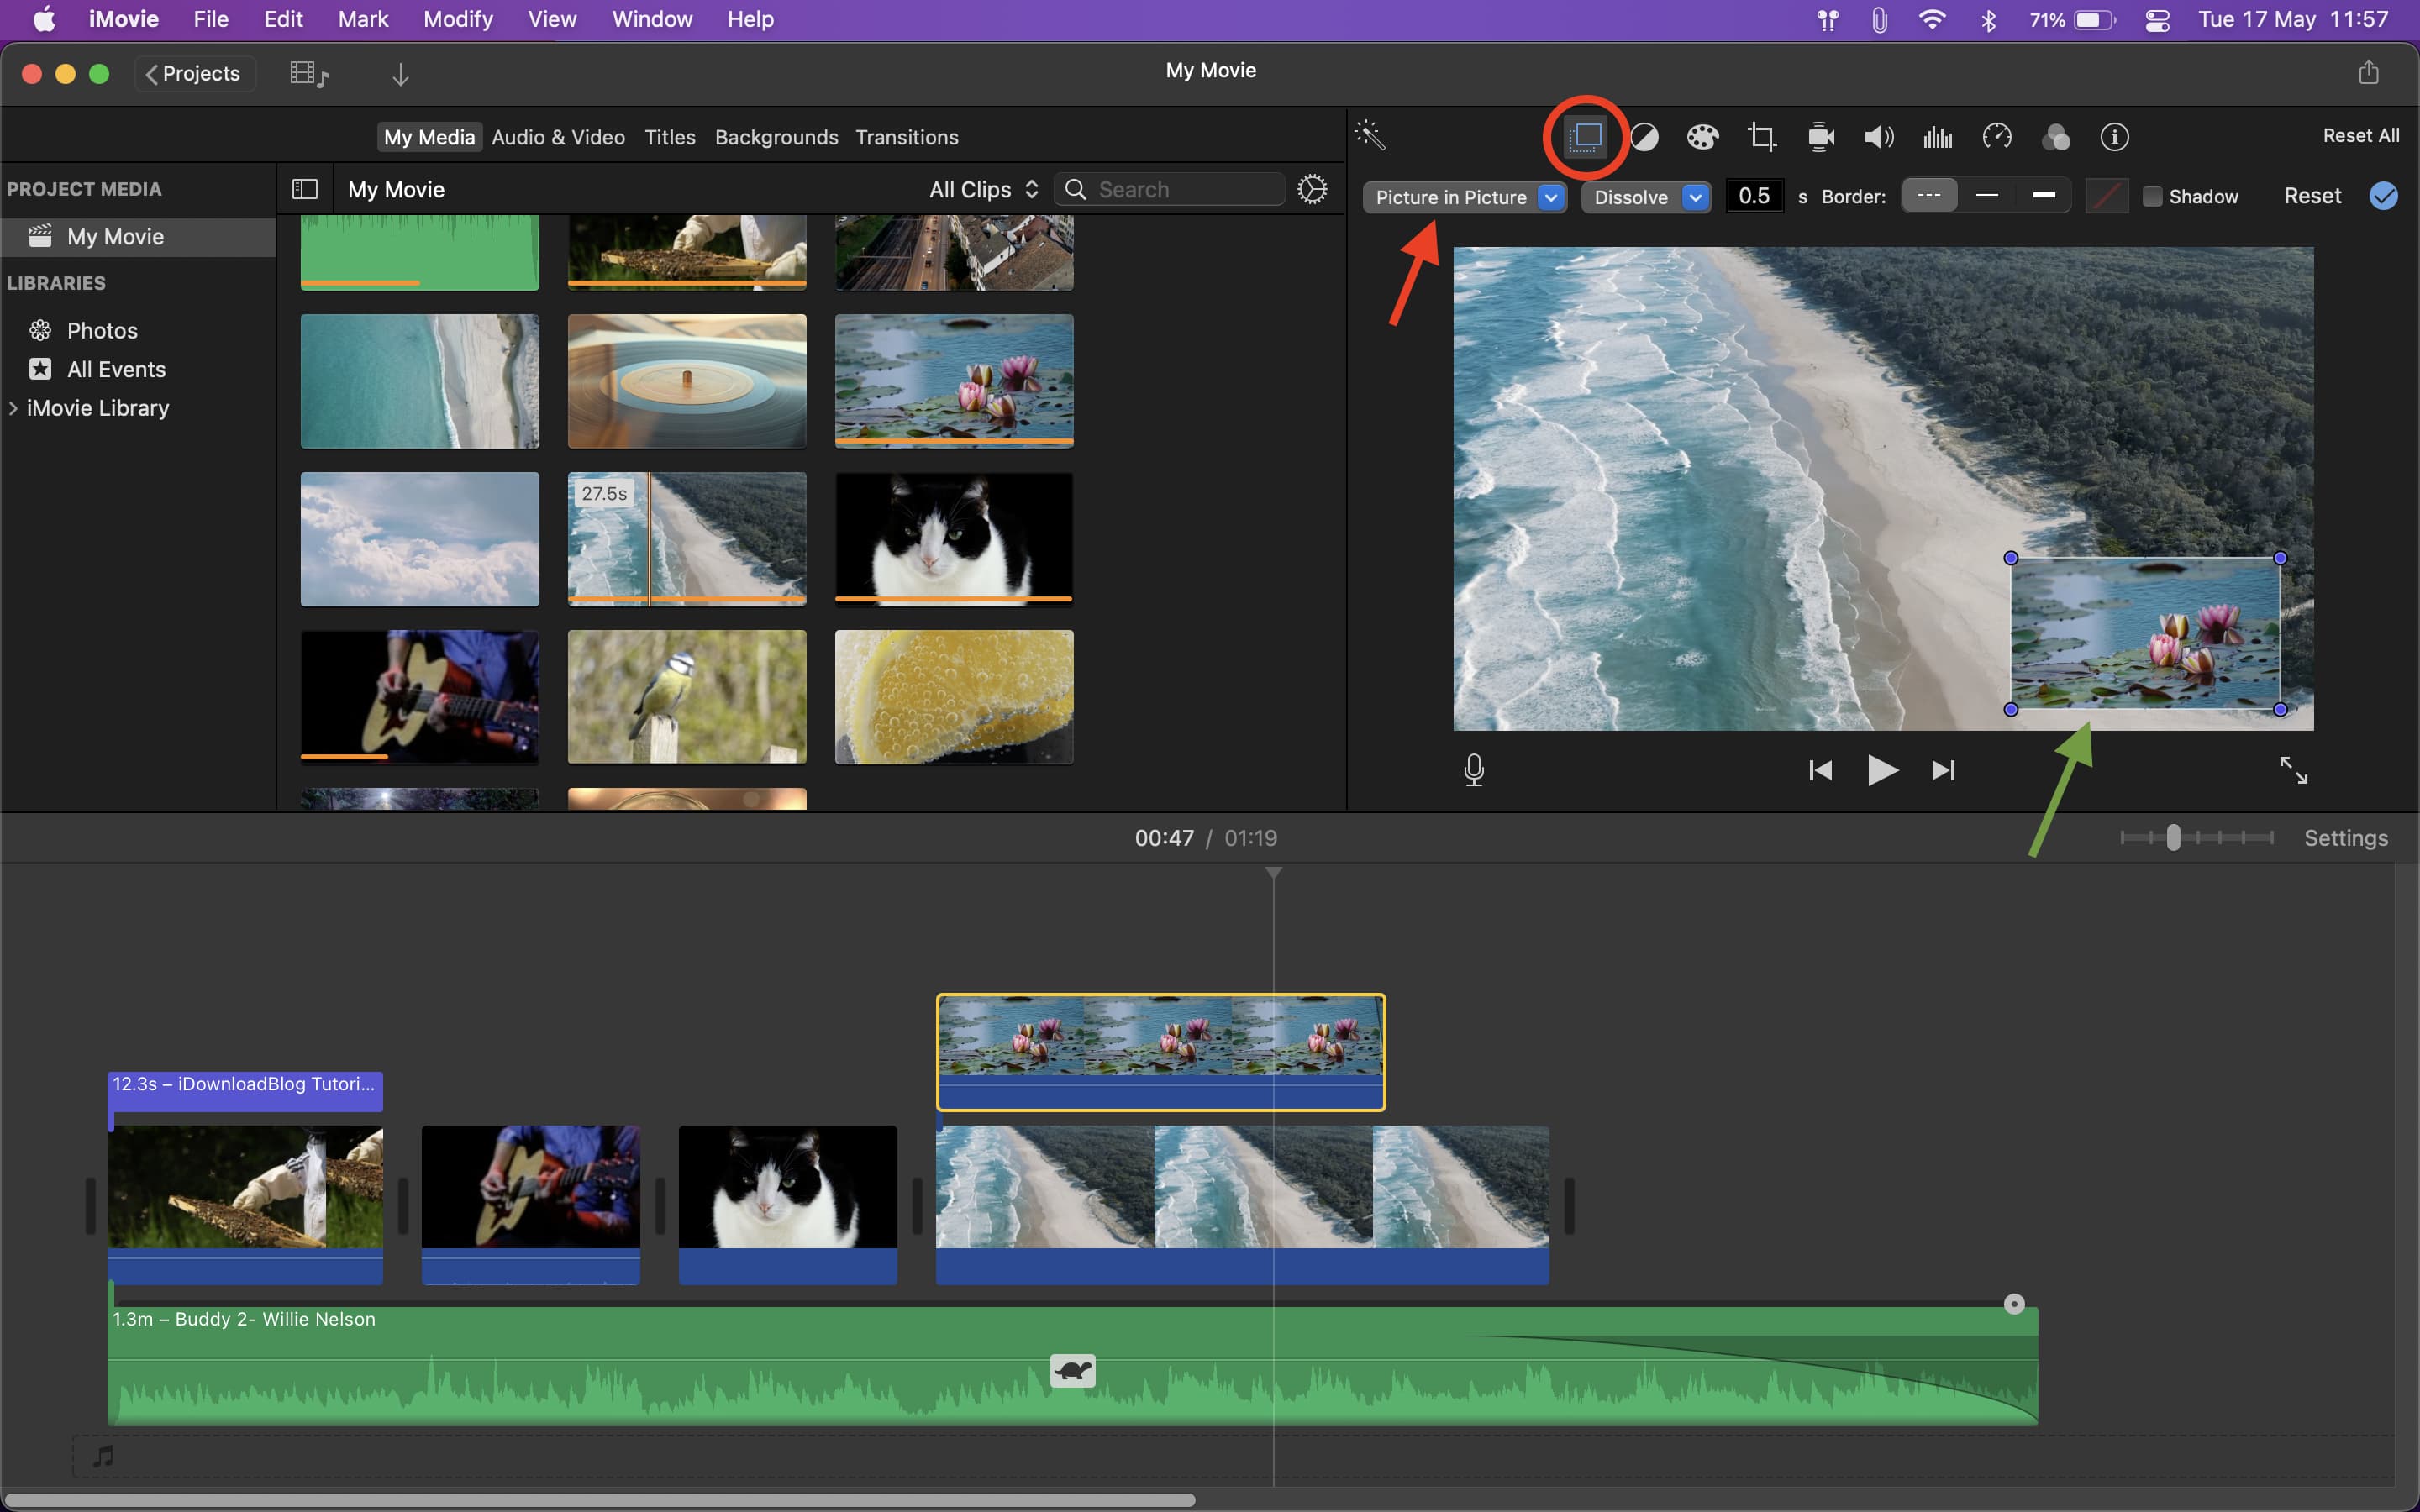
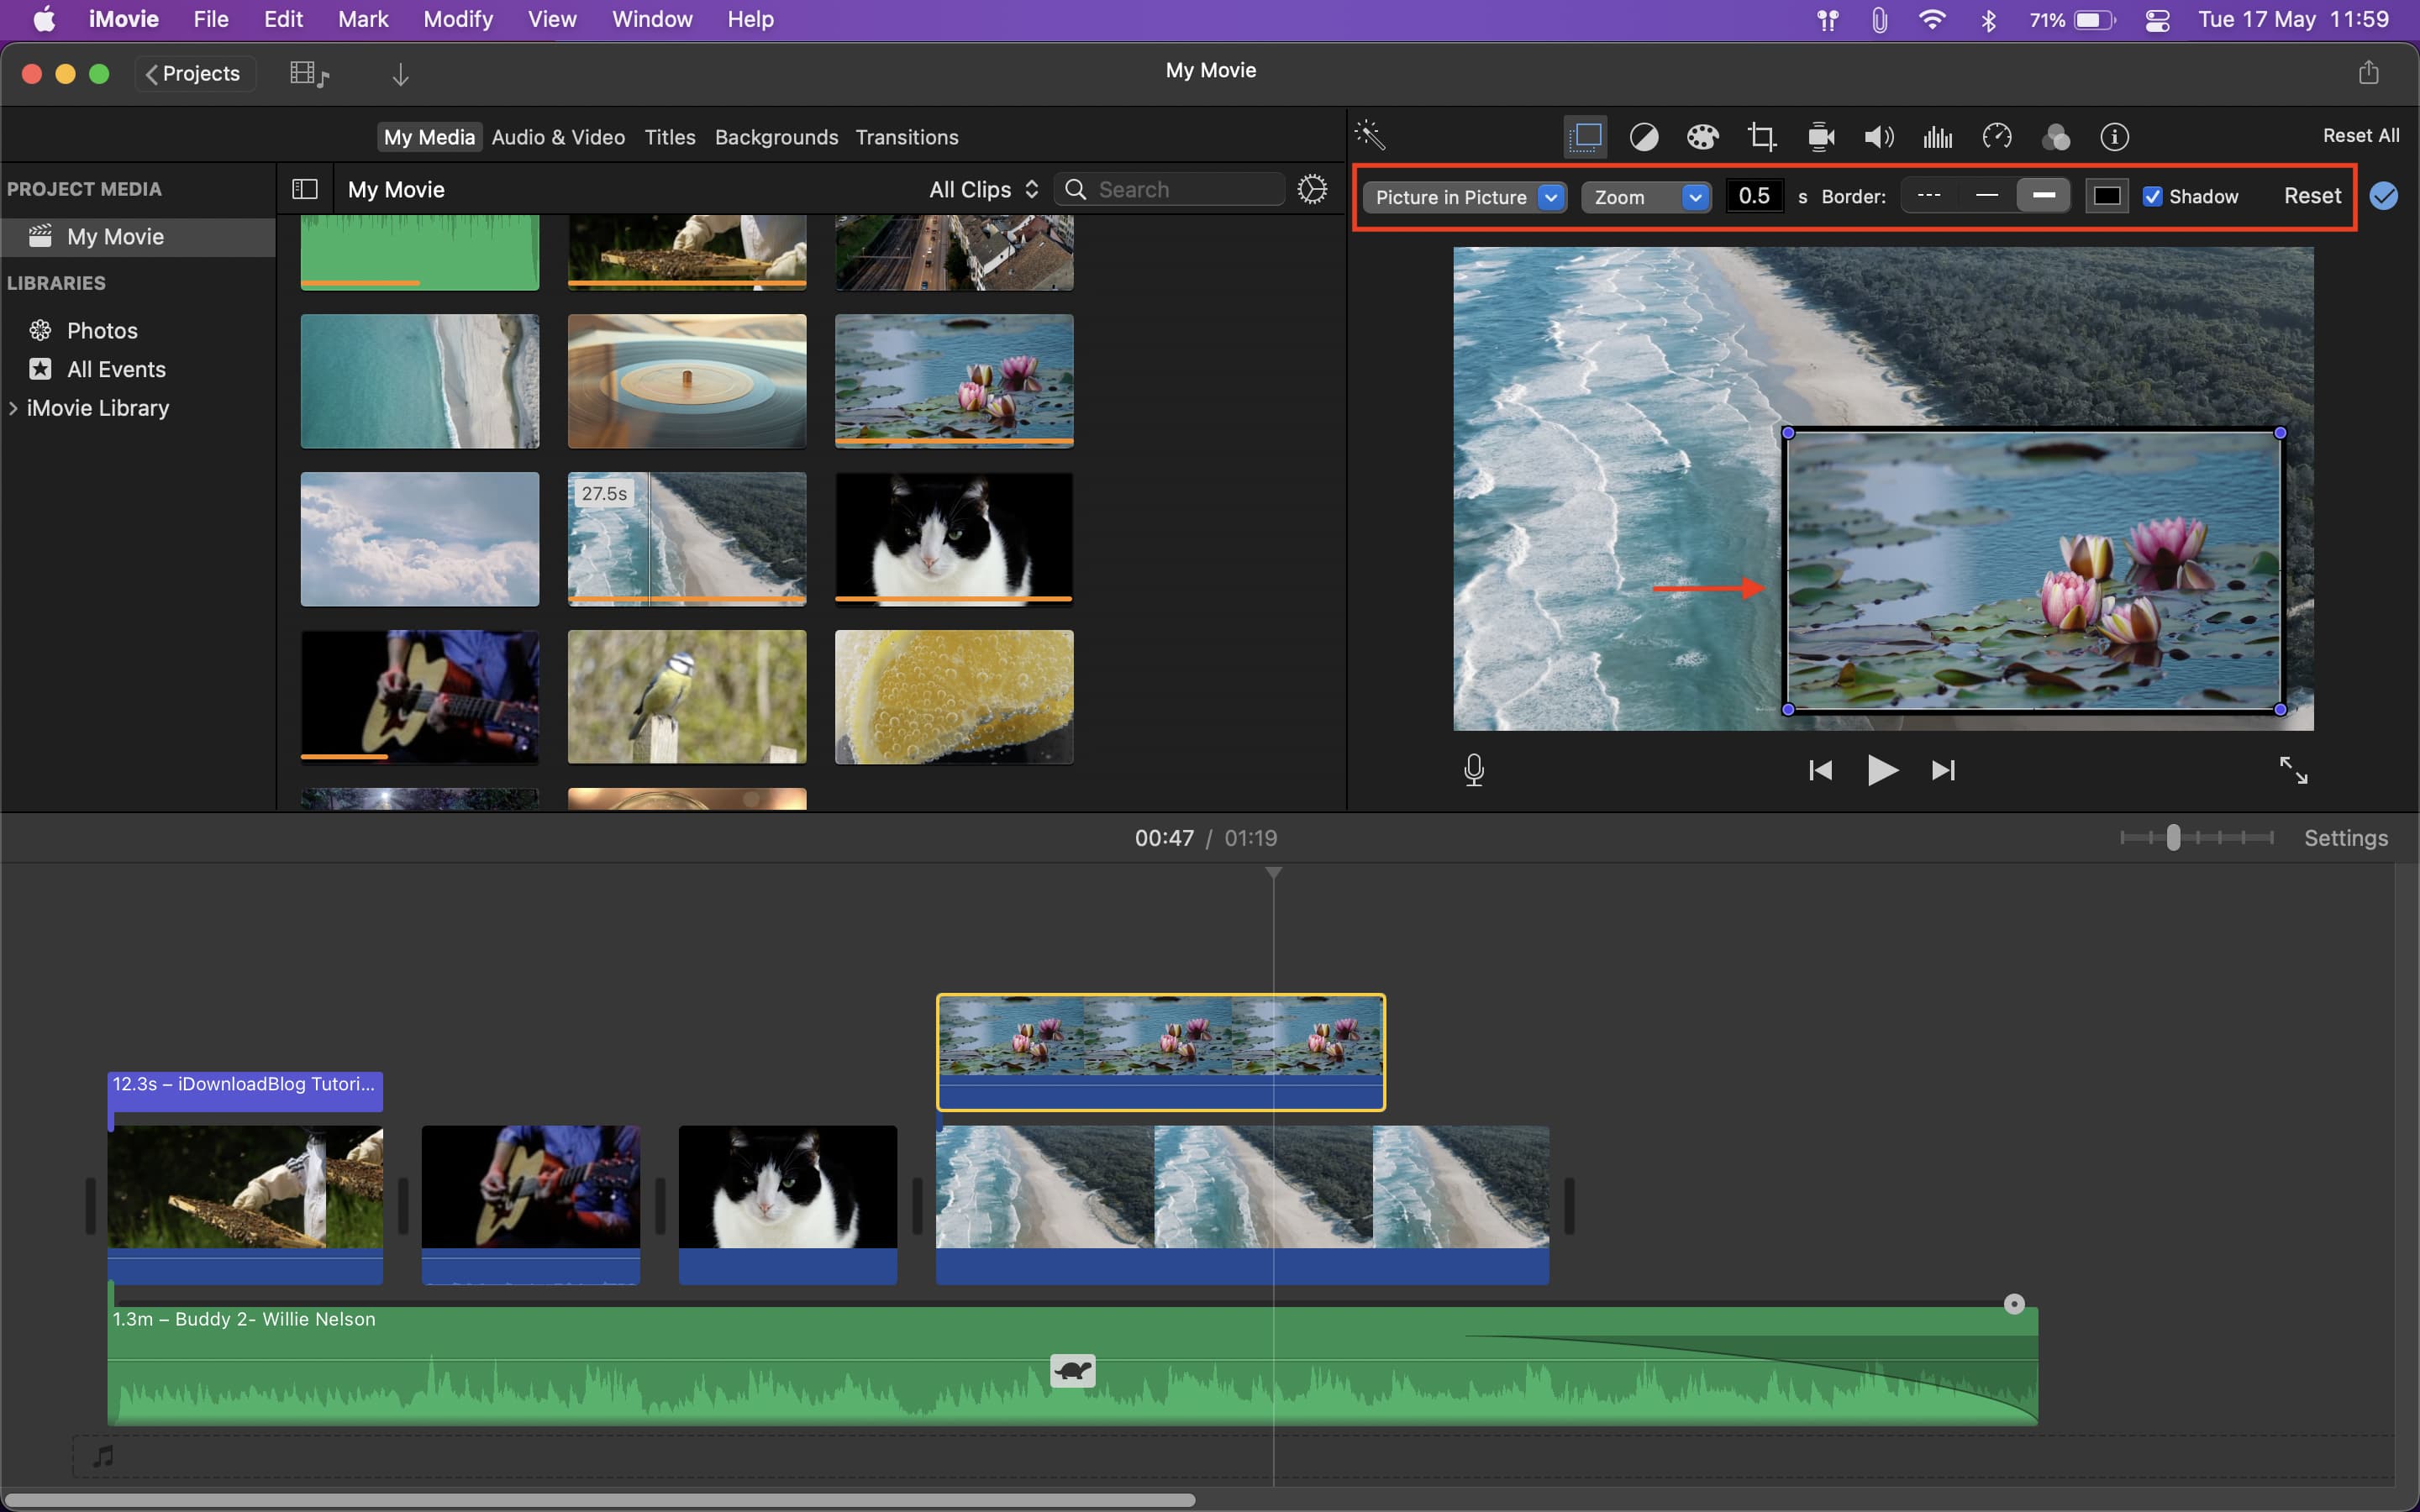
Edit your Picture-in-Picture window
You can make several adjustments to the smaller window once you create the Picture-in-Picture effect. Select the clip in your Timeline and ensure the Overlay screen is still open in the Viewer. If not, click the Video Overlay Settings button. From there, you can then adjust the following:
- Reposition: Click and drag the window where you want it on the screen.
- Resize: Click a corner of the window and drag to resize it.
- Apply a transition: Click the drop-down box to the right of the Picture-in-Picture setting. You can have the smaller window dissolve or zoom as it leaves the larger image. You can also choose to swap the pictures. Next to the transition, you can enter the number of seconds for its duration.
- Add a border: Choose a thin or thick border and select a color to the right if you like.
- Add a shadow: Mark the Shadow checkbox.
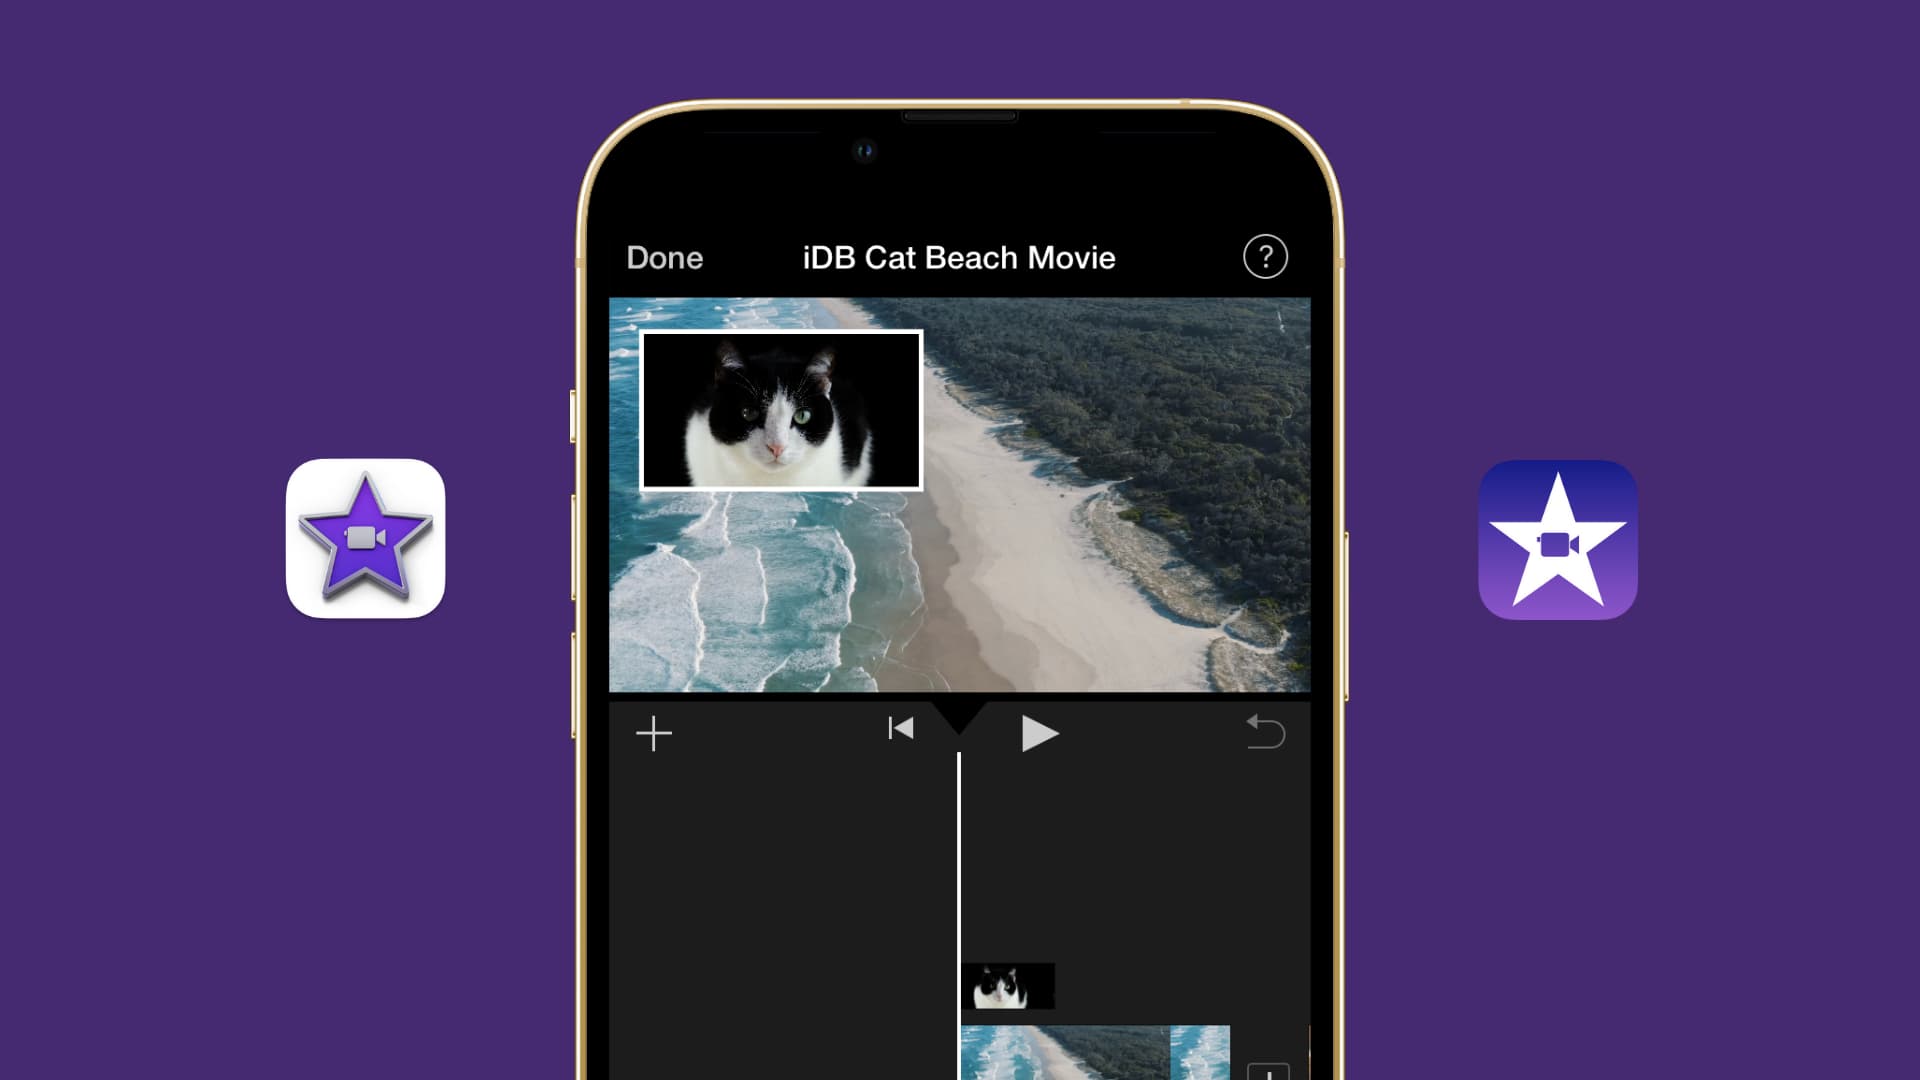
Create Picture-in-Picture in iMovie on iPhone and iPad
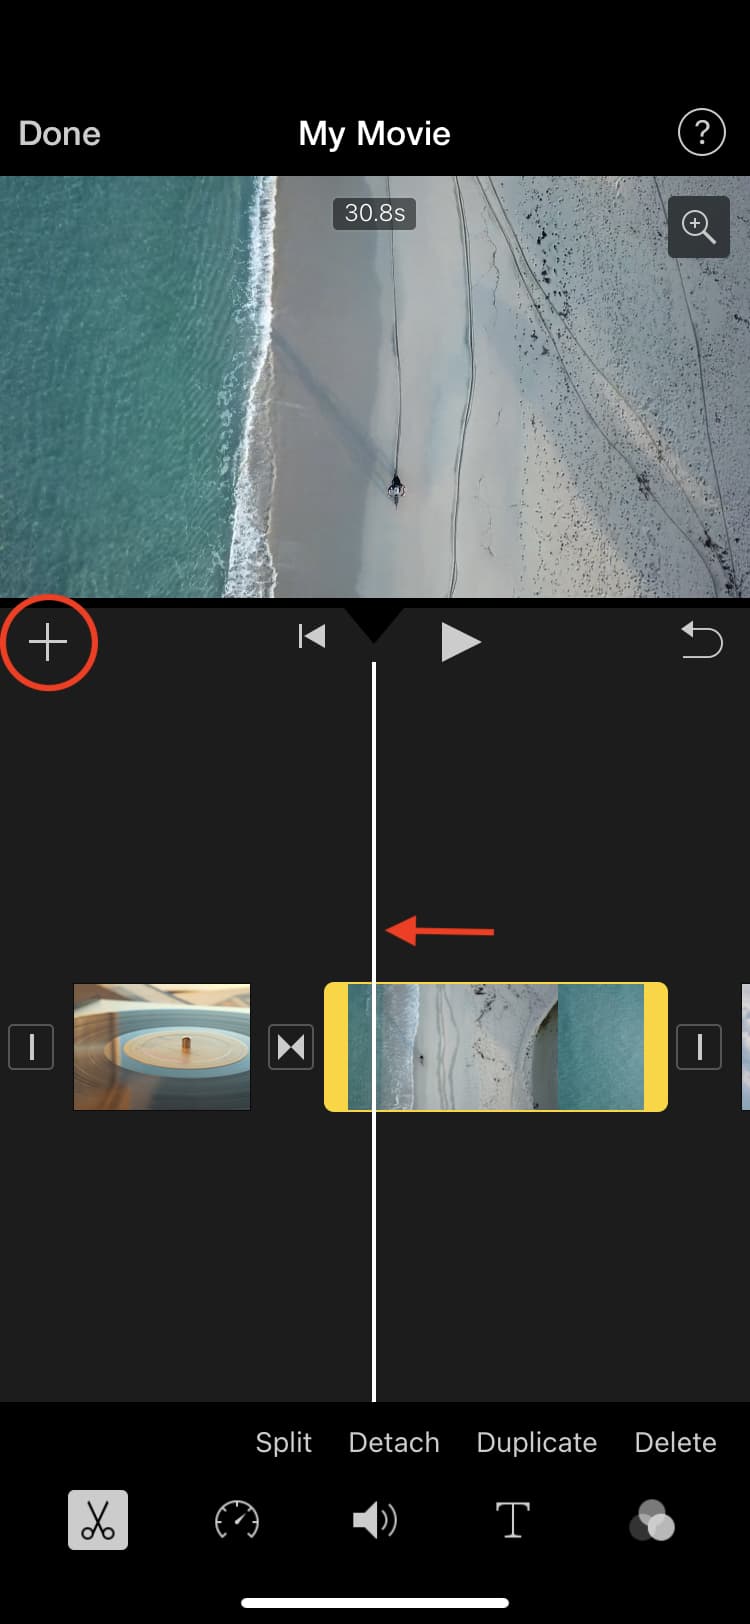
1) Open your movie in iMovie. You’ll see one or more video files in your movie timeline. Tap one of the desired clips to select it. This clip will serve as the background, with a Picture-in-Picture window floating on top of it.
Note: When selecting a clip, ensure the playhead (long vertical bar) isn’t at the end of the clip. If it is, you’ll see an error in step 4 saying, “Move the playhead away from the end to add an overlay.”
2) Tap the plus sign at the top to add the clip or photo you want to display in the Picture-in-Picture window.
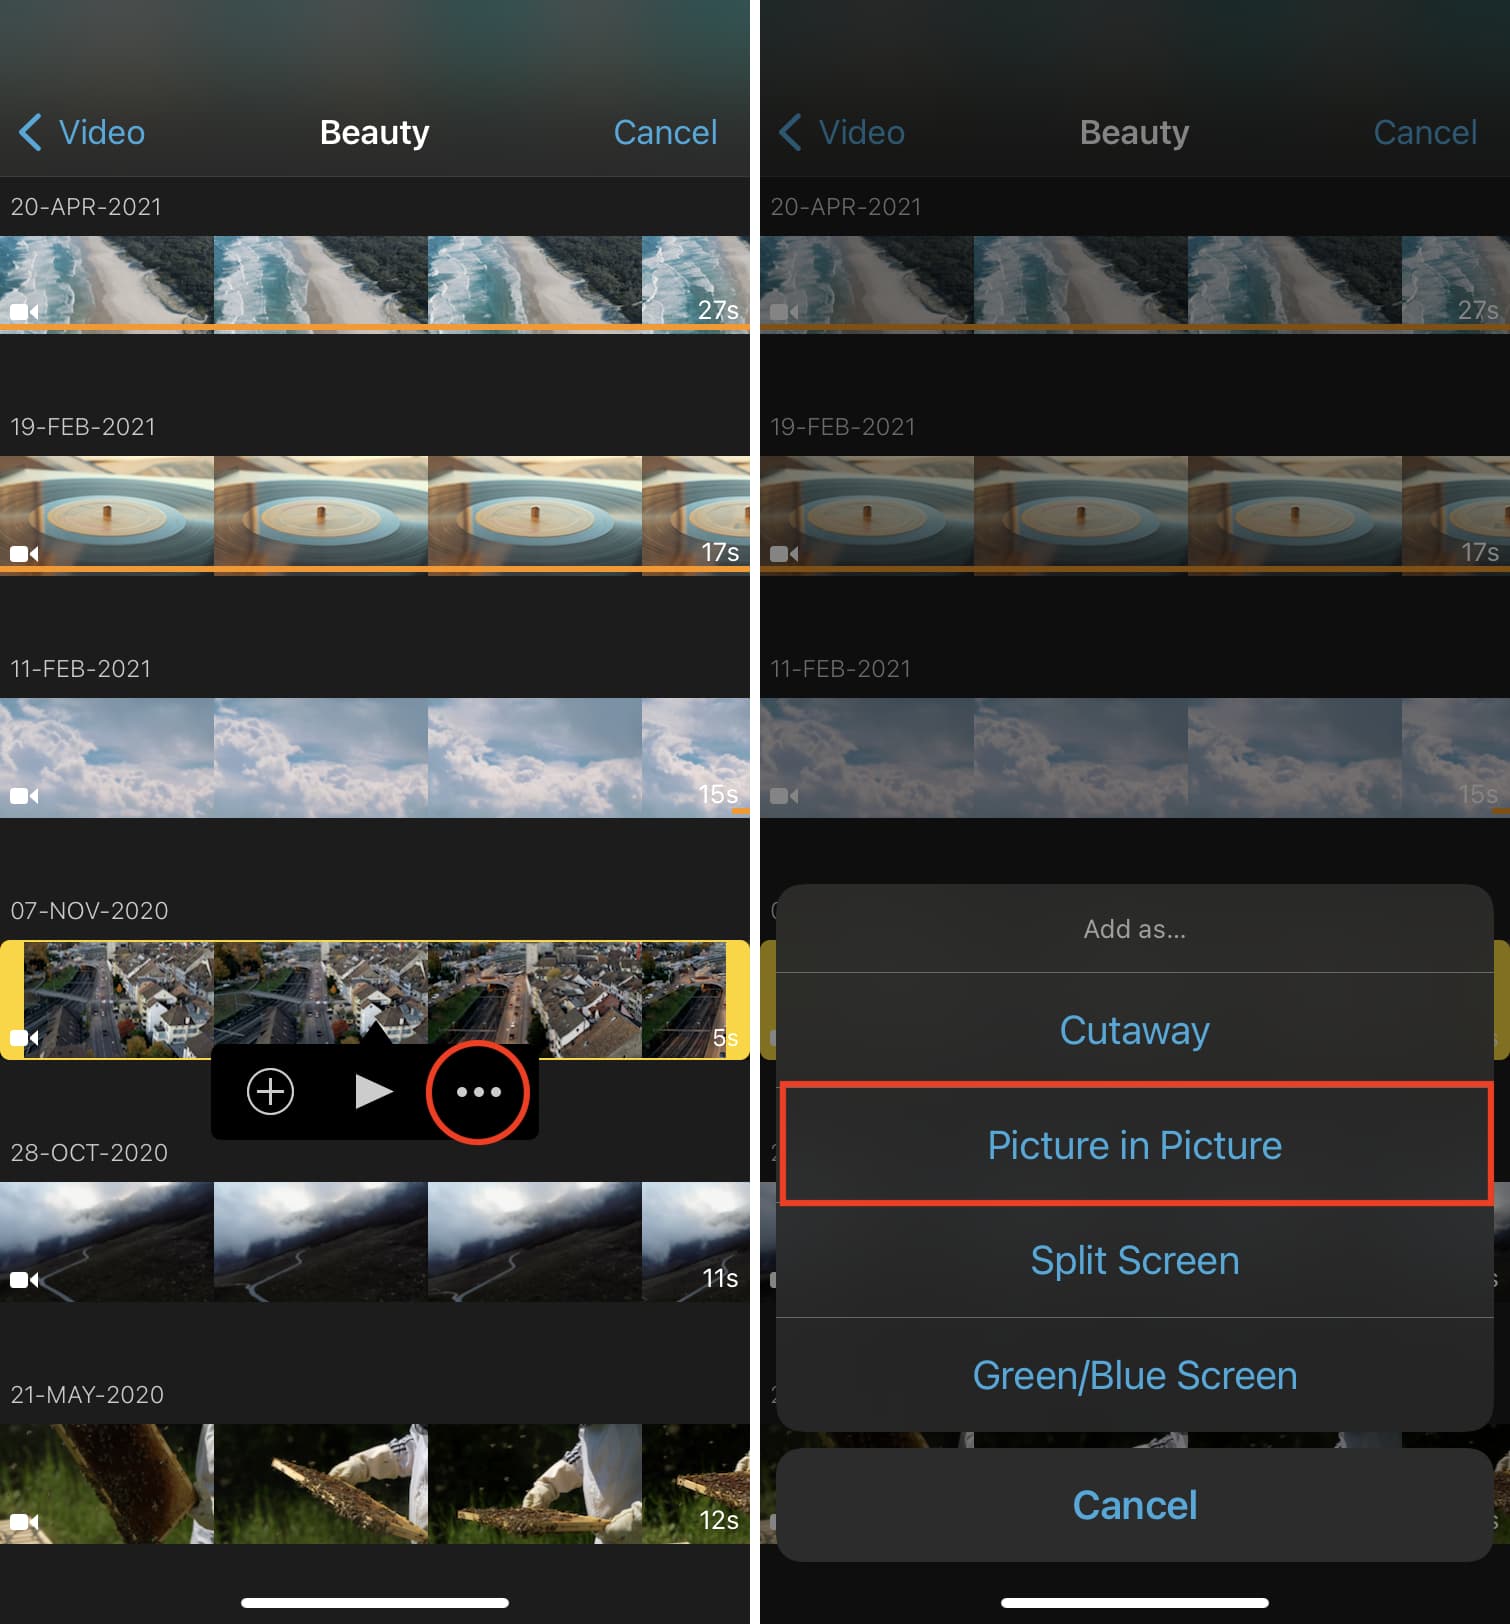
3) Select the image or video and tap the three-dots button.
4) In the menu, select Picture in Picture.
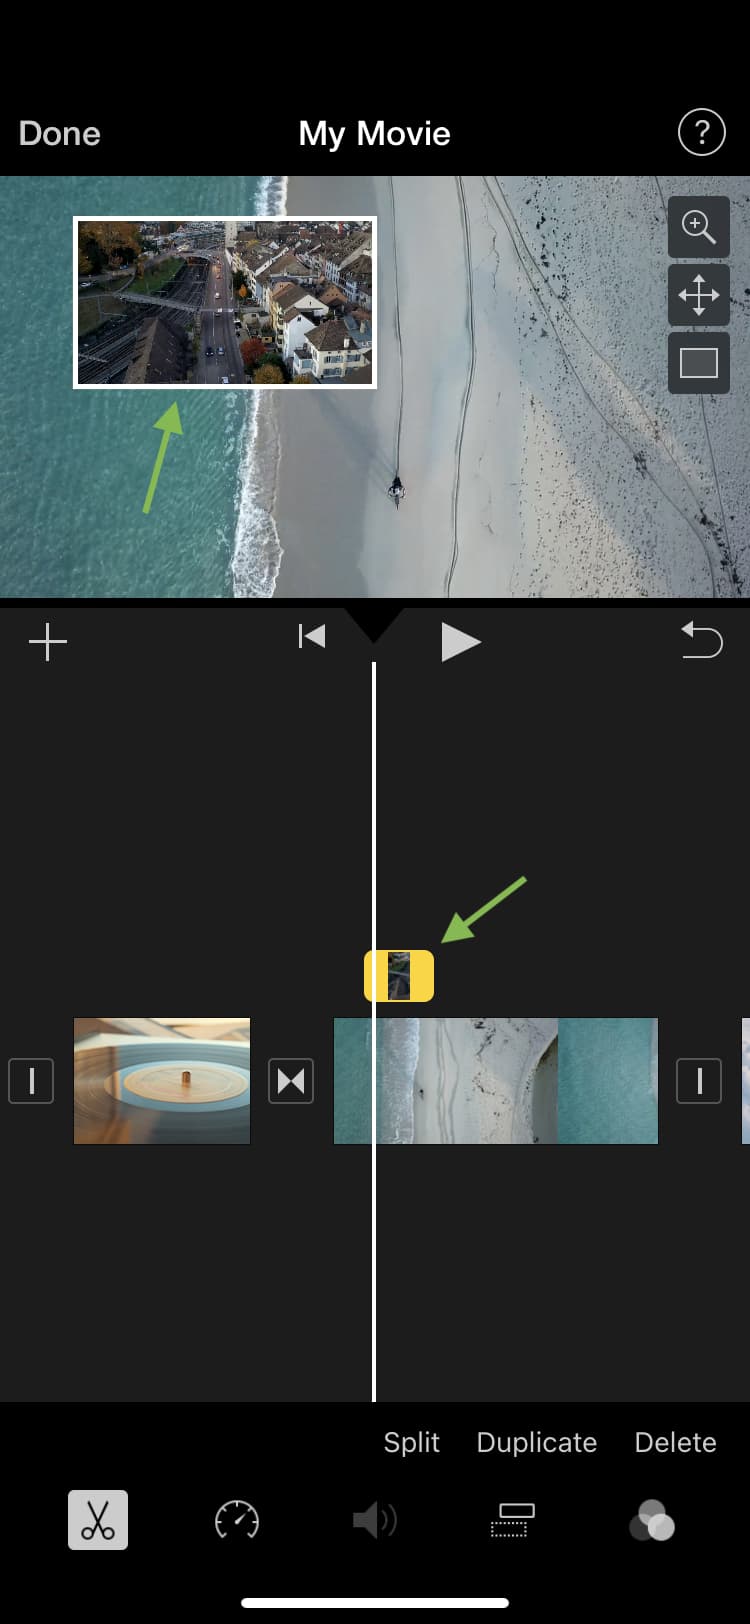
You should now see your image or clip in a Picture-in-Picture view.
Edit your Picture-in-Picture window
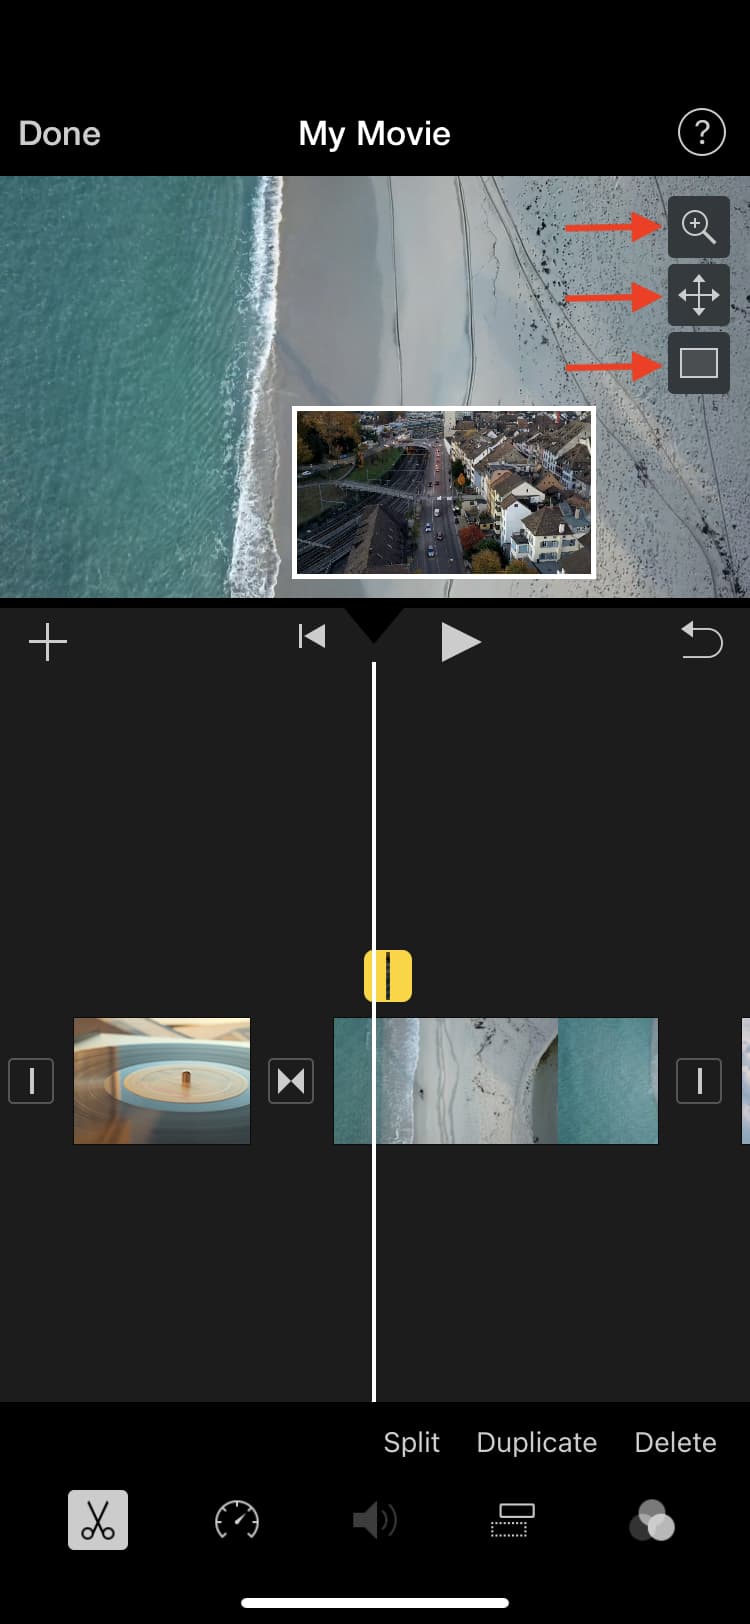
You can make a few adjustments to the smaller window once you create the Picture-in-Picture effect. Tap the clip in your Timeline and then tap the Overlays button at the bottom.
- Zoom: Tap the Zoom button and pinch to zoom in on the image in the window.
- Reposition: Tap the four-sided arrow and drag the window where you want it on the screen.
- Resize: Tap the four-sided arrow and pinch the window to resize it.
- Add a border: Add a thin white border to the window.
Are you going to give this feature a try?
Other iMovie tips: