Learn how to use the Preview app on your Mac to print multiple photos on a single page, maximizing paper usage and minimizing waste.
While you likely know that you can print from the Preview app on your Mac, you might not realize that you can easily print several images on one page without the need for additional software or apps. All it requires is tweaking a couple of things before printing, and we’ll show you how.
Print several images on one page from Mac
1) Open Finder and select all the images you’d like to print. You can do this by dragging through them, holding the Shift key and selecting the first and last in a range, or holding the Command key and clicking each one.
2) Now, double-click over your selected images, and they should open automatically in Preview. If they open in another app, that means Preview isn’t your default image viewer. In this case, right-click over the images and select Open With > Preview.

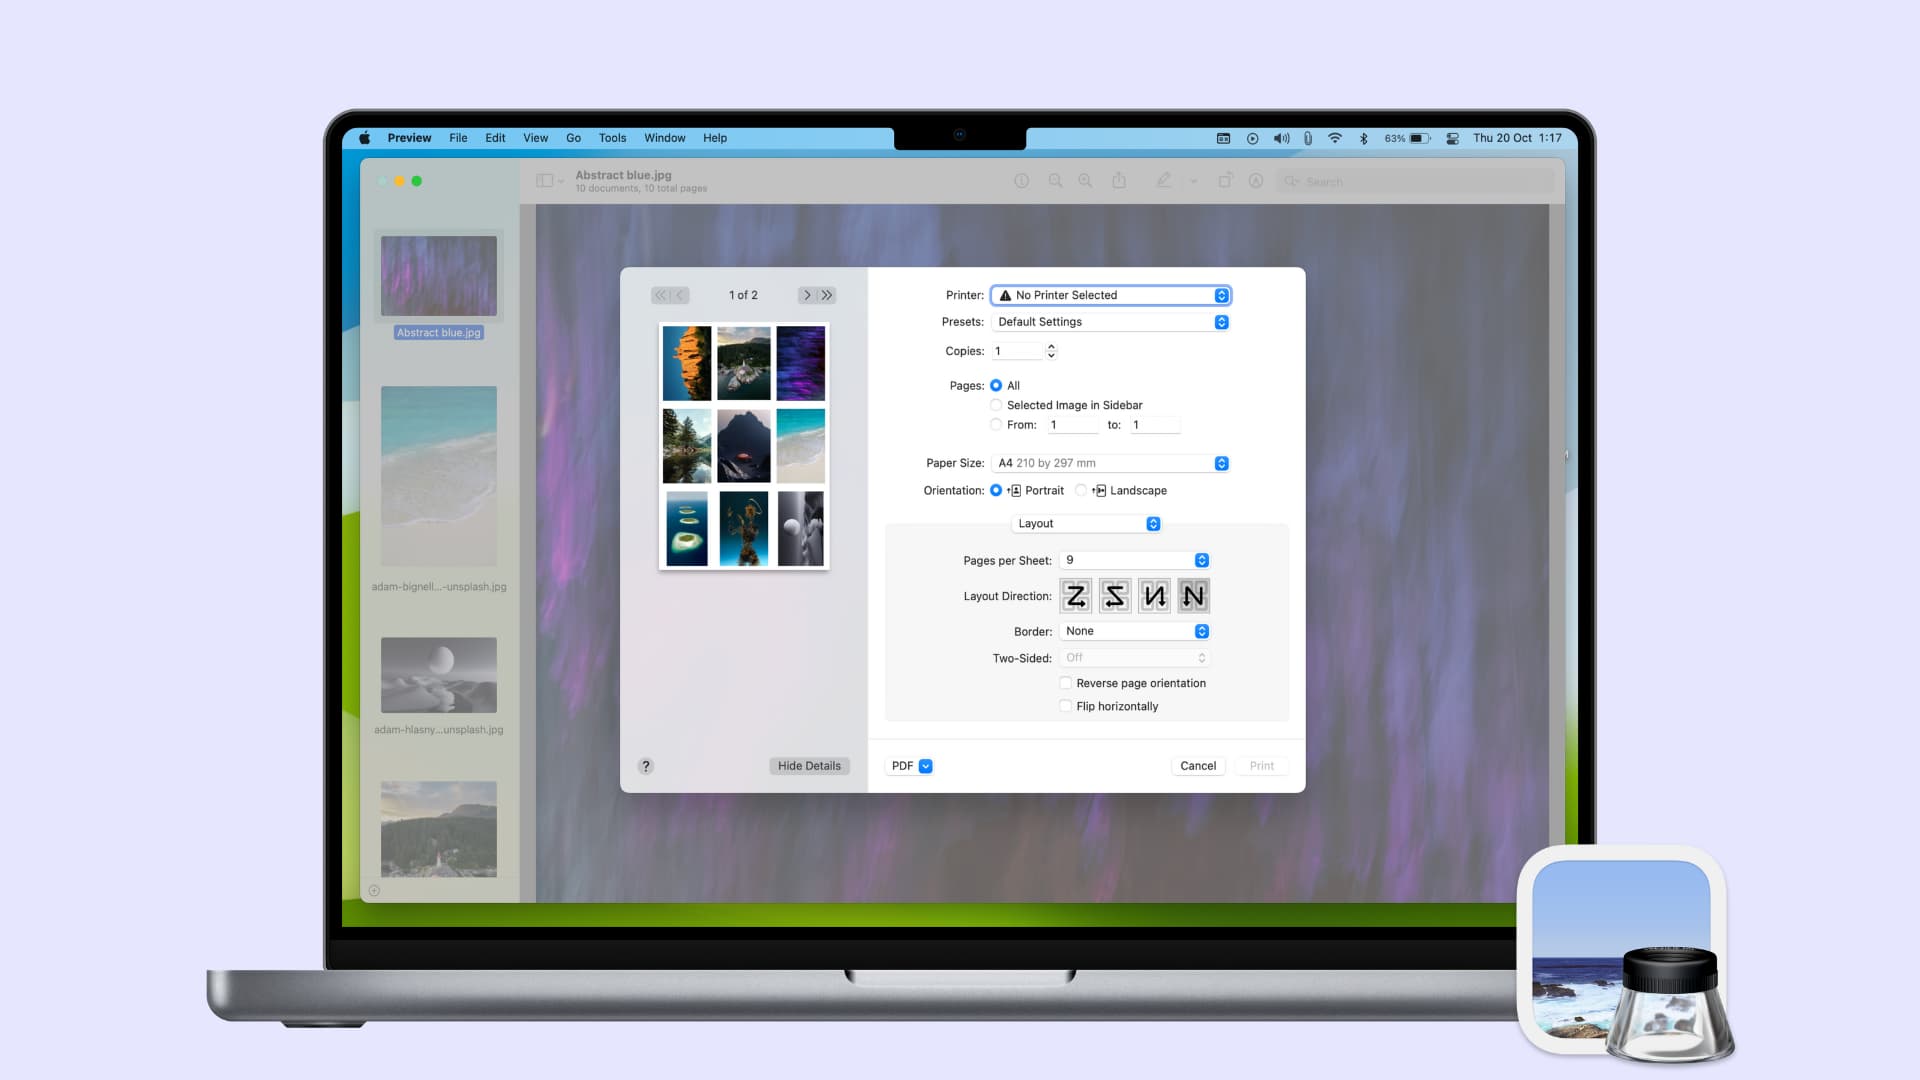
3) Once your images are opened in Preview, click File > Print from the top menu bar. You’ll now see the full Print window on the screen. On older versions of macOS, you may have to click the Show Details button first to see all the options.

4) Expand the Layout option by clicking its tiny arrow (>). Then, in the Pages per Sheet drop-down box, select the number of pages (images) you want on the page. You may have to round up if you have a number not in the list.

5) Next to Layout Direction, you can pick from four different options, depending on your preference.
The other settings are optional, allowing you to add a border between your images, reverse the page orientation, and flip the images. You can also make changes to the settings if needed for things like the number of copies and orientation.
6) You can see a preview of how your page looks at the top left of the print window. When you finish adjusting the page, continue as you normally would by clicking Print.
If you’re working with tons of images at one time that you want to print, you can simply adjust the Pages per Sheet. For instance, say you have 20 images and want five pages of four images per page. You would set the Pages per Sheet to 4 in the drop-down. And you can view each page using the arrows below the preview in the Print window. Just remember that each image is considered a “page” in Preview.
Note that you can also create a collage using other apps and then print them on a single page.
On a related note: How to print password-protected PDF on iPhone