In this quick tutorial, we show you how to compress a large video on your iPhone or iPad without compromising quality, allowing you to share it faster and save storage space.
Capturing videos with your iPhone or iPad is convenient and easy. However, those video files can be pretty large in size. Not only does this take up more space on your device, but it can also make sending or sharing videos difficult.
Reducing the size of your video files by compressing them is simple with the right tool. And once those files are smaller, you’ll save space on your iPhone or iPad and have an easier time sending them in Mail or Messages or sharing them on social media.
We’ll show you how to compress videos on iPhone and iPad using an iOS app we’ve created, called Compress Videos. The app is available for free on the Apple App Store.
Download the Compress Videos app
Shrink videos with Compress Videos
1) Open the Compress Videos app on your iPhone or iPad and allow it to access your photo library.
2) Tap the “Select Videos to Compress” button and pick the video.
The app shows videos that are on your device and in your iCloud Photos. It also displays the file size of each video, which is helpful in identifying the larger ones. Choose one video in the free version or multiple in the pro version and tap the Next button at the top.

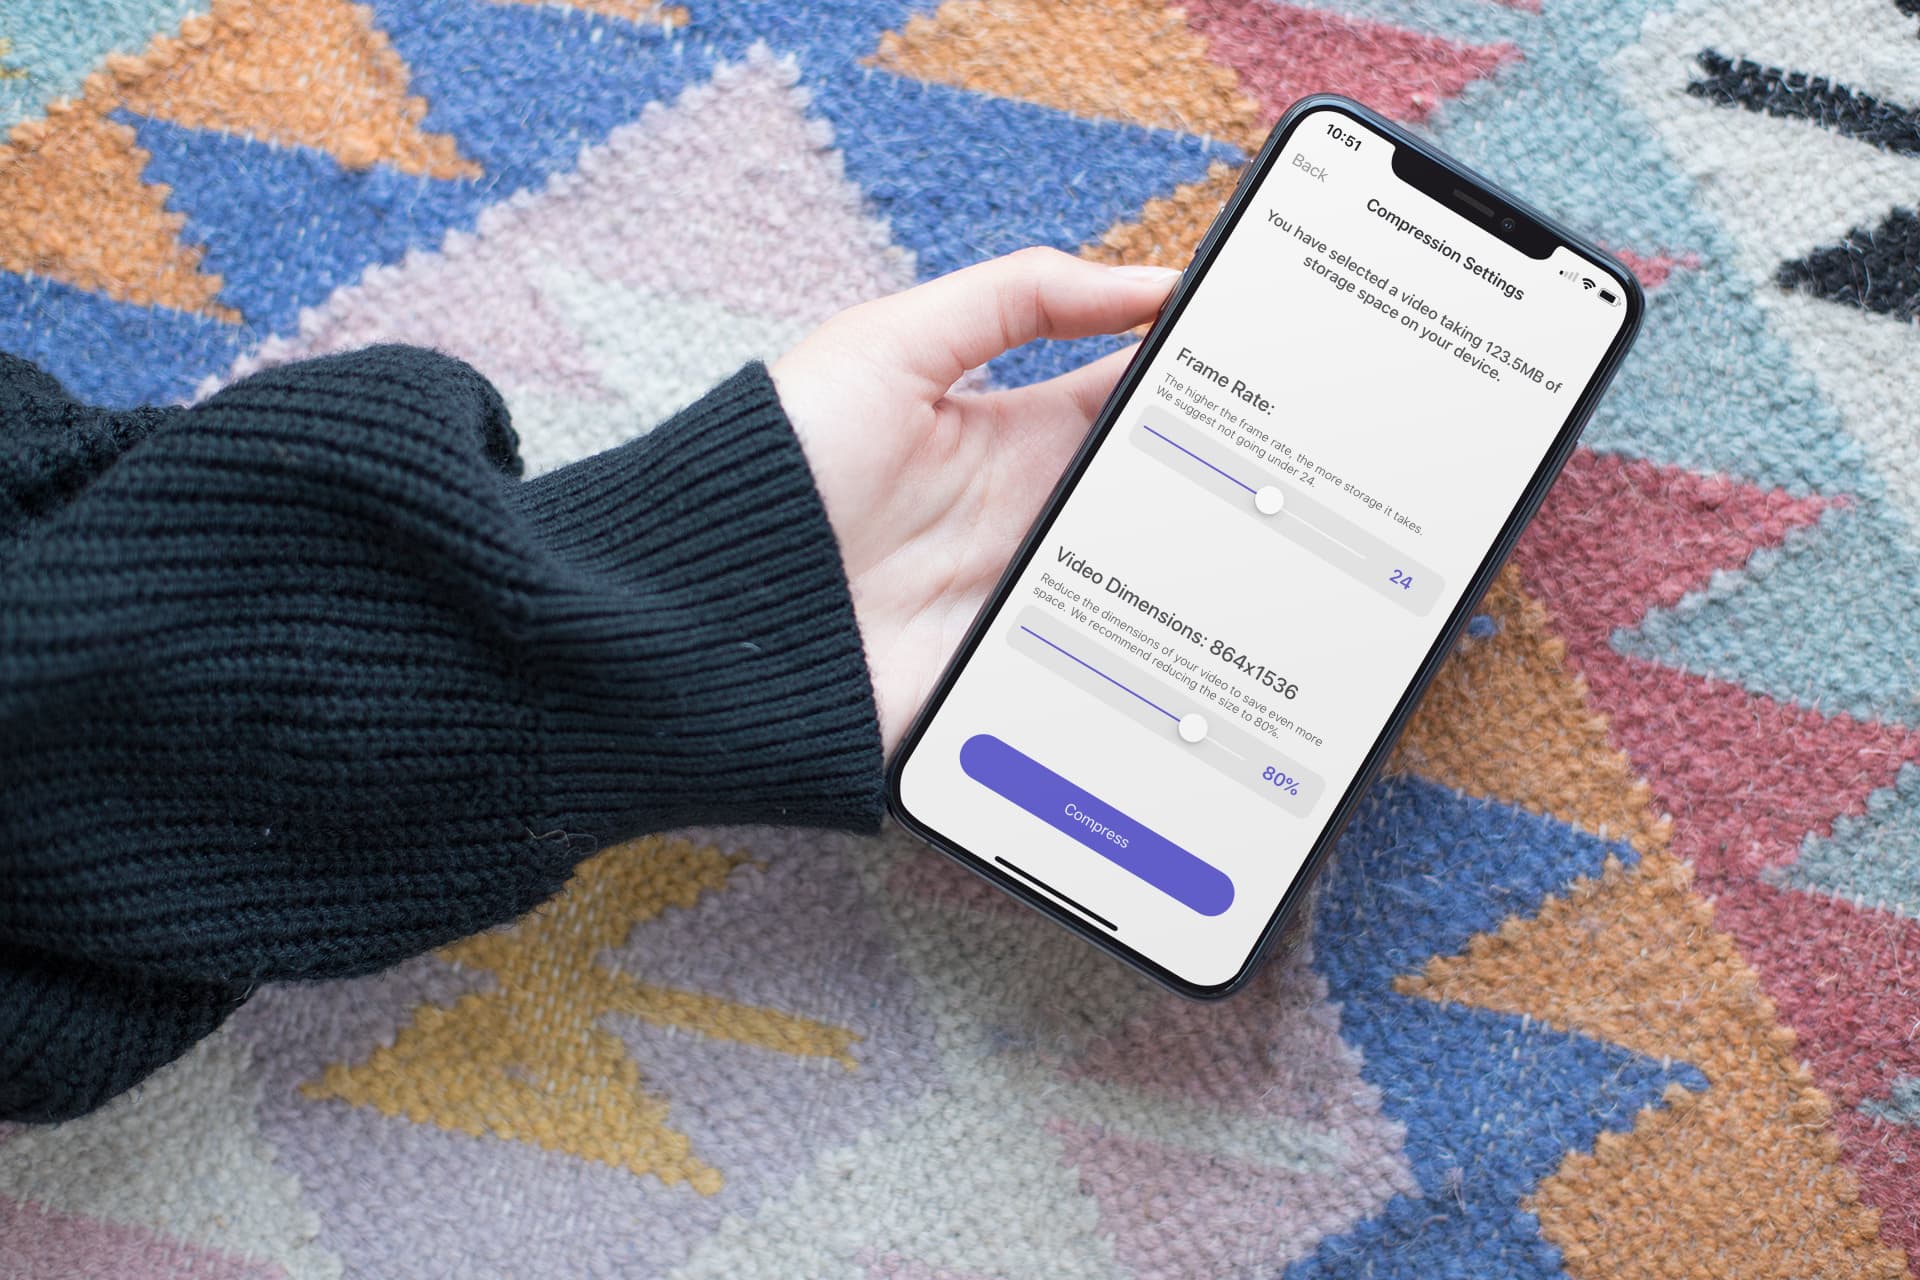
3) This takes you to the Compression Settings screen, where you can adjust a couple of things to reduce the file size of our videos.
- Frame Rate: First, you can adjust the frame rate (fps) down to 24 frames per second. You can, of course, go lower than that to compress the video further, but it can risk lowering the video quality to a point where it’s not really watchable. 24 seems to be the right spot.
- Video Dimensions: Second, you can adjust the video dimensions from 100% (the full size of your video) to a smaller size, such as the recommended 80%. Unless you watch your videos on a large screen, such as a TV, reducing the dimensions to 80% will not have a noticeable impact on picture quality.
Of course, you can adjust the compression settings to your liking. You can also experiment with the settings to find what works best for you.
4) Now, tap the Compress button at the bottom. You’ll then see the video compressing.
5) The app will reduce the video size and save them to both your library and a newly created album called Compressed Videos. On that screen, you’ll also see how much storage space was saved during the process.

At that point, you can choose to delete the original videos or keep them on your device. You can then repeat the process to compress another video or just close the app.

Compressing videos on iPhone and iPad can be easy and take just a few minutes when using the right tool. Perhaps we are a bit partial, but the Compress Videos app is definitely one you should try if you want to shrink your iPhone or iPad videos.
Download the Compress Videos app
On the same note: How to compress photos on your iPhone and iPad