In this tutorial, we explain all the practical ways to right-click—also know as secondary click or Control-click on your Mac using a mouse, trackpad, or keyboard.
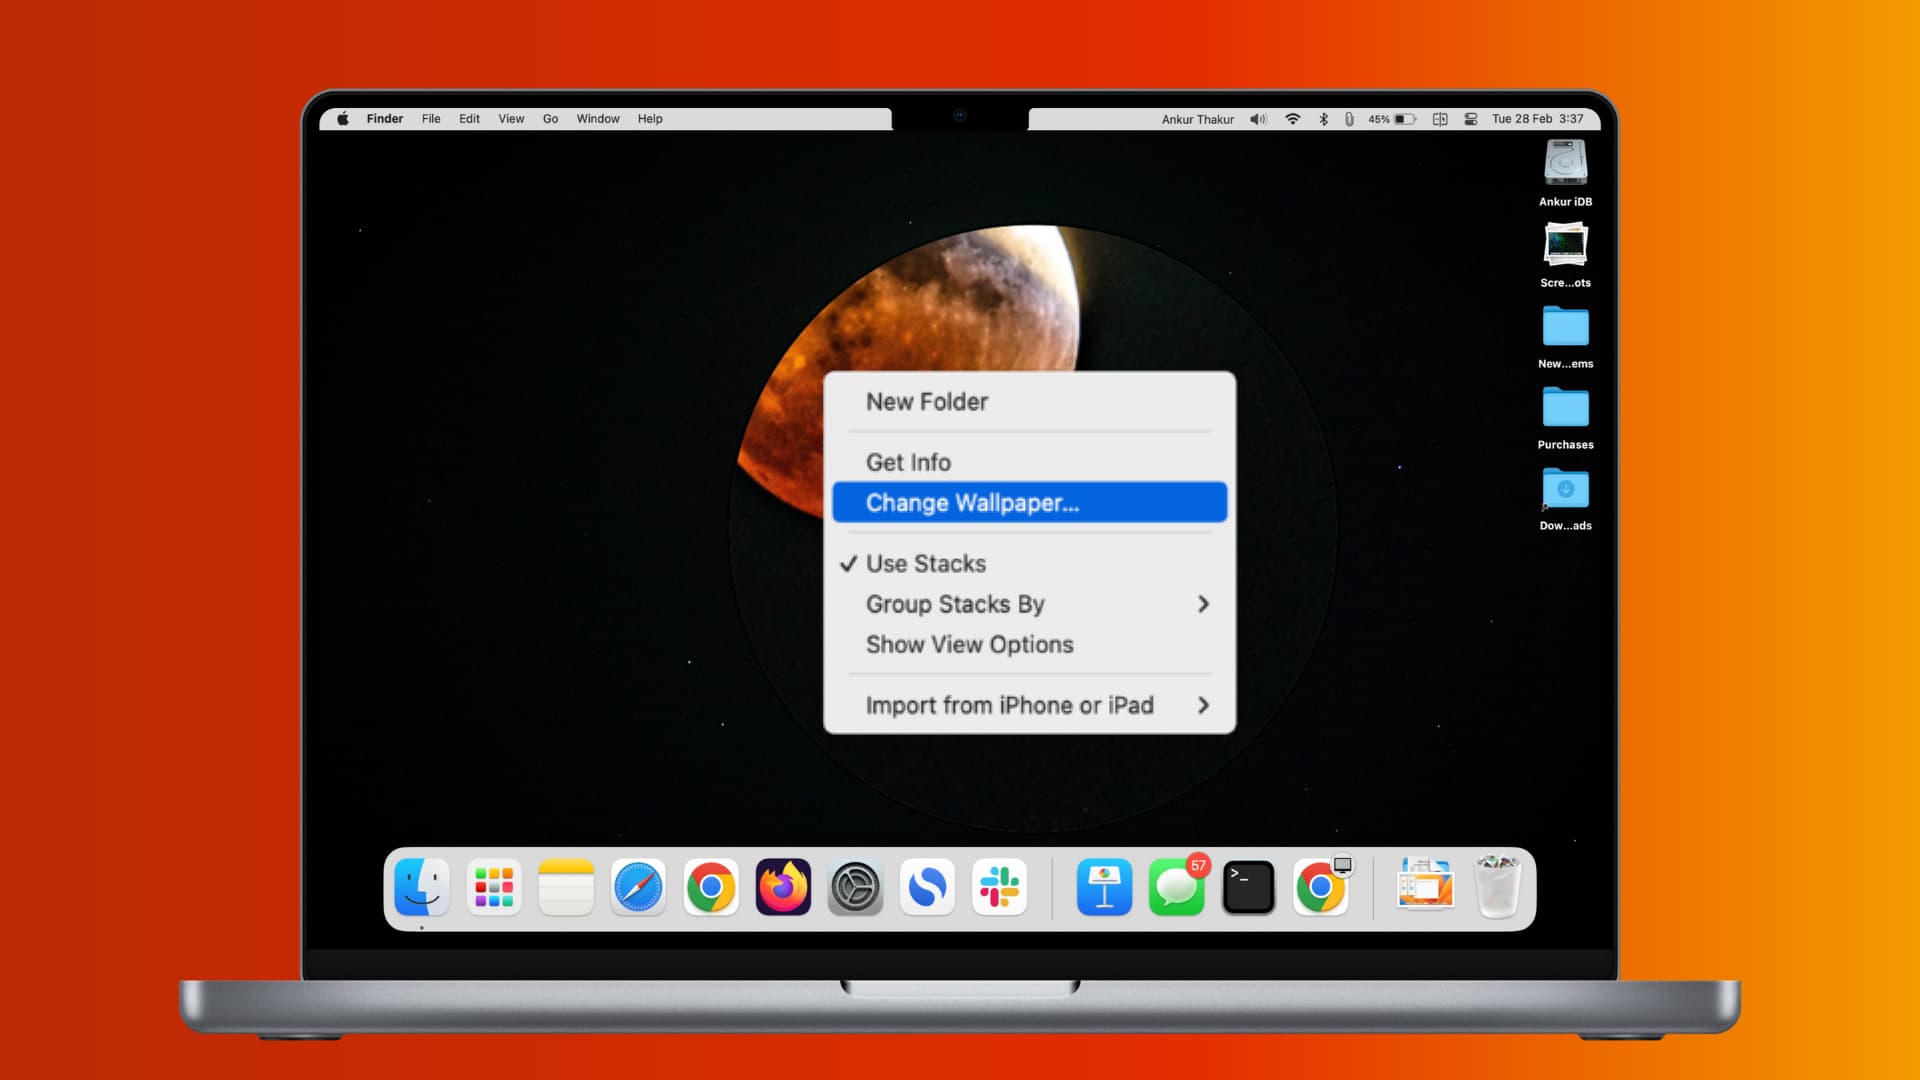
If you’ve owned a Mac for years, then this isn’t anything new to you. But there are plenty of Windows users out there making the move to Mac, and one thing they may struggle with as new Mac users is how to right-click. It sounds simple enough, but there is a difference between Windows and Mac in how you perform this action.
So, after you set up your new Mac, you must take a minute to configure the right-click settings for your trackpad and mouse.
4 ways to right-click on Mac
1. Using the Mac trackpad
Follow these steps to turn on or configure right-click for the built-in MacBook force-touch trackpad or Apple’s Magic Trackpad.
- Click the Apple menu and choose System Settings.
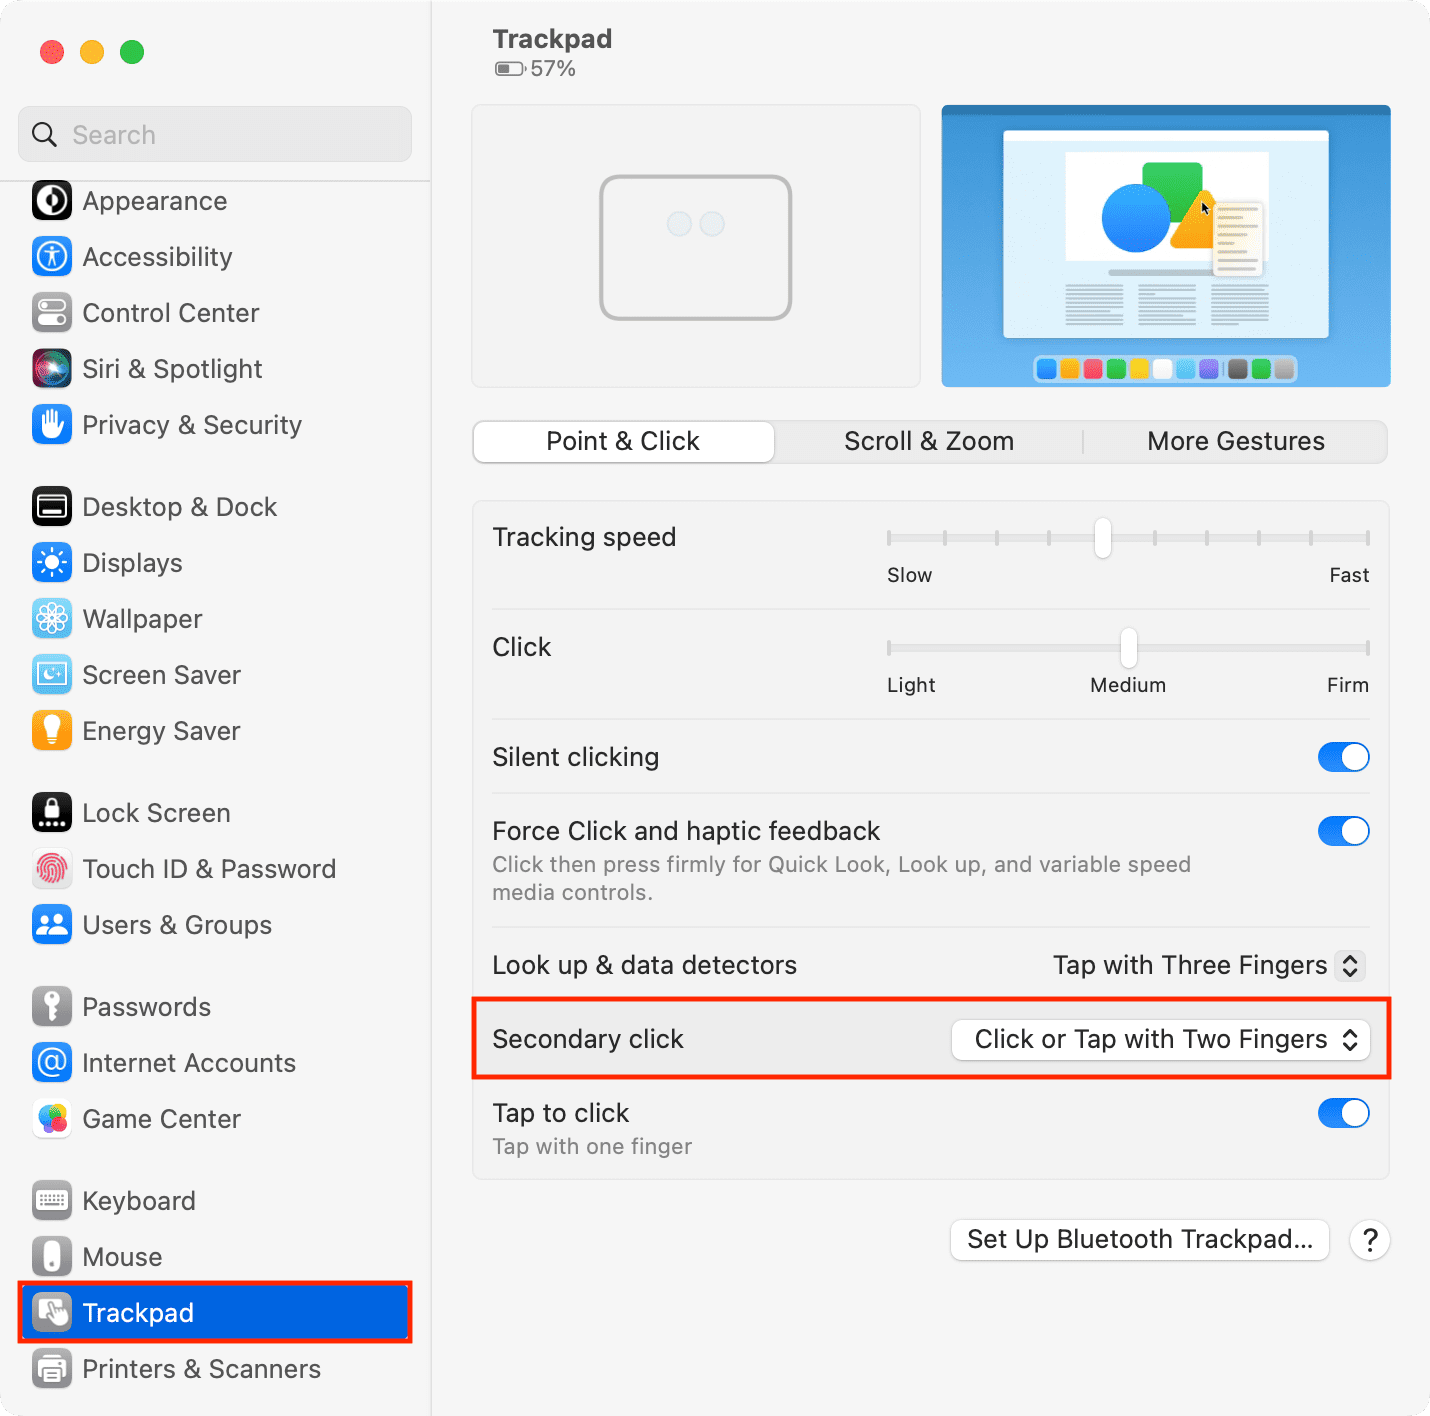
- Scroll down to the bottom and click Trackpad. You’ll see this only if you’re on a MacBook or have a trackpad paired to your Mac mini, Mac Studio, iMac, or Mac Pro.
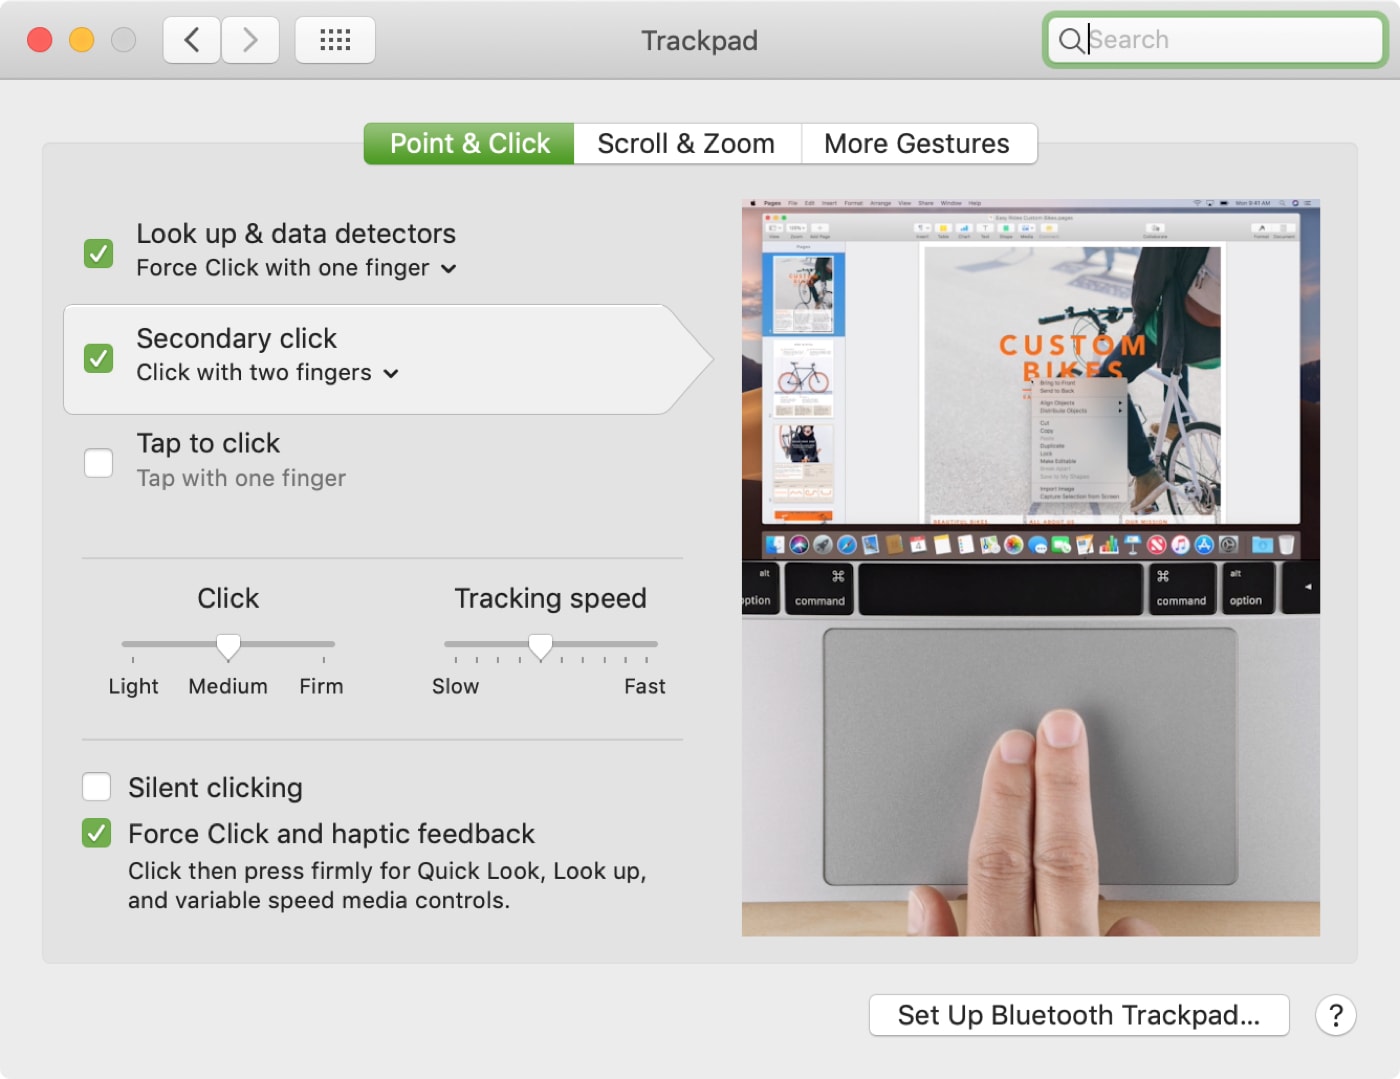
- From the Point & Click tab, hit the drop-down menu next to Secondary click and choose Click or Tap with Two Fingers, Click in Bottom Right Corner, or Click in Bottom Left Corner.
Note: The options in the above steps may be different if you have a non-Apple trackpad.
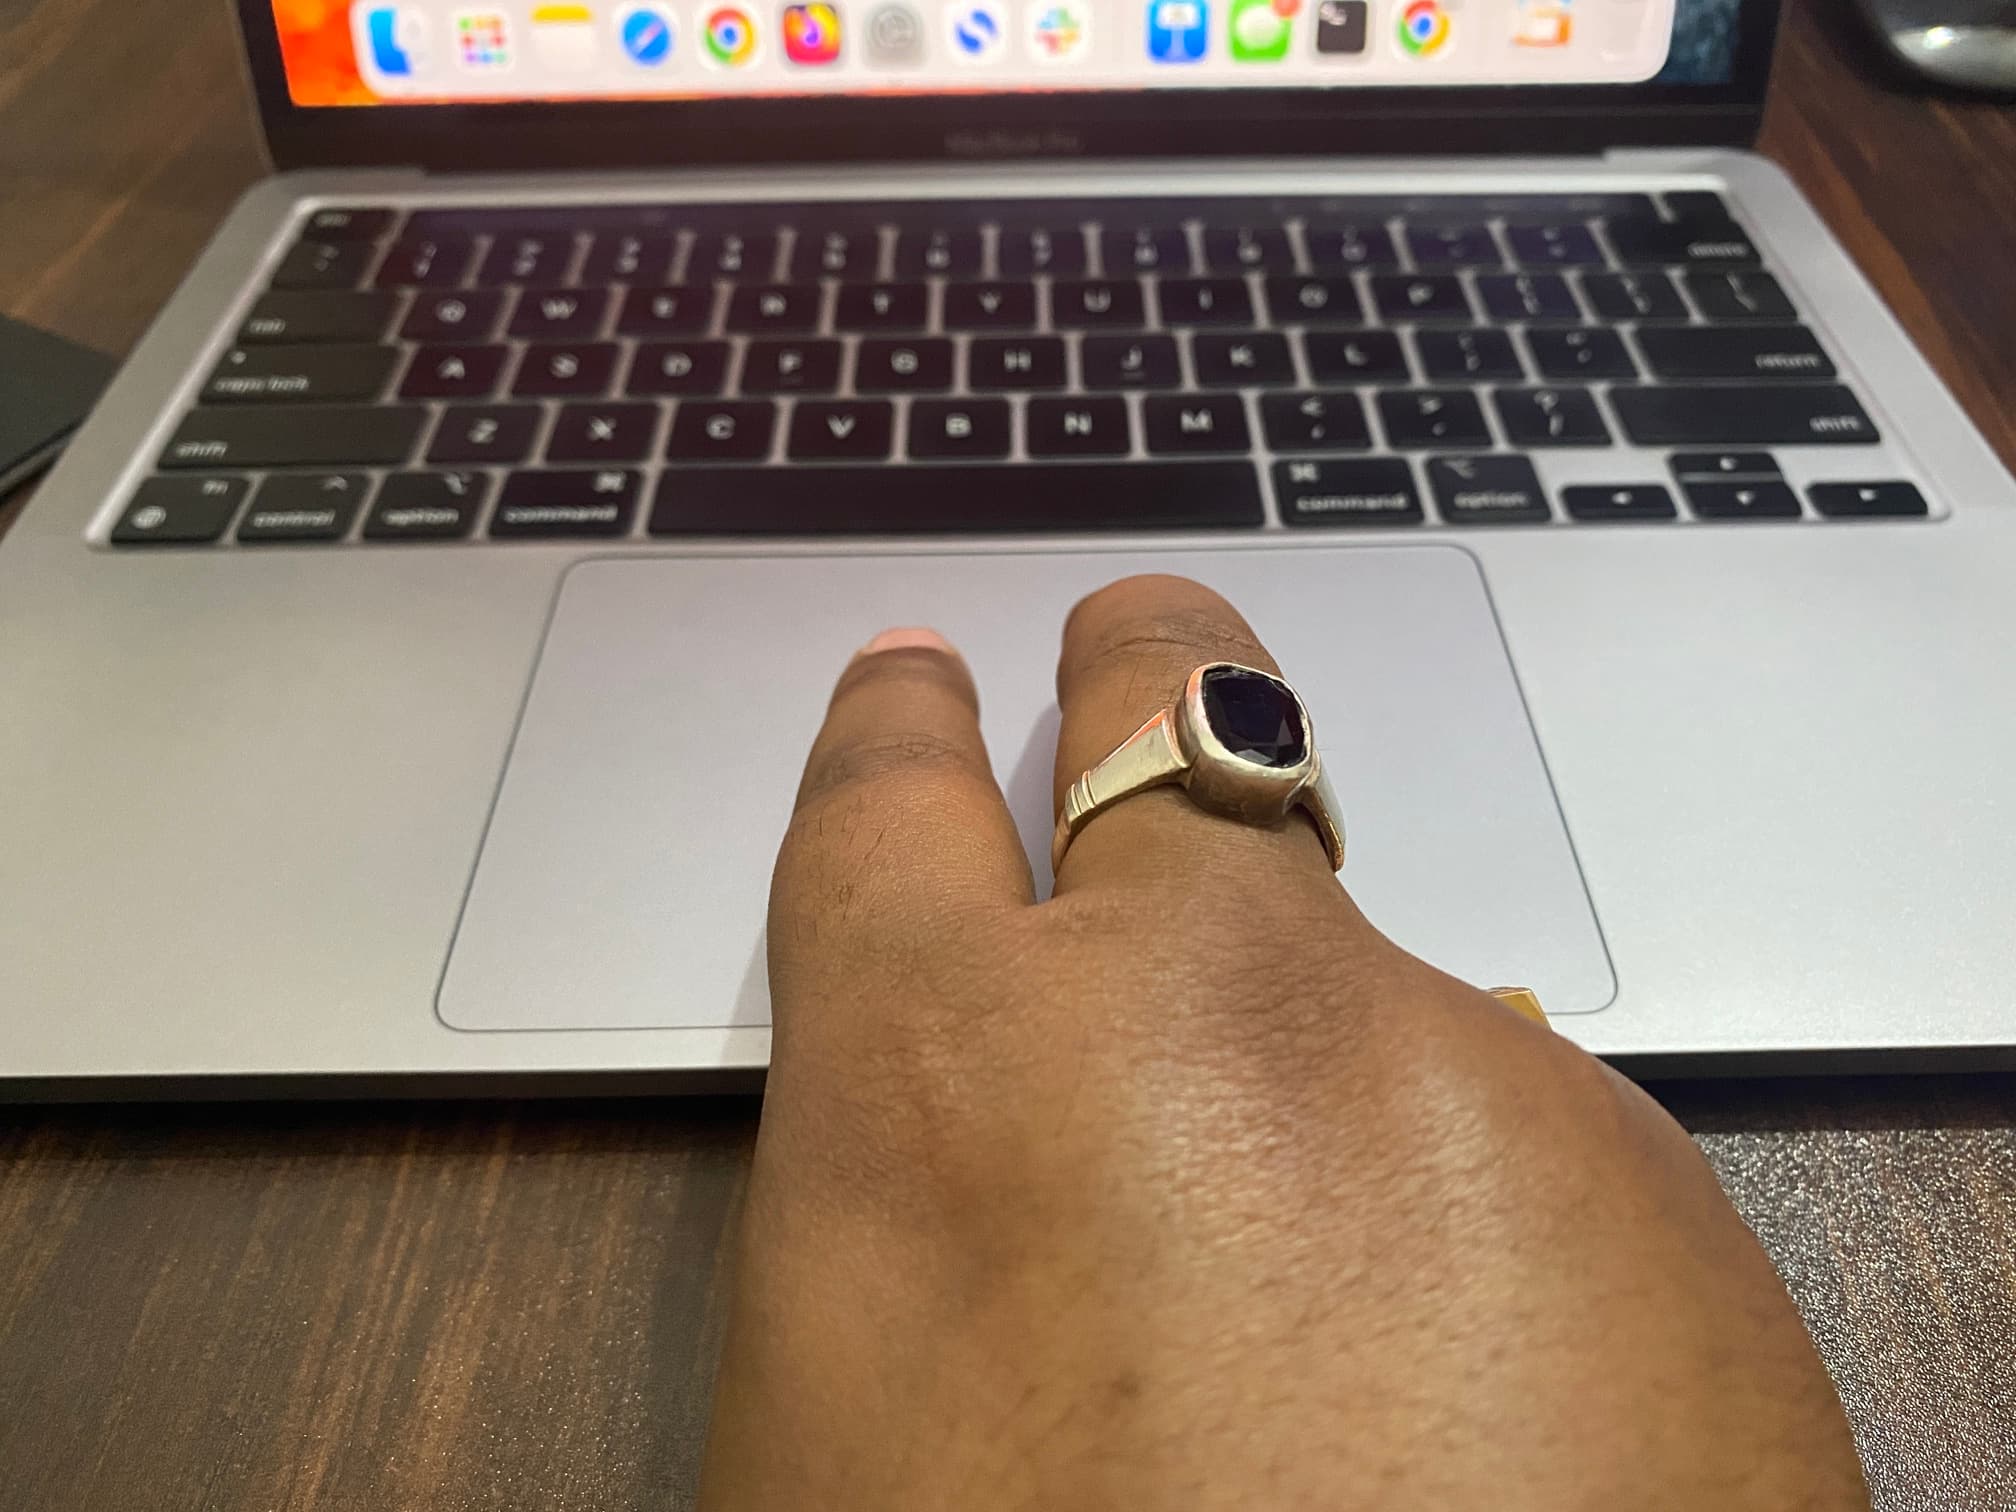
Once you have right-click configured, tap with two fingers on the trackpad to register a right-click and get the context menu.
If you picked another option, press the lower right or lower left area of the trackpad to do a right-click. You’ll feel haptic feedback when you force-press the bottom of the trackpad.
2. With a wireless mouse
Follow these steps to set right-click on Mac for a paired Apple Magic Mouse or other wireless mice:
- Click the Apple icon and select System Settings.
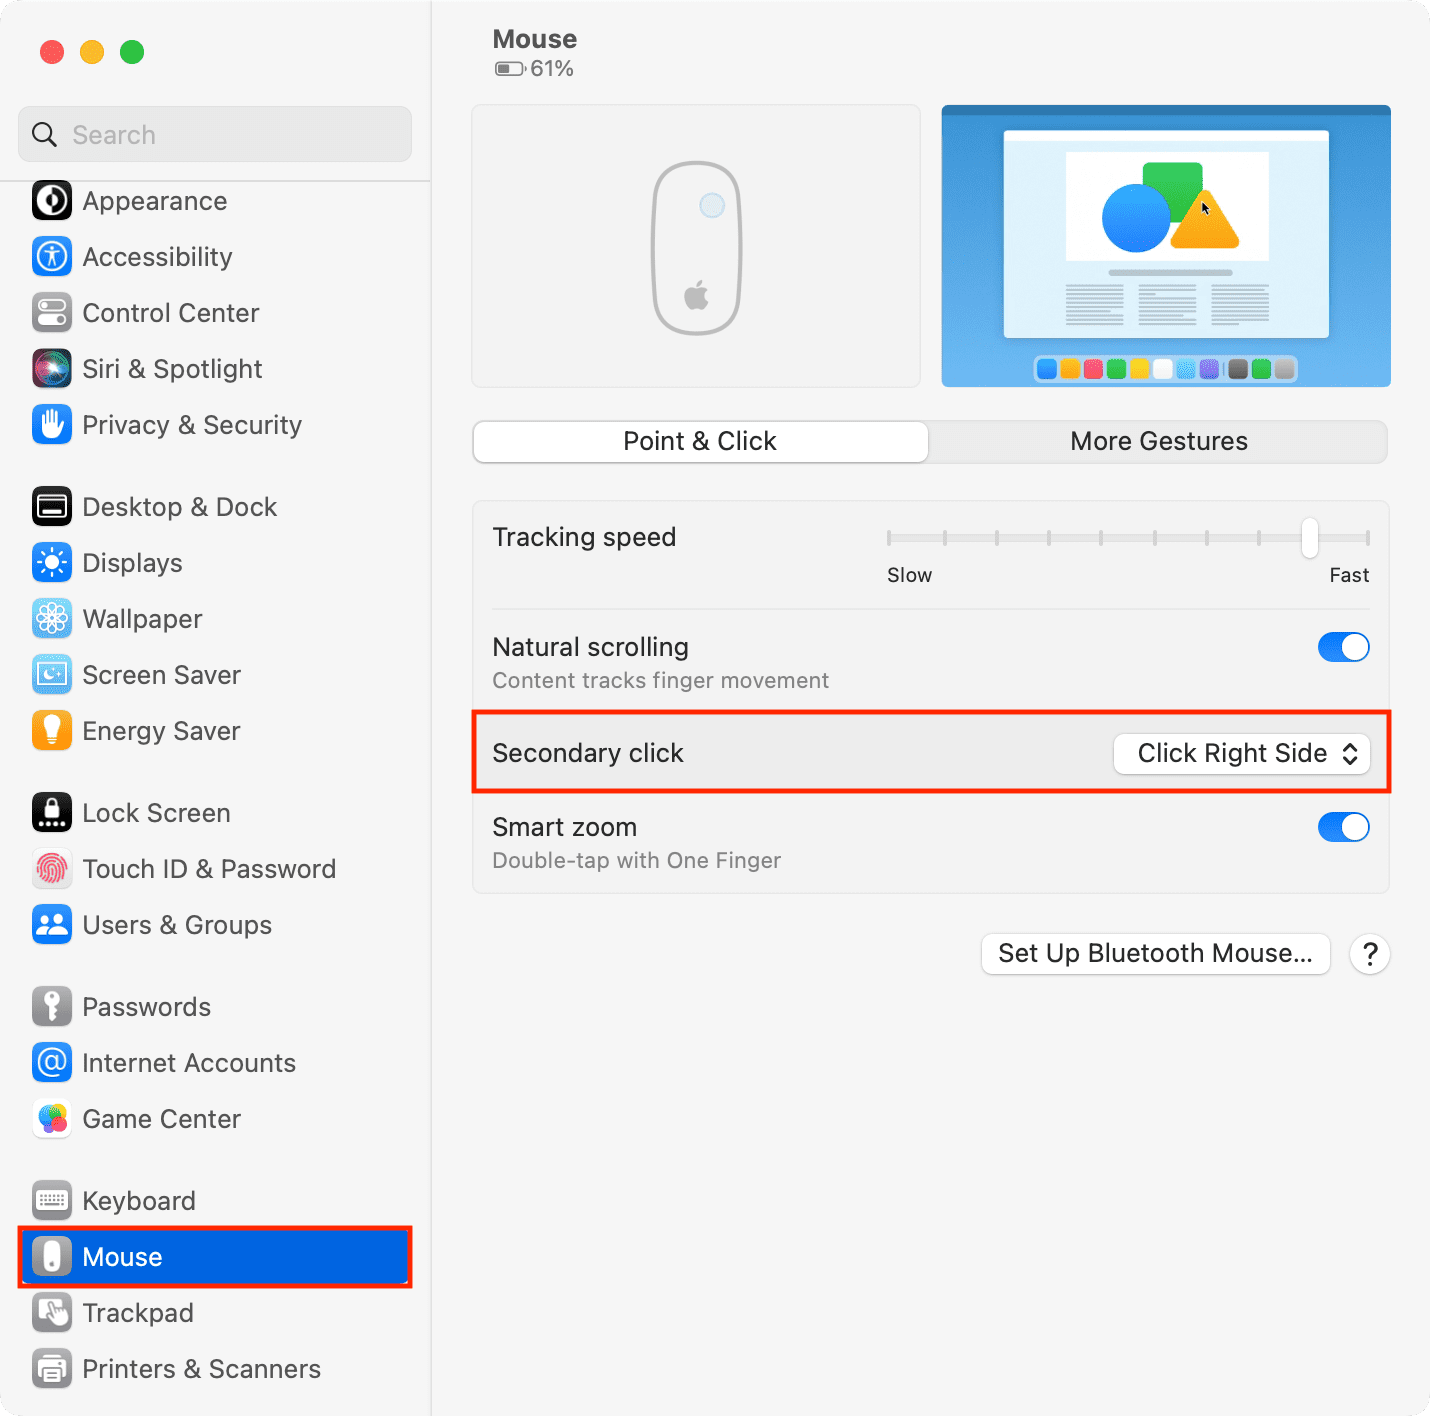
- Scroll down and select Mouse from the bottom left. Again, you’ll see this option only when you have a mouse connected to your computer.
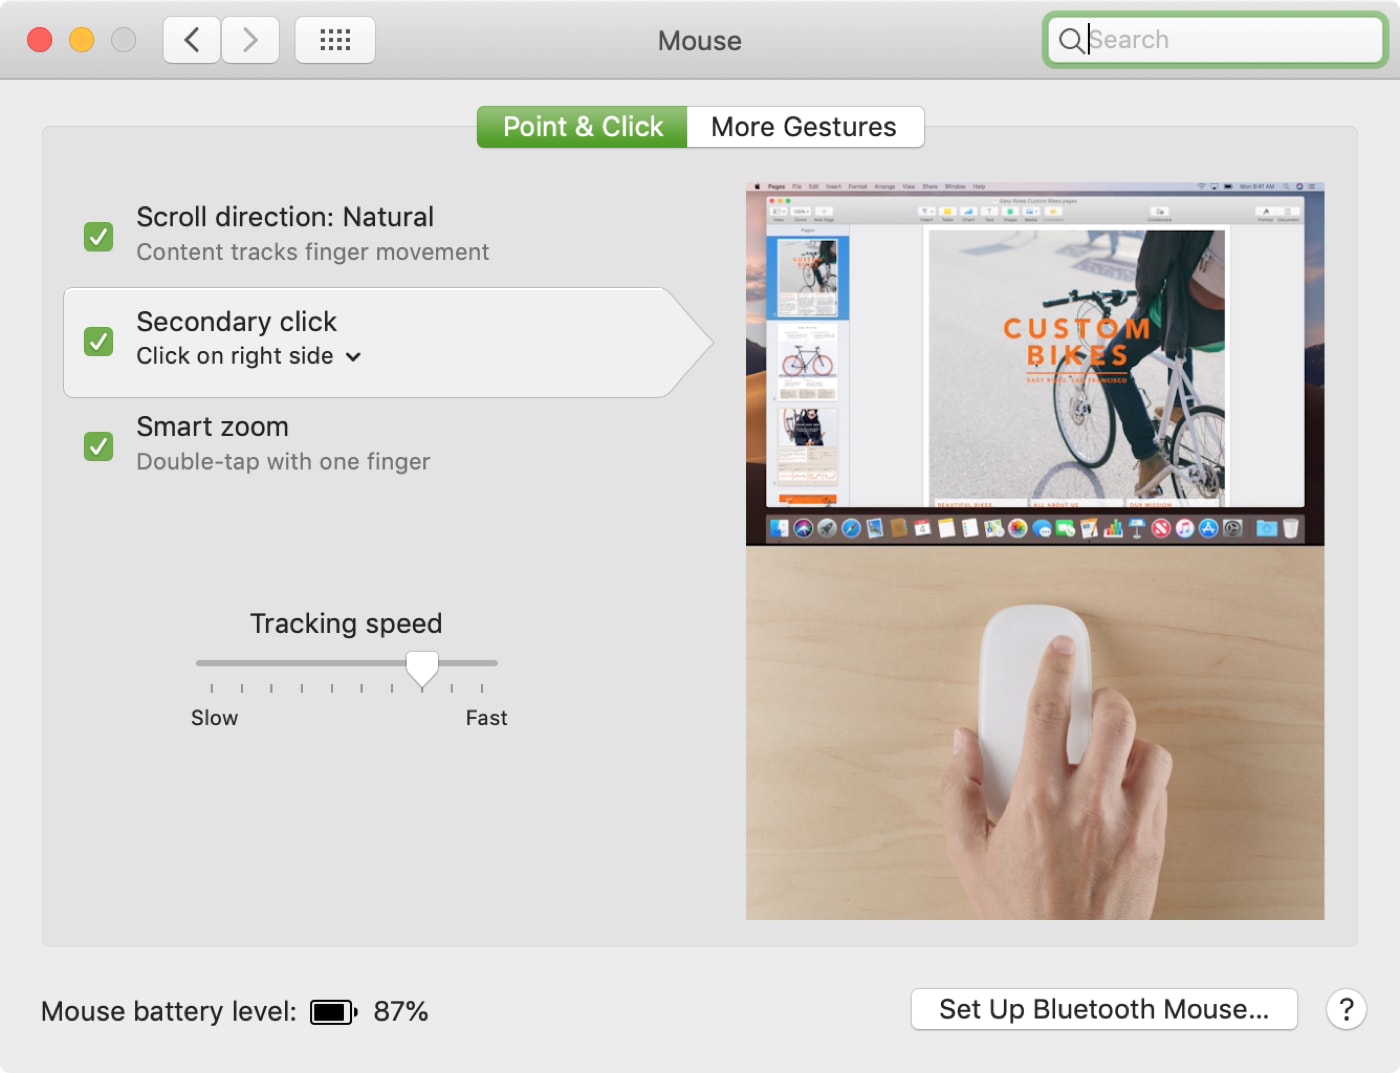
- Click the drop-down menu next to Secondary click and select Click Right Side or Click Left Side.
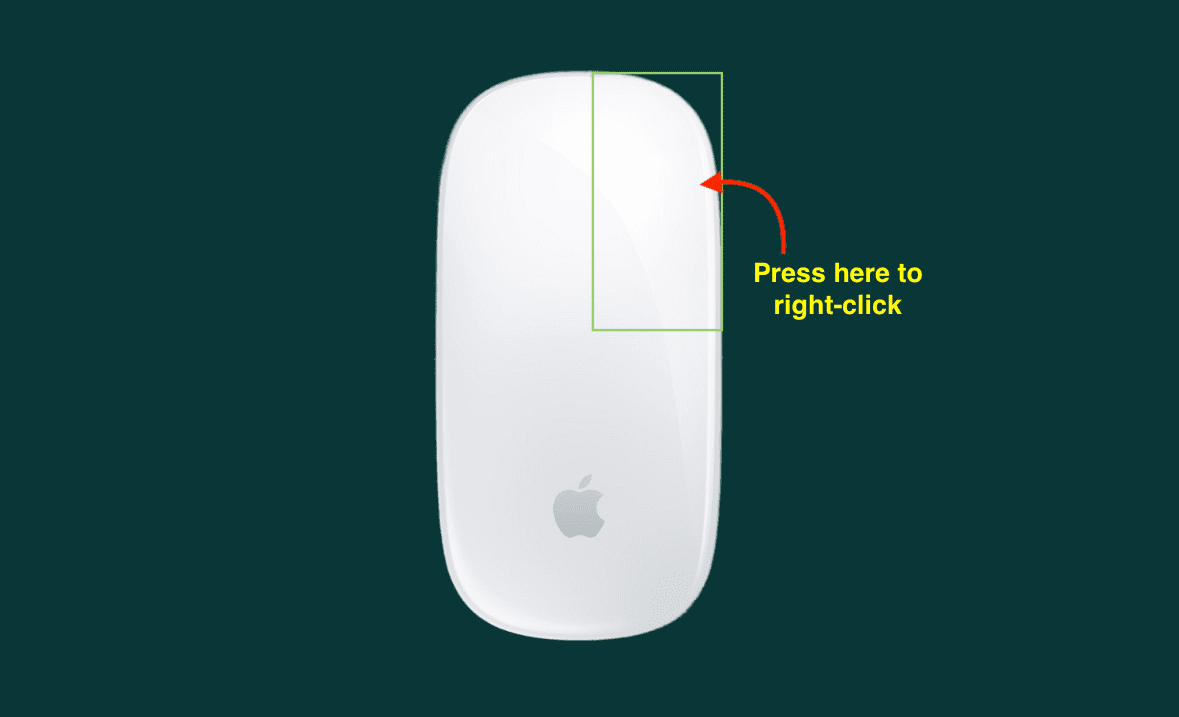
To do a right-click, press the right side of your Magic Mouse or the right button of any other wireless mouse.
3. Using a wired mouse
No setup is required for most types of wired mice. Just plug it into your Mac’s USB port, and you’re ready to right-click by pressing the right button.
4. Using Mac’s keyboard
Hold the Control key on the connected keyboard and click once on the item using your mouse or trackpad to mimic a right-click. Apple officially calls this Control-click.
If you’re on macOS Monterey and older, enable right-click from System Preferences > Trackpad > Point & Click. From here, check the box for Secondary click and then choose an option like ‘Click with two fingers.’
Similarly, for mouse, go to Apple icon > System Preferences > Mouse > Point & Click and enable Secondary click. Next, choose an option like ‘Click on right side.’
Unable to right-click on Mac? Here’s how to fix it
1) Make sure you have enabled right-click for your trackpad or mouse from System Settings > Trackpad/Mouse > Secondary click. Steps described above.
2) Ensure your wireless mouse or trackpad is paired to your Mac. To check, move your mouse or drag one finger on the trackpad, and you should see the pointer move on the screen.
3) Double-check that the wired mouse or trackpad is connected properly to your Mac’s USB port.
4) Restart your Mac by clicking the Apple icon > Restart.
5) Still no luck? Make sure your Mac is updated by going to System Settings > General > Software Update. On older versions, go to System Preferences > Software Update.
6) If a third-party mouse or trackpad is capable of firmware updates, contact the manufacturer’s support team and ask them how to update it.
7) Read the mouse or trackpad manual and see if it’s designed to work with macOS. If it’s a Windows-exclusive device, you will have to get it replaced or buy a model compatible with macOS.
8) Finally, if nothing else works, make sure your mouse or trackpad has no physical problems and it can be used with any other Mac belonging to your friend or family.
More mouse tips: