This simple step-by-step tutorial shows you how to add an email account to the Apple Mail app on your iPhone, iPad, or Mac.
One nice feature of the Apple Mail app on iOS and macOS is that you can add multiple types of email accounts, including iCloud, Gmail, Outlook, Yahoo, or a custom email service. If you haven’t set up additional accounts yet, this quick tutorial will help you manage your inbox and send emails from every account you have — all from one spot.
iPhone and iPad
1) Launch Settings and tap Apps at the bottom. Then, select Mail from the list of applications.
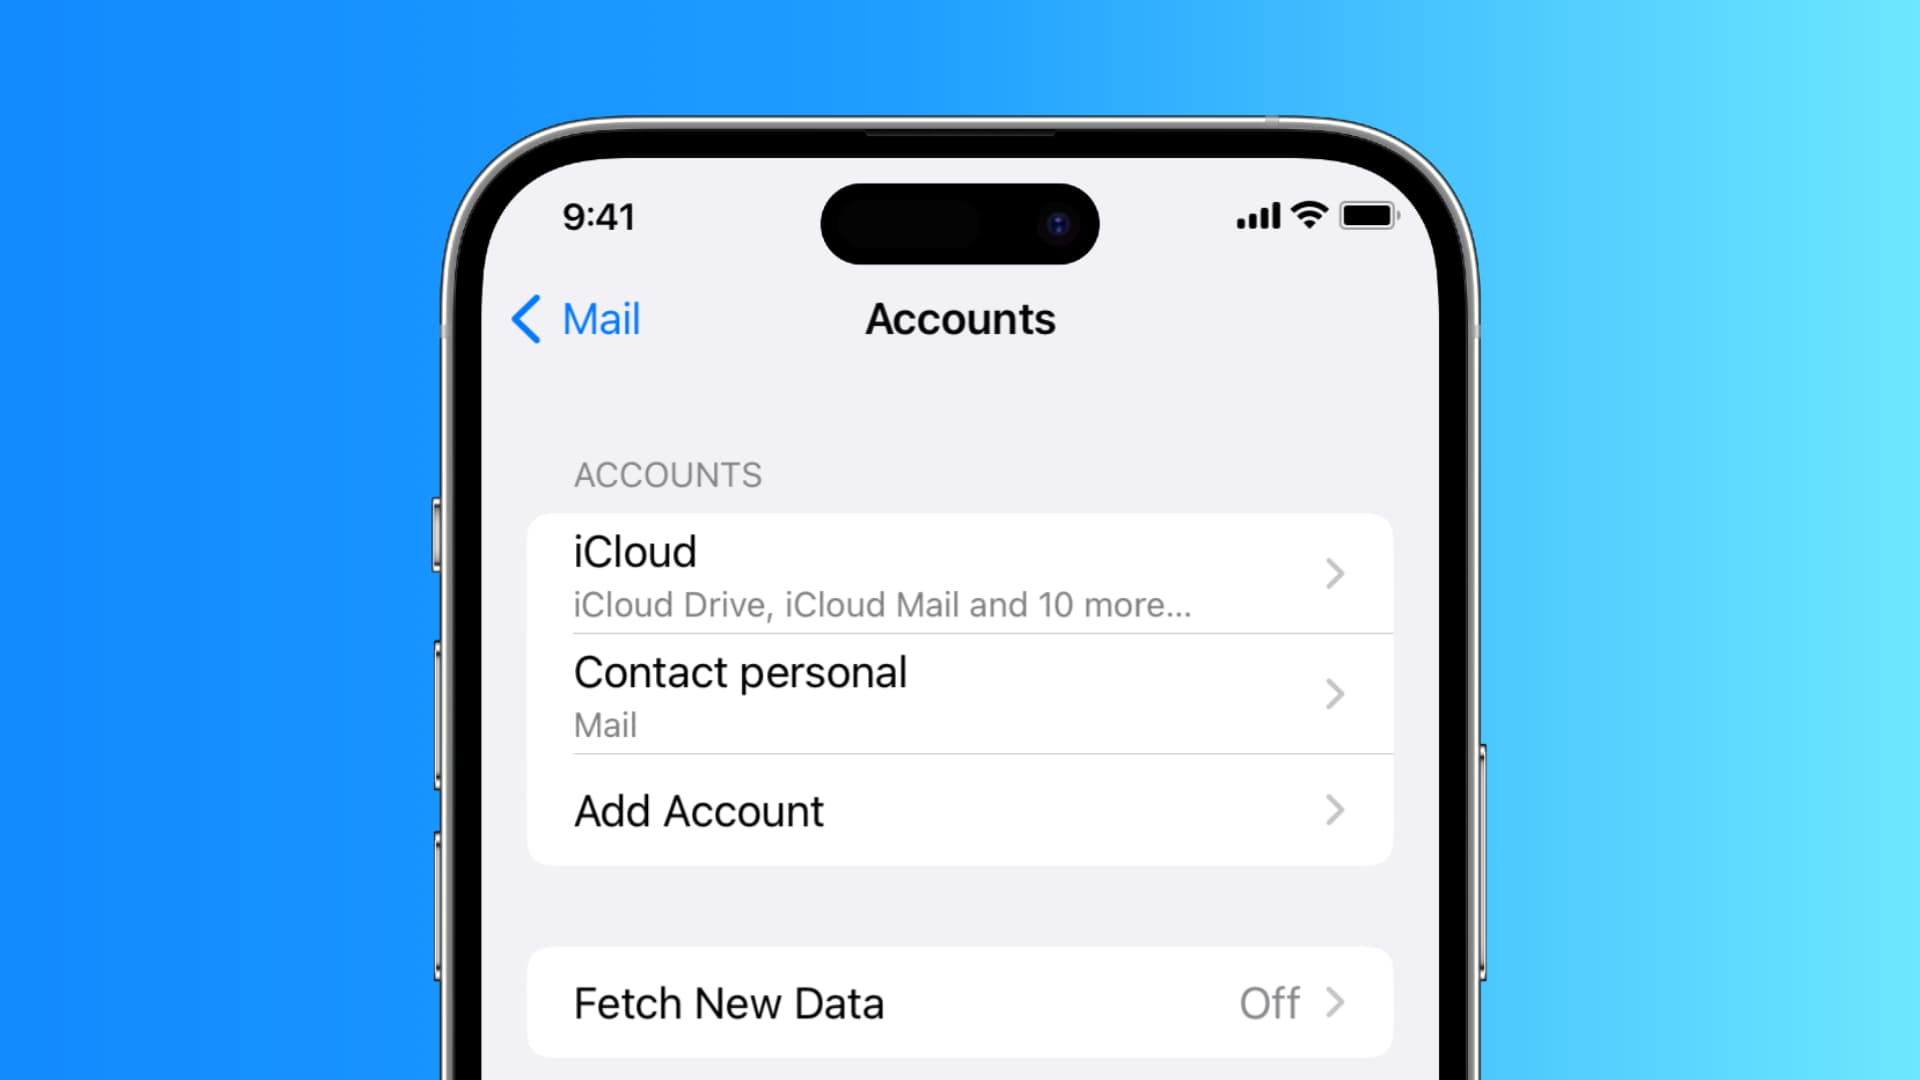
2) Tap Mail Accounts from the top.
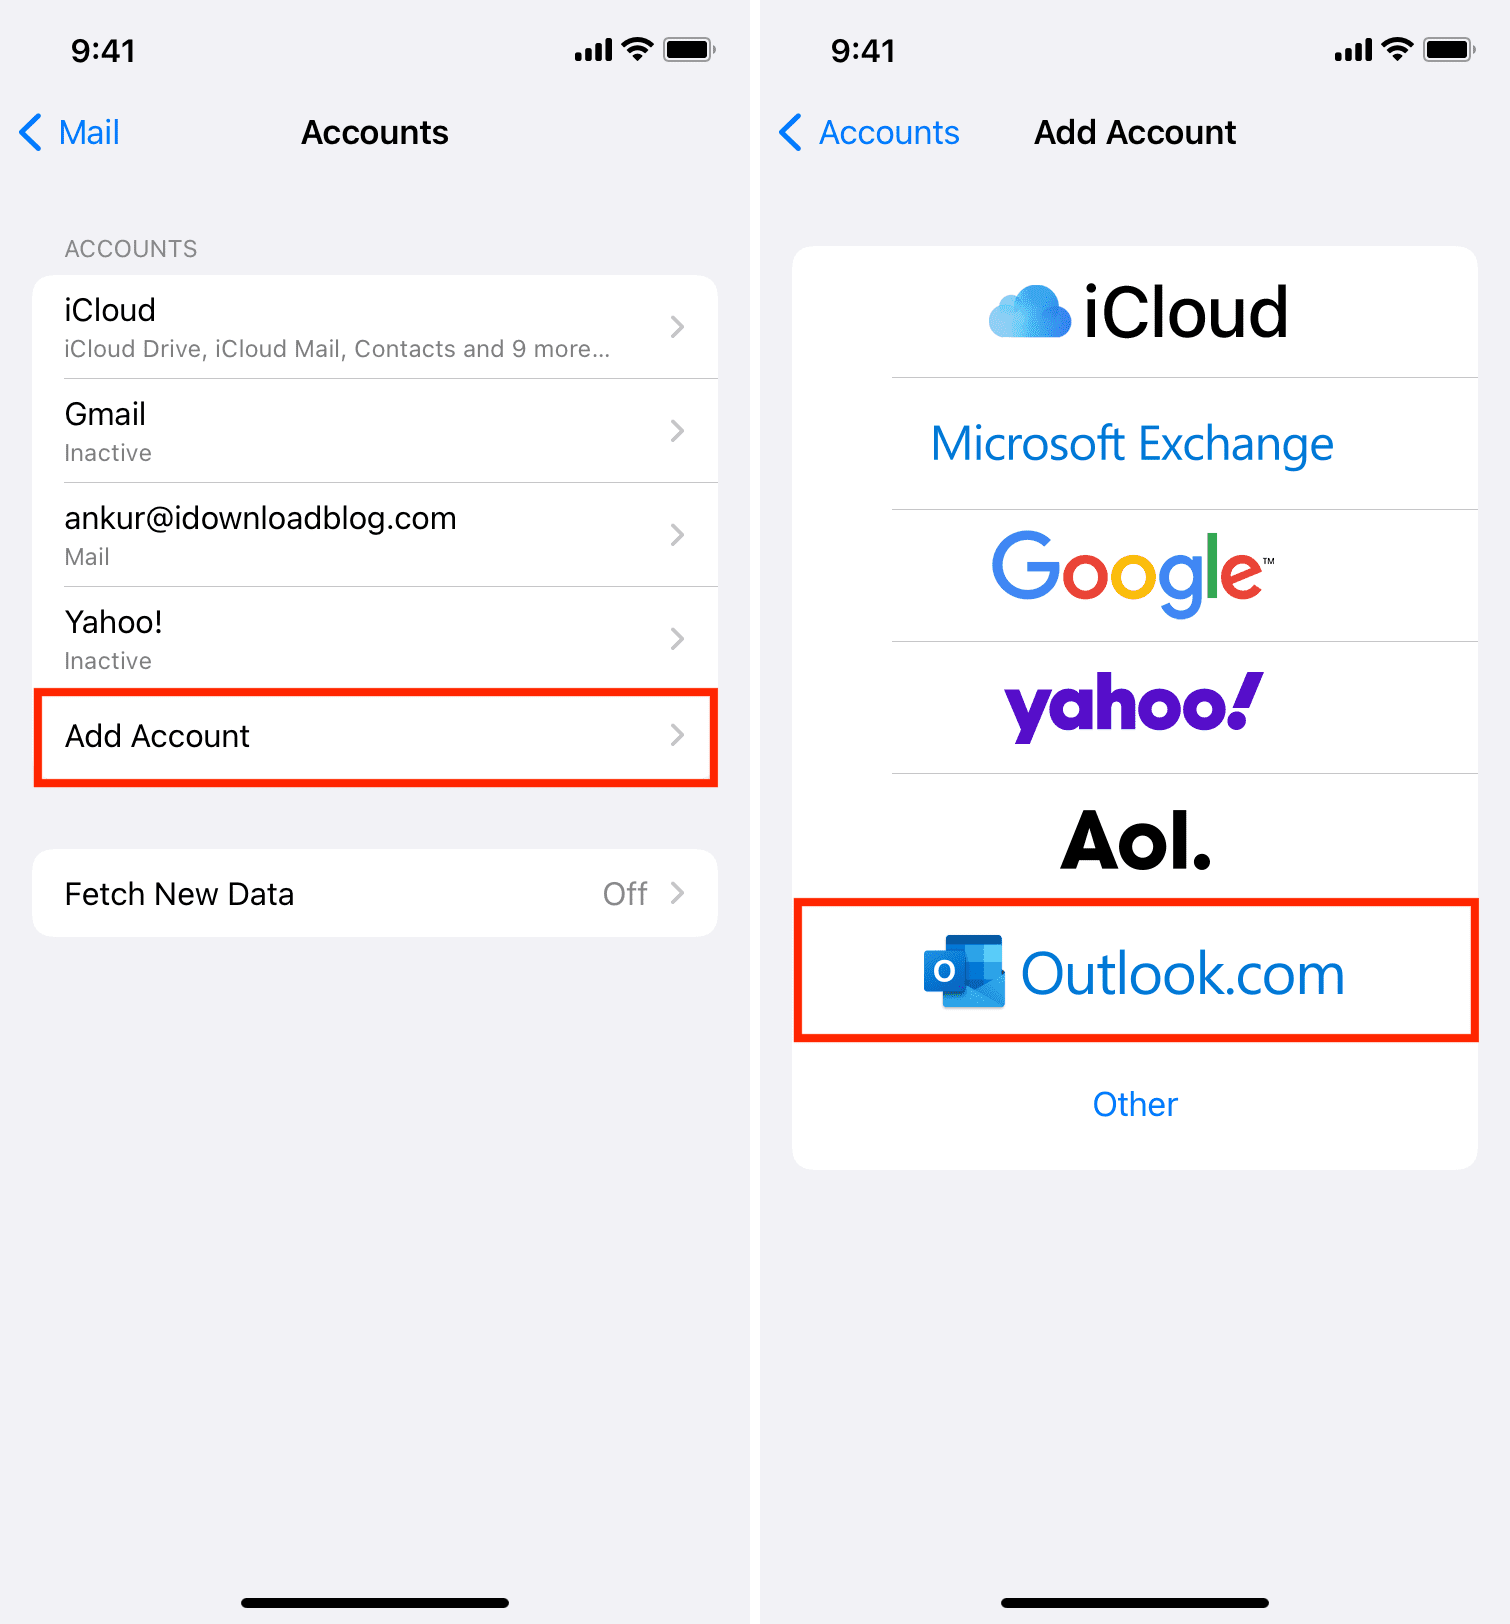
3) Tap Add Account.
4) Select the type of account you’d like to add from options like iCloud, Microsoft Exchange, Google, Yahoo, AOL, or Outlook. You can also choose Other to set it up manually.
5) Follow the prompts to sign in using your account email address and password. The steps here will depend on the type of account you choose.
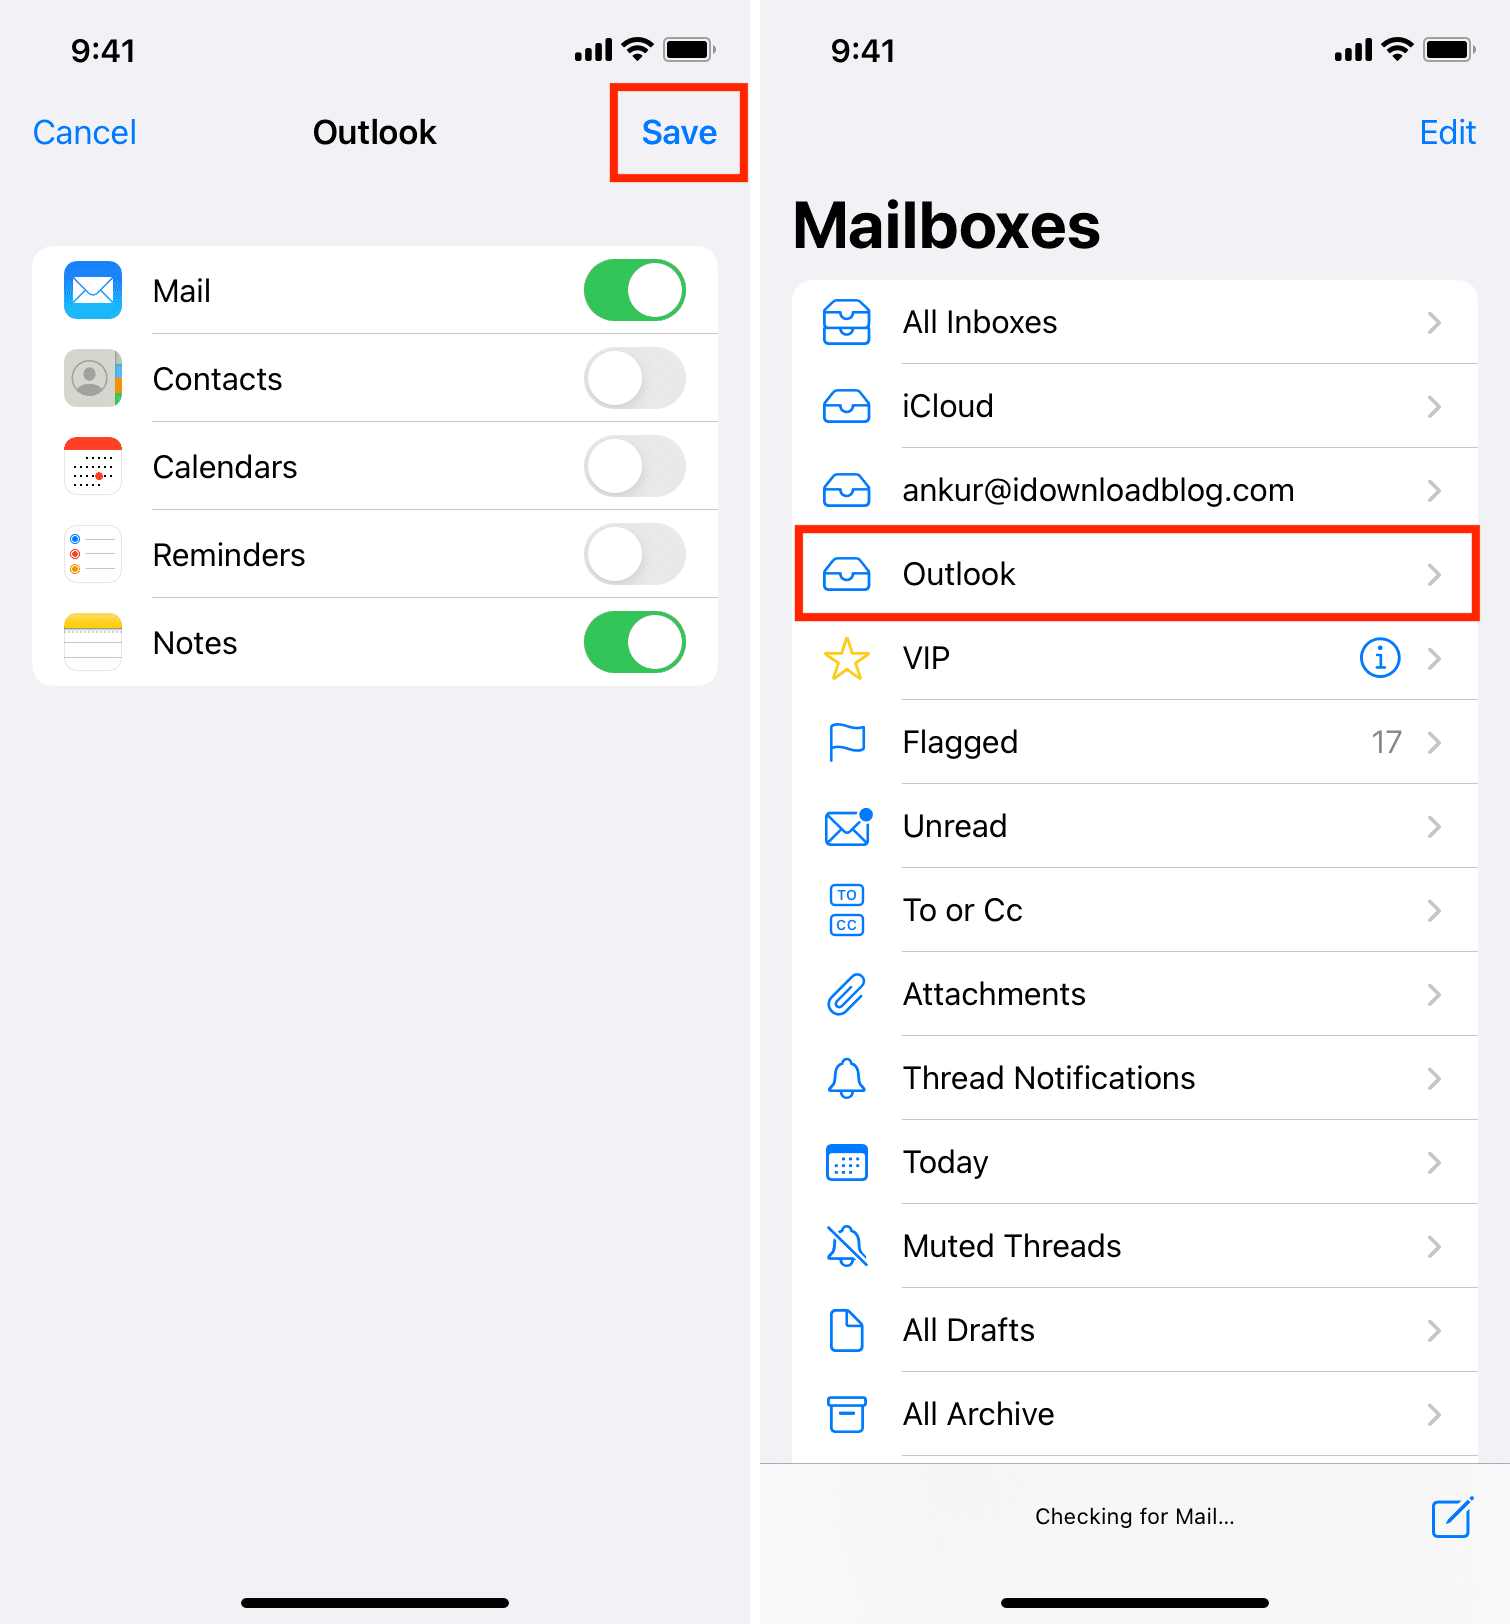
6) Once signed in, make sure the switch for Mail is green and tap Save.
7) Then, open the Apple Mail app, and you’ll see the account listed under Mailboxes.
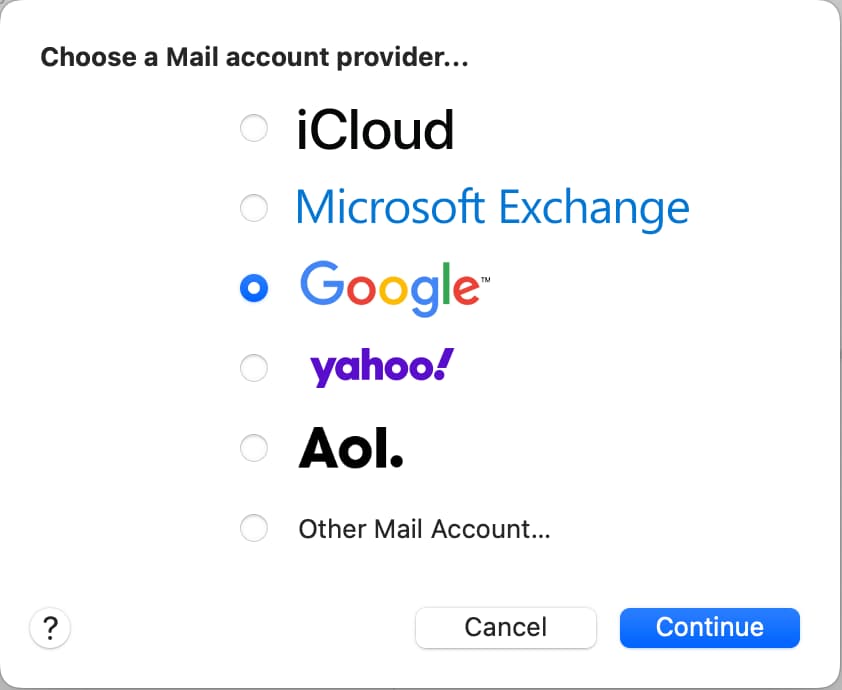
Mac
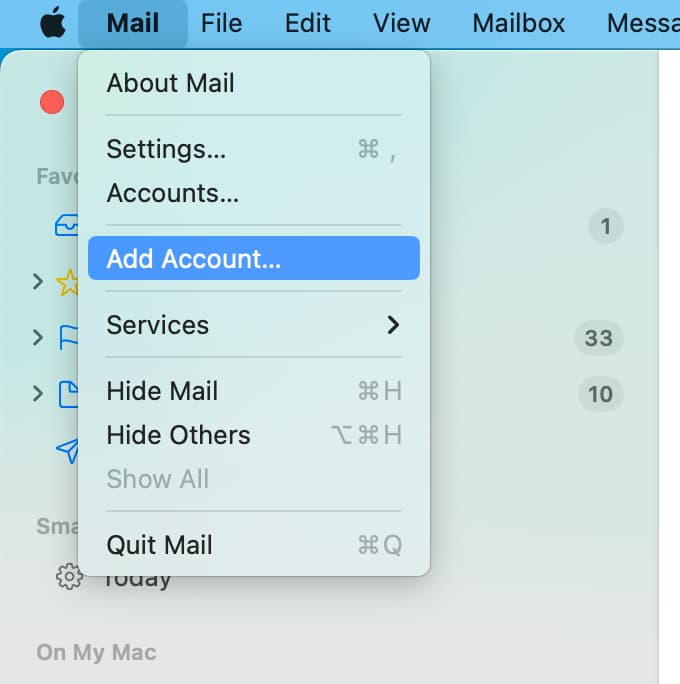
1) Launch the Mail app, and from the top menu bar, click Mail, followed by Add Account.
2) Select the type of account you’d like to add from options like iCloud, Exchange, and Google. After that, click Continue.
Note: If the sign-in page doesn’t open, restart your Mac and follow the above steps again.
3) Follow the prompts to sign in and connect the account, which depends on the type of account you choose.
When you finish, you’ll see that the account has been added on the left side. When you go back to the Mail app, you’ll see the account listed under Mailboxes in the sidebar.
You can also go to Mac System Settings > Internet Accounts > Add Account and select your email provider. Then, complete the sign-in process and make sure the Mail option is left enabled.
Also, check out: