Learn how to automatically delete junk messages and empty the Trash in the Mail app on Mac to save time and keep your mailboxes free of unwanted emails.
Junk emails, spam, and trash pile up over time in your Mail app and can take up unnecessary space. But who has the time or even remembers to go in and clean out those mailboxes? Instead of doing it manually, you can set the Mail app to routinely remove those unwanted messages for you.
Configure your Mail app to auto-delete junk emails
1) Open the Mail app on your Mac and click Mail > Settings or Preferences from the top menu bar.

2) Go to the Accounts tab.
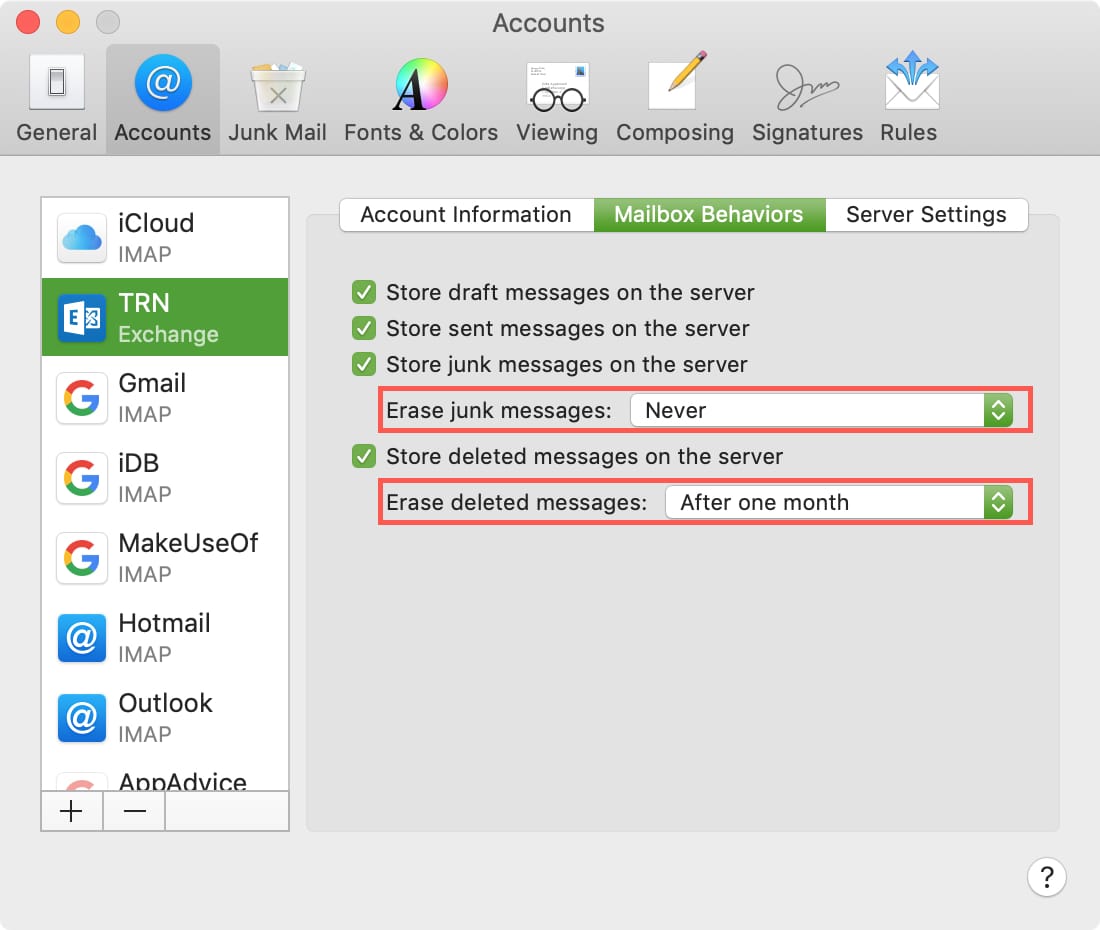
3) Pick an account on the left side and then click the Mailbox Behaviors tab at the top.
4) Confirm the Junk Mailbox. If it isn’t set to match where your junk mails go, you can change it in the drop-down. Below Junk Mailbox, you’ll see Erase junk messages. This is likely set to ‘Never.’ Click the drop-down box and choose when to delete junk mail automatically. You can pick from one day, one week, one month, or when quitting Mail.

5) Next, do the same steps as 4 above to confirm the mailbox and automatically erase your Trash Mailbox messages (i.e., your deleted emails).

Do this for each account in the Mail app, and you’re set.
Keep in mind that the options may differ depending on the type of email account you have. For instance, if you have a Microsoft Exchange account, you won’t get to select the junk or trash mailboxes described above. But you can still set the timeframes to erase the messages.
Keep your mailboxes clean by having them automatically erase the messages you don’t want (junk) or no longer need (Trash). Do you prefer to clean your mailboxes manually? Or are you going to set up an automatic cleaning?
And remember, you can also regain storage space by deleting old email attachments on your Mac.