Learn how to encrypt folders on your Mac or lock them with the password to secure sensitive files and keep your data safe using built-in and third-party tools.
Many people store sensitive information in files and folders on their Macs. Or, maybe you do share your Mac with others in your household and don’t want them to accidentally stumble upon your private items.
To keep your data safe, you can encrypt folders on your Mac (or the entire disk) or lock them with a password, and here’s how.
Lock a folder on your Mac with a password
1) Create a folder using the Finder on your Mac, then put the files in there that you’d like to lock with a password (you can also do this later).
2) Open Disk Utility, and click File > New Image > Image from Folder in the menu. You can also select the “Blank Image” option to create a locked disk image of the desired size and move your folders there.

3) Select the folder you want to protect, and click Choose.

4) In the next window, choose the location for your folder image file (DMG) and give it a custom name or add a tag. To change this location in the future, simply move the folder file elsewhere.
5) Click Encryption and choose between 128-bit AES (a bit faster encryption/decryption, but less secure) or 256-bit AES encryption (more secure, but slower encryption/decryption). Older macOS versions will prompt you to create and verify the encryption password (Step 7) before choosing the Image Format (Step 6).

6) Click the Image Format menu. Newer macOS versions like macOS Tahoe provide multiple choices here, including Sparse Bundle Image (UDSB), Apple Sparse Image (ASIF), and RAW Image which are all readable and writable , meaning you can add new files to the locked folder in the future. Read-only options don’t support adding new files. Things are simpler on older macOS versions; if you only want to view the folder, you can pick Read-Only. But if you want to make changes like adding new files to the folder, then choose Read/Write. I recommend Read/Write so that you can add new files to your locked folder.
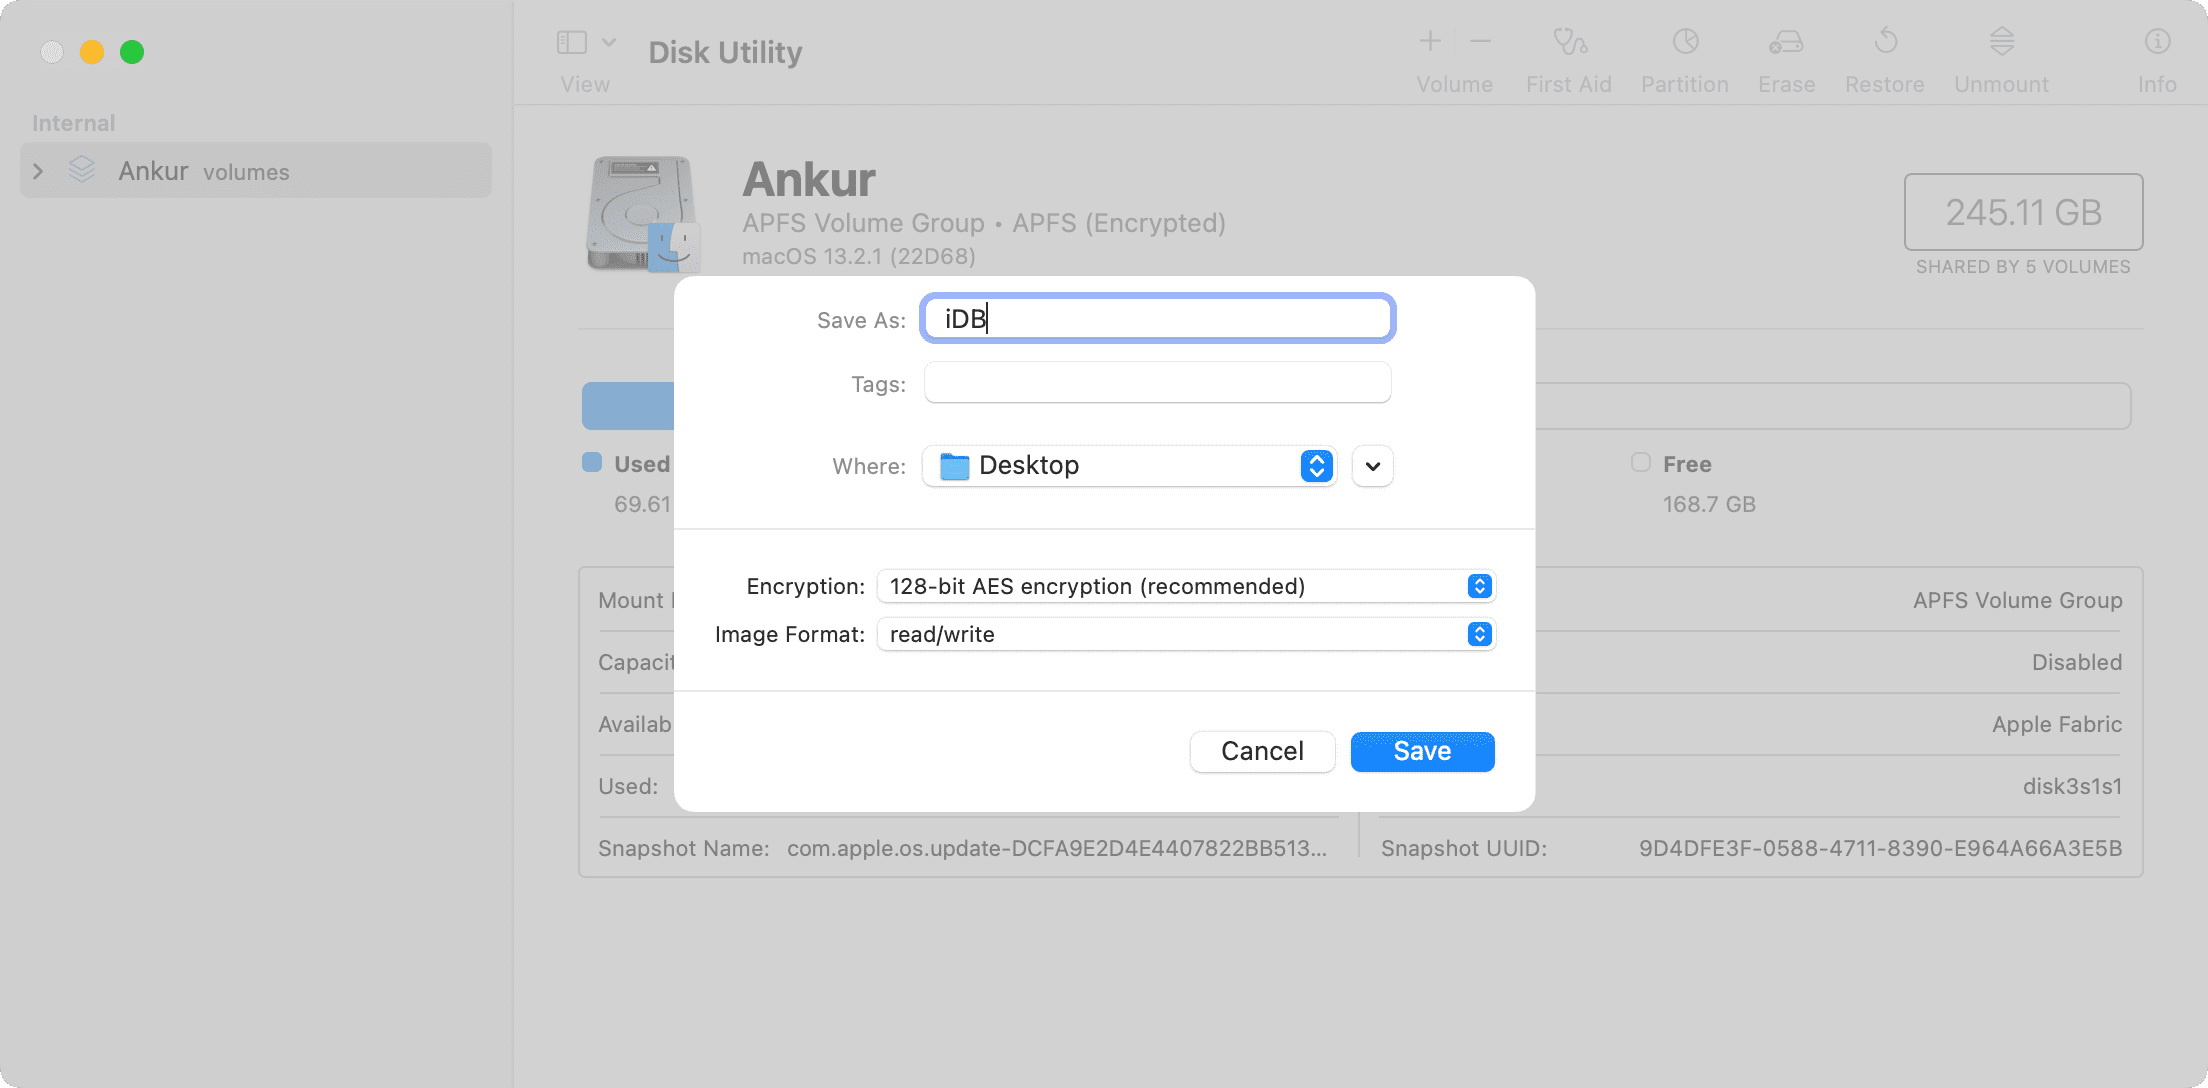
7) Hit the Save button, and you’ll be prompted to set a password for the folder. Be sure to memorize it or write it down and store it somewhere safe (like a password-protected note in the Notes app) because you won’t be able to access the folder without it.

Disk Utility will show the progress bar. Creating the folder disk image may take a while, depending on the number of files in the folder. Click Done when it finishes.

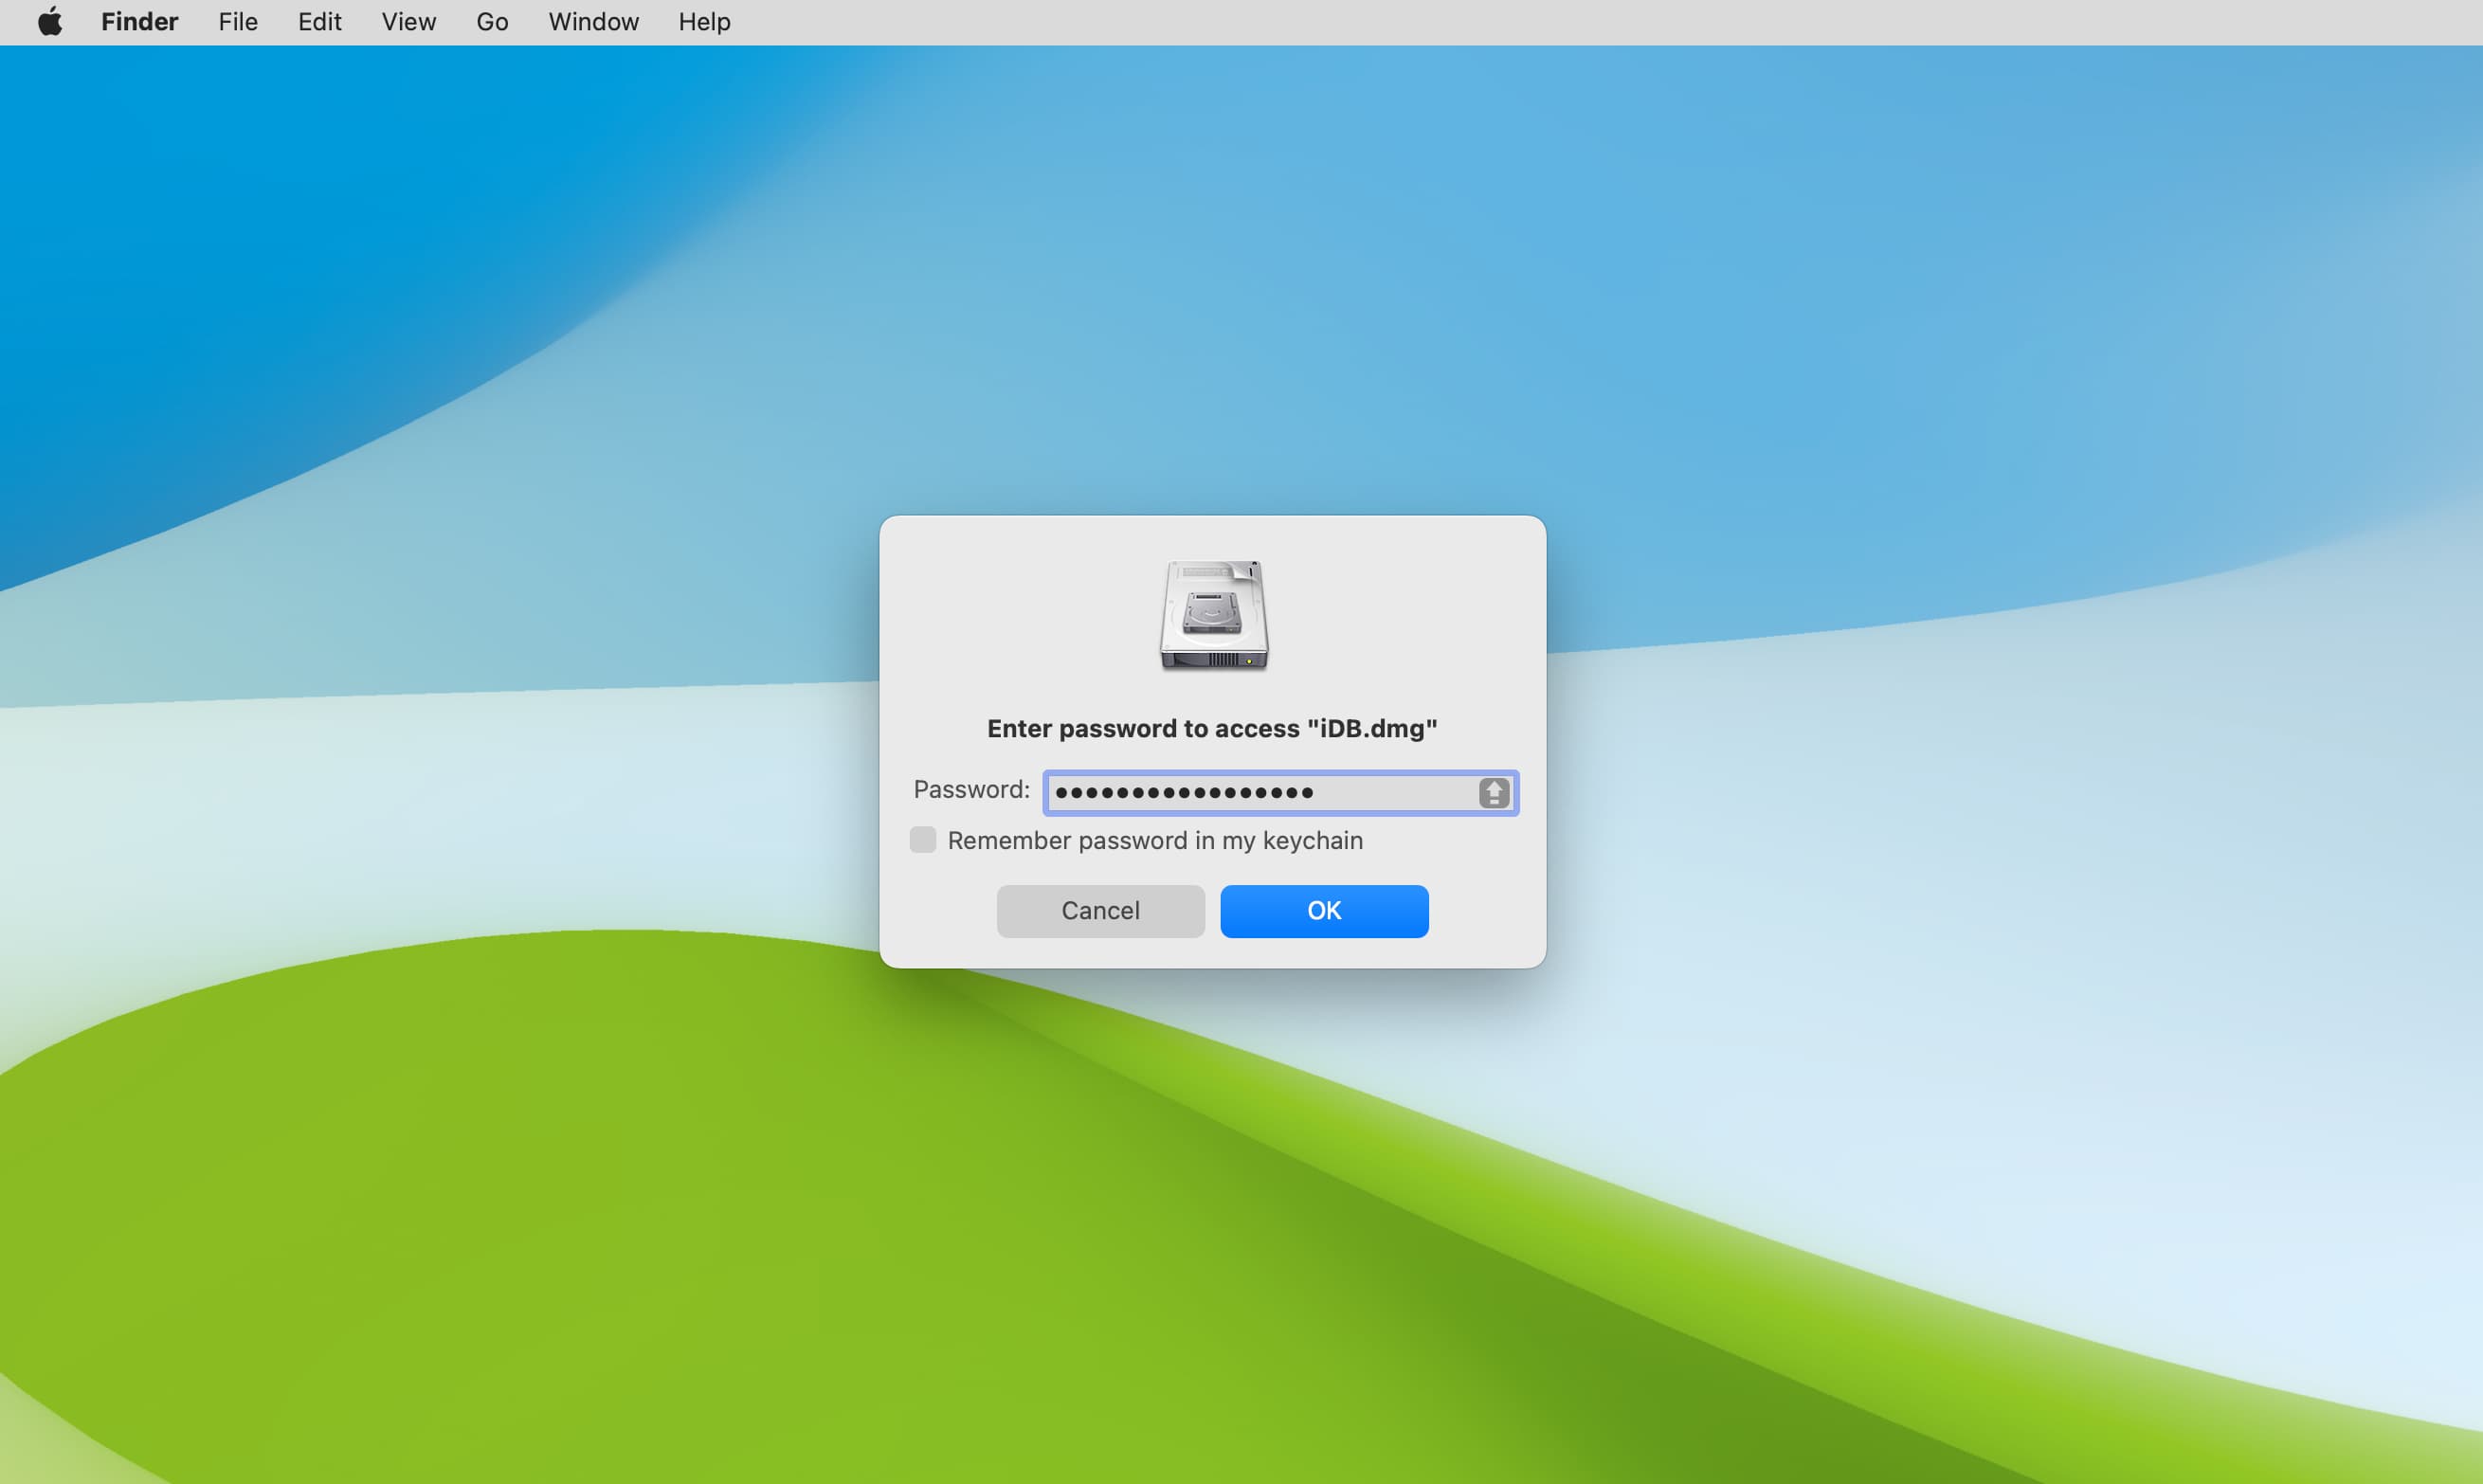
8) Navigate to the location where you saved the folder disk image and double-click it.

9) Enter the password to unlock the folder disk image, then hit OK. You can tick the box to remember the password in your Keychain but keep in mind that doing so defeats the purpose of the password.

10) The mounted folder appears on the desktop and in the Finder sidebar. You can double-click it to open it like you would any regular folder, and then you can add, access, or remove files inside.

11) When finished using the folder, unmount the folder which will password-protect it again; right-click or Control-click the folder and select Eject “folder name.” The next time you want to access the protected folder, simply double-click the folder image file in the Finder, enter your password, and you’re good to go.

That’s how you can password-protect files and folders on your Mac to protect your privacy and keep your data safe. Depending on the amount of free space in your disk image, you can drag more files like PDF documents, videos, audio, pictures, etc., to it. Likewise, you can remove existing files in your locked folder, like you would for any standard folder.
A note about password-protected folders
You’ll notice that the original folder is intact after creating a disk image; you can move it or delete it if you like. Also, if you don’t unmount the disk image, you won’t be prompted for the password when reopening that folder; which will leave the files exposed to anyone who access your Mac. You can try burying your mom sensitive files deep inside the folder so that no one can see or delete them. Also, you can find your folder disk image with Spotlight search by typing .dmg, .asif, or .sparsebundle.
Password-protect files on an external SSD or hard disk
Follow these steps to create a locked folder on your Mac’s internal disk with a custom size, so that you can easily add files to it later.
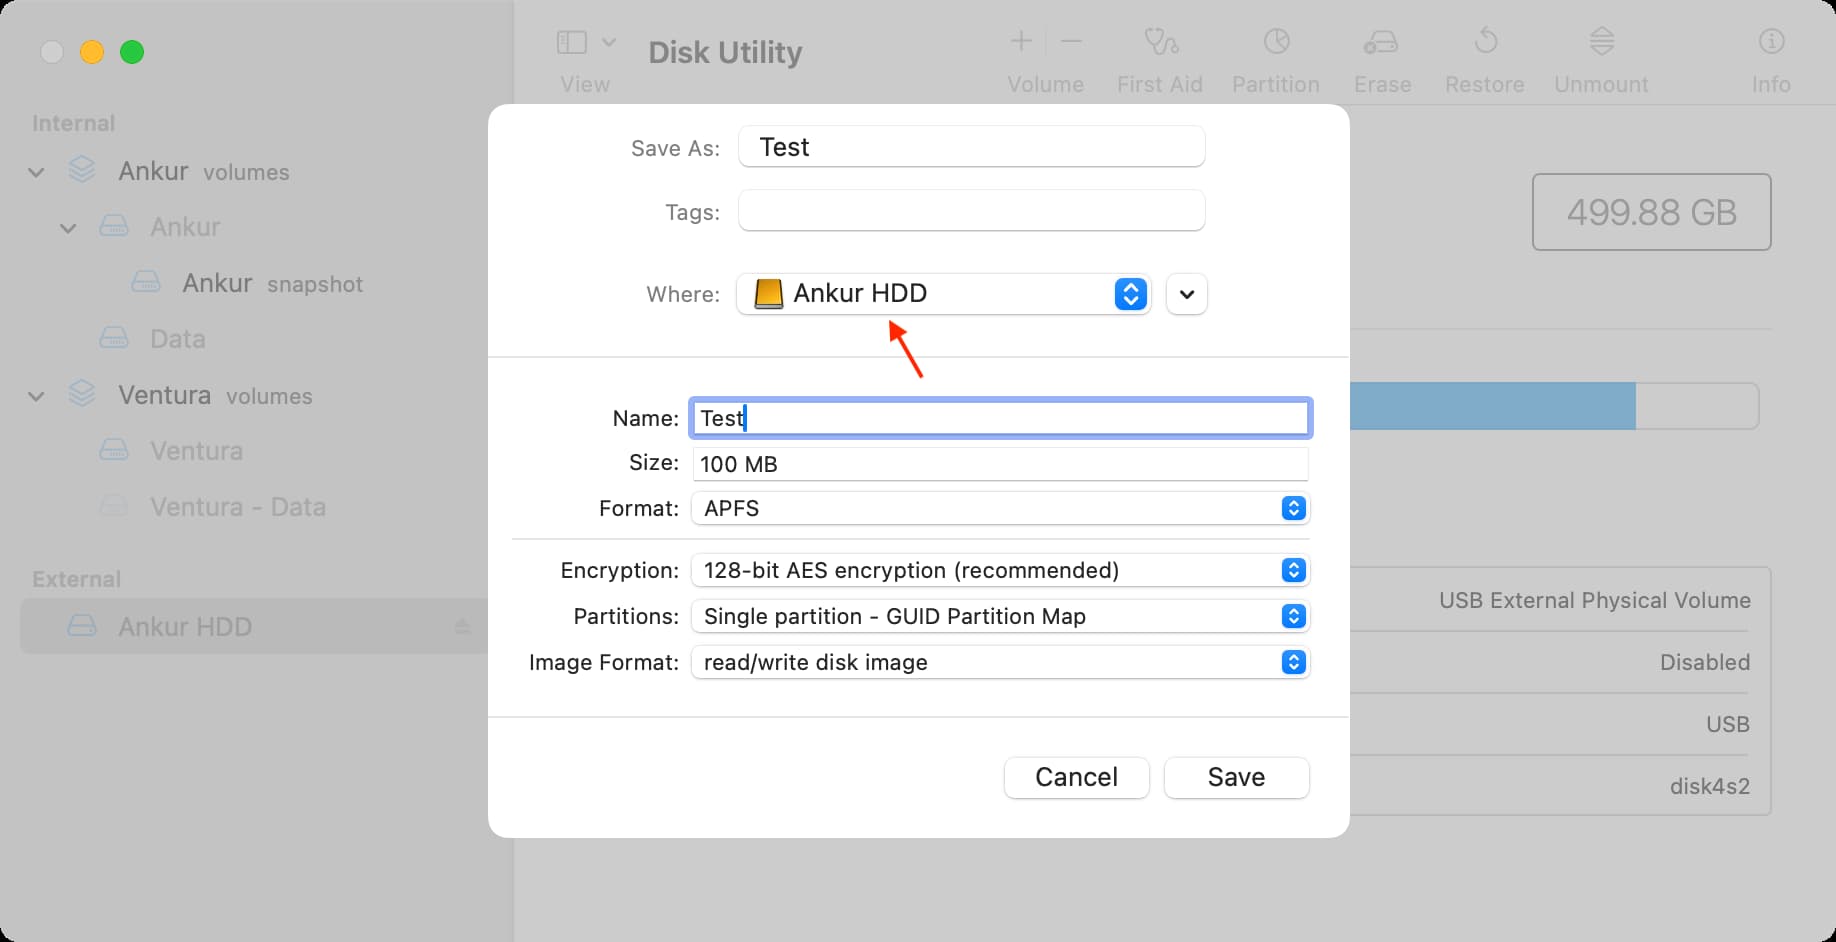
1) Connect your external drive to your Mac.
2) Open Disk Utility and select your external drive in the sidebar.
3) Click File > New Image > Blank Image in the menu or you can create from a folder.
4) Make sure it your drive’s name is listed next to “Where:”. If not, click the menu and select the drive.
5) Fill in standard details, like Name, Size, Encryption, etc., as mentioned under the previous heading, and click Save.
Disk Utility will create a file inside this external drive. Double-click to open it, then enter your password to add files to the drive. Keep in mind hat you cannot open DMG files natively on a Windows PC.
Encrypto: Secure Your Files
You can also use third-party apps, such as Encrypto, to add AES-256 encryption to your files and folders.
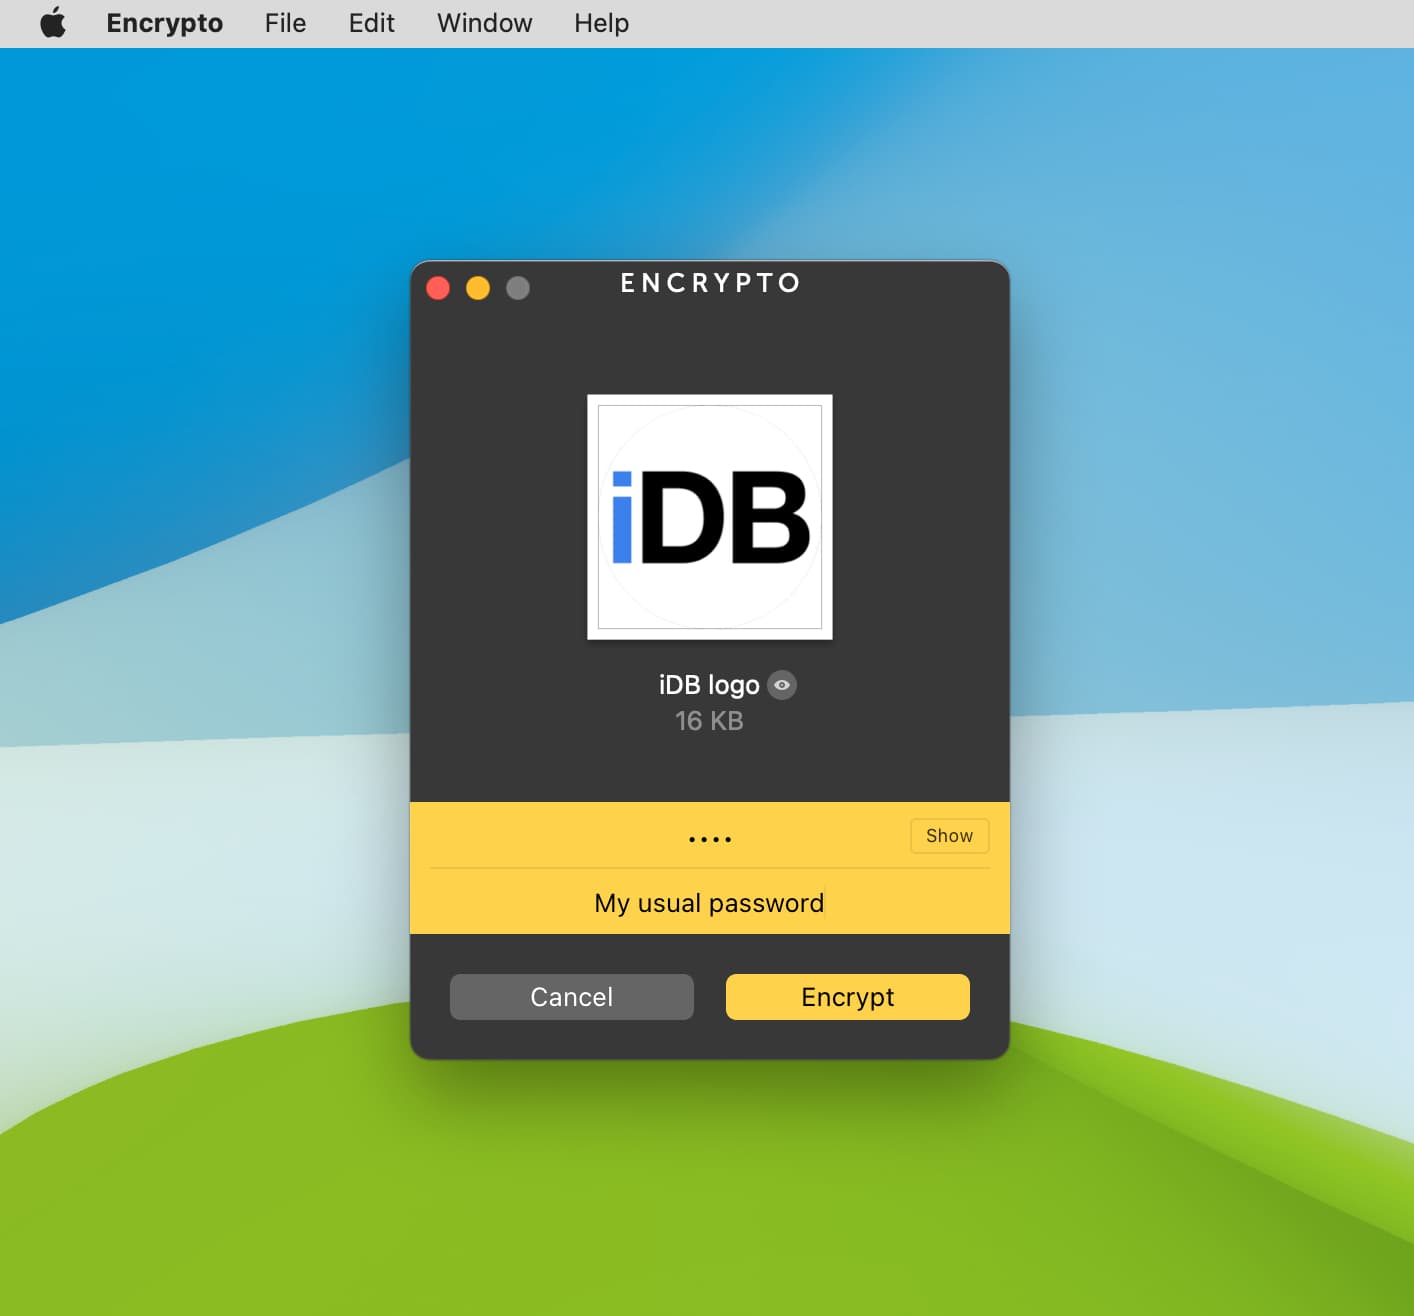
- Get Encrypto for free from the Mac App Store. Open the app and drop the files onto its window that you’d like to encrypt and lock.
- Create a custom password and add an optional hint.
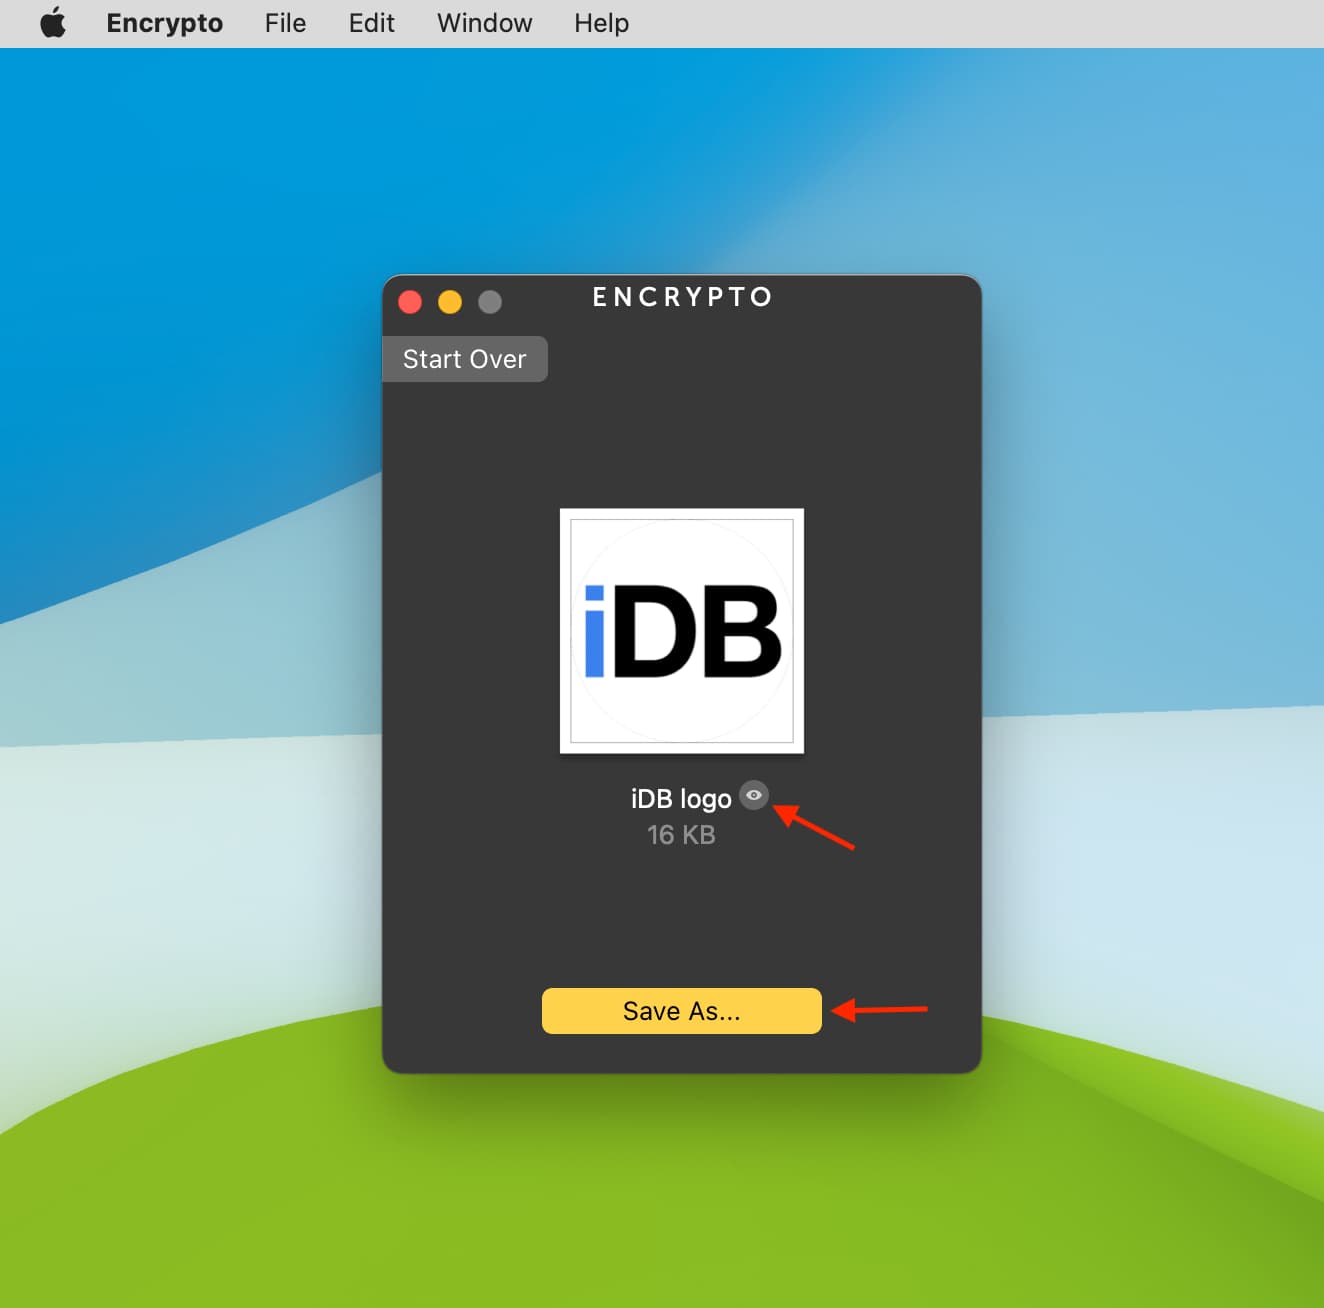
- Click Encrypt. Once that’s done, click Save As, choose a location, and hit Save.
You have successfully encrypted and locked your file. Close the Encrypto app now. To open this locked file, double-click the file with the .crypto extension and enter the password you set in step 3, then click Decrypt. When your file is decrypted, hit the eye icon to open it or click Save As to save an unencrypted copy.
Also, check out: