Learn how to put the forecast and current conditions in your Mac menu bar to view them at a glance and save yourself from opening a separate app each time you want to check the weather.
The menu bar on your Mac is a handy spot to quickly see the date, time, or battery level, plus have fast access to your Notification Center, Spotlight Search, or Siri. So, why not have your weather conditions there too? Then at a glance, you can check the current temperature and click for your forecast.
Use the built-in option to see the temperature and weather forecast in Mac’s menu bar
The Weather app on Mac running a recent version of macOS, such as macOS Tahoe, supports showing the current temperature and icon for the conditions right in the menu bar. Just go to System Settings > Menu Bar and check the box for Weather.
The menu bar will now show the temperature of your current location or the city that’s shown at the top of your Weather app. It will also display an icon indicating whether the conditions are cloudy, sunny, severe, and such.

Unlike third-party apps (explained later below), you cannot pick a city and display its weather forecasts in the menu bar. However, you can open the Apple Weather app and drag an added location to the top to make it appear in the menu bar.

In case you have allowed the Weather app to access your computer’s location, it will always appear at the top in the Weather app, and its details will appear in the menu bar. To stop this, go to System Settings > Privacy & Security > Location Services and turn off the switch for Weather. Now, go to the Weather app and drag the desired city to the top to show its details in the menu bar. You can also right-click on an unneeded location to delete it and declutter the list.

Use the Forecast Bar – Weather + Radar
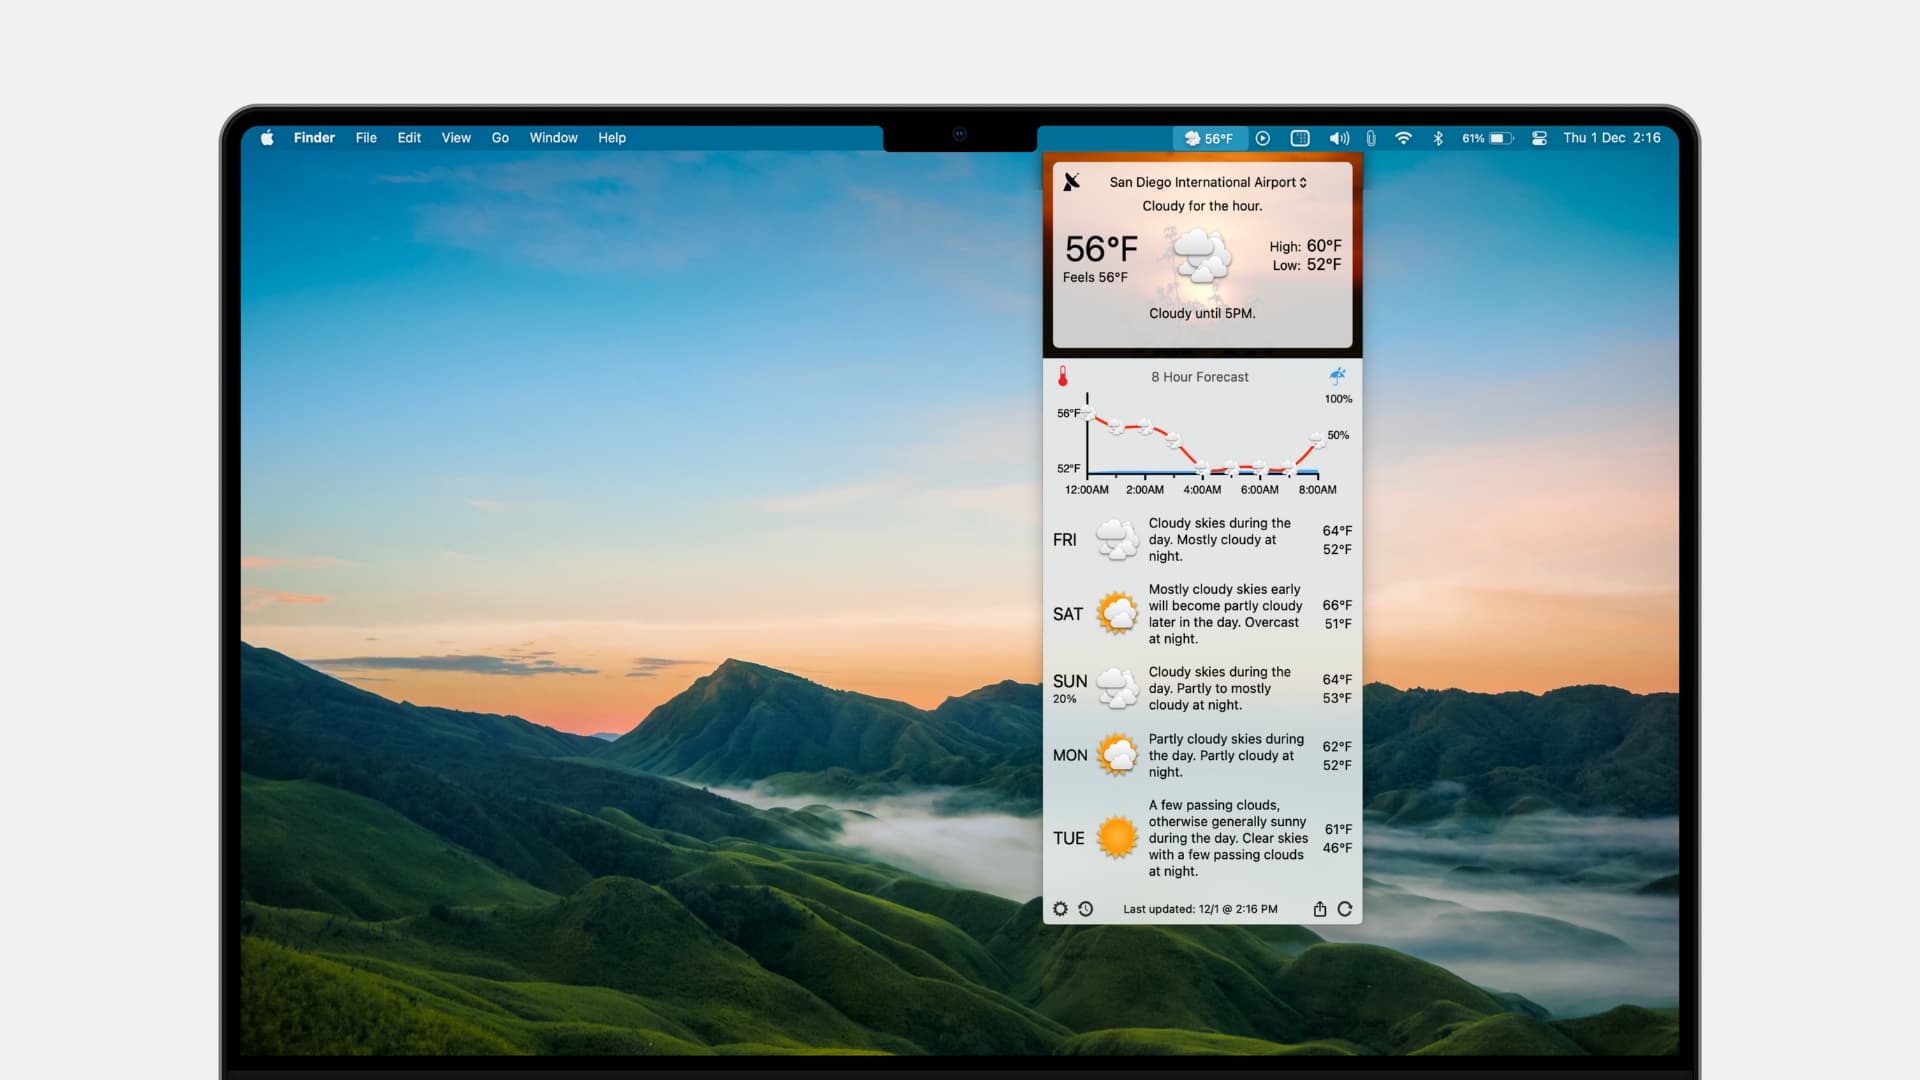
Forecast Bar – Weather + Radar is a great choice with lots to offer. After you download it, you’re given an option to add it to your menu bar or Dock. Choose the menu bar option.
Then, choose a size, how you would like to see today’s forecast (graph or summary), and which notifications you want (precipitation, severe weather, daily forecast). Next, decide whether you’d like to launch the app automatically every time your Mac starts, and then configure the location settings.
After that, click the icon in the menu bar to see your current conditions (if you had allowed location permission). You can also type the name of a desired city and see its weather report.

Forecast Bar – Weather + Radar is free for your Mac with in-app purchases for various update frequency options.
Other weather apps for Mac menu bar
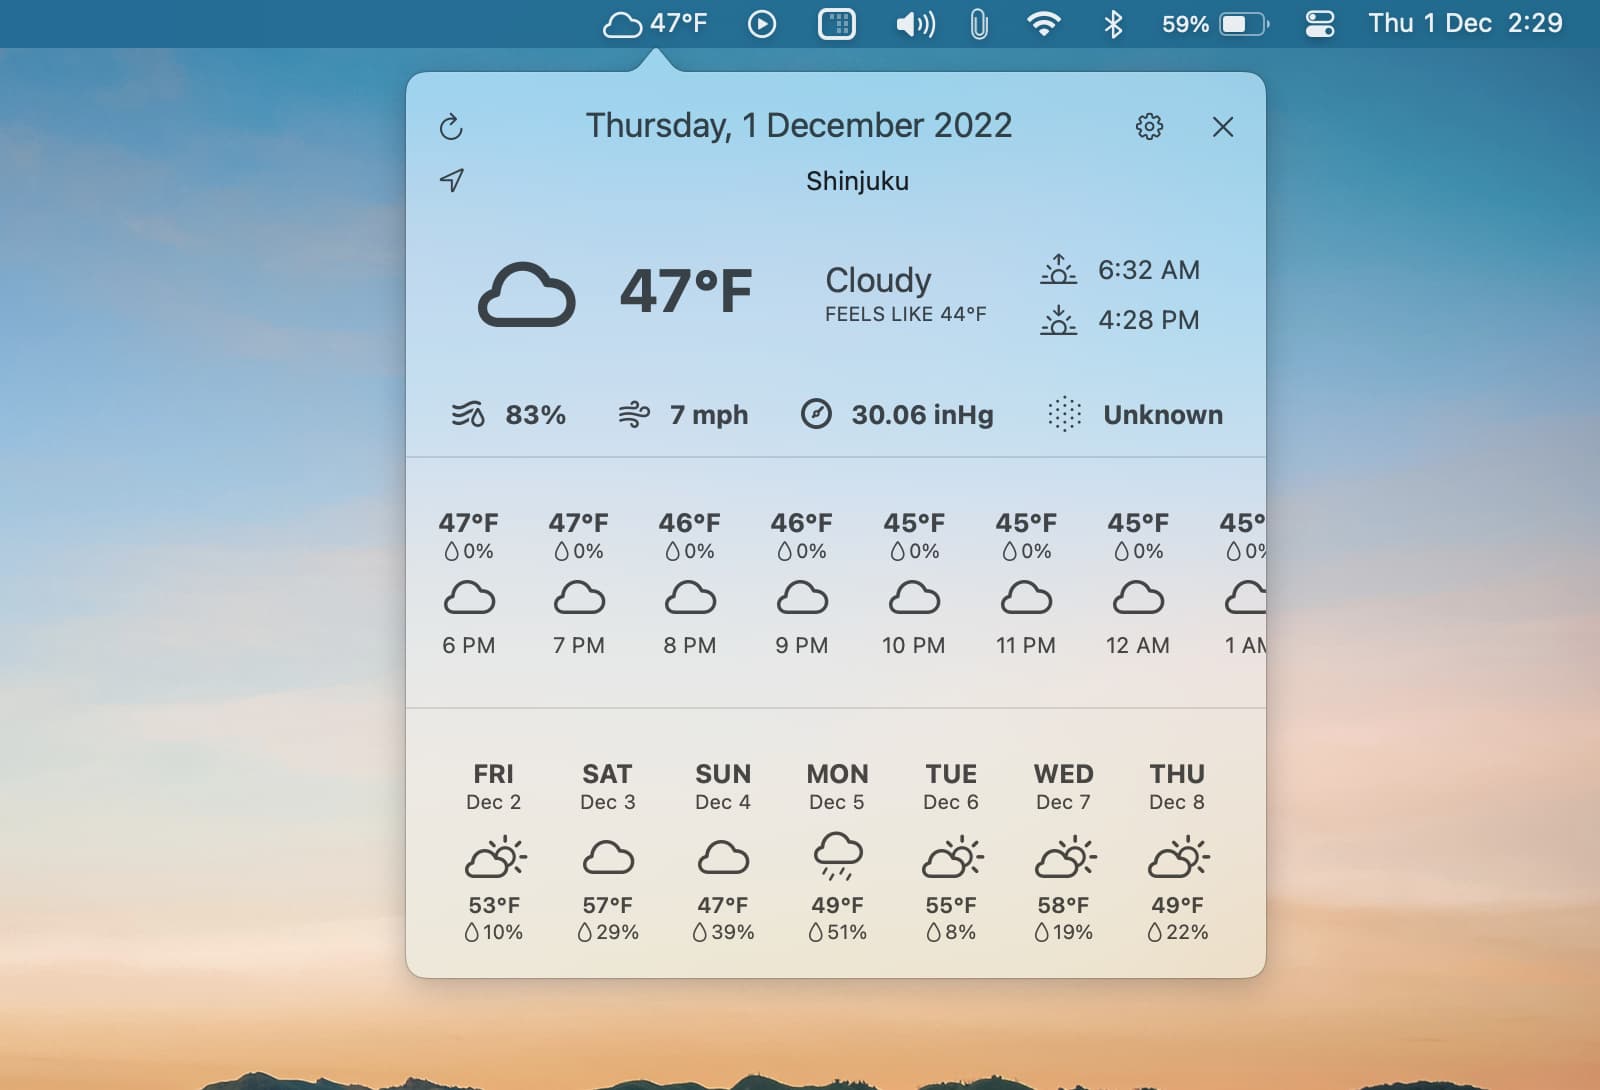
Aside from the Forecast Bar, you can also use these free apps:
- Weather Dock
- Weather for Status Bar
- DearSun (It only shows the temperature in the free version. Rest of the data, like hourly forecast, needs payment to work.)
These cool apps put the details in your menu bar and let you view what you need with a click. Forget searching for or opening a weather app on your Mac to check the current conditions and forecast. Are you going to give these weather apps a try?
For more, here are the best free weather apps for your Mac, as well as how to display weather conditions and forecasts on your iPhone Lock Screen. You can also check the Air Quality Index on your iPhone or Apple Watch to know what you’re breathing.