Learn how to convert PDF documents to images and saved them to the built-in Photos app in the JPG and PNG file formats on your iPhone or iPad.
Rasterizing a PDF converts it into a regular image suitable for sharing on social media, messaging apps and other online services, which in most cases only accept JPG and PNG files. Rasterization converts the vector content of a PDF document into pixels of a bitmap image. Follow along with this guide to learn about several ways to convert pages of a PDF document into JPG or PNG images on an iPhone or iPad.
1. PDF rasterization in the Shortcuts app
Using Safari on your iPhone, download the free PDF To Image shortcut created by the iDB team, then open the Shortcuts app and tap your imported PDF To Image shortcut to run it. Choose your PDF using the Files picker (hit Browse to see all locations, including cloud storage like Dropbox). When the conversion finishes, you’ll receive a notification. After giving the shortcut permission to access your Photos library, you’ll find pages of your PDF saved as individual images in the Photos app.

Conversion happens on-device, the PDF isn’t uploaded to any servers, and the shortcut is free to use. Plus, it functions even if your device is offline. As a bonus, you can edit the shortcut to convert PDFs to other image formats.
Change the image format
By default, the shortcut converts PDFs to PNG images because PDF document usually contain lots of text which looks crips on PNG images, without the fuzziness and compressions artifacts common for the JPG format.
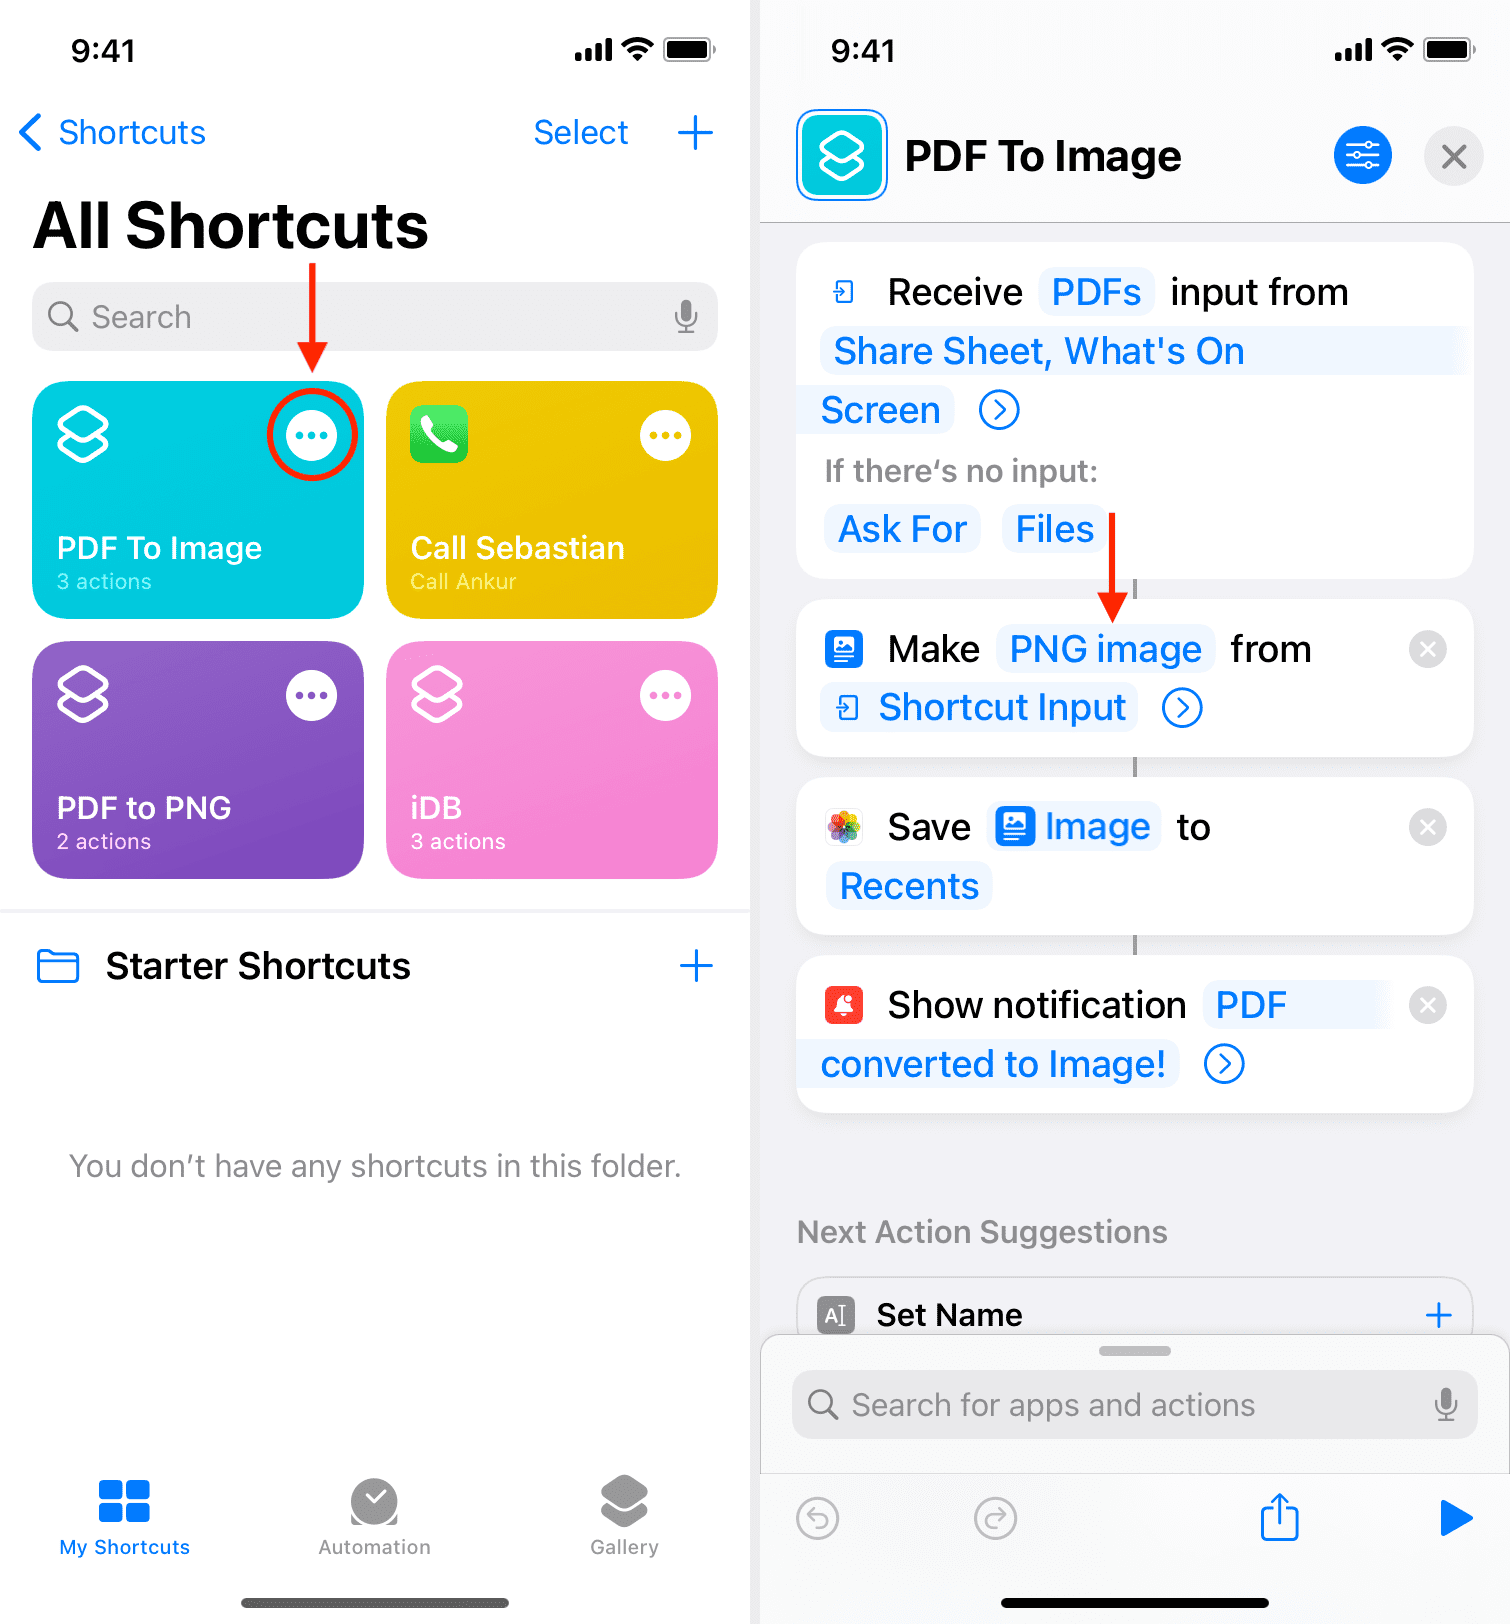
To change this, edit the shortcut by tapping the three-dotted icon on its tile, then hit PNG image to pick another file format like GIF, TIFF or HEIF. Or, set the shortcut to ask for the format every time by choosing Variables > Ask Each Time.
2. PDF screenshoting
This is a quick and dirty method that doesn’t require a shortcut or other apps. It gets the job done, but it’s only advised if you need to convert a few PDF pages quickly and don’t mind extra work to crop all screenshotted PDF pages to the same size.
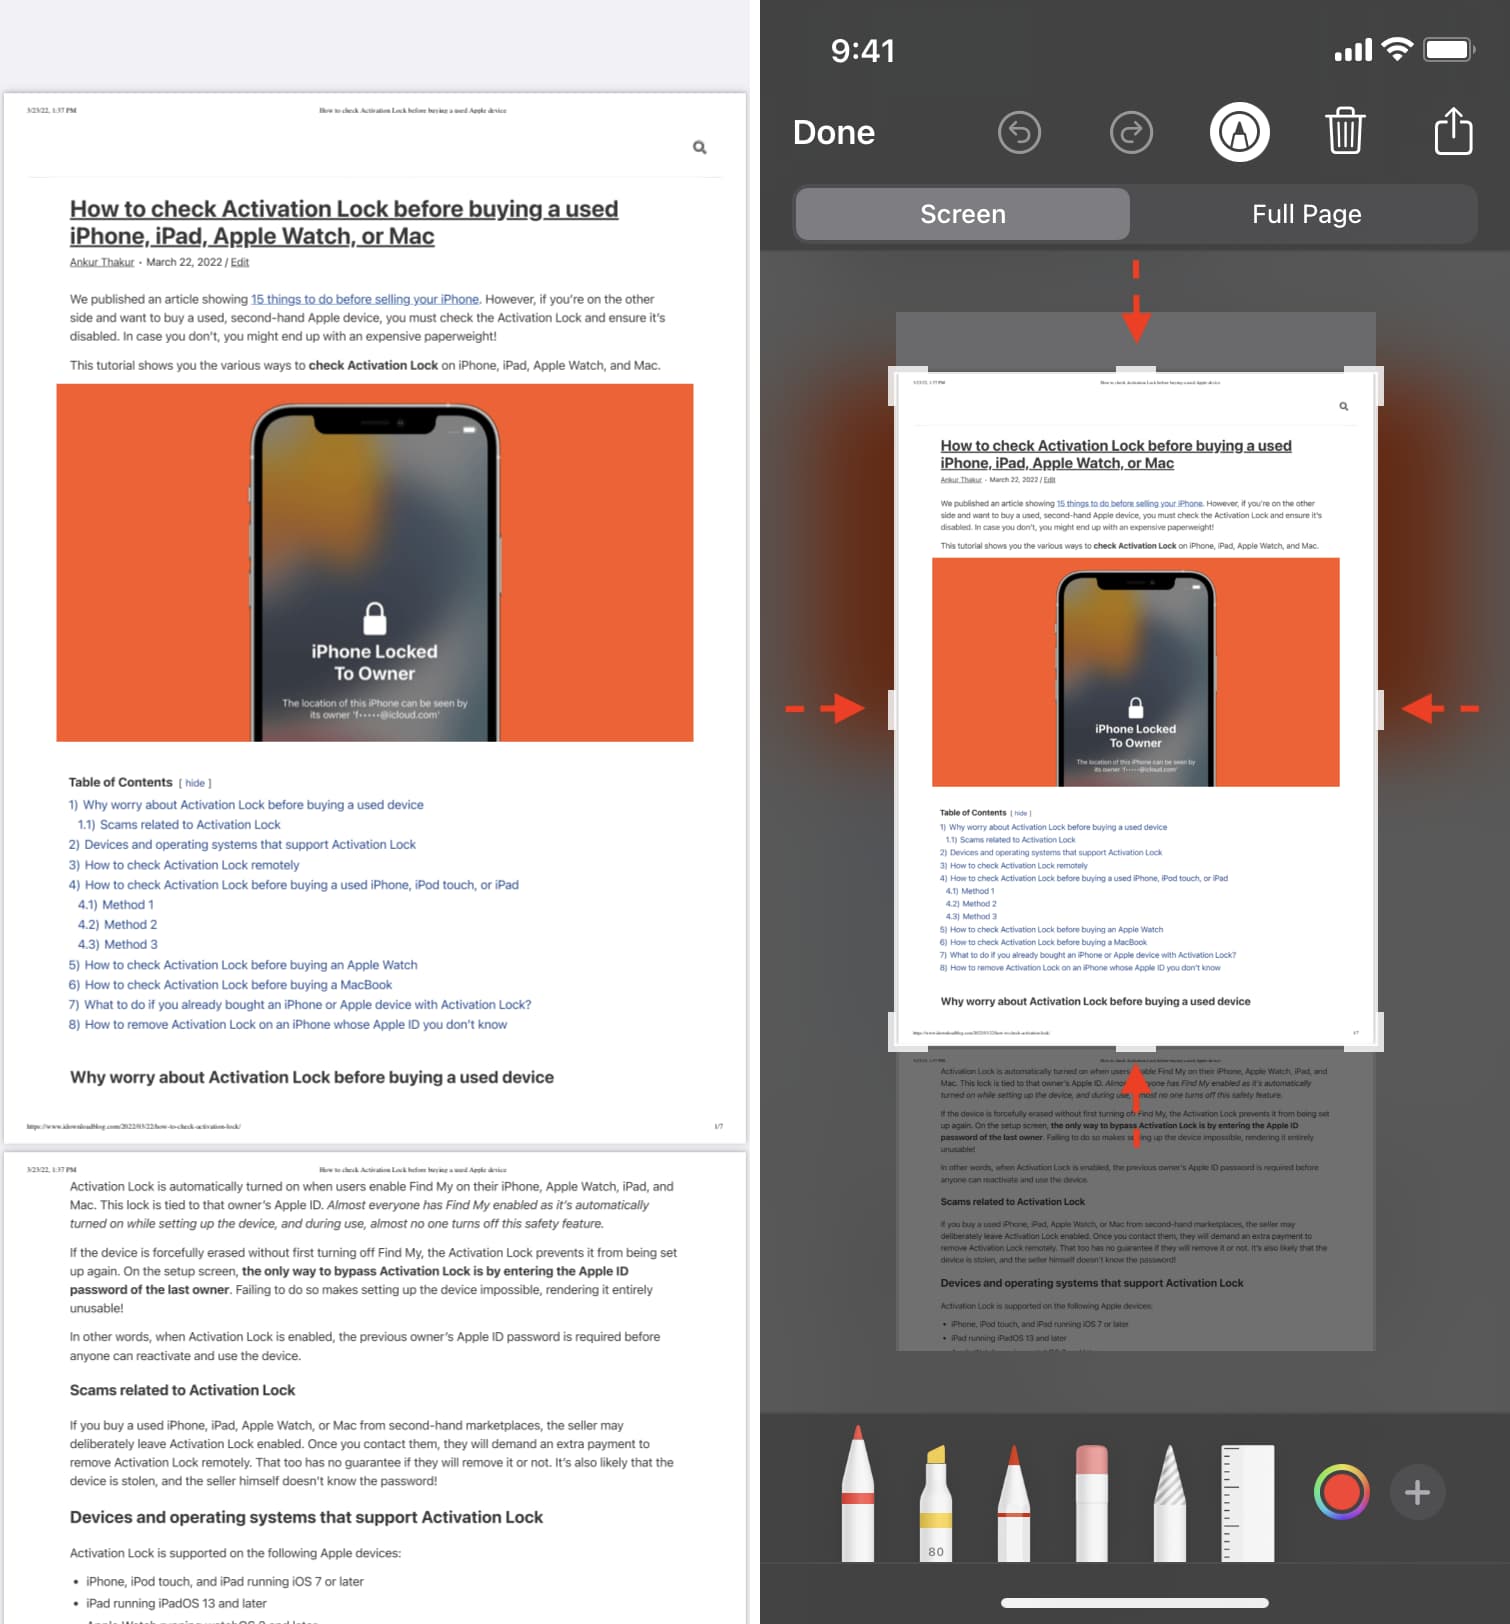
First, open a PDF in your favorite app, like the built-in Files app its creator app, then enter fullscreen reading mode with minimal user interface distractions, if any. Take a screenshot by pressing the side and volume up buttons (Face ID iPhones) or the side and Home buttons (older iPhones). Tap the screenshot thumbnail in the bottom-left corner, crop it if necessary, and then hit Done > Save to Photos. Rasterized PDF pages will be saved as PNG images in the stock Photos app.
3. Convert PDF to JPG using iLovePDF for iPhone
If you don’t mind your PDF being uploaded to a server, JPG-only conversions, and an extra step to save the resulting image to the Photos app, then download the iLovePDF app from the App Store. It’s easy to use and you get four free conversions each day (for more free conversions, visit the iLovePDF website).
Launch the app, select the Files tab, and hit iLovePDF – On my iPhone. Now hit the big red plus button, followed by Files, then select your PDF and choose Open.

Hit the three-dotted icon next to the imported PDF and then Tools > PDF to JPG.

Tick the box next to Pages to JPG and then hit the PDF to JPG button. Once all PDF pages have been converted and saved, hit the Go to Files button to see them.

To mark all images seen here, hit Select and then Select All.

Lastly, hit Share > Save Images to save them in Photos.

Also, check out: