In this tutorial, we’ll guide you through the steps to download and install the latest software version on your HomePod using your iPhone, iPad, or Mac, so you can enjoy all the newest features on your smart speaker.

Like other Apple devices, HomePod runs its own software, which can be easily updated as soon as new firmware becomes available for download. These updates usually bring new features and bug fixes, ensuring a better experience with your Apple smart speaker.
HomePod defaults to automatically installing new updates when they become available. However, you can turn off automatic updates and manually check for new HomePod firmware. You should also know that automatic updates take time to push and usually happen three or four weeks after a software version becomes available.
HomePod software updates are handled by Apple’s Home app on your iPhone, iPad, and Mac. You cannot install new software on your HomePod unless your iOS, iPadOS, or macOS device is signed in with the same Apple Account you used to set up the speaker.
Update HomePod using your iPhone or iPad
- Make sure your iPhone or iPad and your HomePod are connected to the same Wi-Fi network.
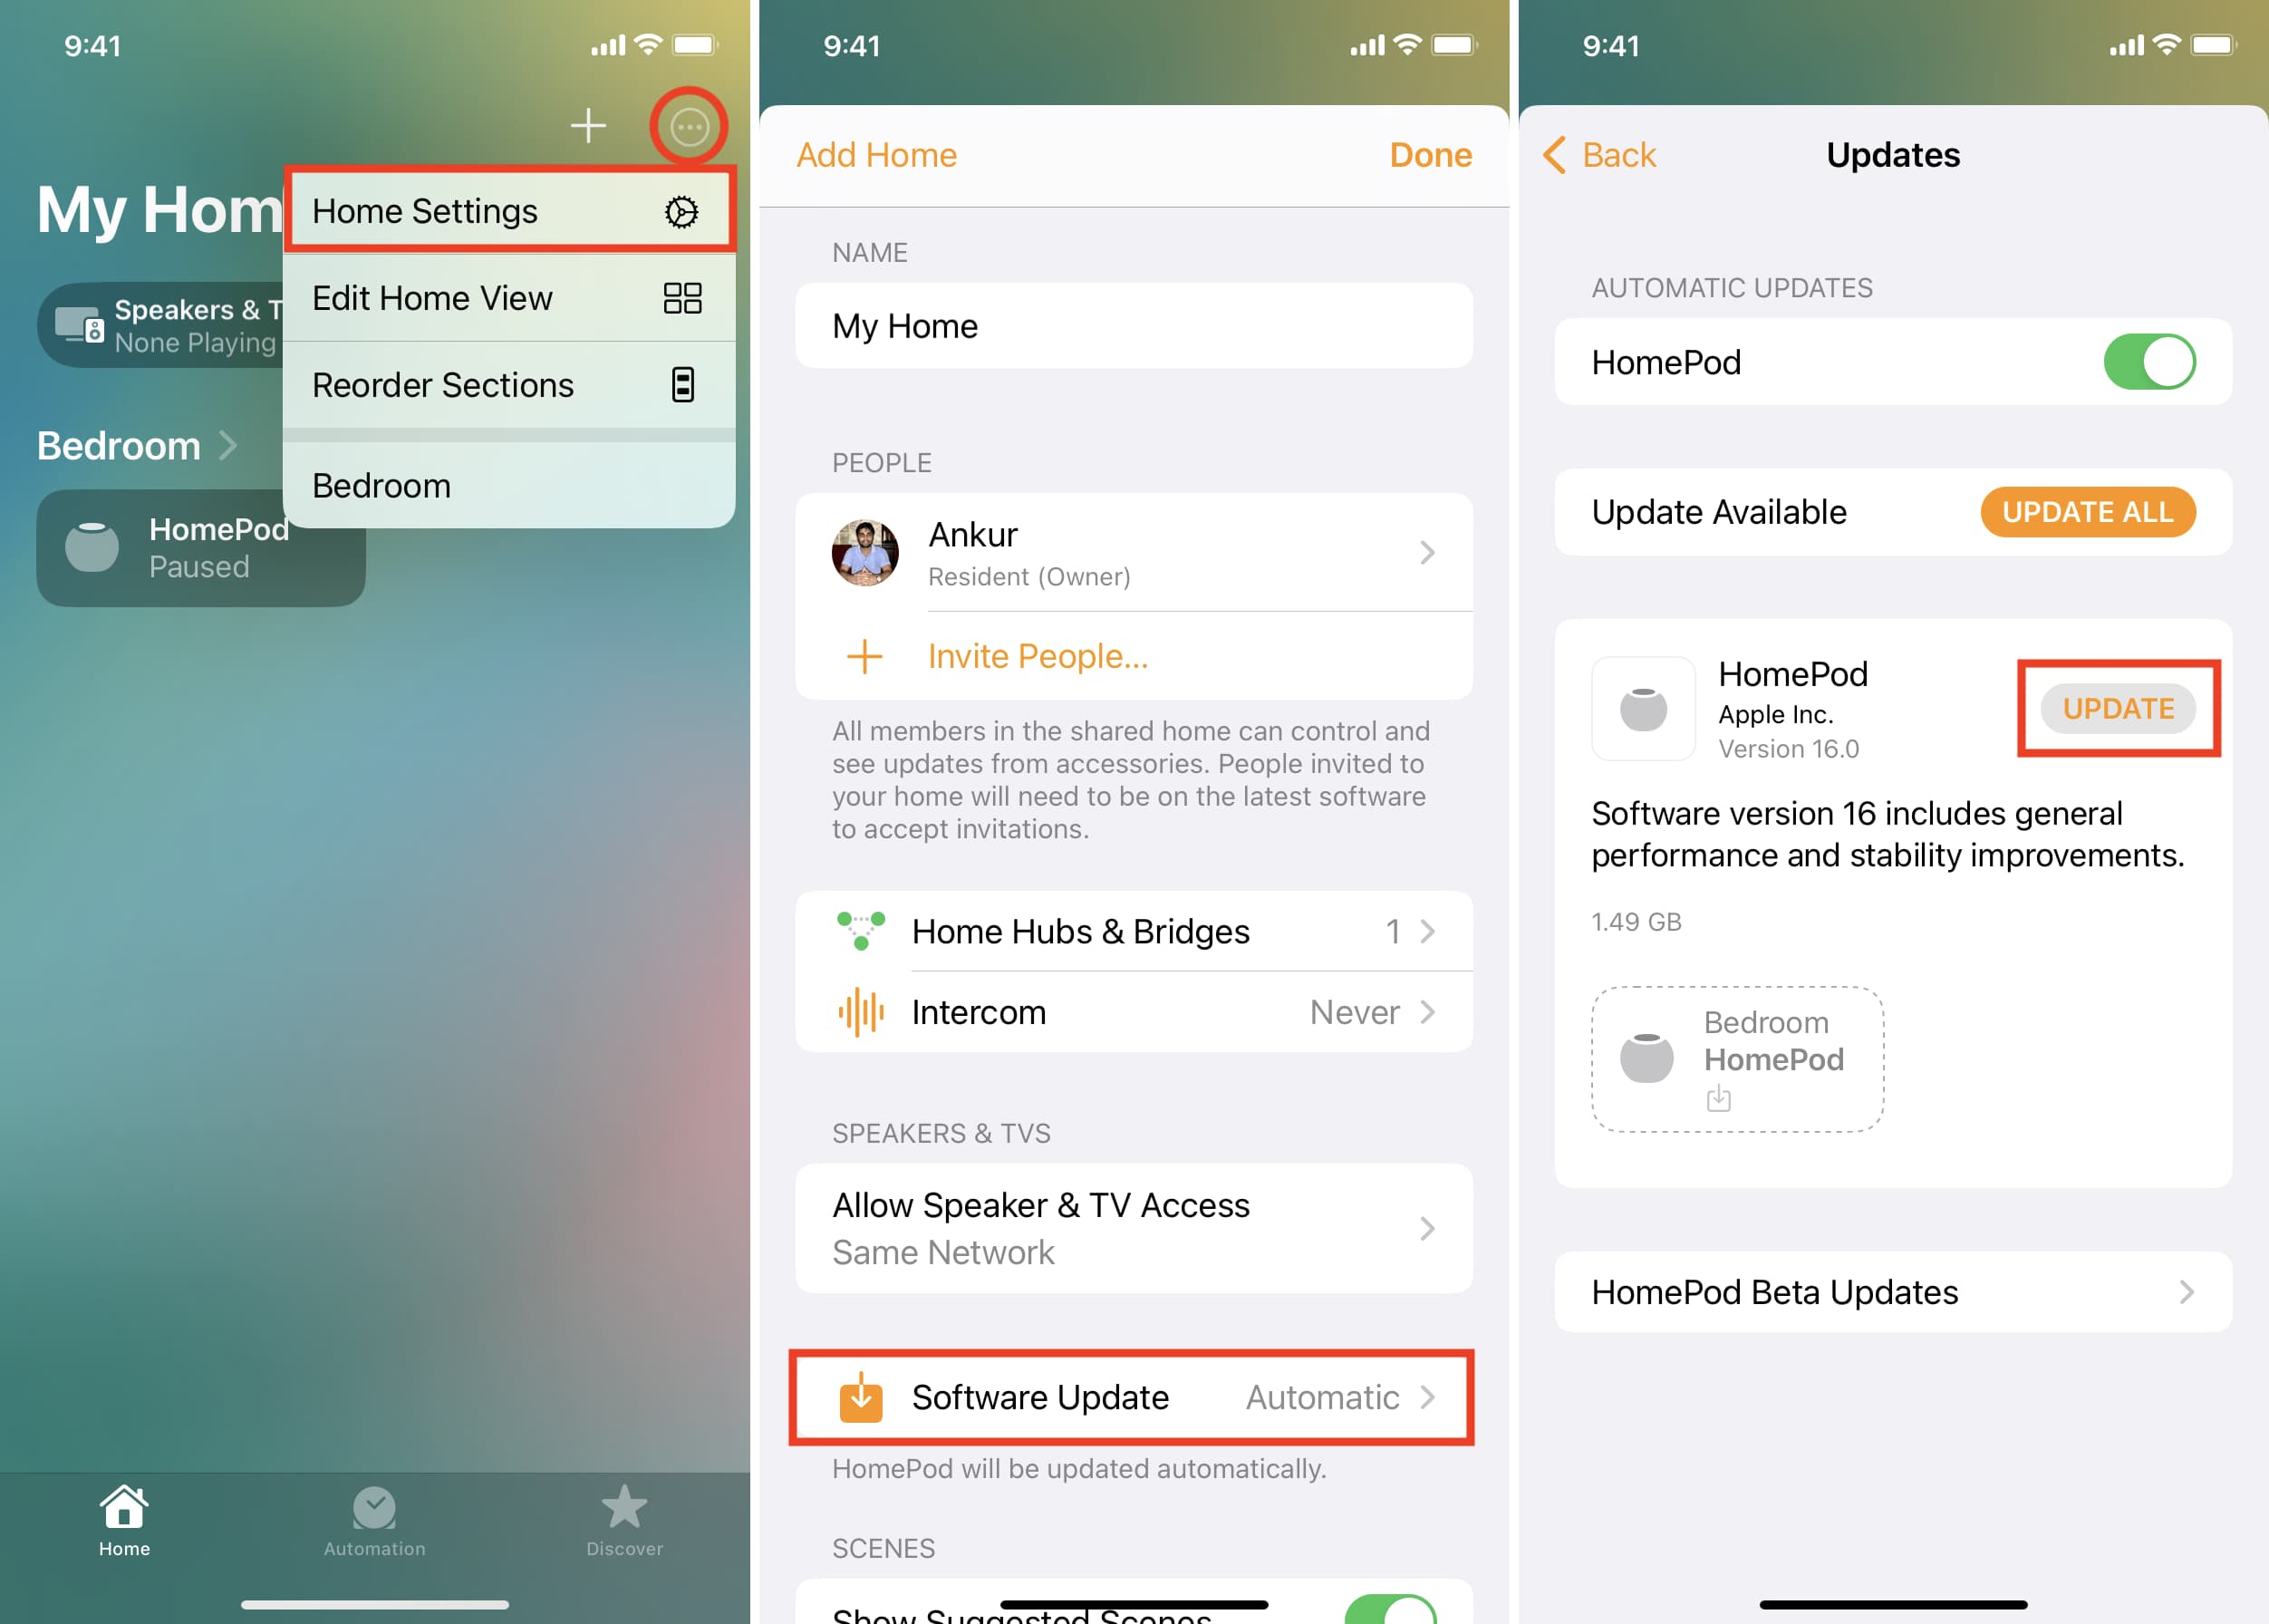
- Open the Home app, tap the three dots menu button from the top right corner, and select Home Settings.
- Tap Software Update.
- Your iPhone or iPad will start checking for HomePod updates. If an update is available, you will see it. Tap Update to download and install it.
There is another easy method for accessing the HomePod update screen, which you can use to install the latest version of the speaker software.
- Open the Home app and tap your HomePod.
- Tap the tiny Settings icon in the bottom right.
- If a software update is available, it will appear at the top. Tap Update to download and install it.

Update your HomePod using your Mac
The steps to update your HomePod using your Mac are identical to iPhone and iPad.
- Open the Home app and click the three dots menu button in the top right, followed by Home Settings.
- Now, click Software Update.
- Click the Update button next to your HomePod to download and install the latest software version for your speaker.

Alternatively, you can click the HomePod tile in the Home app, followed by the gear icon, then click the Update button if shown.

What to do when HomePod is being updated
Make sure your HomePod is connected to power. During the update, a spinning white light appears on the top.
In my experience, the HomePod update is fairly quick. Most software versions take me about 4 to 10 minutes to install.
Also see: How to install the HomePod beta software to try new features ahead of release
See the currently installed software version of your HomePod
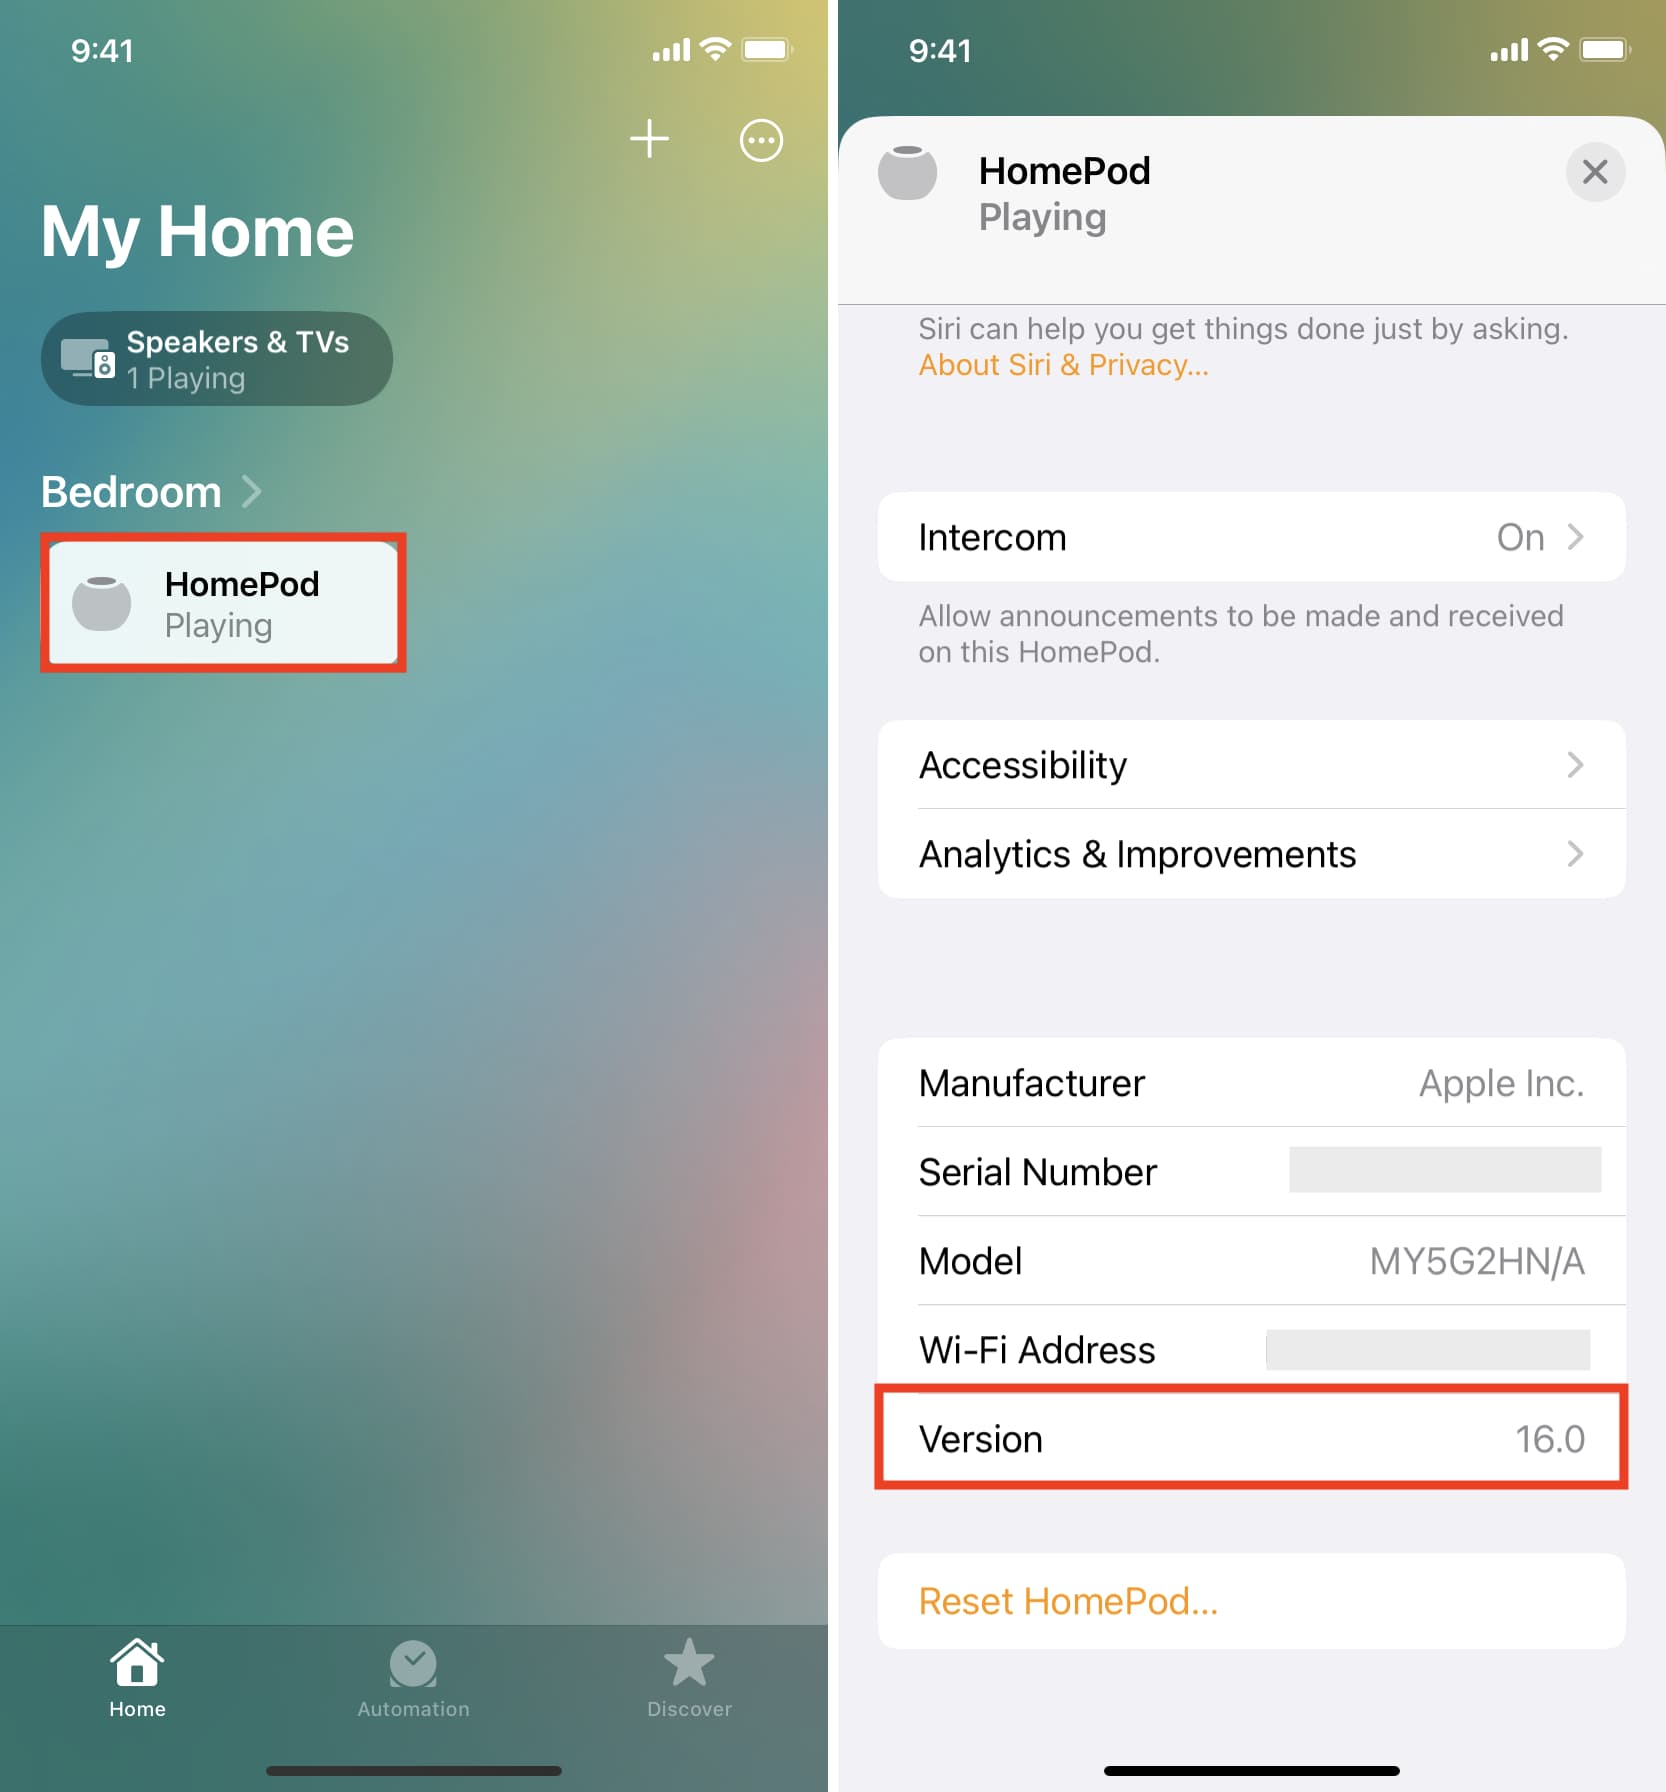
- Open the Home app and tap your HomePod.
- Tap the gear icon to access its settings.
- Scroll down to the bottom, and you’ll see the software version number.
Additionally, you can tap your Apple Account name at the top of the Settings app and select HomePod from your list of devices to check its software version.

Can you update individual HomePods in your Home?
Tapping or clicking the Update option will deploy the most recent software update across all of your HomePod speakers set up in your home. While the ability to install a software update on multiple HomePods at once saves you from updating each speaker individually, it would be nice to have the option to install new software on just one of your HomePods and not the others.

Turn off automatic software updates for HomePod
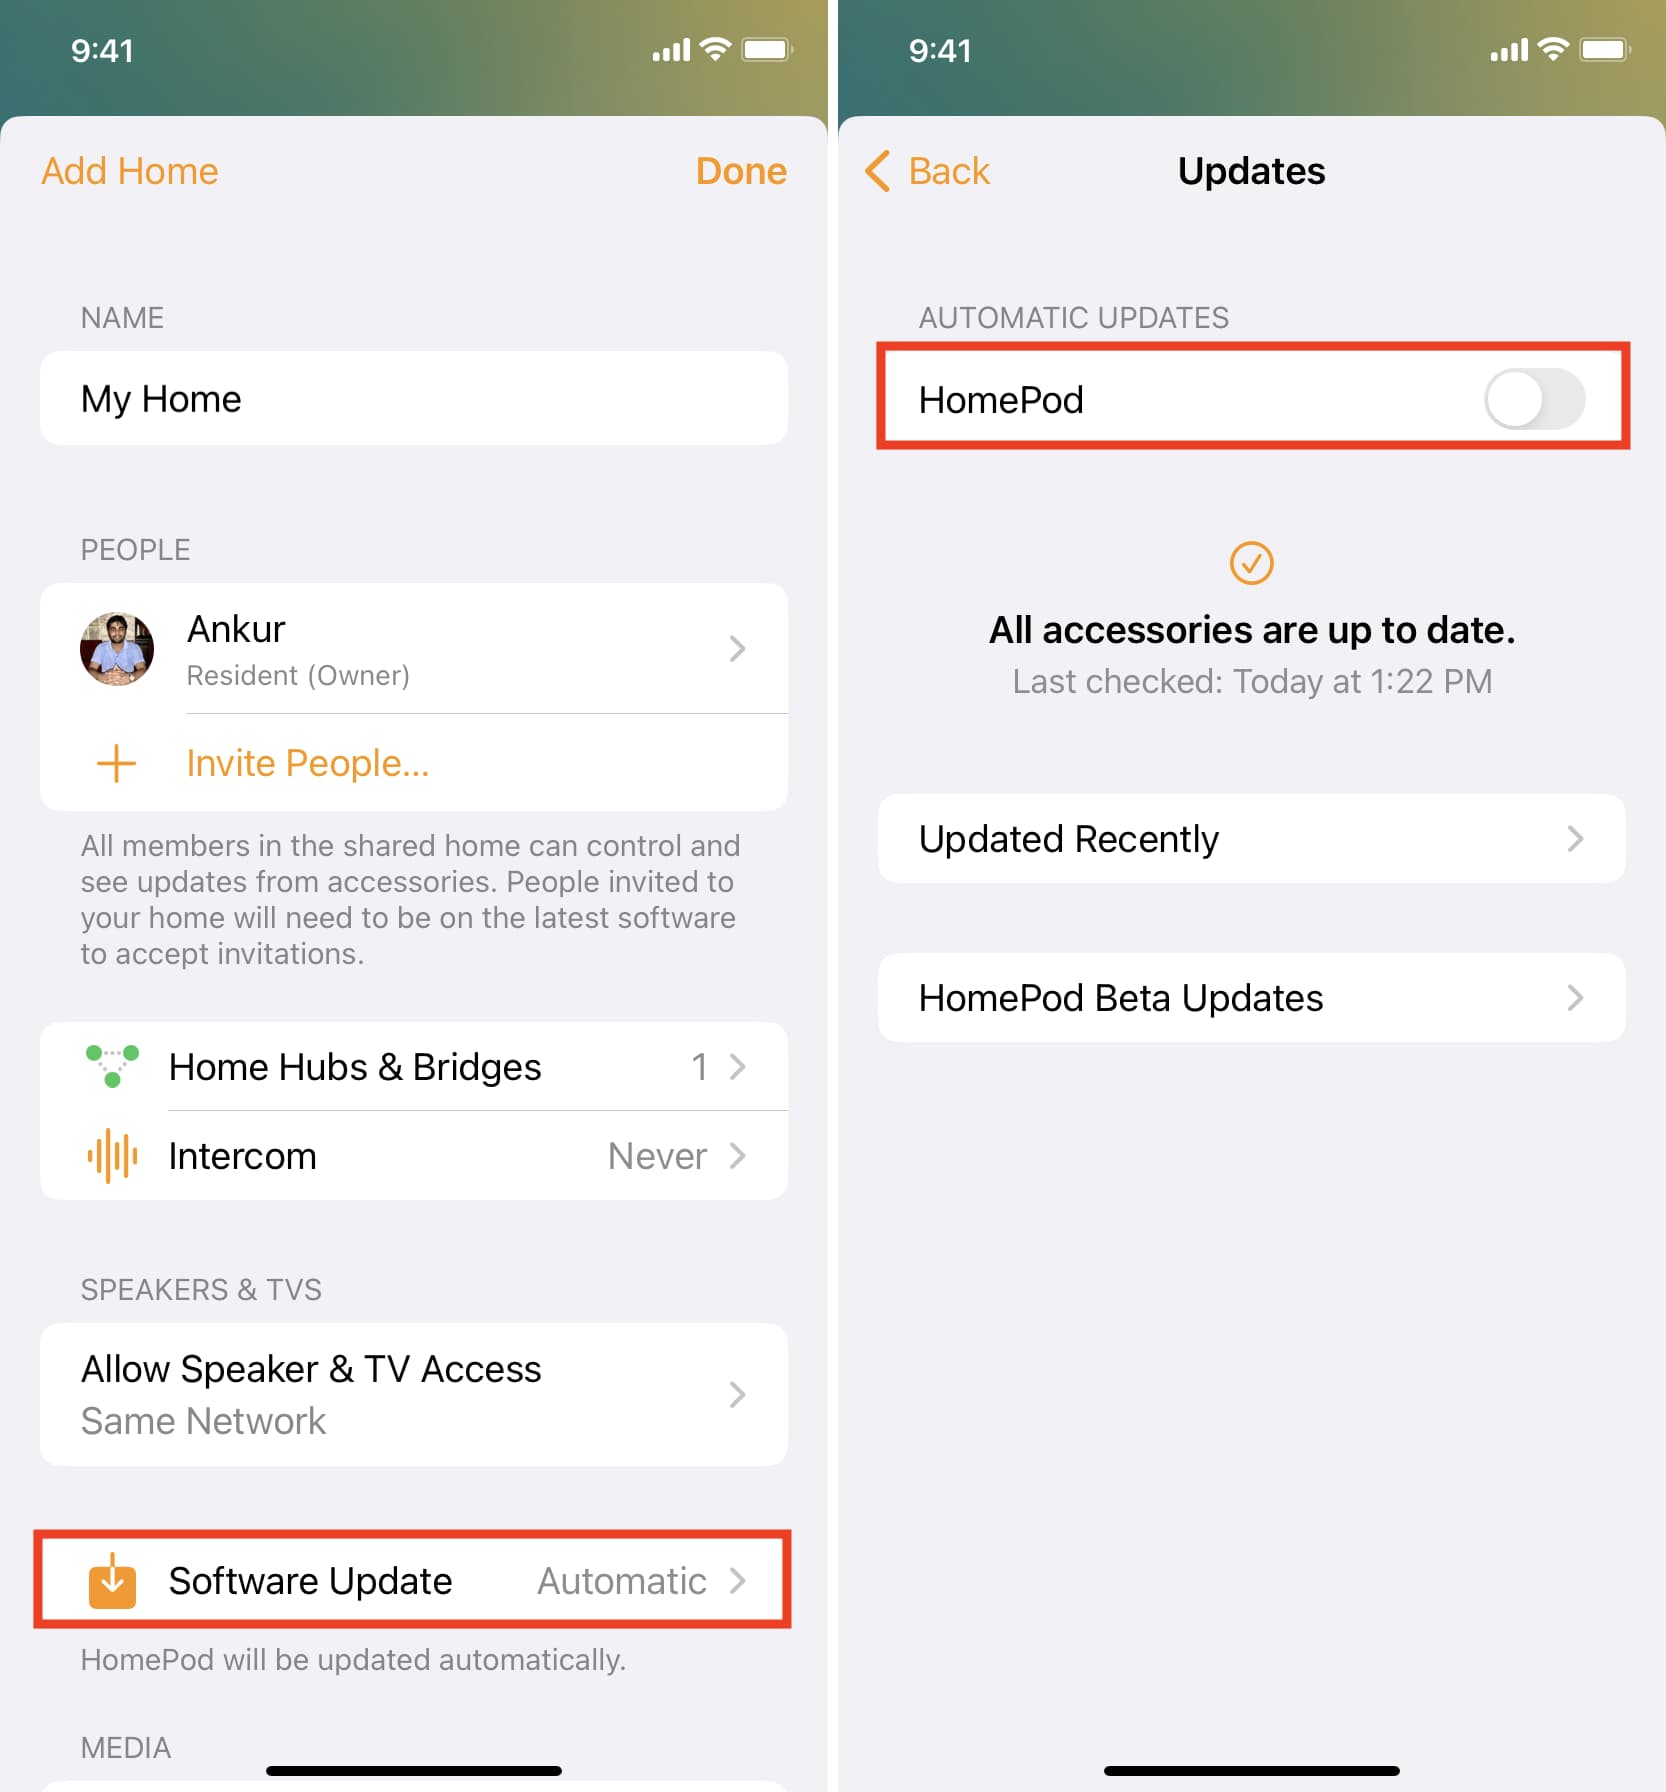
If you’d like to turn off automatic updates for your HomePod, go to the Software Update screen within the Home app on your iPhone, iPad, or Mac and toggle off the HomePod switch under Automatic Updates.
Other useful tips for your HomePod: