Here are 6 safe ways to eject an external hard disk, SSD, memory card, or thumb drive from your Mac.

Why you should safely eject external drives
Whenever you connect an external peripheral to your Mac, like an SD card, external hard drive, SSD, or USB flash drive for file transfers, it’s important to safely eject it when you’re done.
When you don’t eject media from your Mac properly, bad things can happen.
Your Mac may not always be completely done using the drive just because you’re finished with it. To ensure your data remains safe, you need to let your Mac know you’re done by ejecting the drive. Otherwise, you risk damaging data.
Some examples where removing a drive too early can damage the drive or your computer include:
- When you’re performing installations from files via the drive
- When you’re copying files to/from the drive
- When an open application is using files from the drive
- When the drive is in the middle of being erased or formatted
- and more…
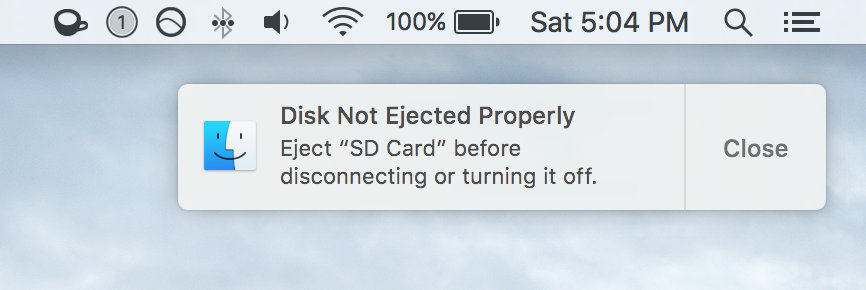
If you remove a media drive without ejecting it first, your Mac will show an error message letting you know the disk was not removed properly. This warning is a reminder to help you develop the habit of safely ejecting your drives.
6 ways to properly eject media drives from your Mac
There are several ways to safely eject media drives like SD cards, external hard drives, and USB flash drives from your Mac. It’s important to make a habit of using one of these methods, rather than simply unplugging the drive when you’re done.
1. The right-click method
When you have a media drive connected to your Mac, it will typically show up on your desktop unless you’ve specifically configured your Mac not to show drives on your desktop.
To eject drives using the right-click method, simply right-click on the drive you want to remove and click on the Eject “[insert drive name here]” button.
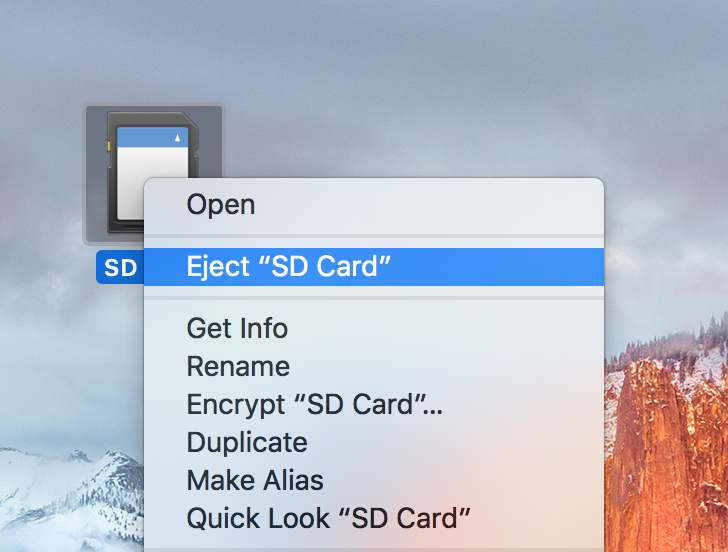
Then, just wait until the drive disappears from your desktop before pulling it out. This can sometimes take up to 5 seconds.
2. The Finder menu method
Another way to safely eject media drives from your Mac is to open a Finder window while you have a drive plugged into your computer.
At the bottom of the sidebar in the Finder window, you should see the drive you want to remove under the Devices list. Simply click the Eject button to the right of the media drive’s name to safely eject it.
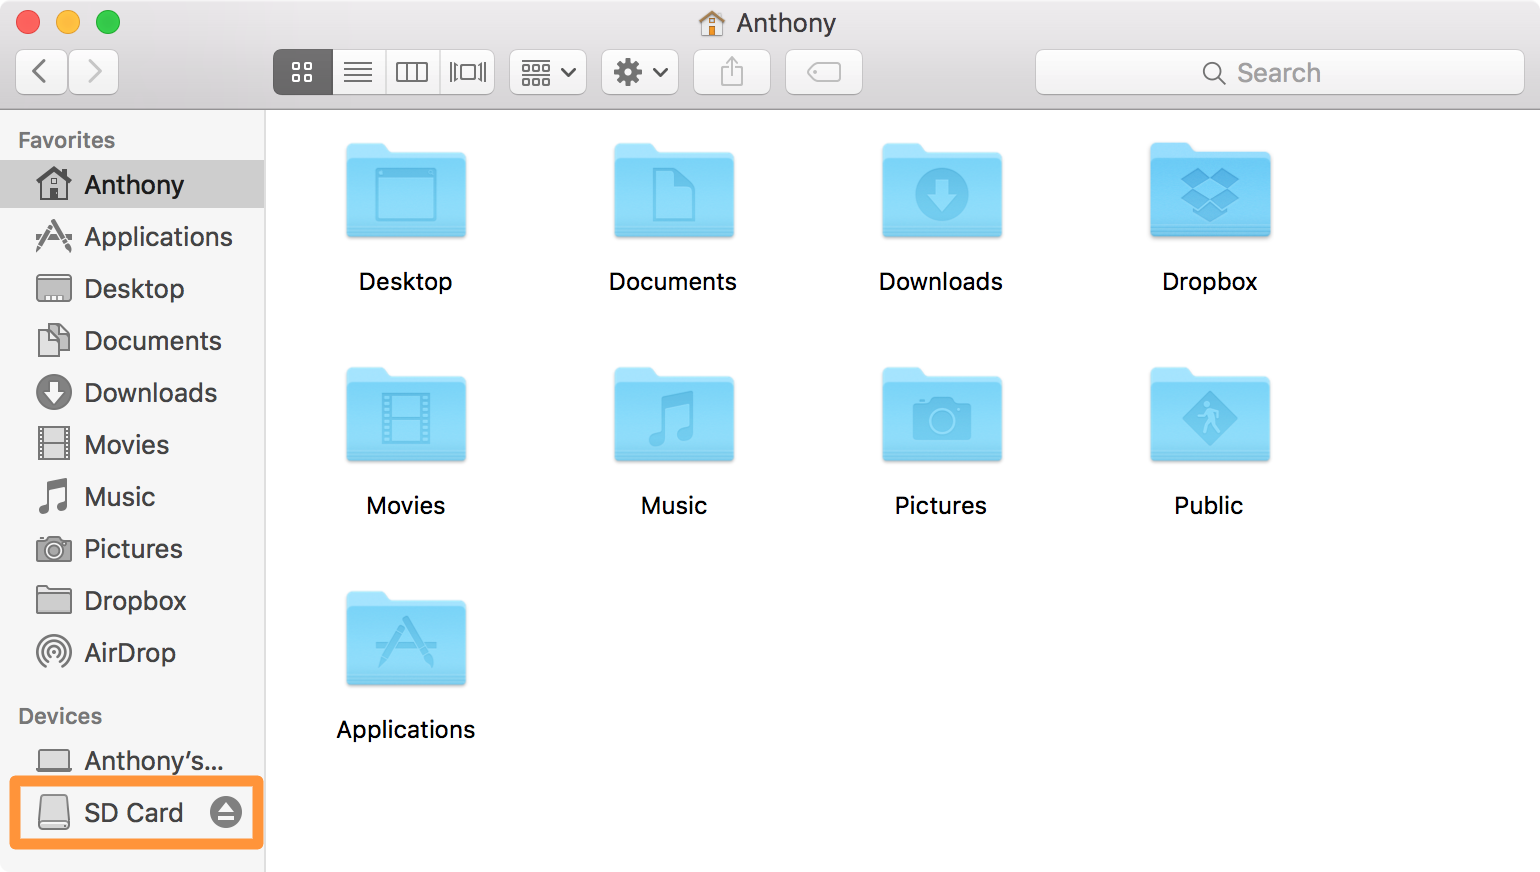
Now just wait until the drive disappears from the sidebar. Once it does, you’re safe to remove it from your computer.
3. The Trash method
With this method, you can simply click and drag the connected media drive icon to the Trash icon on your Dock. If done properly, an Eject icon should appear.
After dragging, you can release it over the Eject icon, and this will safely eject the drive from your Mac to be removed.
Wait until the icon disappears from your desktop before you remove the drive, and you’re good to go.
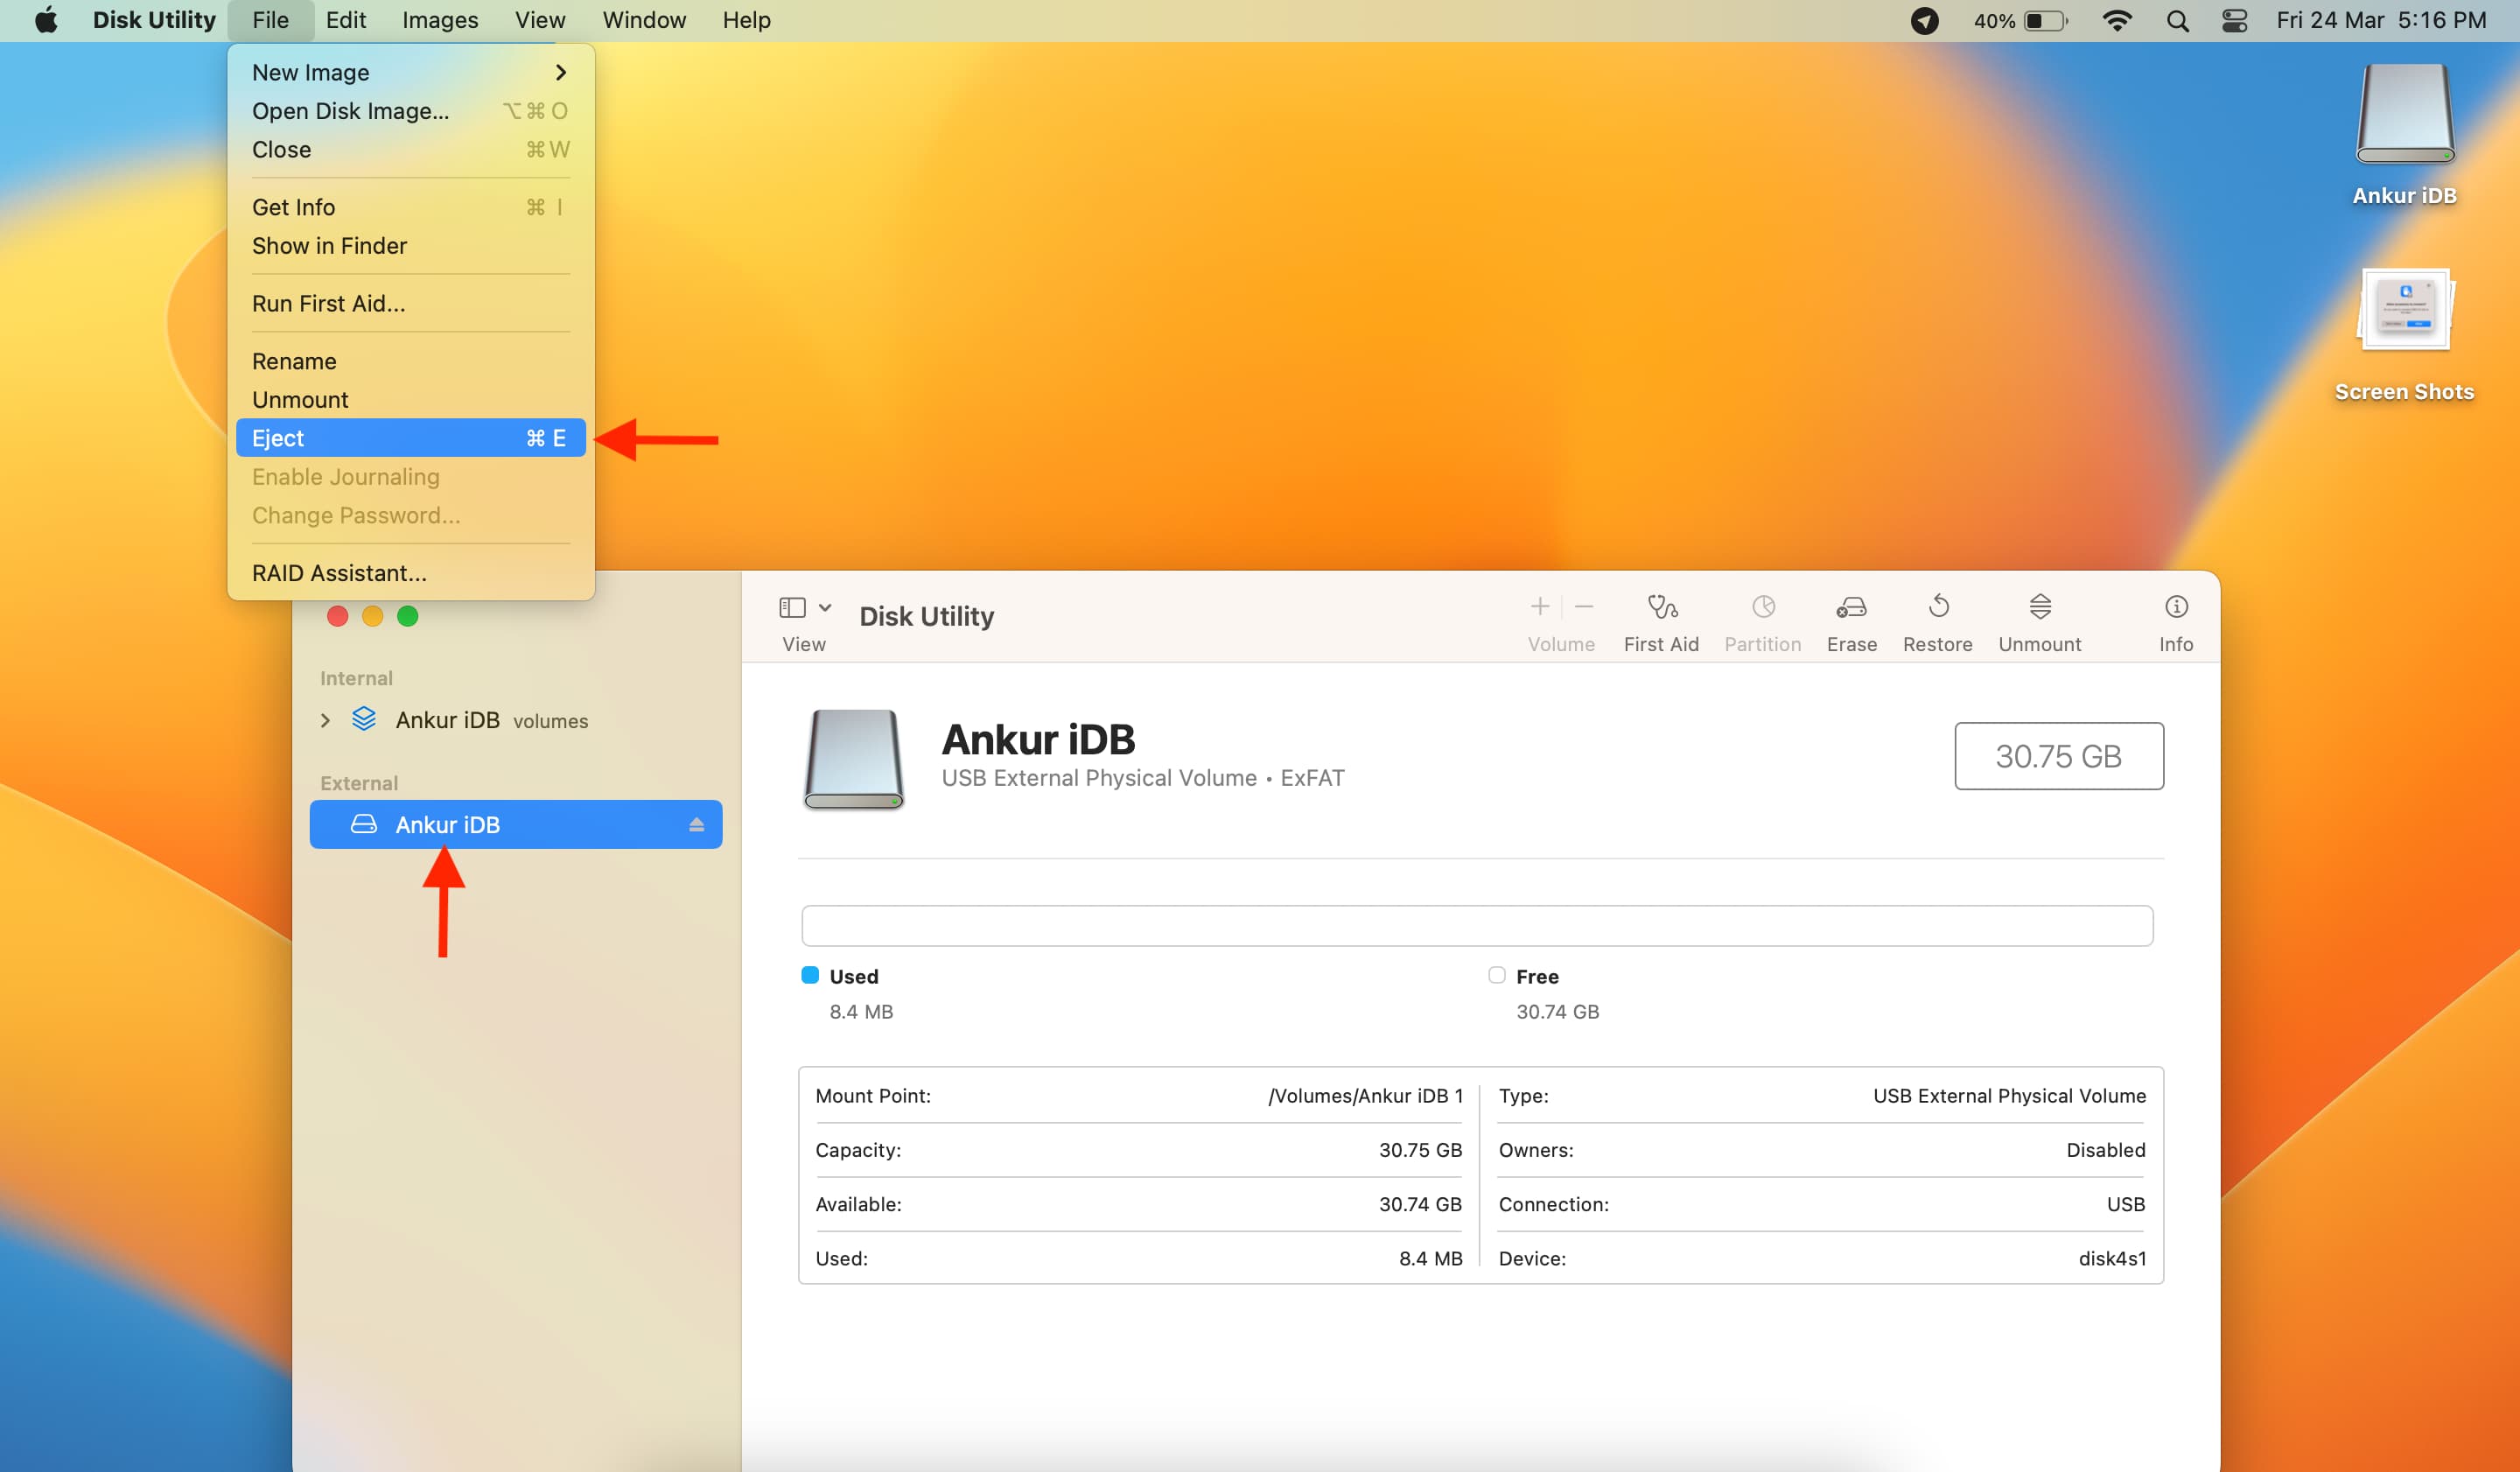
4. Eject from Disk Utility
Follow these steps if you can’t see a connected external drive on the desktop or in Finder:
- Open the built-in Disk Utility app on your Mac.
- You will see the connected drive here under the External heading. Right-click over the drive name and choose Eject. You can also select the drive and click File > Eject from the top menu bar.
5. Use Terminal
With simple Terminal commands, you can see a list of all disks connected to your Mac and then eject one using its name or disk number.
- Open Terminal and type
diskutil listto see a list of all drives on your Mac. Alternatively, you can also typediskutil list externalto see just the external disks. - Now, type
diskutil eject disknameordiskutil eject disknumberand hit the return/enter key. For instance,diskutil eject ankurordiskutil eject disk5.

6. Use third-party apps
You can also explore apps like Disk Master or Ejectify that will help you safely eject external drives and offer additional options.
If you can’t eject a drive on Mac

If the methods above don’t work, you’ll see a “Force Eject” option. In this case, you can either forcefully eject the external drive or Force Quit apps and services that are using the external drive. Once the app is closed, use one of the above methods to eject the drive.
If everything fails, try shutting down your computer and unplugging the external drive.
Check out next: